Tag: muzzleloader

  • May 2009 Spring Practice

    May 2009 Spring Practice

    May 2009 Spring Practice

    This video was produced in 2009 but was never uploaded. In doing site maintenance to www.blackpowdermag.com I found it in a different folder. Besides some shots of excellent locks, it shows some of the trials that one goes through to prepare for a video session.

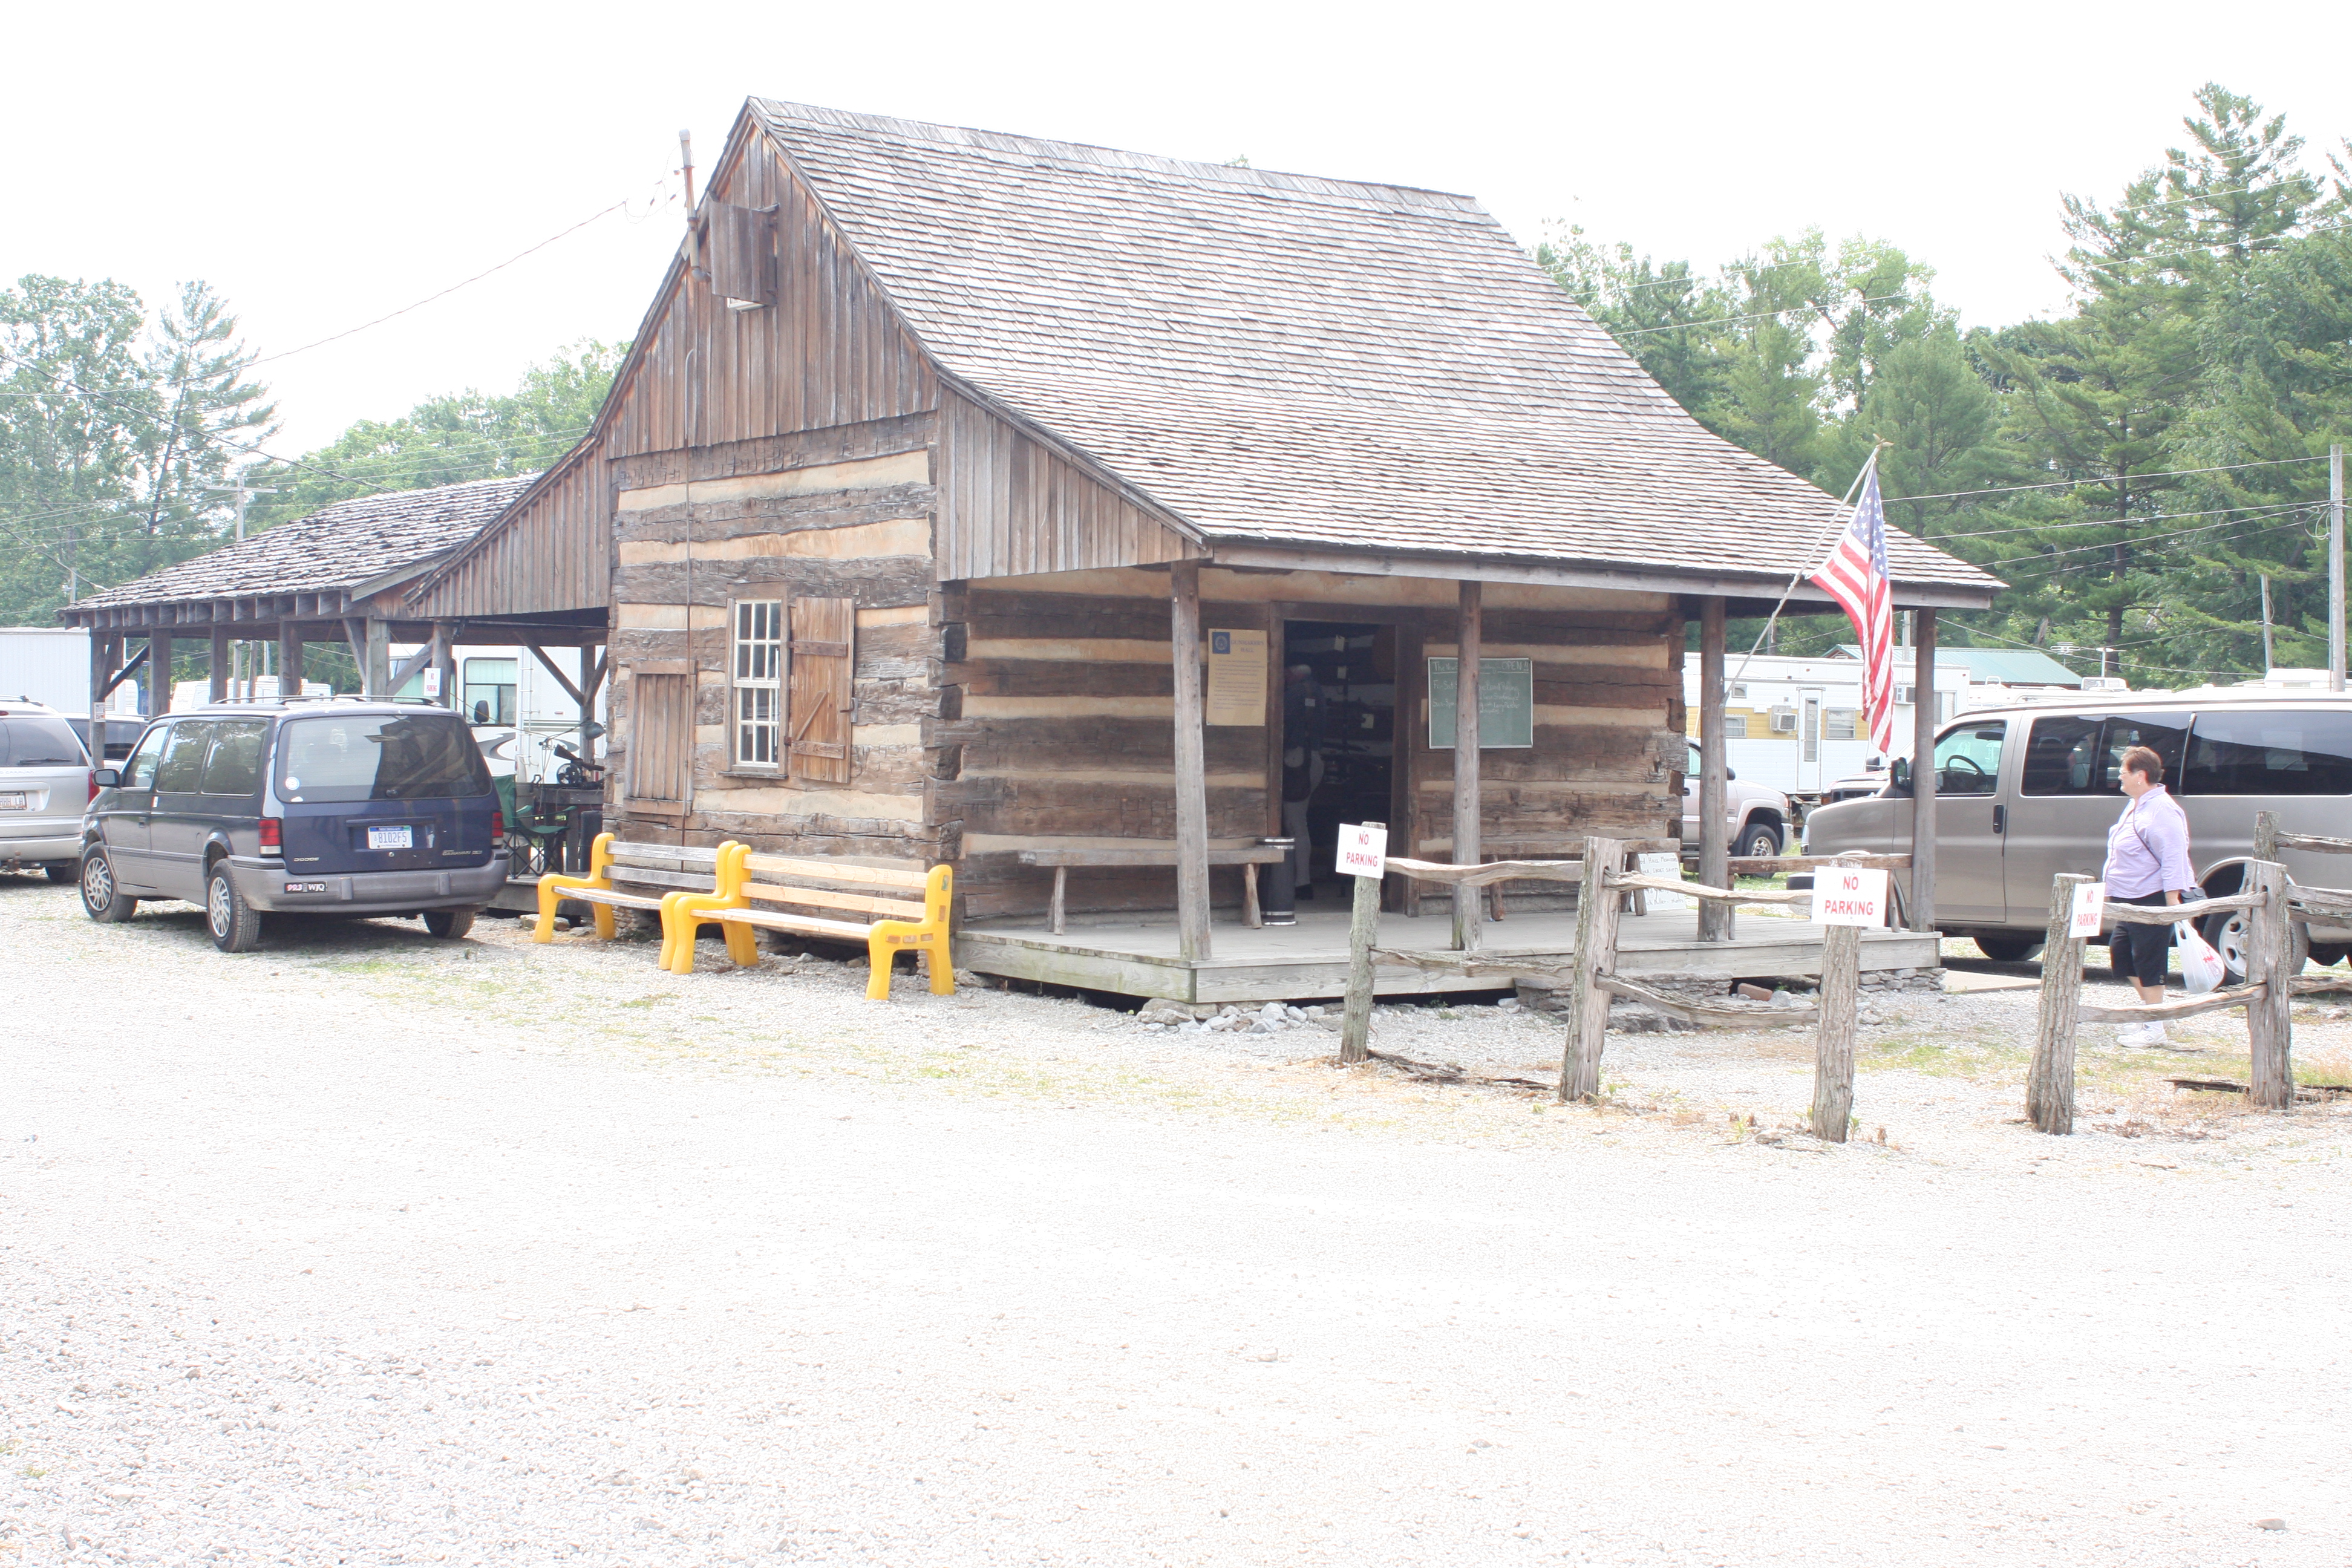
    In preparation for the Spring Shoot with Olympus Industrial, Steve Chapman and I met Grant Ferguson on the NMLRA grounds. We set up equipment behind Gun Makers Hall and tried different exposure settings, camera angles, and experimented with lighting.

    Slow Motion Crew
    Slow Motion Crew L to R: Steve Chapman, Kevin Pletcher, Dave Schnitker, Grant Ferguson (from a later article)

    It was at this point that we made the decision to shoot B&W instead of color. We weighed the advantage of increased definition against the loss of color. Increased definition won.

    When viewing the video you will see the different camera angles and exposure settings as we experimented. This gave us the information we needed to plan for the video we did a month later, during the Spring Shoot.

    We used two large Siler locks for this practice session. The first one viewed is one built by Sam Everly. The lock’s tumbler is supported by tiny two ball bearings. It is an extremely smooth lock and deserves to be mounted on a gun. The video contains 4 tries, the first with Goex cannon grade powder just for fun. The remaining trials are with Swiss Null B.

    The second Siler is a workhorse. It has been used for testing purposes since 1986. It has probably been fired 5000 times with all sorts of flints and powder. Practically all of my experiments and articles used this lock. Jim Chambers has given me incredible support with this lock.

    Our video contains three firings with the workhorse Siler, two with Null B and a final one with Goex cannon.

    https://youtu.be/U99DADs9UYw

  • Cleaning Your Gun by Wayne Stormer

    Wayne Stormer is an experienced muzzleloader who posted this on FaceBook.  It is reproduced here with his permission. He retains all publishing rights.  Wayne and I are both interested in seeing newer black powder shooters get a good start.

    CLEANING YOUR GUN

    It keeps popping up on other sites off and on all the time. I see all sorts of concoctions and magical spells being used by novice and seasoned black powder shooters alike. Everyone looking to make the elusive magical patch lube and how to magically clean their guns. Lets dis-spell a few ideas and look at some basics here while avoiding debates.Remember there are new shooters to this sight as well and this is mainly geared towards them.

    You’ve wiped your bore dry, loaded you new gun up, and you’ve fired it. You’ve wiped between shots, and are done for the day. You’ve got fouling in your bore, and it is time to clean things up and go home. That’s right. I’m talking about cleaning up right in the field or at the firing range after a shooting session. Maybe you choose to clean when you get home, but I like to clean my gun then and there.

    The fouling residue in the gun has salts, carbon, and acids. Any internal combustion device will produce acids. That is just the way it is. It is time to neutralize and clean the gun. Your gun will smell good and so will you thus keeping the missus happy when you get home……especially if you are late to dinner again.

    Everyone has their magical mystical way of doing things but, for the old boys, it gets down to the basics. Water, alcohol, and oil/grease to get the job done.
    1- The water softens and removes the salts, acids, and grime.
    2- The alcohol helps remove excess water and moisture.
    3- The oil/grease neutralizes any remaining minute traces of salts
    and gives a protective coating to the bore of the gun preventing
    rust.

    Want to use a modern wonder lube or cleaner? Be my guest and best of luck to you in your endeavors sincerely. For me, I got into shooting black powder in a more traditional sense to a point. I take a bottle of water, 70-90% Isopropyl rubbing alcohol with Wintergreen and Methyl Salicylate in it, followed with either WD40 or use an oiled/greased shooting patch. That is how I clean my bore and lock. Simple.

    But what about these commercial wonder lubricants and cleaners? Do you need them? No and yes. Yet if they work for you, and you are routinely cleaning your gun, then I say go with it! Cleaning that gun is what matters. However, lets look at the basis of these things for a moment.

    Whether it is crude oil from organic matter that has been in the ground, or the pitch & crude oil made from coniferous trees, all these “new” and improved things are the products of numerous distillations with things added and subtracted to attain various characteristics sought to do the things we want them to do. Pine oil, and other items made from such, is nothing new. The ancients and Appalachian folk new about such things. Trust me, Americans love to distillate things! For purely medicinal purposes only, don’t you know……..

    What is behind these modern wonder lubes and cleaners? The same things that were used before through time. They made pine beers, soaps, oils, emulsifiers, inks and so much more. Anyhow, this distillation process of coniferous trees is where Tall Oil comes from which is a main ingredient in those magical lubes and cleaners. They are a pine detergent, and pine oil, added to mixed alcohol, with a non-polar solvent to keep them mixed as a single entity for use. Sometimes a little citrus oil thrown it as well. Nothing new under the sun. People have been making their own similar concoctions for some time but finally some folk saw there wasn’t a patent for such and obtained one for their concoction. Hey, free enterprise.

    As for the distillates from crude pitch/asphaltus/crude oil from the ground, mankind has been using such for thousands of years where available as well. It too has brought about many distillates that we use. This brings us to Ballistol and WD40 products. Yes, they are distillate products blended with others to do specific jobs they were intended for. Ballistol is pretty well know and works, but WD40 has a mystery to it having been first brought about in 1953 by Norm Larsen with his Rocket Chemistry Company in San Diego, California and Ken East was set to work improving and creating different variation of it until he came up with Water Displacement formula 40. I guess you could say it is rocket science after all.

    WD40 isn’t fish oil either boys and girls.That is what I heard as well before but it just isn’t so. Here is what it contains:
    50% aliphatic hydrocarbons (long term non-volatile viscous oil)
    <25% petroleum base oil distillate (light lubricating mineral oil)
    12-15% low vapor pressure aliphatic hydrocarbon (evaporator)
    2-3% carbon dioxide (propellant) if in a spray can

    This gives you a product that has penetrating anti-corrosion ingredients, with water displacement in even the tiniest minute crevices (like the area where the breech plug with threads connect with the barrel threads), and soil removal, leaving a rust inhibitor on the metal. It is a low viscosity oil easy to remove and not a heavy oil. Night and day items with different properties and characteristics.

    Don’t forget that your iron barrel guns are similar but different critters from yesterday’s evolving carbon steel barrels and today’s high carbon, molybdenum, and chromium molybdenum steel barrels being made. Different properties and characteristics. You might have to season iron barrels, but you have to coat and protect your steel barrels because most steels rust quickly. Therefore you must be on top of the game with your steel barrels to prevent rust getting any toe hold on your gun. That means cleaning and oiling your gun as soon as you can as humidity and moisture are your enemies in an unclean gun.

    Please, we aren’t going to have debates over how long one’s gun can go before cleaning either. Not everyone lives in a low humidity area and home or in a high humidity region. You may not see it but your bore is being affected ever so slightly when you leave fouling in it. Things can culminate over time.

    There you have it. Cleaning your gun is important and is fun with the right attitude. Maintenance is a part of life. It can also be an enjoyment while inspecting your gun for things needing attention before they become a problem too.

    As long as you clean your gun and oil it WHICH EVER WAY YOU PREFER (emphasizing only), it’ll do well and so will you. Just be sure to wipe the bore dry, and clean the touch hole or percussion ignition pathway, before loading and you’re all set to go. It is and isn’t rocket science.

    Wayne, thank you for your contribution.

    Larry Pletcher, editor

  • Flint Elk Rifle

    Flint Elk Rifle

    The history of this rifle began years ago when my friend Rick Shellenberger in Colorado cleaned out an old muzzleloading shop. Among other items, he brought home 2 Sharon .58 caliber rifle barrels. Both were rifled at 1 turn in 72 inches. These barrels have eight lands and grooves. Rick kept one barrel and gave the other one to me.

    Back in Indiana, years passed until I began collecting parts to complete the rifle. My friend Steve Chapman gave me hard maple rifle stock. It was a half stock with a 1 inch barrel channel and a mortice cut for an L&R lock. Steve suggested we look for an L&R lock that matched the mortice, and both of us like Davis triggers. I bought parts at the Friendship spring shoot, and Steve took them back to his shop.

    Steve knew that time wasn’t a factor, and had a number of other gun-making projects to finish ahead of mine. When he began to work on the gun, a couple decisions were made.  One decision was to use Tom Snyder’s vent coning tool to make the vent.  This process consists of drilling a 1/16″ hole, inserting Tom’s threaded pin, and installing the cutter through the open breech.  We used a cordless drill to cut the internal cavity.  The cavity is very similar to Jim Chamber’s vent liners.

    The barrel was shortened to 32 inches as stock proportions were considered. Considerable wood was removed to give the rifle much better lines.   Steve poured a very nice pewter nose cap. A removable aperture rear sight was used to help a pair of 70 year old eyes.

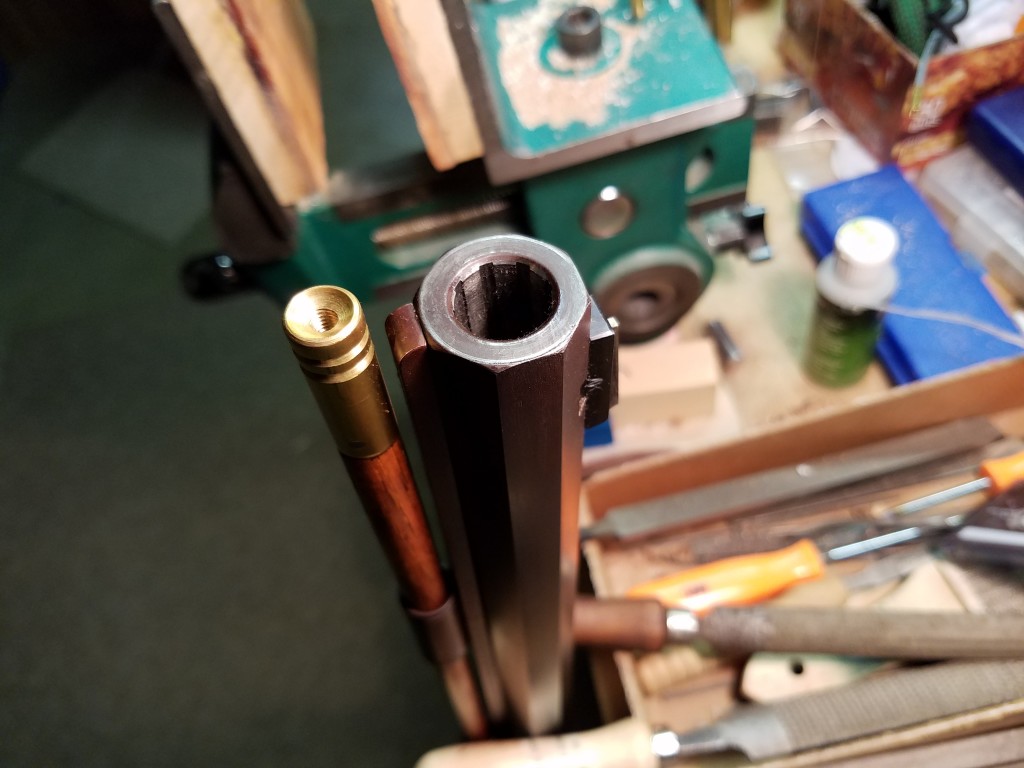
    Here you can see the .58 caliber hole and the crown Steve cut.
    Here you can see the .58 caliber hole and the crown Steve cut.
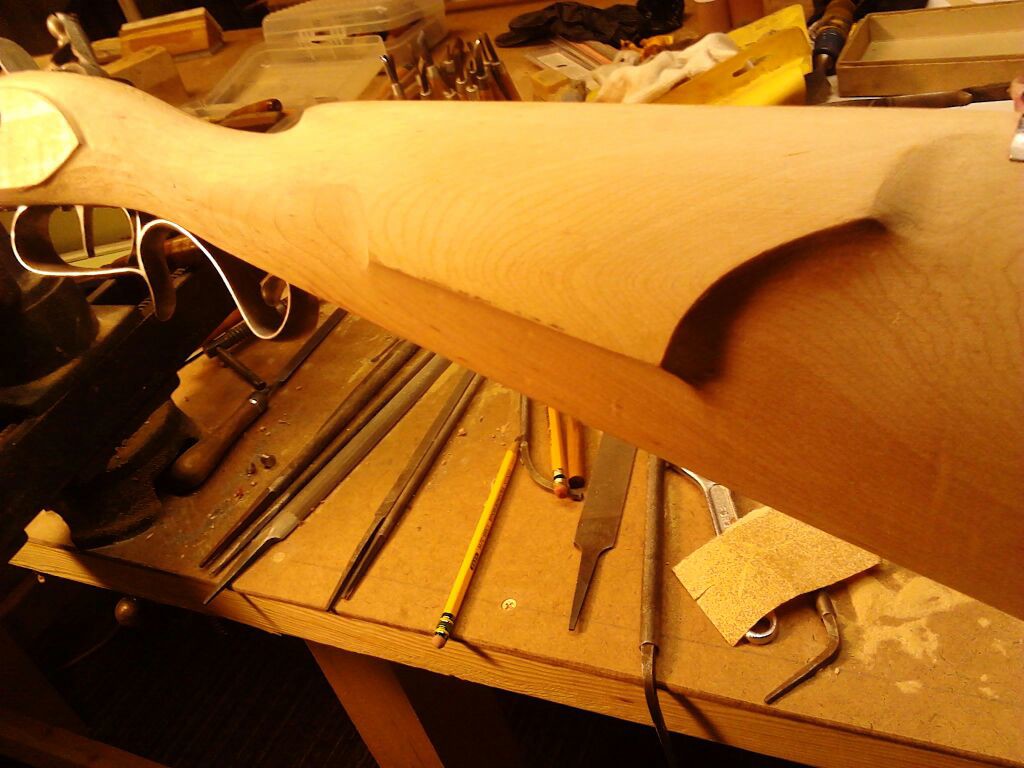
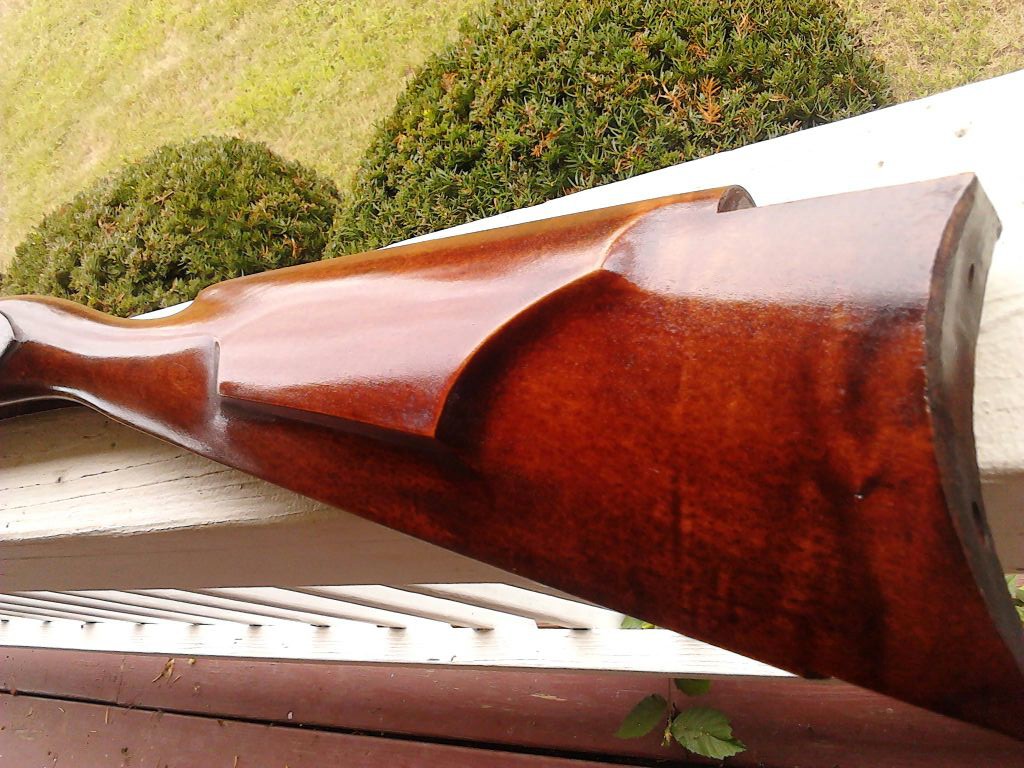
    Final shaping of cheek piece
    Final shaping of cheek piece  (Photo S Chapman)
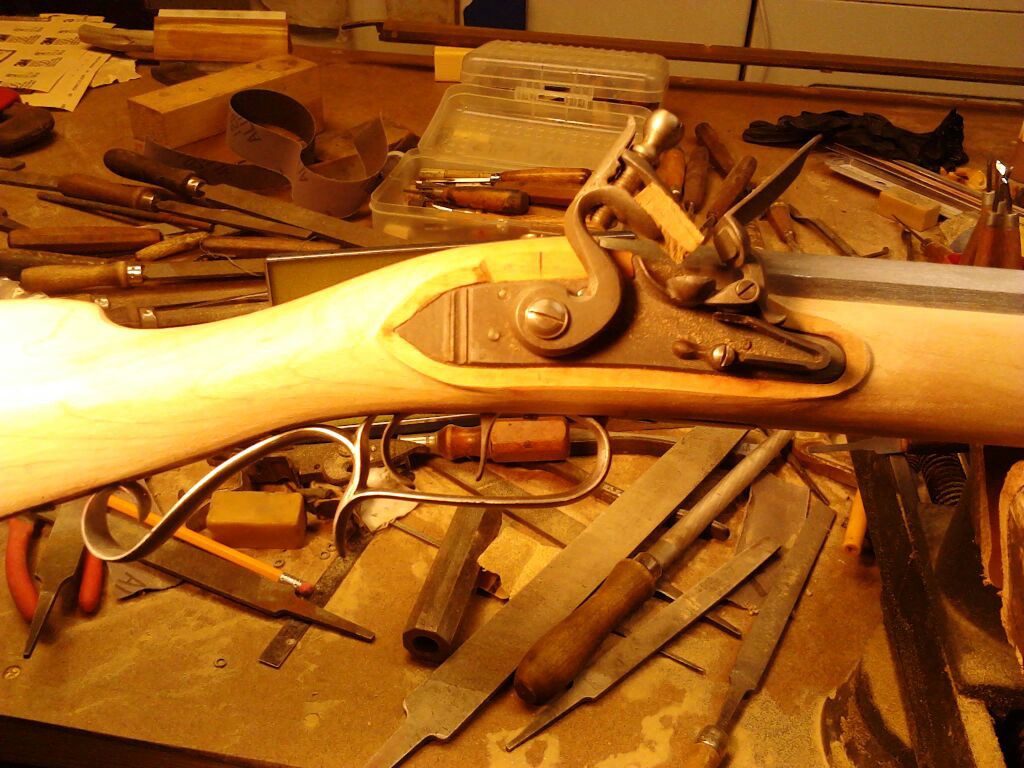
    Lock installed, wrist shaped
    Lock installed, wrist shaped  (Photo S Chapman)
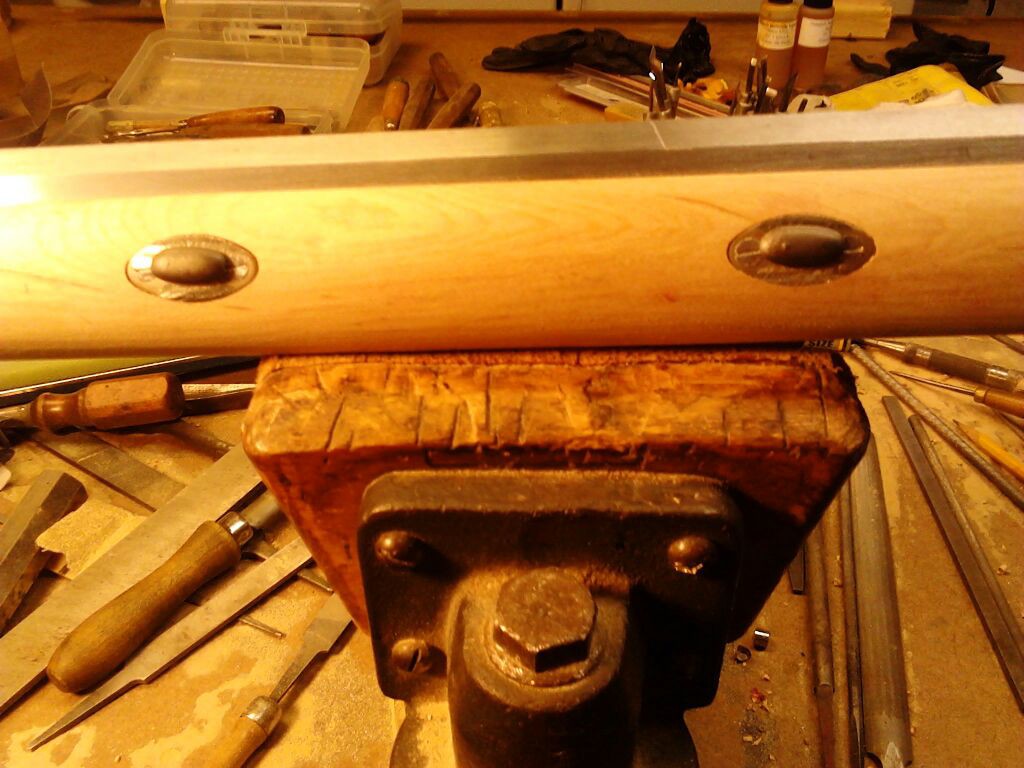
    Barrel Lugs
    Barrel Lugs  (Photo S Chapman)

    The finish used on the stock was a mixture of stains that Steve likes, and I like the way the stock turned out. I didn’t quiz Steve on the exact mixture, but I know that it was a mixture of Homer Dangler’s stains.

    Cheek piece
    Cheek piece  (Photo S Chapman)
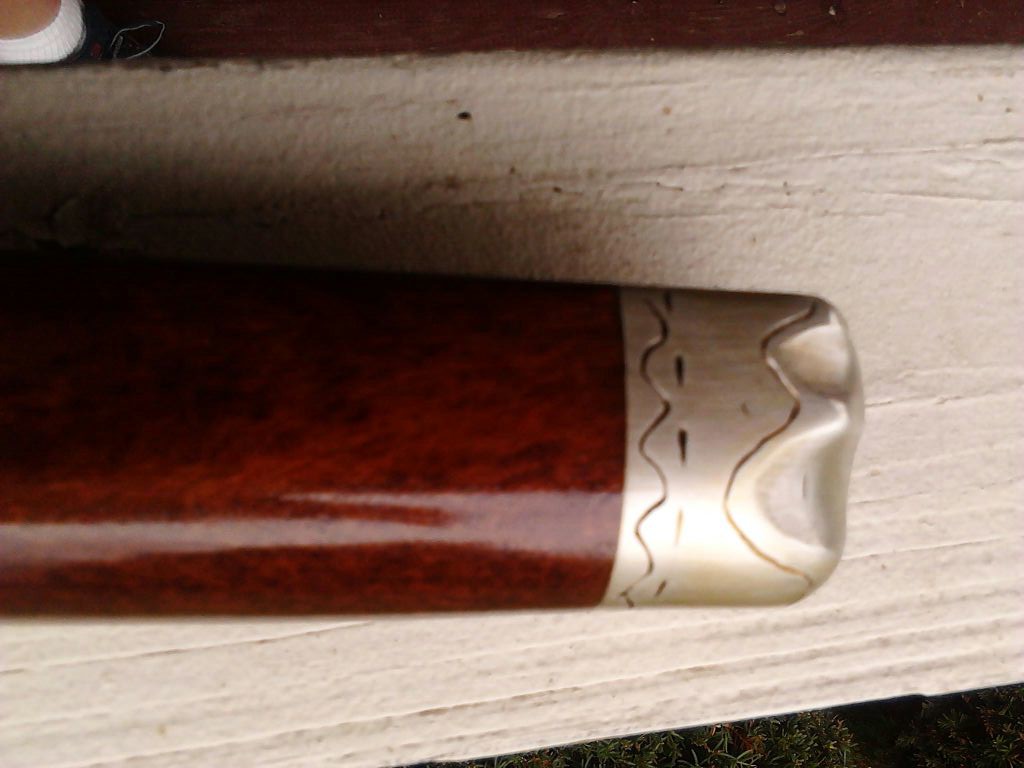
    Pewter nose cap
    Pewter nose cap  (Photo S Chapman)
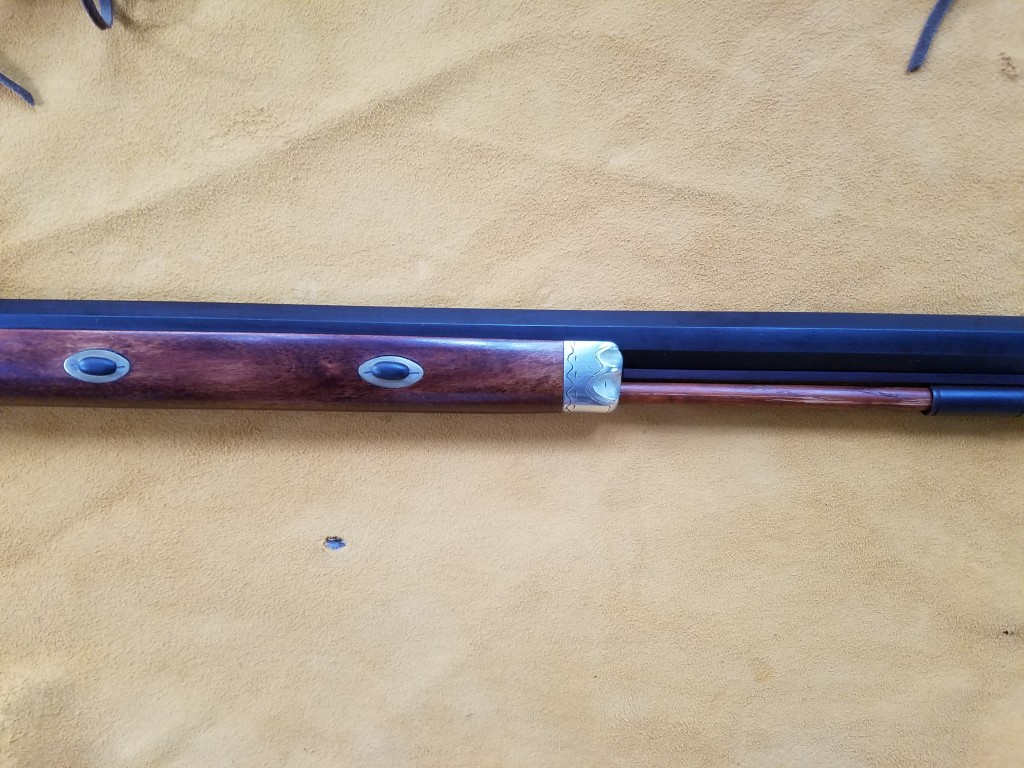
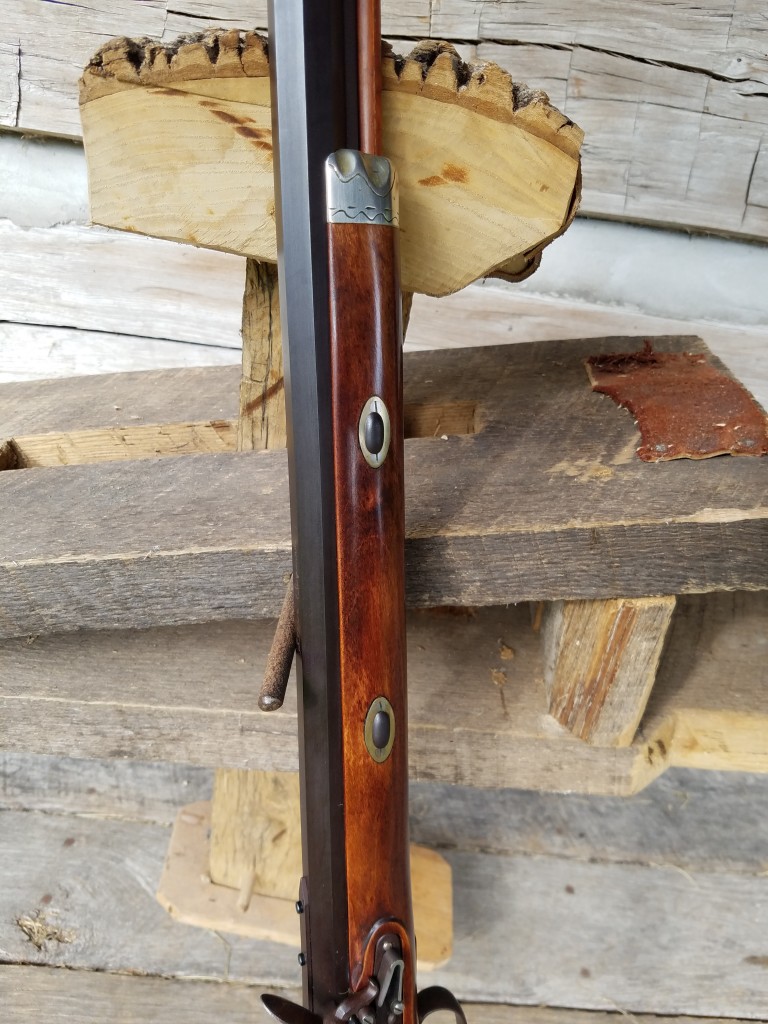
    Forearm and nose cap
    Forearm and nose cap  (Photo L Pletcher)
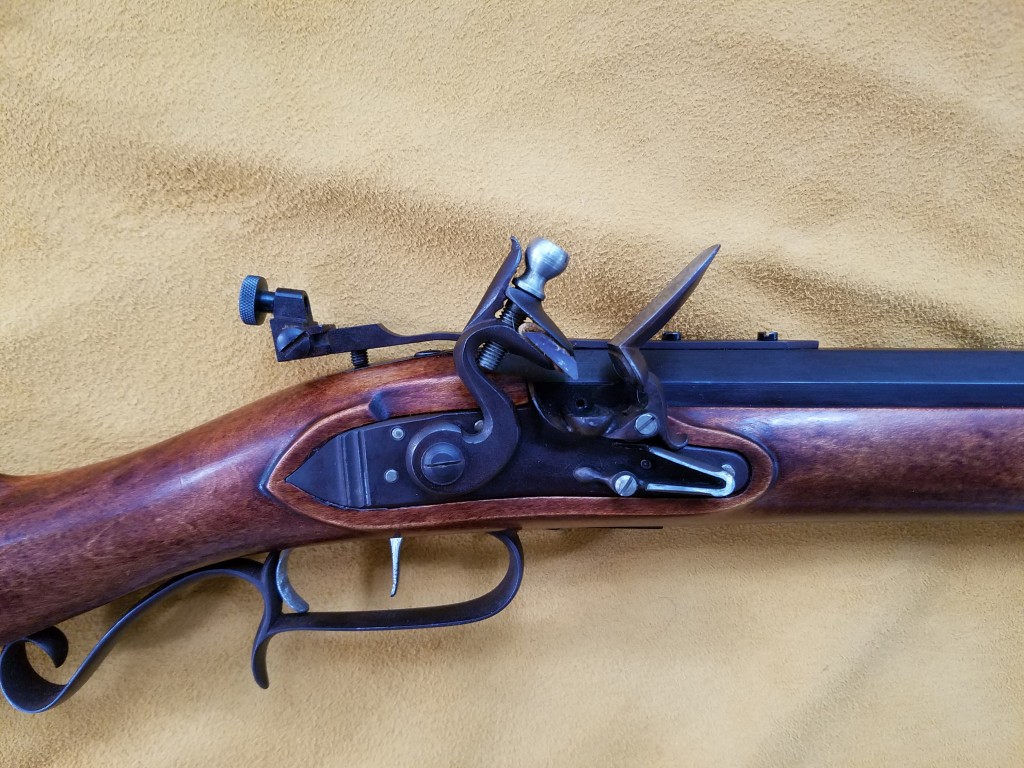
    Lock area
    Lock area  (Photo L Pletcher)

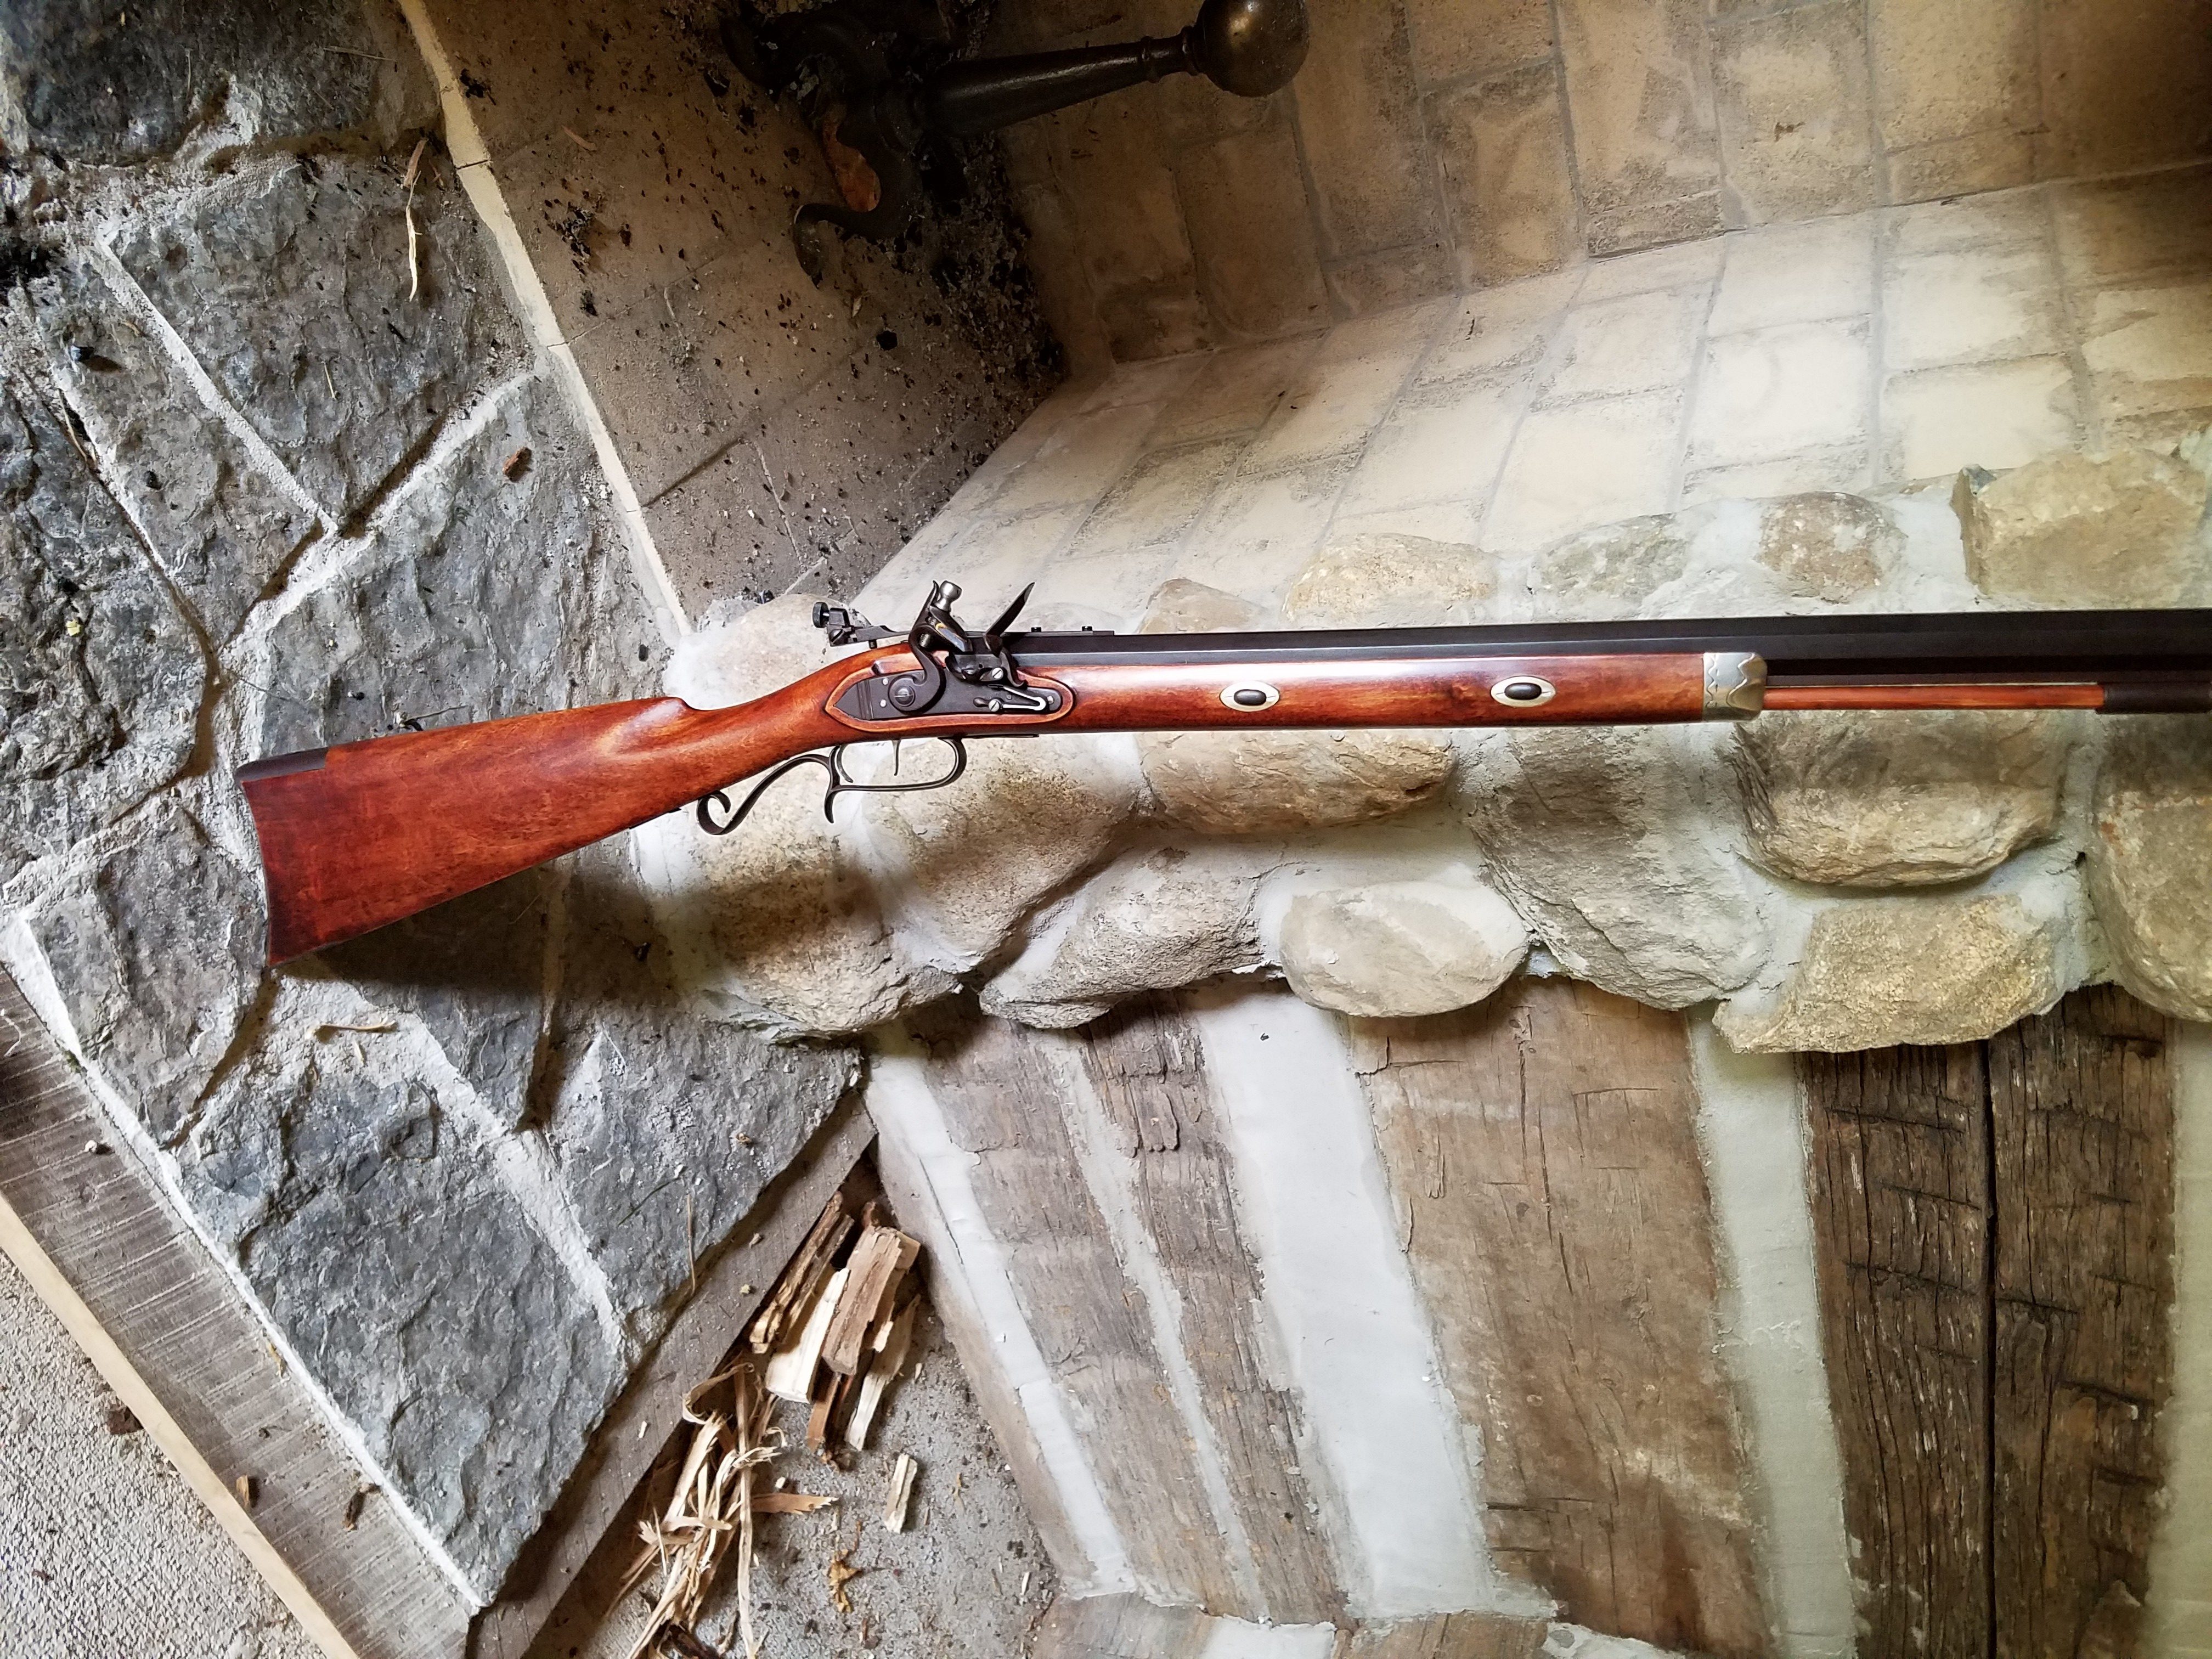
    When the rifle was finished, we went to the Stones Trace range to sight it in. With the rifle shooting to point of aim, we played with powder charges. A Swiss load of 90 grains of fffg gave us almost 1700 feet/second. I expect that a load of ffg may be found that will give similar velocities with less pressure. At this writing, I expect to experiment with different powder brands and grain sizes. Right now it is a potent rifle at both ends.

    20160921_103154

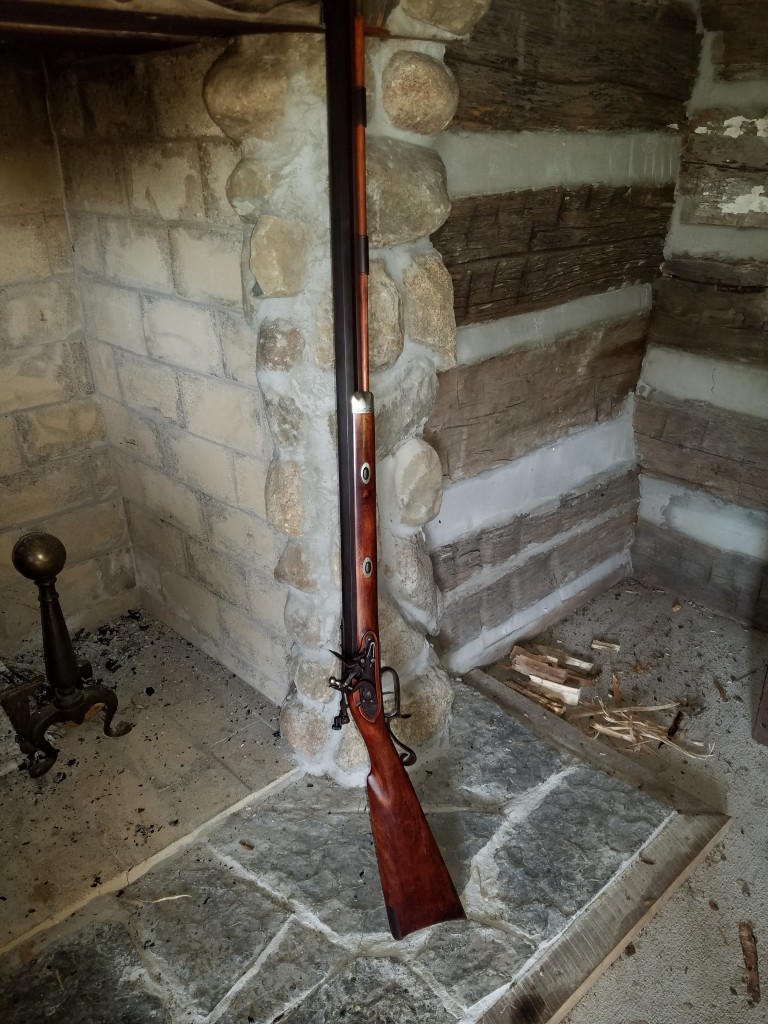
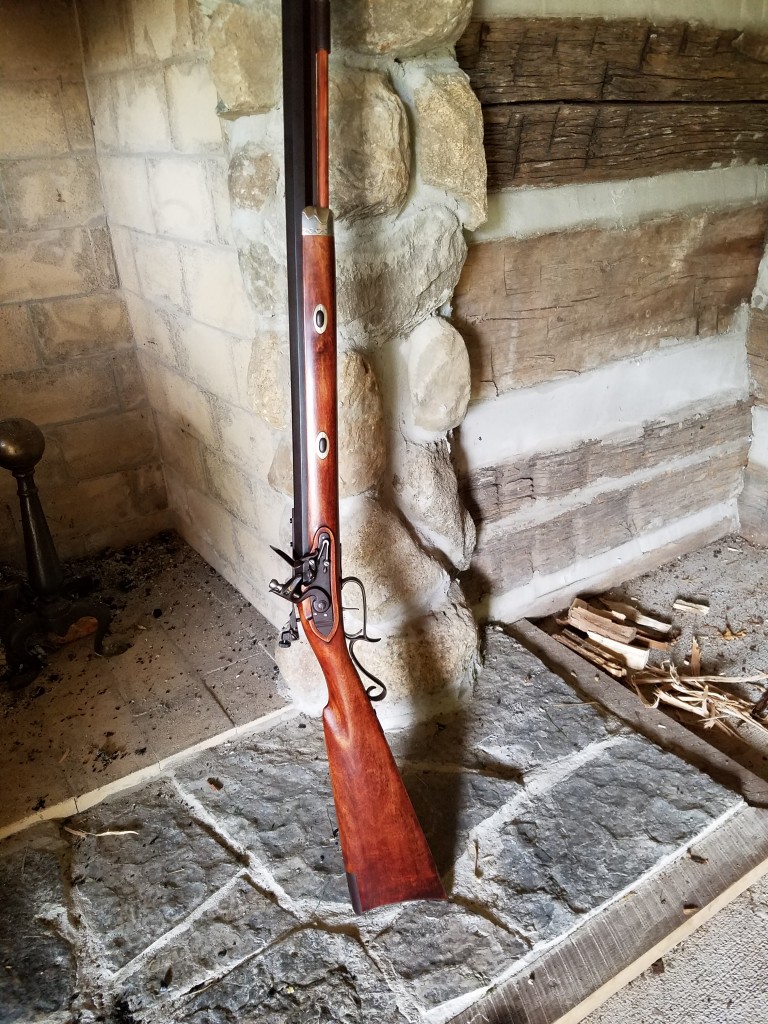
    Rifle by the hearth (Stones Trace Historical Society
    Rifle by the hearth Stones Trace Historical Society  (Photo L Pletcher)

    As we finished up our chronograph session, Steve said, “ Since this gun puts the ball at the top of the front blade, you could head shoot squirrels with it, or bark them.”

    I said, “Well maybe not with 90 gr. of Swiss fffg.”

    “Yah,” Steve said. “Wonder what it would do with a squib load, like maybe 30 gr.”

    So, we chronographed a 30 gr. Swiss load of fffg. This load drove the 280 grain ball an average of 870 fps. Maybe we need to think lower for a squib. On a whim, we also clocked a load of 30 gr of Goex. It averaged less than 500 fps. This does seem more squib-like.

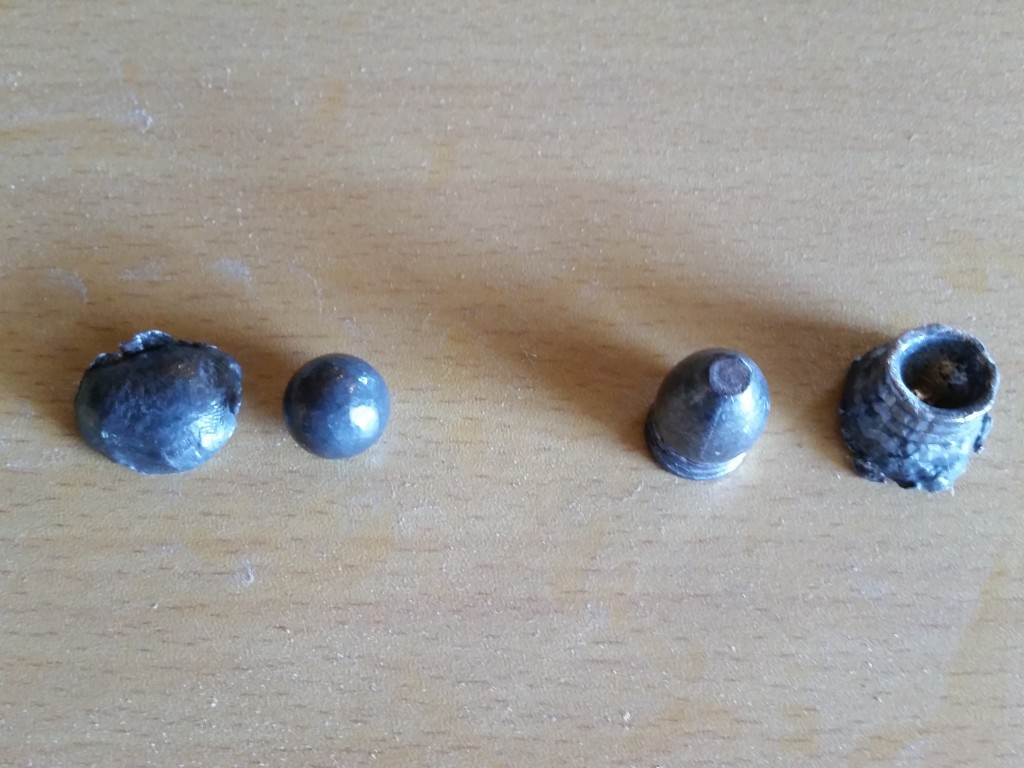
    As a side bar, my friend Rick in Colorado stocked a rifle with the other .58 barrel that I mentioned at the beginning of this post. Rick wanted to recover a ball to see how much it expanded. During my time visiting him, we filled a garbage can with water and fired a 90 gr ffg load down into the can. The garbage can split down the side, but we did recover the ball. We taped the can together as best we could and fired a .58 cal. mini ball.  Below is a pic of the expanded ball with the mini ball before and after.  These rifles will make a big hole in about anything in North America. If my health and physical condition permitted, this would be the gun I’d use for elk.

    Left is the .570 ball before and after recovery. On right is a mini ball for comparison
    Left is the .570 ball before and after recovery. On right is a mini ball for comparison
    Rifle by the hearth
    Rifle by the hearth  (photo L Pletcher)

    Back here in Indiana, Steve and I will need to do some form of Rick’s water experiment. We haven’t decided what we want to destroy, but it will be something filled with water.

    Steve Chapman is a close friend with rifle-making and machinist skills.  We have worked on many projects and experiments together.  Whenever a project needs more hands, Steve is the person who helps.  He usually pulls the trigger in any test that measures accuracy.  While we both fired this gun for accuracy, Steve’s shooting skills have been necessary in many of our experiments.  Steve’s many skills have been a benefit in many of these experimental articles.


    Future tests, thoughts,etc

    Thought: We might learn more from a different water test. We’re thinking of a row of milk jugs filled with water. A .308 is caught in the fifth jug. We think the .58 will do better.

    Also: Build a water box to hold 1 gallon plastic bags. With this setup we could repeat tests and compare different calibers and loads. Compare the 90gr ffg Goex load and the 90 gr fffg Swiss load.


  • Two Hole Vent Test

    Two Hole Vent Test

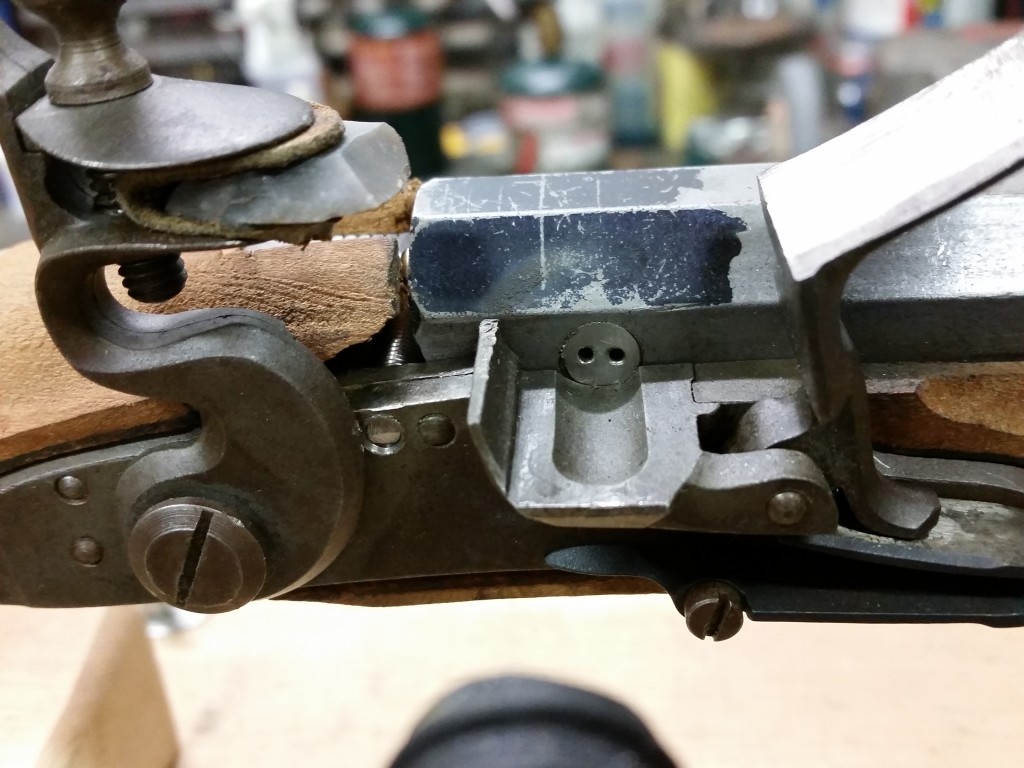
    This test is a long time coming.  A couple years ago at CLA, Steve Chapman and I were looking over a flint gun made by Allan Sandy. The vent Allan used had two smaller holes located horizontally.  Allan said the vent was internally coned but used two .052″ holes.  Allan said he didn’t know whether it was faster or slower than a normal vent. My reply was that I could time it.  Allan offered to provide me a vent, and on the way home, Steve and I planned how the vent would be tested.

    Time passed with many interruptions in the way.  In the meantime Fred Stutzenberger entered the picture.  I believe Fred saw the “double-hole vent” on Sandy’s table at the same show that we did. Fred however, was more prompt than we were and published an article on the vent in the August 2014 issue of MuzzleBlasts.

    Without great detail, Fred’s article compared Allan’s double-hole vent with a single-hole vent that had the same area as the sum of the two smaller vents.  His findings showed that shots fired with the double-hole vent had slightly higher velocities than the single-hole vent even, though the vent area was the same.  The “choked-flow principle” (comparing circumference to area) is the likely cause.  Fred explains this better than I do; please read the article.

    Our testing focused only on ignition speeds.  We compared ignition time of the double-hole vent (two .052″ holes) and the single-hole vent (.073″) Both vents have the same area, but vary in their circumferences.

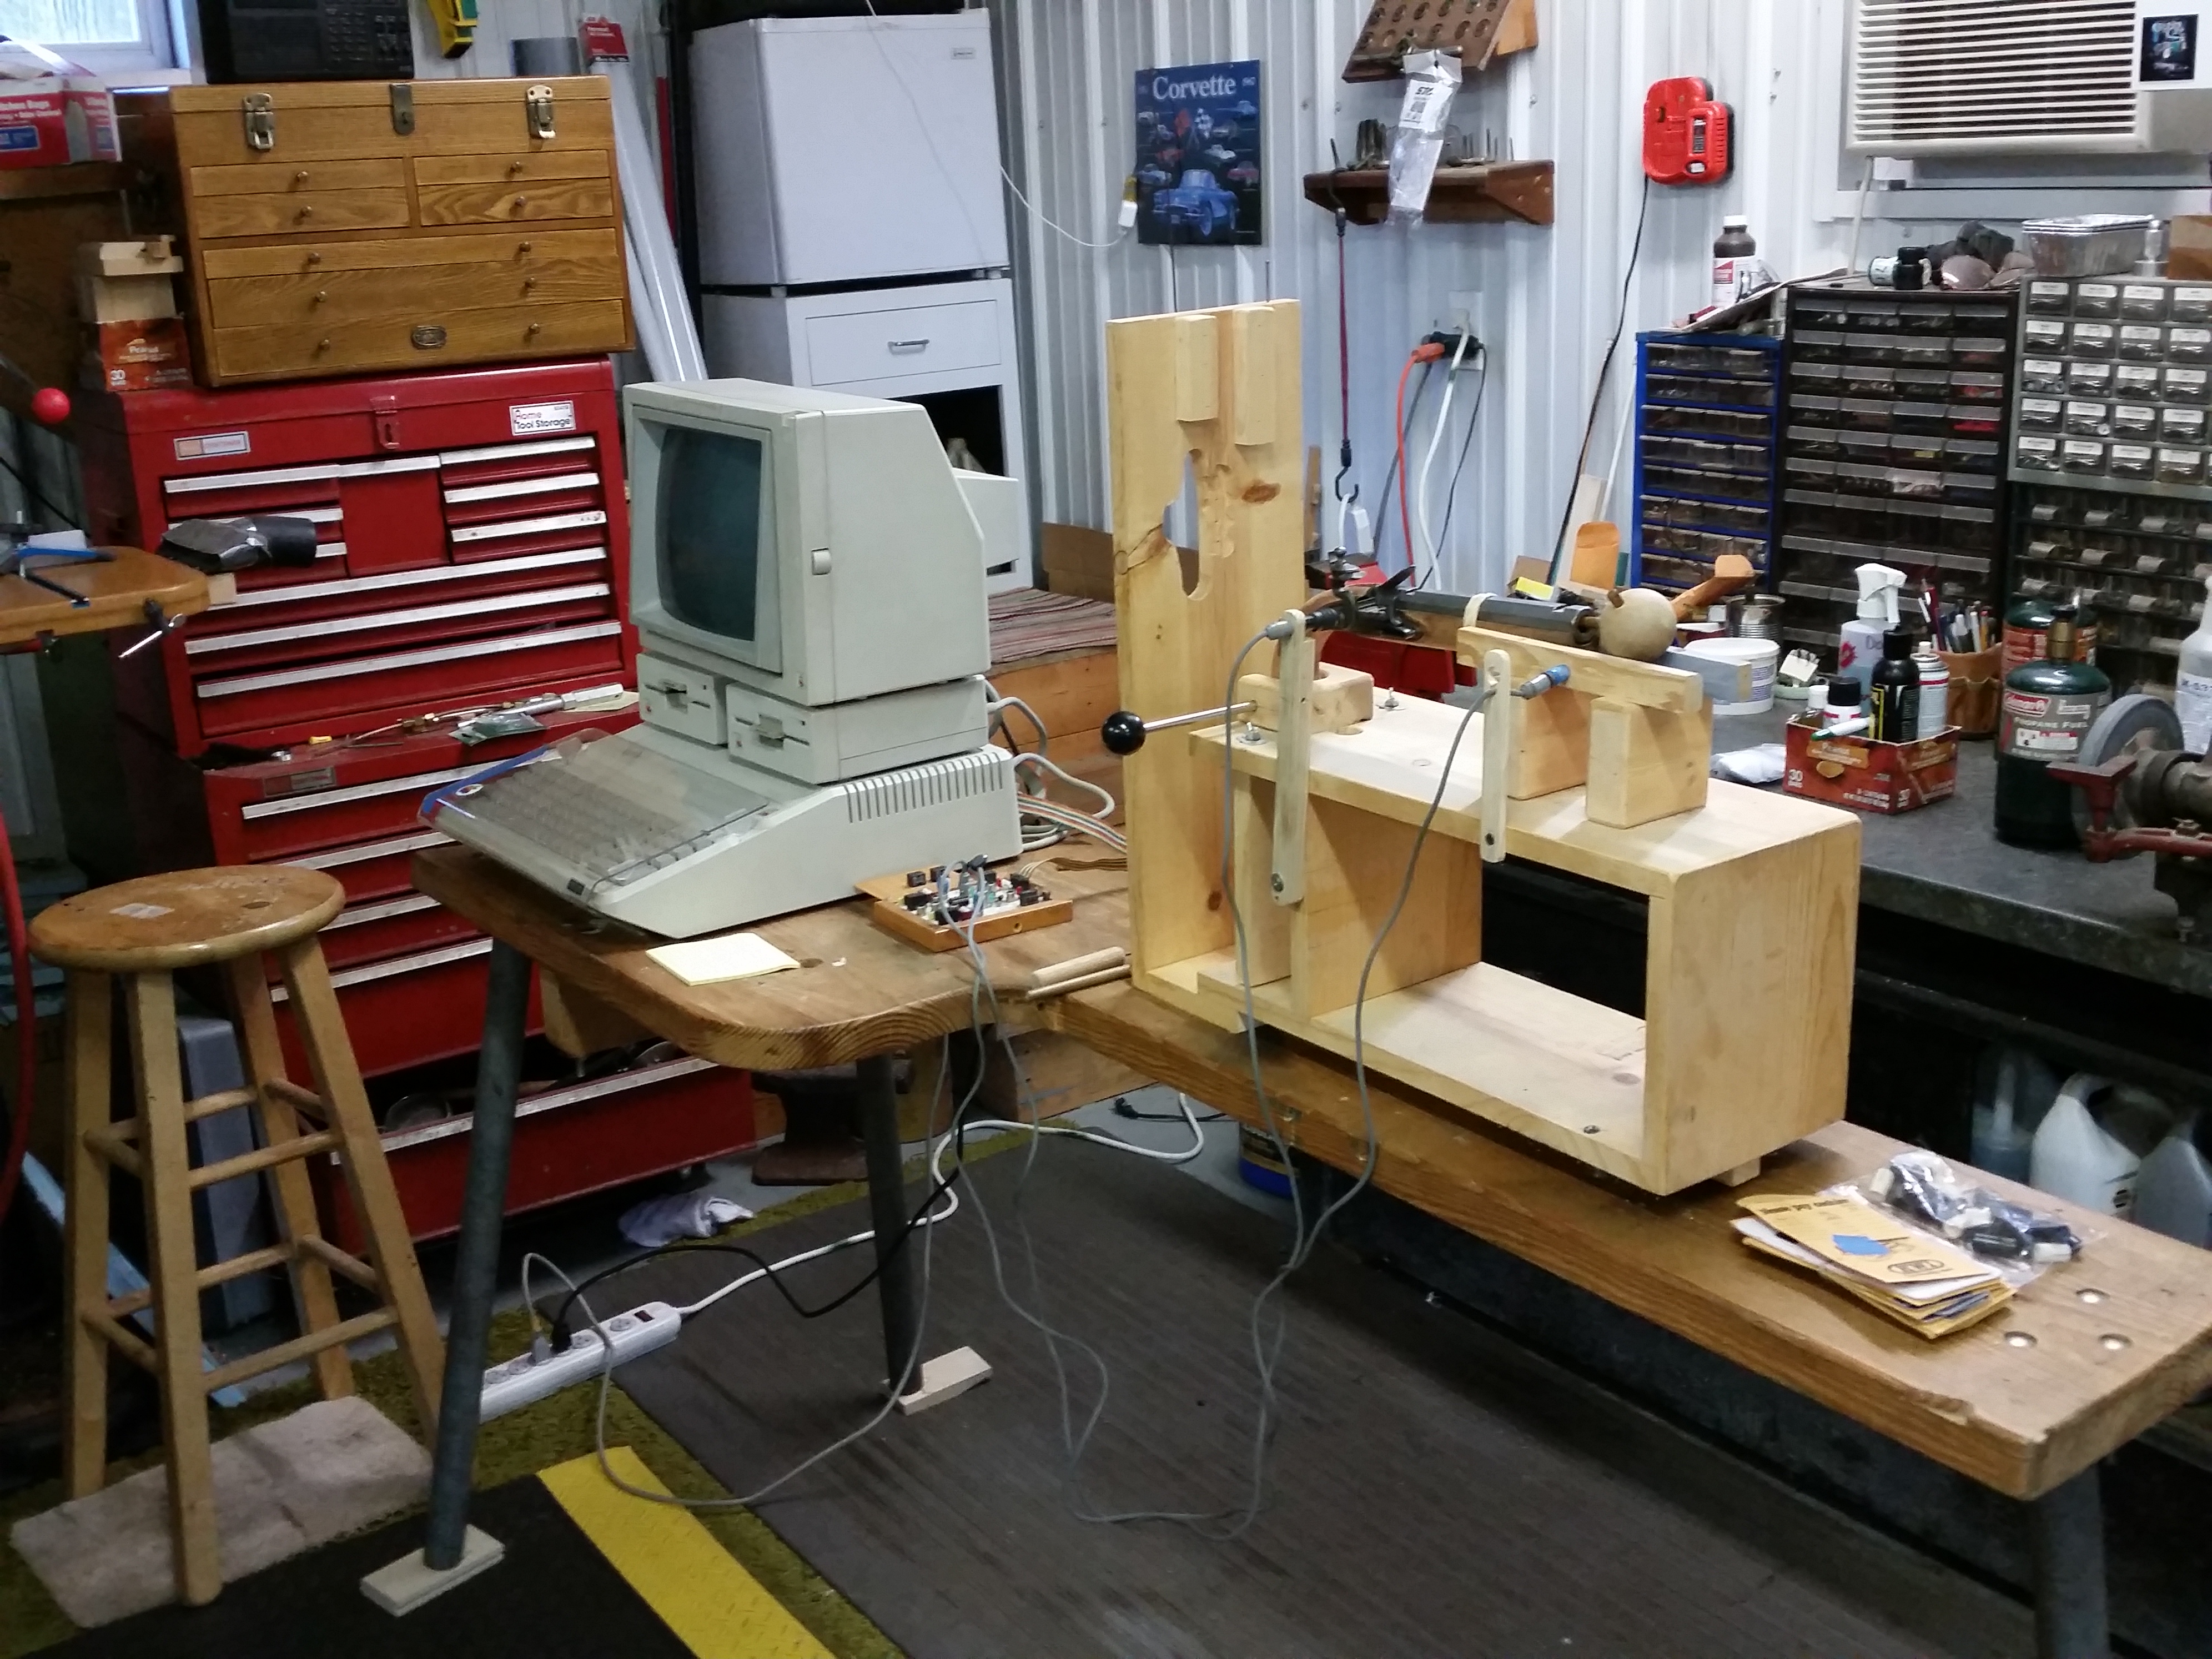
    2015-11-05-18-58-52

    The main question I have is, “If the choked flow principle tends to restrict flow leaving the vent, might it also restrict flow entering the vent, causing slower ignition?”

    We used a 10″ barrel stub with a small Siler flint.  The test used a double-hole vent with .052 holes and a single-hole vent with a .073 hole.  We did 10 trials each and lit the pan with a red hot copper wire.  Our reason for this was to prevent a changing flint edge from entering into the test.  The single .073 vent was better both in speed and consistency.

    Before finishing, we ran 5 trials each in which the pan was ignited by the small Siler.  In those trials the single-hole vent was better, but by a smaller margin.  None of the trials sounded abnormal to the ear.  No matter the range from high to low, human senses could not tell the difference.  In fact, Steve tried to guess and was invariably wrong.

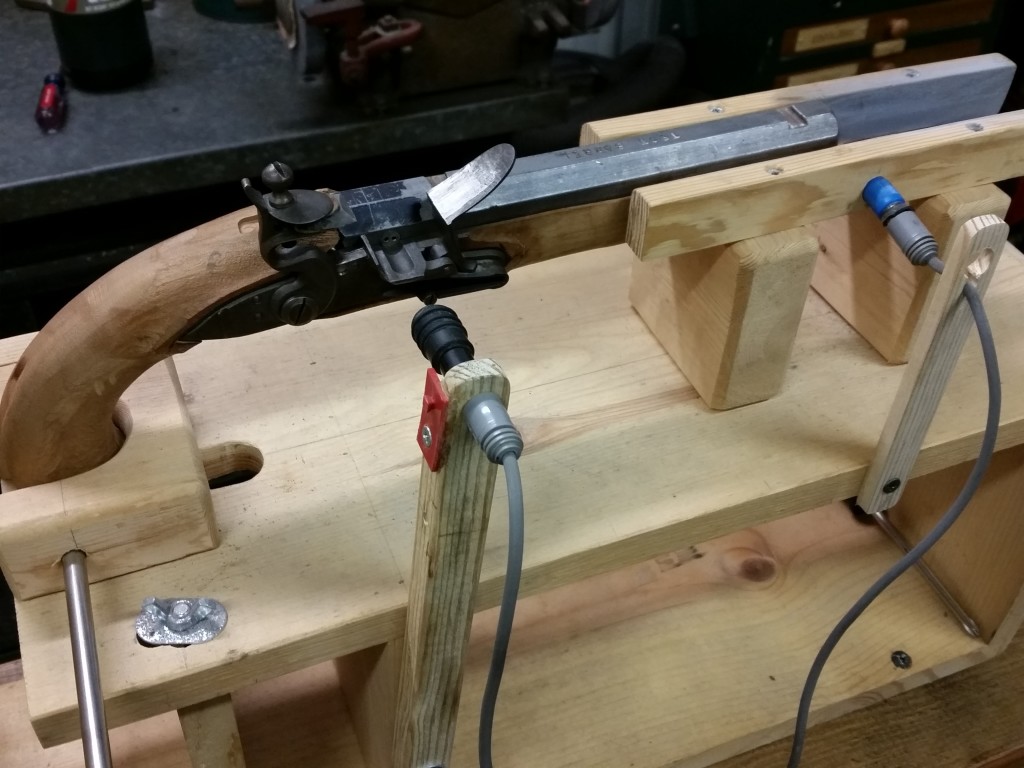
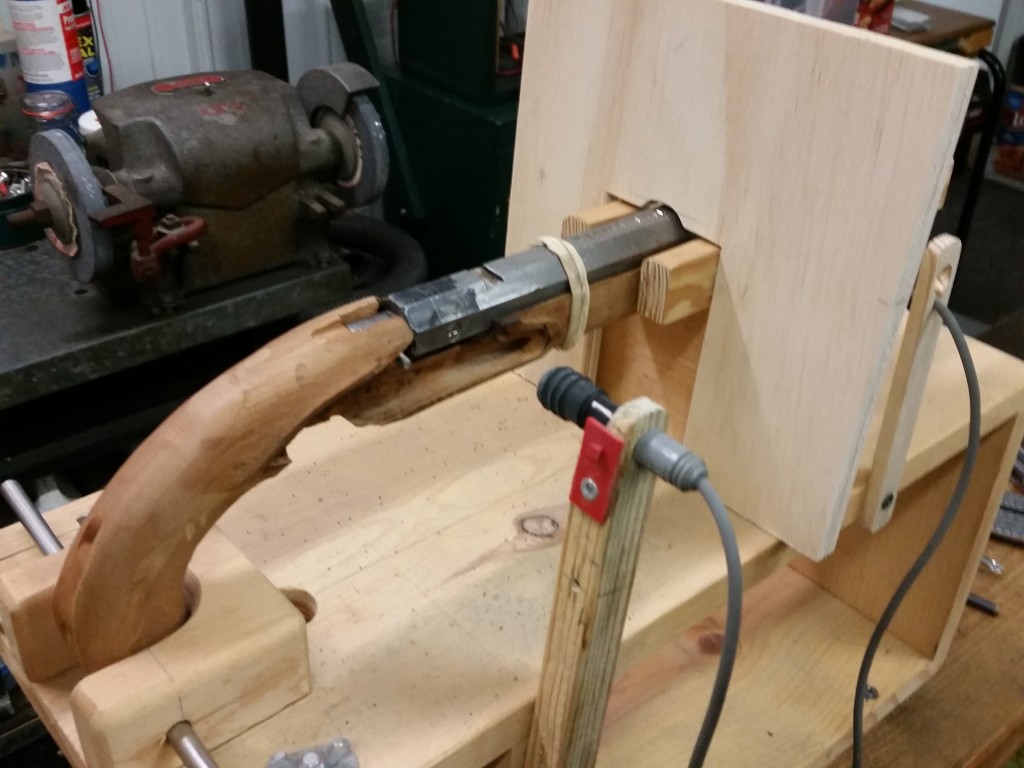
    Here you see the shield that prevented both photocells from triggering when the pan flashed
    Here you see the shield that prevented both photocells from triggering when the pan flashed

    Interpreting the results can sometimes be misleading.  In this case, I like the single-hole vent.  However, I do have two doubts. (1) I have questions about the reliability of a vent as small as .052”.  A double-hole vent with larger holes might alter the result.  (2) I wonder if the shape of vent’s exterior would change the result.

    The included photos show the fixture and the position of the photo cells used in the timing.  The photo cell at the pan trigger the start, while the photo cell and the muzzle triggers the stop.

    2015-11-05-18-57-14

    The last pic is a close up of the vent.  These holes are .052″.  BTW, the stock is a heavily mutilated factory second supplied by Jim Chambers. It was important because it allowed the sear to be struck from below by the plunger. It also allowed us to use a small Siler lock for an earlier test.  At that time it allowed three different locks to be tested using the same lock mortice.

    To conclude, I’d like to thank Allan Sandy for the chance to time his vent. I feel that this vent type is well worth studying. I’d like to repeat this with a .055” 2 hole vent.

    My thanks also to Steve Chapman and Mike Coggeshall for their assistance in the testing.

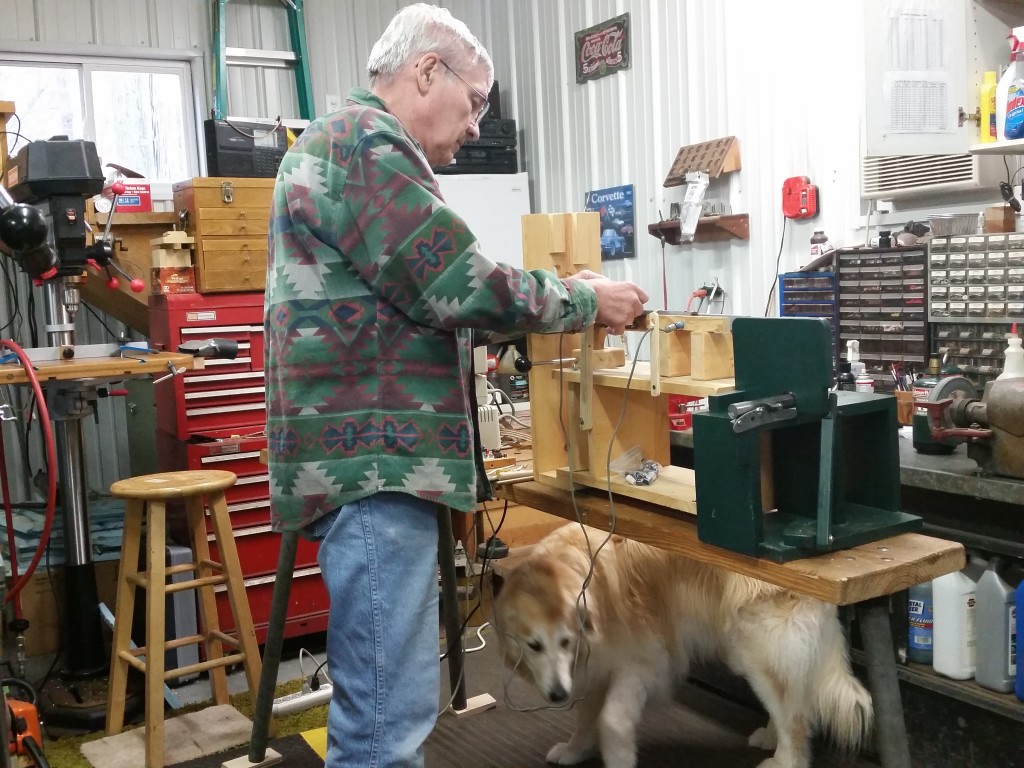
    Of course every experimenter needs a furry assistant
    Of course every experimenter needs a furry assistant

    Larry Pletcher, editor