This video was produced in 2009 but was never uploaded. In doing site maintenance to www.blackpowdermag.com I found it in a different folder. Besides some shots of excellent locks, it shows some of the trials that one goes through to prepare for a video session.
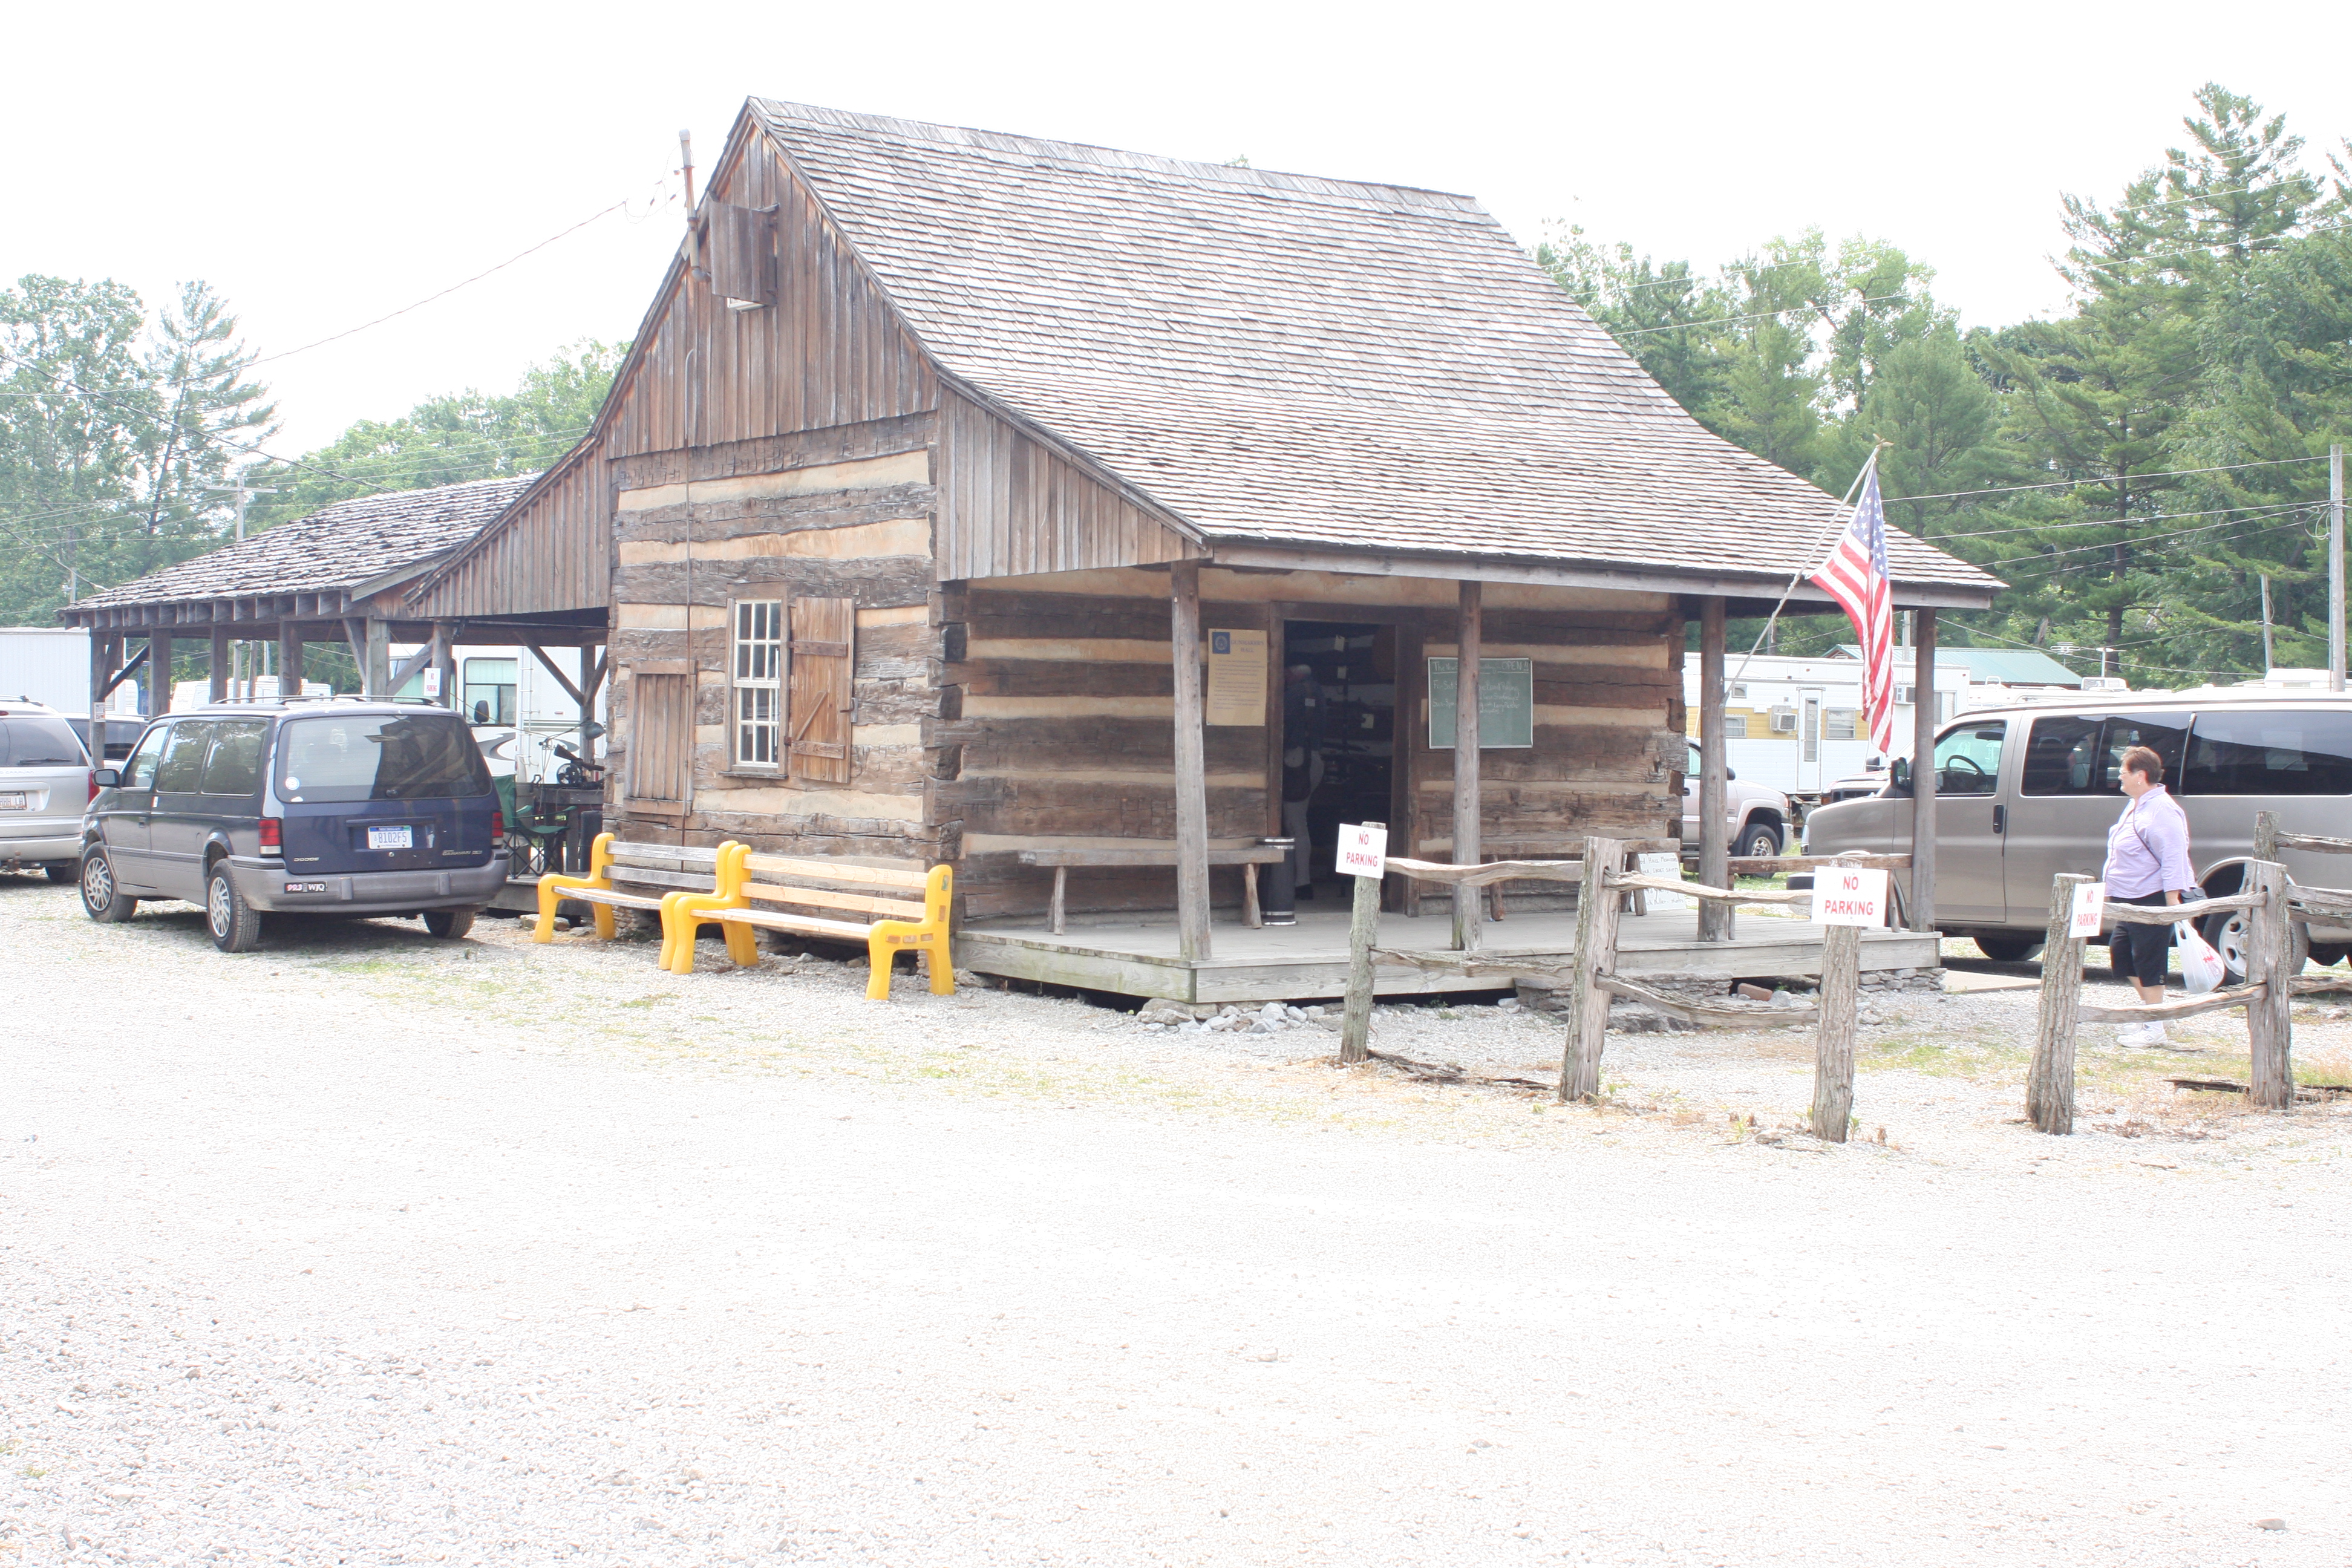
In preparation for the Spring Shoot with Olympus Industrial, Steve Chapman and I met Grant Ferguson on the NMLRA grounds. We set up equipment behind Gun Makers Hall and tried different exposure settings, camera angles, and experimented with lighting.
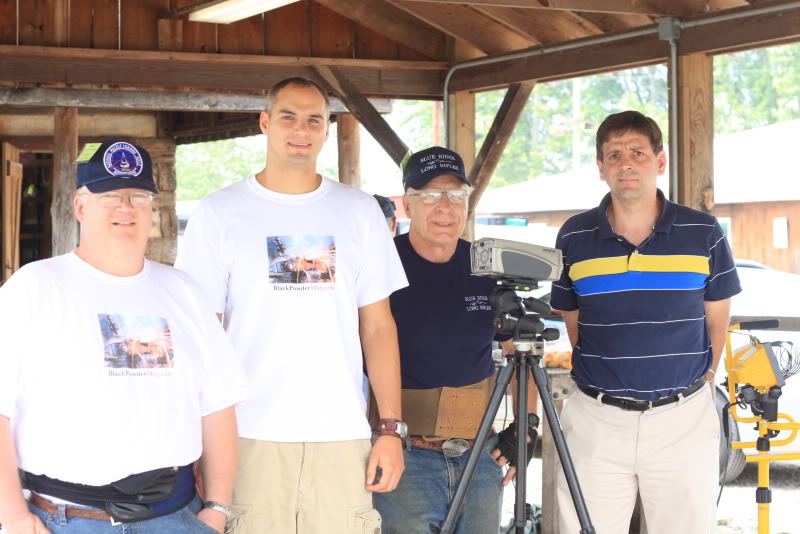
Slow Motion Crew L to R: Steve Chapman, Kevin Pletcher, Dave Schnitker, Grant Ferguson (from a later article)
It was at this point that we made the decision to shoot B&W instead of color. We weighed the advantage of increased definition against the loss of color. Increased definition won.
When viewing the video you will see the different camera angles and exposure settings as we experimented. This gave us the information we needed to plan for the video we did a month later, during the Spring Shoot.
We used two large Siler locks for this practice session. The first one viewed is one built by Sam Everly. The lock’s tumbler is supported by tiny two ball bearings. It is an extremely smooth lock and deserves to be mounted on a gun. The video contains 4 tries, the first with Goex cannon grade powder just for fun. The remaining trials are with Swiss Null B.
The second Siler is a workhorse. It has been used for testing purposes since 1986. It has probably been fired 5000 times with all sorts of flints and powder. Practically all of my experiments and articles used this lock. Jim Chambers has given me incredible support with this lock.
Our video contains three firings with the workhorse Siler, two with Null B and a final one with Goex cannon.
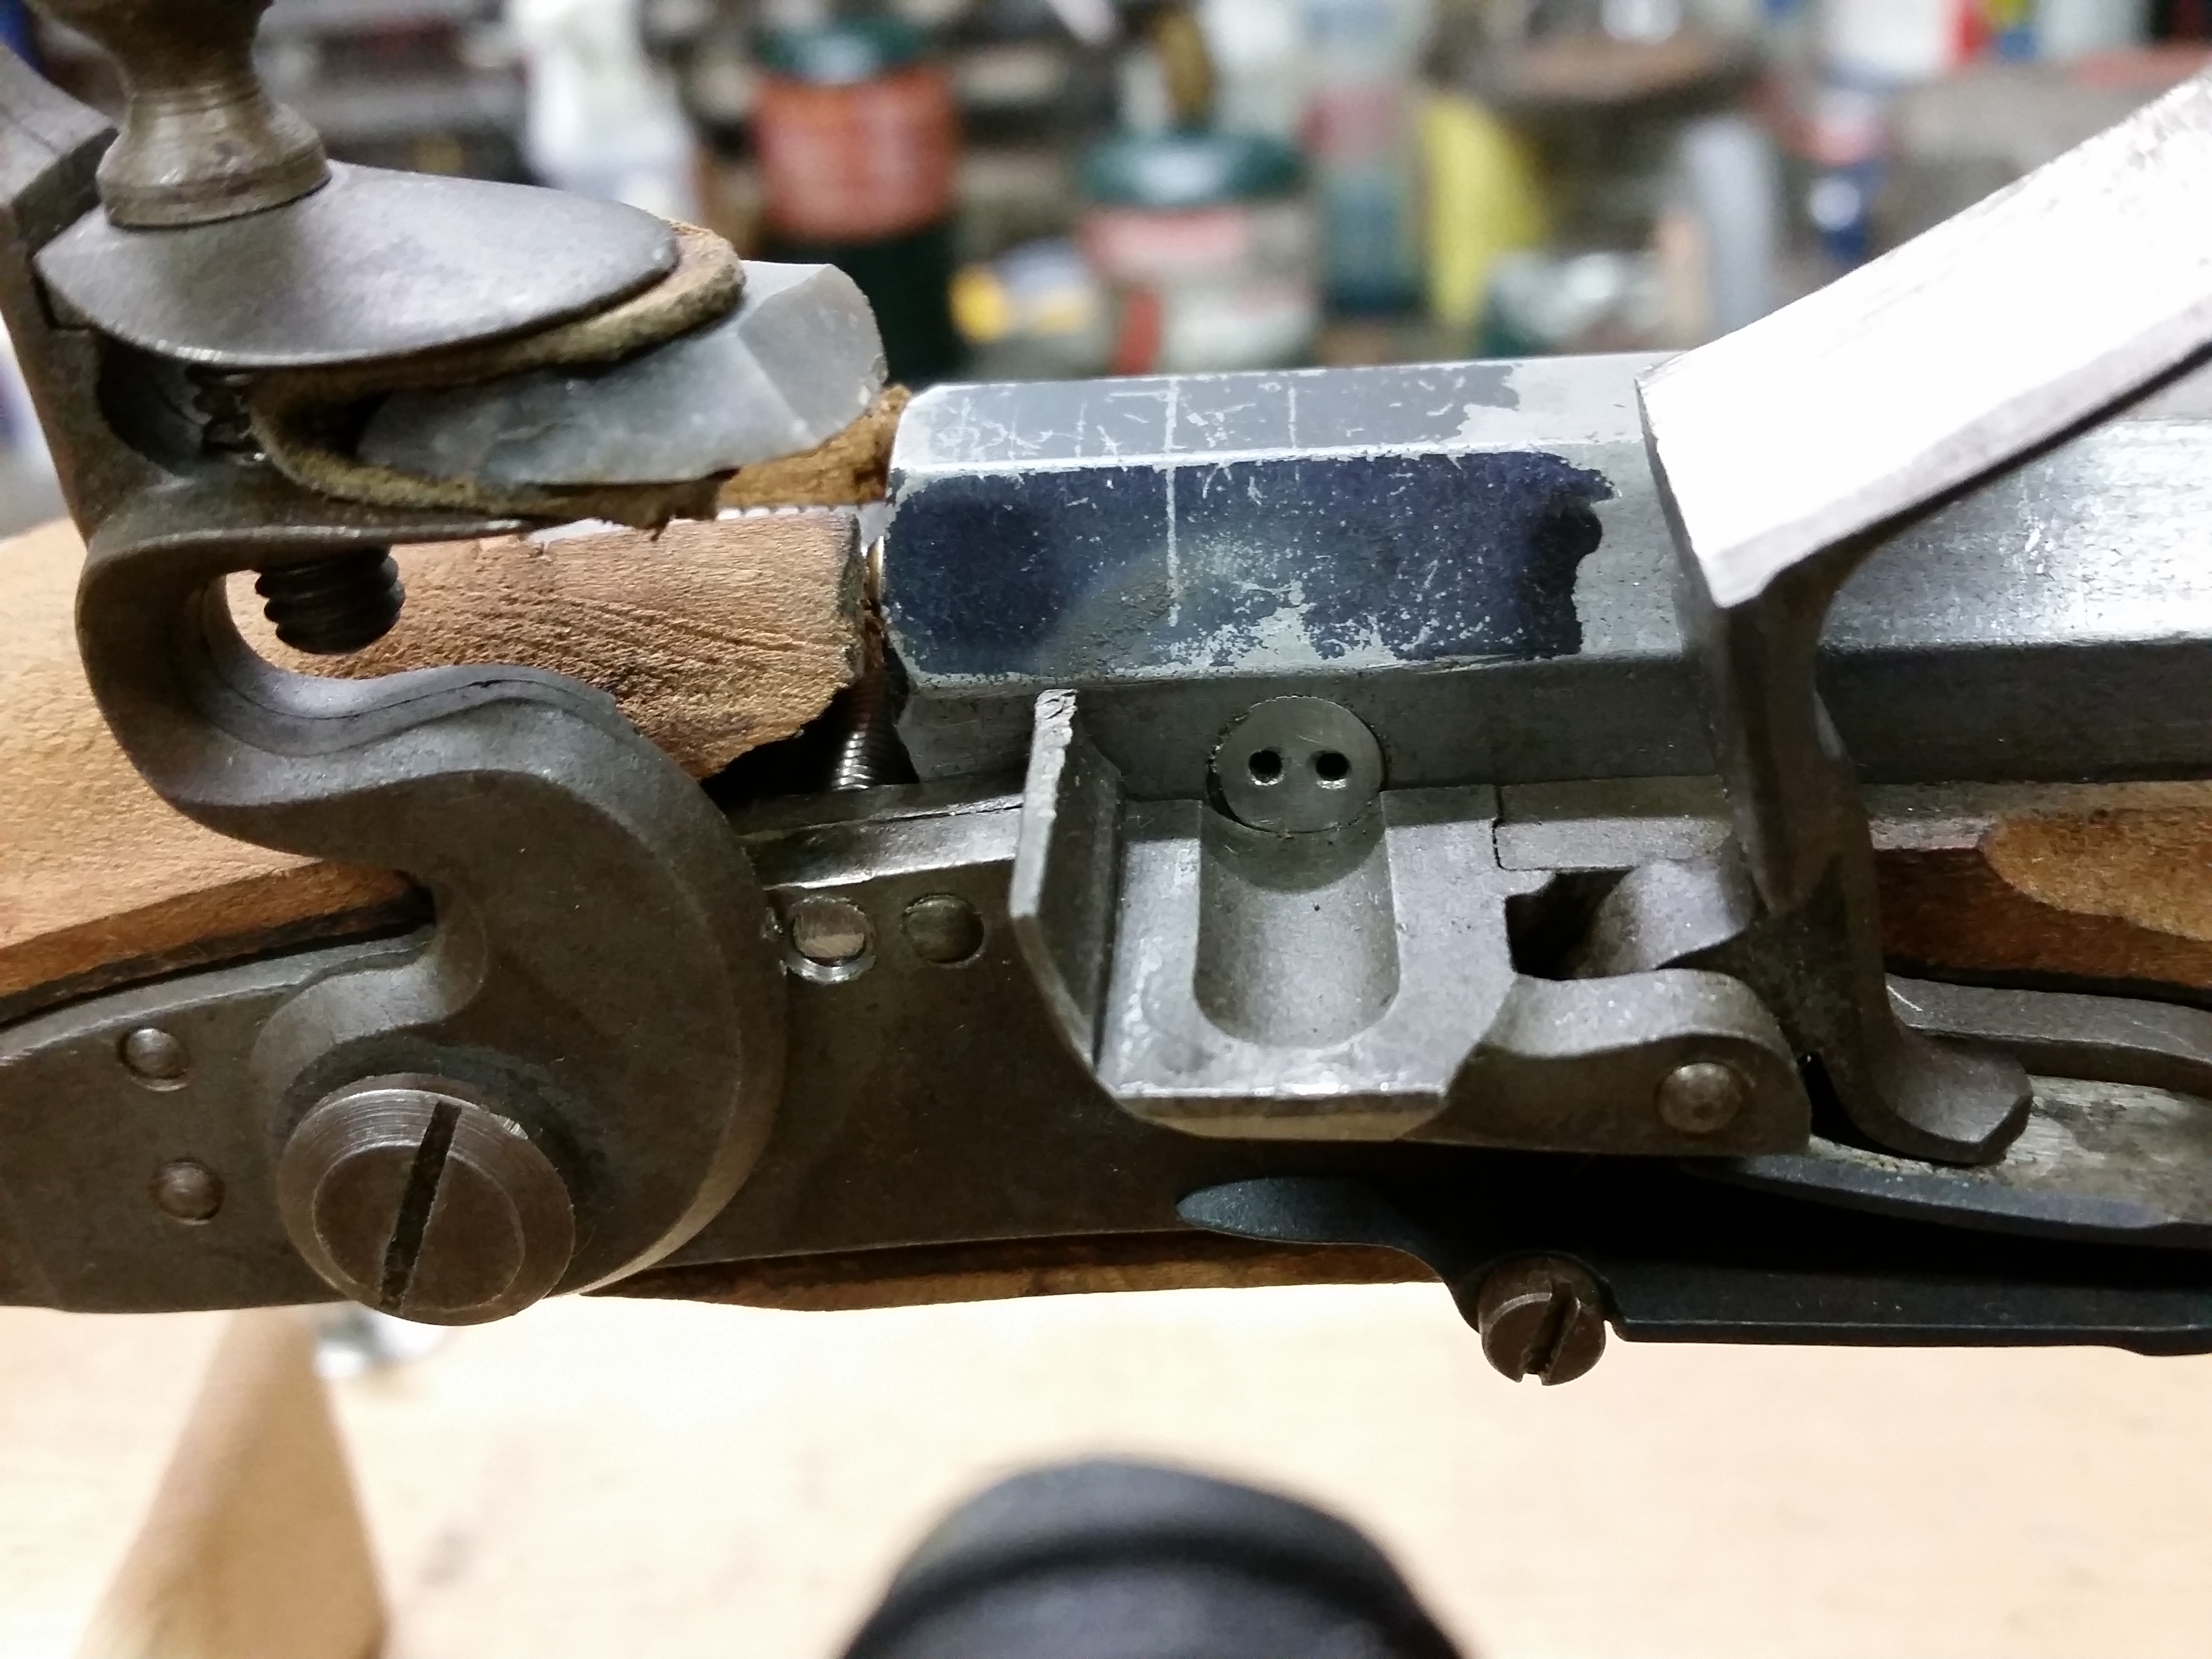
This test is a long time coming. A couple years ago at CLA, Steve Chapman and I were looking over a flint gun made by Allan Sandy. The vent Allan used had two smaller holes located horizontally. Allan said the vent was internally coned but used two .052″ holes. Allan said he didn’t know whether it was faster or slower than a normal vent. My reply was that I could time it. Allan offered to provide me a vent, and on the way home, Steve and I planned how the vent would be tested.
Time passed with many interruptions in the way. In the meantime Fred Stutzenberger entered the picture. I believe Fred saw the “double-hole vent” on Sandy’s table at the same show that we did. Fred however, was more prompt than we were and published an article on the vent in the August 2014 issue of MuzzleBlasts.
Without great detail, Fred’s article compared Allan’s double-hole vent with a single-hole vent that had the same area as the sum of the two smaller vents. His findings showed that shots fired with the double-hole vent had slightly higher velocities than the single-hole vent even, though the vent area was the same. The “choked-flow principle” (comparing circumference to area) is the likely cause. Fred explains this better than I do; please read the article.
Our testing focused only on ignition speeds. We compared ignition time of the double-hole vent (two .052″ holes) and the single-hole vent (.073″) Both vents have the same area, but vary in their circumferences.
The main question I have is, “If the choked flow principle tends to restrict flow leaving the vent, might it also restrict flow entering the vent, causing slower ignition?”
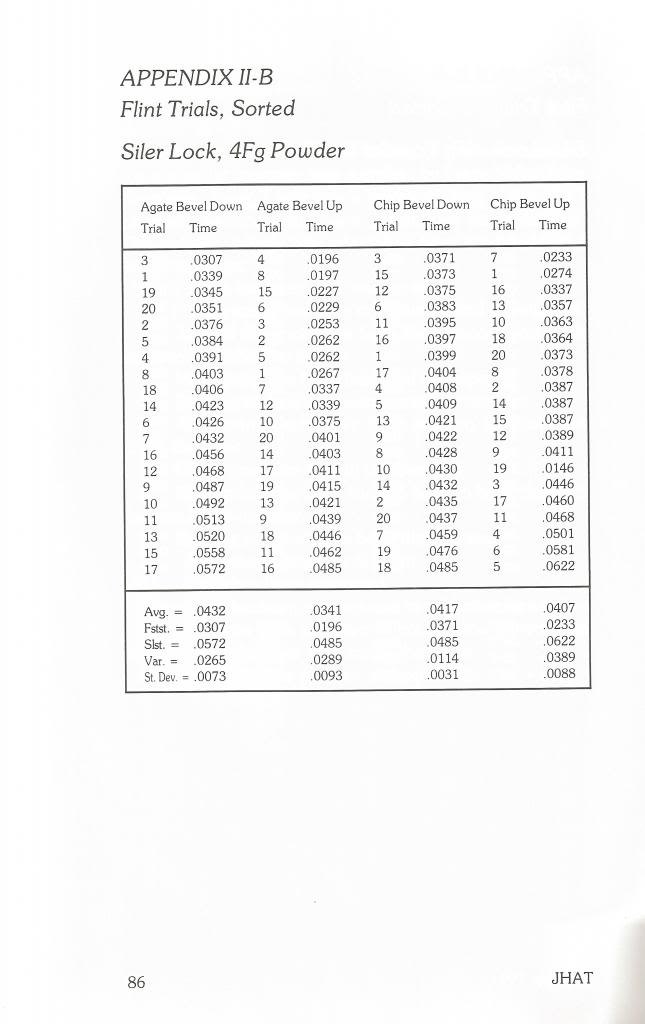
We used a 10″ barrel stub with a small Siler flint. The test used a double-hole vent with .052 holes and a single-hole vent with a .073 hole. We did 10 trials each and lit the pan with a red hot copper wire. Our reason for this was to prevent a changing flint edge from entering into the test. The single .073 vent was better both in speed and consistency.
Before finishing, we ran 5 trials each in which the pan was ignited by the small Siler. In those trials the single-hole vent was better, but by a smaller margin. None of the trials sounded abnormal to the ear. No matter the range from high to low, human senses could not tell the difference. In fact, Steve tried to guess and was invariably wrong.
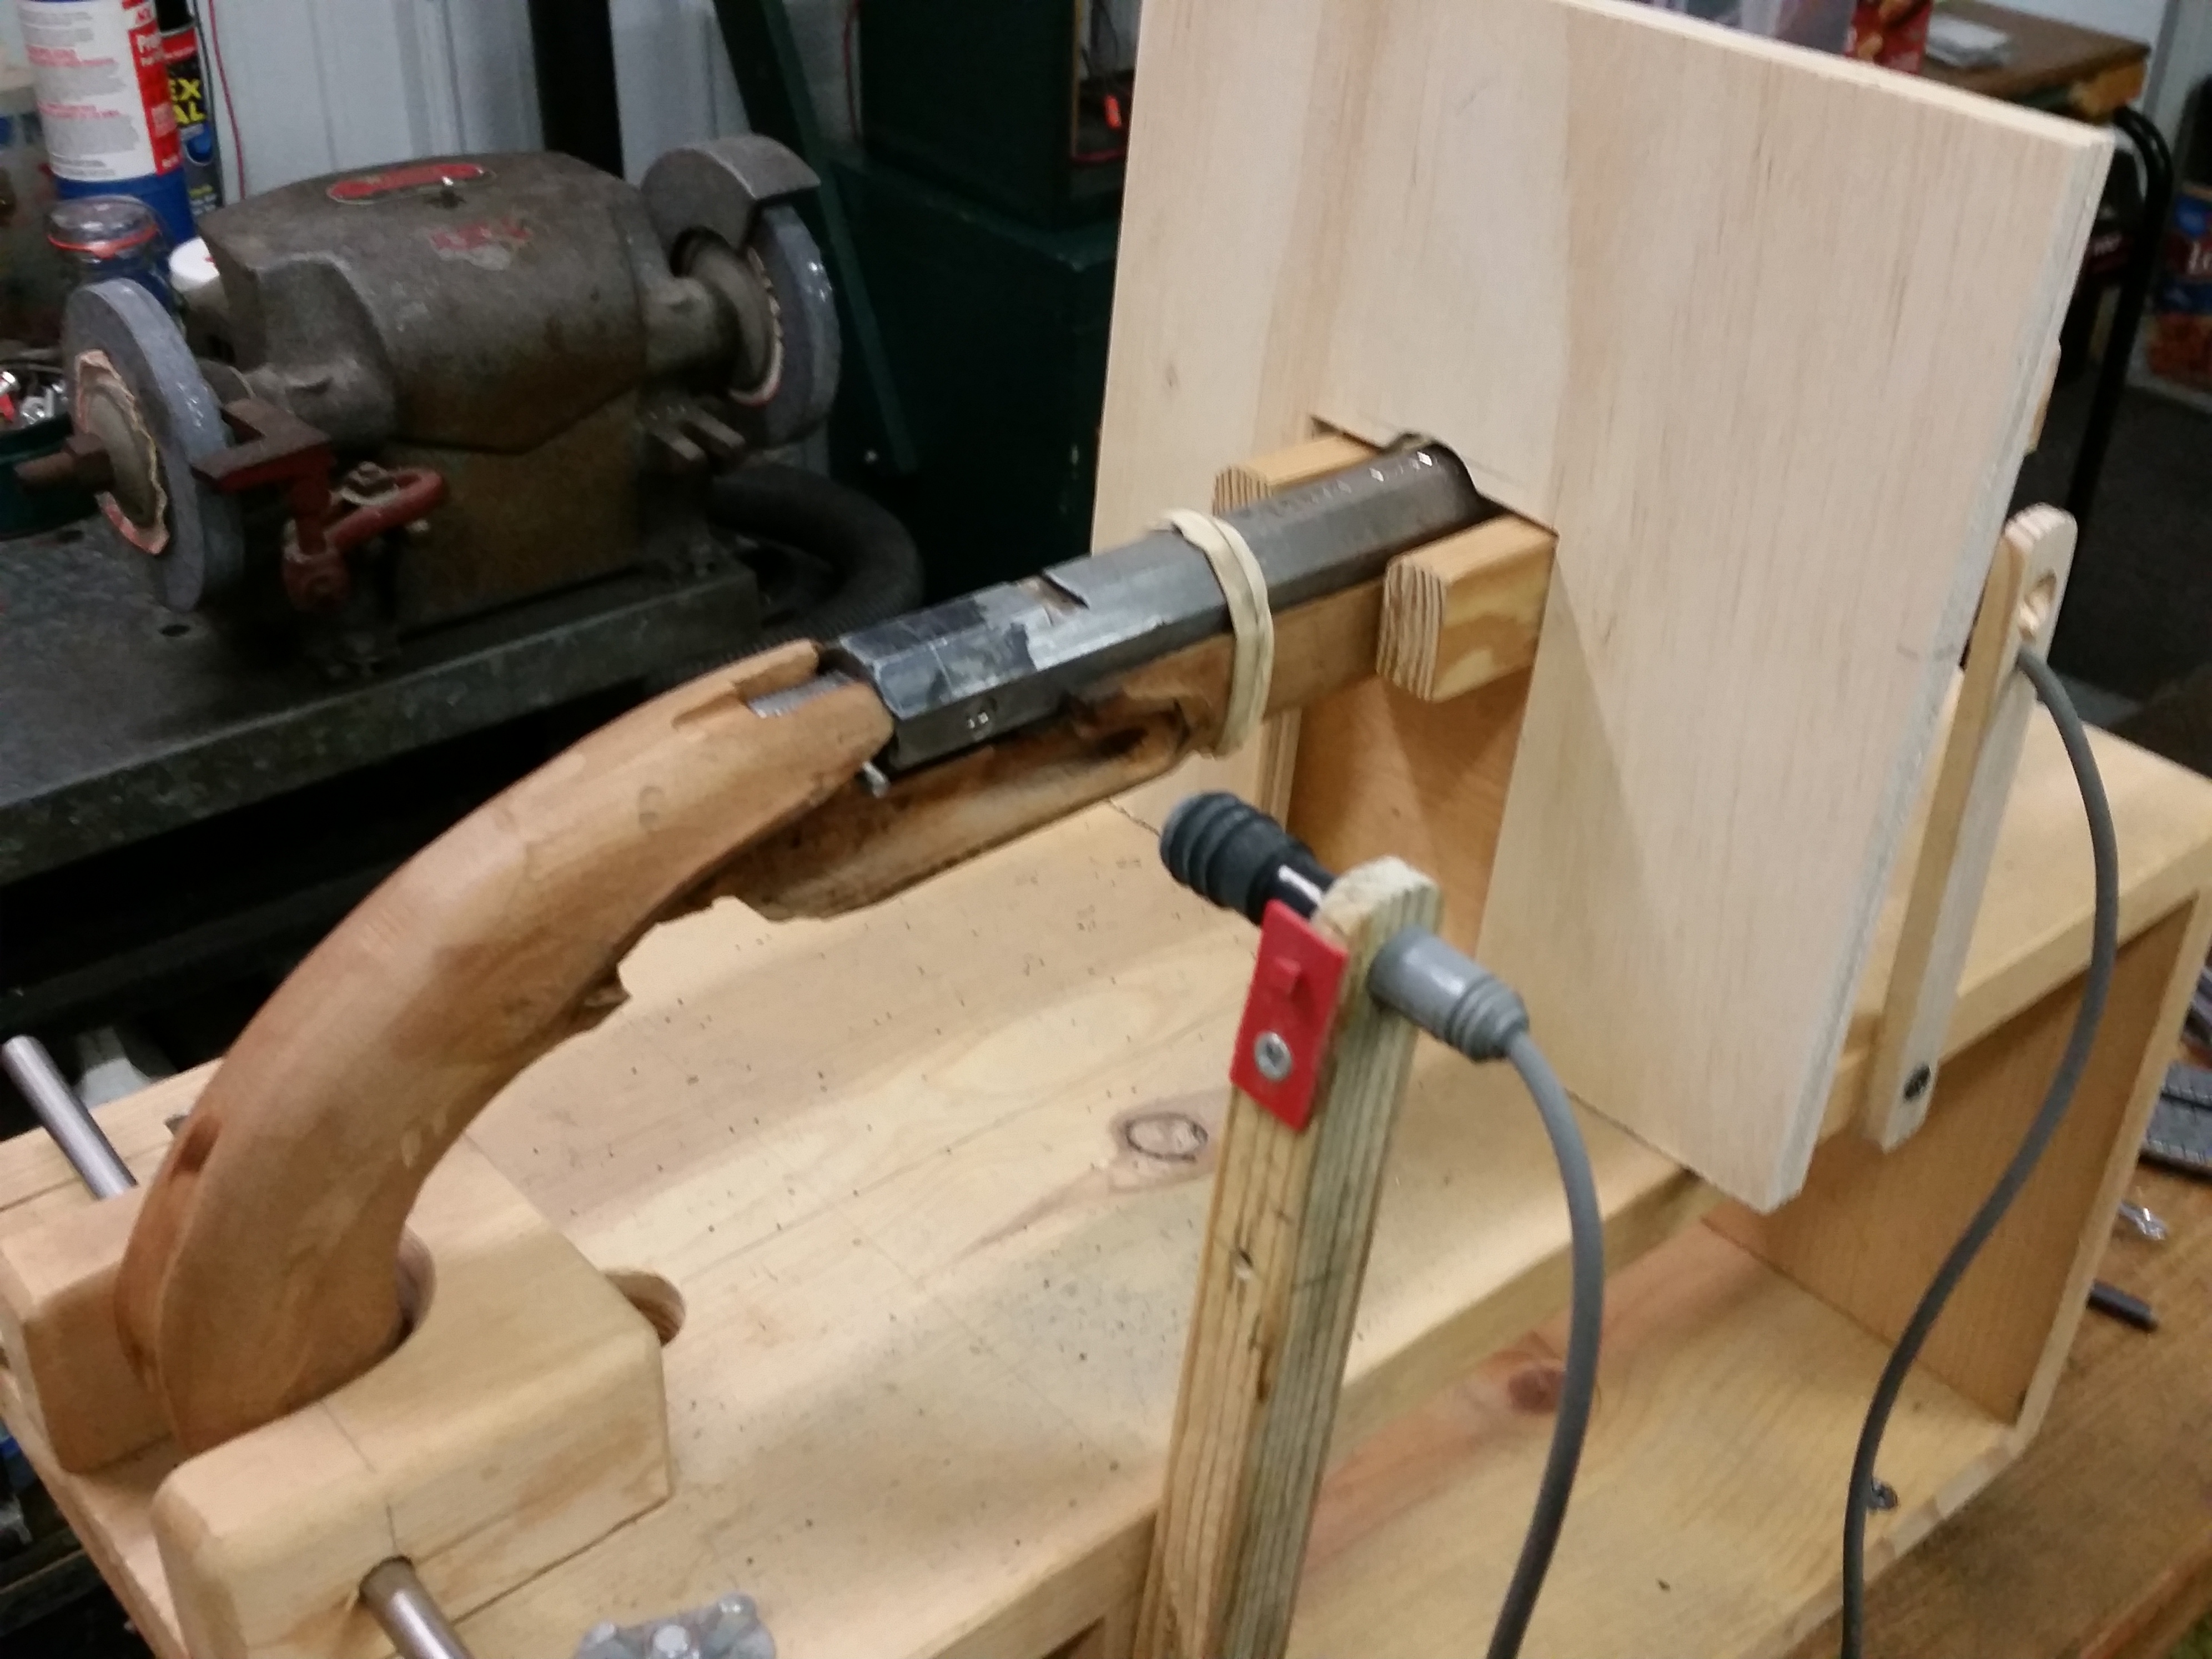
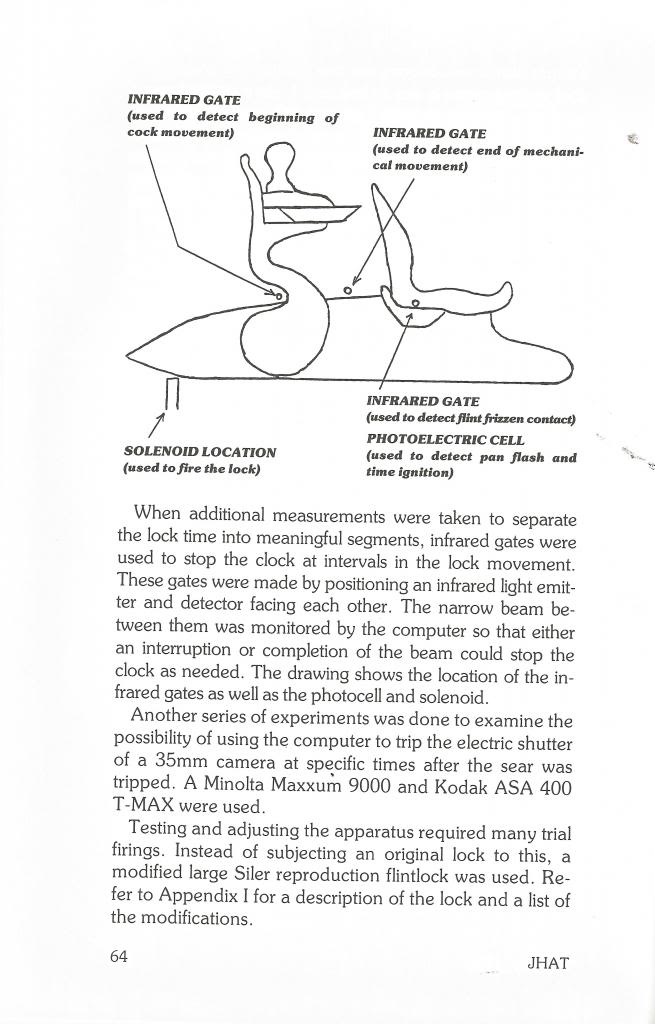
Here you see the shield that prevented both photocells from triggering when the pan flashed
Interpreting the results can sometimes be misleading. In this case, I like the single-hole vent. However, I do have two doubts. (1) I have questions about the reliability of a vent as small as .052”. A double-hole vent with larger holes might alter the result. (2) I wonder if the shape of vent’s exterior would change the result.
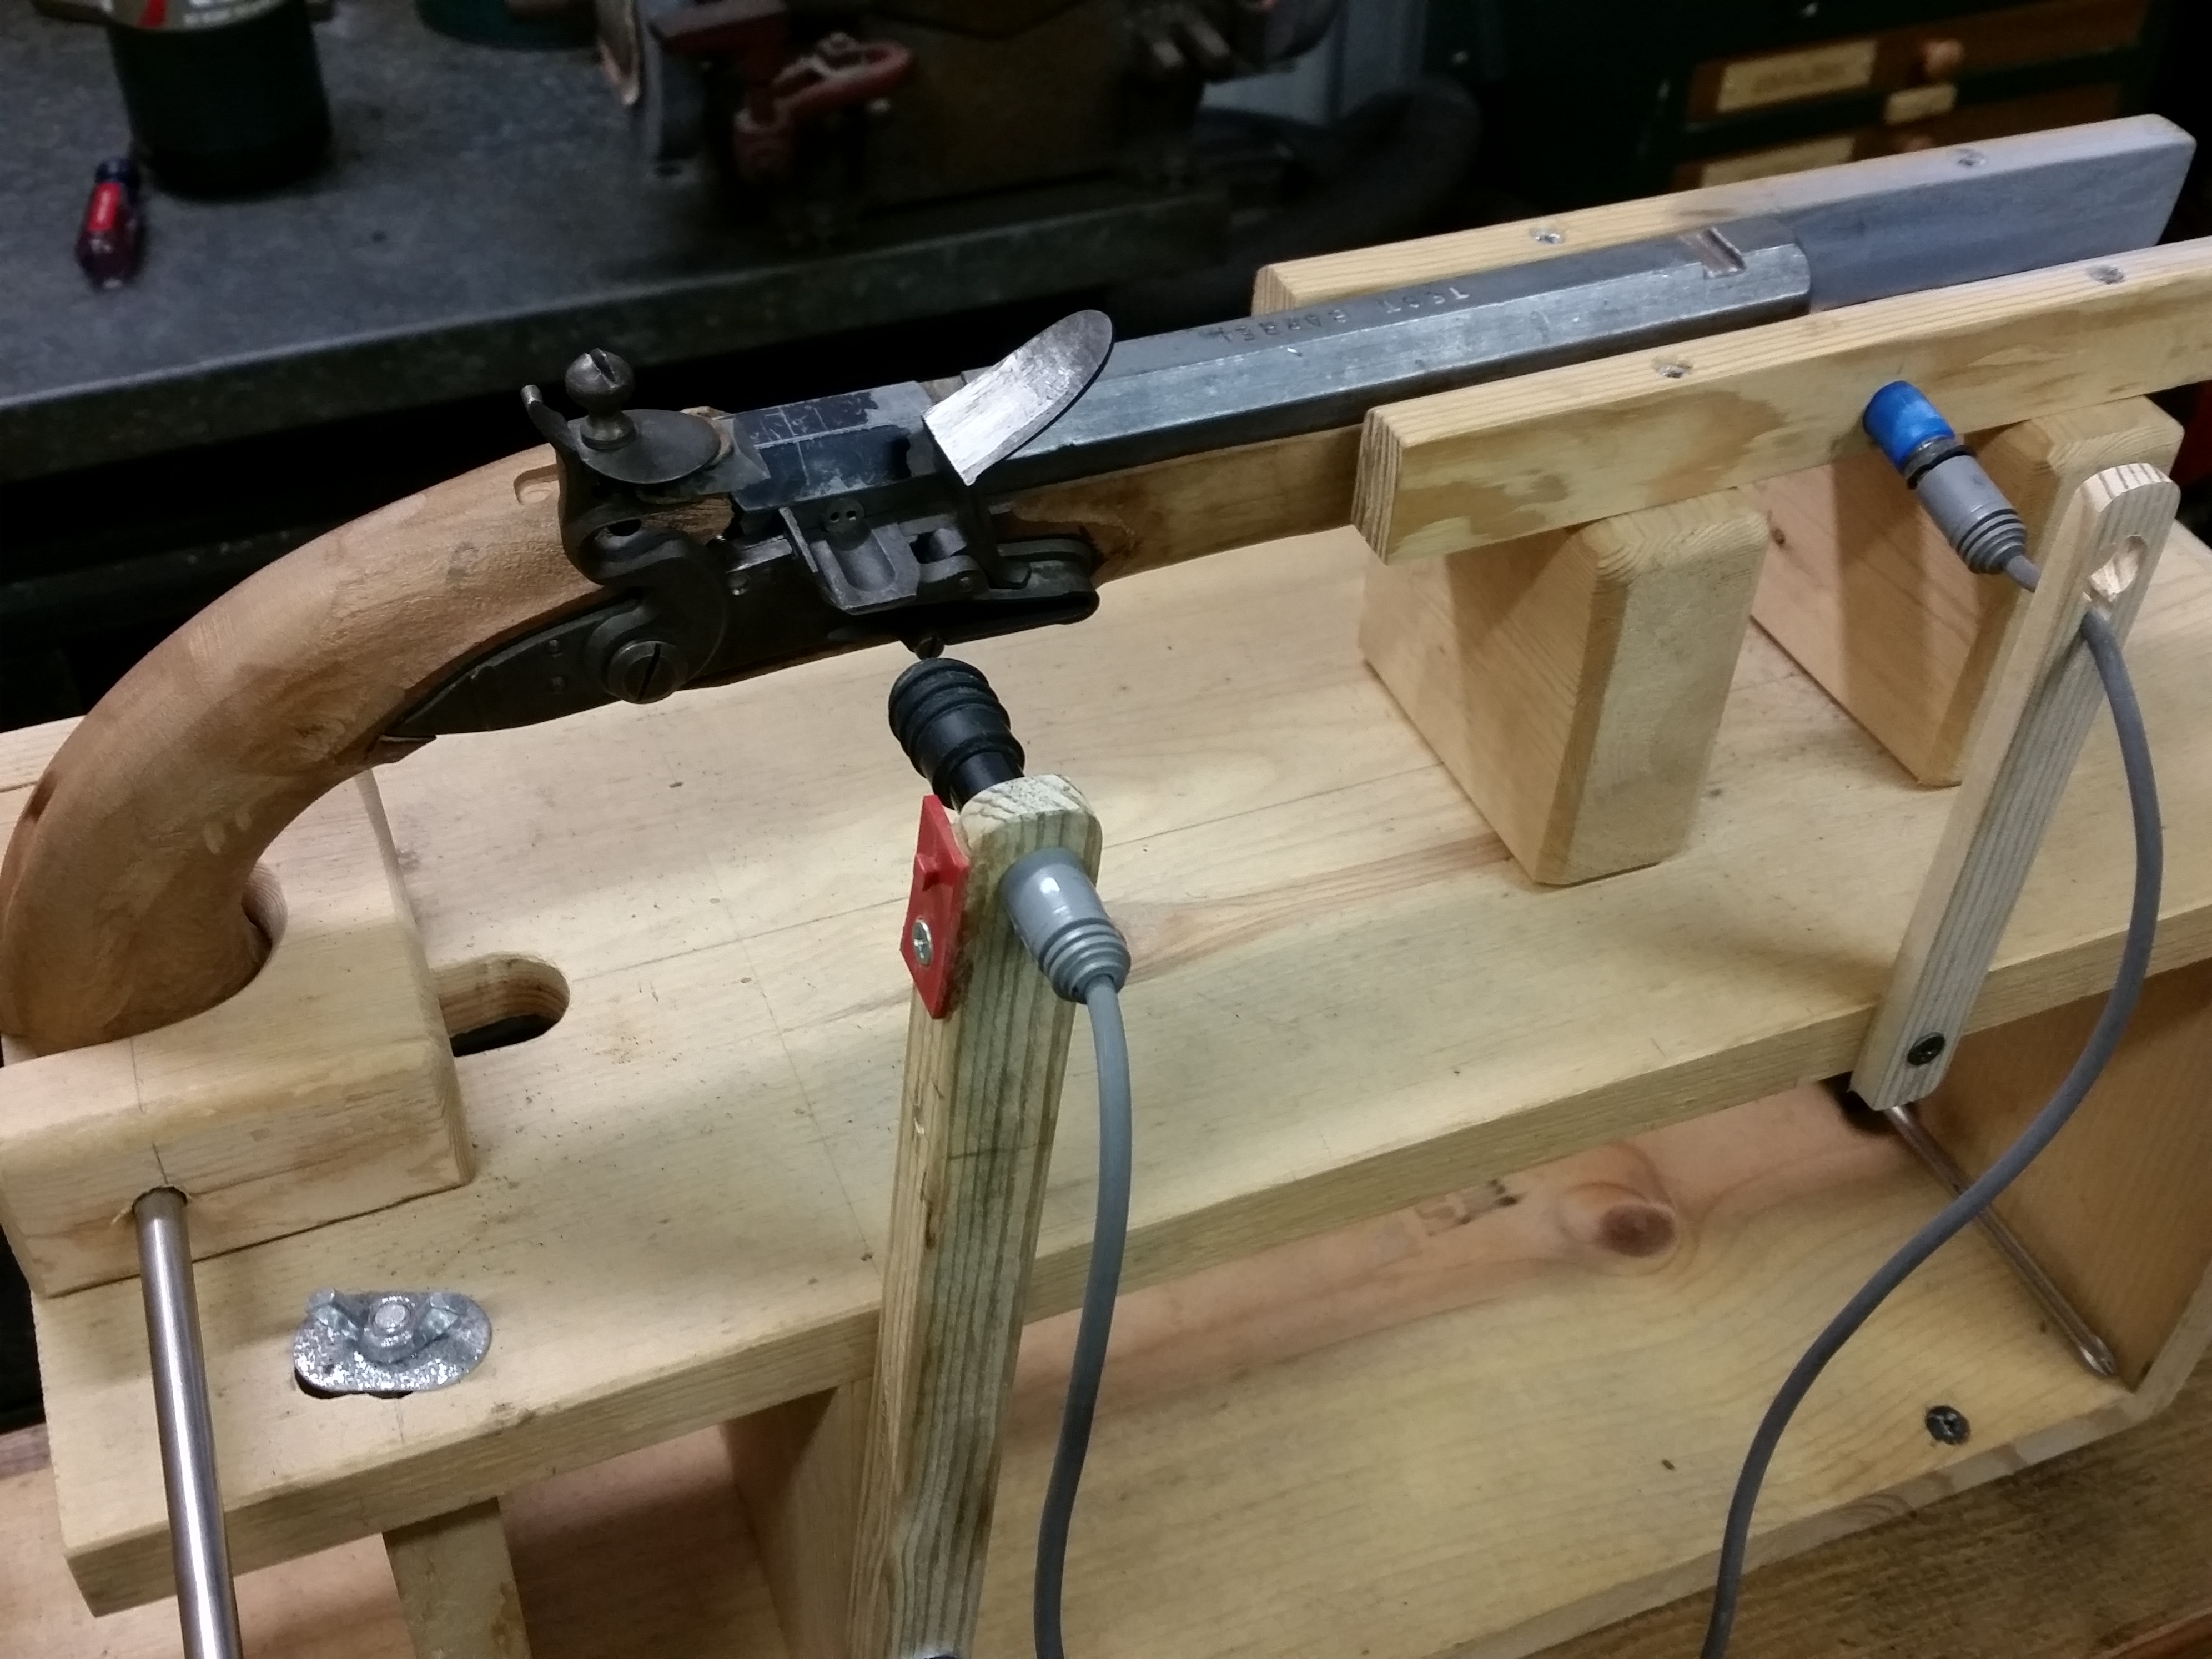
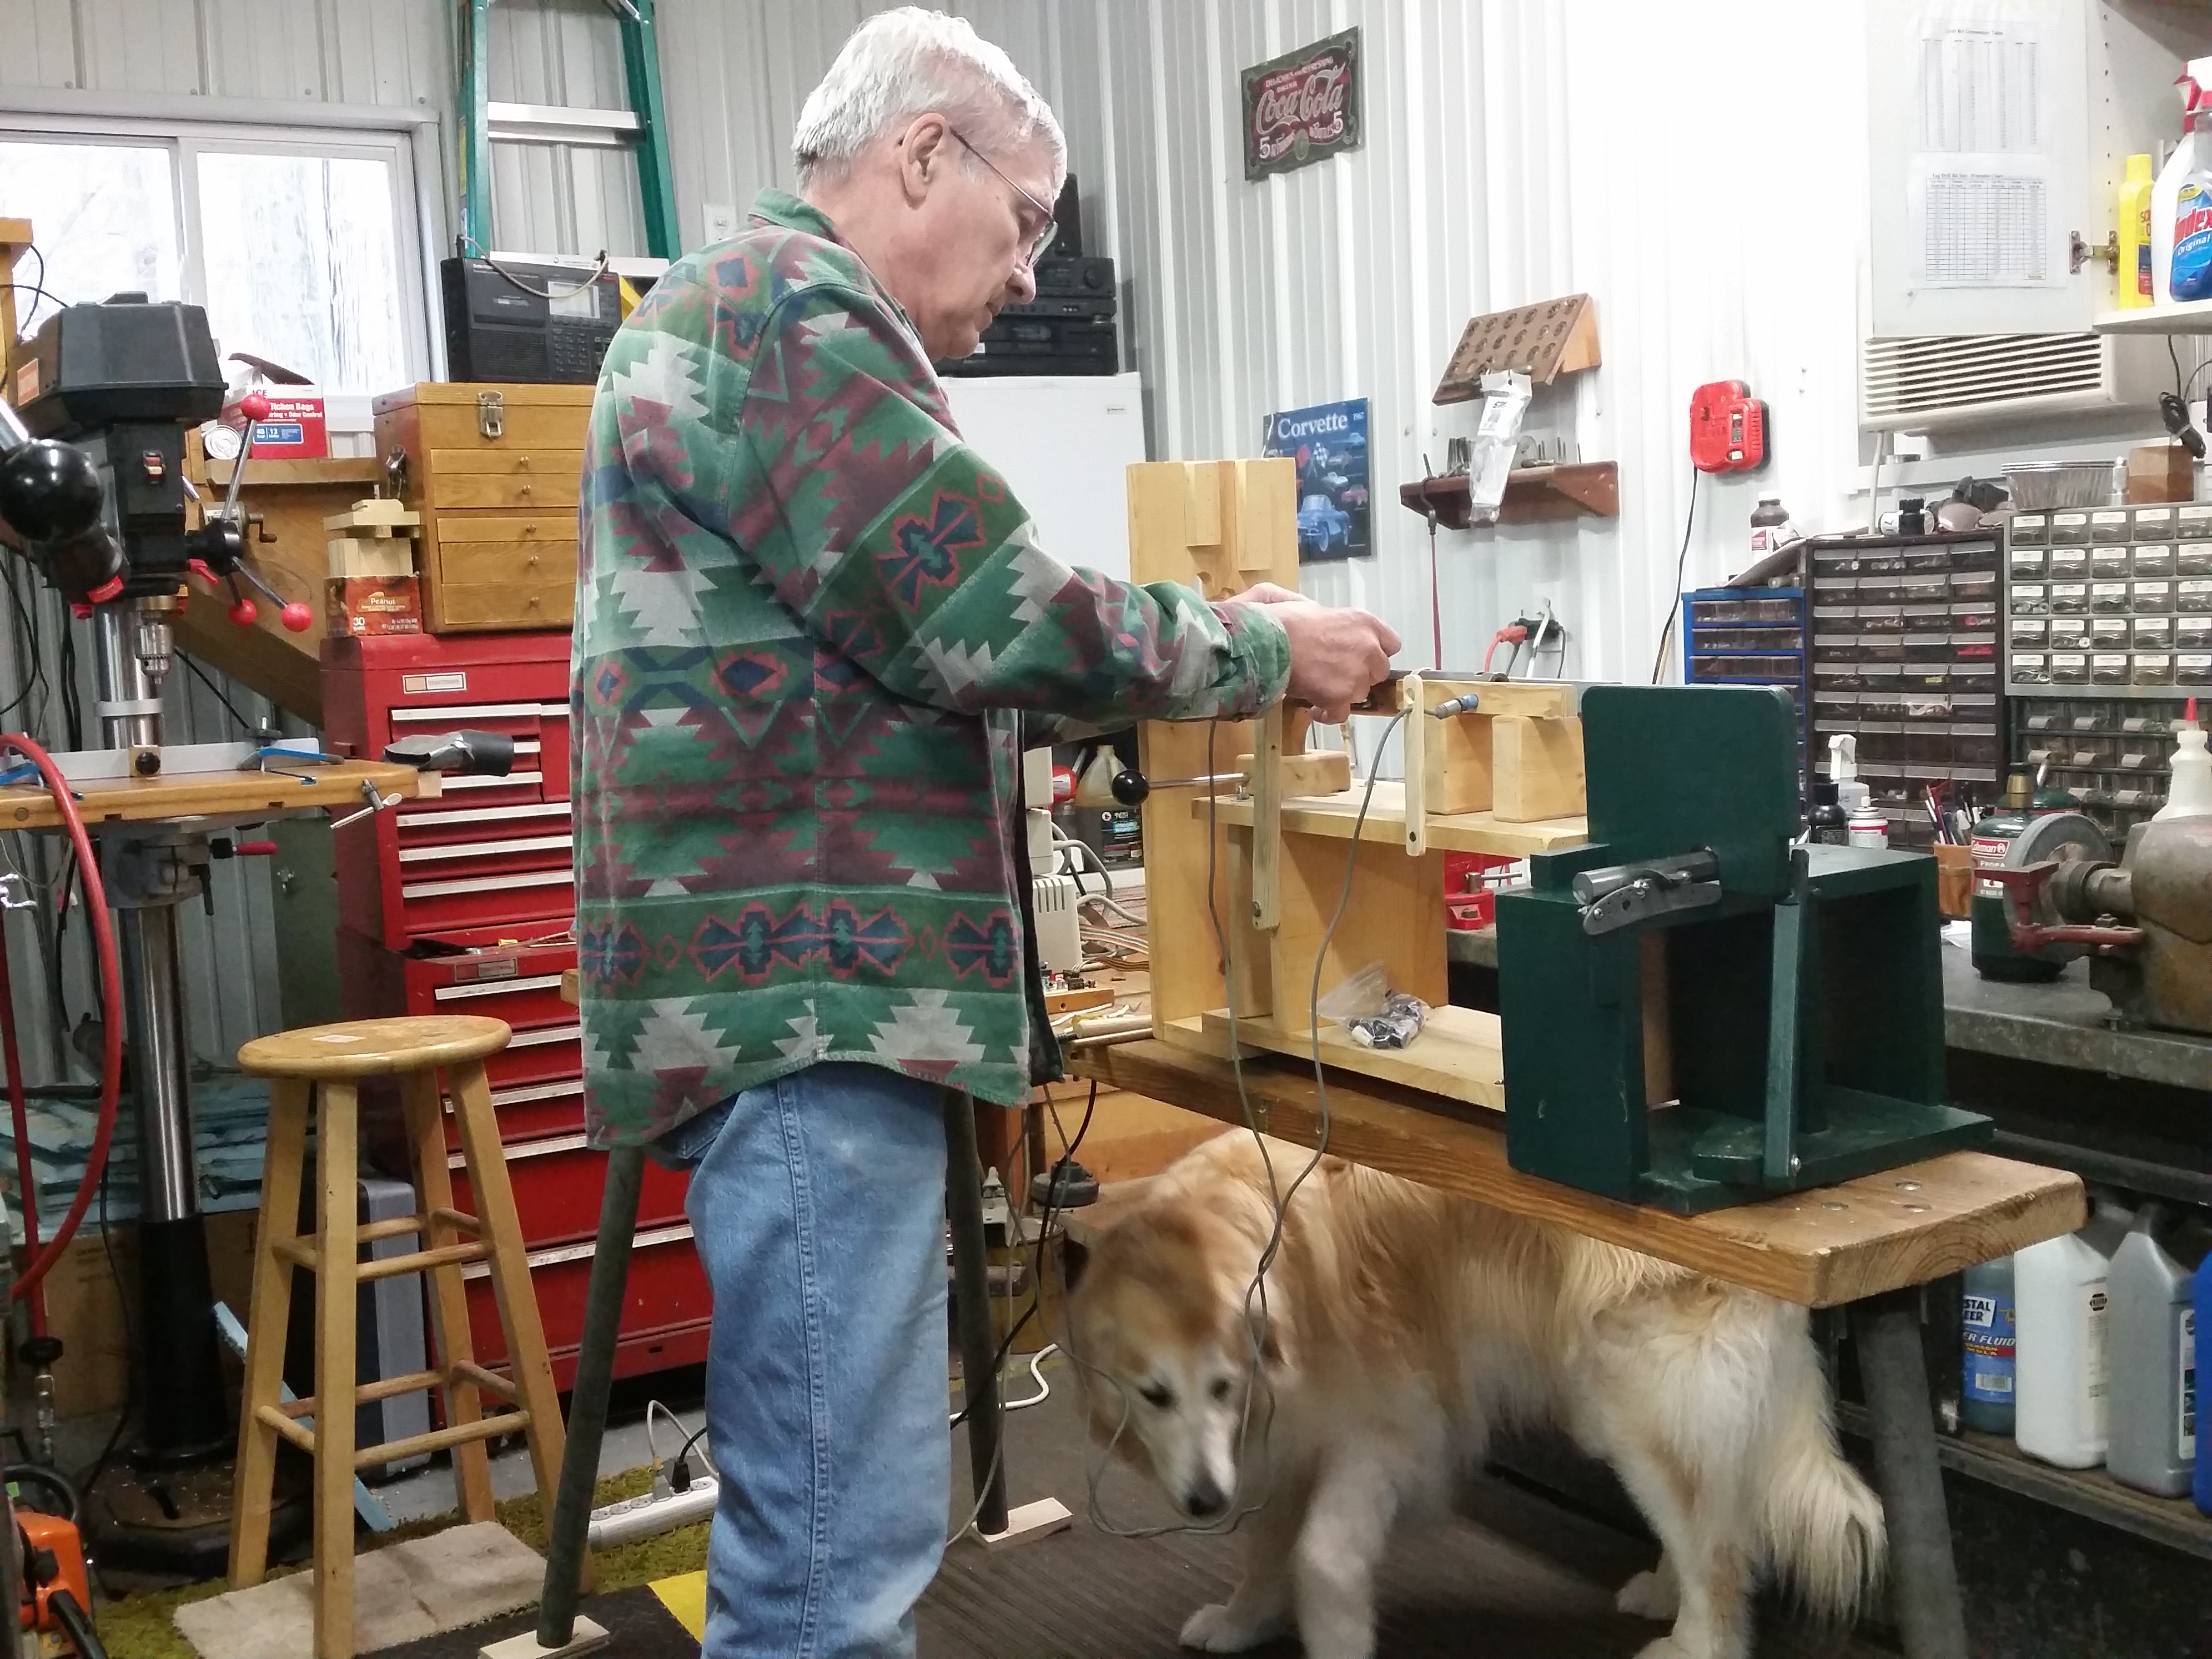
The included photos show the fixture and the position of the photo cells used in the timing. The photo cell at the pan trigger the start, while the photo cell and the muzzle triggers the stop.
The last pic is a close up of the vent. These holes are .052″. BTW, the stock is a heavily mutilated factory second supplied by Jim Chambers. It was important because it allowed the sear to be struck from below by the plunger. It also allowed us to use a small Siler lock for an earlier test. At that time it allowed three different locks to be tested using the same lock mortice.
To conclude, I’d like to thank Allan Sandy for the chance to time his vent. I feel that this vent type is well worth studying. I’d like to repeat this with a .055” 2 hole vent.
My thanks also to Steve Chapman and Mike Coggeshall for their assistance in the testing.
Of course every experimenter needs a furry assistant
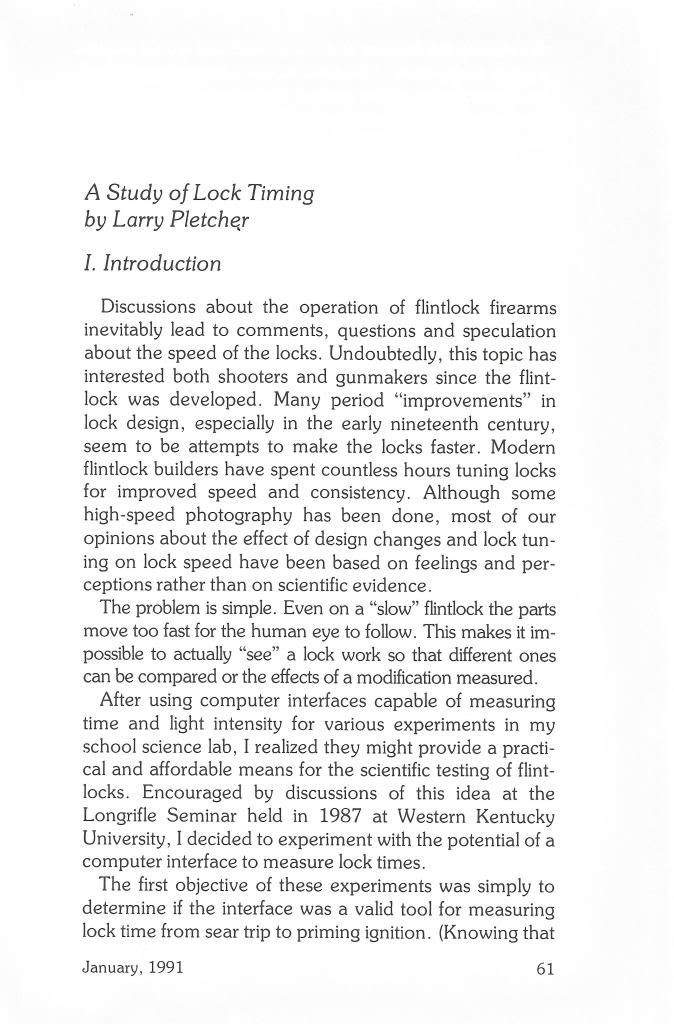
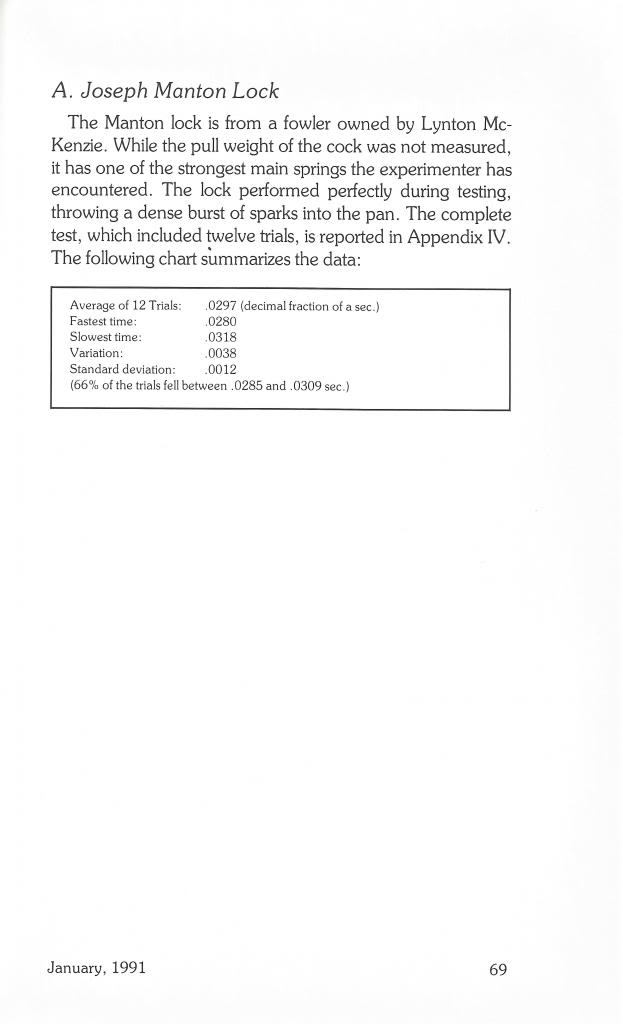
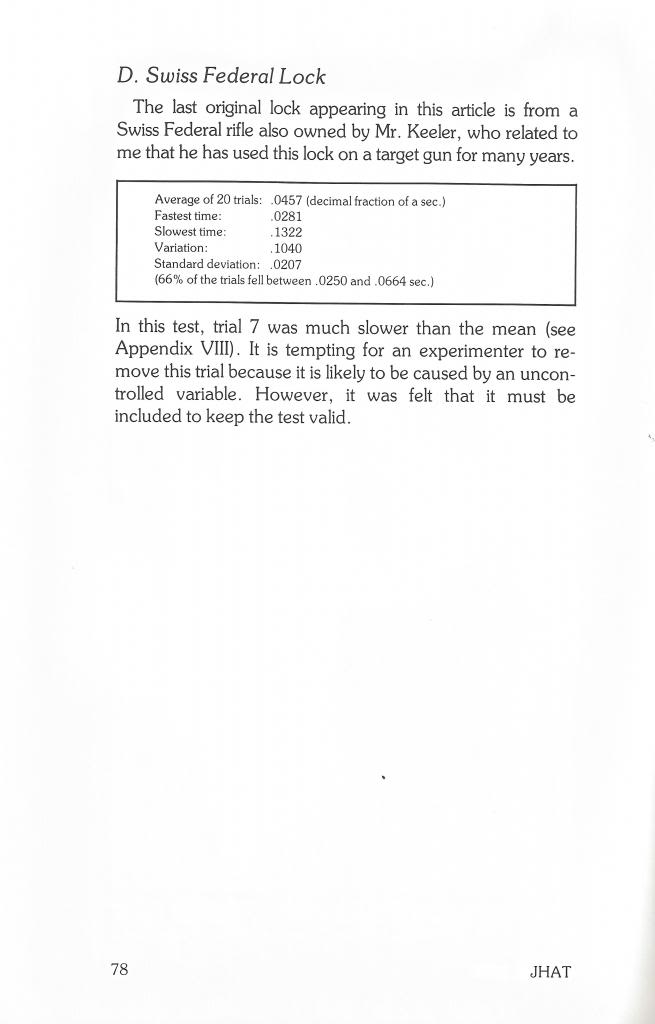
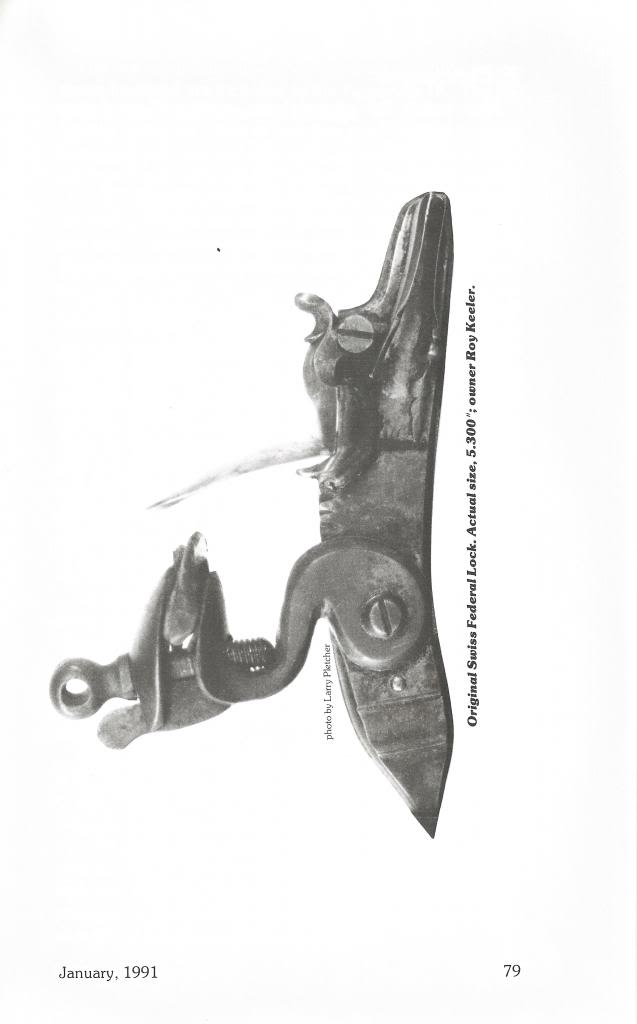
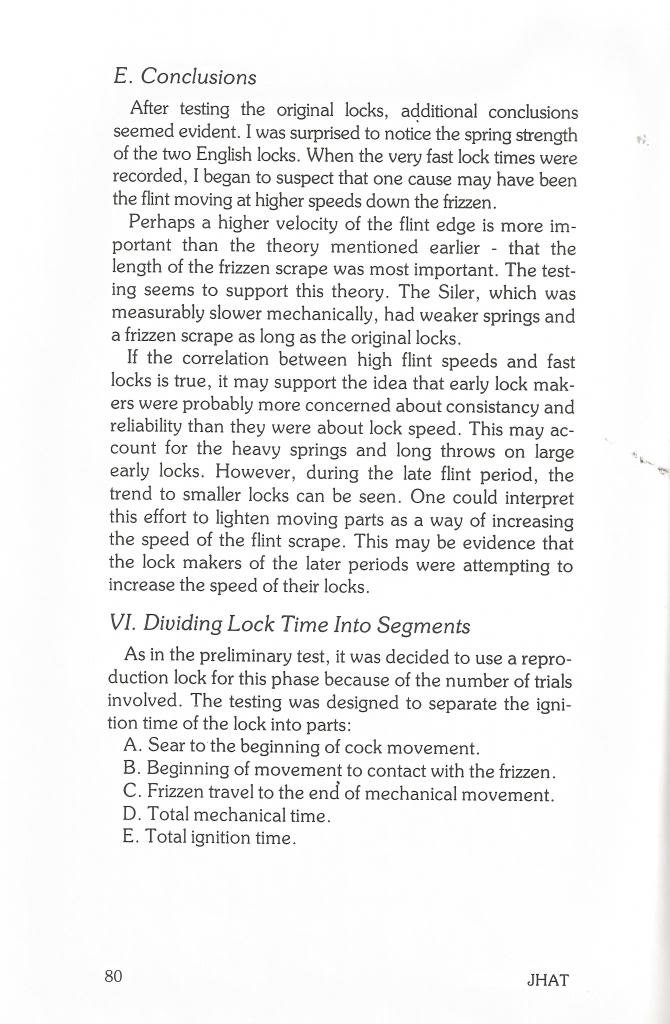
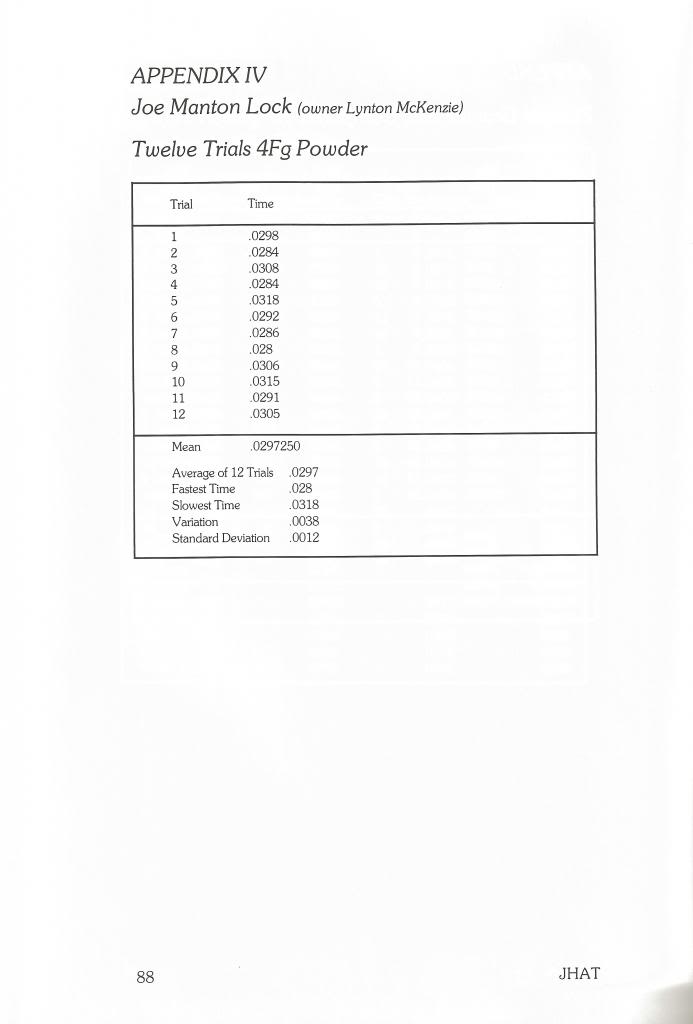
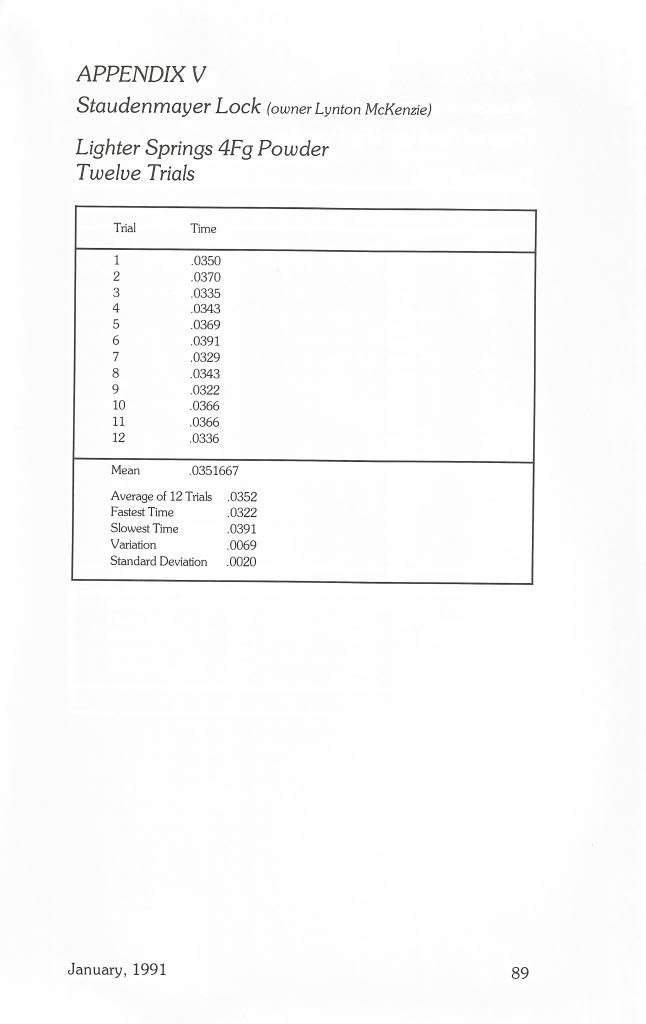
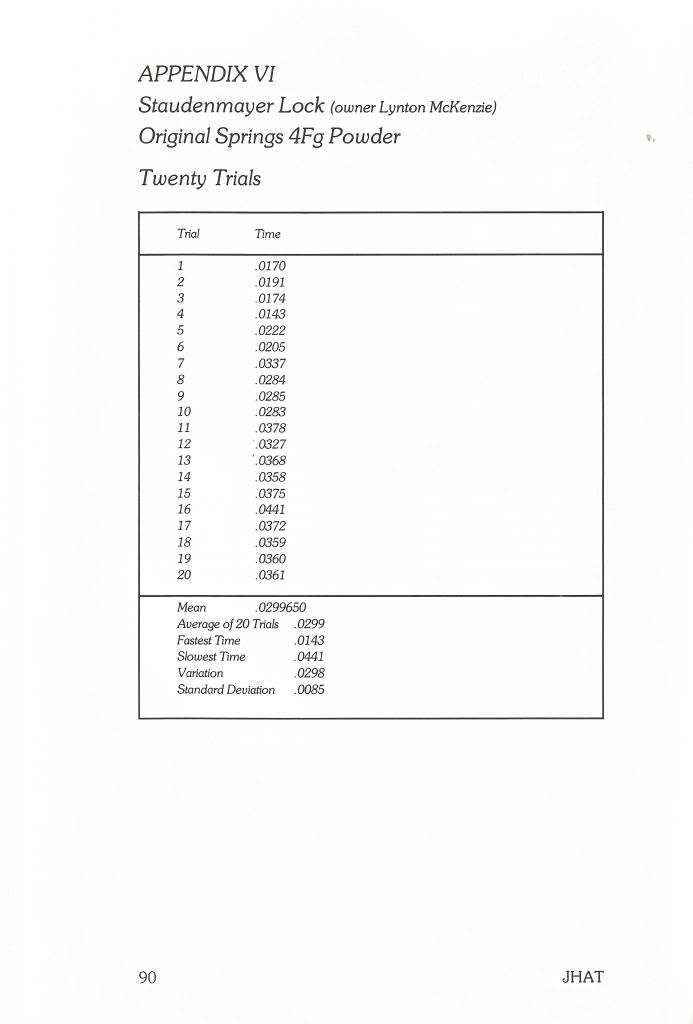
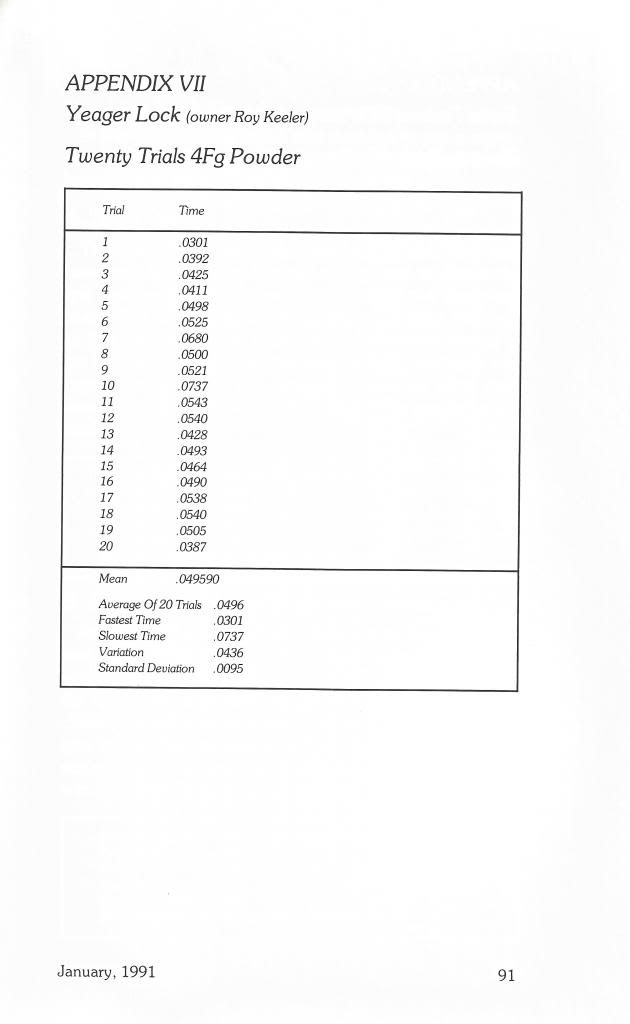
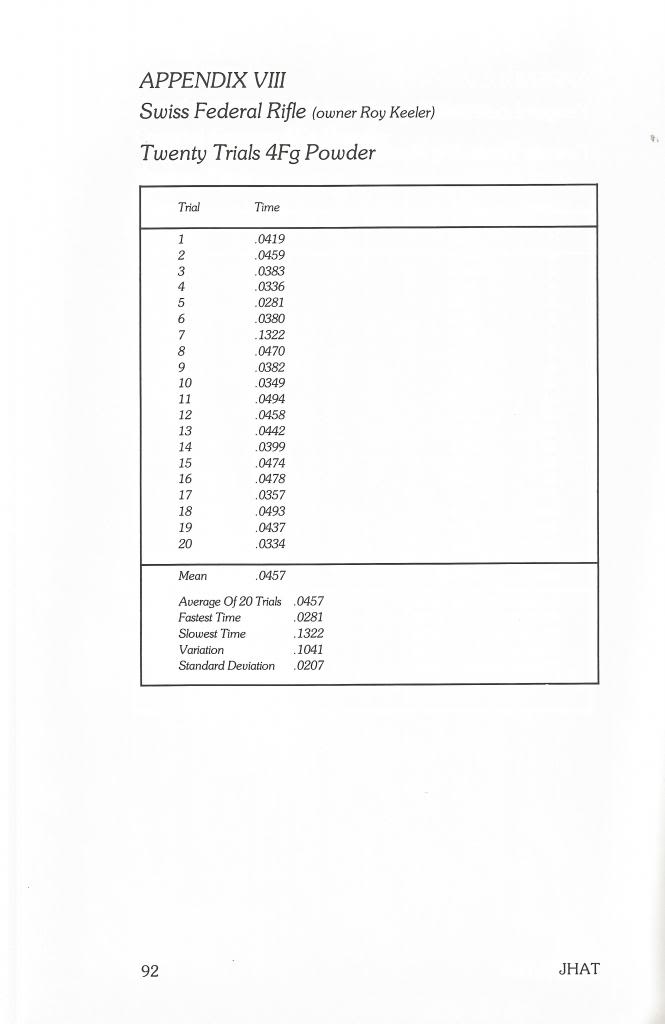
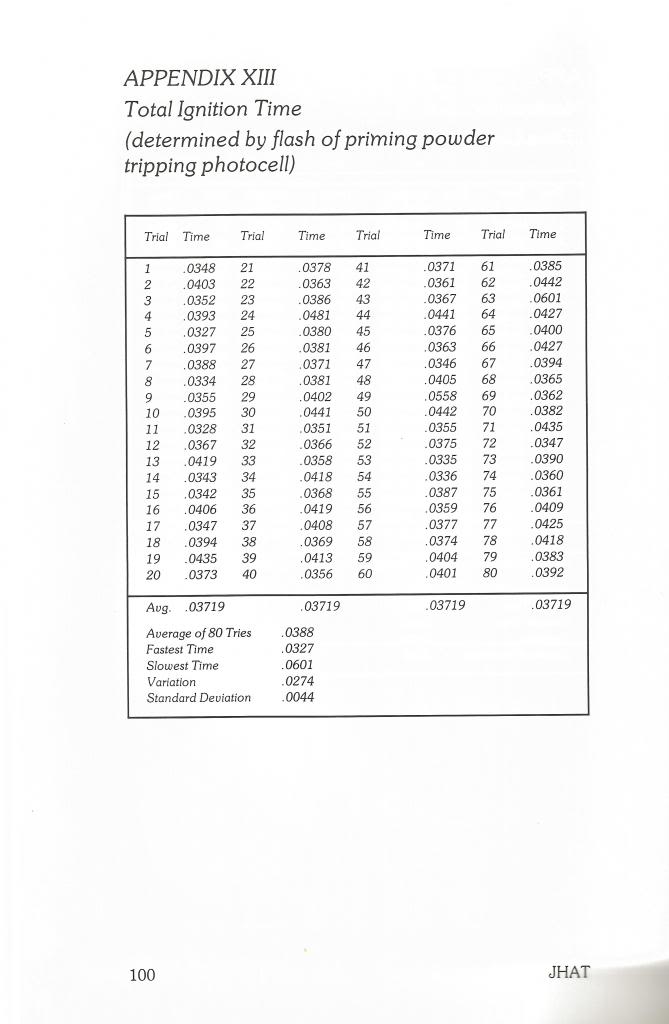
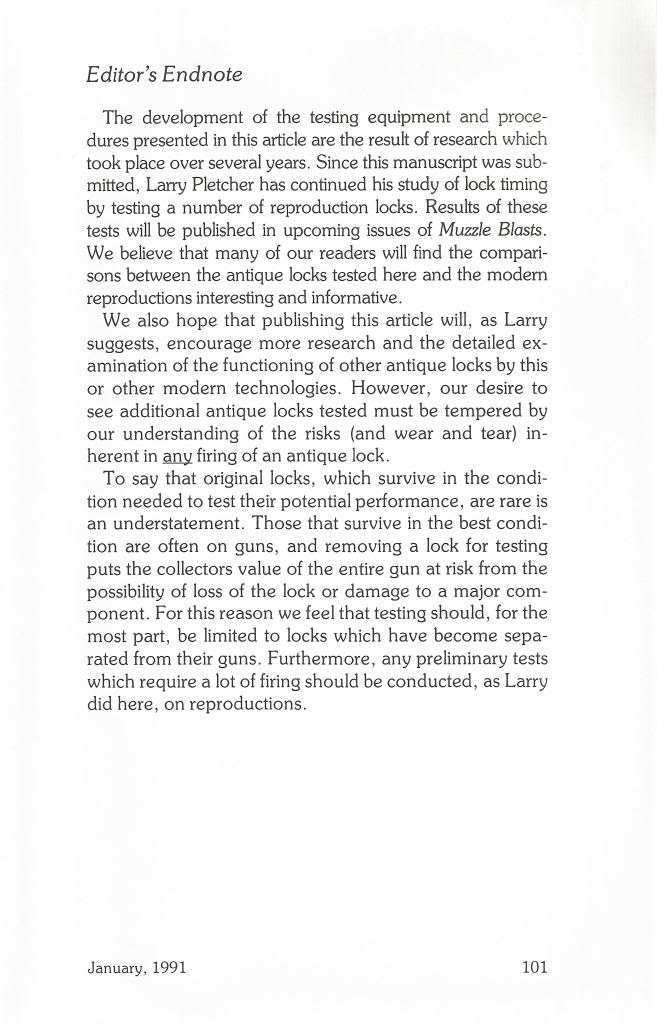
[box type=”note” align=”aligncenter” ]”A Study in Lock Timing” was originally a part of the Journal of Historical Armsmaking Technology, published by the NMLRA in 1991. It is reproduced here with permission from the NMLRA.,[/box]
I’d like to thank Gary Brumfield for his encouragement and advice during the data collecting and writing of this article.
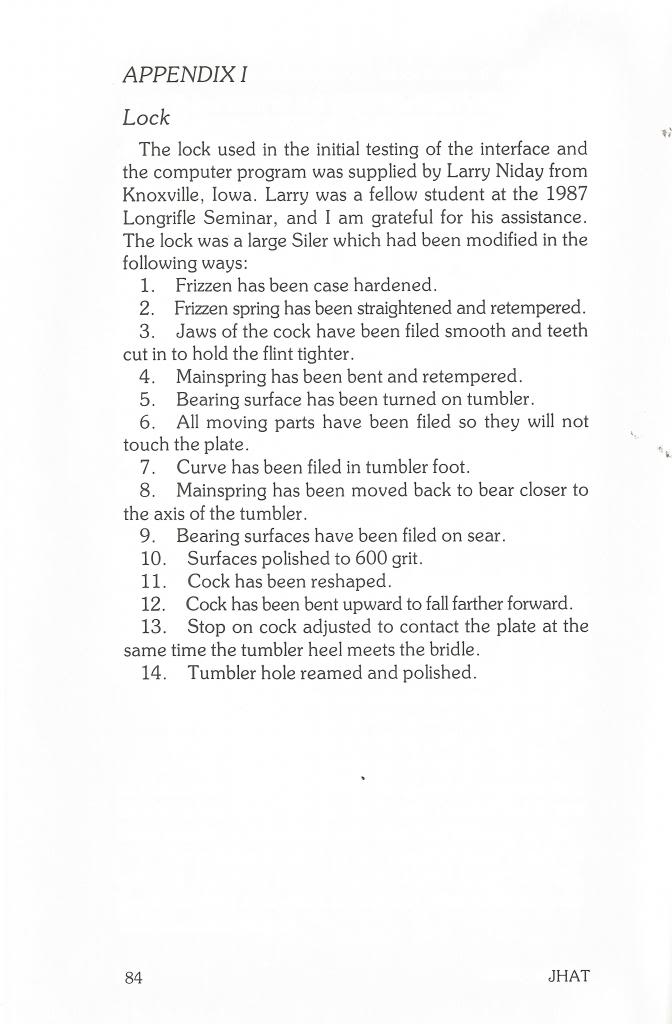
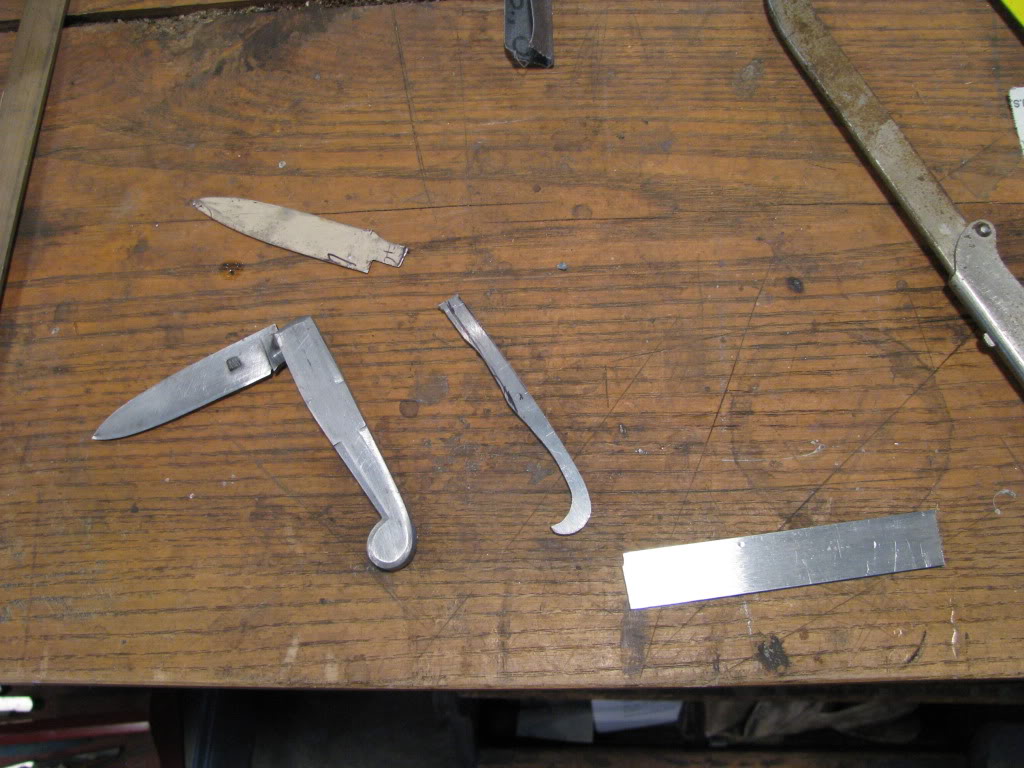
The Siler below is the lock used in the ’80s for the JHAT article. It has been fired probably thousands of times, but never was mounted on a gun. The article below listed all the modifications that were done when the lock was made. It has served as a test bed for many different experiments.
I still have that exact same lock. However only the plate and the cock are original. In 2010 Jim Chambers planned to change the cracked frizzen. By the time he was finished only the cock and plate were left. It continues to be my test bed lock.
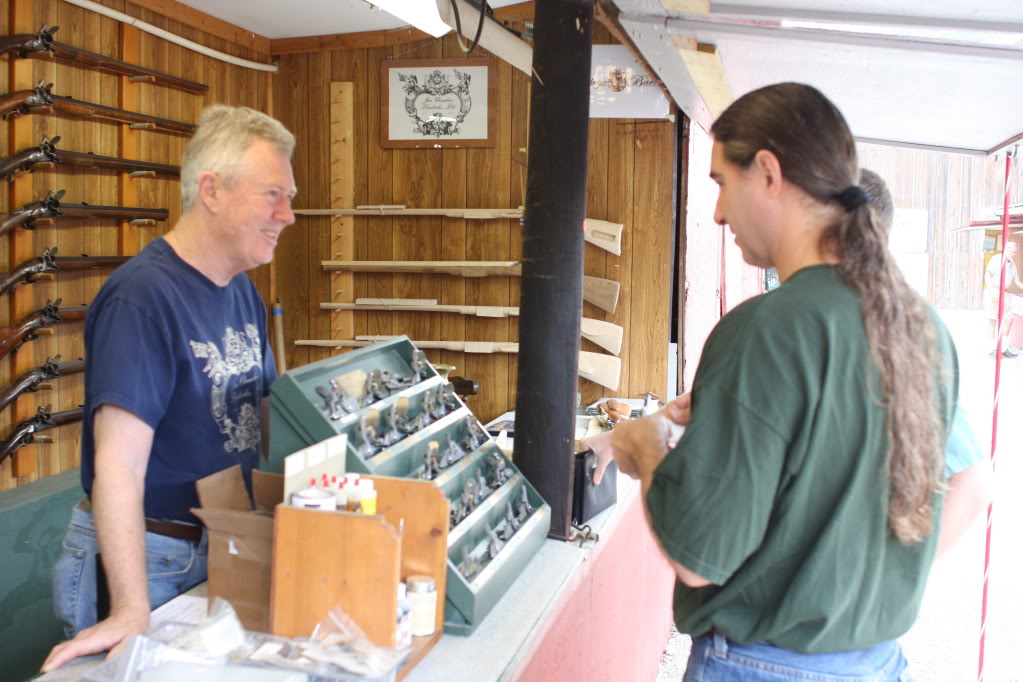
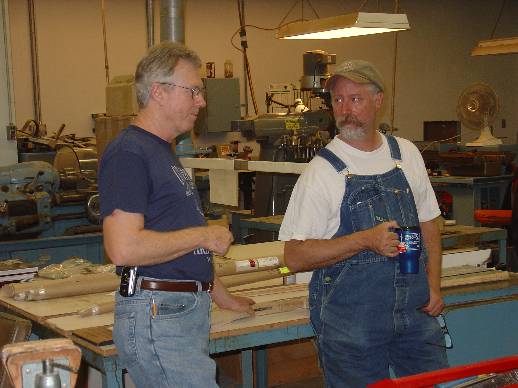
Jim Chambers has been a friend of mine for many years. I stopped in his booth and enjoyed a chat with him.
Jim told me about his start in muzzleloading and his work with John Bivins. You’ll enjoy Jim’s story of his interview with John. He also tells about acquiring the Siler lock-making business from Bud Siler. Jim tells how the kit business actually began with ideas as far back as the Bicentennial. It was especially fun for me to hear about what Jim likes to do more than anything else in muzzleloading. It shouldn’t be a surprise.
The Conner Prairie 17th Annual Traditional Arts and Arms Making Workshop is history. Flintlock fans came from California to New England to learn from a core of talented instructors. A majority of the students come back year after year. Take a look at what you missed and what is in store for next year. If you shoot black powder, you’ll want to see this.
I had heard about the Conner Prairie classes for quite a number of years. I knew some of the instructors because of visits to the National Shoots at Friendship. I learned about the date for this year’s classes from Lee Larkin at the Fall Shoot. Lee gave me a folder describing the classes and encouraged me to come. Lee’s class on horn-building would be one of many classes offered this year, many of which I would like to take. I decided to make arrangements to do an article for BlackPowderMag, reporting on the classes this fall and to help promote the class offerings for the fall of 2007. Nathan Allen is the Manager of Historic Trades at Conner Prairie. He liked the idea of promoting the classes, and we arranged for me to visit on Tuesday.
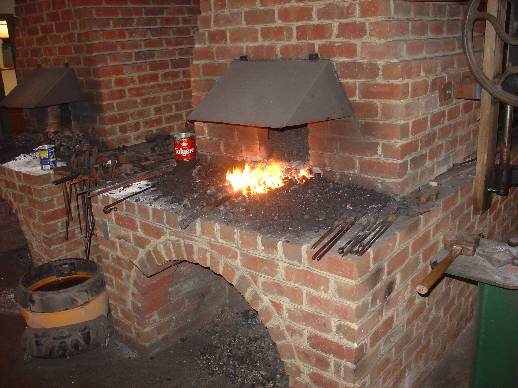
When I first walked in I was surprised at the facilities. The blacksmith shop is the best place for teaching blacksmithing that I’ve seen. Boasting 10 forges with electric blowers, the shop was extremely well equipped. With an instructor for every 6-8 students, the opportunity for learning couldn’t have been better. Nathan Allen and Melvin Lytton were the instructors for tomahawk making. I had a chance to photograph students and instructors as they worked. Each of the students would make four tomahawks during the week. Each step in the process would be completed on all four hawks at once, giving the student a chance to become proficient at that step before beginning the next step. In the five day hawk class, the students made four Fort Meigs style hawks. On the previous 2-day weekend class, students made four pipe tomahawks. It would have been easy to stay here and learn, but there were more cool things to photograph. I walked away thinking that I need to take this class.
Nathan Allen was in charge of the tomahawk forging
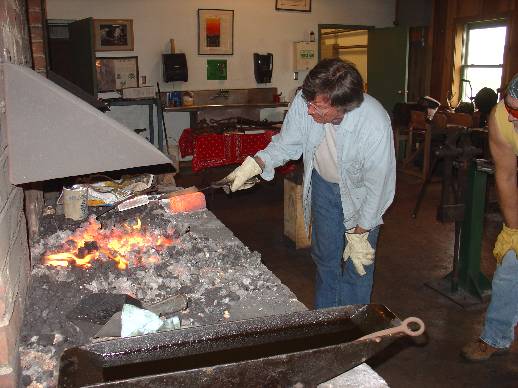
Hershel House at the forgeAnother photo of Hershel
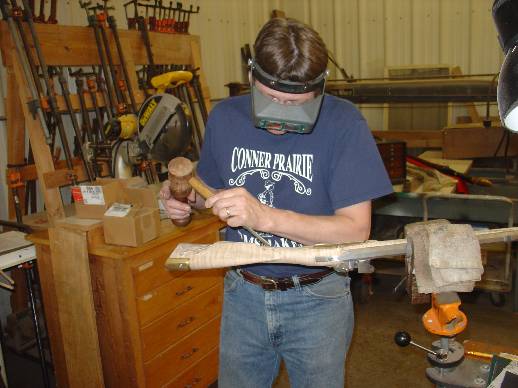
Next to the hawk forges were the fellows making knives under the supervision of Hershel House. I knew Hershel from the rifle-building seminars at Bowling Green Kentucky, but I was only one of many students Hershel has taught, and I’m not sure he remembered me. But, he treated me like one of the family and invited me to get involved. He was about to draw the temper on a blade, and in a moment the students and I were watching colors showing in the blade. As I looked at the various knives being made, I noticed that while the knives were all unique, they all had hand forged blades and many had antler handles. The students’ knives varied in size from quite large to delicate little patch knives. Again I came away thinking that this was another class I need to take.
Lee Larken with his students
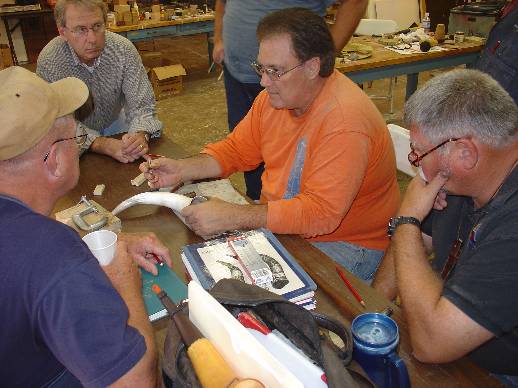
My next stop was the horners’ corner. Lee’s students were shaping the horns and finishing the plugs. Dye was being heated, and the horns began to take on that 200 year old look. I took photos throughout the day, returning to see the students ready for a new step. Again, a small student/teacher ratio paid off as students got much individual attention. On one of my last trips to watch the horners, Larkin was showing his class tips and tricks for engraving their horns. From blade shapes and sharpening to actual cutting techniques, Lee’s students seemed well prepared for the engraving step. I regretted that I would not see their finished products. It’s another class I need to take.
Jim and Mike in conversation
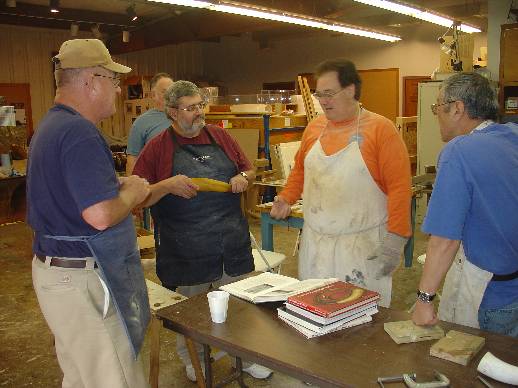
Through the next door is the kit assembly class. Here Jim Chambers, Mike Brooks, and John Weston assisted students to get the rifle components together correctly. Jim and Mike are subjects of BlackPowderMag interviews elsewhere on this site. I have known each since the ‘80s. All three are very capable instructors, stepping in frequently to show the students their techniques. If a student needed extra inspiration, he would only need to walk over to a rack of finished guns brought by the instructors. Among them is perhaps the most beautiful flintlock rifle I have ever seen. This rifle was on a tour of various art exhibits, including Conner Prairie called: “Three Centuries of Tradition: The Renaissance of Custom Sporting Arms in America”. Jim Chambers can be justifiably proud of it. As I was looking at it, I heard one of the instructors say, “That is the finest flintlock in America.” I won’t argue with him.
Jim at the bench
The next class is stock carving. Here James Klein has a group of students at work on various styles of stock decorating. Some are working on “Quaker” stocks, while others are working on a stock from a project at home. James also has a stock to carve as he works with the students. They can see Klein demonstrate the technique before they attempt it. These students also have the advantage of working with a unique swivel vise that Conner Prairie has provided. It allows the builder to hold the stock in about any angle he chooses. I had a chance to see students working on about every phase of stock carving from the drawing the pattern to contouring the raised parts of the carving.
John Schippers
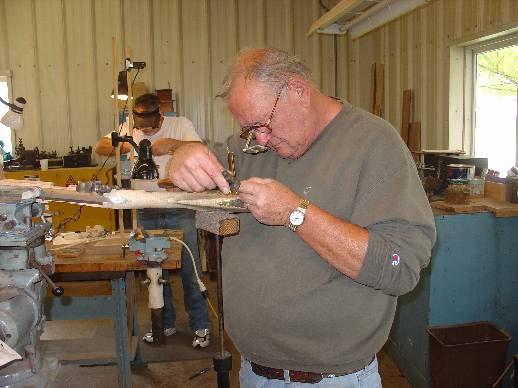
The engraving class was nearby. John Schippers was the instructor. John has retired from Conner Prairie, but returns to teach. In earlier years John had much to do with the development of this program. Besides his early contribution, the class benefits greatly when John returns to teach engraving. He and his students use an elevated vice that permits a straight back while working. As in other classes the small student /teacher ratio helps students make great progress during the week. In addition to the personal attention John can give students, he is working on a book which will allow the student additional access to John’s engraving skills. His book, called Custom Engraving, is soon to be published. Other instructors spoke highly of John’s book, one saying he knew he could learn from it.
Glen Sutt hard at work
Down the hall was the last of the five day classes. The trade silver class was taught by Don Secondine. Students again benefited from a small student/teacher ratio. Don first assisted the class in making a battery of punches to use in decorating the silver project. When I was there the students were finishing the punches and beginning the layout of their project. Some had begun stamping. This class contained a number of women who were interested in making trade silver. Some had husbands in other classes and decided to accompany them, enrolling in a class of their own. As in other classes, it would have been good to see the students’ work at the end of the class instead of just the second day. I’m sure the pride of completing the project would have been worth getting on film.
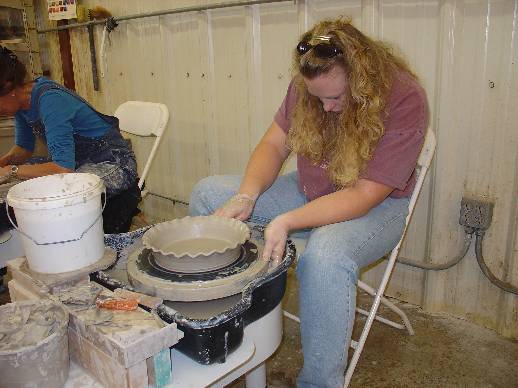
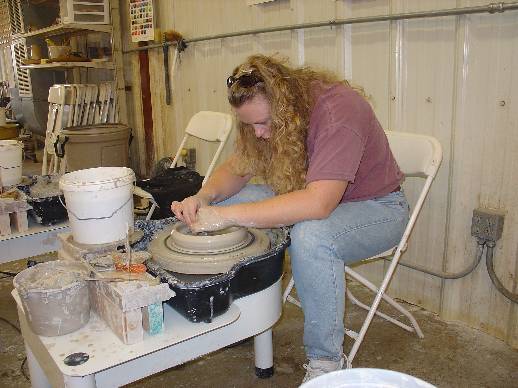
Barbie working on a bowl
The pottery class is another of the three day classes. The instruction here was one to one as Larry Gilliam and his assistant had only two students. Both were working on wheels when I was there. Barbie Chambers, Jim’s daughter was working on a deep pie pan. Photos in the gallery of this magazine will give some idea of the variety available in the class. I was impressed with how well the students managed the wheels.
There were two classes that did not meet until the last half of the week. Ken Scott will teach a class making leather pouches and bags. I have seen Ken’s work at gun shows and wish I had not missed his class. Robin Scott will teach a course in quill work during the second half of the week. This is another skill where I have little knowledge, but for which I have great admiration.
This was an impressive week. The instructors were superb and must have had fun working with such motivated students. The equipment and environment provided by Conner Prairie was second to none. As I moved from class to class, I often felt that I need to come next year and take classes. Many of the students voiced this opinion. A high percentage of the students are returning former students. One student had been here for nine years. If there could be a better endorsement I don’t know what it would be.
Blackpowdermag presents a Panel Discussion from GunMakers Hall. Listen as Mark Silver, Jim Chambers,Bob Harn, Wallace Gusler, and LC Rice field audience questions. . . . . . .
Black Powder Magazine is pleased to bring you a series of digital interviews and discussions promoting black powder shooting sports. Our initial offering is a panel discussion taped at Gunmakers Hall during the NMLRA 2006 Spring Championships in Friendship, Indiana. Participants in the discussion are Jim Chambers, Wallace Gusler, Bob Harn, LC Rice, and Mark Silver. Because of its length, the discussion will be broken into six segments. The panel discussion segments will be published at intervals in the coming months. We think you will enjoy hearing the experts’ thoughts on a variety of muzzleloading topics. All comments are “off the cuff” responses to audience questions. The segments vary in length between 15 and 25 minutes.
Panel Discussion Part 1:
LC Rice talks about barrels. Wallace Gusler and Mark Silver discuss fitting a custom gun to the shooter. Wallace also talks about effect of moisture on the “movie gun”.