Tag: Goex

  • Flint Elk Rifle

    Flint Elk Rifle

    The history of this rifle began years ago when my friend Rick Shellenberger in Colorado cleaned out an old muzzleloading shop. Among other items, he brought home 2 Sharon .58 caliber rifle barrels. Both were rifled at 1 turn in 72 inches. These barrels have eight lands and grooves. Rick kept one barrel and gave the other one to me.

    Back in Indiana, years passed until I began collecting parts to complete the rifle. My friend Steve Chapman gave me hard maple rifle stock. It was a half stock with a 1 inch barrel channel and a mortice cut for an L&R lock. Steve suggested we look for an L&R lock that matched the mortice, and both of us like Davis triggers. I bought parts at the Friendship spring shoot, and Steve took them back to his shop.

    Steve knew that time wasn’t a factor, and had a number of other gun-making projects to finish ahead of mine. When he began to work on the gun, a couple decisions were made.  One decision was to use Tom Snyder’s vent coning tool to make the vent.  This process consists of drilling a 1/16″ hole, inserting Tom’s threaded pin, and installing the cutter through the open breech.  We used a cordless drill to cut the internal cavity.  The cavity is very similar to Jim Chamber’s vent liners.

    The barrel was shortened to 32 inches as stock proportions were considered. Considerable wood was removed to give the rifle much better lines.   Steve poured a very nice pewter nose cap. A removable aperture rear sight was used to help a pair of 70 year old eyes.

    Here you can see the .58 caliber hole and the crown Steve cut.
    Here you can see the .58 caliber hole and the crown Steve cut.
    Final shaping of cheek piece
    Final shaping of cheek piece  (Photo S Chapman)
    Lock installed, wrist shaped
    Lock installed, wrist shaped  (Photo S Chapman)
    Barrel Lugs
    Barrel Lugs  (Photo S Chapman)

    The finish used on the stock was a mixture of stains that Steve likes, and I like the way the stock turned out. I didn’t quiz Steve on the exact mixture, but I know that it was a mixture of Homer Dangler’s stains.

    Cheek piece
    Cheek piece  (Photo S Chapman)
    Pewter nose cap
    Pewter nose cap  (Photo S Chapman)
    Forearm and nose cap
    Forearm and nose cap  (Photo L Pletcher)
    Lock area
    Lock area  (Photo L Pletcher)

    When the rifle was finished, we went to the Stones Trace range to sight it in. With the rifle shooting to point of aim, we played with powder charges. A Swiss load of 90 grains of fffg gave us almost 1700 feet/second. I expect that a load of ffg may be found that will give similar velocities with less pressure. At this writing, I expect to experiment with different powder brands and grain sizes. Right now it is a potent rifle at both ends.

    20160921_103154

    Rifle by the hearth (Stones Trace Historical Society
    Rifle by the hearth Stones Trace Historical Society  (Photo L Pletcher)

    As we finished up our chronograph session, Steve said, “ Since this gun puts the ball at the top of the front blade, you could head shoot squirrels with it, or bark them.”

    I said, “Well maybe not with 90 gr. of Swiss fffg.”

    “Yah,” Steve said. “Wonder what it would do with a squib load, like maybe 30 gr.”

    So, we chronographed a 30 gr. Swiss load of fffg. This load drove the 280 grain ball an average of 870 fps. Maybe we need to think lower for a squib. On a whim, we also clocked a load of 30 gr of Goex. It averaged less than 500 fps. This does seem more squib-like.

    As a side bar, my friend Rick in Colorado stocked a rifle with the other .58 barrel that I mentioned at the beginning of this post. Rick wanted to recover a ball to see how much it expanded. During my time visiting him, we filled a garbage can with water and fired a 90 gr ffg load down into the can. The garbage can split down the side, but we did recover the ball. We taped the can together as best we could and fired a .58 cal. mini ball.  Below is a pic of the expanded ball with the mini ball before and after.  These rifles will make a big hole in about anything in North America. If my health and physical condition permitted, this would be the gun I’d use for elk.

    Left is the .570 ball before and after recovery. On right is a mini ball for comparison
    Left is the .570 ball before and after recovery. On right is a mini ball for comparison
    Rifle by the hearth
    Rifle by the hearth  (photo L Pletcher)

    Back here in Indiana, Steve and I will need to do some form of Rick’s water experiment. We haven’t decided what we want to destroy, but it will be something filled with water.

    Steve Chapman is a close friend with rifle-making and machinist skills.  We have worked on many projects and experiments together.  Whenever a project needs more hands, Steve is the person who helps.  He usually pulls the trigger in any test that measures accuracy.  While we both fired this gun for accuracy, Steve’s shooting skills have been necessary in many of our experiments.  Steve’s many skills have been a benefit in many of these experimental articles.


    Future tests, thoughts,etc

    Thought: We might learn more from a different water test. We’re thinking of a row of milk jugs filled with water. A .308 is caught in the fifth jug. We think the .58 will do better.

    Also: Build a water box to hold 1 gallon plastic bags. With this setup we could repeat tests and compare different calibers and loads. Compare the 90gr ffg Goex load and the 90 gr fffg Swiss load.


  • Priming Powder Timing

    Priming Powder Timing

    [box type=”note” align=”aligncenter” ]Reprinted from MuzzleBlasts April 2005 by Larry Pletcher —- This article is another in a series of reprinted articles that measure a flintlock’s ability to ignite black powder. This article compares ignition time of black powder varieties used for priming the flintlock pan.[/box]

    As a retired educator and a student of the flintlock, I am fascinated with what we can learn by applying technology to the field of black powder. This is another in a series of articles that uses a computer interface to experiment with our black powder hobby. The first articles (1990-1992) described experiments timing various flintlocks. Another article (2000) described the timing of touch holes. This article explores the timing of different grades of black powder used for flintlock priming.


    My initial goal was to compare priming powder. Two samples of Goex 4fg were included. The ’89 Goex sample came from the plant before the plant explosion and will be referred to as “Early Goex”. The second Goex sample, “Late Goex”, was produced after the plant was relocated.

    Two Swiss samples were included as well. These were purchased at Friendship at the fall 2004 shoot. One sample is the normal Swiss 4fg priming powder. The other sample is called Null B. This powder is reputed to be the tailings (sweepings) left from production runs of the other grades of Swiss. Finishing the test group were Goex samples of 2fg and 3fg. Because 3fg and 2fg powder are at times used as priming powder, it seemed logical to include these grades of powder as well.


    In experimentation of any kind, controlling variables is a very important responsibility. In tests involving a flintlock, this is especially difficult. In this experiment, the variable we wish to test is the powder, and it is important to control all remaining variables.

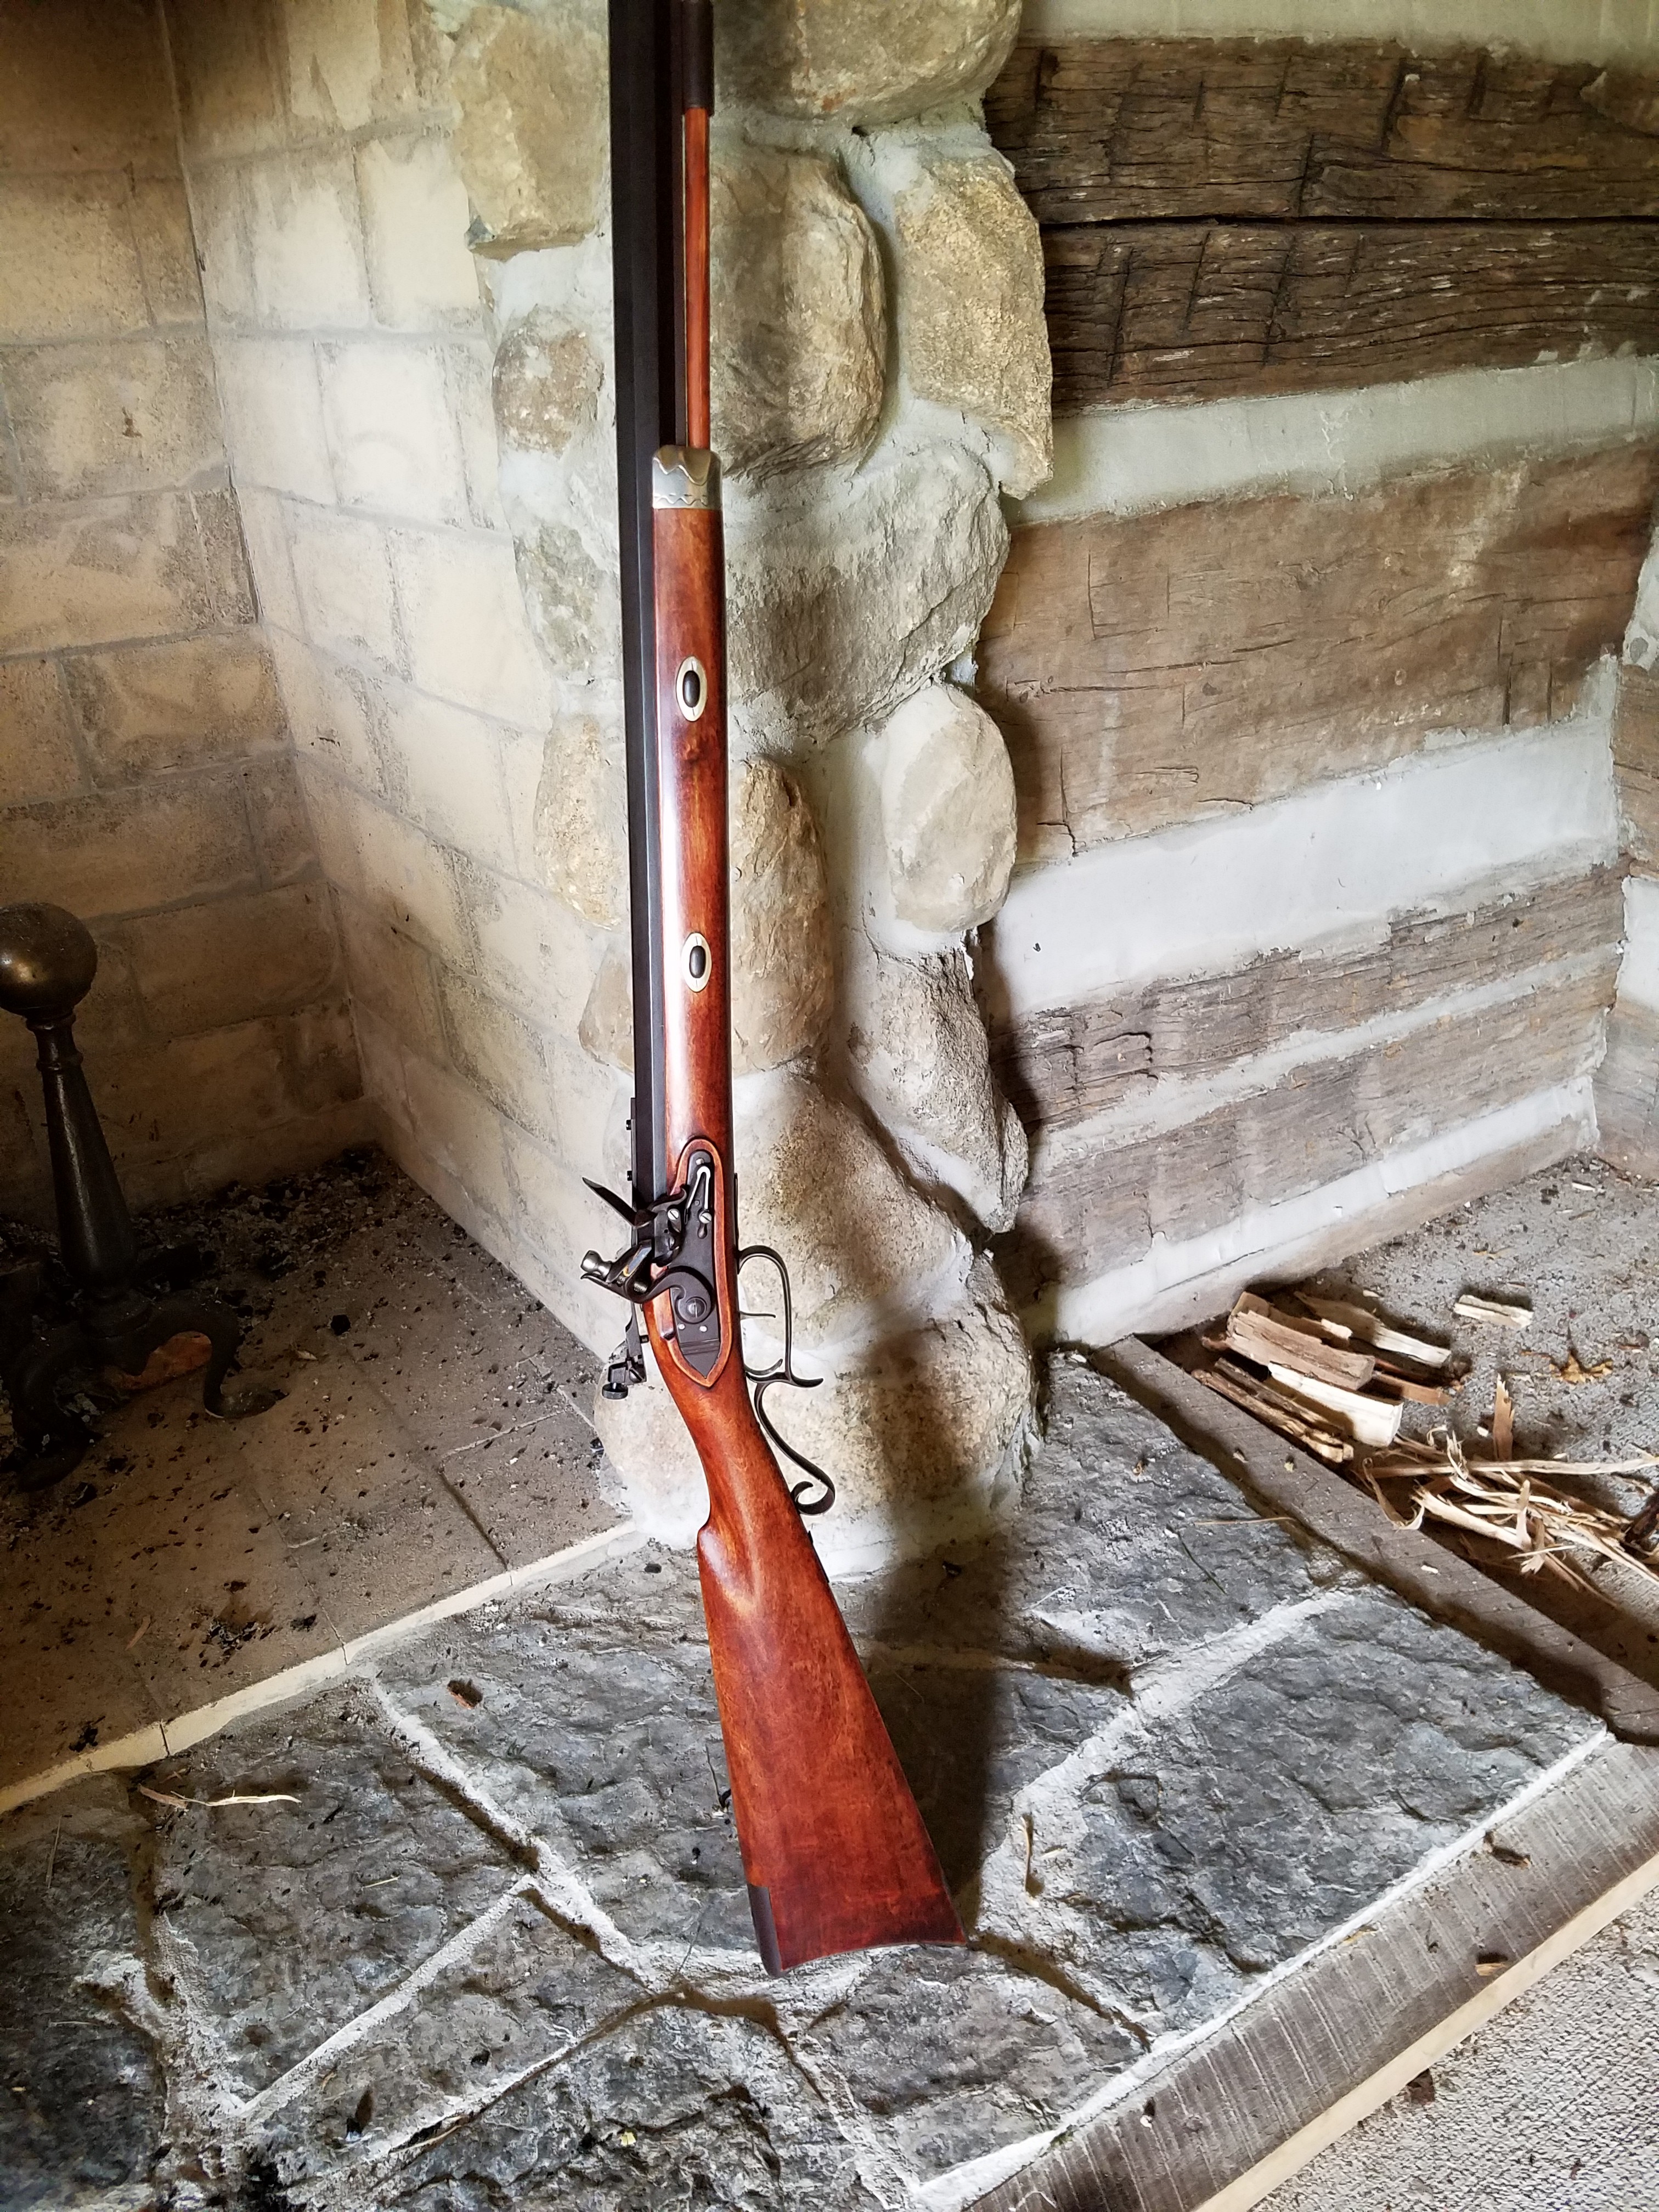
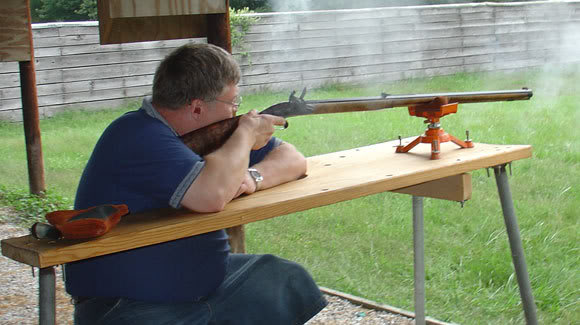
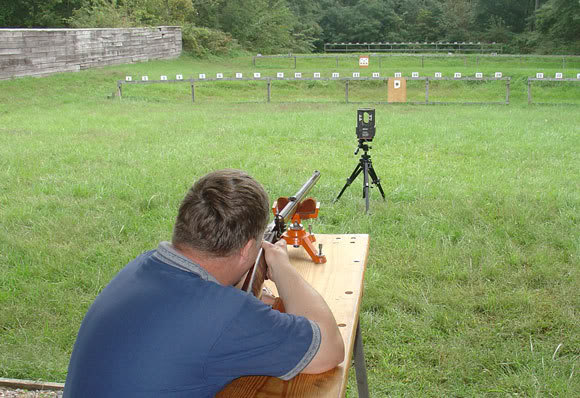
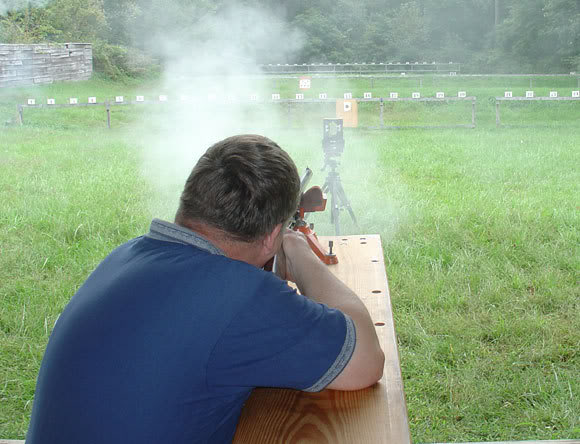
    Humidity is one of the variables which I wished to control. Since I had no means to manipulate the humidity up or down, I took a number of steps to minimize its fluctuation. These tests were completed in an insulated garage used to store antique cars. An exhaust fan was used to remove the smoke. The day for the testing was chosen with humidity in mind. I noted humidity at the beginning and end of each powder test group. The humidity was 63% when I began testing, and dropped to 48% by the time testing was complete. I felt this range was acceptable and was probably the best I could do. Without the fan, the humidity might have been more uniform, but firing a flintlock 140 times in an enclosed garage would have obvious disadvantages. The physical equipment remained the same as the apparatus used in the earlier testing. It has remained unchanged for years, but more important, it was unchanged throughout all six powder tests. The software and lock also remained unchanged throughout all testing. The lock is a large Siler that has been a workhorse in my years of testing. The Siler has been a benchmark for my work and is the lock I have tested the most.


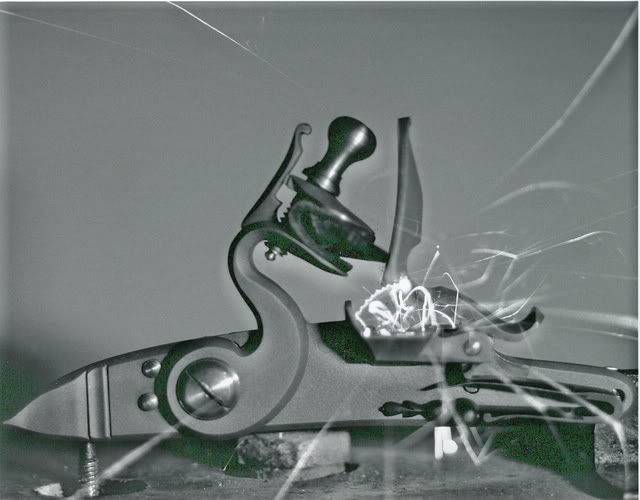
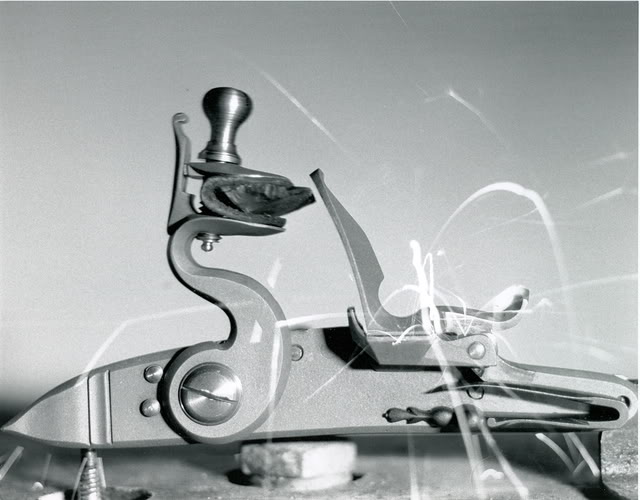
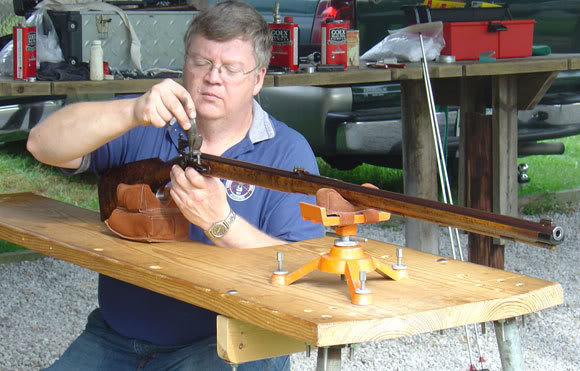
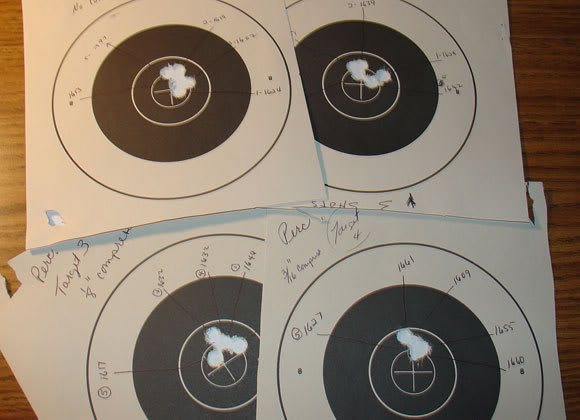
    The variable that is the most difficult to control is the flint edge. In an ideal world the flint edge would be identical throughout all trials. In reality the edge is different on every trial. Every strike against the frizzen leaves a different edge because of the flint fragments that break off with each try. Flint shooters also recognize this problem and strive to manage it. During the testing, I took a number of steps to minimize this variable. Every powder test group was begun with a new flint. Every powder test group was begun with the lock removed and cleaned. The flint edge and frizzen were cleaned between each individual trial. The flint was knapped whenever the elapsed time or my experience made me feel it was necessary. The way powder is placed in the pan can also be a variable. However, in these tests the only concern is to provide a uniform powder area for sparks’ landing. The procedure used was to fill the pan level full. In this way, sparks from every trial have the identical bed of powder on which to land.

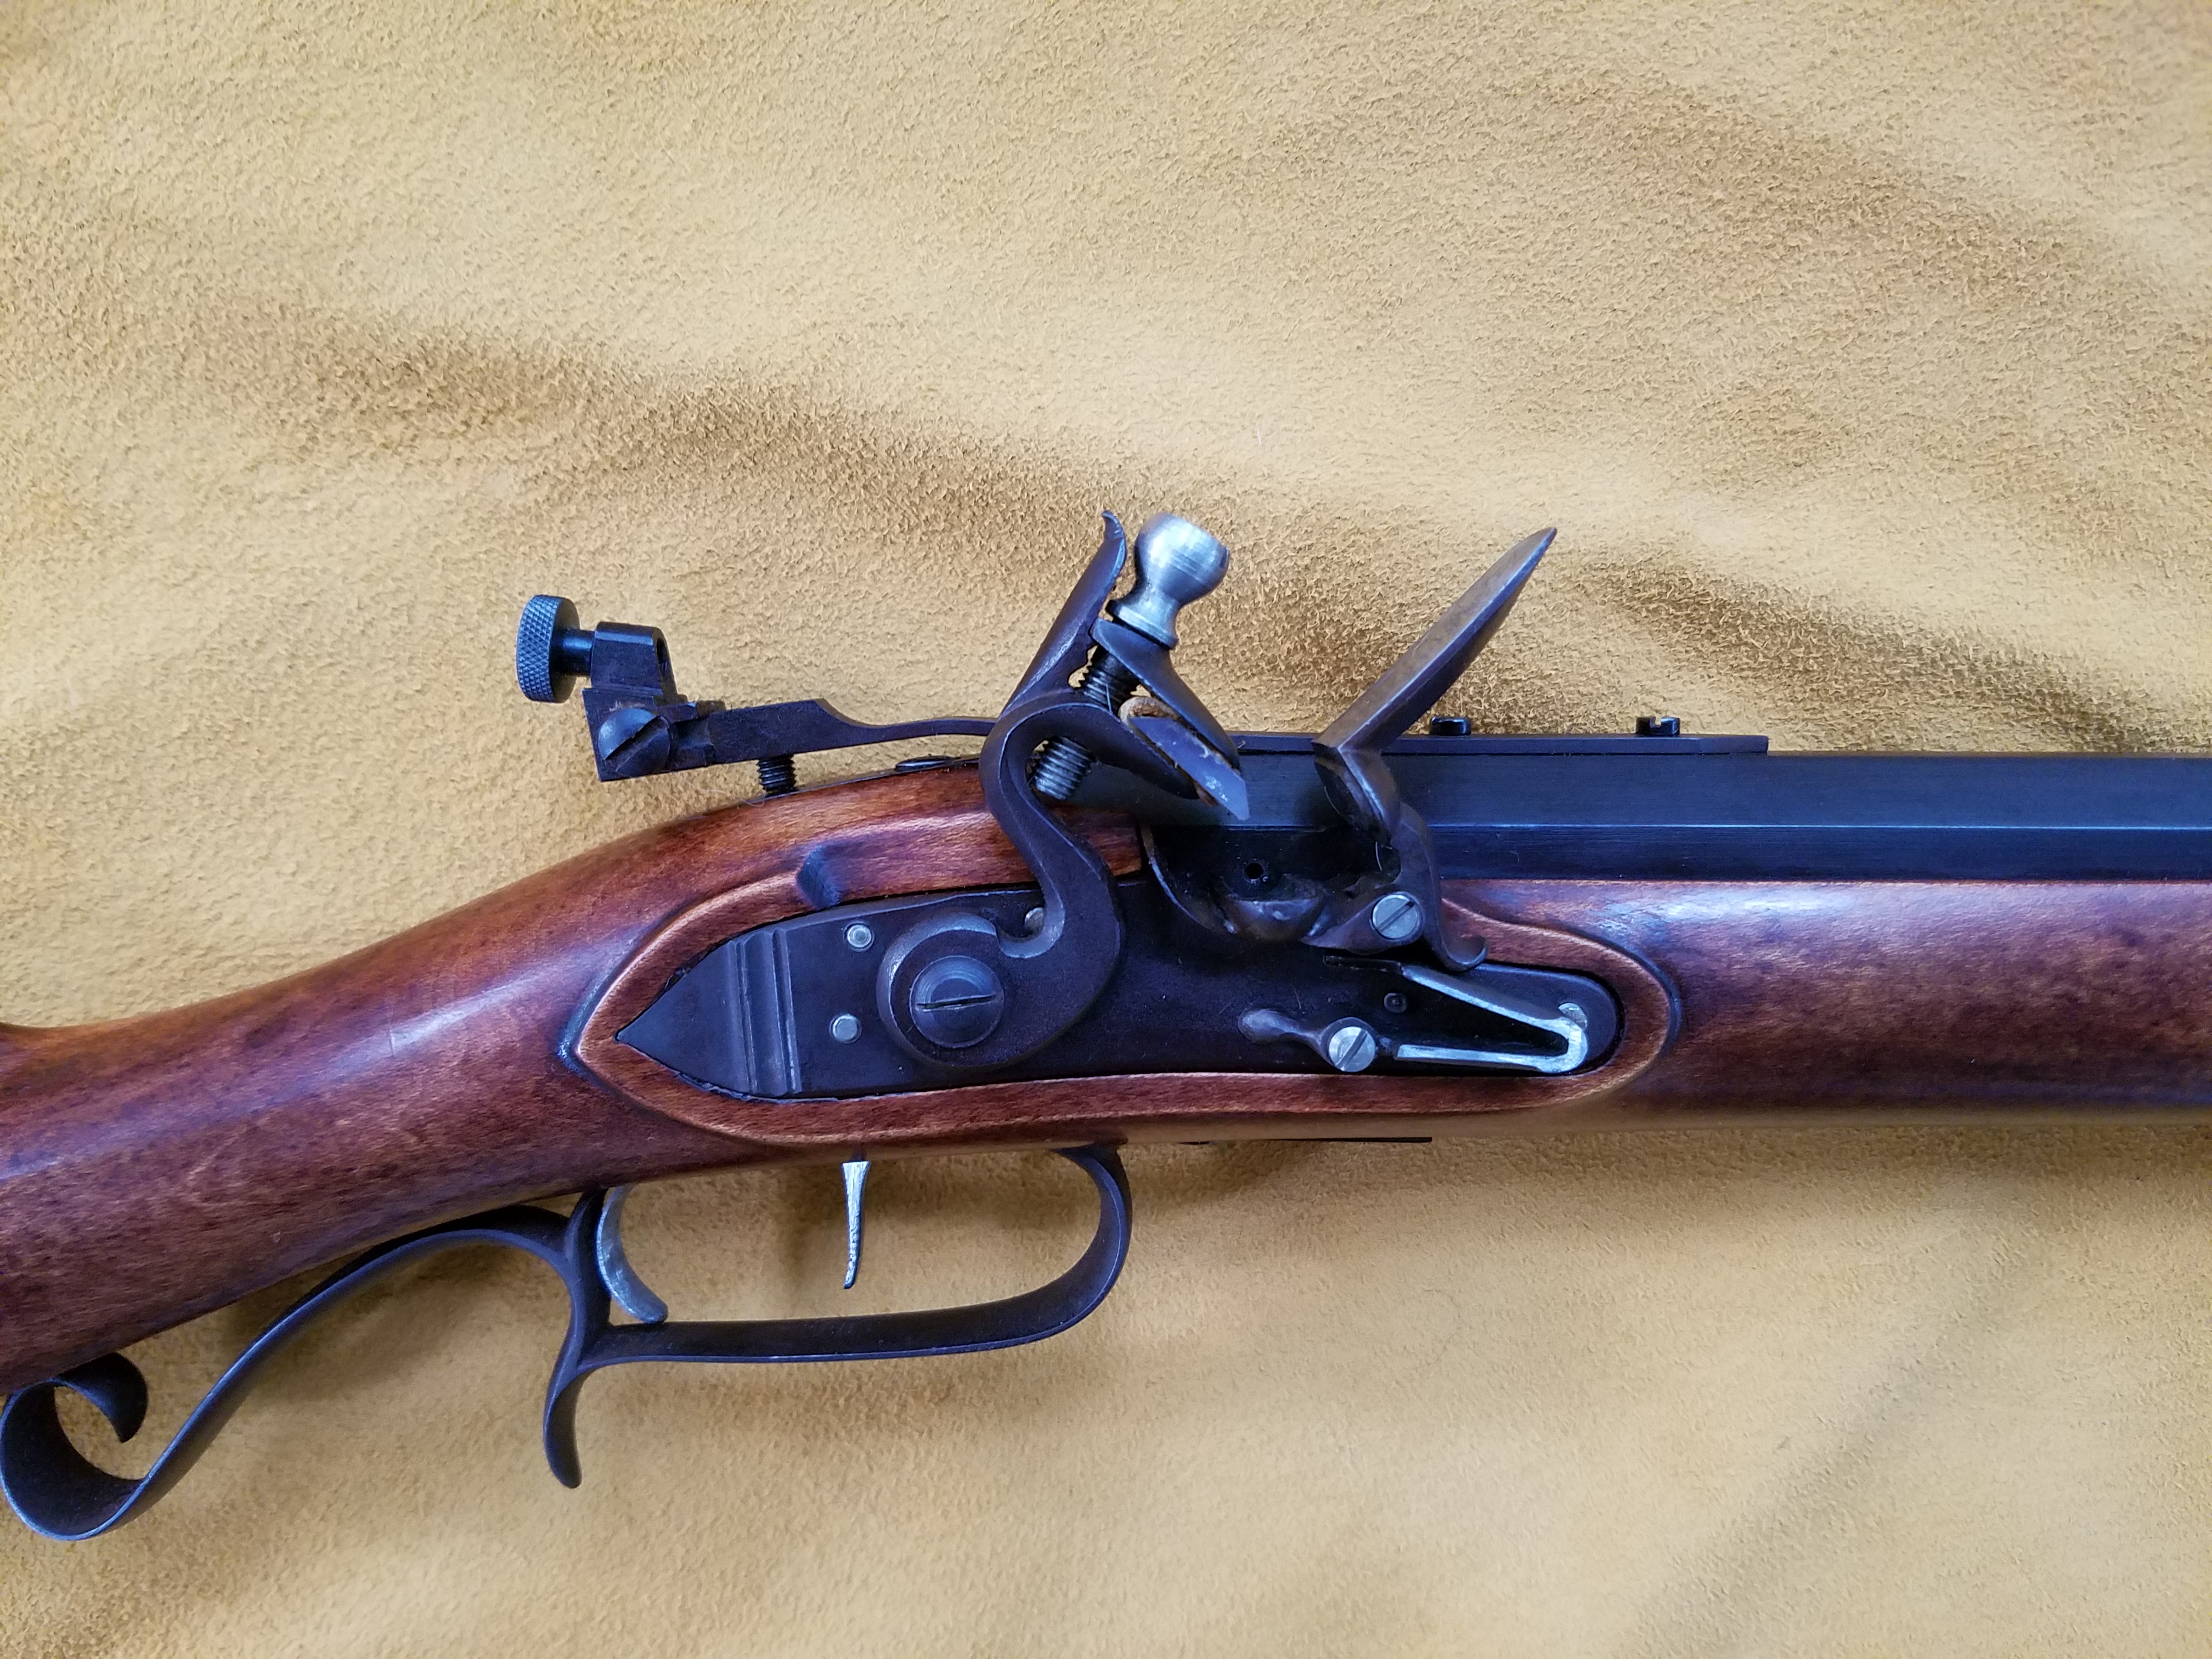
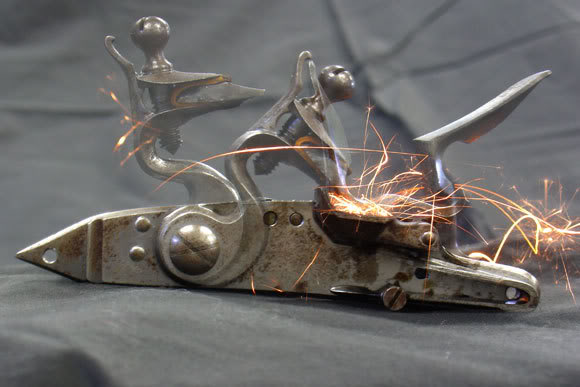
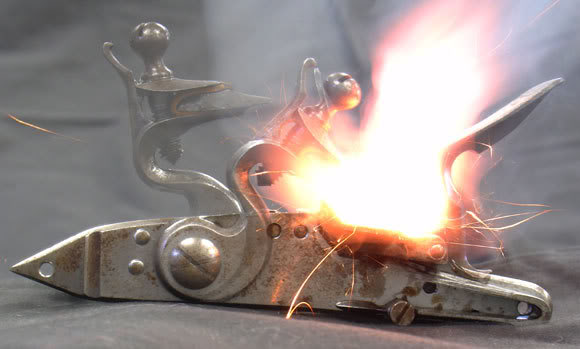
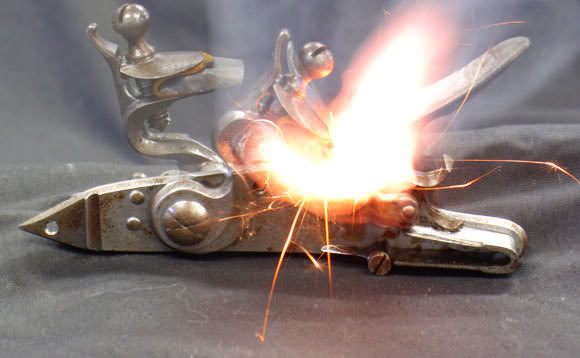
    The fixture that holds the lock is largely unchanged for the last 10 years. The lock is mounted in the fixture locating the sear bar directly over a 12 volt solenoid. A photo cell is mounted so that it “looks” into the pan. Both the solenoid and the photo cell are attached to the computer, using a high school physics interface. The computer program controls the firing of the solenoid, sensing the photo cell, and measuring the time in between the two. After the lock is prepared for firing, pressing the space bar on the computer fires the lock and starts the machine language timing routine. When the pan flashes, the photo cell stops the timer which reads to the nearest ten thousandths of a second.


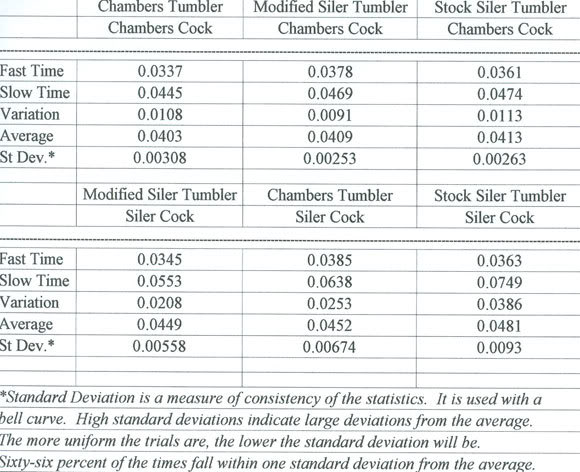
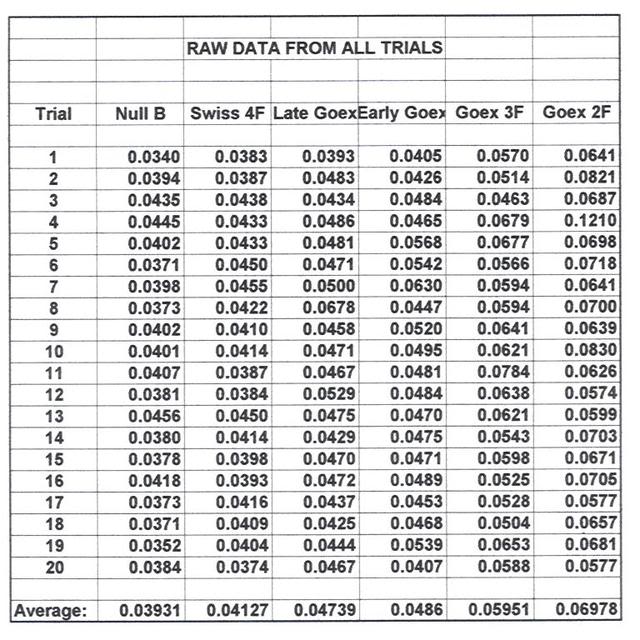
    The times for 20 trials are recorded on a spreadsheet. The spreadsheet subtracts the time it takes for the solenoid to reach the sear. The remaining time begins as the sear is tripped and ends with pan ignition. The spreadsheet then finds the fast time, slow time, variation, average, and standard deviation. Beginning and ending humidity are noted. These stats are the basis for the article. The powders’ spreadsheets are included at the end of the article. Summary sheets and graphs were made for comparison.

    A summary of all the tests can be seen in the following Chart. In this chart you can see all trials for each powder in the order they were fired. Each powder’s average is shown at the bottom.


    The next chart shows the averages for each group as a bar graph. One can see a gradual decrease in the times of the four priming powders. Then the times increase as the fffg and ffg powders are displayed. It is worth noting that the fastest powder (Null B) also had the finest granule, and the slowest powder (ffg) had the largest granule.


    The aqua and yellow on the scattergram indicate the two Swiss powders. It should be obvious that these powders were the fastest and the most consistent of all the powders tested. The variations between fast and slow times were every small. From the experimenter’s standpoint, these powders look very good. They were so consistent that it was difficult to tell if or when the flints needed knapping. The Null B powder was marginally faster. However, any trial from one of these powders would fit nicely in the other. The slowest time in each was within .0001 of each other. Each powder has an advantage when one looks at the results closely. The Null B has the fastest average, and the Swiss 4fg has the smallest variation and standard deviation. In fact, the variation for the 4fg is astonishingly small at .0081 of a second. This very small variation gives it the edge in standard deviation also. (Standard deviation can be thought of as a measure of consistency. The more consistent the trials, the lower the standard deviation will be. Sixty-six percent of the trials should fall within one standard deviation of the average. Ninety-six percent fall within two standard deviations.)

    The red and blue represent Goex ffffg priming powder before and after their factory accident. These powders compare well together. A quick summary would be to say that the early Goex was slightly more consistent, and the late Goex was slightly faster. Both of these powders are slightly slower than the Swiss powders. About three quarters of the Goex times fall outside of the high to low interval on the Swiss chart.

    The colors violet and brown represent the Goex 3fg and 2fg powder. While these powders are not considered priming powder, both are used as prime especially in military applications where paper cartridges are used. While it is apparent that these powders are slower than the various priming powders, one also notices that they are much less consistent than the rest. The variation between fast and slow times was considerably larger.


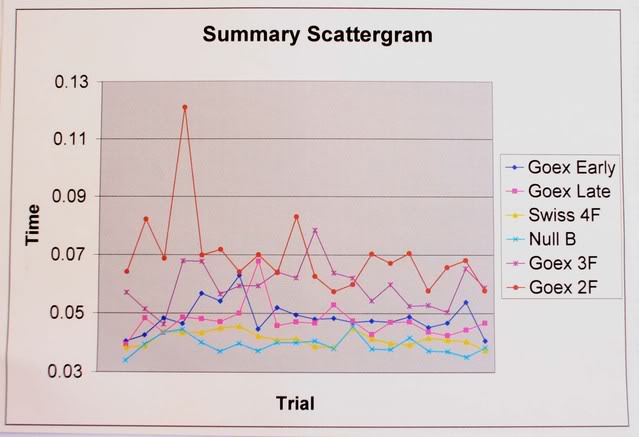
    In comparing the 2fg and 3fg powders to each other, one can see that while the fffg Goex powder averaged faster than the 2fg Goex, it also had a big advantage in consistency. The 2fg powder had a particularly large variation due mainly to a very slow ignition in one trial. This trial seems uncharacteristic based upon the rest of the times, but is reported in the interest of accuracy. Knapping the flint produced a faster subsequent trial. The question, “Why didn’t I knap the flint one shot sooner?” is a problem for the experimenter as well as the flintlock shooter.

    When making comparisons between these powders and the priming powders, one can see that the true priming powders hold a substantial advantage. For instance, the fastest 3fg time is slower than the slowest of the Swiss times. Variations from high to low are greater as well. Drawing conclusions after the experimentation requires great care. One conclusion deals with the comparison of priming and non-priming powder. While there was a significant difference, I could not discern this difference with human senses. Friends, who report that their ignition with regular horn powder is just as fast, support this. Their ignition is slower, I believe, but we cannot detect the difference without scientific means.

    The results from timing the four priming powder samples were even closer. While this experiment can measure differences in the ignition speeds of these samples, the human eye and ear cannot tell the difference. The variations between the priming powders tested here are simply too small for human senses to detect. That said, one piece of anecdotal information was gathered this fall at Friendship. A good friend who is a rifle and horn builder from Duck River, TN, told me that he thought the new Null B powder was extremely consistent shot to shot. He is not wrong.

    At the end of my first article in 1990, I wrote, “This article just scratches the surface.” I feel the same way today. There are many things about the way black powder ignites which need more study. As an example, the humidity range that shooters encounter is far wider than the relatively narrow humidity range in this experiment. If this experiment would be repeated at either humidity extreme, the results may give us more insight about these powder samples. I am interested in any study methods that help add to our knowledge. Readers with ideas may reach me at 4595 E. Woodland Acres, Syracuse, IN 46567.

  • Flintlock Timing Part 3, MuzzleBlasts December 1992

    Flintlock Timing Part 3, MuzzleBlasts December 1992

    [box type=”note” align=”aligncenter” ]Reprinted from MuzzleBlasts December 1992 by Larry Pletcher —- This article is the third in a series of three reprinted articles that measure a flintlock’s ability to ignite black powder. This article deals experimental Siler flintlock components from Jim Chambers, riflemaker and vendor of black powder parts.[/box]

    Most of us, at one time or another, have wondered what factors cause locks to produce good results. Obviously, there are considerations which we have not been able to measure and maybe can never isolate. In this article, I would like to look at some factors


    Photo 1: The flint is just about to begin contact with the frizzen. Two thirds of the mechanical time is complete.

    which have not yet been measured. By experimenting with different modifications, perhaps we can identify some characteristics of successful locks.

    This month’s experiment was done with the help of Jim Chambers. He supplied me with a large Siler lock with replaceable tumblers and cocks. This gave me a chance to alter one variable at a time to see what change it would make. I was provided with the following:

    		a Siler lock assembled by Mr. Chambers
    		a stock Siler tumbler 
    		a modified Siler tumbler
    		a Chambers tumbler
    		a stock Siler cock
    		a Chambers cock

    (The mainspring needed to be repositioned depending on which tumbler was installed. Mr. Chambers modified the lockplate allowing this change to be made easily).

    With these parts to use, six possible combinations could be tested. I began by testing to see which way the flint bevel should be placed to work the best. The flint installed with the bevel up provided the best performance. Each test thereafter was done this way.


    Photo 2: This photo was taken .002 seconds later than Photo 1.


    Photo 3: This photo was taken .002 seconds after the previous one. The flint fragment located just below the flint in the photo demonstrates a variable always present – a constantly changing flint edge.

    As in earlier articles, testing was done with a measured amount of Goex 4Fg powder. (The powder had been stored at room temperature in a dry environment). The flint and frizzen were cleaned between trials. Flints were knapped when any noticeable change in operation developed.

    A series of 20 trials were conducted with each possible combination. The following chart provide a summary of trials:


    An examination of the charts leads to a number of conclusions. First of all, the modified Siler tumber (test 2,4) had a pronounced camming effect as the lock was brought to full cock. In fact, one had to practice finding the half cock notch. The Chambers tumbler had a camming effect to a lesser degree; the stock Siler tumbler had none. Since the difference in results 1,2,3 were so small, the camming effect may not add a great deal to the functioning of the lock.

    The Chambers cock seems to make a difference in the speed and standard deviation in these tests. Wile the tumbler does make a small difference, the first three combinations (in both speed and standard deviation) used the Chamber cock. This

    cock had a lightly longer throw than the Siler cock. The extra length seems to be achieved by lengthening the neck; the angle of the jaws of the cock does not appear to have been changed. Whatever the difference, the Chambers cock appears to be an improvement. If I were buying a lock from Jim Chambers, I would specify the modified tumbler and Chambers cock.

    The standard deviation in each combination seems to increase as the time increases. (Tests 1 and 2 were the only ones which did not follow that pattern). The standard deviation on tests 2 and 3 were very good. They would compare favorably with most locks today.

    In June of 1990, I attended the NMLRA’s Gunsmithing Workshop & Seminar held at Northern Kentucky University. One topic discussed dealt with position of sparks when a flintlock is fired. One instructor proved to us, using ultra high speed video, that sparks from a well-made lock literally coat the pan! Photo Number 4 demonstrates this phenomenon quite well. This photo is illuminated only by sparks produced by the lock. Note that the pan is white with sparks.


    Photo 4: Taken without any flash, this photo is lit only by sparks. It is safe to say that this lock puts the sparks in the right place.

    Another spark phenomenon discussed was a secondary burst. The spark appears to fly away only to burst into three or four new sparks. This can be seen in two of the photos.

    Measurements from the photos can be used to determine the speed of the flint as it travels down the frizzen. Using photos 2 and 3, I measured the distance traveled during the .002 seconds that elapsed. I set up a proportion to convert distance to the scale of the lock. This gave a flint speed of 24.2 feet per second. By measuring other locks in the same way, perhaps we can determine how much effect flint speed has on spark production.

    As I have stated before in other articles, I think we are just scratching the surface in learning what makes locks work well. There is much to learn. As before, suggestions are welcome and may be sent to 4595 E. Woodland Acres, Syracuse, IN 46567.

  • Load Compression and Accuracy

    Load Compression and Accuracy

    We attempt to measure the effect of seating pressure on black powder ignition in both percussion and flintlock rifles. – Larry Pletcher and Steve Chapman

    The purpose of these compression tests was to find out how flint and percussion rifles would react to changes in compression as the ball was seated on the powder. My personal method has been to use firm and consistent pressure whether I was shooting a percussion or a flint firearm. Many of my friends hold similar opinions. However I recently heard varying opinions and wanted to find a way to measure how different guns react to pressure changes.


    I was pleased to have Steve Chapman, shown in the photos, help conduct these tests. Steve is a member of our local club and shoots at five other clubs. His shooting abilities eliminated variables that my shooting would have introduced. We also used his rifle which is convertible from flint to percussion. Having Steve and his rifle meant that all the gun handling was done by the same person, with the same rifle, and with the same equipment.


    In order to load with identical seating pressures throughout a 5 shot group we adopted a method used by black powder cartridge shooters. We measured pressure not in pounds but in inches of compression. In our tests we used a stop on the ramrod that was set in the following 4 ways:

    a. no compression

    b. 1/16” of compression

    c. 1/8” of compression

    d. 3/16” of compression.


    A collar was made with a set screw that could be firmly attached to a steel bench rod. This rod’s sole purpose was to seat the patched ball. The first setting was determined by seating a ball to just touch the powder. The collar was lowered 1/32 inch and attached. This left the ball “just a hair” above the powder. Each additional 5 shot group was loaded after adding a 1/16” shim between the muzzle and the collar and reattaching the collar.

    The rifle was wiped with a wet and dry patch between shots. We were concerned that if the breech was not cleaned well, fouling would take up additional space, increasing the length of the powder charge, and alter the compression. We feel that thorough cleaning prevented this from happening.


    We fired the rifle at 25 yards off a bench and through a chronograph. We recorded the velocities of each shot and noted those velocities on the targets as they were done. Our load was a .400 cast ball (Lyman mold) and pocket drill for patches. The patches were lubed with Murphys oil soap and cut at the muzzle. A powder charge of 40 grains of Goex fffg was used throughout all testing. After the velocity and ball placement on the target were recorded, a piece of black target paper was placed behind the target to improve the sight picture for the shooter. In effect the target was a fresh one for each shot. After firing the four groups in the flint gun, the vent liner was replaced with a percussion nipple and a mule ear percussion lock was installed. Then we repeated the four groups with percussion ignition.

    Each 5 shot group was measured at the widest point and the width of the ball was subtracted to arrive at a center-to-center group size. The following chart shows the group sizes and the compression:

    Compression —————– Flint —————- Percussion

    1. None ——————- .92 inch ————– .53 inch
    2. 1/16 inch —————.84 inch ————– .85 inch
    3. 1/8 inch —————–.85 inch ————– .55 inch
    4. 3/16 inch ————– .46 inch ————— .41 inch


    Interpreting results can be tricky and should perhaps be left to the reader. My impression is that as a flintlock, the gun liked compression and responded to compression with smaller groups. The percussion version also liked compression but seemed a little more forgiving as far as the amount of compression used. The percussion shot far better with no compression, but when compression was added, both versions ended up essentially the same.

    The obvious limitations of this test are that it was done on only one gun and only one powder brand. Will other guns or powder varieties respond the same way – only more testing will tell. Will this test change my loading? On flint guns the answer is probably yes. I will run more tests on my gun, but the seating pressure I normally use on my flint gun is too light based on this test.

    Ideas for further tests might include:

    1. Pre-weighing powder charges on a scales
    2. Weighing and culling the balls
    3. Using aperture sights
    4. Attempt the test on a day with more consistent light conditions
  • First Try with Slow Motion Flintlock Video

    First Try with Slow Motion Flintlock Video

    It’s finally ready! Flintlocks with multiple variables at 5000 frames/second. This movie will run at GunMakers’ Hall this spring. Here’s your chance to see it early. See if you can see individual blackpowder grains ignite.

    Ferguson with HS Camera
    Grant Ferguson makes adjustments to the Olympus HS camera

    The accumulation of my high speed flintlock videos is finally finished. Because of over all size the movie is in two parts. Part A includes experiments with my old faithful large Siler lock using chipped English flints, sawn agates, Swiss Null B and Goex ffg priming powder. A video of a Chambers Round Face lock without a frizzen spring has also been included. Of particular interest is the trial with Goex ffg. The grains of powder can be seen flying in the air above the pan. The first ignition takes place above the flint almost even with the top jaw.

    Part B includes a pair of high speed videos of a large Siler lock firing up side down. The lock is tried with chipped English flints bevel up and down. Swiss Null B is used in both trials.

    Also included in Part B are three tries at video taping a flint rifle firing. The camera used was monochrome are 15,000 frames/second – three times faster than the rate used on the locks. Lighting was a tough problem. We used 3000 watts on the gun and wished for double or triple that amount. The frame rate means a very fast shutter. In the first two tries, we started the camera on the sound of the trigger. In the last we simply let the camera run and fired the rifle.