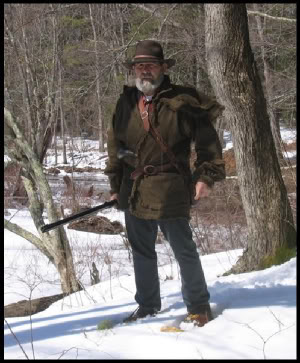
If you are looking for a particular lock, powder, or flint combination, this listing may help. Each red title lists the locks in the order they appear.
If you are looking for a particular lock, powder, or flint combination, this listing may help. Each red title lists the locks in the order they appear.
May 2009 Spring Practice
This video was produced in 2009 but was never uploaded. In doing site maintenance to www.blackpowdermag.com I found it in a different folder. Besides some shots of excellent locks, it shows some of the trials that one goes through to prepare for a video session.
In preparation for the Spring Shoot with Olympus Industrial, Steve Chapman and I met Grant Ferguson on the NMLRA grounds. We set up equipment behind Gun Makers Hall and tried different exposure settings, camera angles, and experimented with lighting.
It was at this point that we made the decision to shoot B&W instead of color. We weighed the advantage of increased definition against the loss of color. Increased definition won.
When viewing the video you will see the different camera angles and exposure settings as we experimented. This gave us the information we needed to plan for the video we did a month later, during the Spring Shoot.
We used two large Siler locks for this practice session. The first one viewed is one built by Sam Everly. The lock’s tumbler is supported by tiny two ball bearings. It is an extremely smooth lock and deserves to be mounted on a gun. The video contains 4 tries, the first with Goex cannon grade powder just for fun. The remaining trials are with Swiss Null B.
The second Siler is a workhorse. It has been used for testing purposes since 1986. It has probably been fired 5000 times with all sorts of flints and powder. Practically all of my experiments and articles used this lock. Jim Chambers has given me incredible support with this lock.
Our video contains three firings with the workhorse Siler, two with Null B and a final one with Goex cannon.
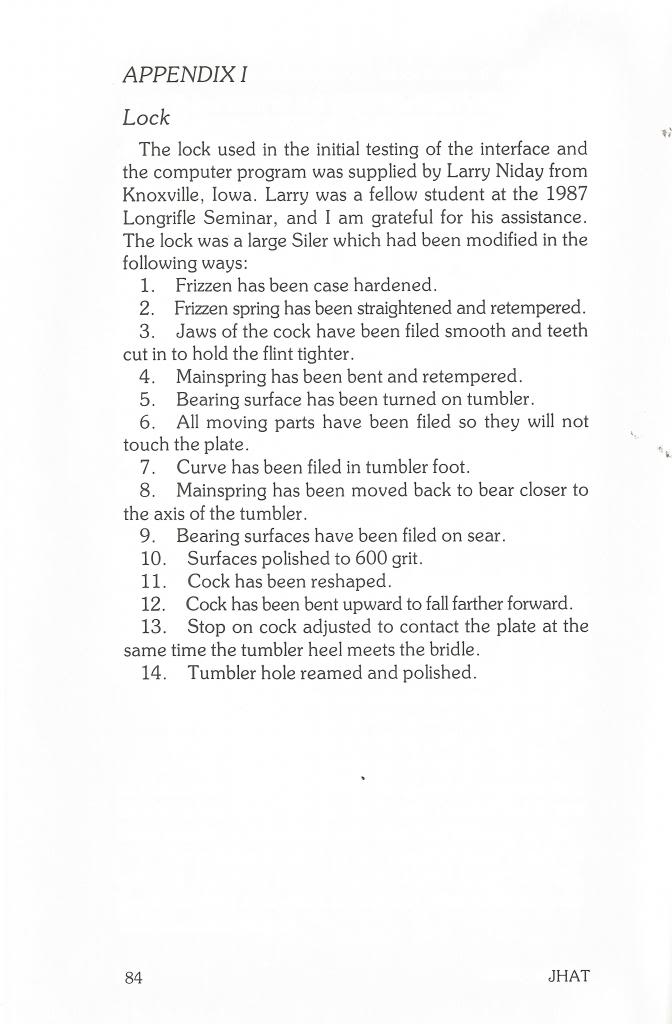
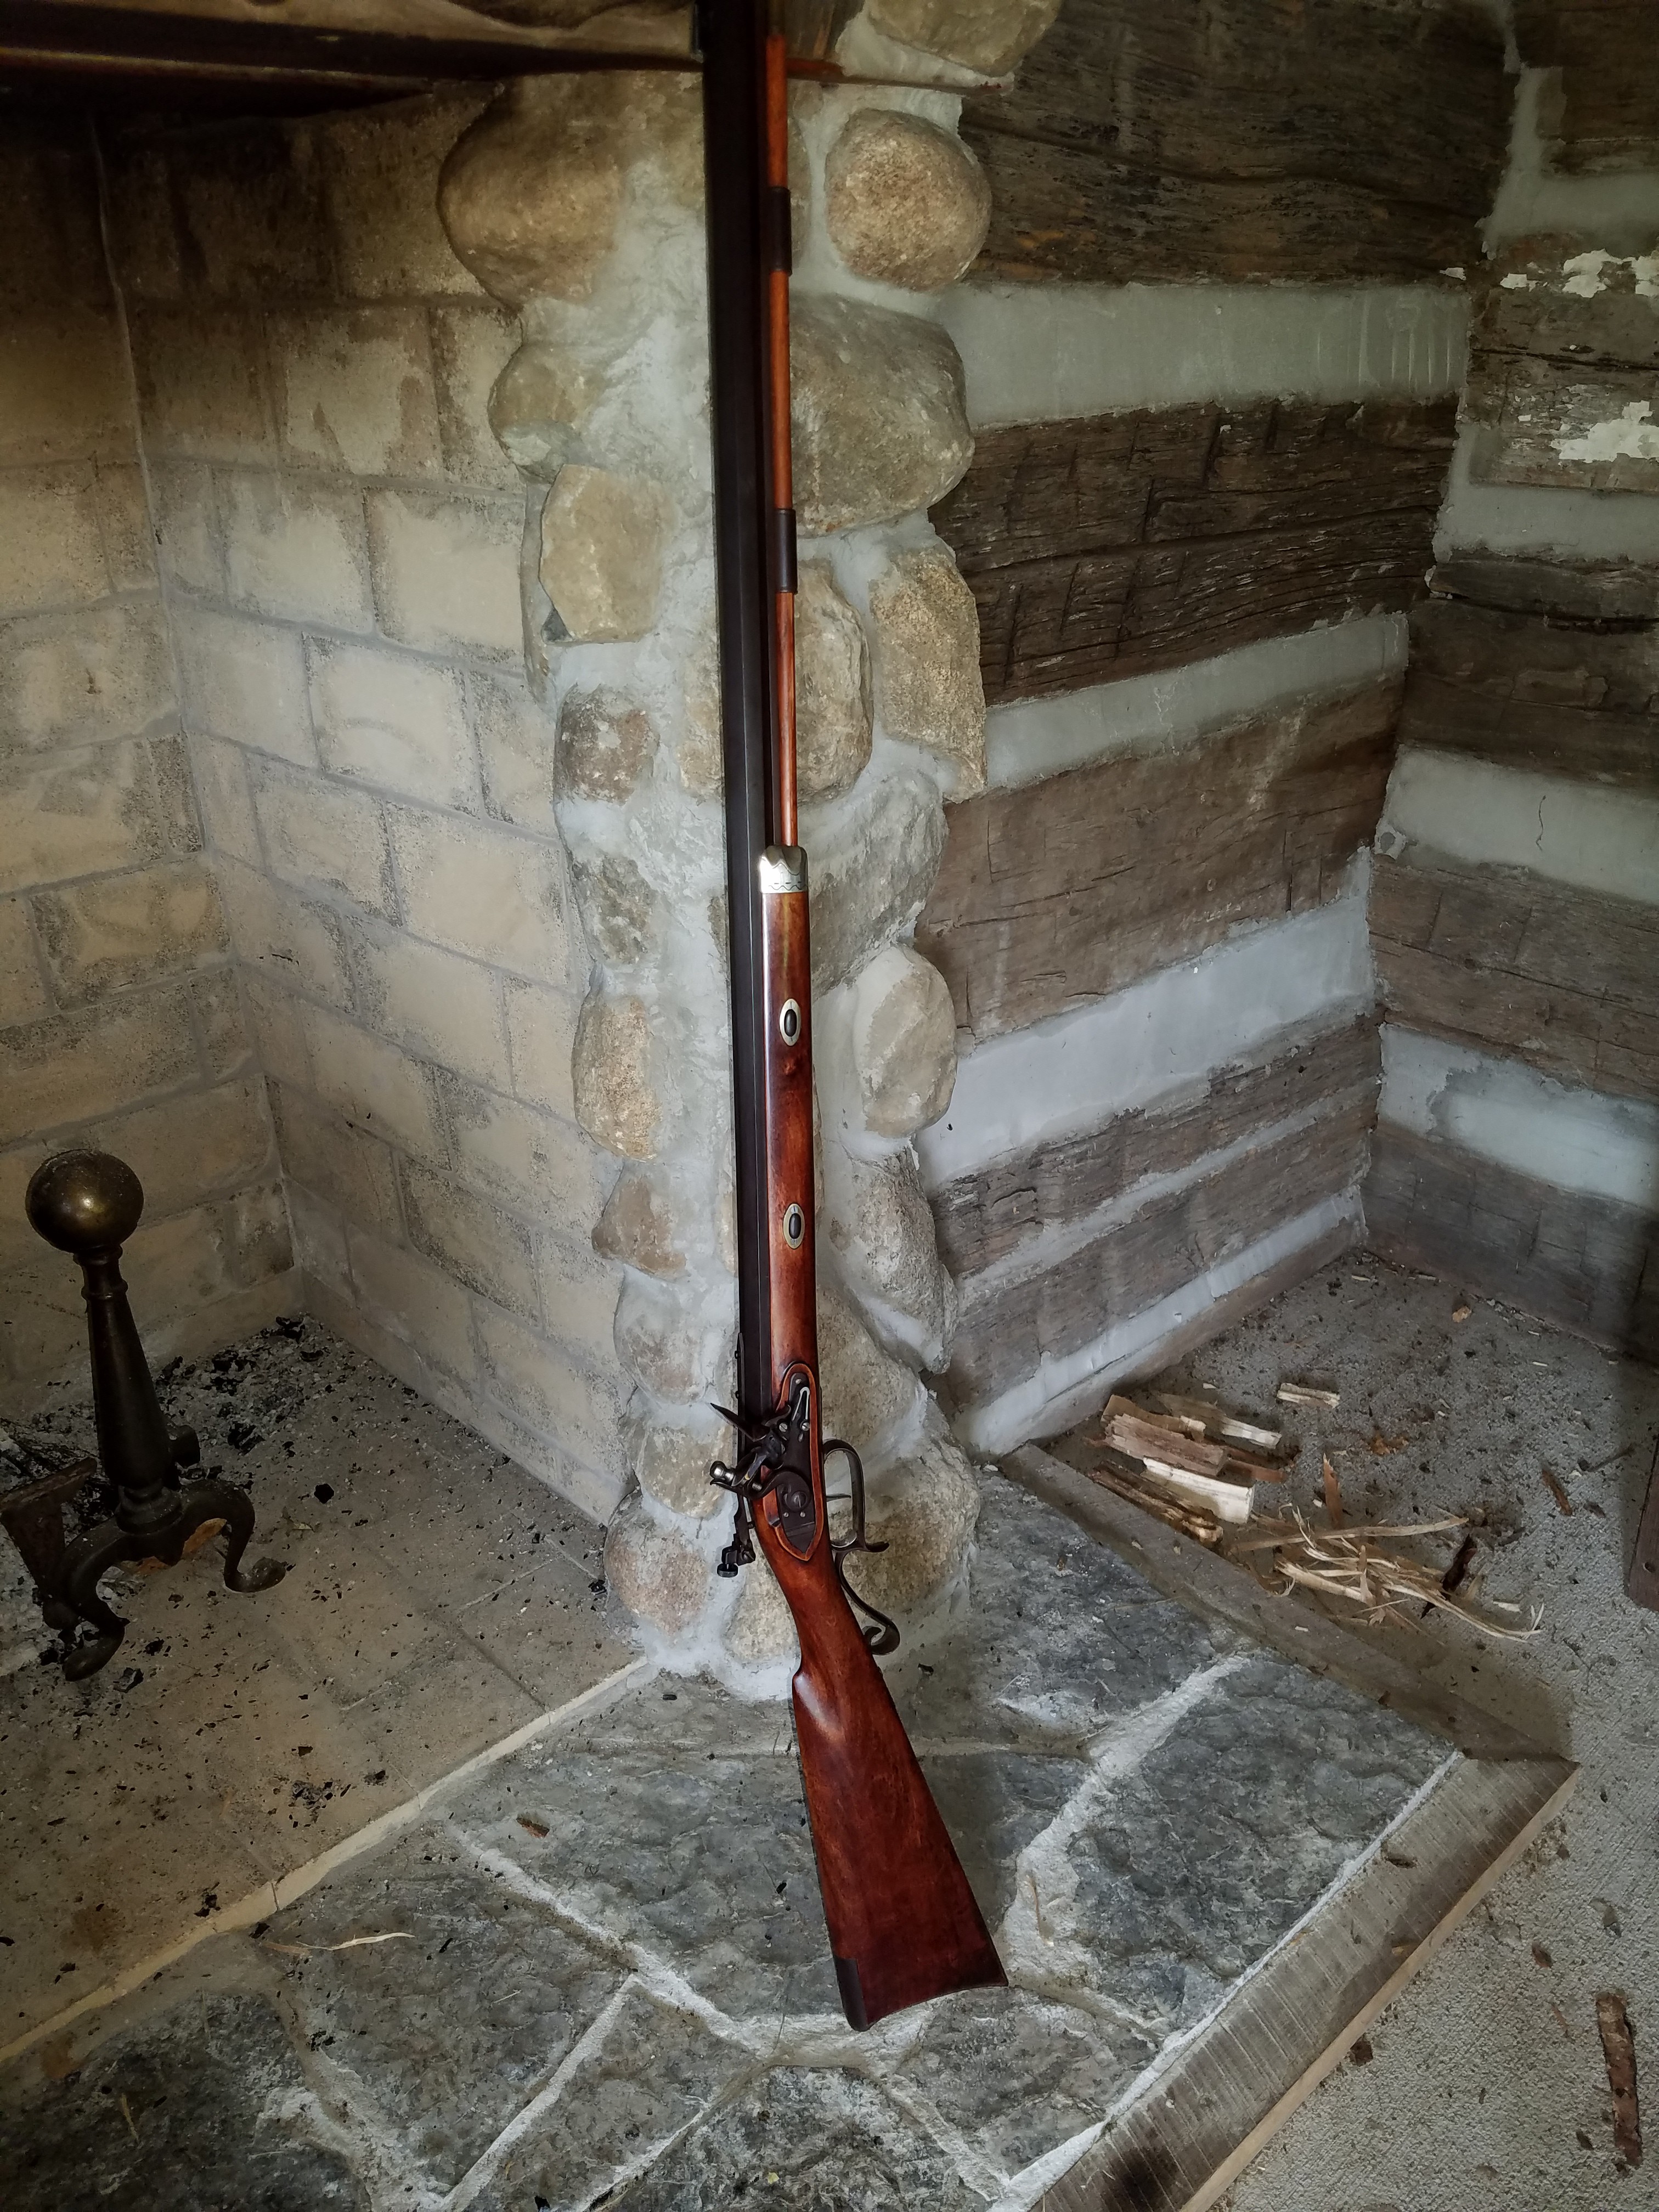
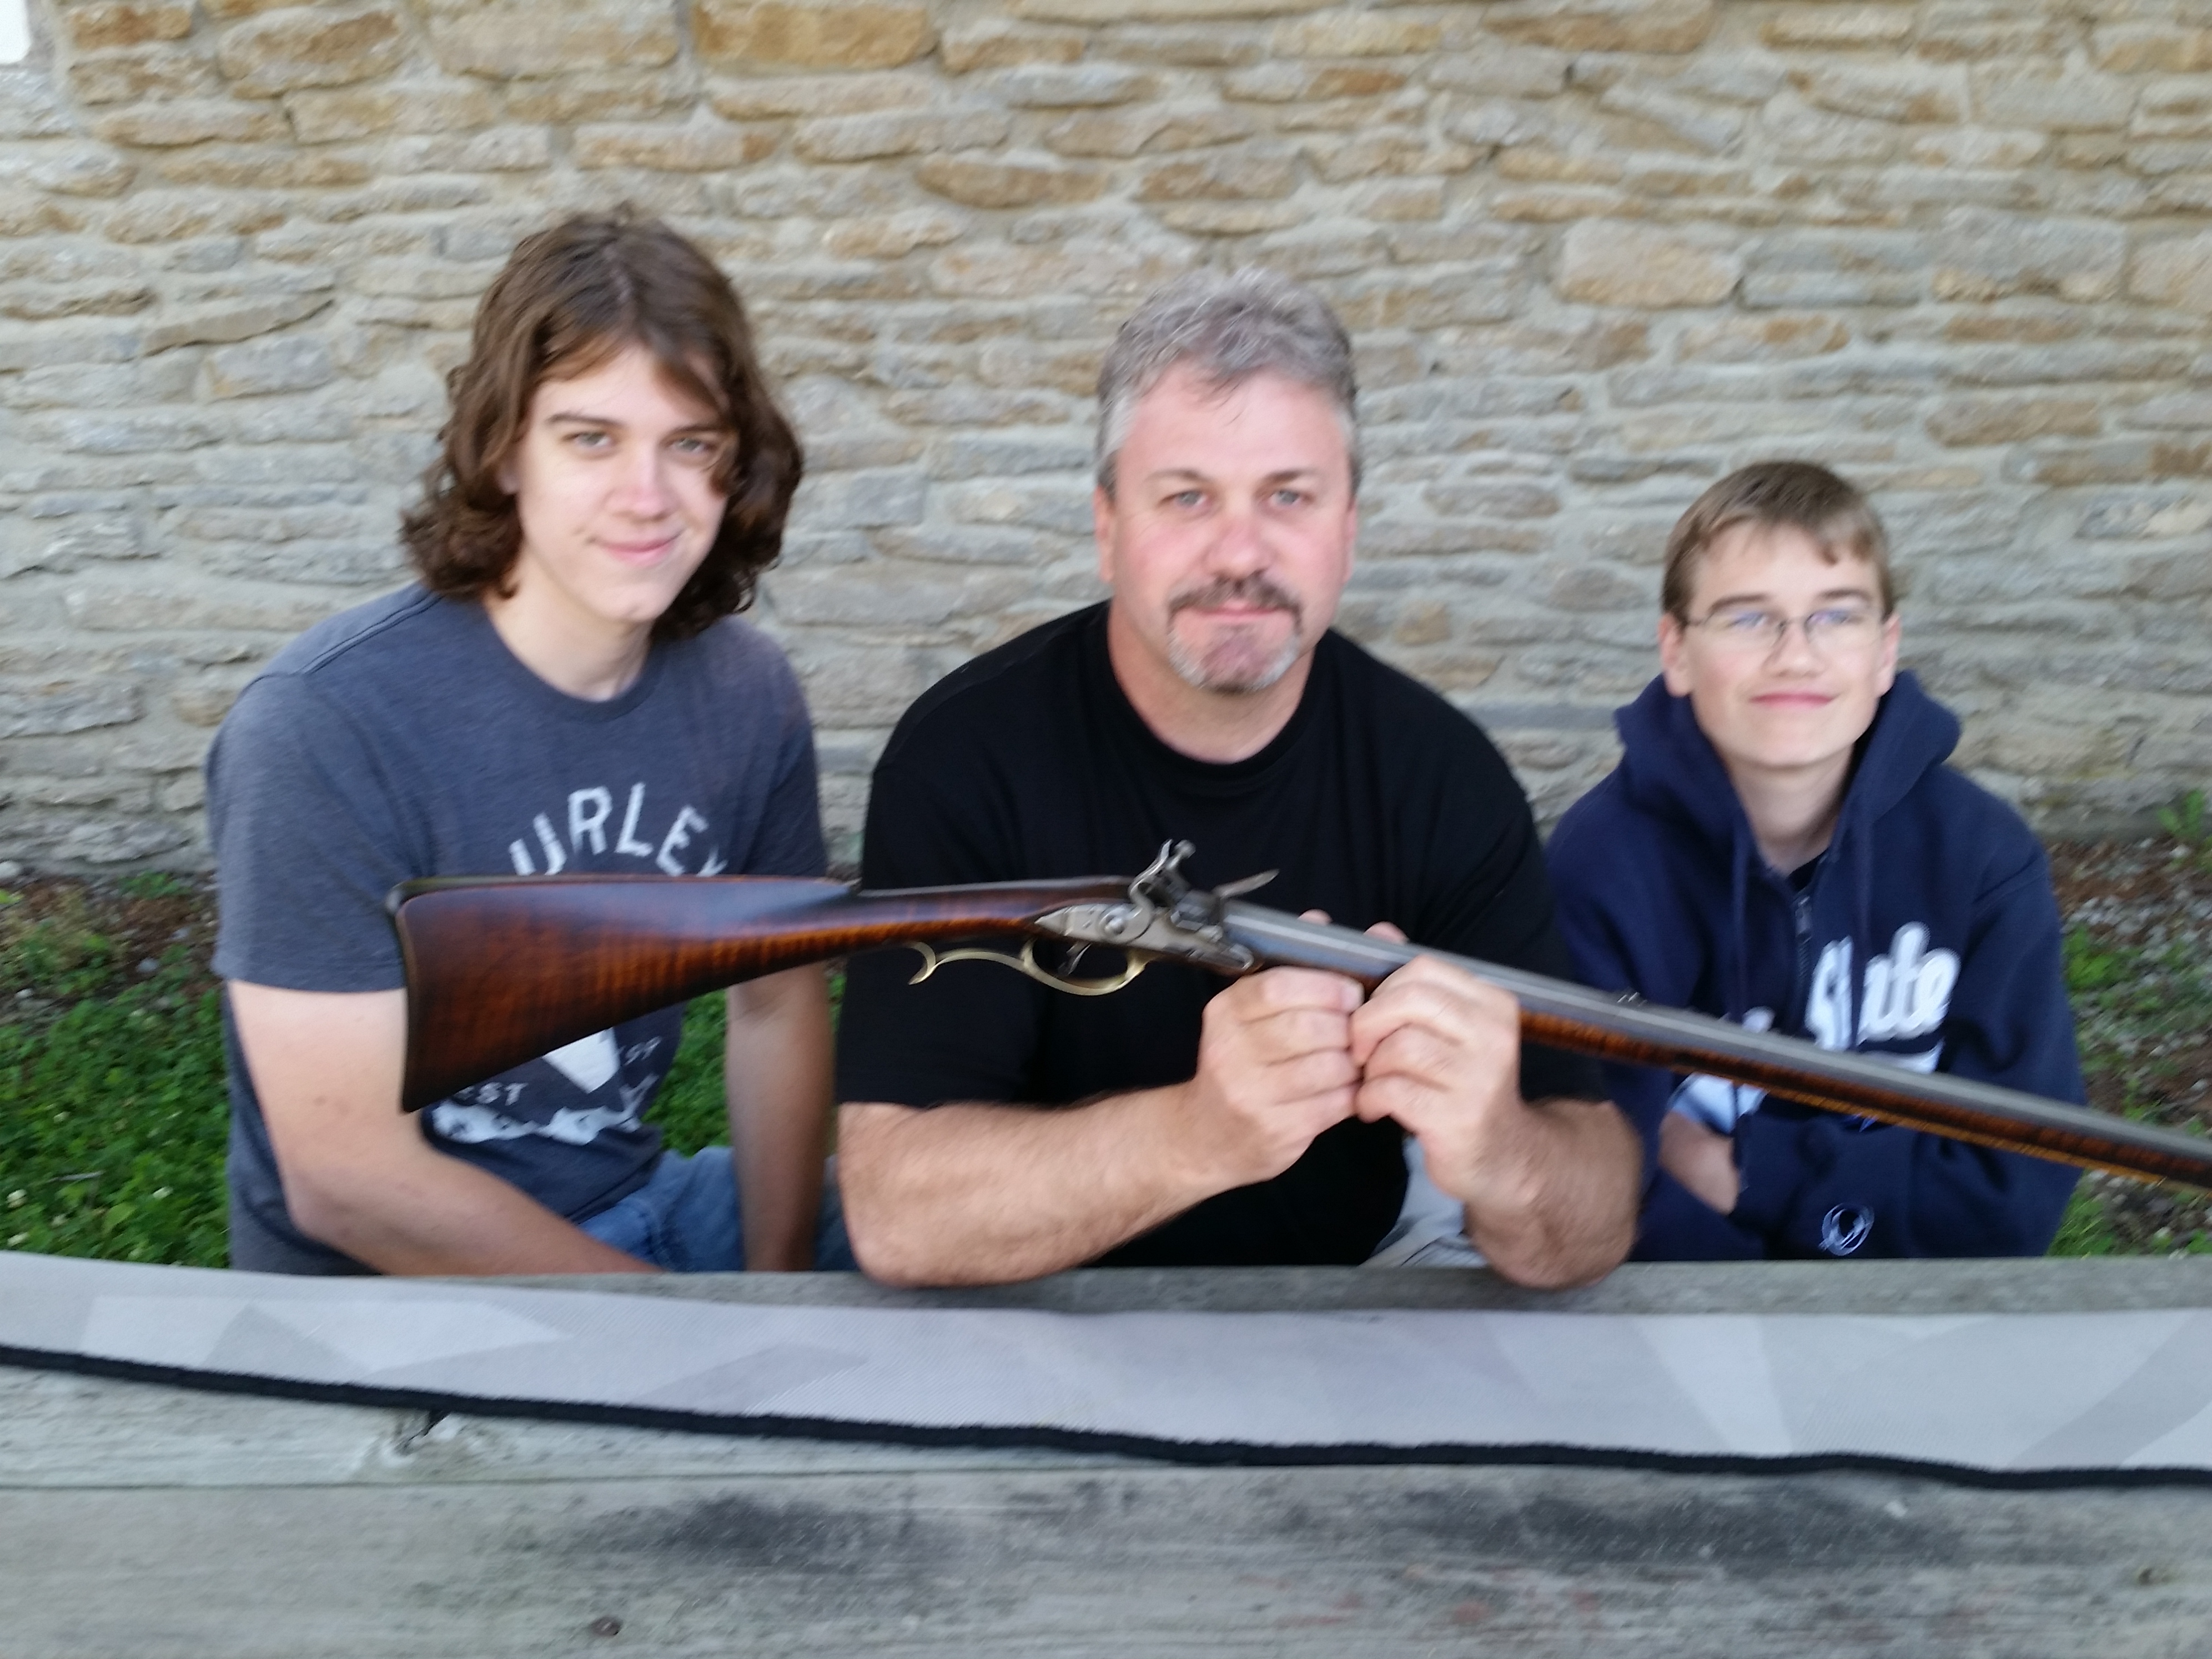
The history of this rifle began years ago when my friend Rick Shellenberger in Colorado cleaned out an old muzzleloading shop. Among other items, he brought home 2 Sharon .58 caliber rifle barrels. Both were rifled at 1 turn in 72 inches. These barrels have eight lands and grooves. Rick kept one barrel and gave the other one to me.
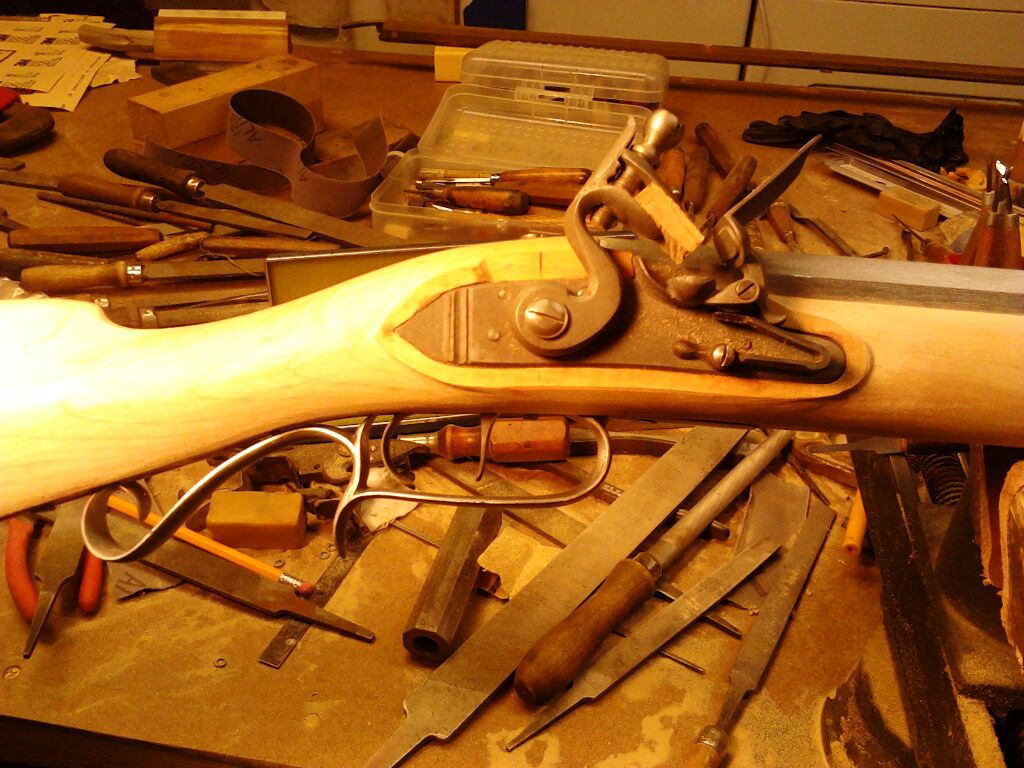
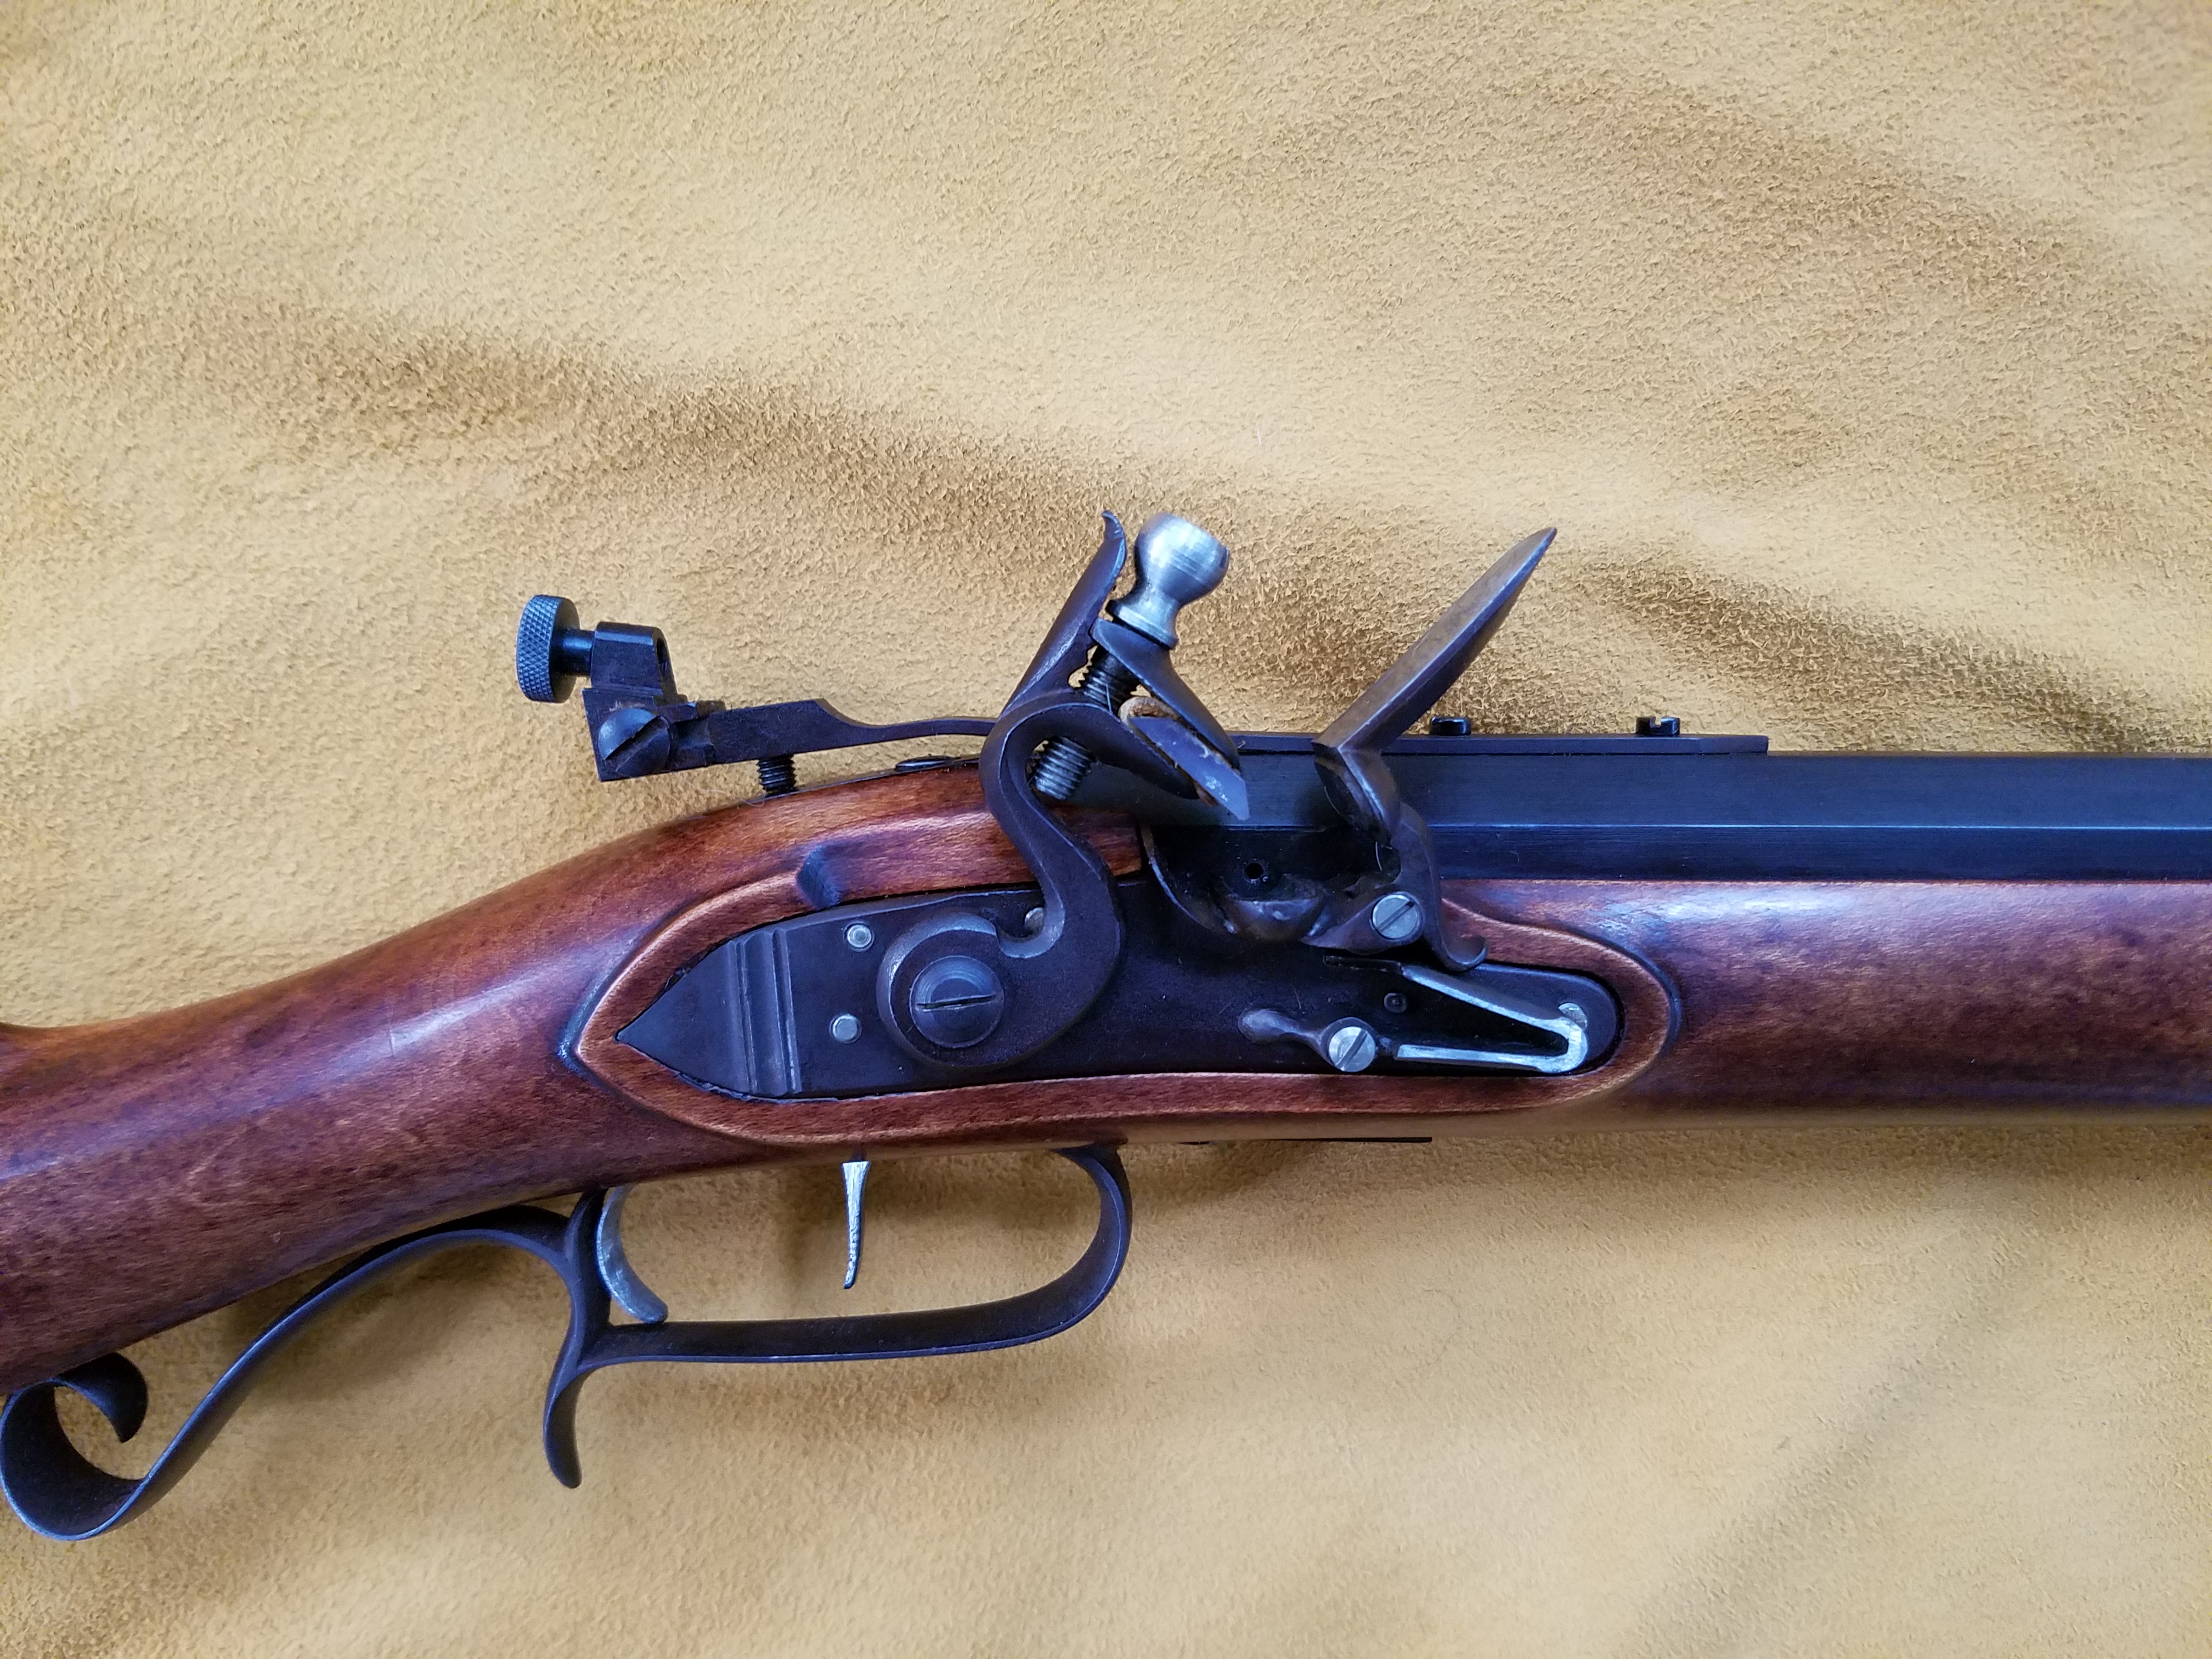
Back in Indiana, years passed until I began collecting parts to complete the rifle. My friend Steve Chapman gave me hard maple rifle stock. It was a half stock with a 1 inch barrel channel and a mortice cut for an L&R lock. Steve suggested we look for an L&R lock that matched the mortice, and both of us like Davis triggers. I bought parts at the Friendship spring shoot, and Steve took them back to his shop.
Steve knew that time wasn’t a factor, and had a number of other gun-making projects to finish ahead of mine. When he began to work on the gun, a couple decisions were made. One decision was to use Tom Snyder’s vent coning tool to make the vent. This process consists of drilling a 1/16″ hole, inserting Tom’s threaded pin, and installing the cutter through the open breech. We used a cordless drill to cut the internal cavity. The cavity is very similar to Jim Chamber’s vent liners.
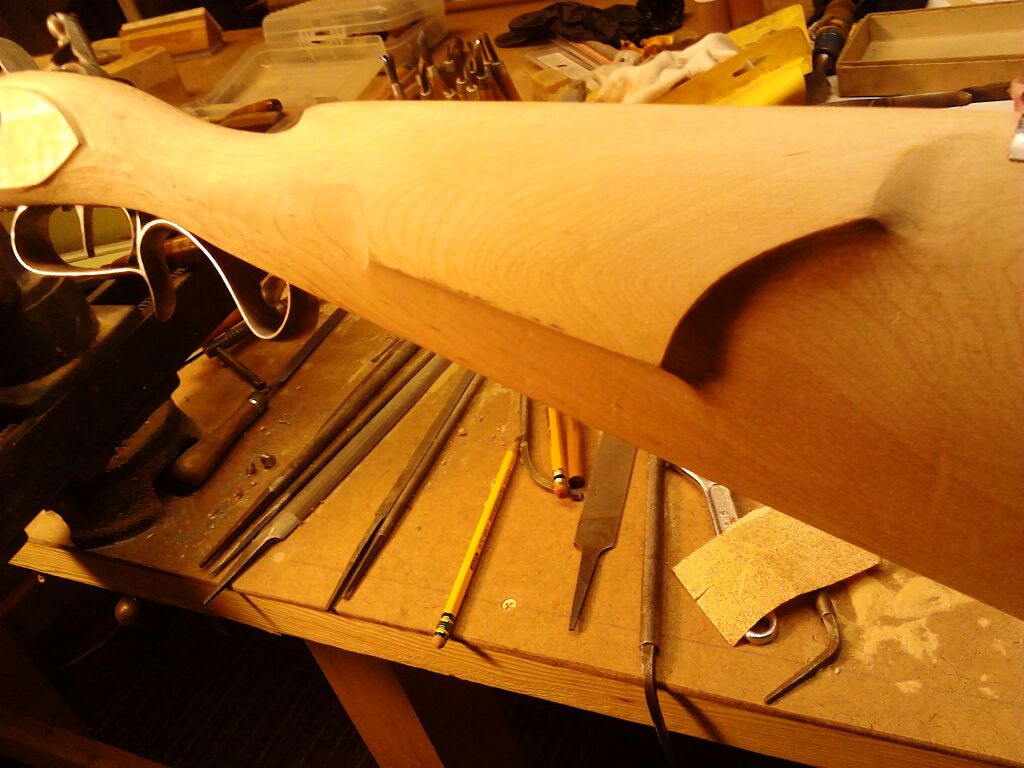
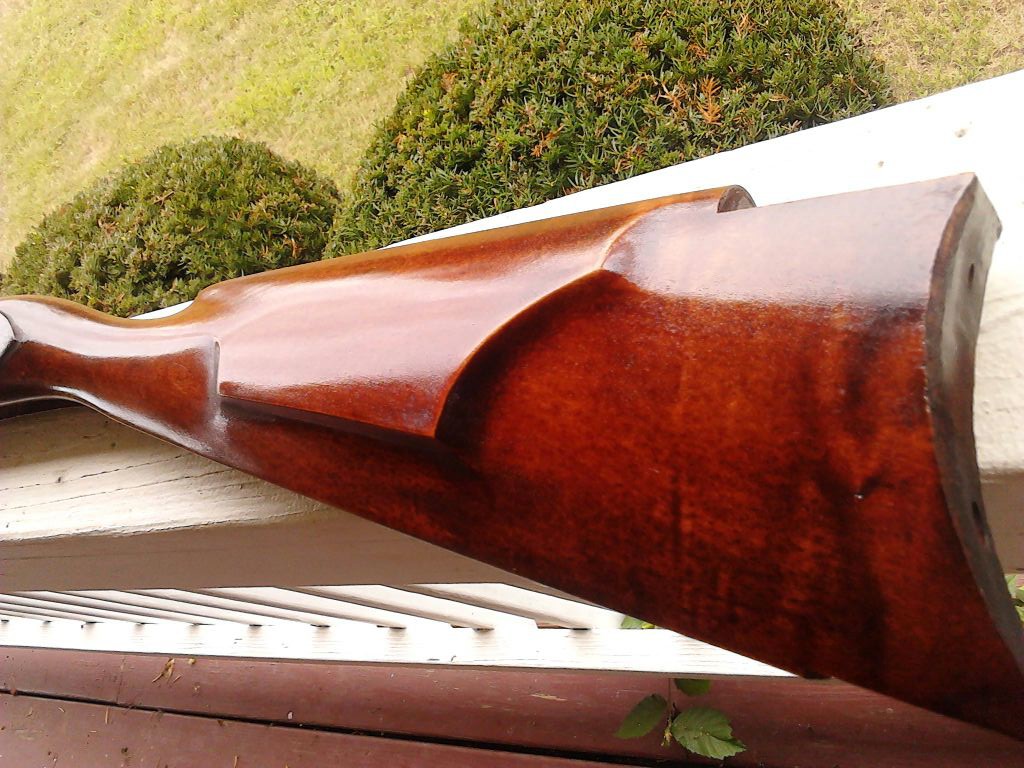
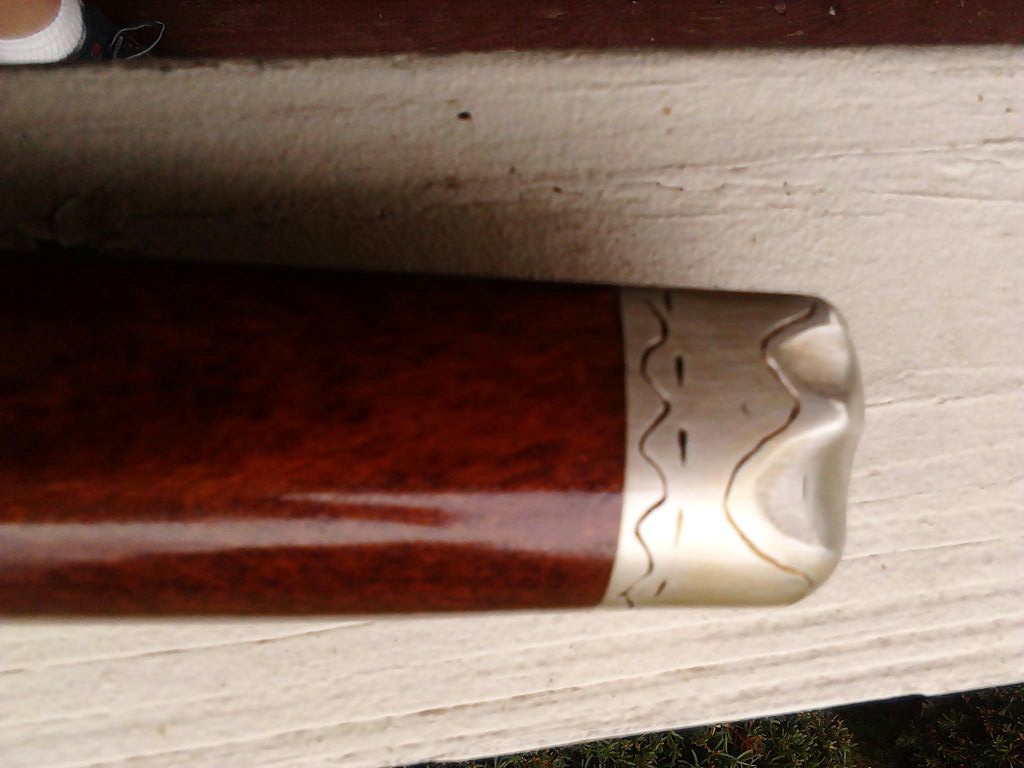
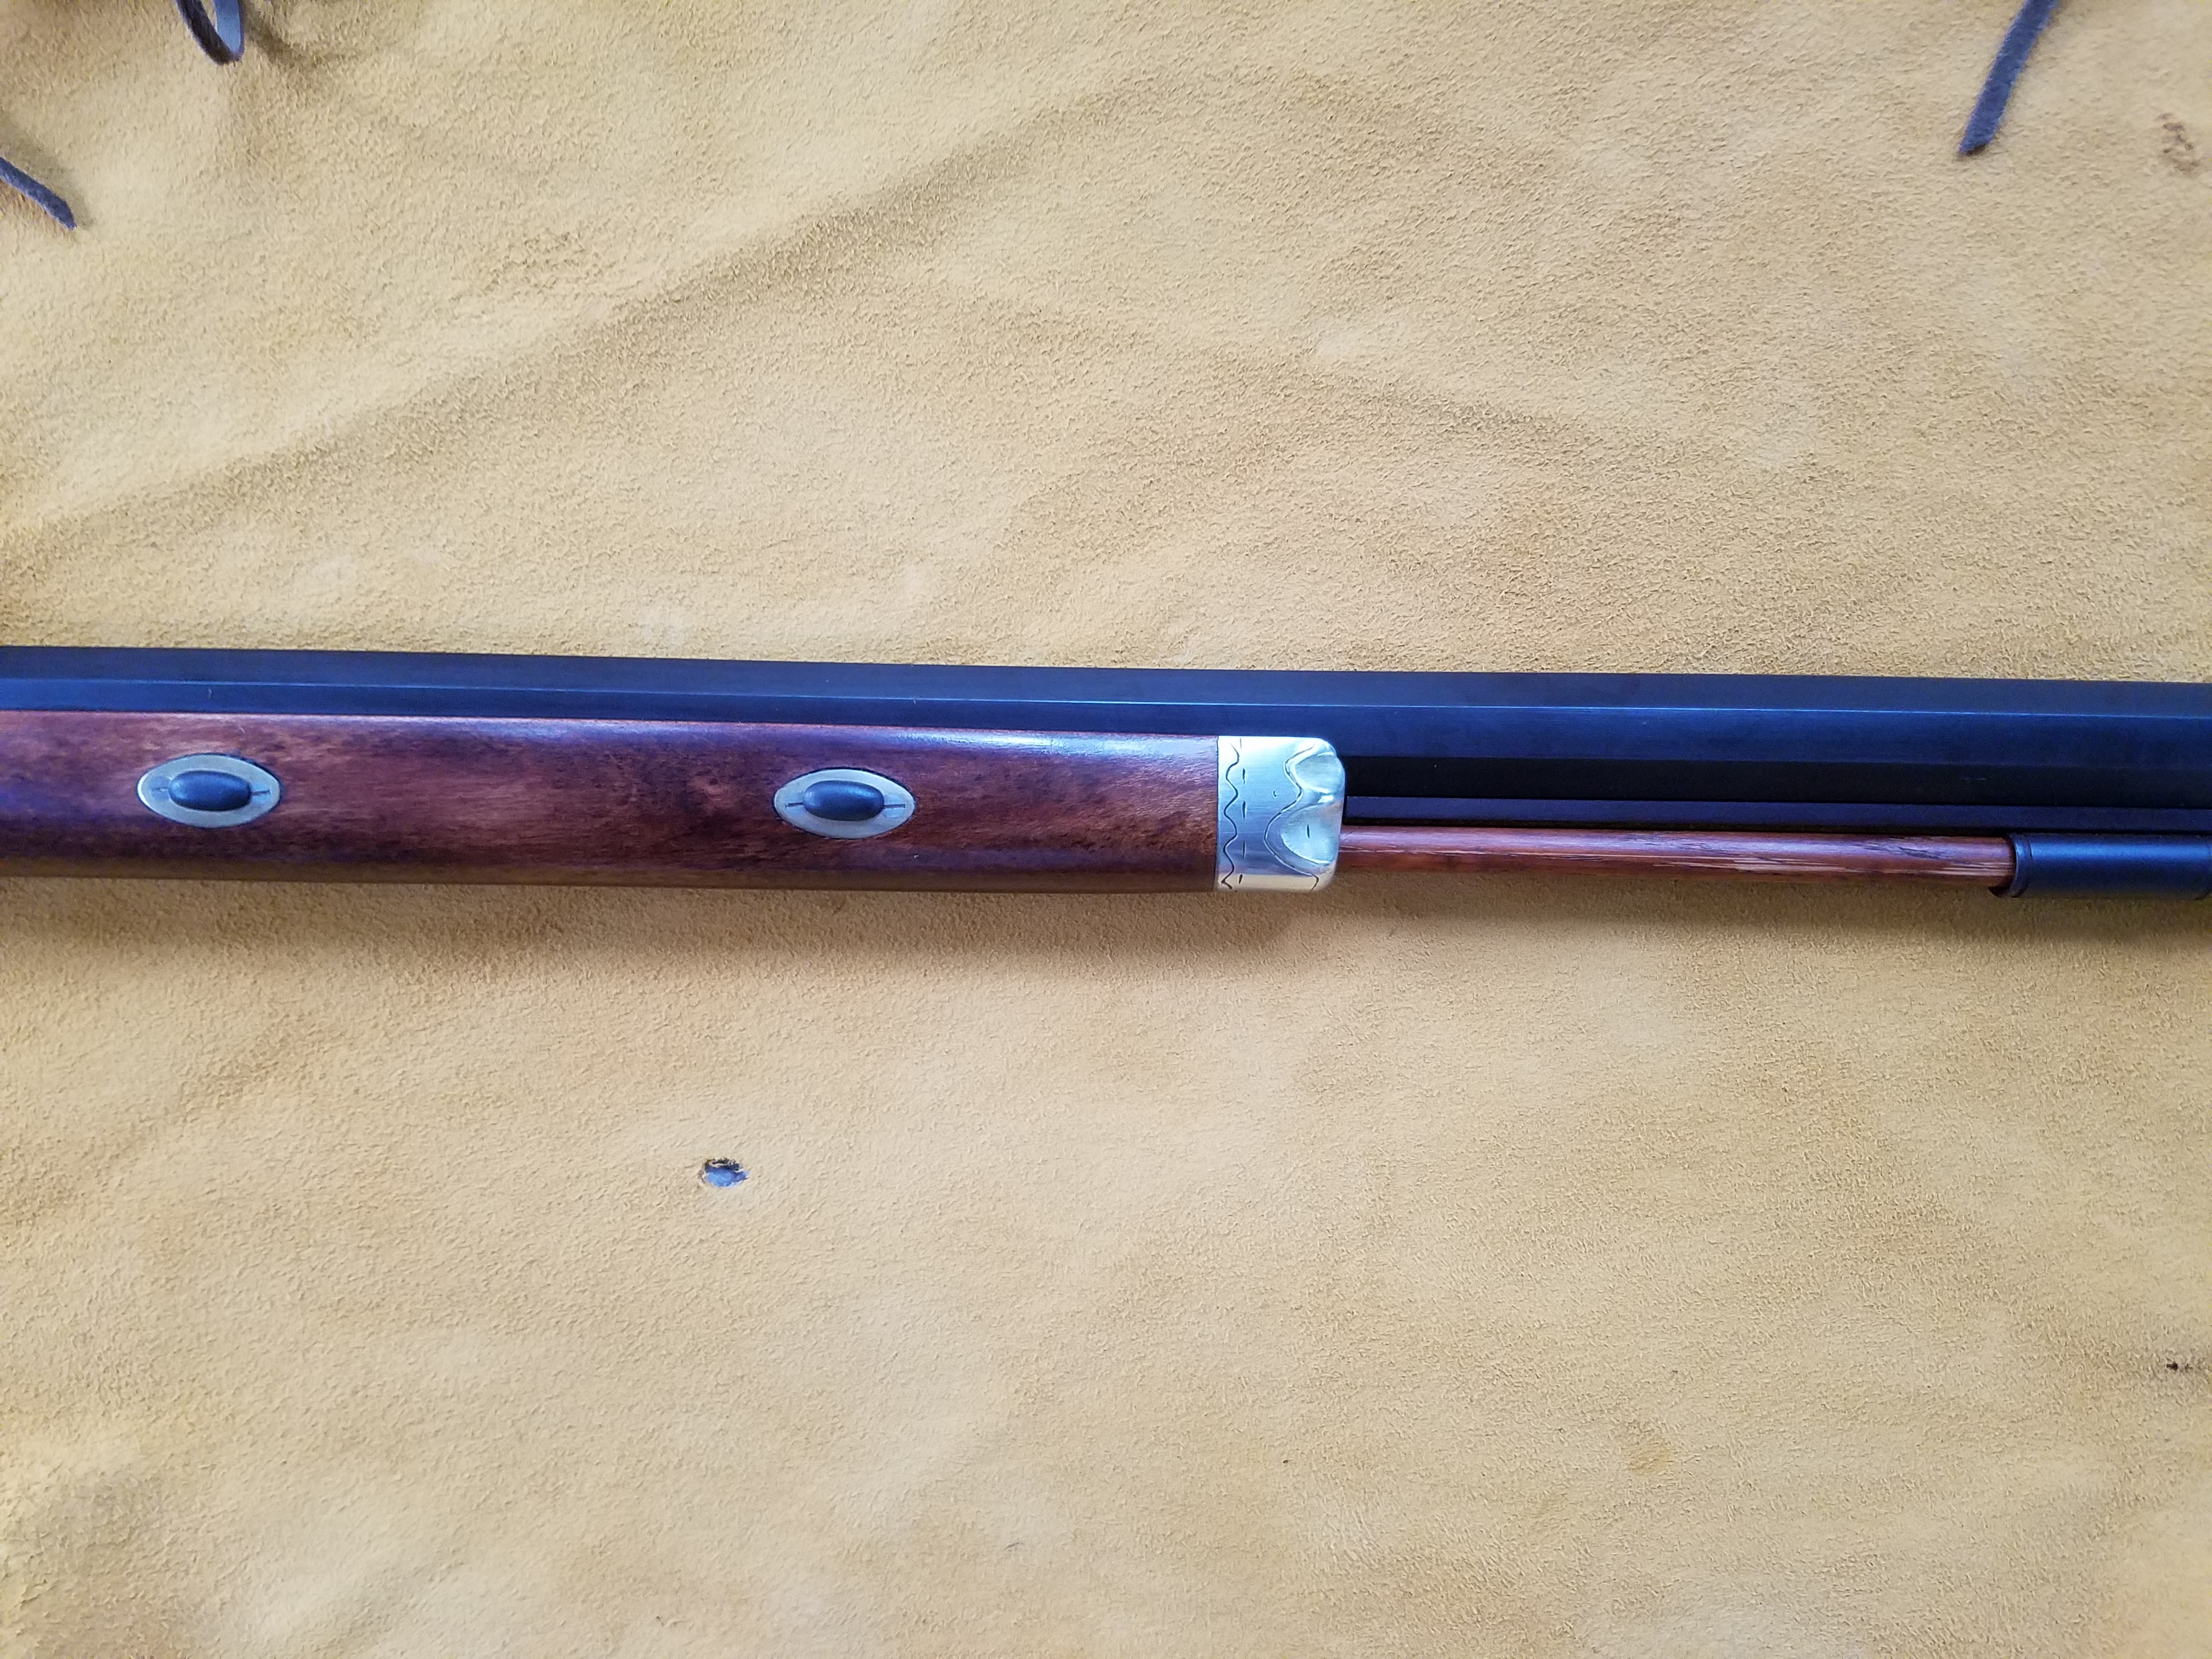
The barrel was shortened to 32 inches as stock proportions were considered. Considerable wood was removed to give the rifle much better lines. Steve poured a very nice pewter nose cap. A removable aperture rear sight was used to help a pair of 70 year old eyes.
The finish used on the stock was a mixture of stains that Steve likes, and I like the way the stock turned out. I didn’t quiz Steve on the exact mixture, but I know that it was a mixture of Homer Dangler’s stains.
When the rifle was finished, we went to the Stones Trace range to sight it in. With the rifle shooting to point of aim, we played with powder charges. A Swiss load of 90 grains of fffg gave us almost 1700 feet/second. I expect that a load of ffg may be found that will give similar velocities with less pressure. At this writing, I expect to experiment with different powder brands and grain sizes. Right now it is a potent rifle at both ends.
As we finished up our chronograph session, Steve said, “ Since this gun puts the ball at the top of the front blade, you could head shoot squirrels with it, or bark them.”
I said, “Well maybe not with 90 gr. of Swiss fffg.”
“Yah,” Steve said. “Wonder what it would do with a squib load, like maybe 30 gr.”
So, we chronographed a 30 gr. Swiss load of fffg. This load drove the 280 grain ball an average of 870 fps. Maybe we need to think lower for a squib. On a whim, we also clocked a load of 30 gr of Goex. It averaged less than 500 fps. This does seem more squib-like.
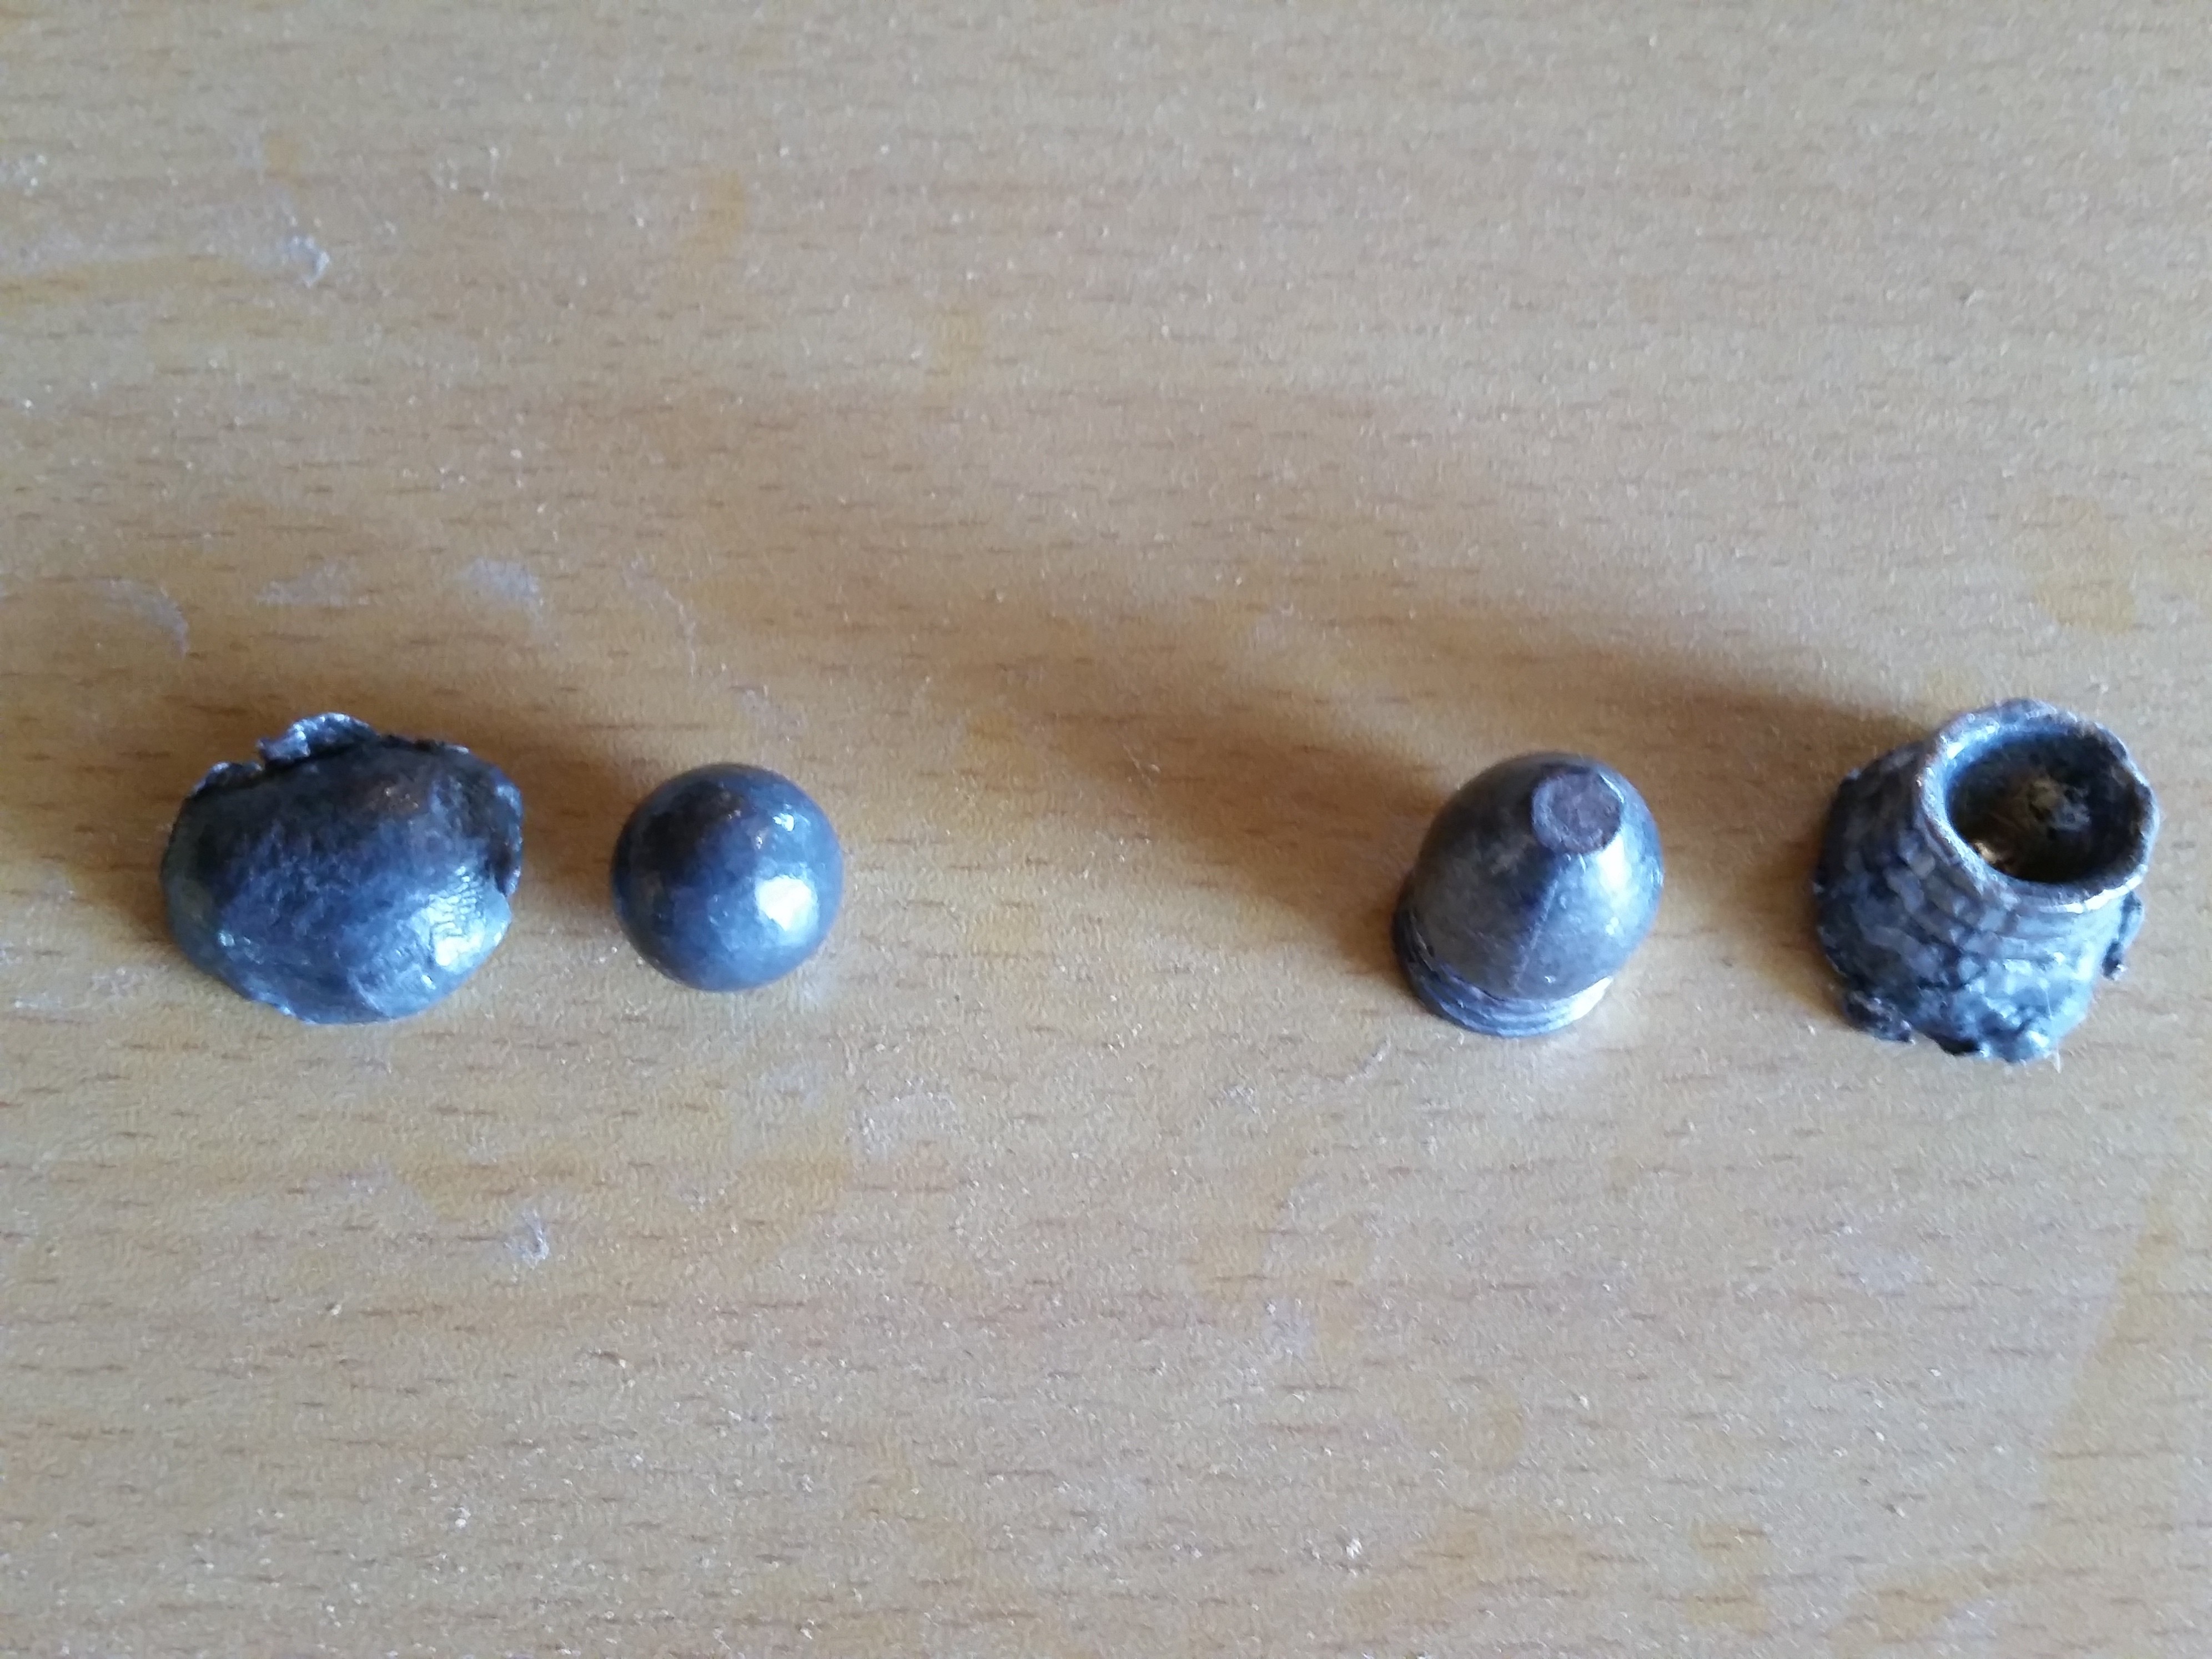
As a side bar, my friend Rick in Colorado stocked a rifle with the other .58 barrel that I mentioned at the beginning of this post. Rick wanted to recover a ball to see how much it expanded. During my time visiting him, we filled a garbage can with water and fired a 90 gr ffg load down into the can. The garbage can split down the side, but we did recover the ball. We taped the can together as best we could and fired a .58 cal. mini ball. Below is a pic of the expanded ball with the mini ball before and after. These rifles will make a big hole in about anything in North America. If my health and physical condition permitted, this would be the gun I’d use for elk.
Back here in Indiana, Steve and I will need to do some form of Rick’s water experiment. We haven’t decided what we want to destroy, but it will be something filled with water.
Steve Chapman is a close friend with rifle-making and machinist skills. We have worked on many projects and experiments together. Whenever a project needs more hands, Steve is the person who helps. He usually pulls the trigger in any test that measures accuracy. While we both fired this gun for accuracy, Steve’s shooting skills have been necessary in many of our experiments. Steve’s many skills have been a benefit in many of these experimental articles.
Future tests, thoughts,etc
Thought: We might learn more from a different water test. We’re thinking of a row of milk jugs filled with water. A .308 is caught in the fifth jug. We think the .58 will do better.
Also: Build a water box to hold 1 gallon plastic bags. With this setup we could repeat tests and compare different calibers and loads. Compare the 90gr ffg Goex load and the 90 gr fffg Swiss load.

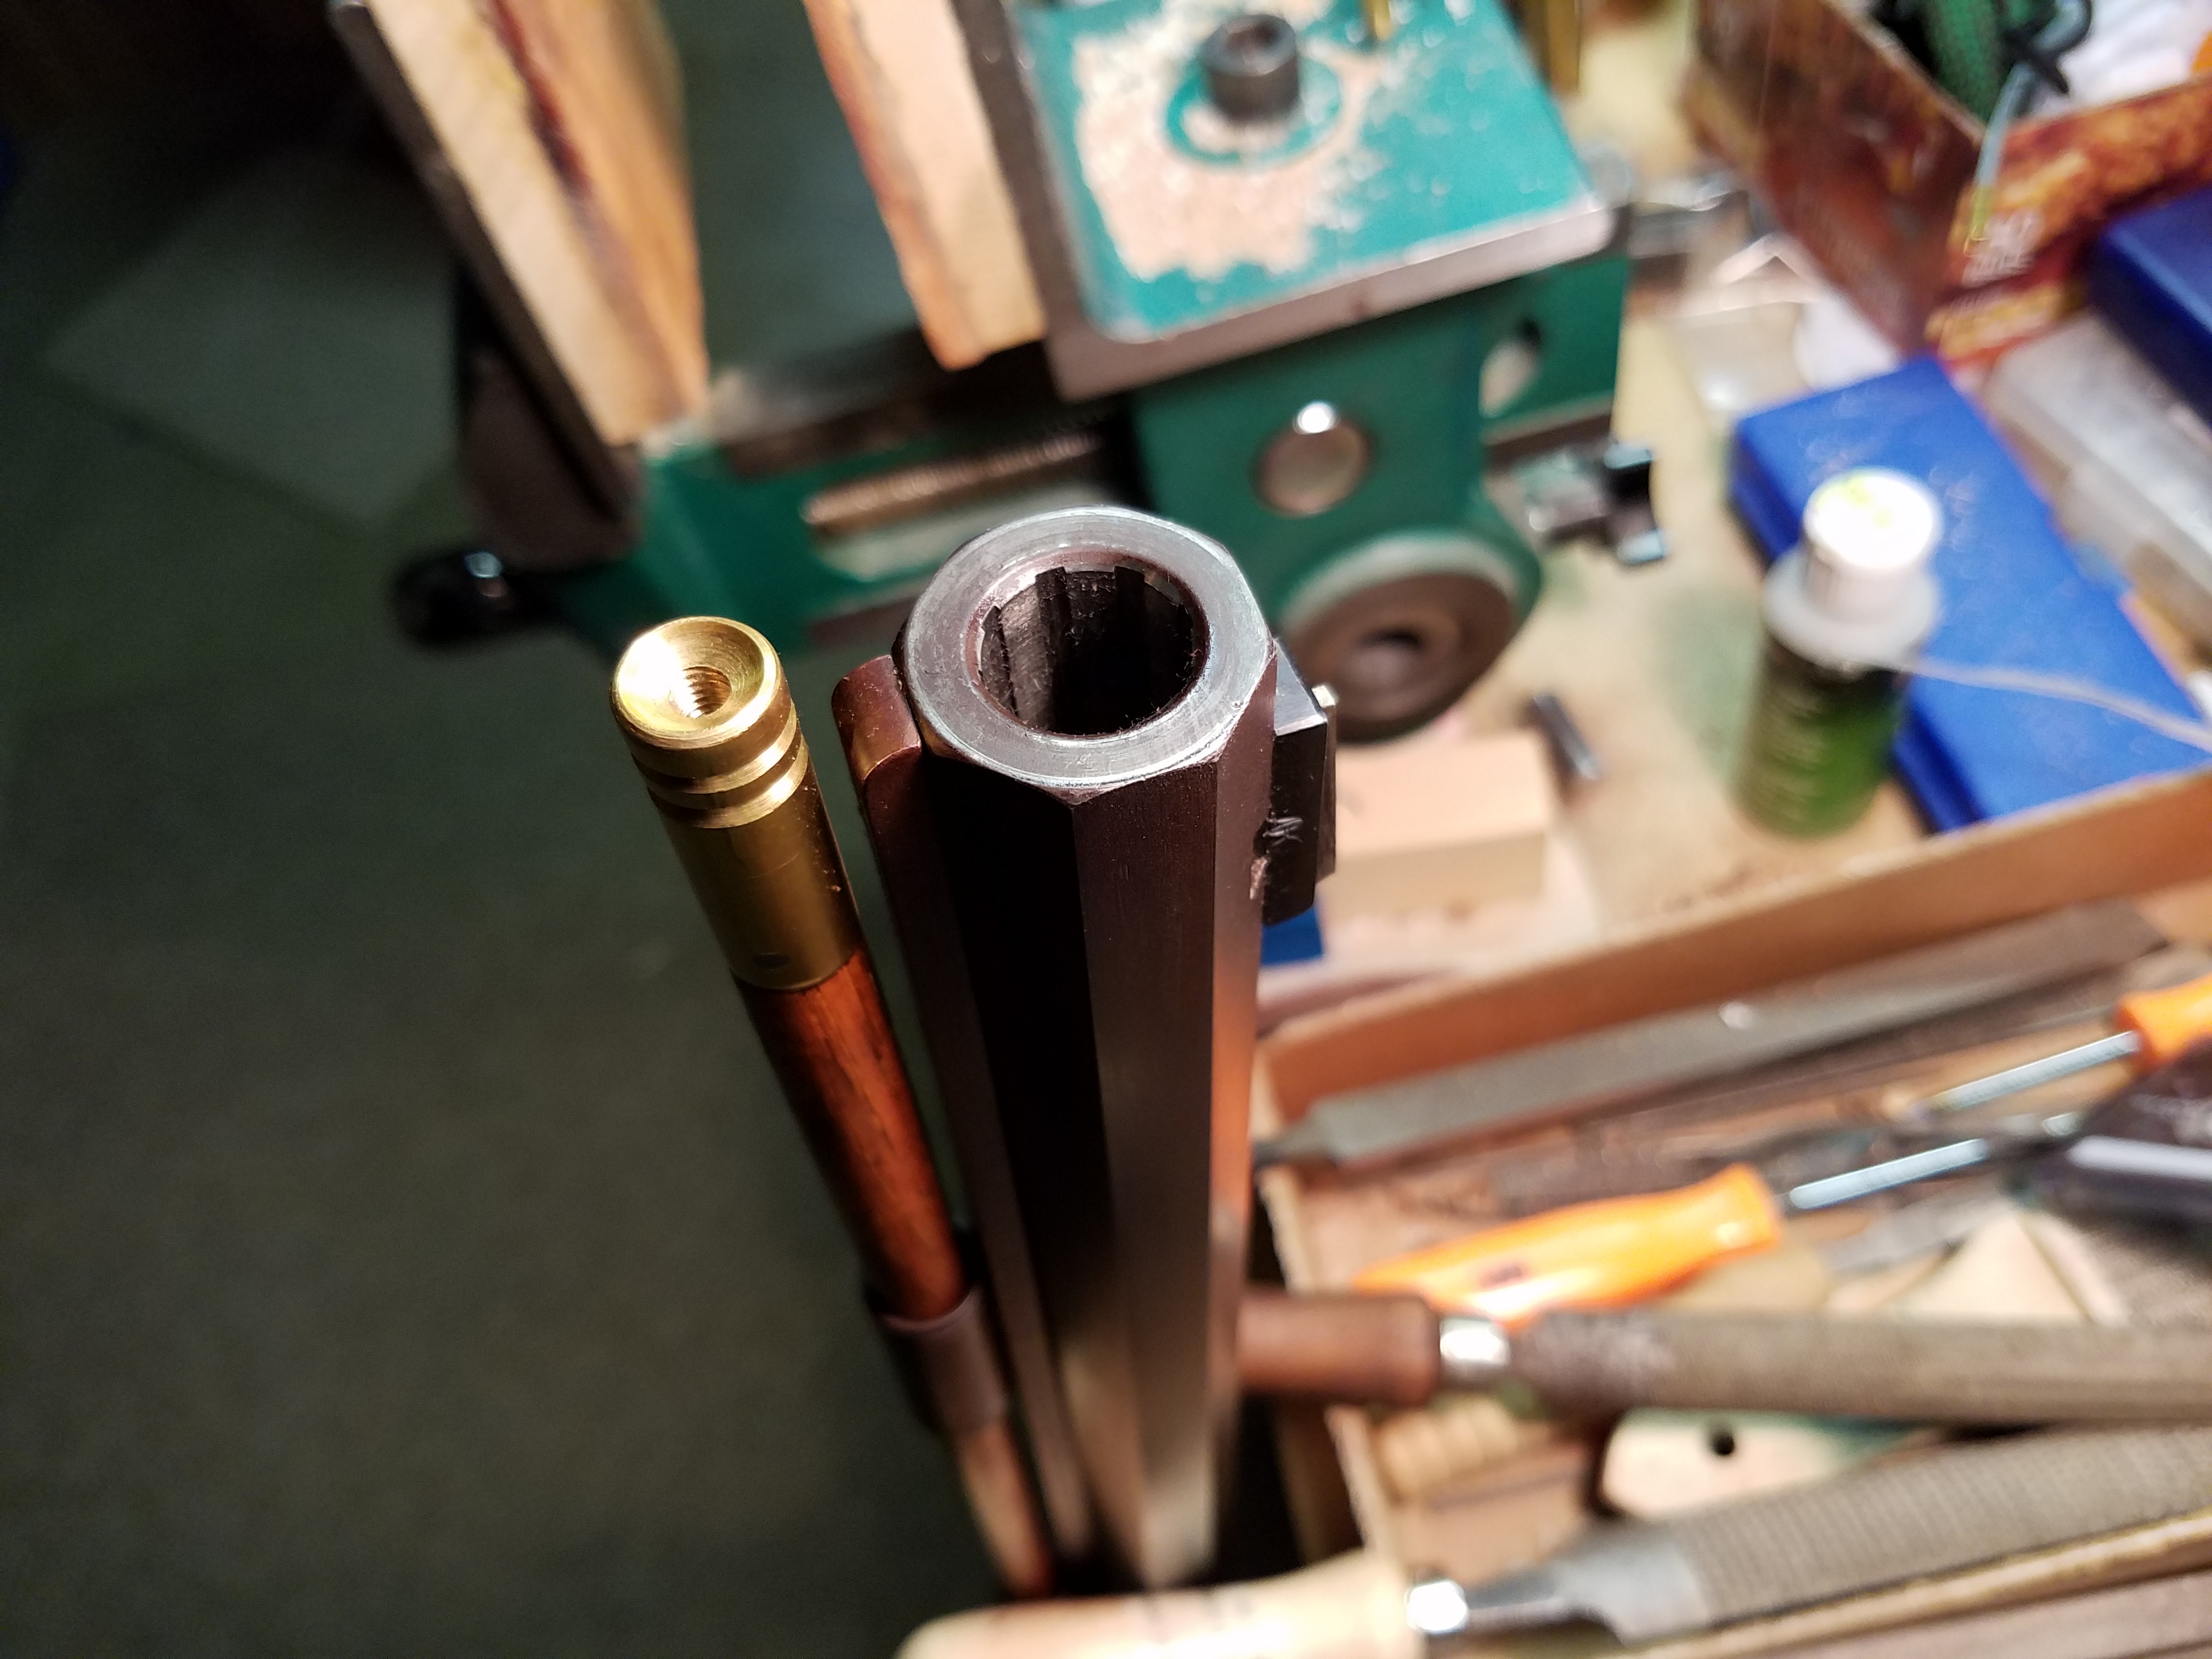
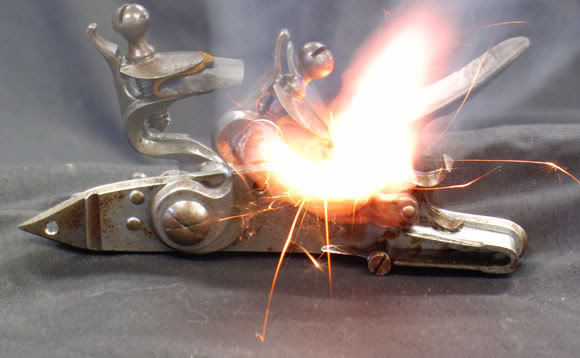
This test is a long time coming. A couple years ago at CLA, Steve Chapman and I were looking over a flint gun made by Allan Sandy. The vent Allan used had two smaller holes located horizontally. Allan said the vent was internally coned but used two .052″ holes. Allan said he didn’t know whether it was faster or slower than a normal vent. My reply was that I could time it. Allan offered to provide me a vent, and on the way home, Steve and I planned how the vent would be tested.
Time passed with many interruptions in the way. In the meantime Fred Stutzenberger entered the picture. I believe Fred saw the “double-hole vent” on Sandy’s table at the same show that we did. Fred however, was more prompt than we were and published an article on the vent in the August 2014 issue of MuzzleBlasts.
Without great detail, Fred’s article compared Allan’s double-hole vent with a single-hole vent that had the same area as the sum of the two smaller vents. His findings showed that shots fired with the double-hole vent had slightly higher velocities than the single-hole vent even, though the vent area was the same. The “choked-flow principle” (comparing circumference to area) is the likely cause. Fred explains this better than I do; please read the article.
Our testing focused only on ignition speeds. We compared ignition time of the double-hole vent (two .052″ holes) and the single-hole vent (.073″) Both vents have the same area, but vary in their circumferences.
The main question I have is, “If the choked flow principle tends to restrict flow leaving the vent, might it also restrict flow entering the vent, causing slower ignition?”
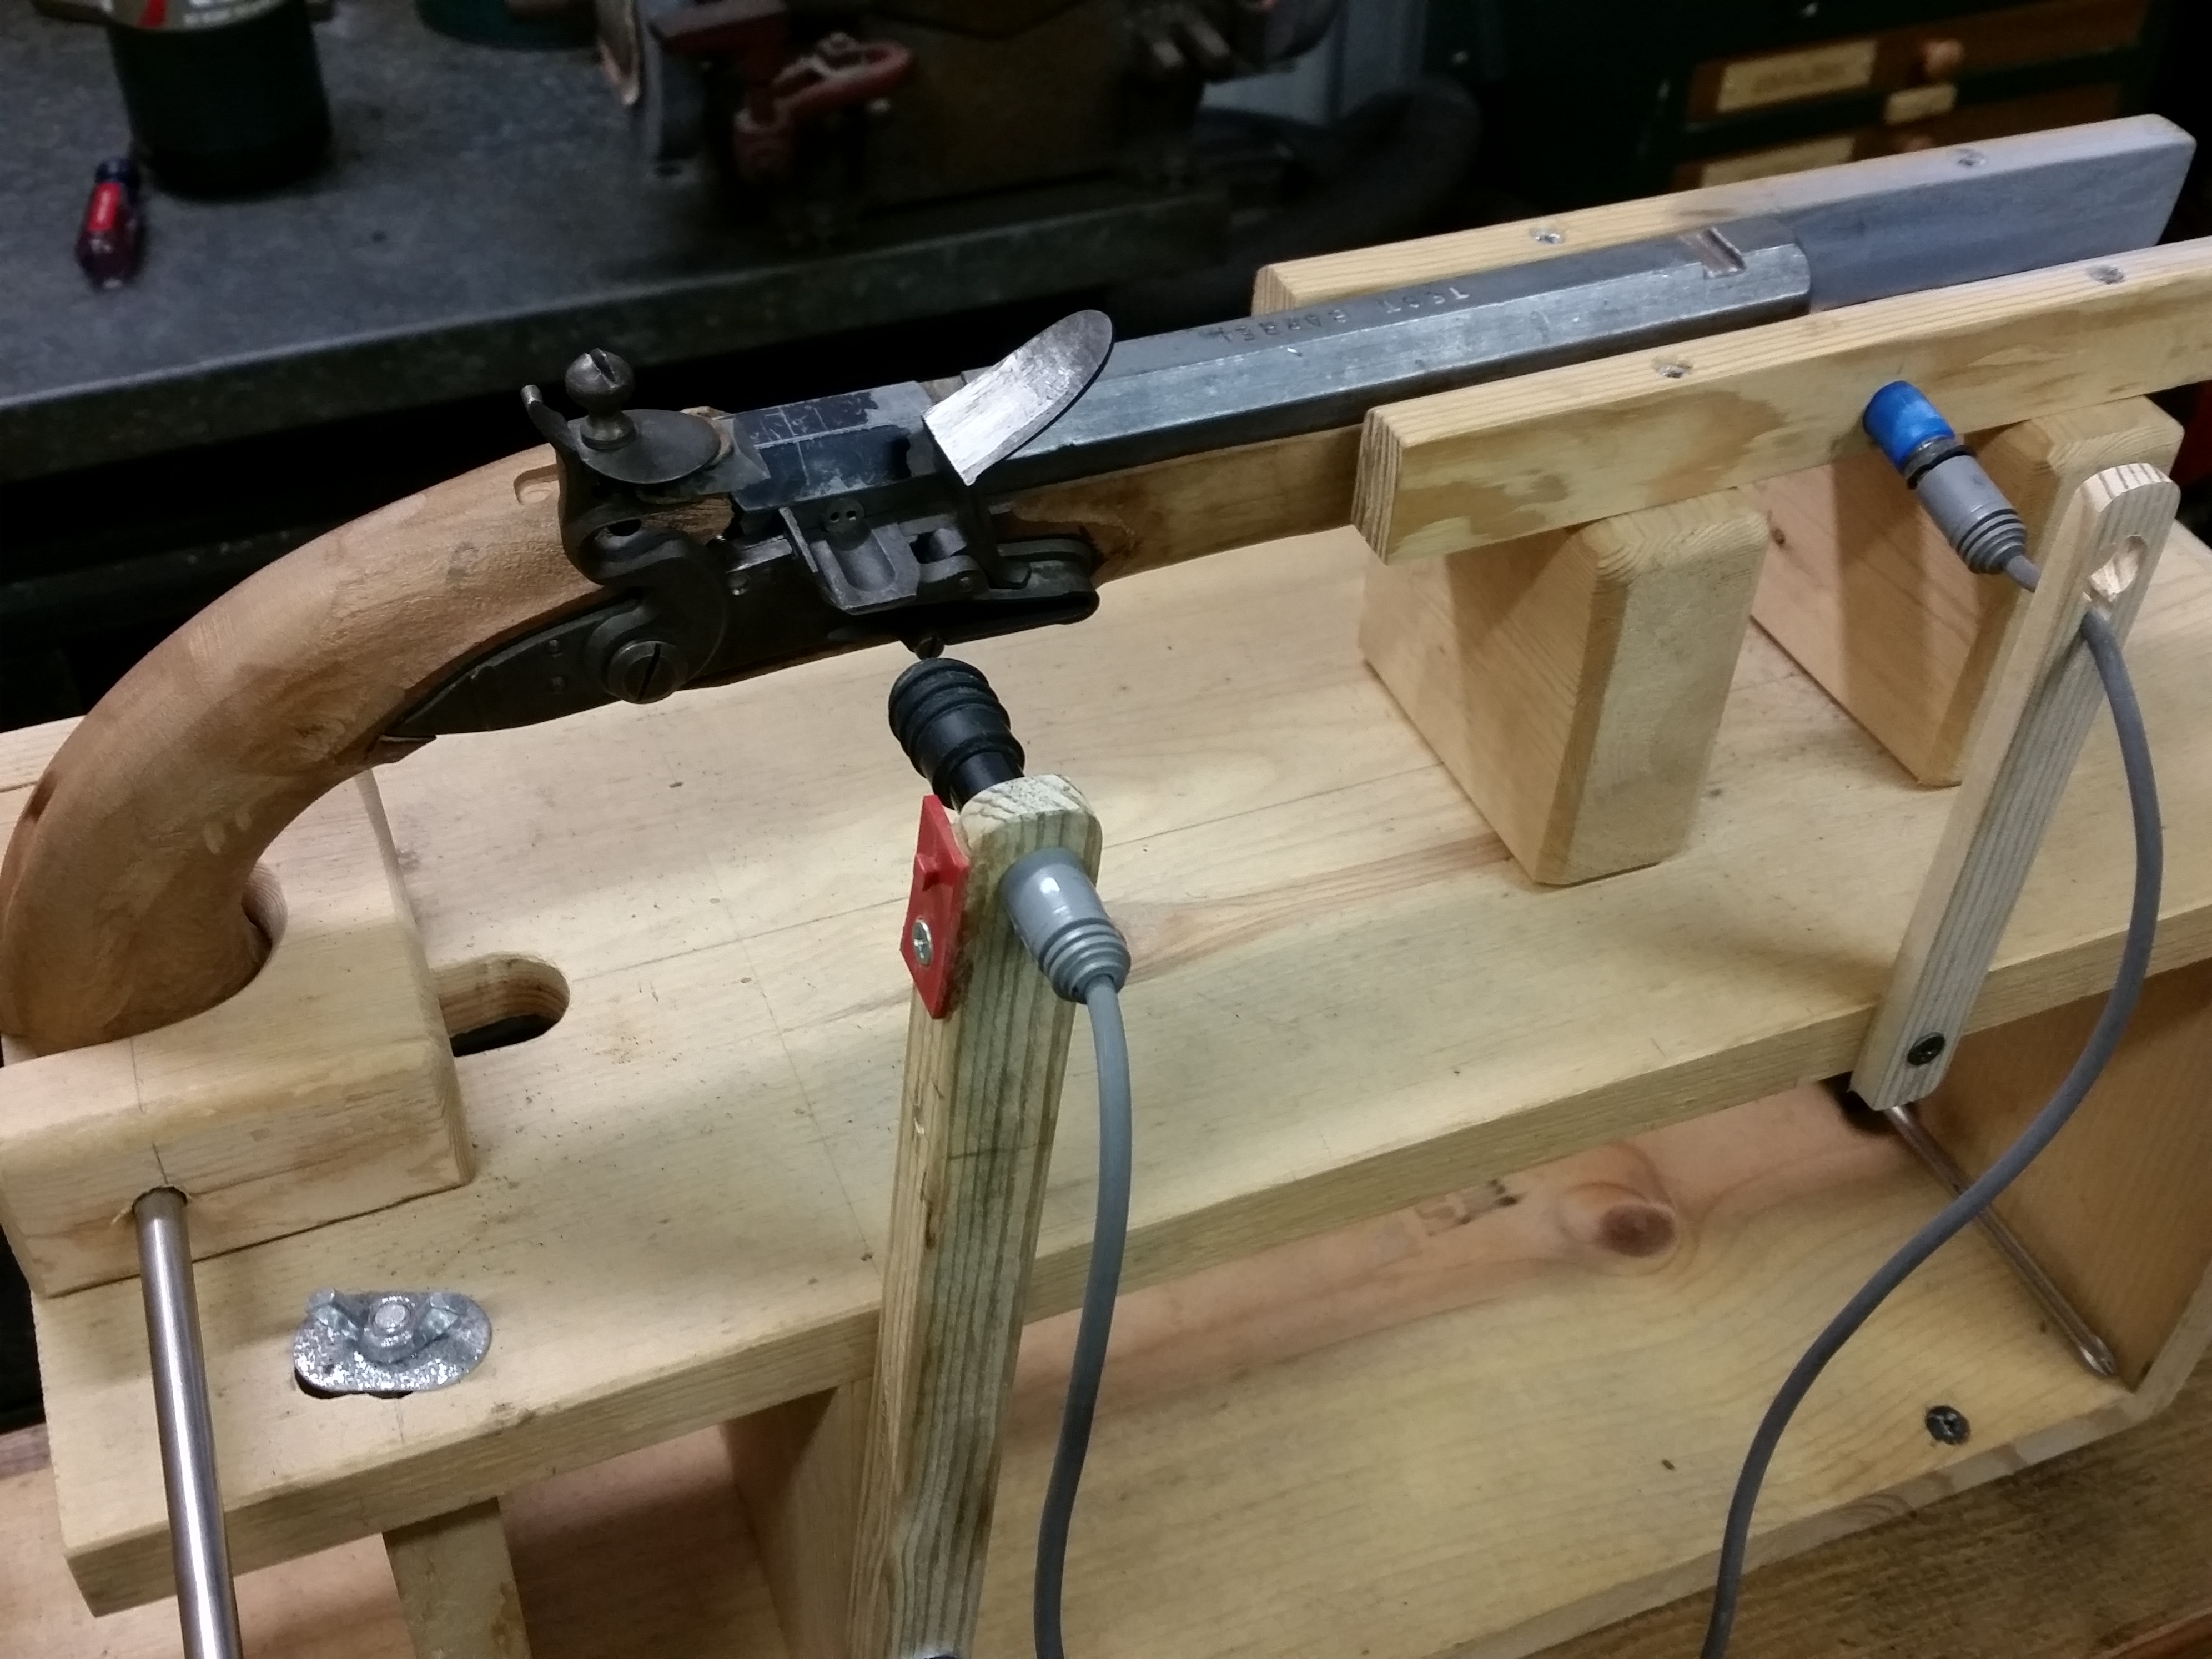
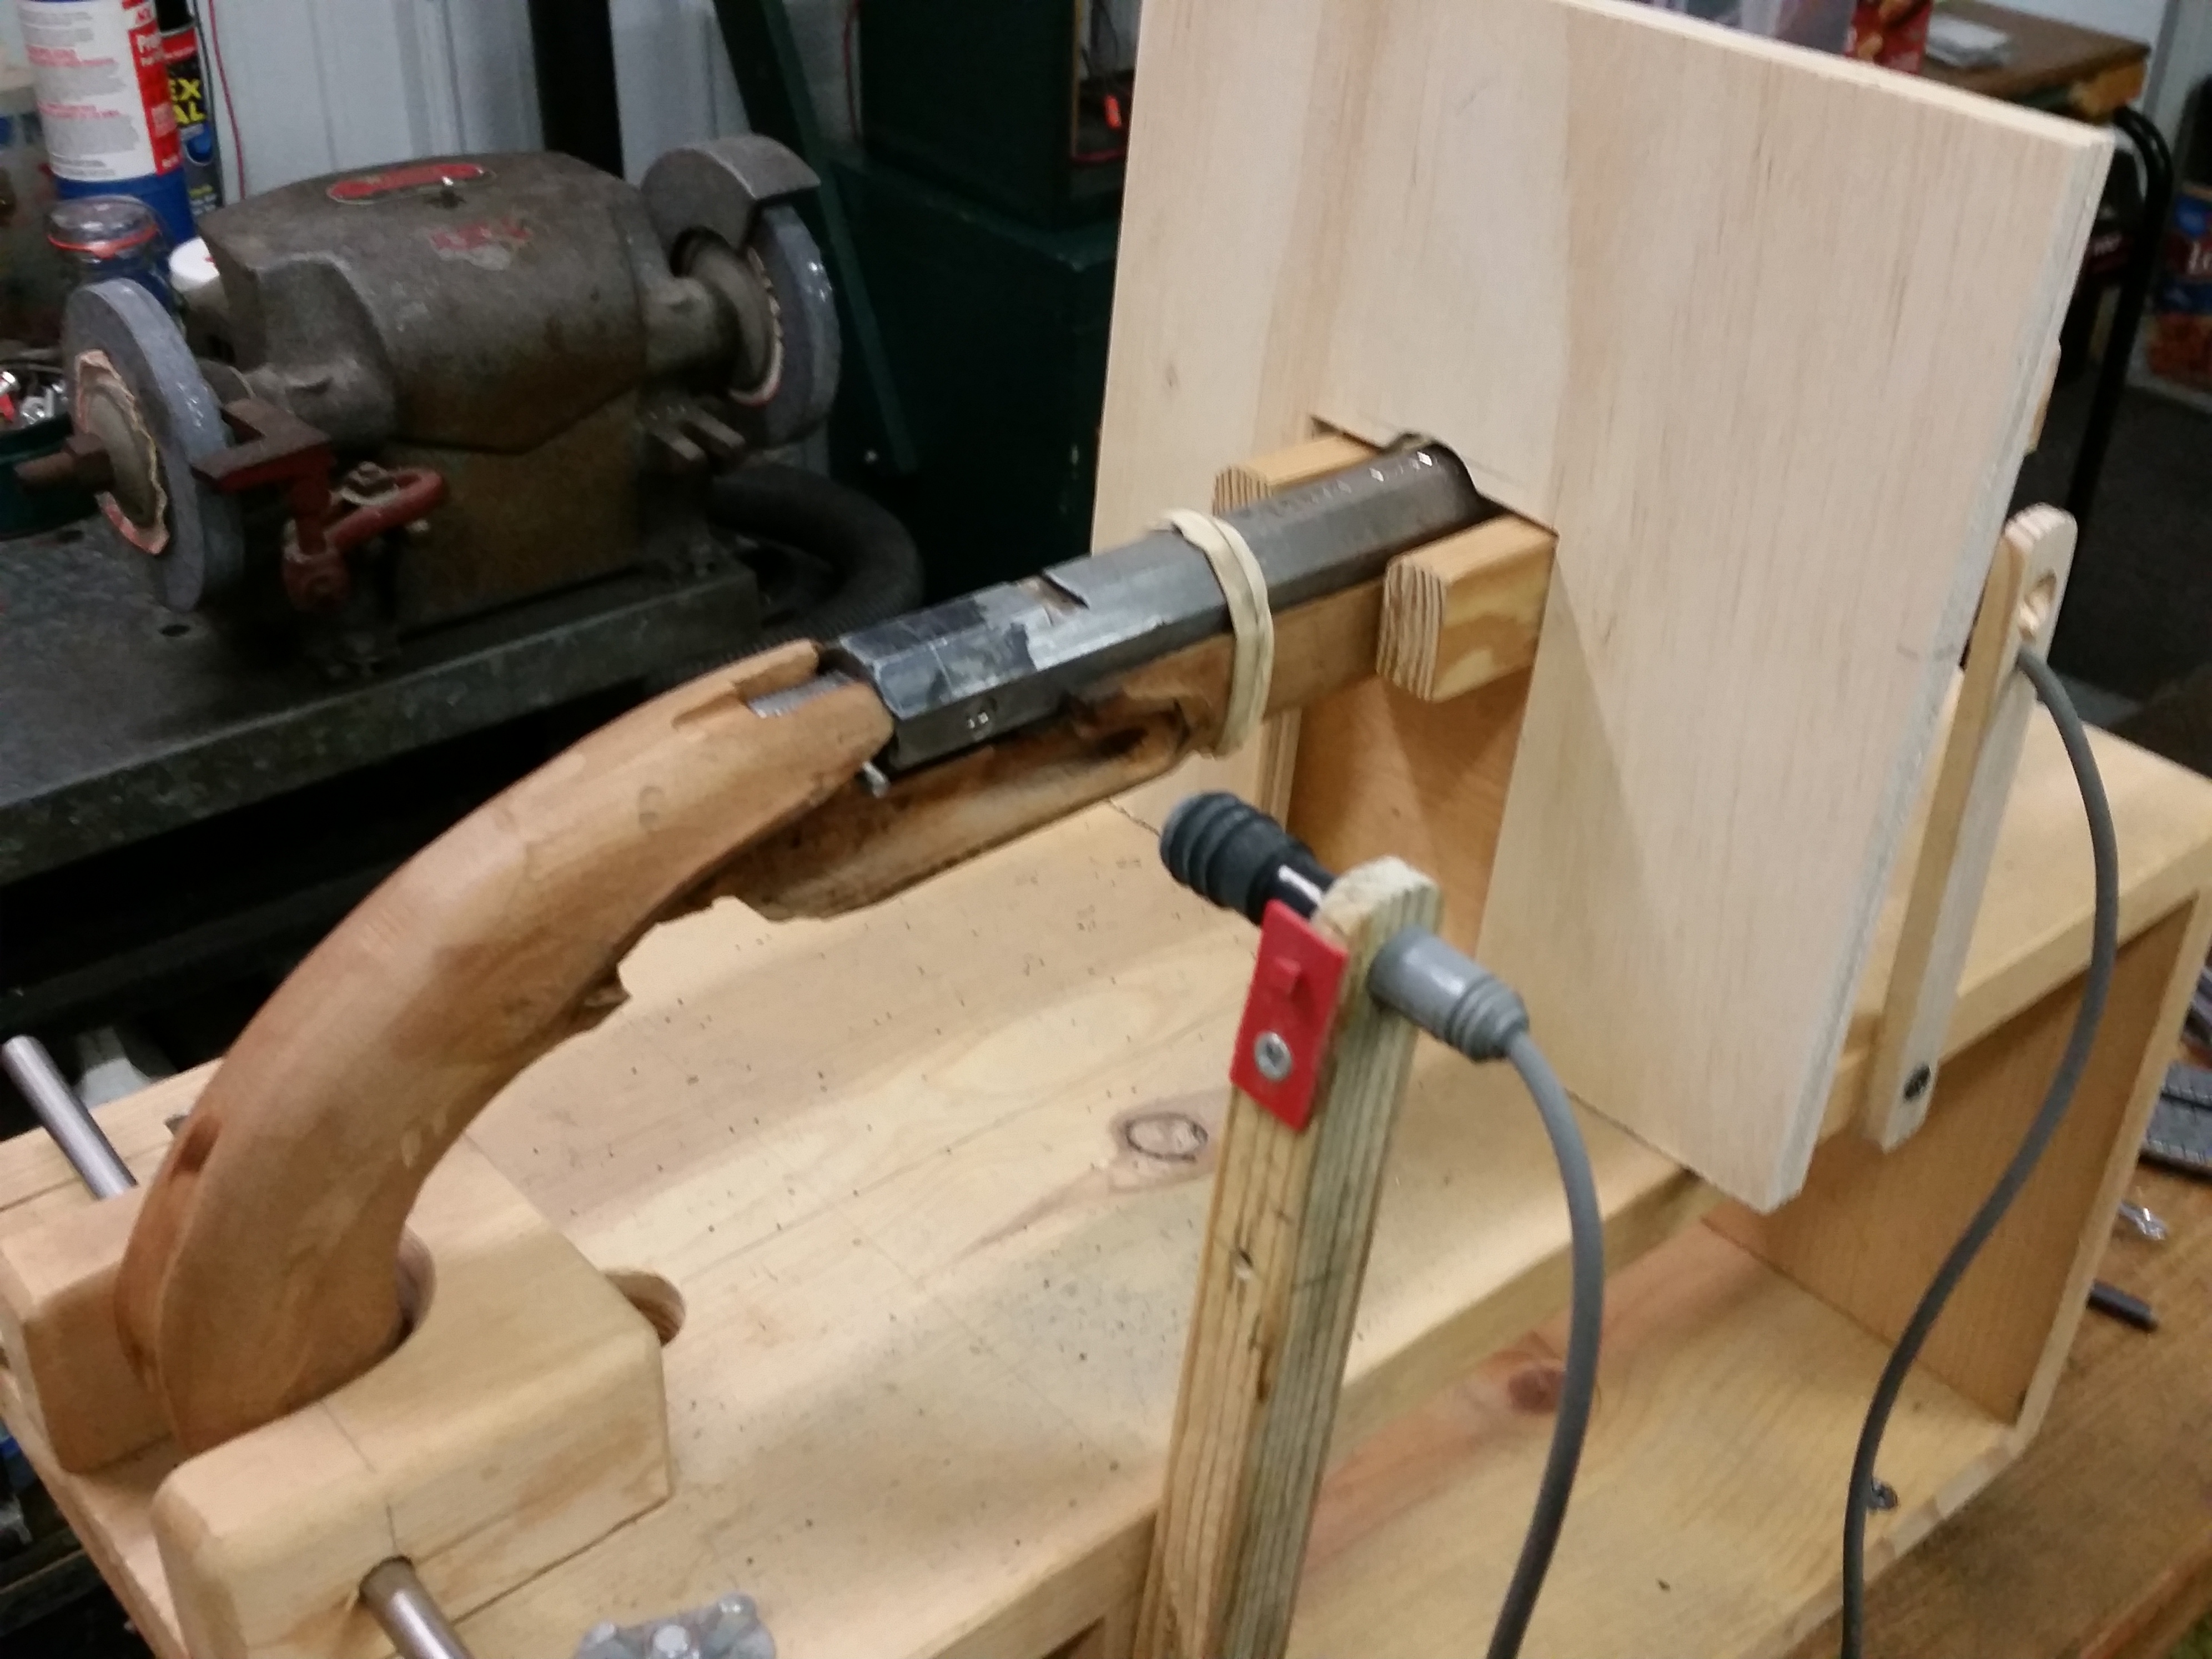
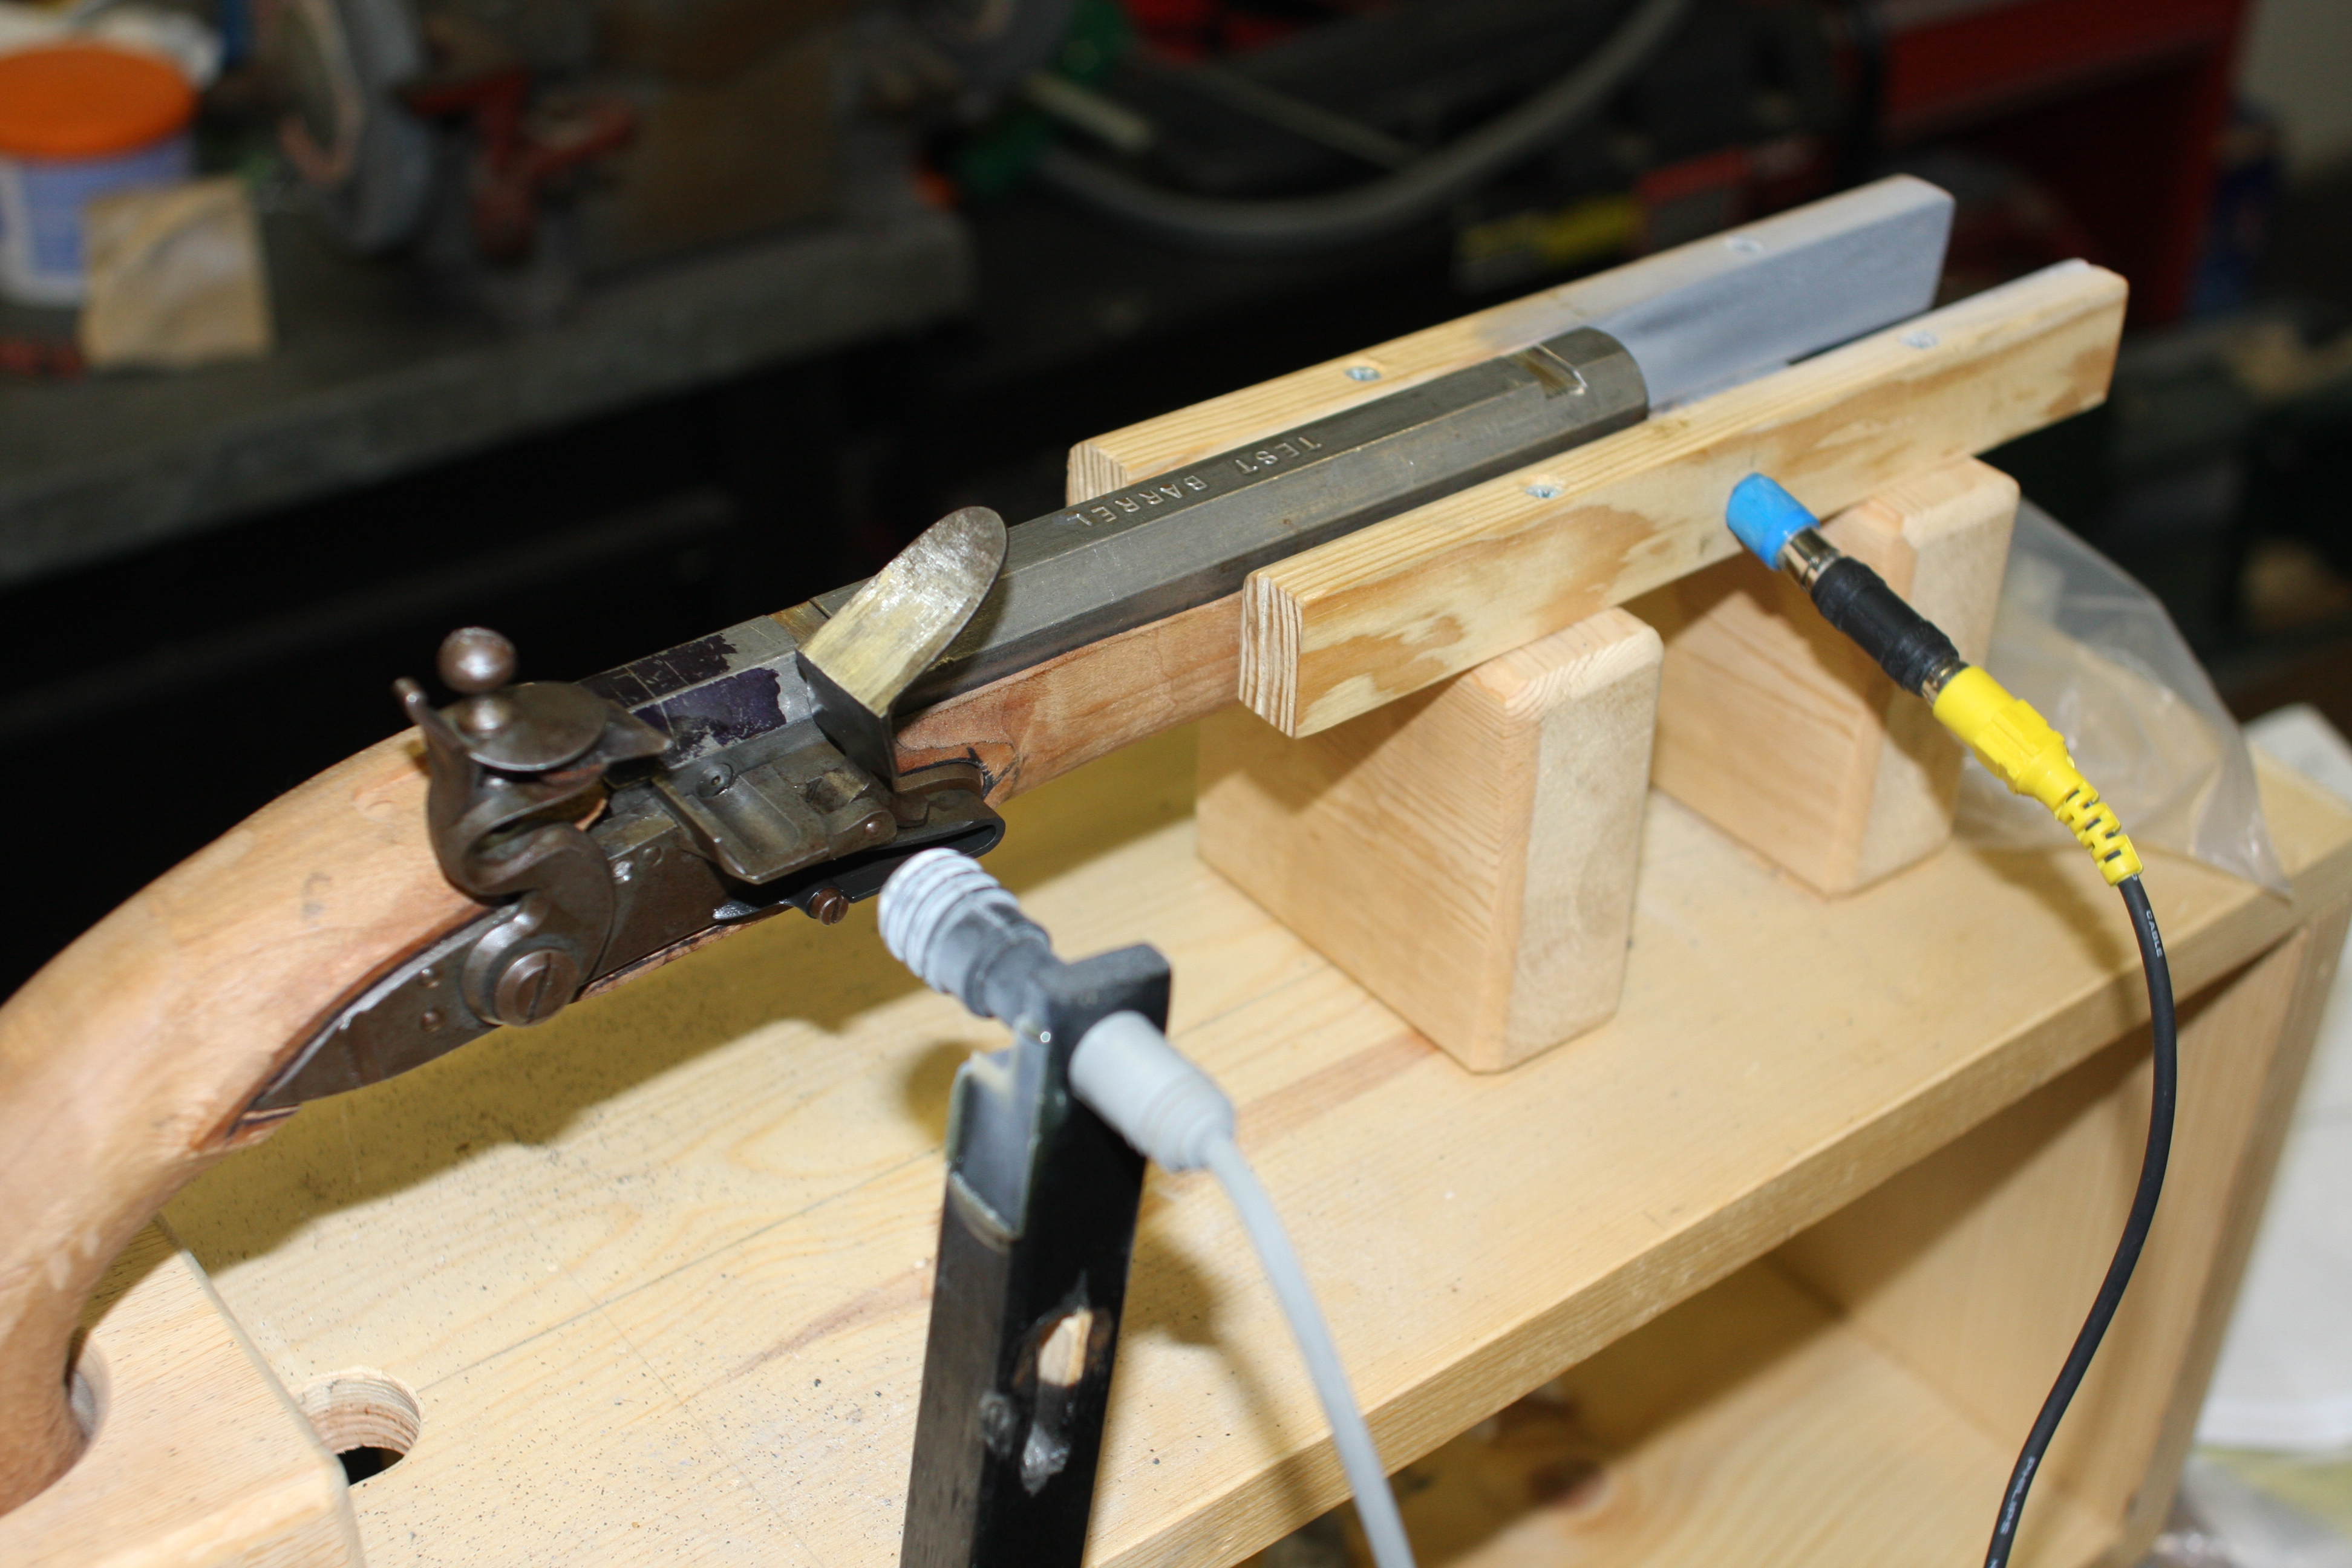
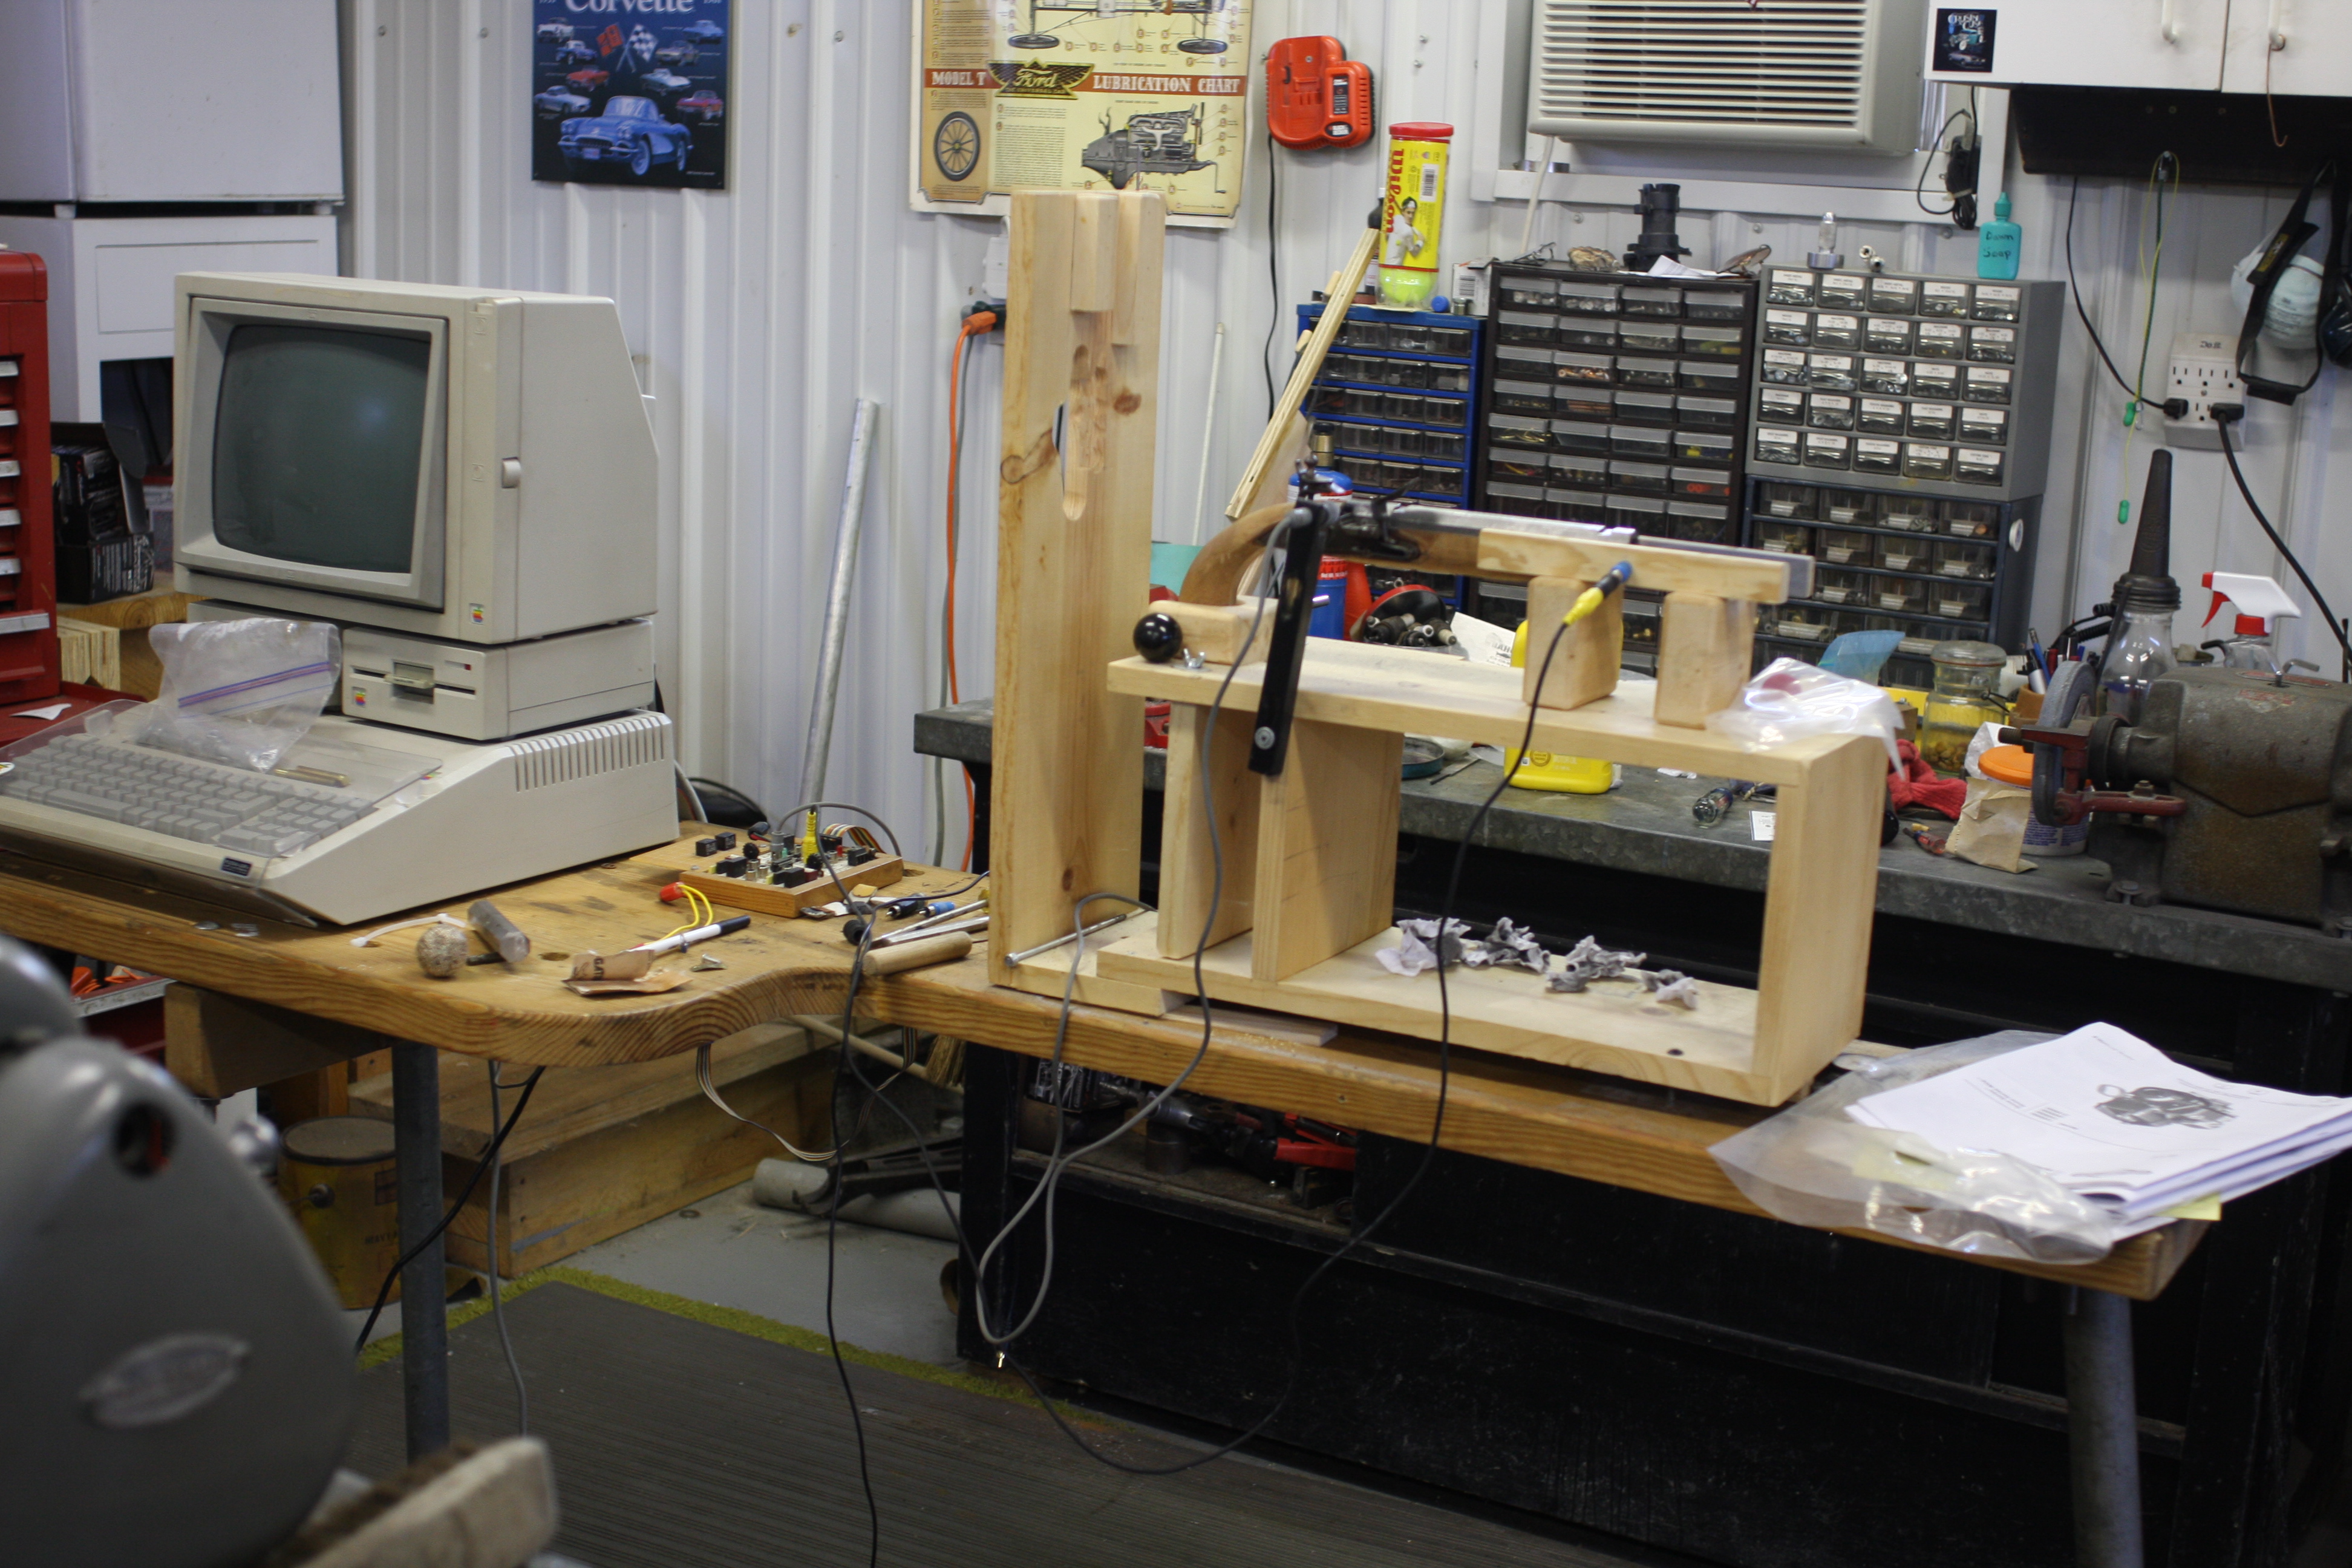
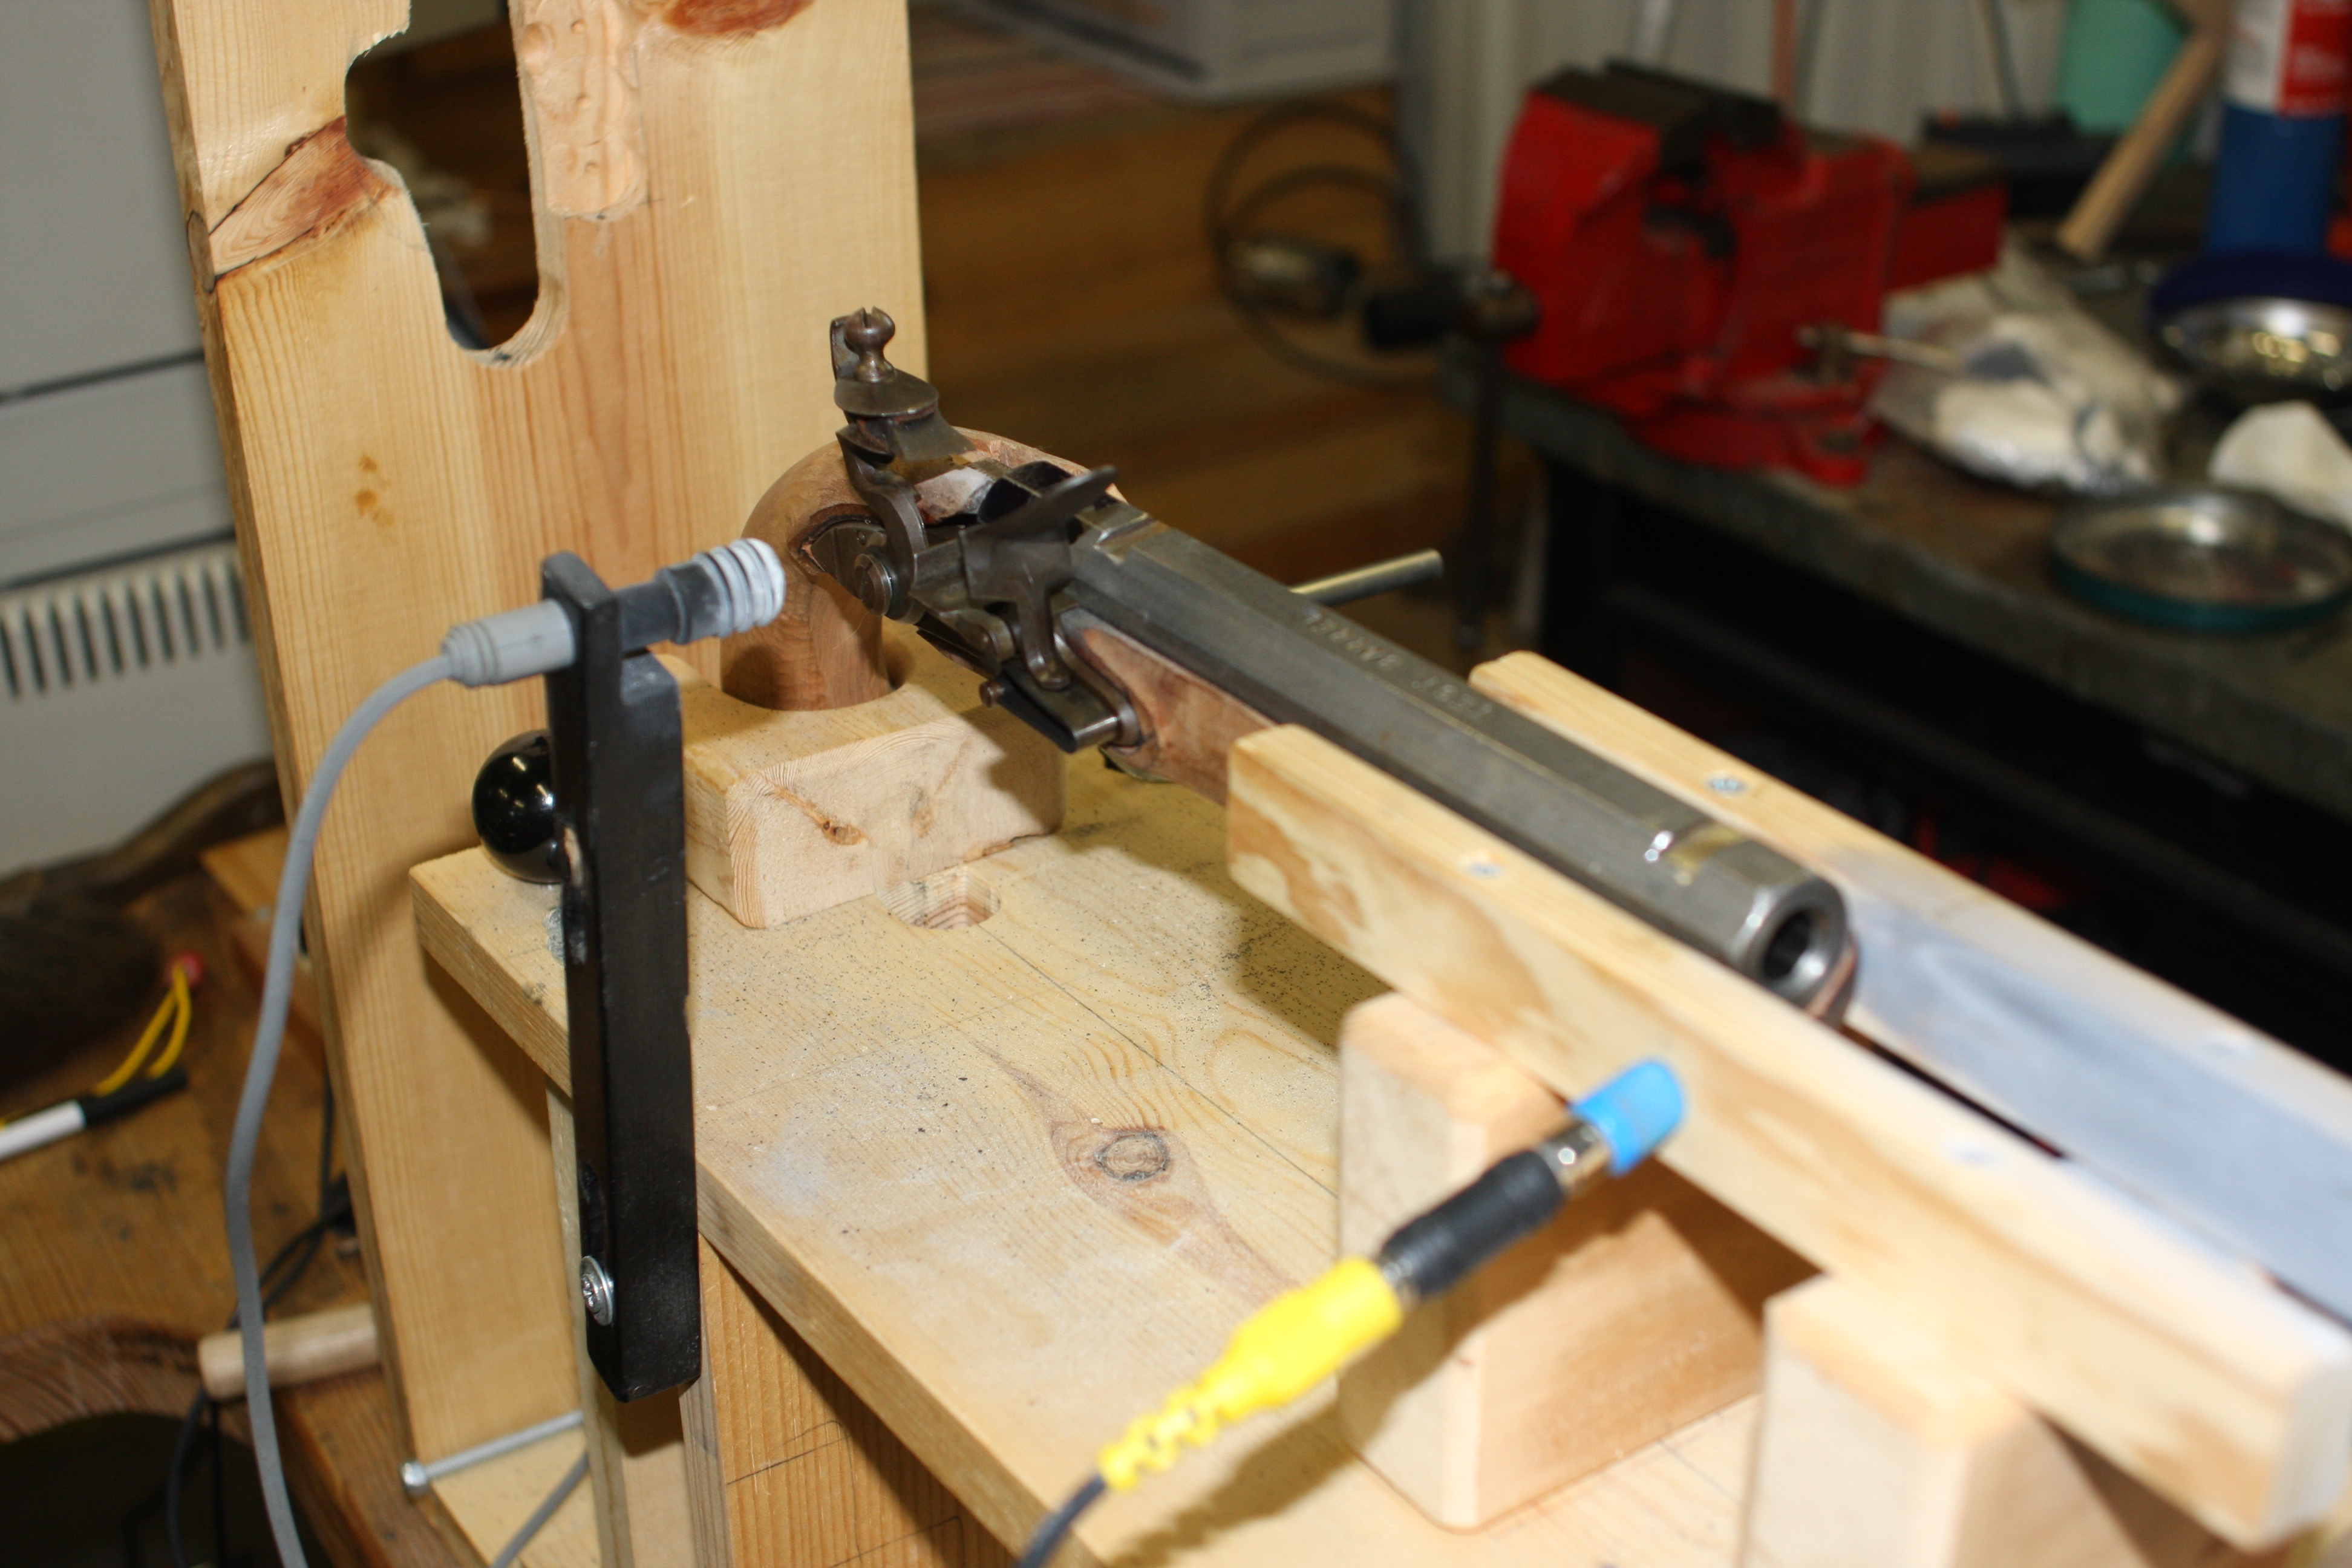
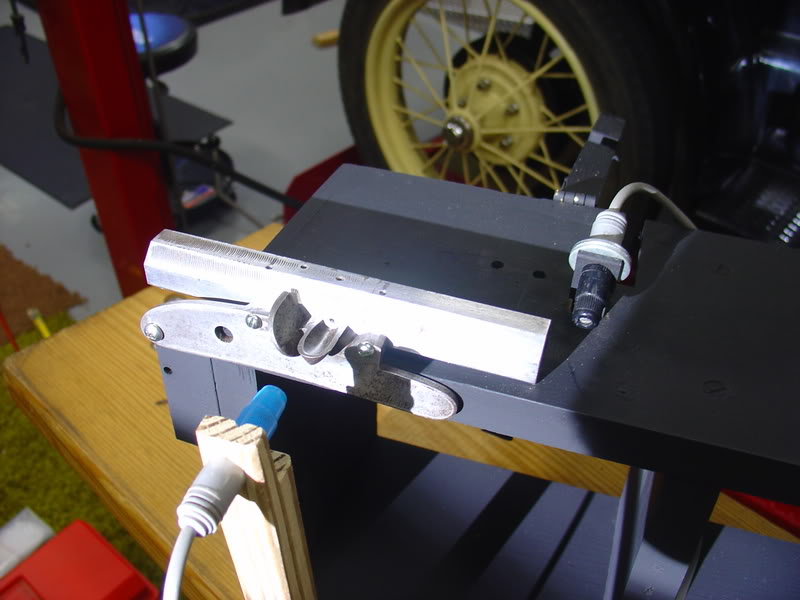
We used a 10″ barrel stub with a small Siler flint. The test used a double-hole vent with .052 holes and a single-hole vent with a .073 hole. We did 10 trials each and lit the pan with a red hot copper wire. Our reason for this was to prevent a changing flint edge from entering into the test. The single .073 vent was better both in speed and consistency.
Before finishing, we ran 5 trials each in which the pan was ignited by the small Siler. In those trials the single-hole vent was better, but by a smaller margin. None of the trials sounded abnormal to the ear. No matter the range from high to low, human senses could not tell the difference. In fact, Steve tried to guess and was invariably wrong.
Interpreting the results can sometimes be misleading. In this case, I like the single-hole vent. However, I do have two doubts. (1) I have questions about the reliability of a vent as small as .052”. A double-hole vent with larger holes might alter the result. (2) I wonder if the shape of vent’s exterior would change the result.
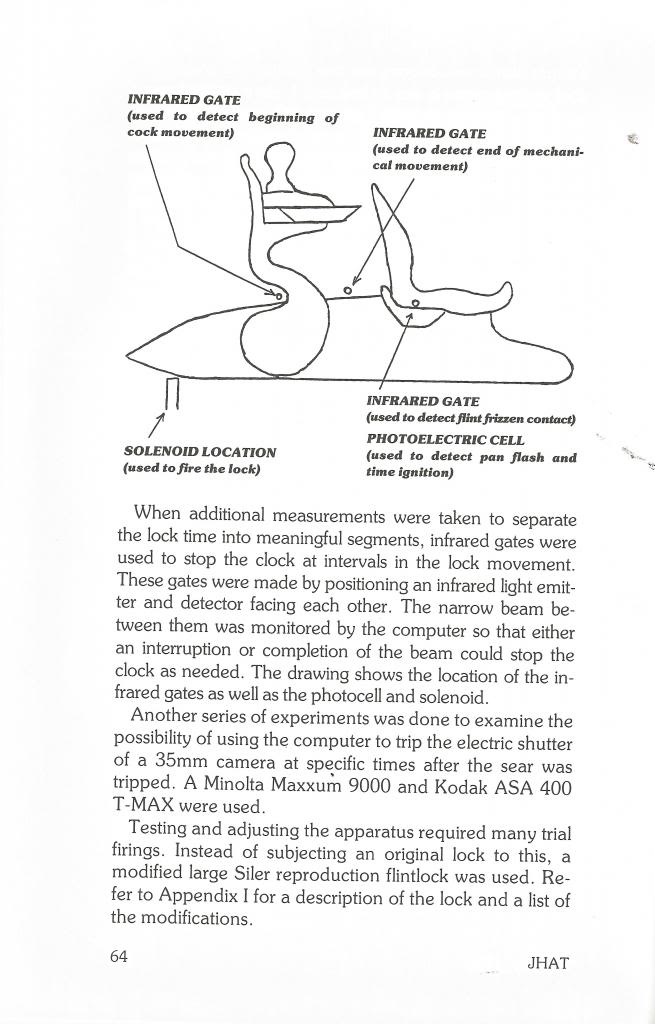
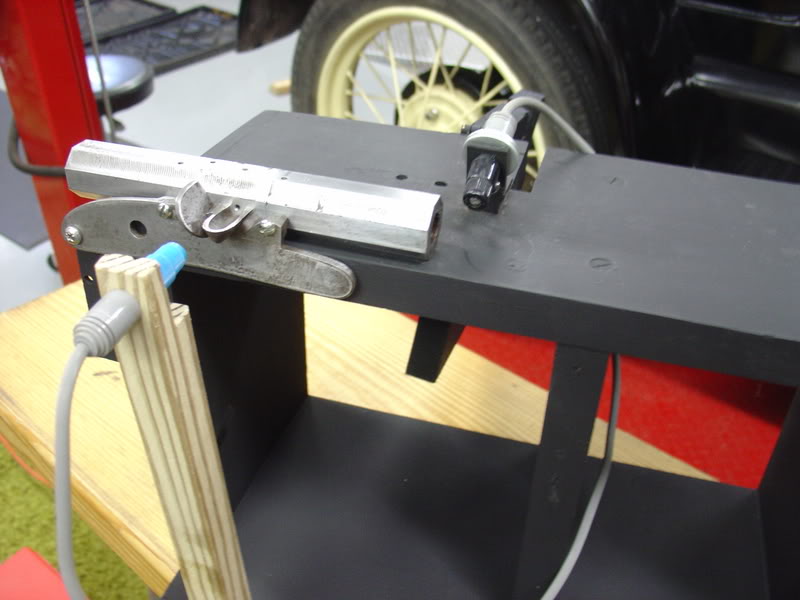
The included photos show the fixture and the position of the photo cells used in the timing. The photo cell at the pan trigger the start, while the photo cell and the muzzle triggers the stop.
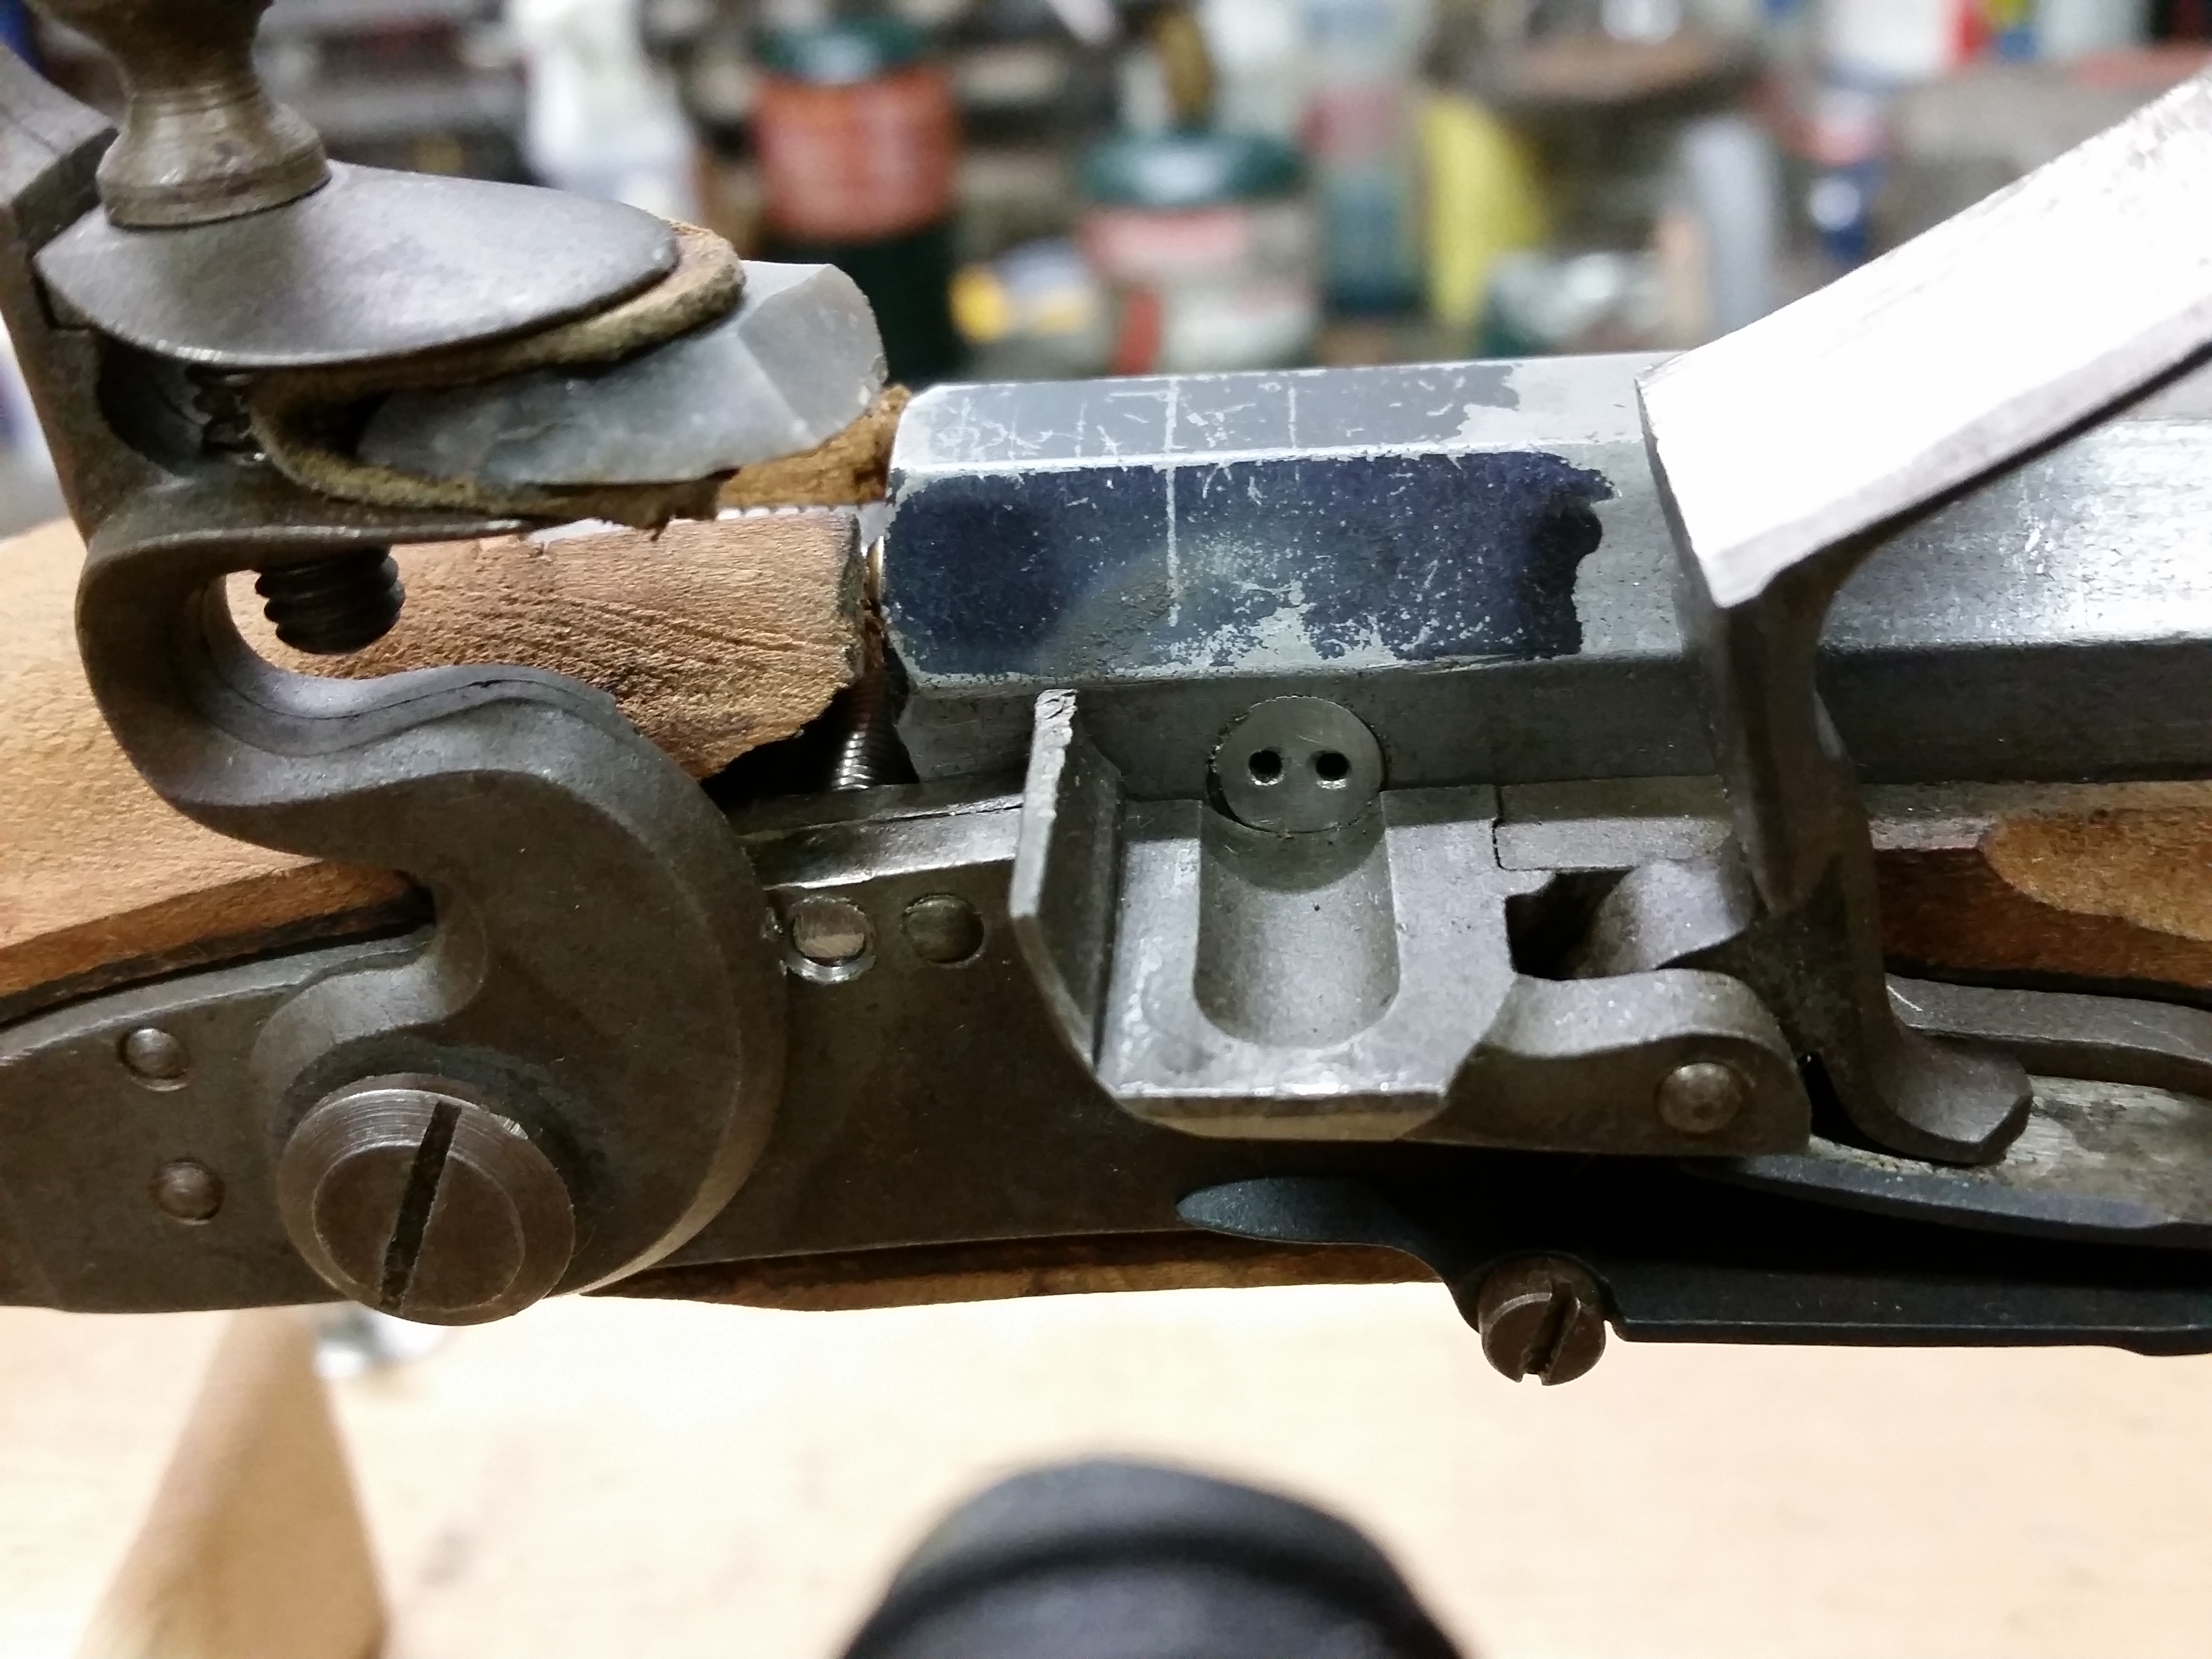
The last pic is a close up of the vent. These holes are .052″. BTW, the stock is a heavily mutilated factory second supplied by Jim Chambers. It was important because it allowed the sear to be struck from below by the plunger. It also allowed us to use a small Siler lock for an earlier test. At that time it allowed three different locks to be tested using the same lock mortice.
To conclude, I’d like to thank Allan Sandy for the chance to time his vent. I feel that this vent type is well worth studying. I’d like to repeat this with a .055” 2 hole vent.
My thanks also to Steve Chapman and Mike Coggeshall for their assistance in the testing.
Larry Pletcher, editor
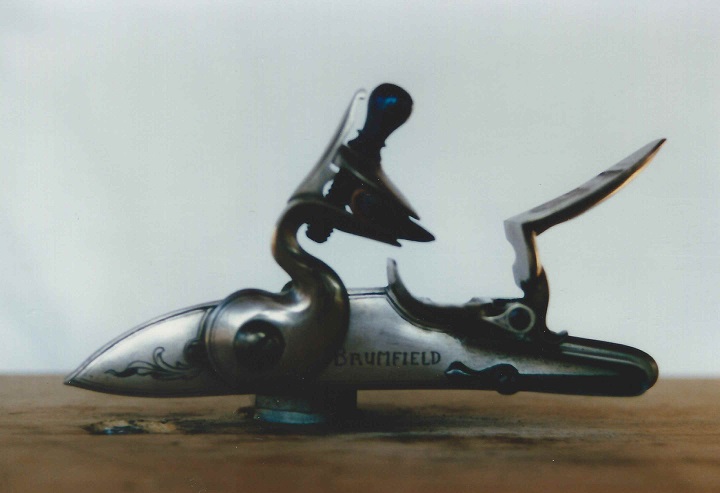
A Bucks County rifle and accouterments article has been on my mind for a number of years. The motivation for this came from three different people. First, Samuel Pletcher was my great, great, great grandfather. He lived in Lancaster County until he was about 40, then took his family by wagon to the Howard area in north central Pennsylvania around 1790. I’ve been interested in stories, tools, and possessions that would have been a part of his life.
Gary Brumfield was another influence. Gary was important to me and to others who study flintlocks. One area I appreciated was his knowledge of regional styles. Gary went through some of the factors that assisted in the evolving of these styles. I was intrigued by these factors as they applied to the region of Samuel Pletcher.
Since the area of interest is SE Pennsylvania, it is probably logical that Allen Martin would play a part in a Bucks County project. Allen is among a very talented group of Pennsylvania gun makers, and one who is widely respected in his study and making of the guns of this area. It would be difficult to mention Bucks Co, Berks Co, or Lehigh Valley guns with out mentioning Allen.
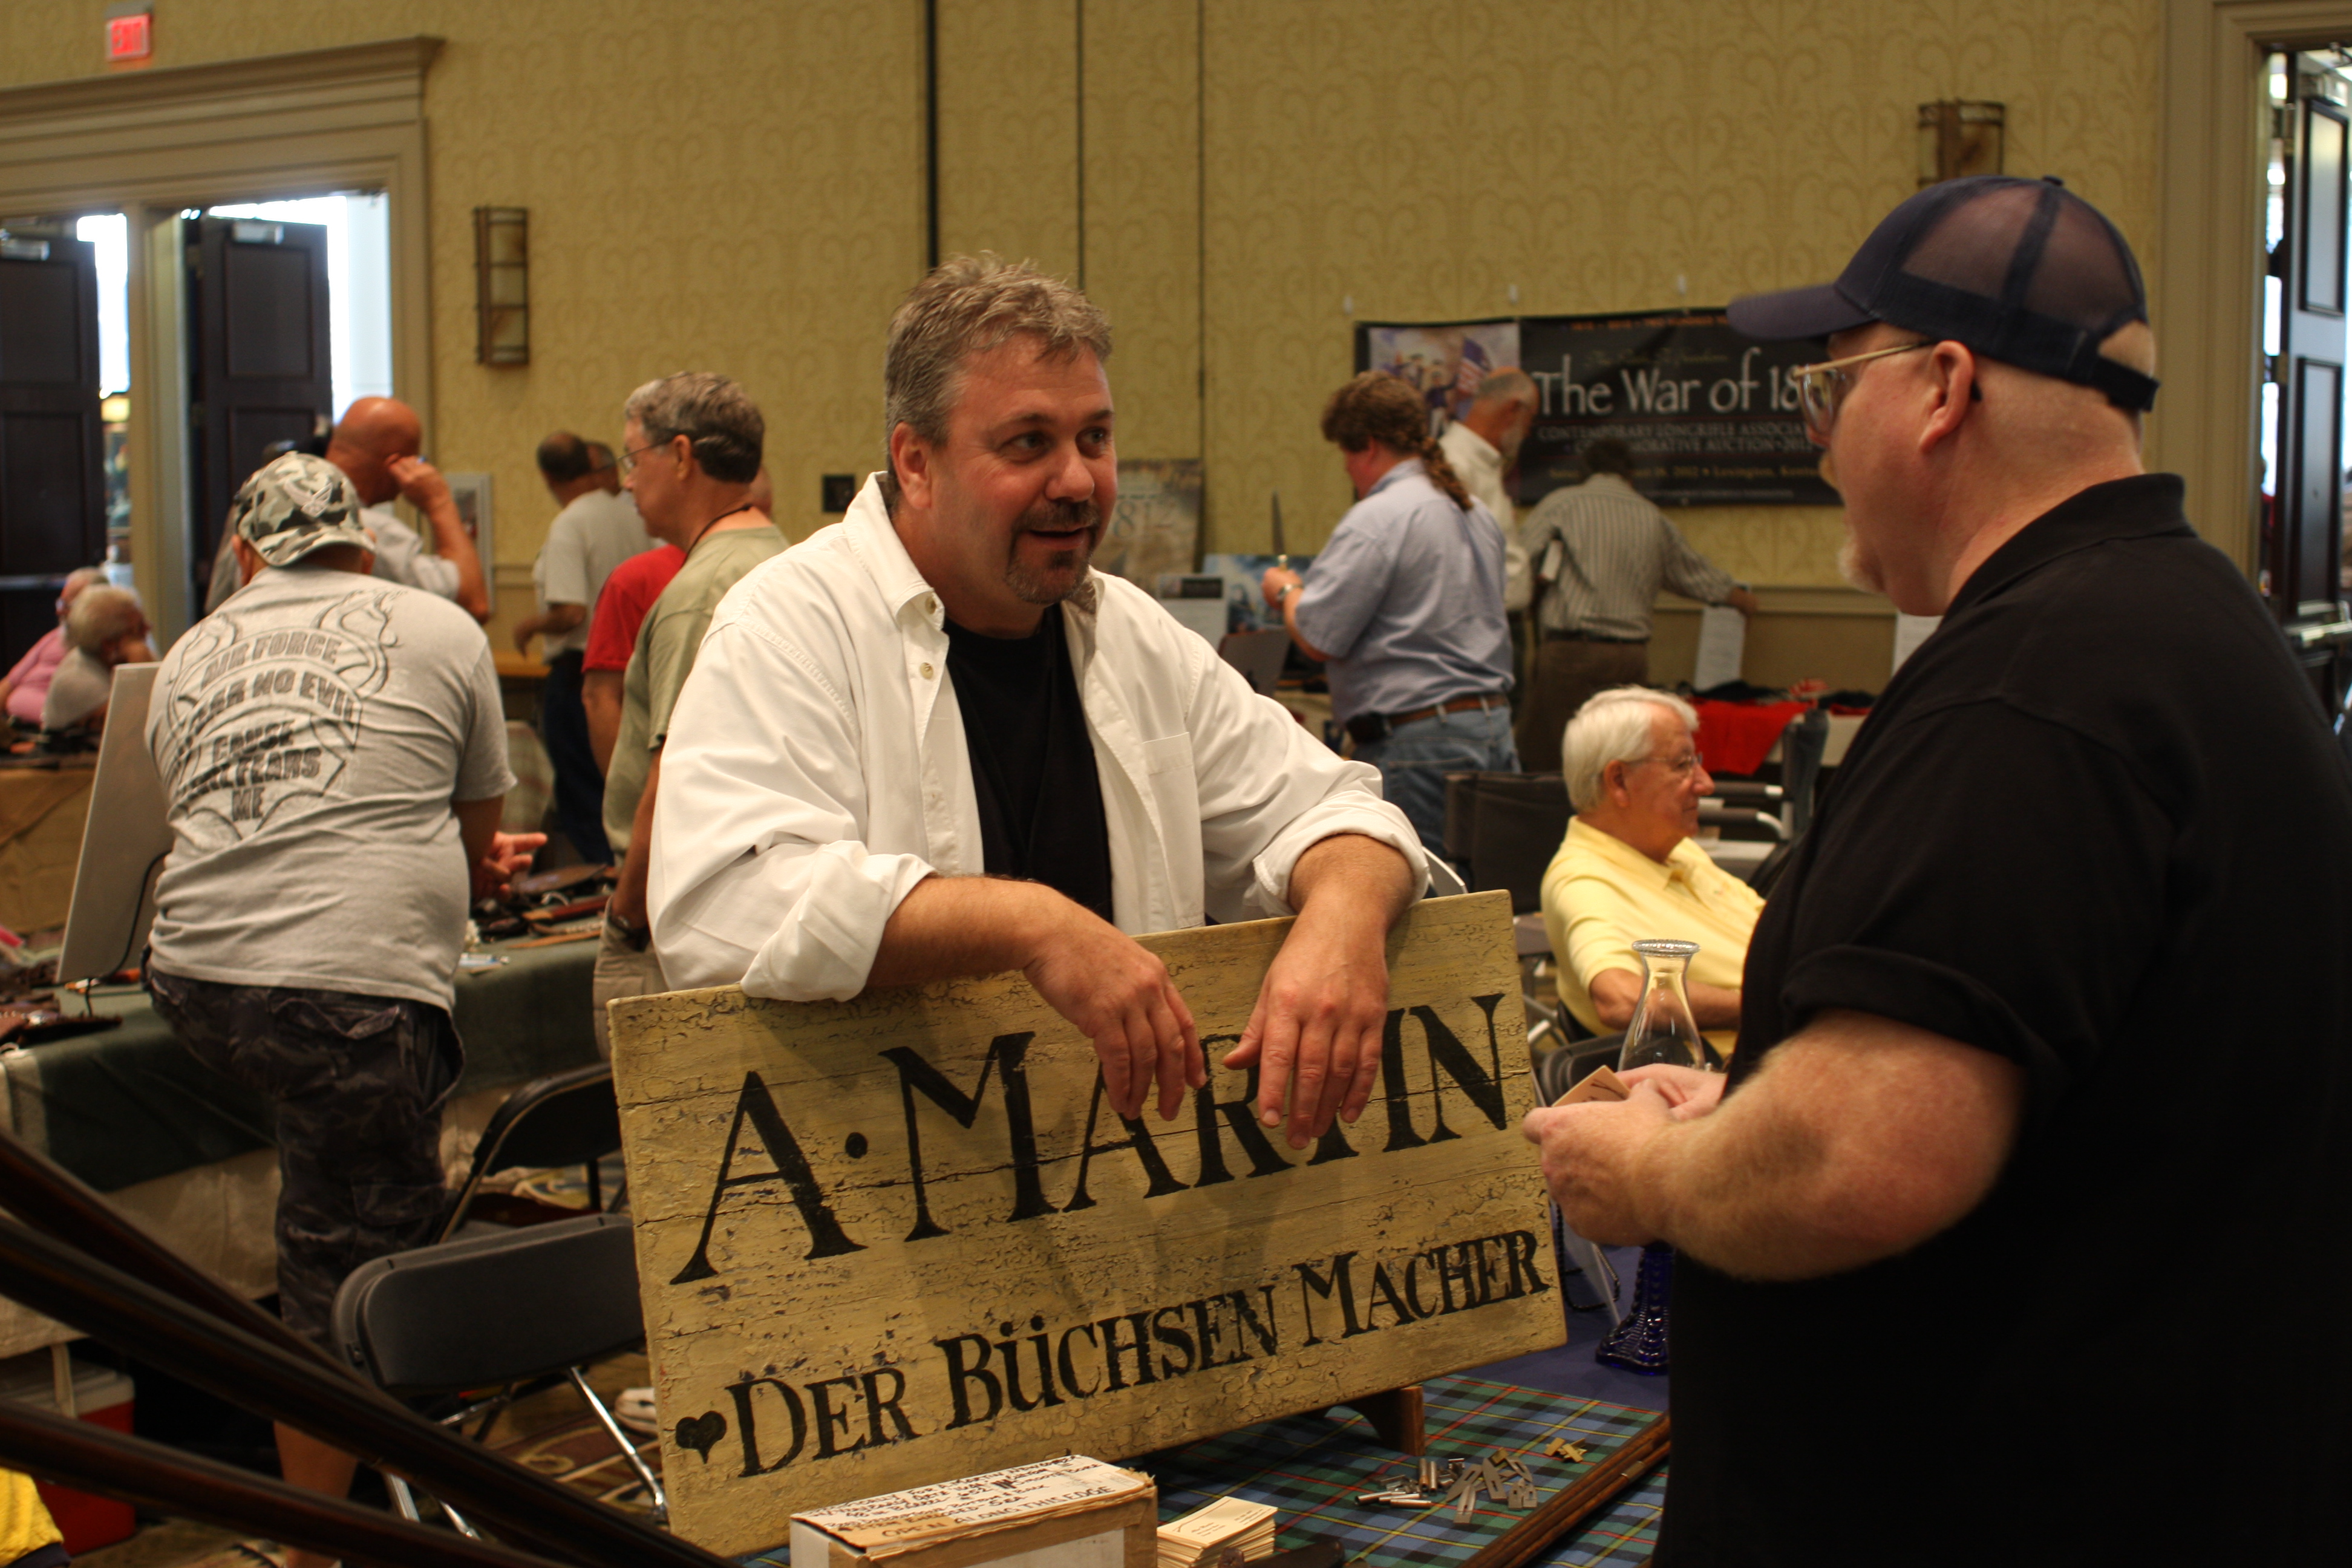
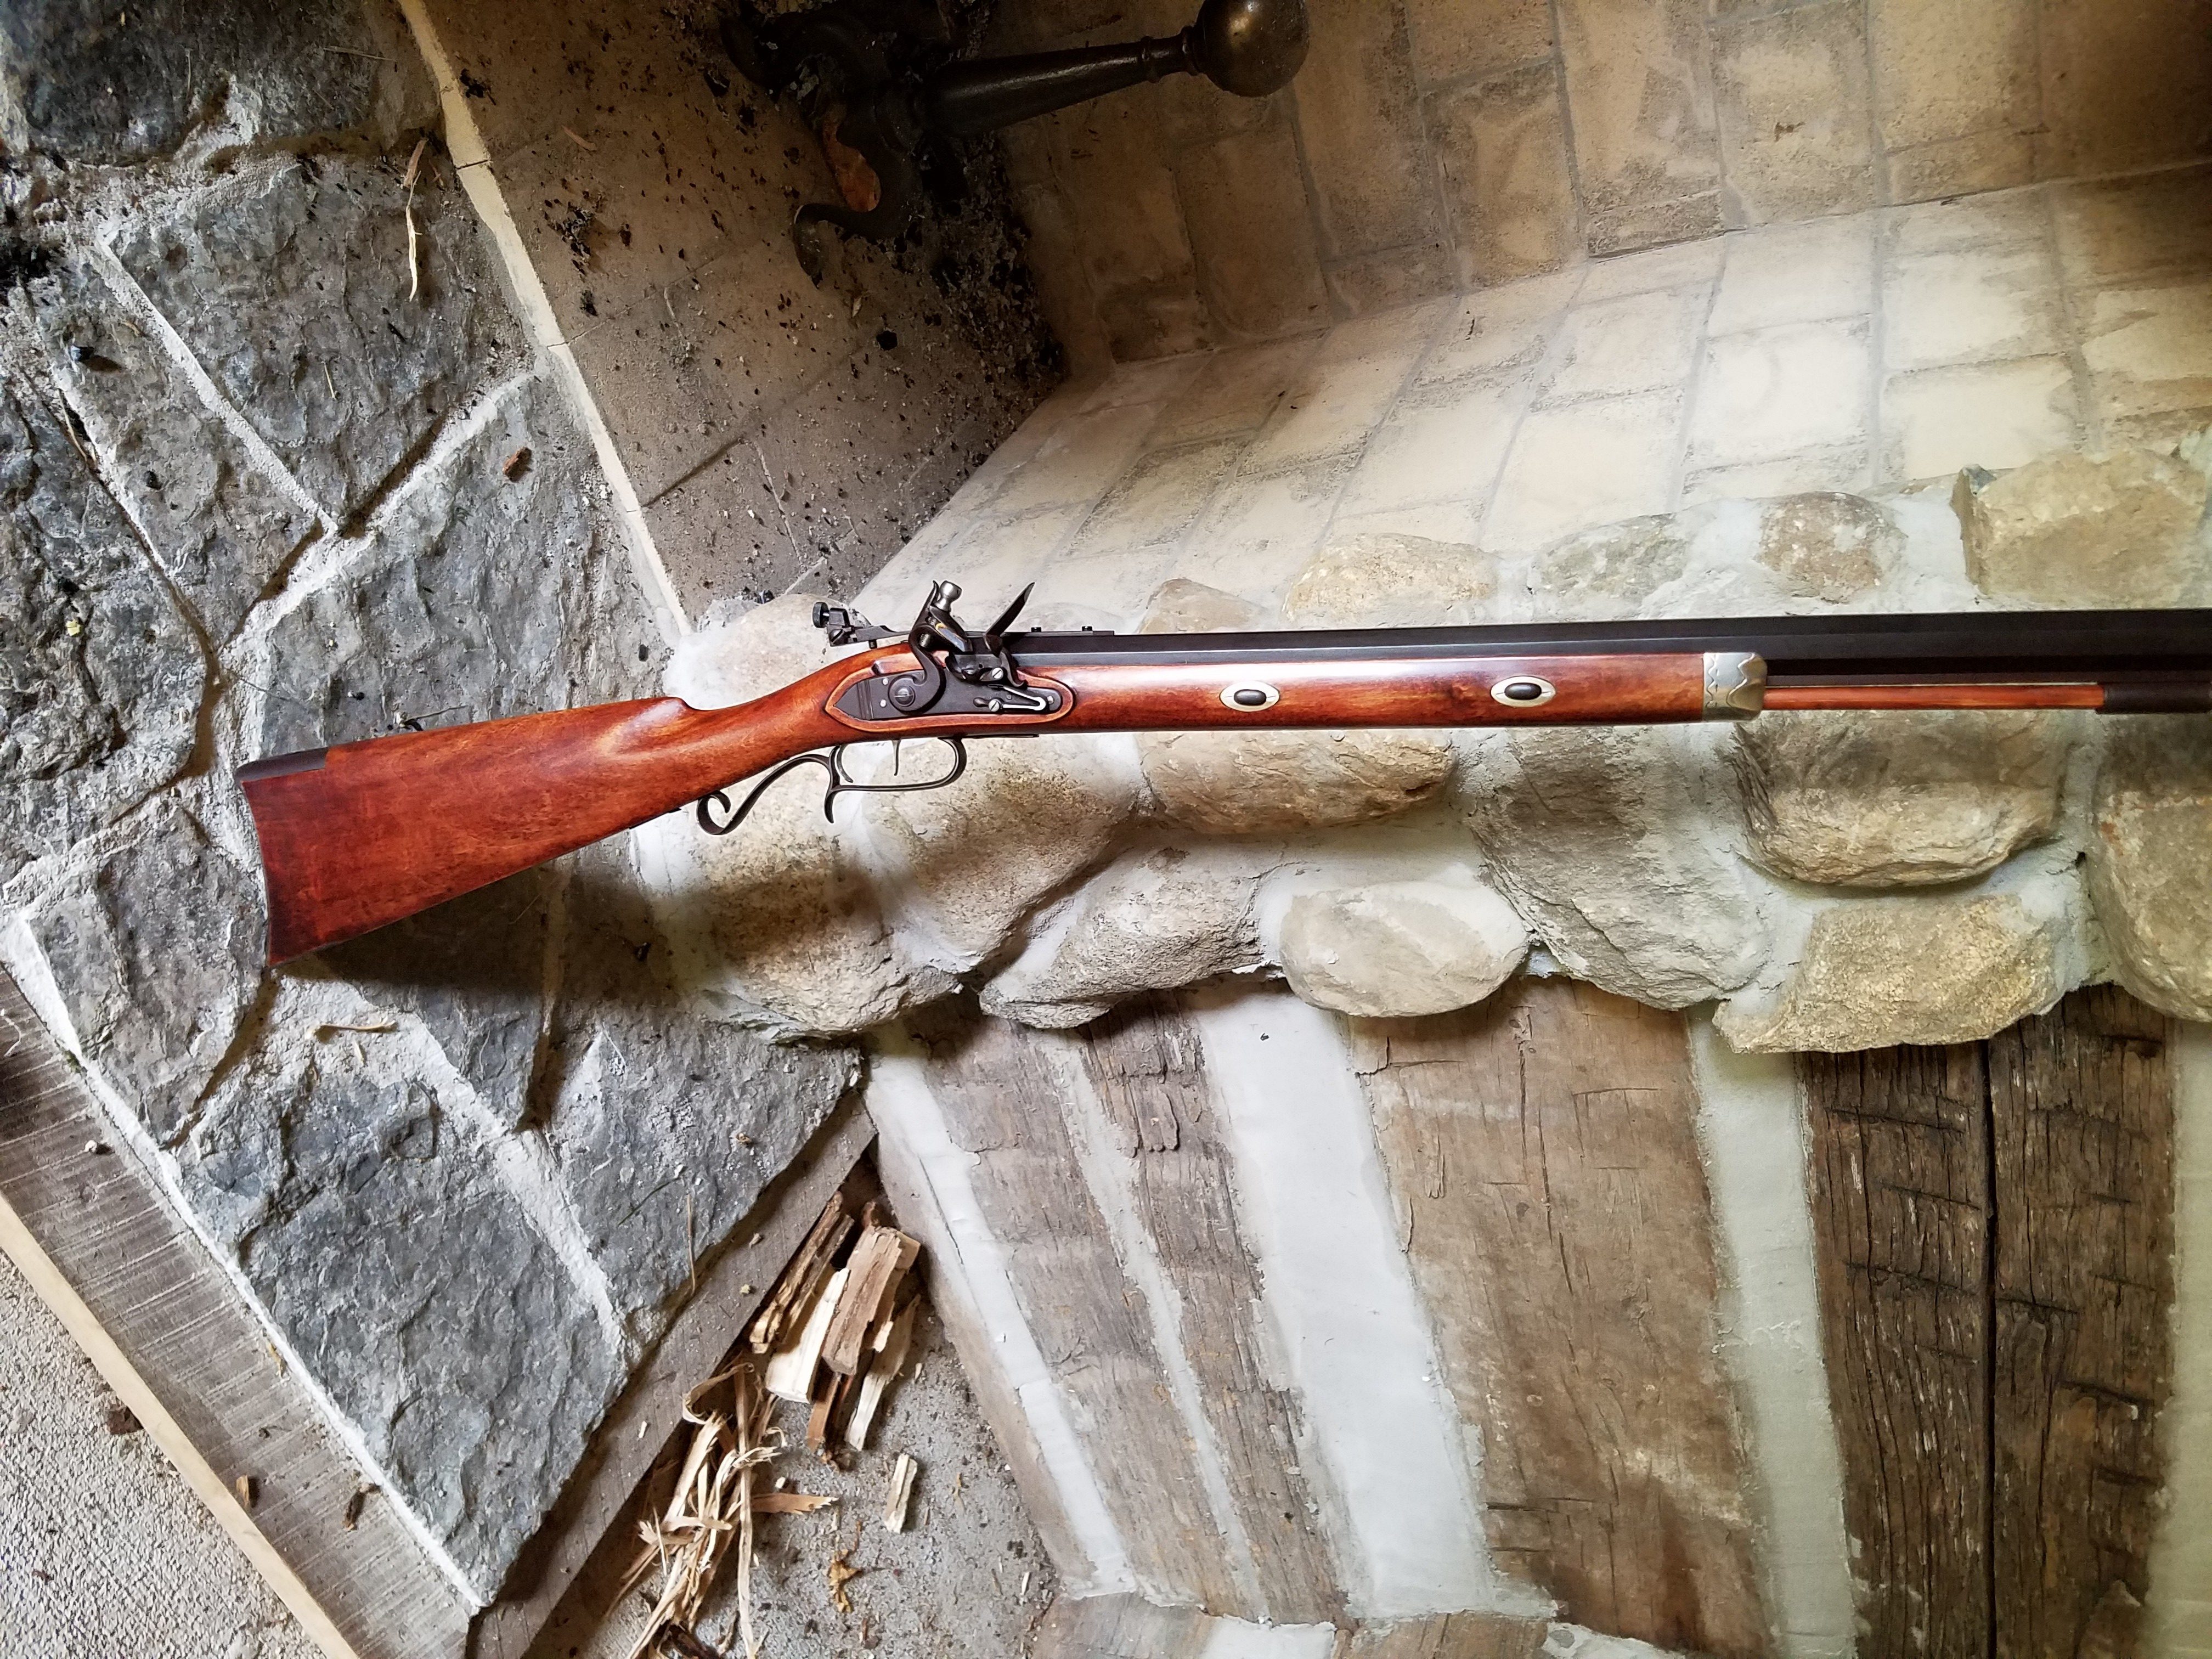
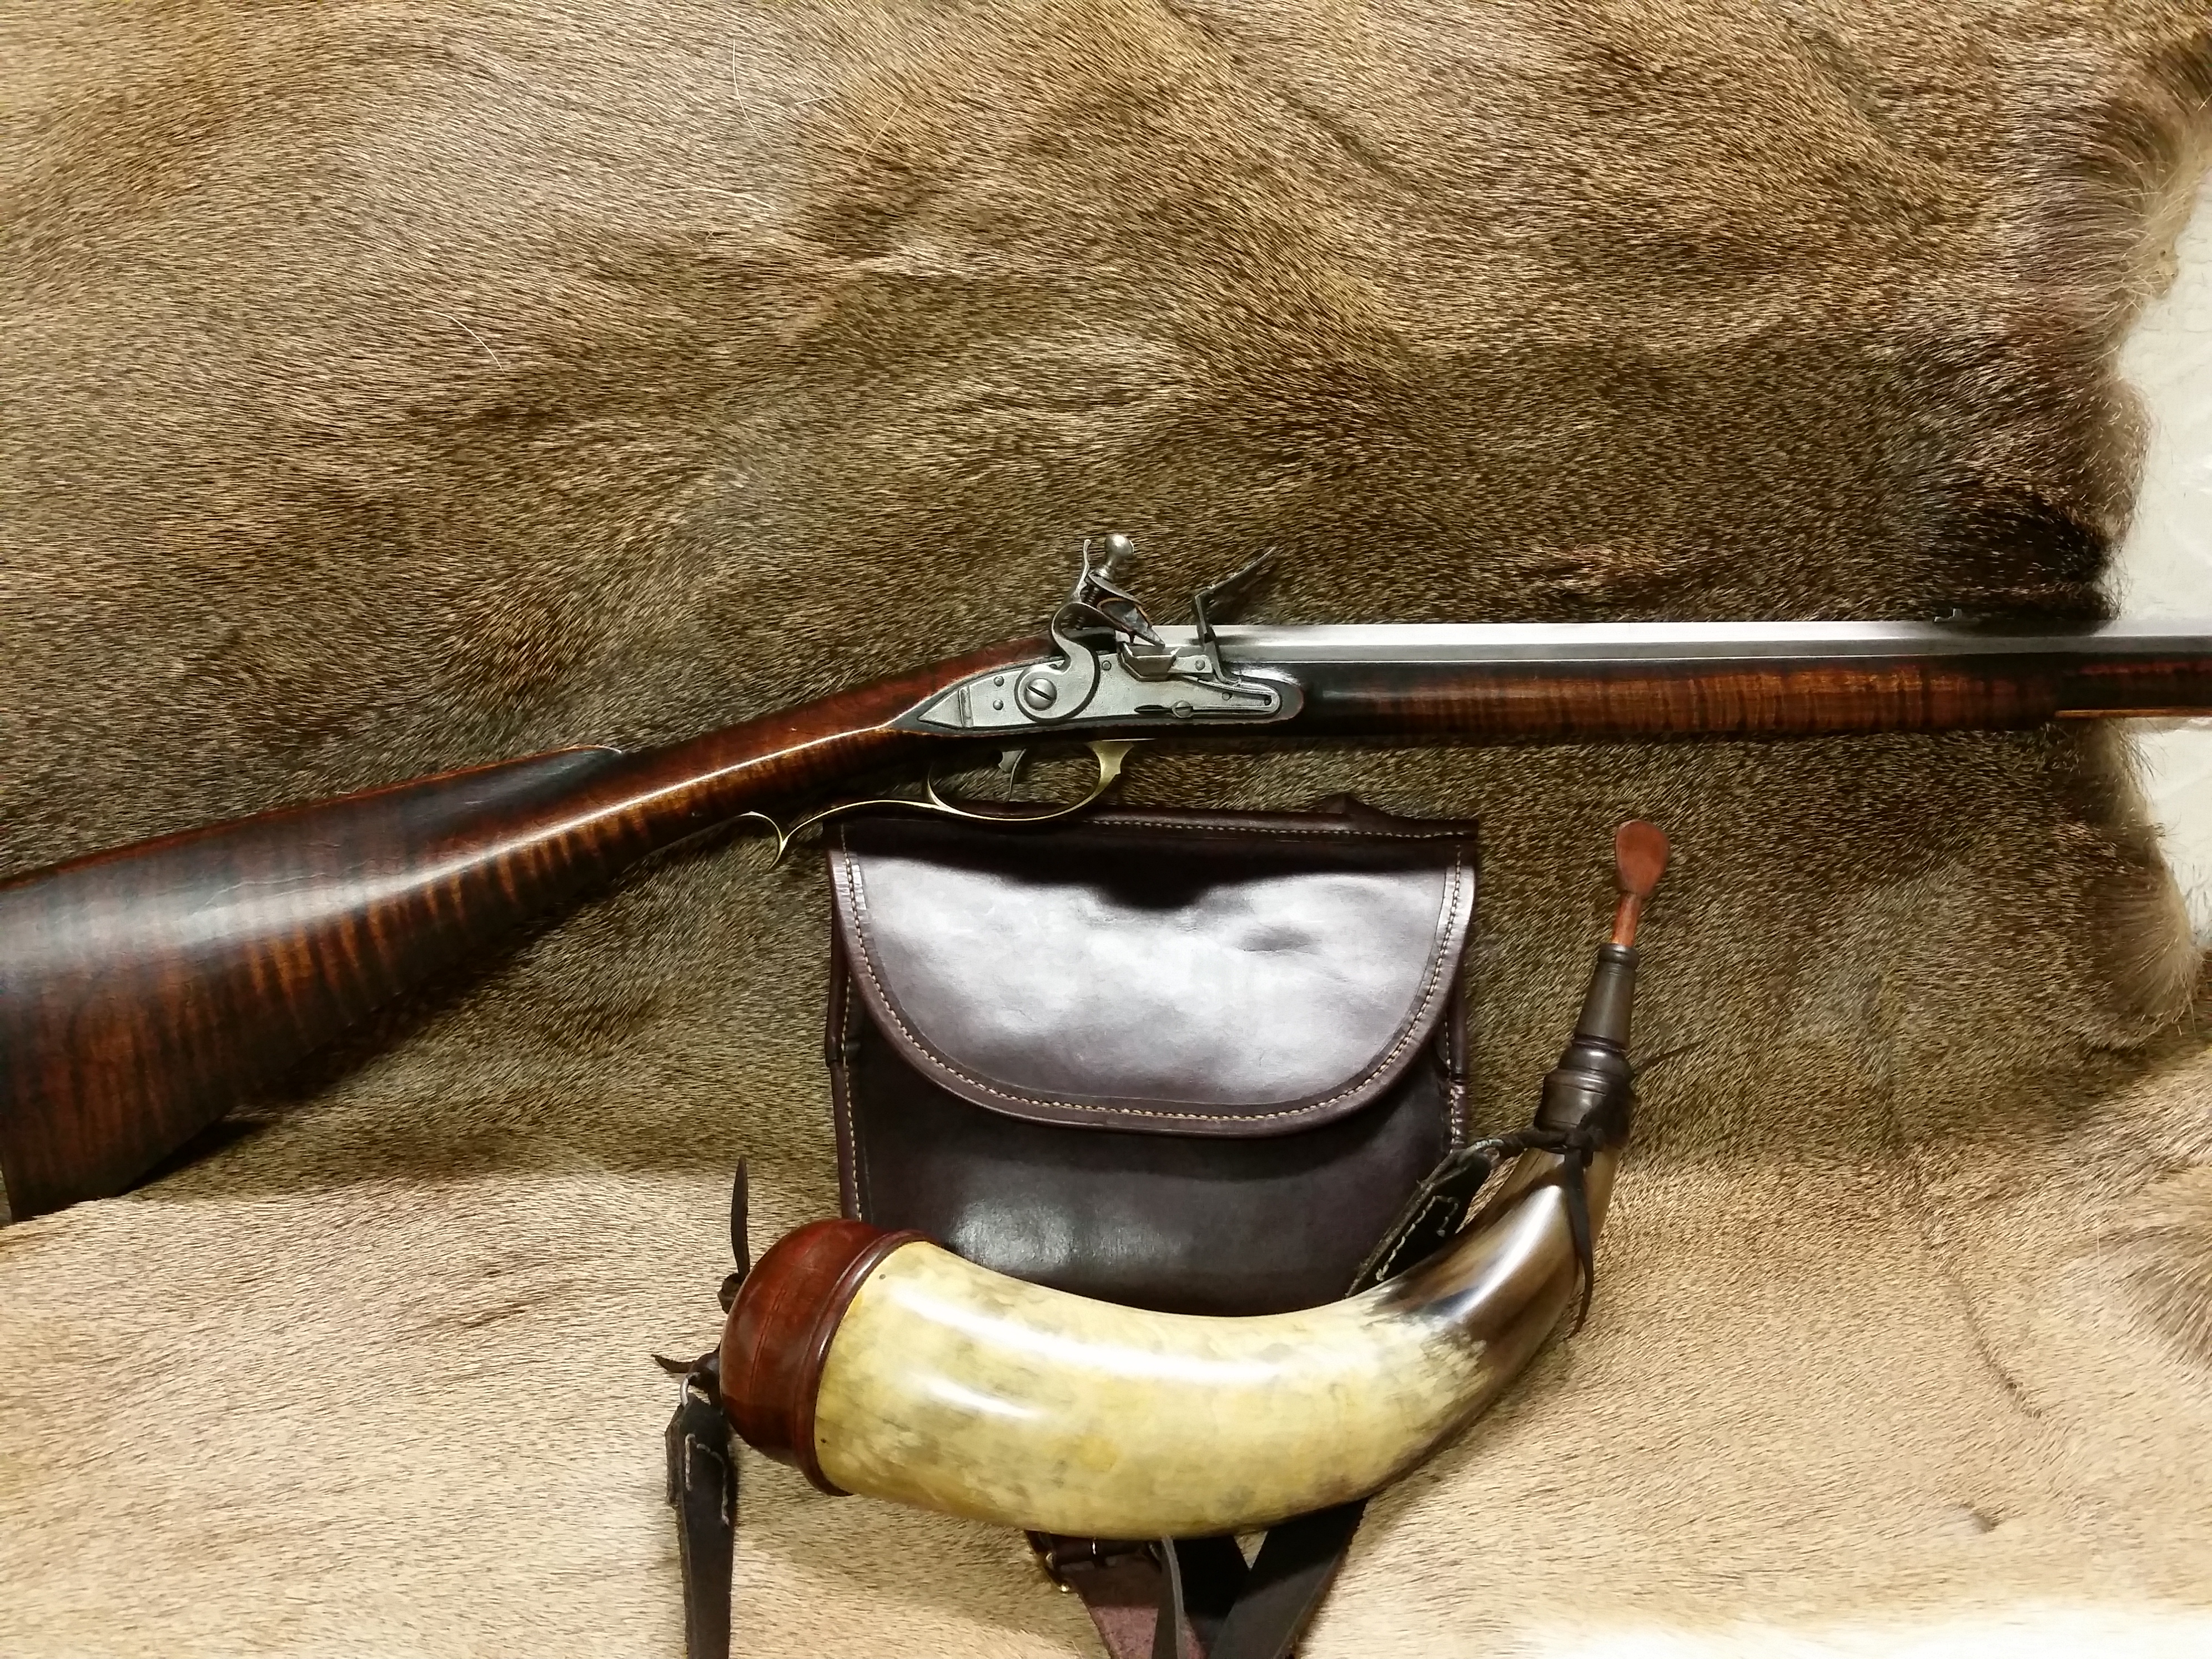
Allen and I have discussed the architecture of these guns at the annual CLA show. I handled a wonderful Bucks County Schimmel and decided to have Allen make one for me. We discussed the typical ageing health and eye problems, and he assured me that the schimmel would meet all my health issues. He was certainly correct.
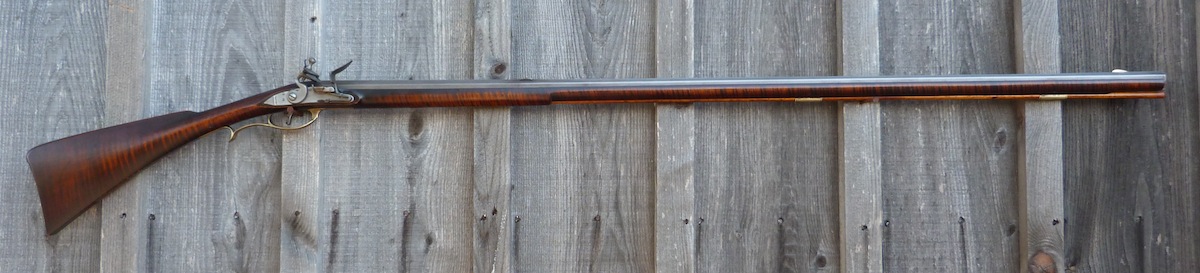
I received the schimmel at the 2014 Spring Shoot at Friendship. It is a delicate little .40 caliber: long and slim, with wonderful balance. It may not weigh 7 pounds. It is slightly aged, but not distressed. The stock is dark maple with very nice curl. The beauty of this rifle comes from the architecture. As Allen told me, “Architecture is everything.”
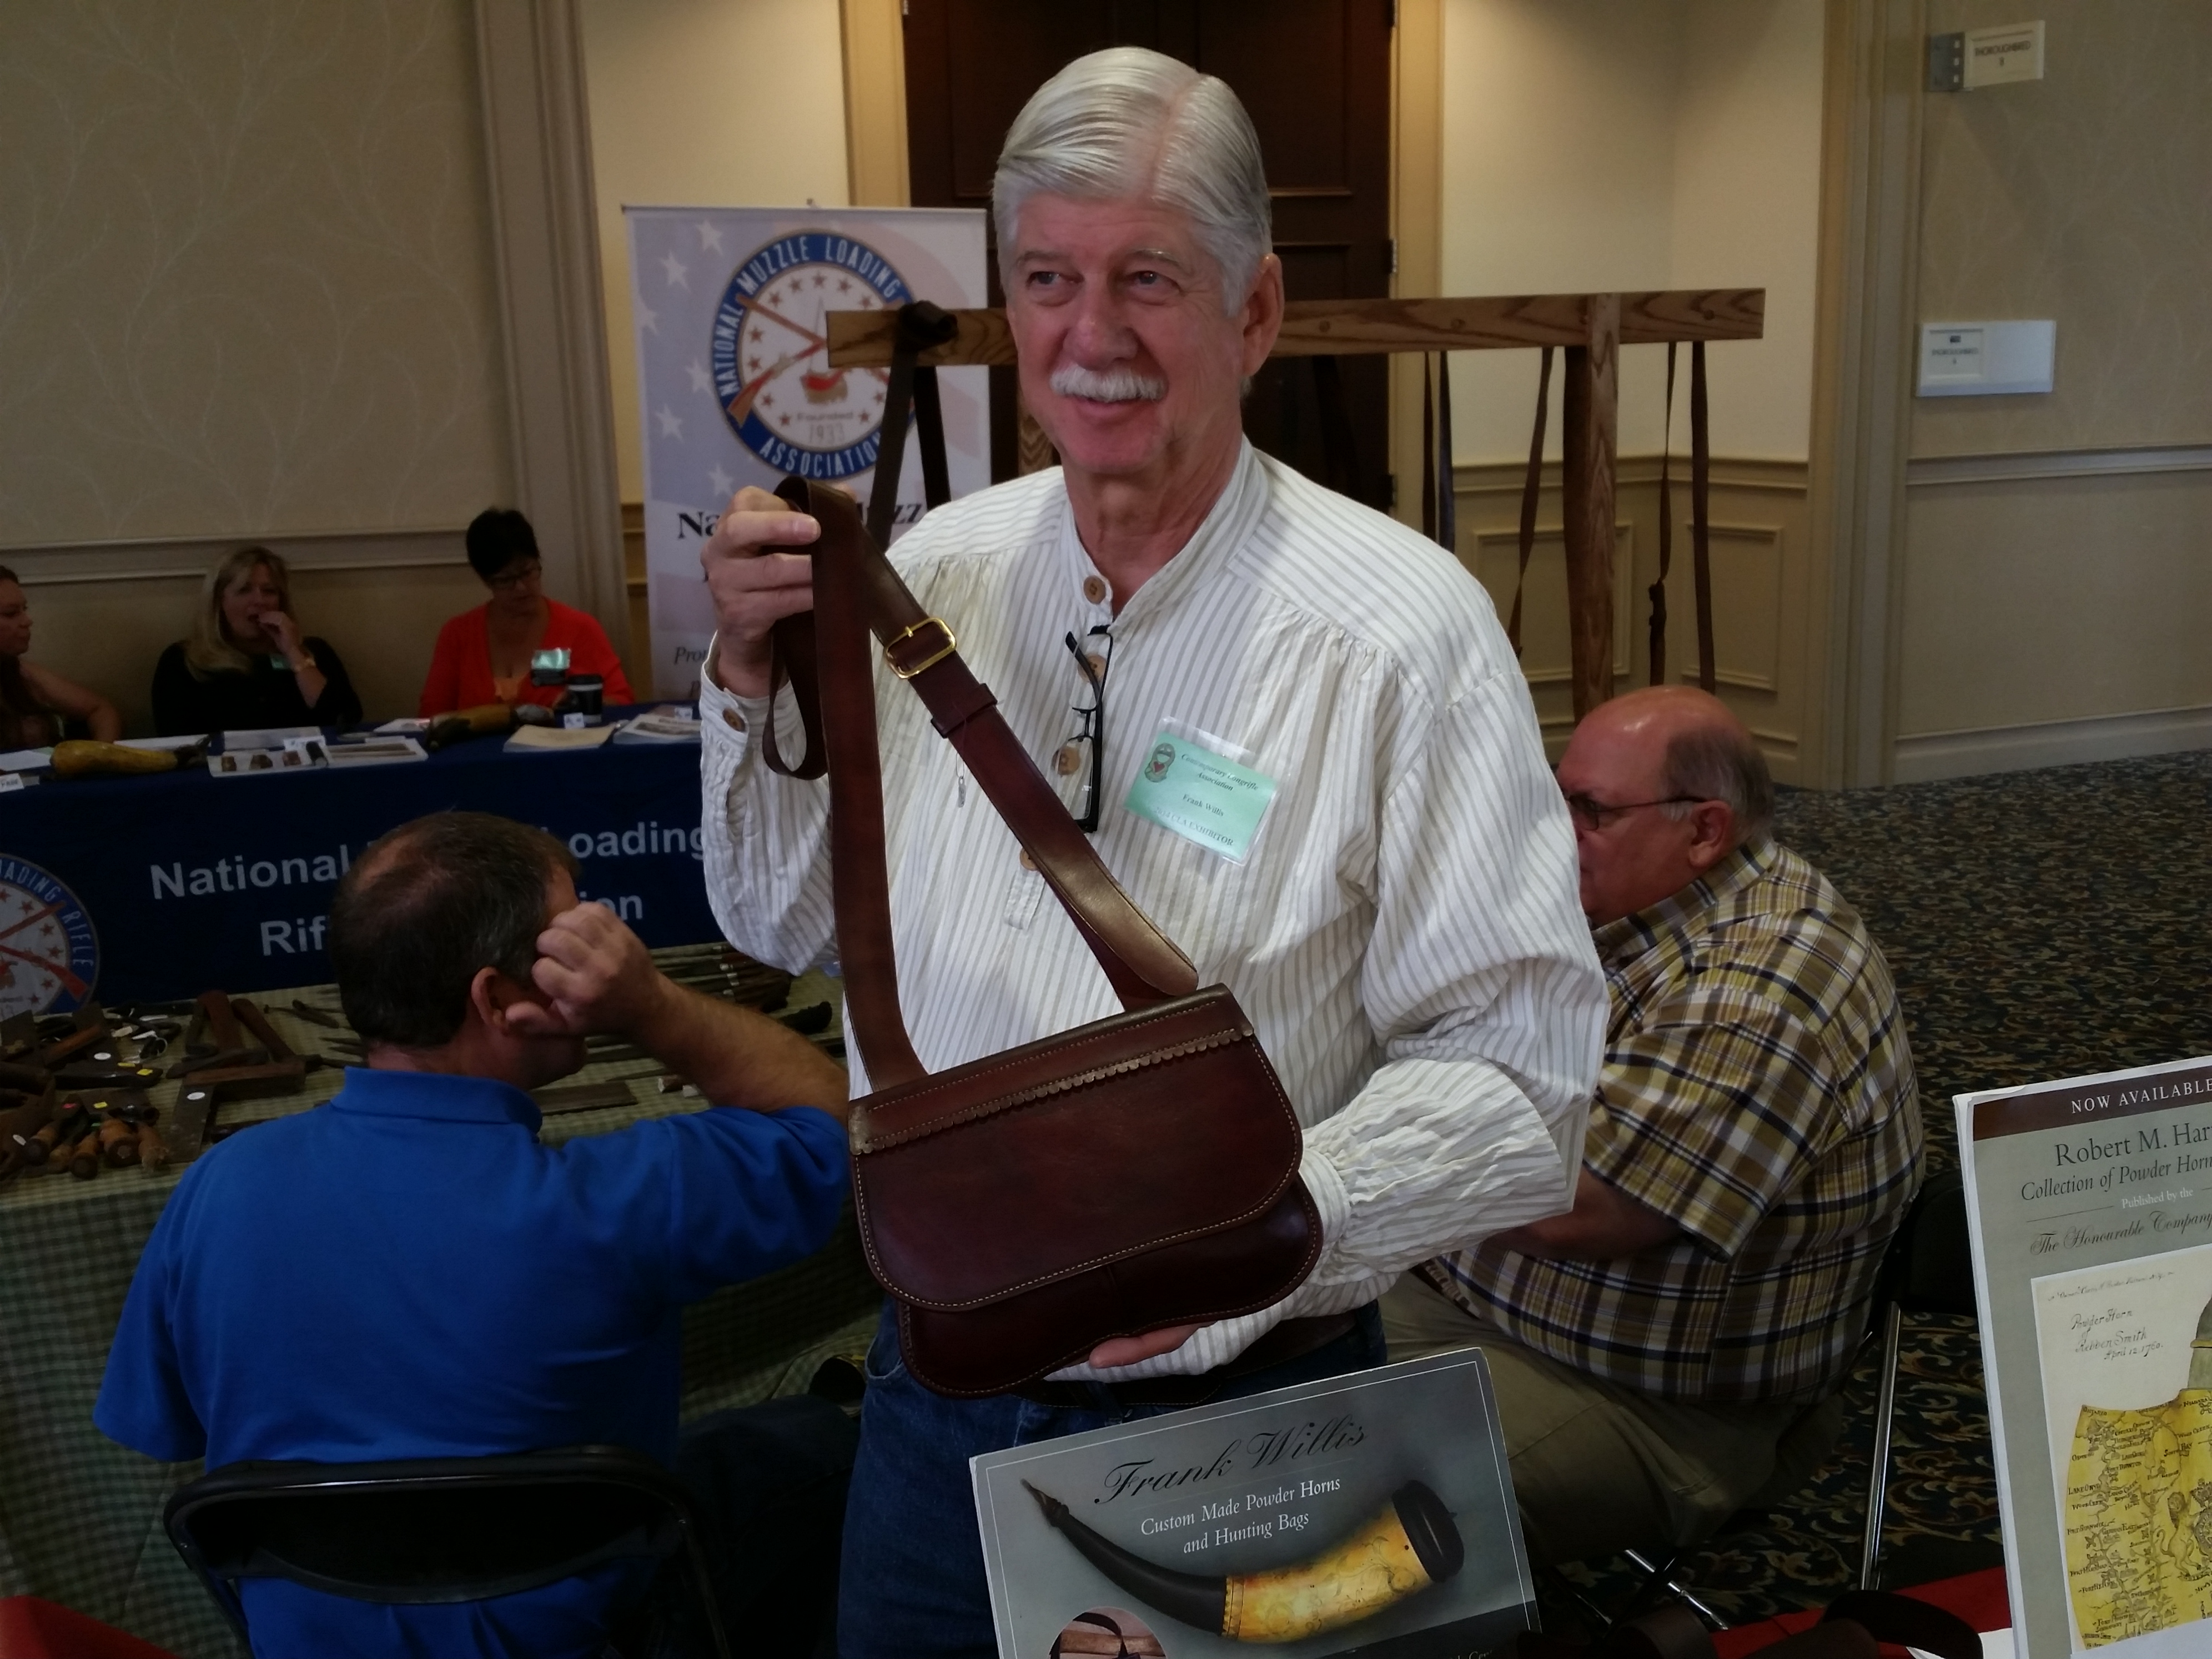
The Bucks County Kit now needs a bag and horn. Frank Willis was my next stop. At CLA Frank had an original bag found in lower Bucks County. I bought a copy that Frank made from this original. There are some unique features about this bag, perhaps unique only to the original maker. These features are discussed in Frank’s article.
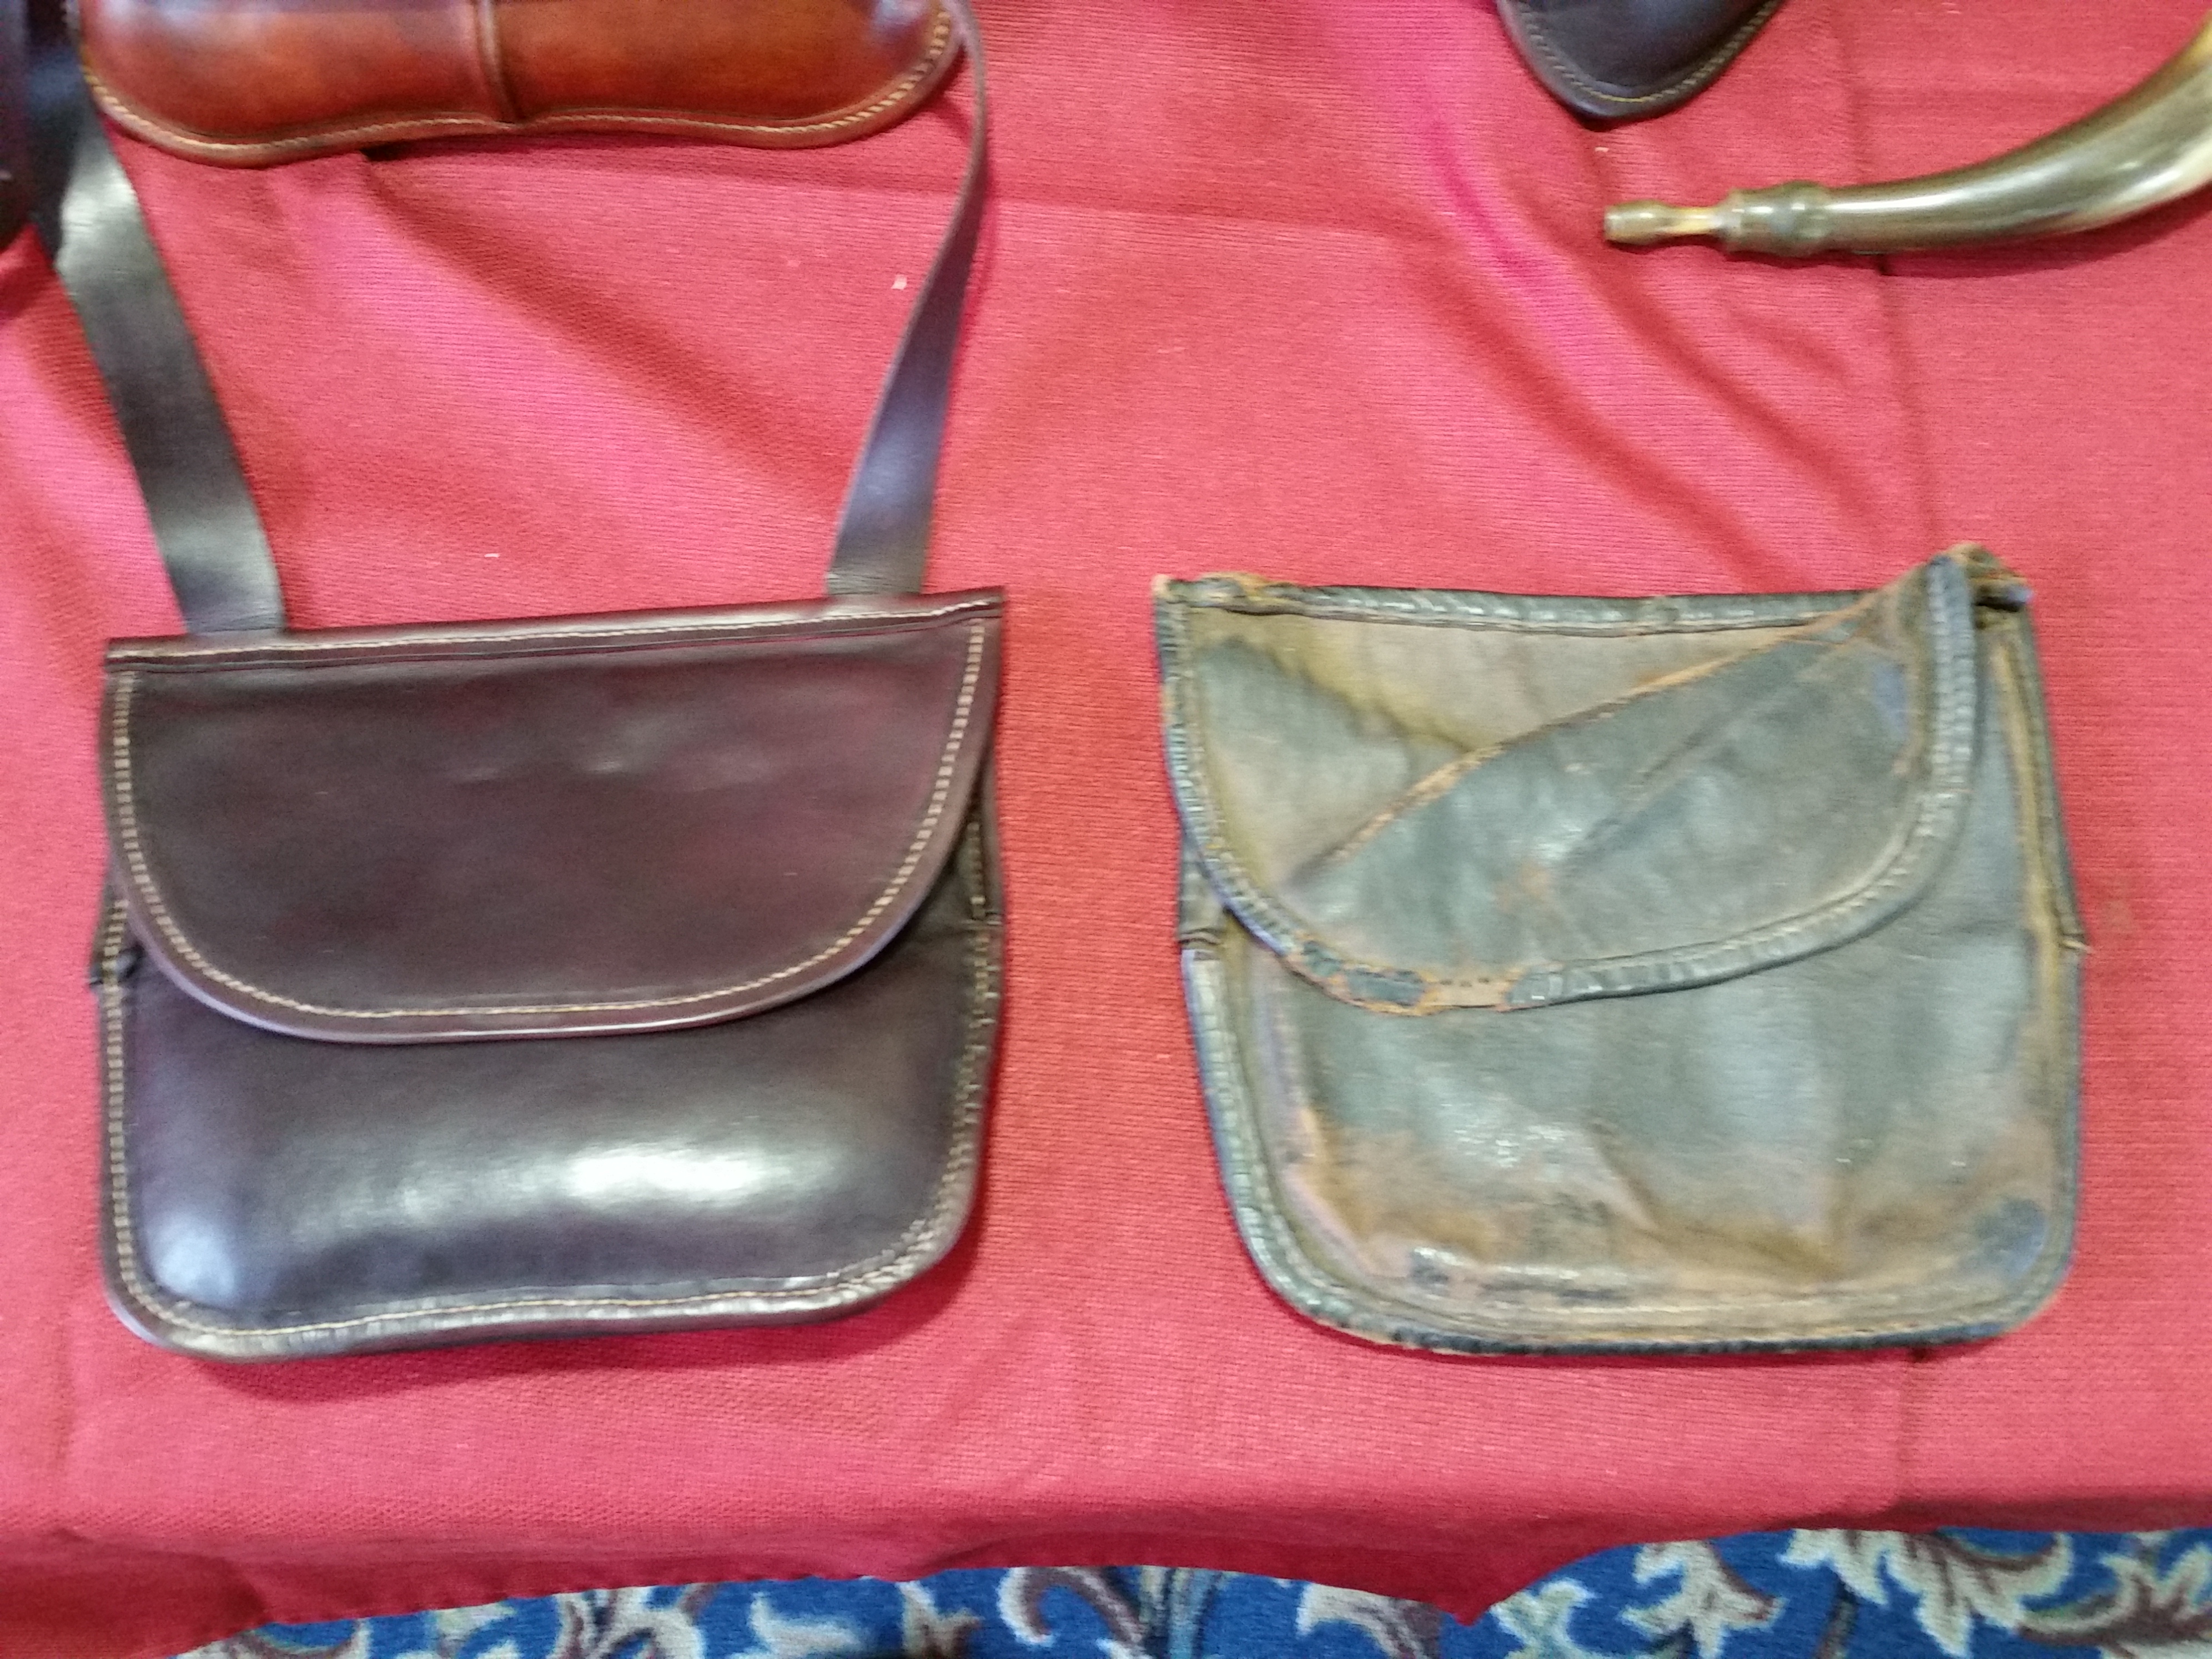
A rifle this fine and a proper original bag needs a proper horn. With many horners at CLA and many horns, the one that caught my eye was at Pete Hutton’s table. Pete makes screw-tip horns of various regional styles. One of the prettiest ones there happened to be a Bucks County screw-tip. I figured it would look just fine with the Martin schimmel and the Willis bag, so it came home with me.
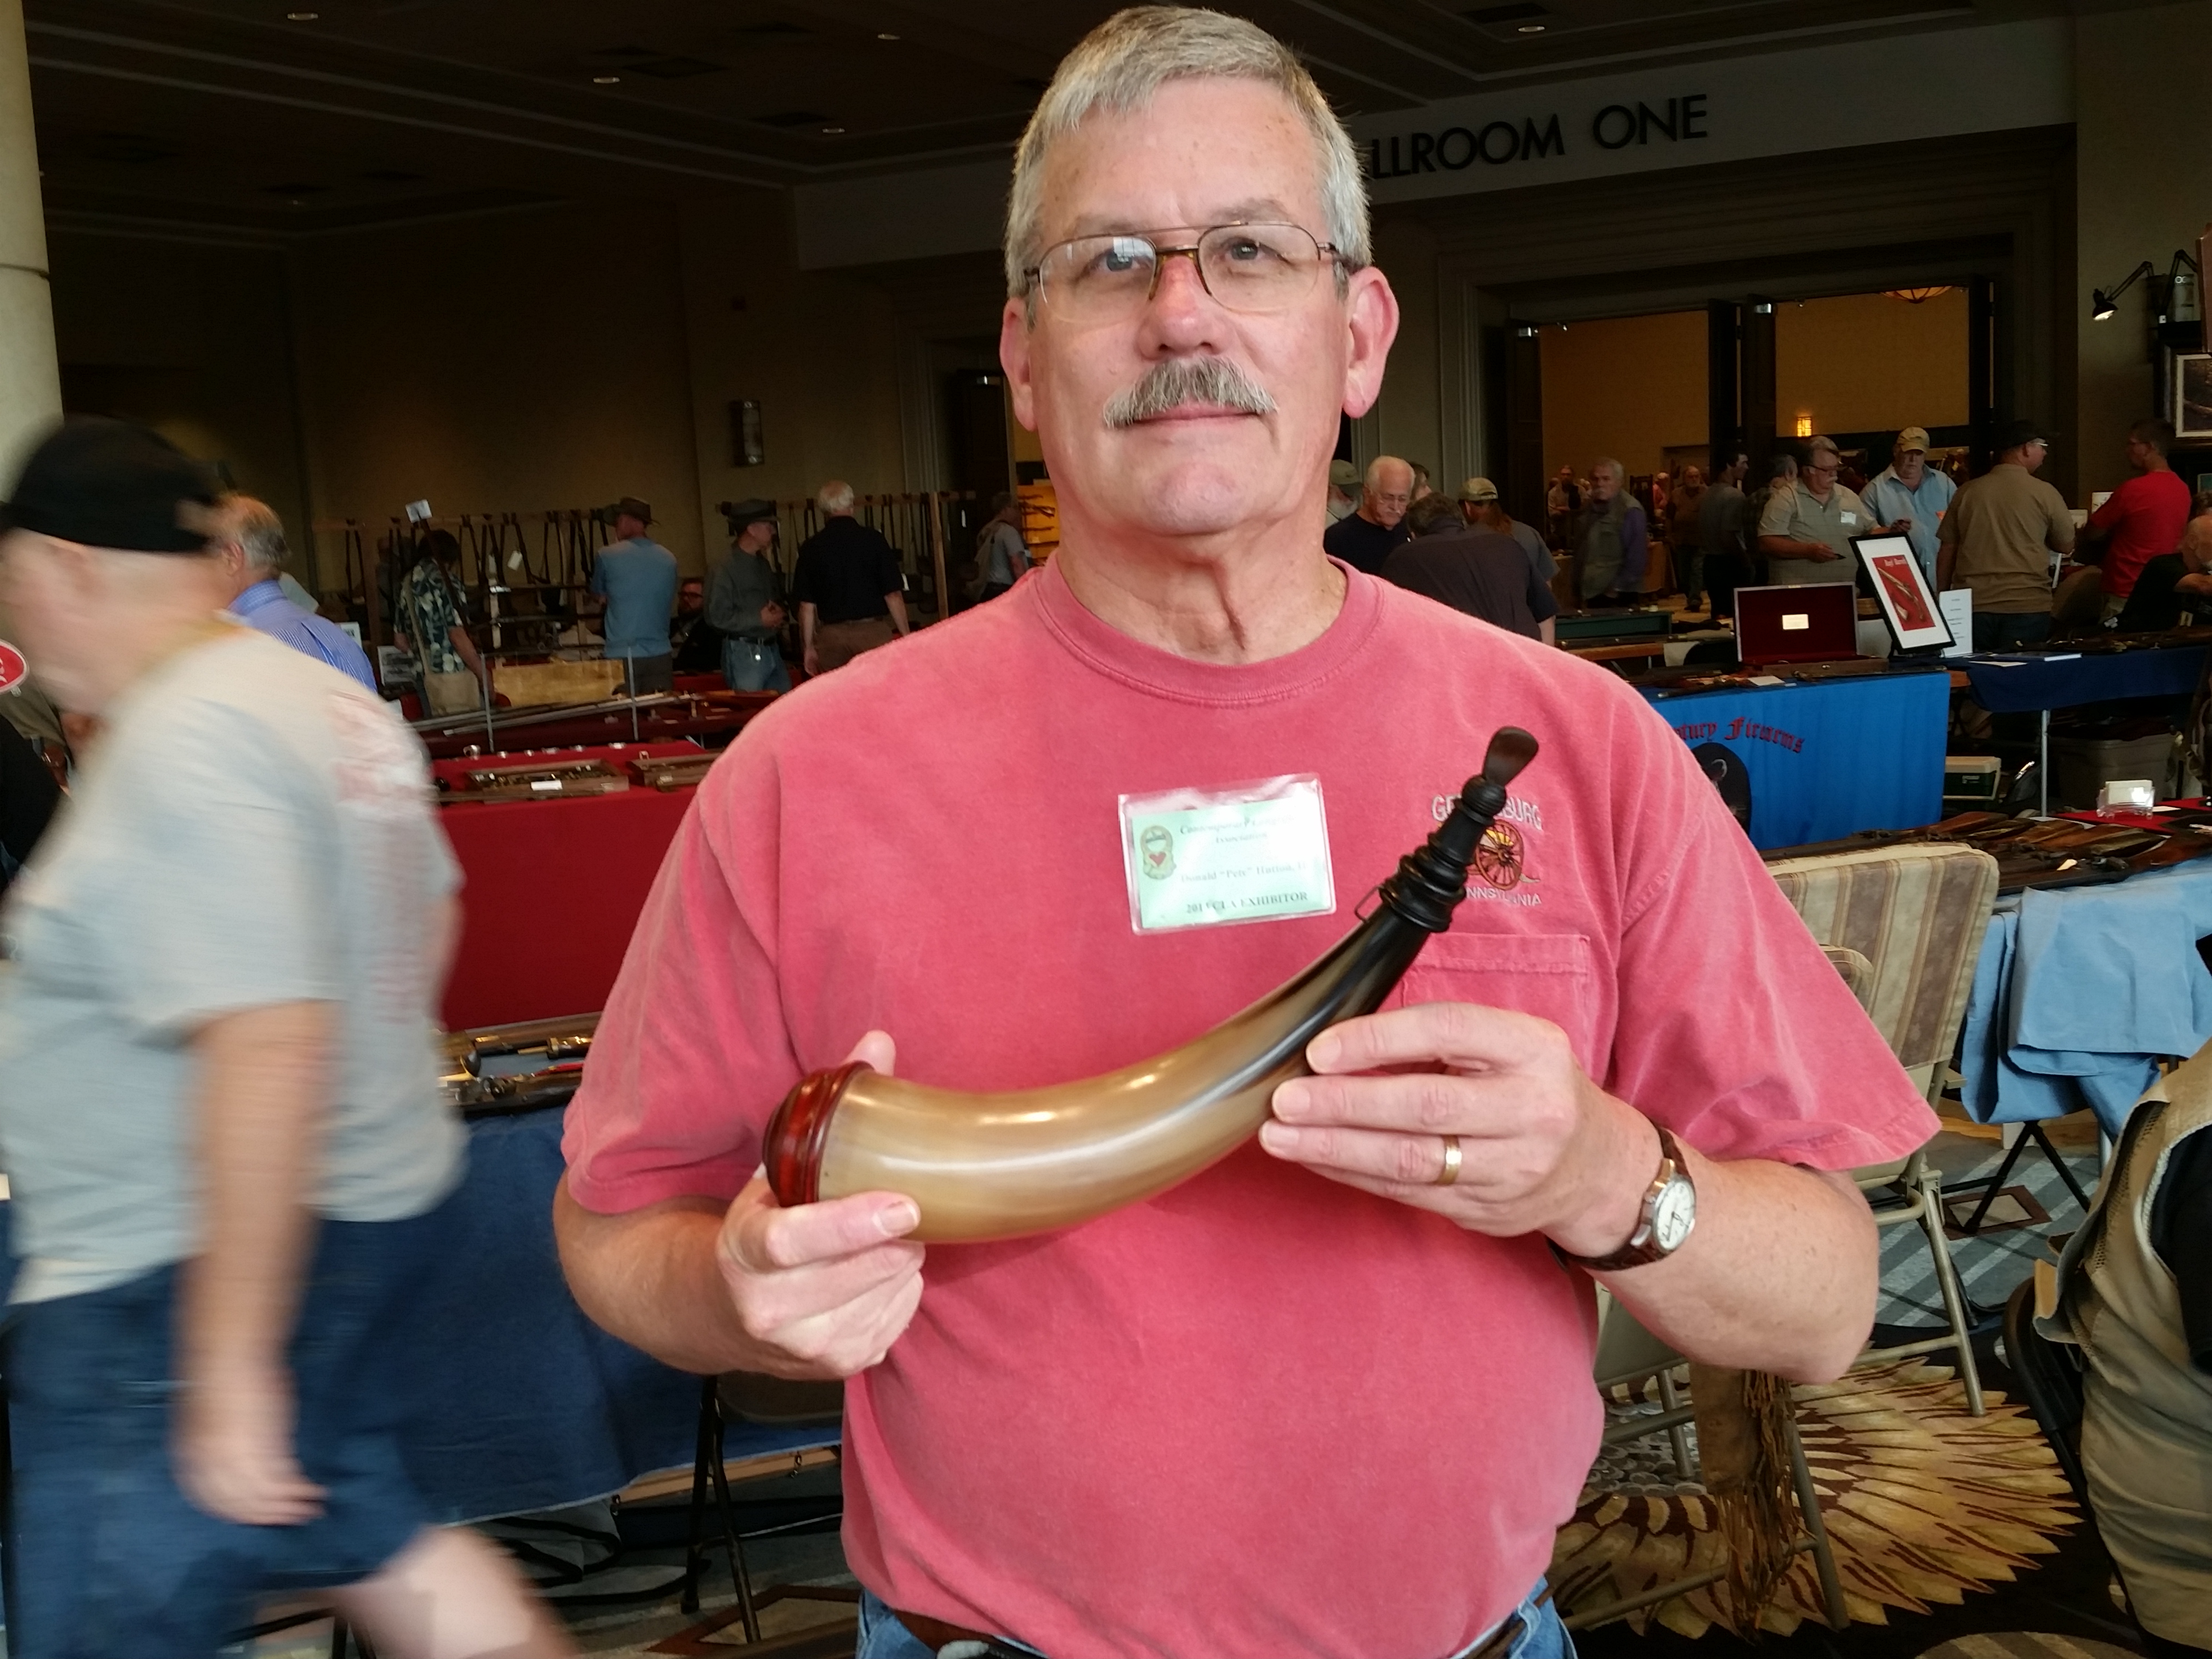
It is worth noting that horners have been studying and making screw-tip horns for many years. It was Art DeCamp who put the information on regional styles together. After years of careful research, he published a book detailing these styles called Pennsylvania “Horns of the Trade” Screw-tip Powder Horns and Their Architecture. It has become the definitive work on Pennsylvania screw-tip horns.
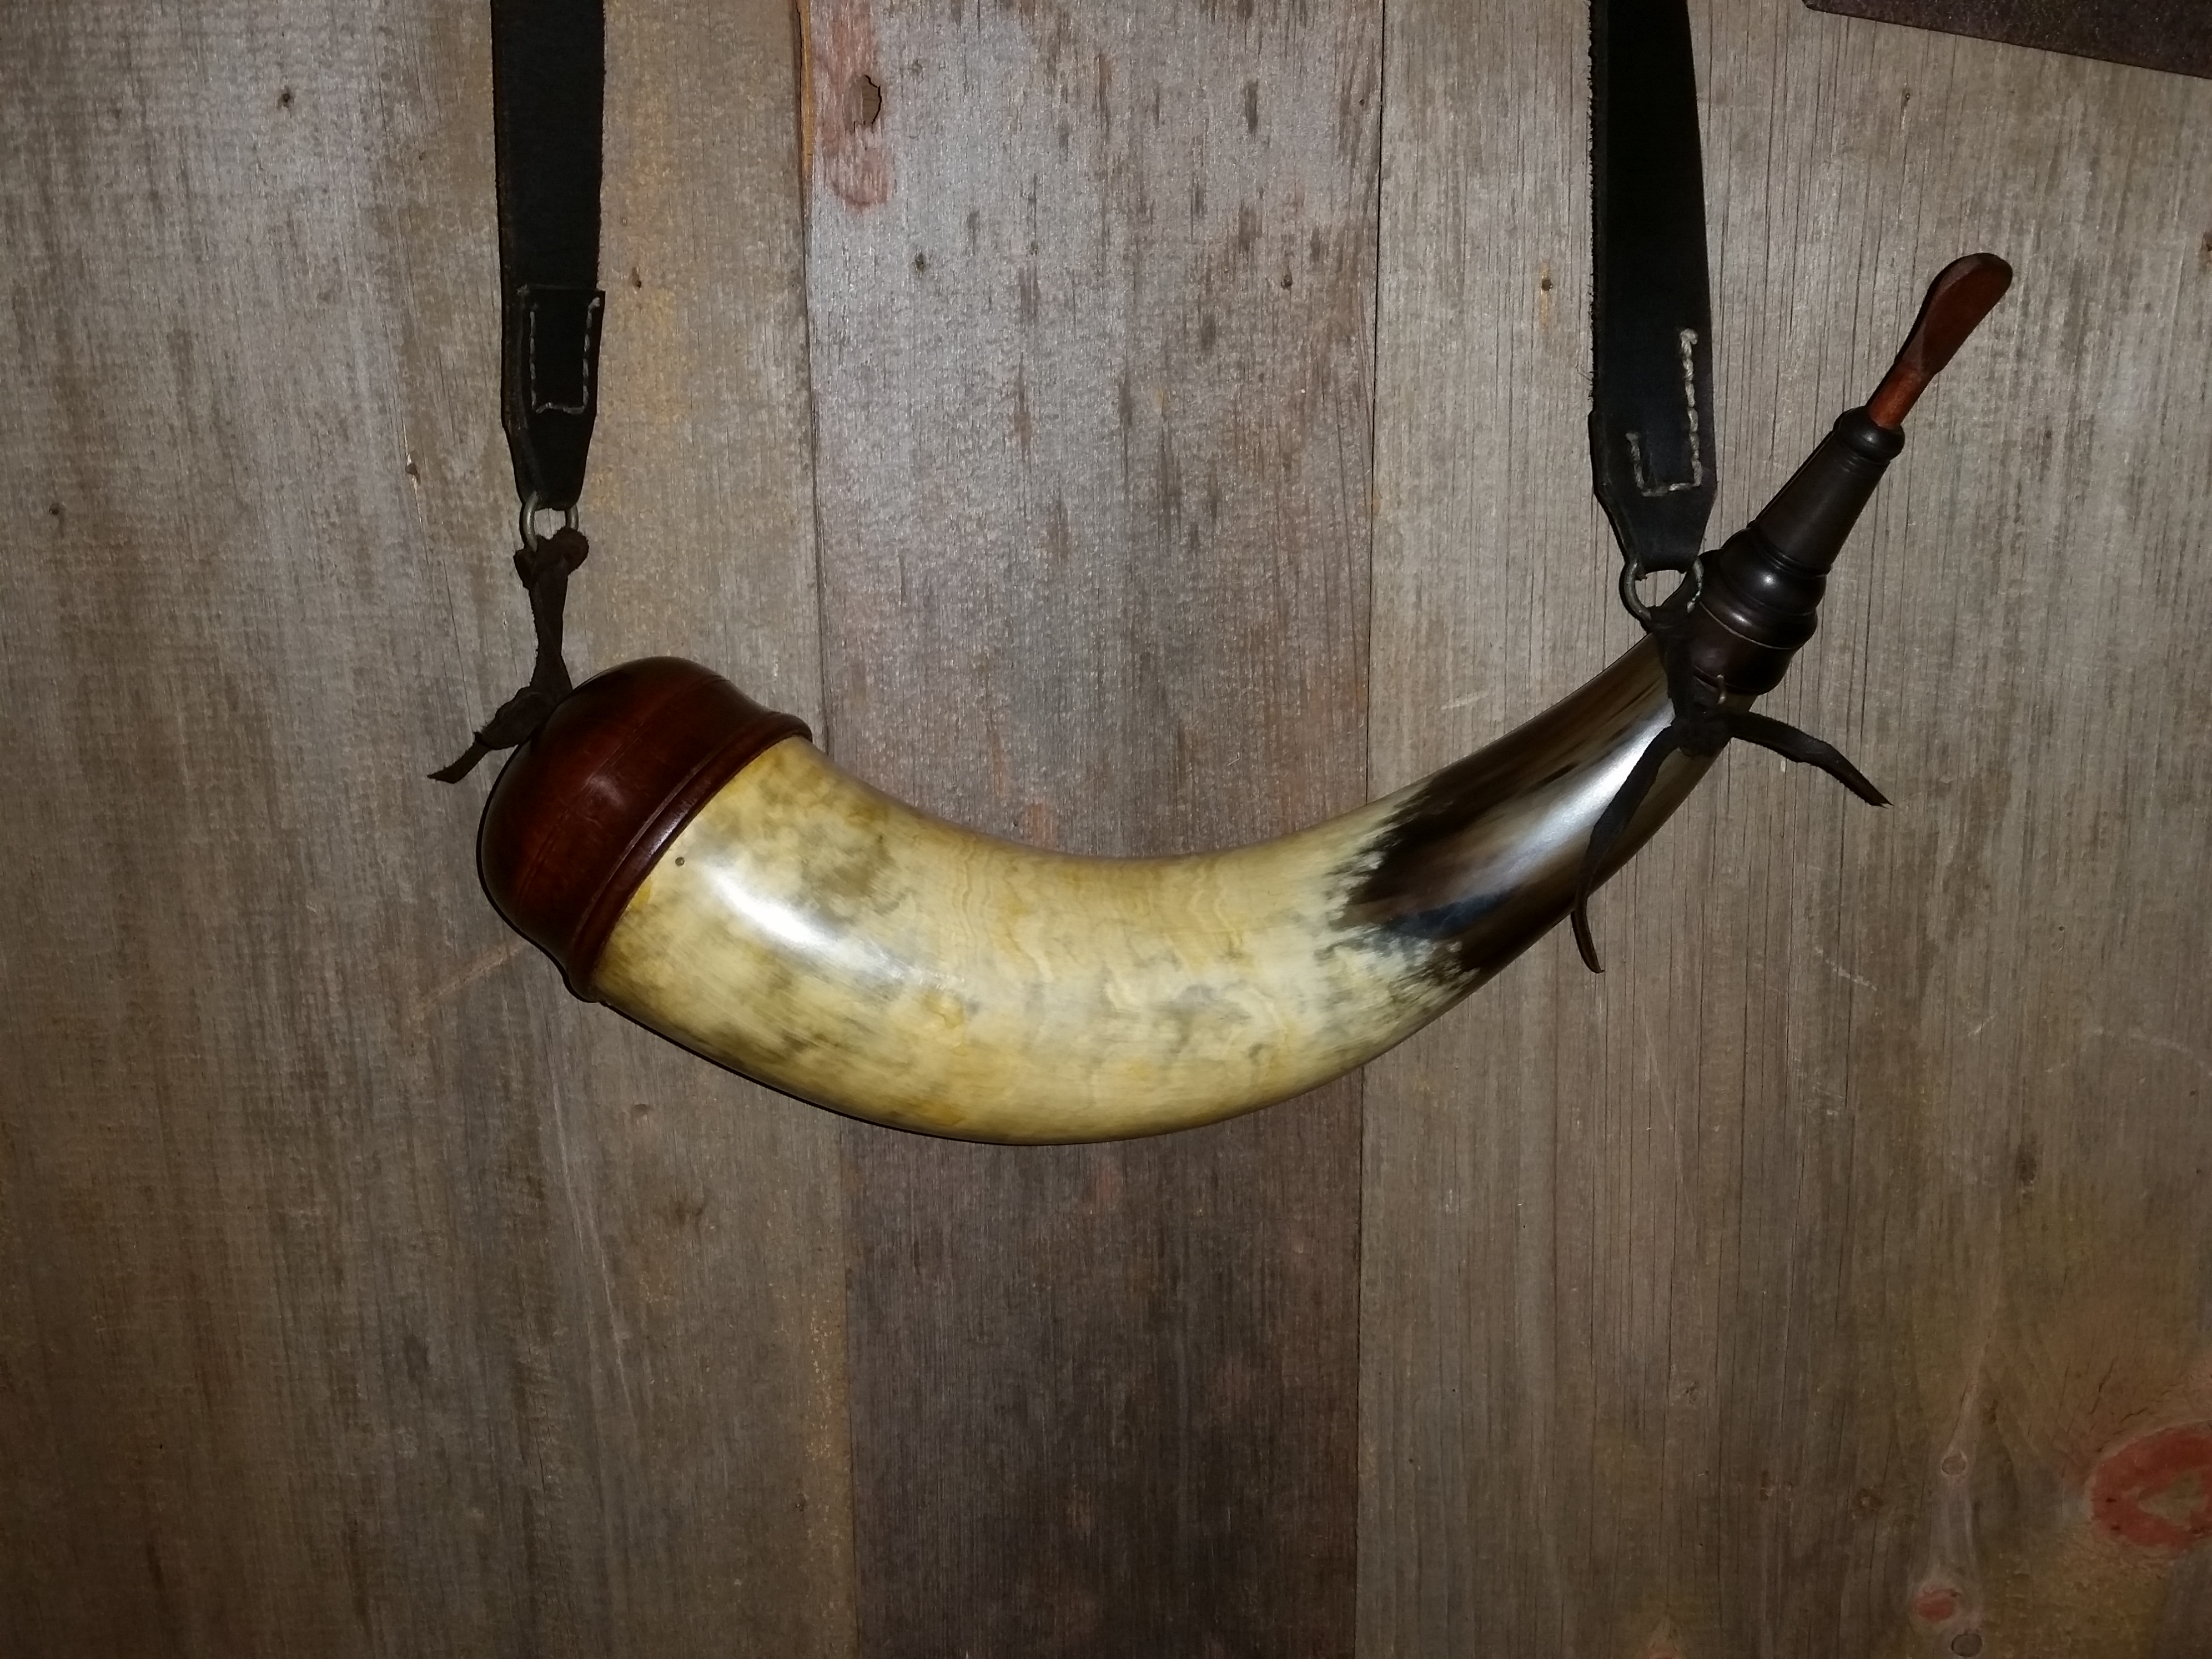
When I studied the Bucks County section of Art’s book, I looked for the characteristics that Frank incorporated in his screw-tip. Frank’s is quite similar to #36 on page 128-129. Art describes this horn as an early horn, probably Bucks/Chester county just north of Philadelphia. The collar and tip show a Philadelphia influence. Art mentioned that Bucks County horns were “less refined and of a coarser nature than Philadelphia horns.” Frank’s horn, however, is finely finished, second to none in workmanship.

The schimmel, bag, and horn make a great combination. Besides equipping me for Indiana’s squirrel season, it serves as a reminder of three very talented makers whose work deserves recognition. We should also remember the study of Gary Brumfield, Art DeCamp, and many others have advanced our knowledge of Pennsylvania firearms history. I hope you will take the time to explore the links above.
The links associated with names in the text above take you to the artist’s page on this site. The links below take you to their own site.
Pete Hutton: powderhorn1
Larry Pletcher, editor: www.blackpowdermag.com
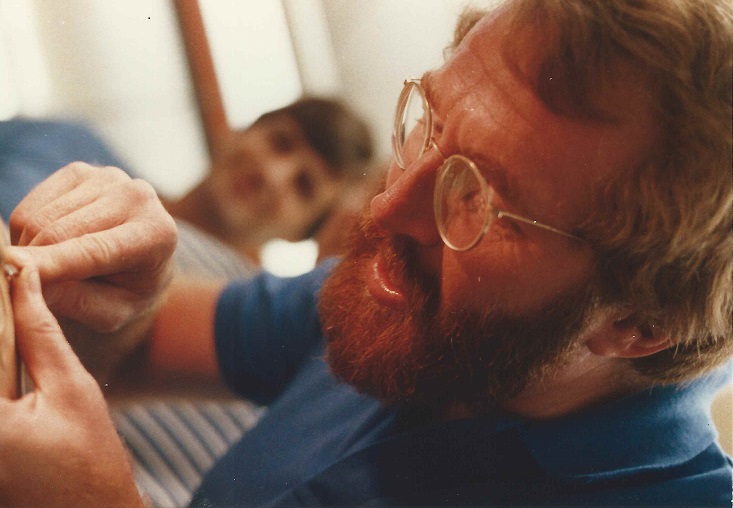
It’s Saturday morning , and Allen Martin and I will try a new method for interviews. Formerly, I used a digital audio recorder, but this year we will use video. On the picnic table where we’re sitting is a wonderfully thin flintlock. That’s where the interview will start.
Allen, thank you for a most impressive rifle. Thanks also for being a part of this first try at a video interview.
Larry Pletcher, editor Blackpowdermag.com
This is an informal list of future project ideas. Nothing cast in stone here; just a place to keep notes on ideas.
1. Vent shape experiments — this will include an exterior tool made by Tom Snyder, a friend who also makes an interior vent coning tool, as well as other tools for the gun maker.
2. A before and after test of Jim Chambers‘ late Ketland lock. We’ll time various combinations of the current and new parts.
3. Find an elapsed time for a double set trigger. This will pretty subjective, and we’re not sure of a methodology. Lowell Gard and I are brain-storming on this.
4. Slow motion video session with Olympus Industrial. I have a few friends with original English locks that we’ll want to video tape. We will also tape locks of any shooters who would like a video tape of their lock.
5. Because of missing a chance to get an interview with Gary Brumfield, I’d like to collect thoughts from his many friends. This is just in planning stages, I want to make sure this gets done.
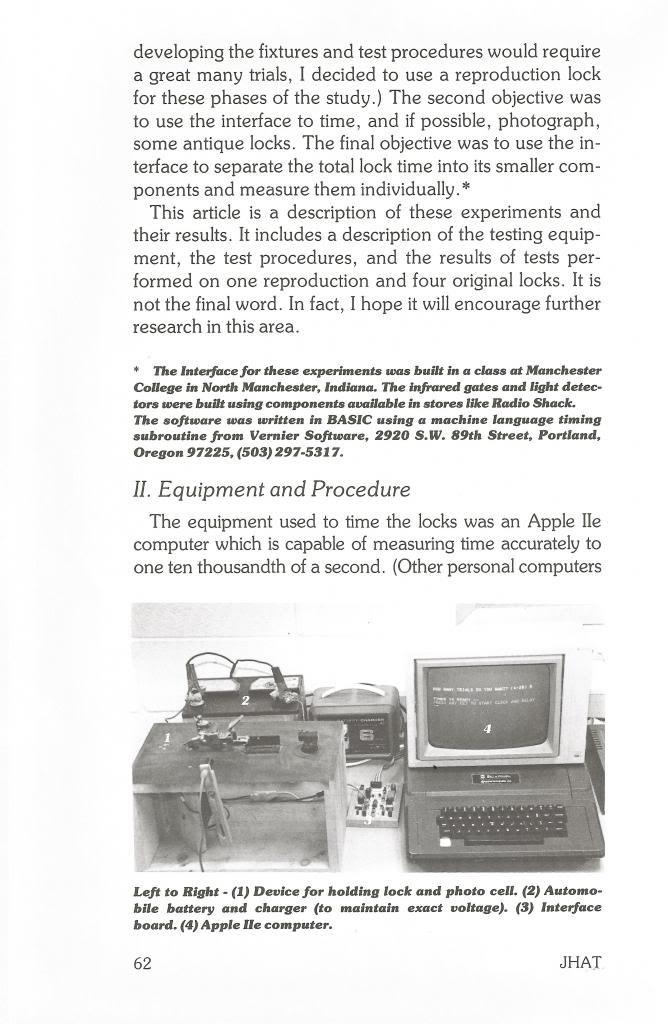
6. A photo session done at the Seminar in Bowling Green.
7. Continue doing video interviews.
8. Add two more lubes to the lube test.
9. Jim’s experiment with golden age tumblers.
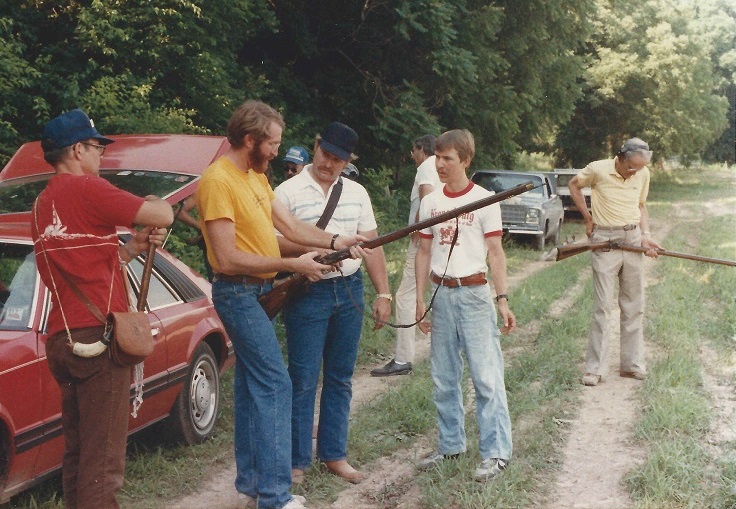
Gary Brumfield has been a friend, mentor, encourager, and teacher to me as well as many others. He was the push behind the lock-timing experiments, helping me to develop methodology we used to time locks. Much of his help came while we were at the Seminar at Bowling Green back in the ’80s.
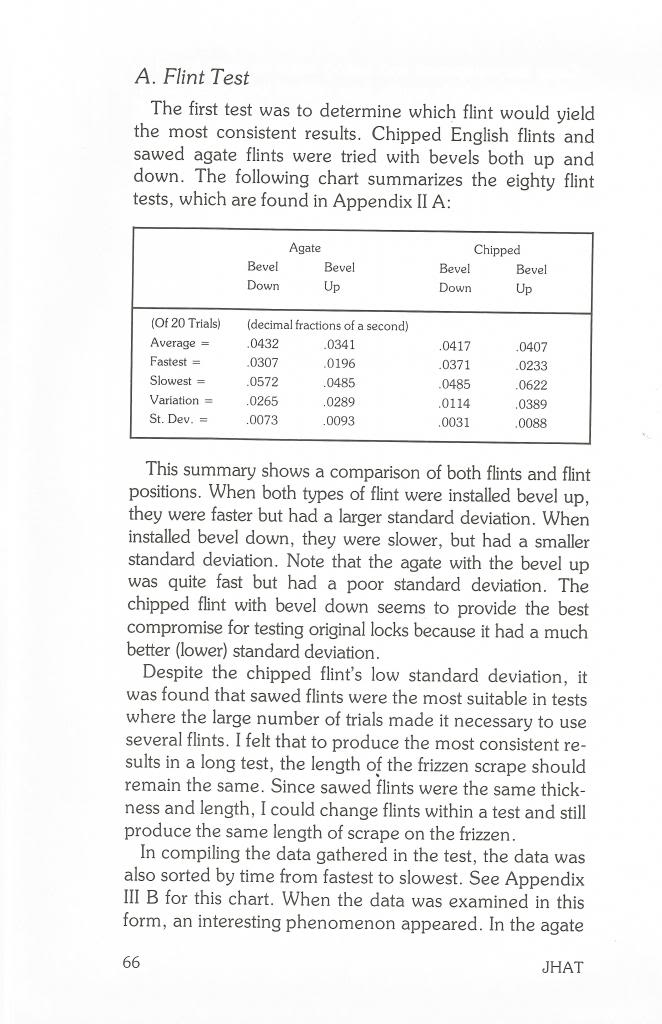
On the first day of the early Seminars, we would meet behind Terry Leeper’s house and have a little shoot. Nothing formal, just a chance to touch off a few and get acquainted. Two of the photos below came from those afternoon shoots.
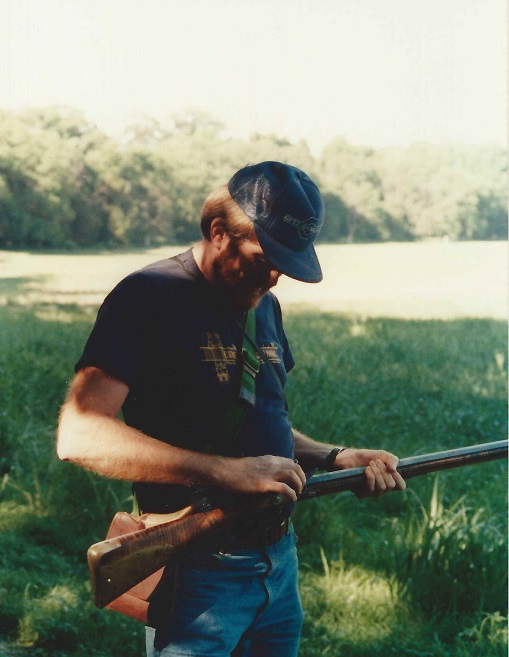
The last photo of Gary was taken at the Seminar in the late ’80s. I used it for the title photo, but thought I’d end with it too. This is the way I choose to remember him.

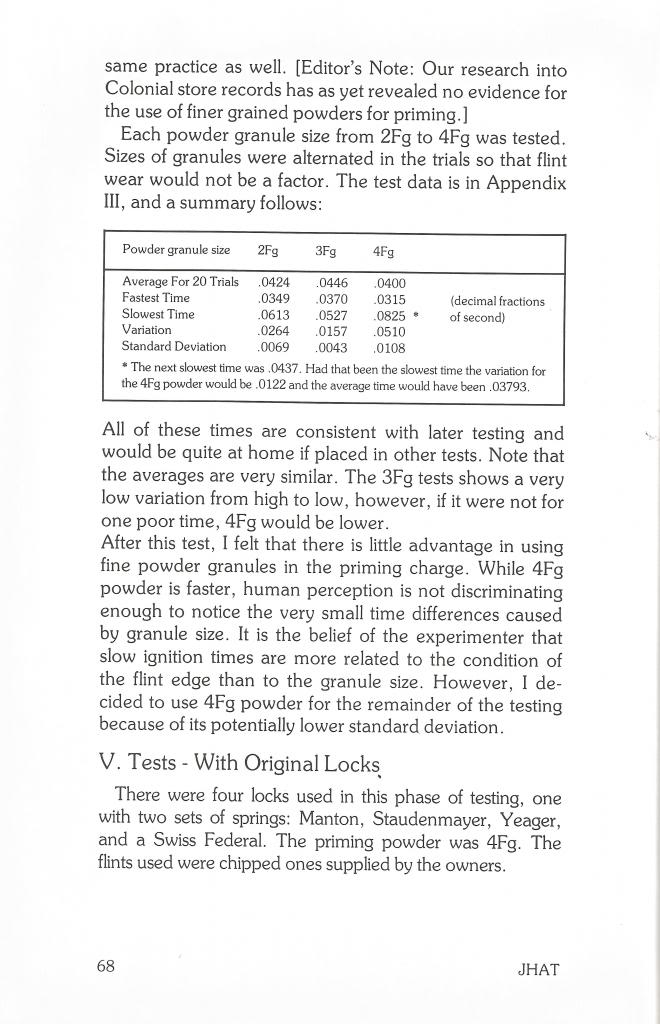
It’s been a long time coming, but Blackpowdermag has a new look!
For some time we have considered revamping Blackpowdermag, and when a group of files were corrupted, we changed to a WordPress authoring system. The result is a new, fresh-looking format that reads well on smart phones and tablets, as well as computers. We are especially pleased with this improvement that was made possible by WordPress.
We also will connect with a Blackpowdermag Facebook page. We envision notifications on Facebook with the appearance of new articles and photos on blackpowdermag.com.
Dealing with the damaged files and articles presented some challenges. Upper most in my mind was to prevent the loss of important experiments and the articles that reported the findings. Since the site’s materials came from a variety of sources, different solutions were used. The result is that all the MuzzleBlasts articles are back, looking better than ever. Other experiments have been saved as well. The slow-motion videos of 80+ flintlocks are back. Photo galleries are organized with material from Friendship, Conner Prairie, CLA, and Dixon’s Gun Fair. And, as I write this, the taped interviews of gun makers are being finished up.
Much of the credit for the new, revised Blackpowdermag belongs to my son, Kevin. Kevin has extensive experience in internet commerce, currently employed by Bloomreach, a premier Internet technology company. Without his help, I’m afraid this site would have simply faded away.

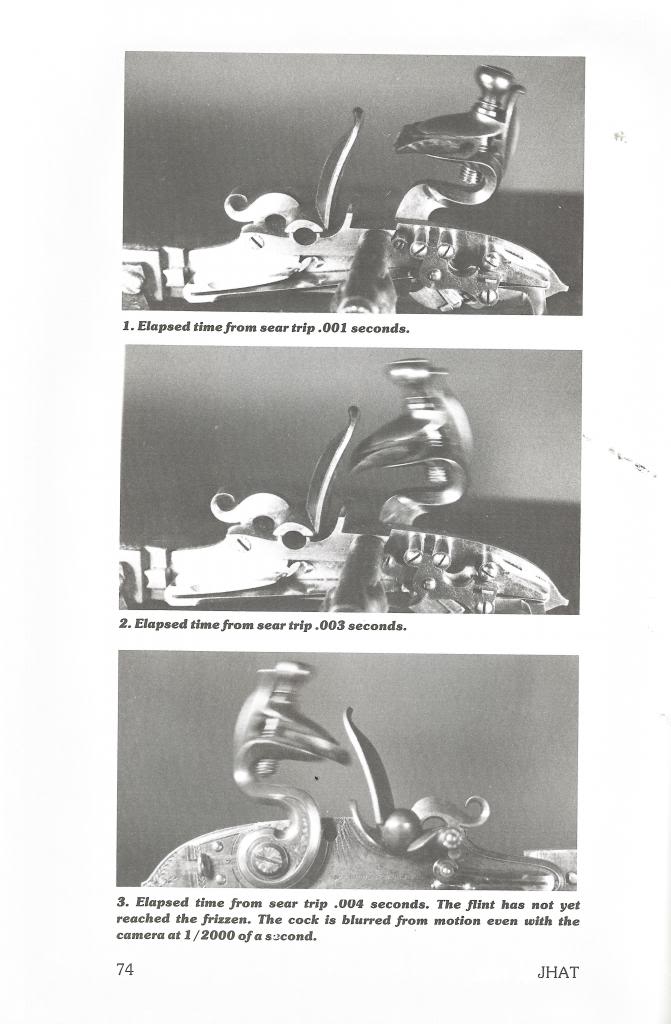
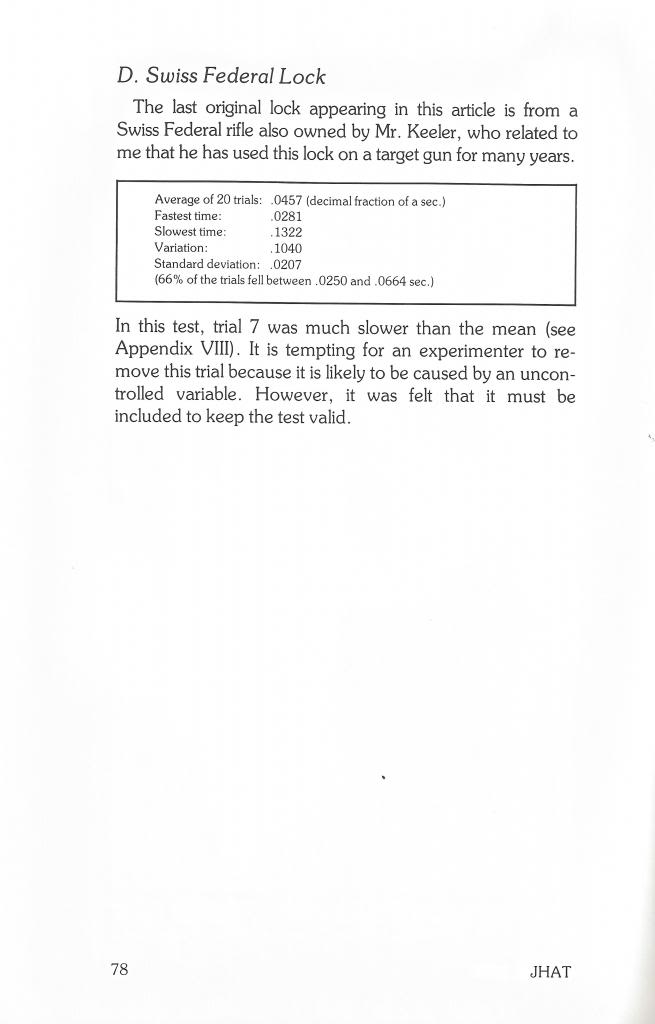
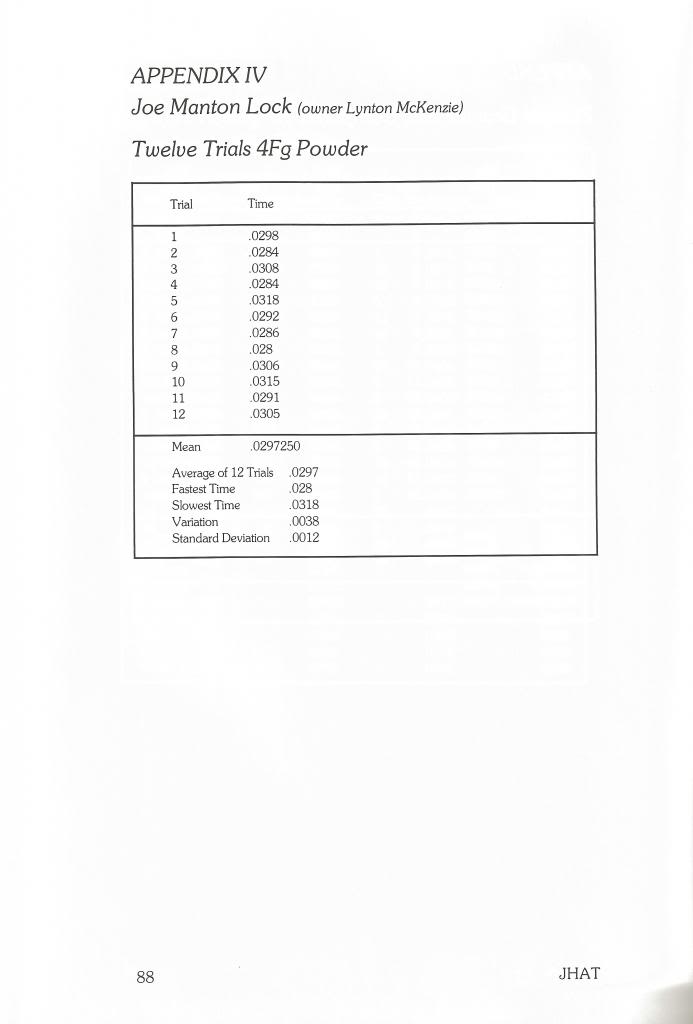
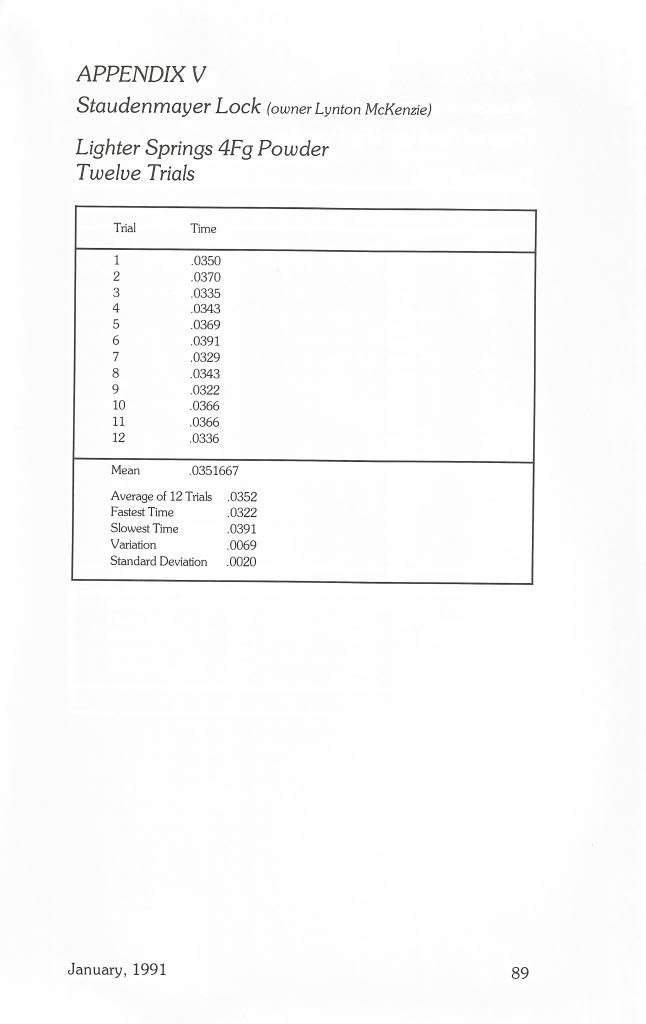
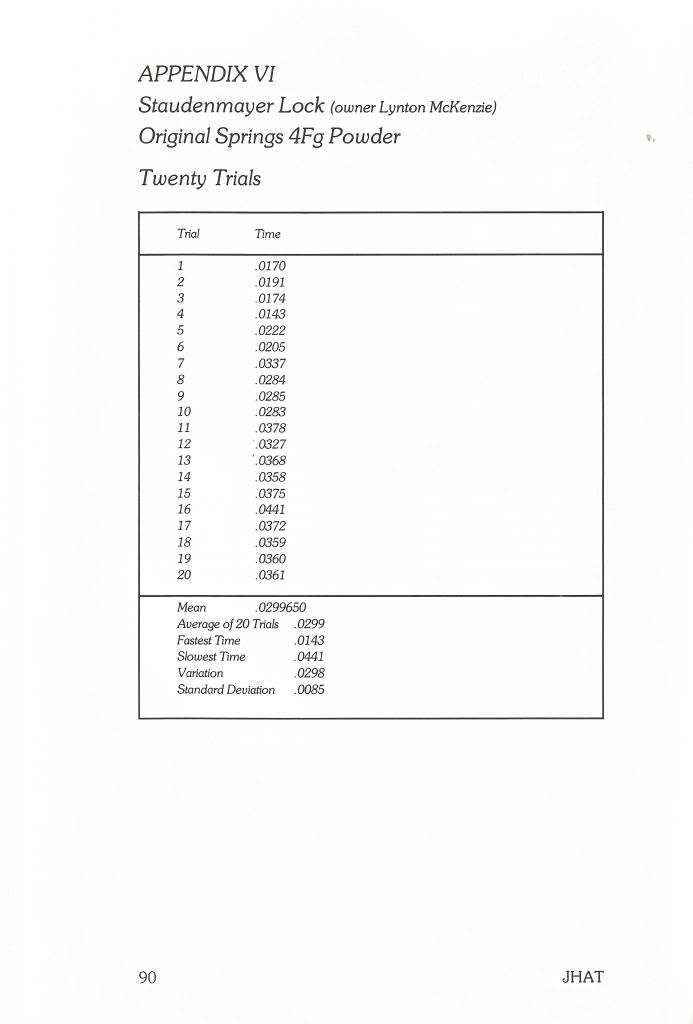
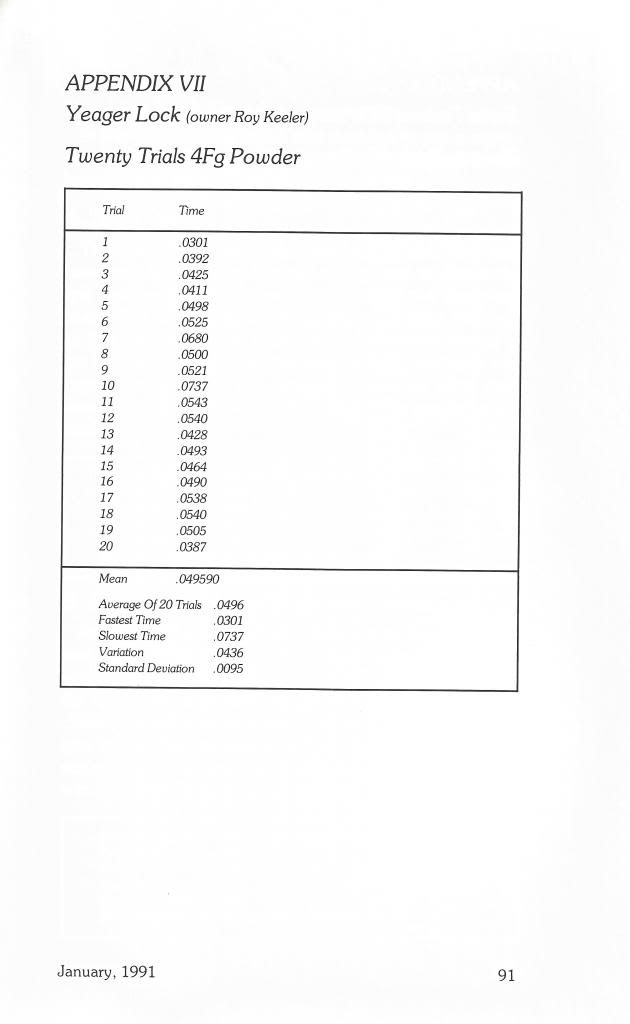
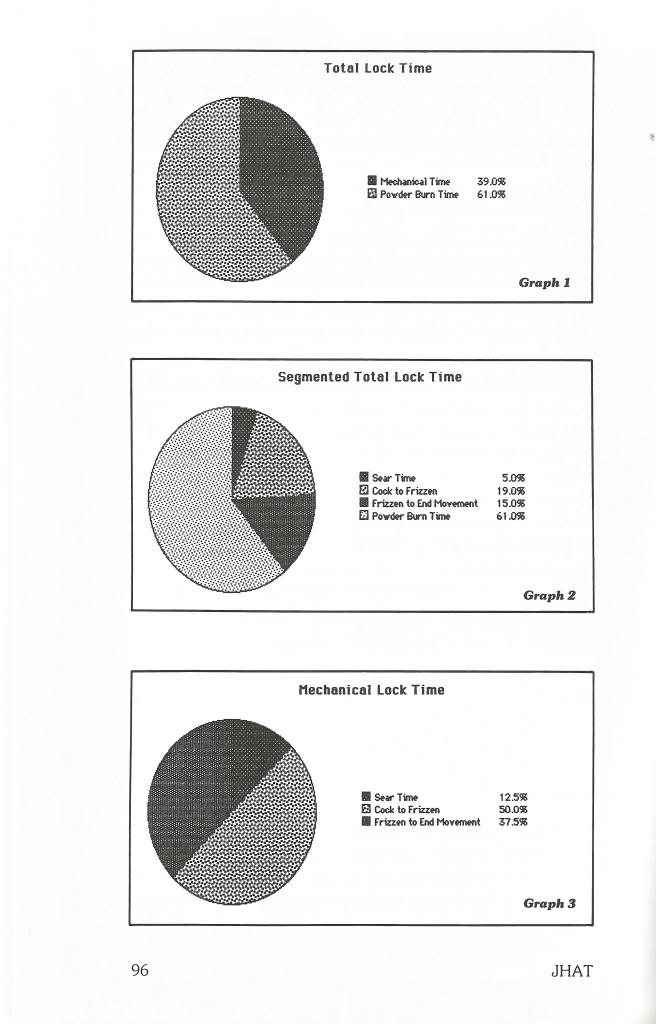
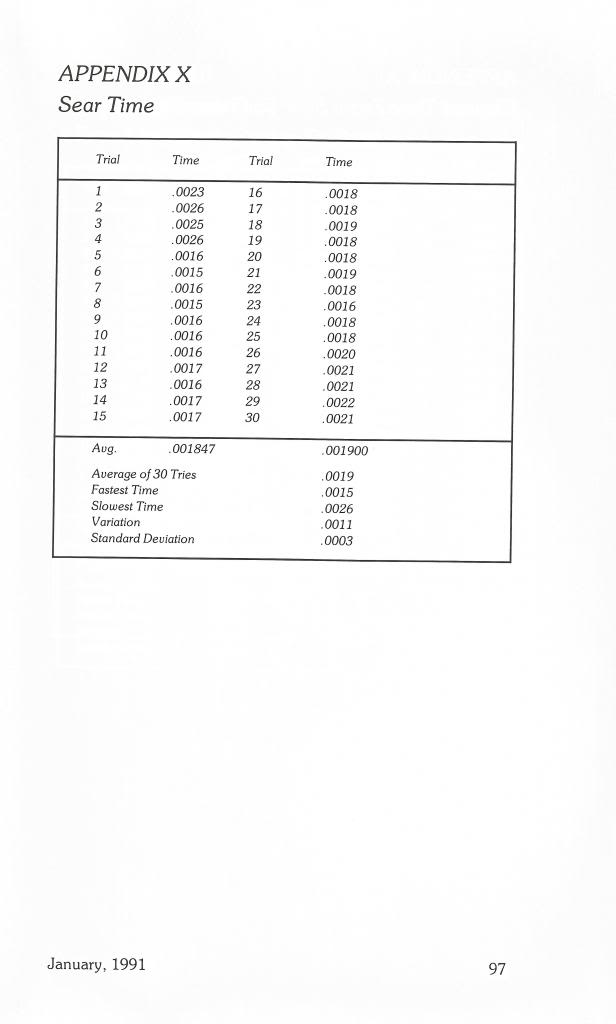
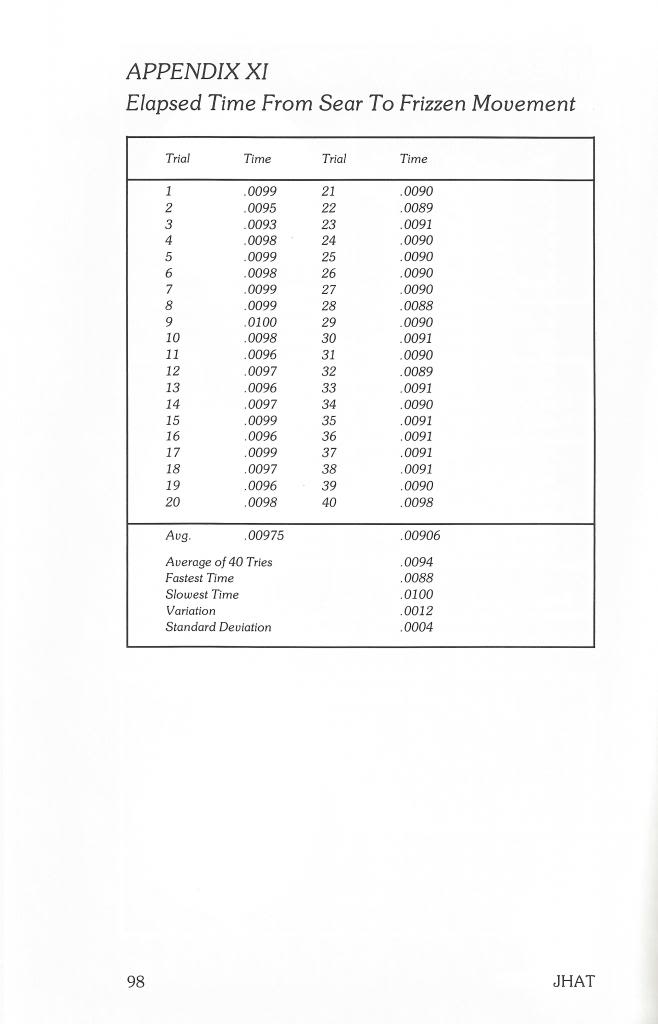
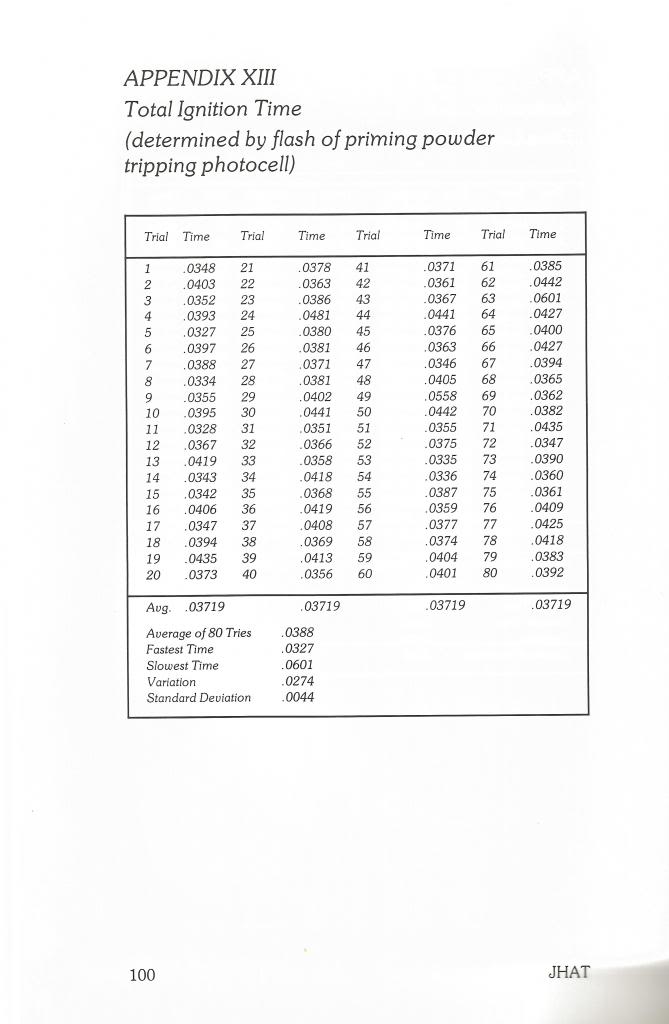
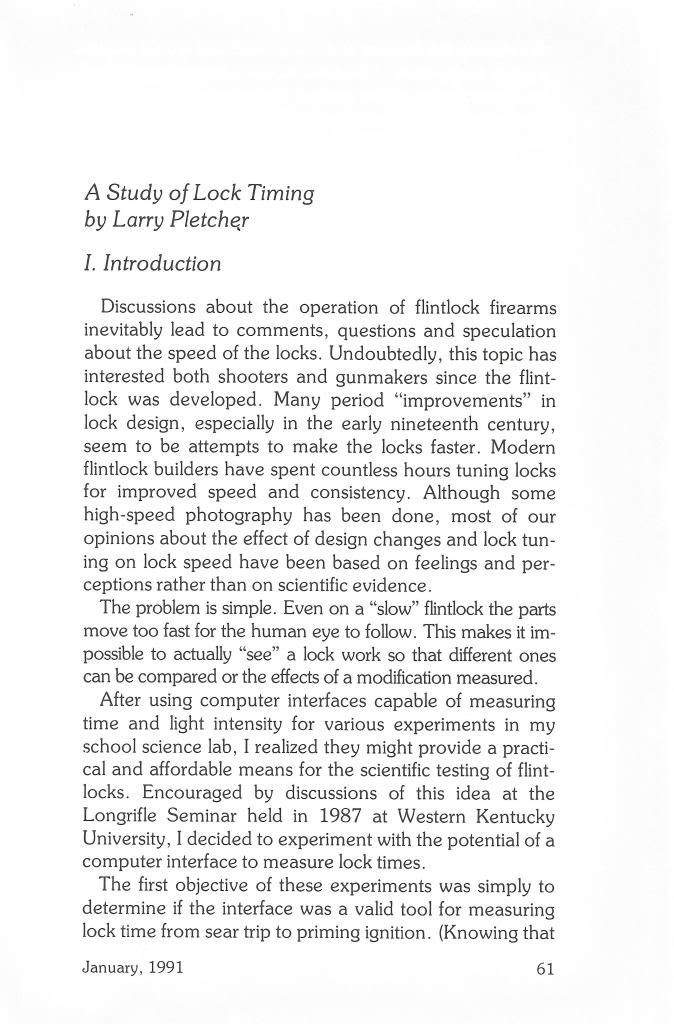
[box type=”note” align=”aligncenter” ]”A Study in Lock Timing” was originally a part of the Journal of Historical Armsmaking Technology, published by the NMLRA in 1991. It is reproduced here with permission from the NMLRA.,[/box]
I’d like to thank Gary Brumfield for his encouragement and advice during the data collecting and writing of this article.
The Siler below is the lock used in the ’80s for the JHAT article. It has been fired probably thousands of times, but never was mounted on a gun. The article below listed all the modifications that were done when the lock was made. It has served as a test bed for many different experiments.
I still have that exact same lock. However only the plate and the cock are original. In 2010 Jim Chambers planned to change the cracked frizzen. By the time he was finished only the cock and plate were left. It continues to be my test bed lock.

Filling a flintlock touch hole with priming powder causes a slower ignition. The pan fire has to burn through instead of flash through the vent. Is this “fuse effect” true? Can the difference be measured? Are the “hang fires” experienced by black powder shooters caused by something else? Reporting the answers to these questions is the purpose in this article.
The purpose of this test was to see if there was a measurable delay in ignition when a straight cylinder vent was filled with priming powder. (We did not deal with vent liners in this test.) For the purpose of this experiment I will define this “fuse effect” as an ignition delay caused by the priming powder having to burn its way through the vent to ignite the main charge instead of “flashing” through the vent. I’m personally not fond of the term because it implies that we know what caused the delay. I like the term “hang fire” because it does not suggest a cause.
The test was set up using a fixture we used earlier to time lock ignition speeds. We used a “pistol” with a barrel stub, small Siler lock, and my computer with photo cells “looking” at the pan and barrel muzzle. The barrel is loaded with 30 gr 3fg and a sabot to hold powder in place. The pan is primed, and ignited with a red hot wire to eliminate lock variables. Between firings, the barrel is wiped with two patches, a vent pick used, and compressed air is blown through the vent to insure that the vent is clean. The pan is primed with Null B close to the barrel. The only difference between the two test phases was that the vent was completely empty in one, while in the other, we picked priming powder into the vent until no more would go in.
The barrel used was octagon 7/8” across the flats and was .45 caliber. It had a flat flint-type breech. The vent was a straight cylinder with a 1/16” diameter approximately .21 inches in length. Time starts when the pan photo cell is triggered and stops when the barrel photo cell is triggered. Thus barrel time is included in this test, however this obviously the same for both vent conditions.
We recorded 5 trials for each vent condition. The average time for the clean, empty vent was .028 seconds. The filled vent average was .031 seconds. As you would expect, the slowest time we recorded was in the filled vent phase (.0363). However the fastest time of the day was also in the filled vent phase (.0233). (We also did a single clean vent trial where we banked the prime away from the vent and recorded at time of .067 – more than two times slower than the clean vent average.)
These averages are quite close together. We expected a larger difference because our ears tell us a hang fire has taken place. And, here is the most unusual finding. The fastest time (.0233) we recorded sounded as if it was a hang fire. The slowest time (.0363) recorded sounded like a sharp crack – no hang fire – sounded like a .22 rim fire. This reinforces a belief I have long held that our eyes and ears are terrible tools for judging flint events.
This all makes me wonder what we are really hearing. Maybe our ears send us false information. Consider this: You are three shots into a target and have 3 tens. You shoot the 4th shot and it’s a nine. Sounded fast, but you think it was just you. You shoot the 5th shot, and it has an audible hang. You look through the scope, and no. 5 is back in the 10 ring. Maybe the fourth shot was slow, the fifth shot was fast, and your ears are at fault. With what we learned here, it could be possible. I truly don’t know the answer. Sometimes experiments leave you with more questions than answers. I do know that I trust my ears less than the numbers.
There are so many variables that can cause delays that in most cases it can be impossible to rule out all but one. That was the purpose in our experiment. We wanted to put a number on the amount of delay, if any, caused by packing a cylinder vent with priming powder.
The delays we found were measurable but not large enough to account for the delays we have measured in pan ignition – where the variables were flint edges, priming, particle size, and location of the prime in the pan. I have measured far larger time variations caused by these variations. The other big factor is the delay caused by fouling in the vent. A vent full of priming is one thing, but a vent filled with fouling is quite another. Besides causing huge hang fires, I believe fouled vents are the flint shooter’s biggest cause of failures to fire.
If I were to list the top causes for delays based on my testing they would be:
1. Lack of good spark production from good flint edge
2. Improper priming location in the pan with good priming powder
3. Vent not absolutely clear of fouling.
(A clean vent filled with prime is not a major cause IMHO.)
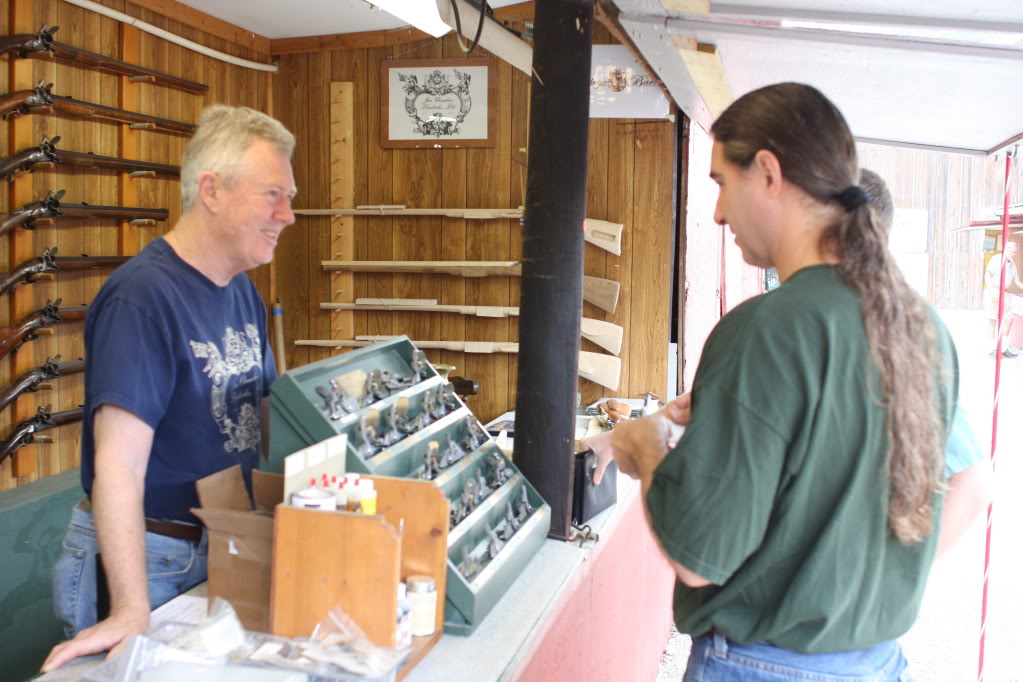
Jim Chambers has been a friend of mine for many years. I stopped in his booth and enjoyed a chat with him.
Jim told me about his start in muzzleloading and his work with John Bivins. You’ll enjoy Jim’s story of his interview with John. He also tells about acquiring the Siler lock-making business from Bud Siler. Jim tells how the kit business actually began with ideas as far back as the Bicentennial. It was especially fun for me to hear about what Jim likes to do more than anything else in muzzleloading. It shouldn’t be a surprise.
Visit Jim Chamber’s website www.flintlocks.com
David Price makes beautiful guns. His speciality is the Swivel Breech. In the years I have known him, I have had the chance to look at many of his guns. His work is on numerous magazine covers, at Dixons, at Friendship, and as the raffle gun for GunMakers’ Hall.
David is man with the desire and ability of teach others what he knows. His web site, The Flintlock Shop, has tutorials on carving and wire inlay. He teaches classes in his shop, Dixons, and at Friendship. As an example after attending one of his classes on tool sharpening, I know what “sharp” is.
Our first try at an interview suffered from technical difficulties. Below is the interview just completed (2014 Spring Shoot).
I spent a particularily enjoyable afternoon when David helped me with the high speed video of locks at GunMakers’ Hall. When we discussed our plans I mentioned that I thought we should use the same powder for each trial, David said, “I think the same guy should do all the priming.” And then he did just that – removing another variable in our work.
In all of this David and I have become good friends. Besides his abilities as a gunmaker, David is a good story-teller and has a great sense of humor. And – I treasure the book he gave me containing photos of his work.
David granted me permission to use photos from his book. Here is one I especially like.
[box type=”note” align=”aligncenter” ]Learning how black powder ignites in a flintlock has been a passion of mine for 20 years. In this series of tests we examine the way fire travels from the pan to the barrel. The process involves the use of camera, computers, and a physics interface. What we learn may change the way we think about flintlock tradition.[/box]
Introduction
This series of experiments has evolved into one of greater scope than originally intended. Earlier intentions were to examine the ignition qualities when the position of the vent hole varied up or down in relation to the pan. The methods to investigate included a computer timing procedure used to measure times from a barrel stub and lock plate with a pan attached.
An L&R plate was chosen because the pan was attached. The plate was drilled and attached to a barrel stub with screws. The rear screw is attached to the barrel through a vertical slot in the lock plate. This allows for adjusting the height of the vent hole in relation to the plate.
At the rear of the plate a hole was drilled to provide a pivot point so that the barrel could be rotated to vertical for loading. The barrel is two inches long but is breeched by using a plug with an octagon shape, providing the same dimensions as the barrel.
The computer equipment used included a science interface designed for use in high school physics classes. The hardware was designed and built in the late 80’s. The computer is of similar vintage, but the combination allows measuring time intervals to the nearest 10,000th of a second.
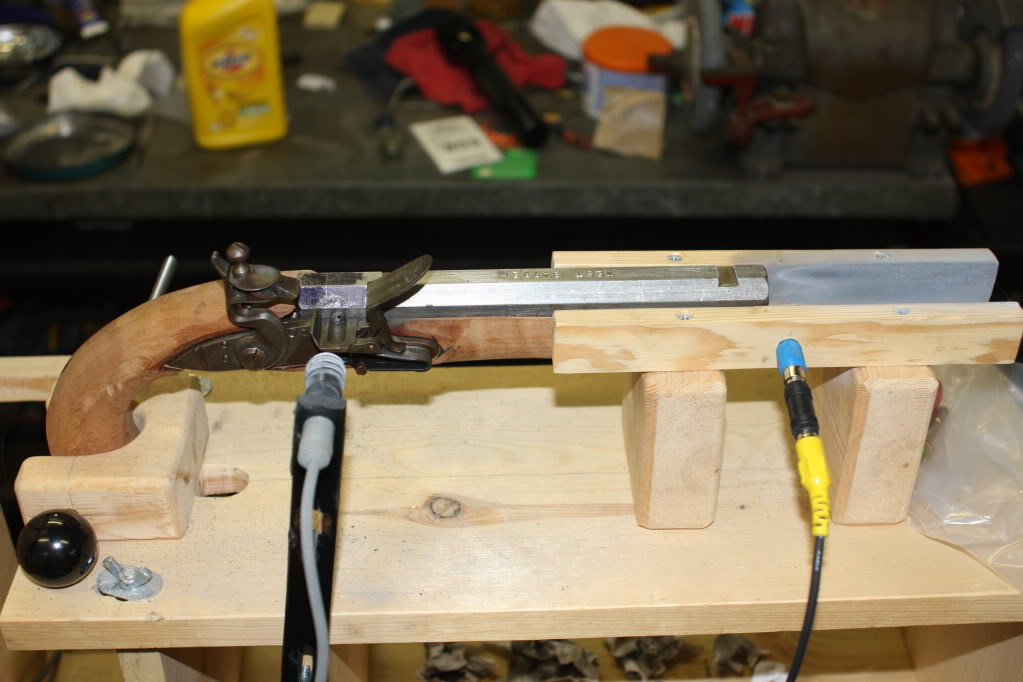
This photo shows the fixture holding the barrel and the photo cells positioned at the pan and muzzle.
Pan Ignition Experiments
The experimentation has been broken into phases. The results of each section will be used in successive testing. The plan is to learn enough to control variables for our final experiment, which will be to the measure and evaluate of different vent locations. Each of the following parts is a link to the actual experiment. Methodologies used will be discussed as well as the experiment and the results.
Part 1 — Black Powder Ignition Characteristics
(Powder on sheets) This phase of testing was suggested to me by Mr. Bill Knight. Its purpose is to identify how the ignition travels across blackpowder exposed to the air as in a flint pan.
Part 2 — Initial Pan Experiments
(Card between barrel and pan) The card test was designed to determine the intensity of the flame at the vent. An index card was cut and pinched between the lock plate and the barrel. The pan was primed in three different positions.
Part 3 — Photography through the muzzle
In this phase I wanted to see if there was a visible difference in the amount of fire traveling through the vent. I used a digital camera to photograph the fire coming through the vent as seen from the muzzle. The camera is aimed to look directly into the barrel muzzle.
In this part we will examine the amount of priming powder used. Weighed amounts of powder will be timed. Plans call for .5 grains, .75 grains, and 1.0 grains of swiss Null B priming powder.
Part 5 — Timing Powder locations in Pan (Is it better to bank the powder away from the vent?)
The technique is to use photo cells to detect pan ignition and start the time. A second photo cell detects fire at the muzzle of the 2 inch barrel and stops the clock.. The methodology for this phase needed careful thought. Informal trials yielded some times that were out of predictable bounds. I suspect they were caused by an unknown variable, perhaps fouling.
Part 6 — Timing Vent locations (high, medium, low)
This final test will explore the ignition speed when the location of the vent hole is varied vertically. The test will start with the vent centered on the top of the pan. Other tests will be conducted with the vent as low in the pan as one could expect to find and with the vent located well above the pan center line.