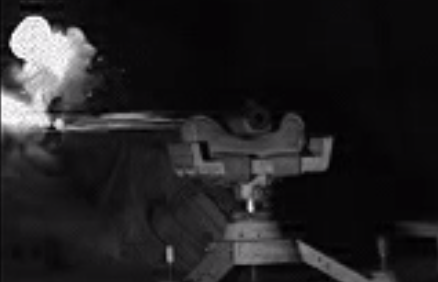
Is it better to bank the black powder priming away from the vent? This piece of conventional flintlock wisdom will be tested.
Part 5 of our test series will examine the question about where in the pan provides the best ignition. Conventional wisdom has told us that banking the priming powder away from the vent will produce the fastest ignition. Practically avery black powder shooter has heard this. This theory is based on human senses or what looks and sounds fast. The current test is designed to see if conventional wisdom is correct.
Early attempts showed a trend developing but had results that did not fit the rest of the range. A careful plan was developed to remove as many variables as possible especially those that were caused by fouling. Between firings the following were done:
The barrel was wiped. An additional step was added here and explained in the video.
A pan brush was used.
A pipe cleaner was used in the vent.
Compressed air was blown into the vent.
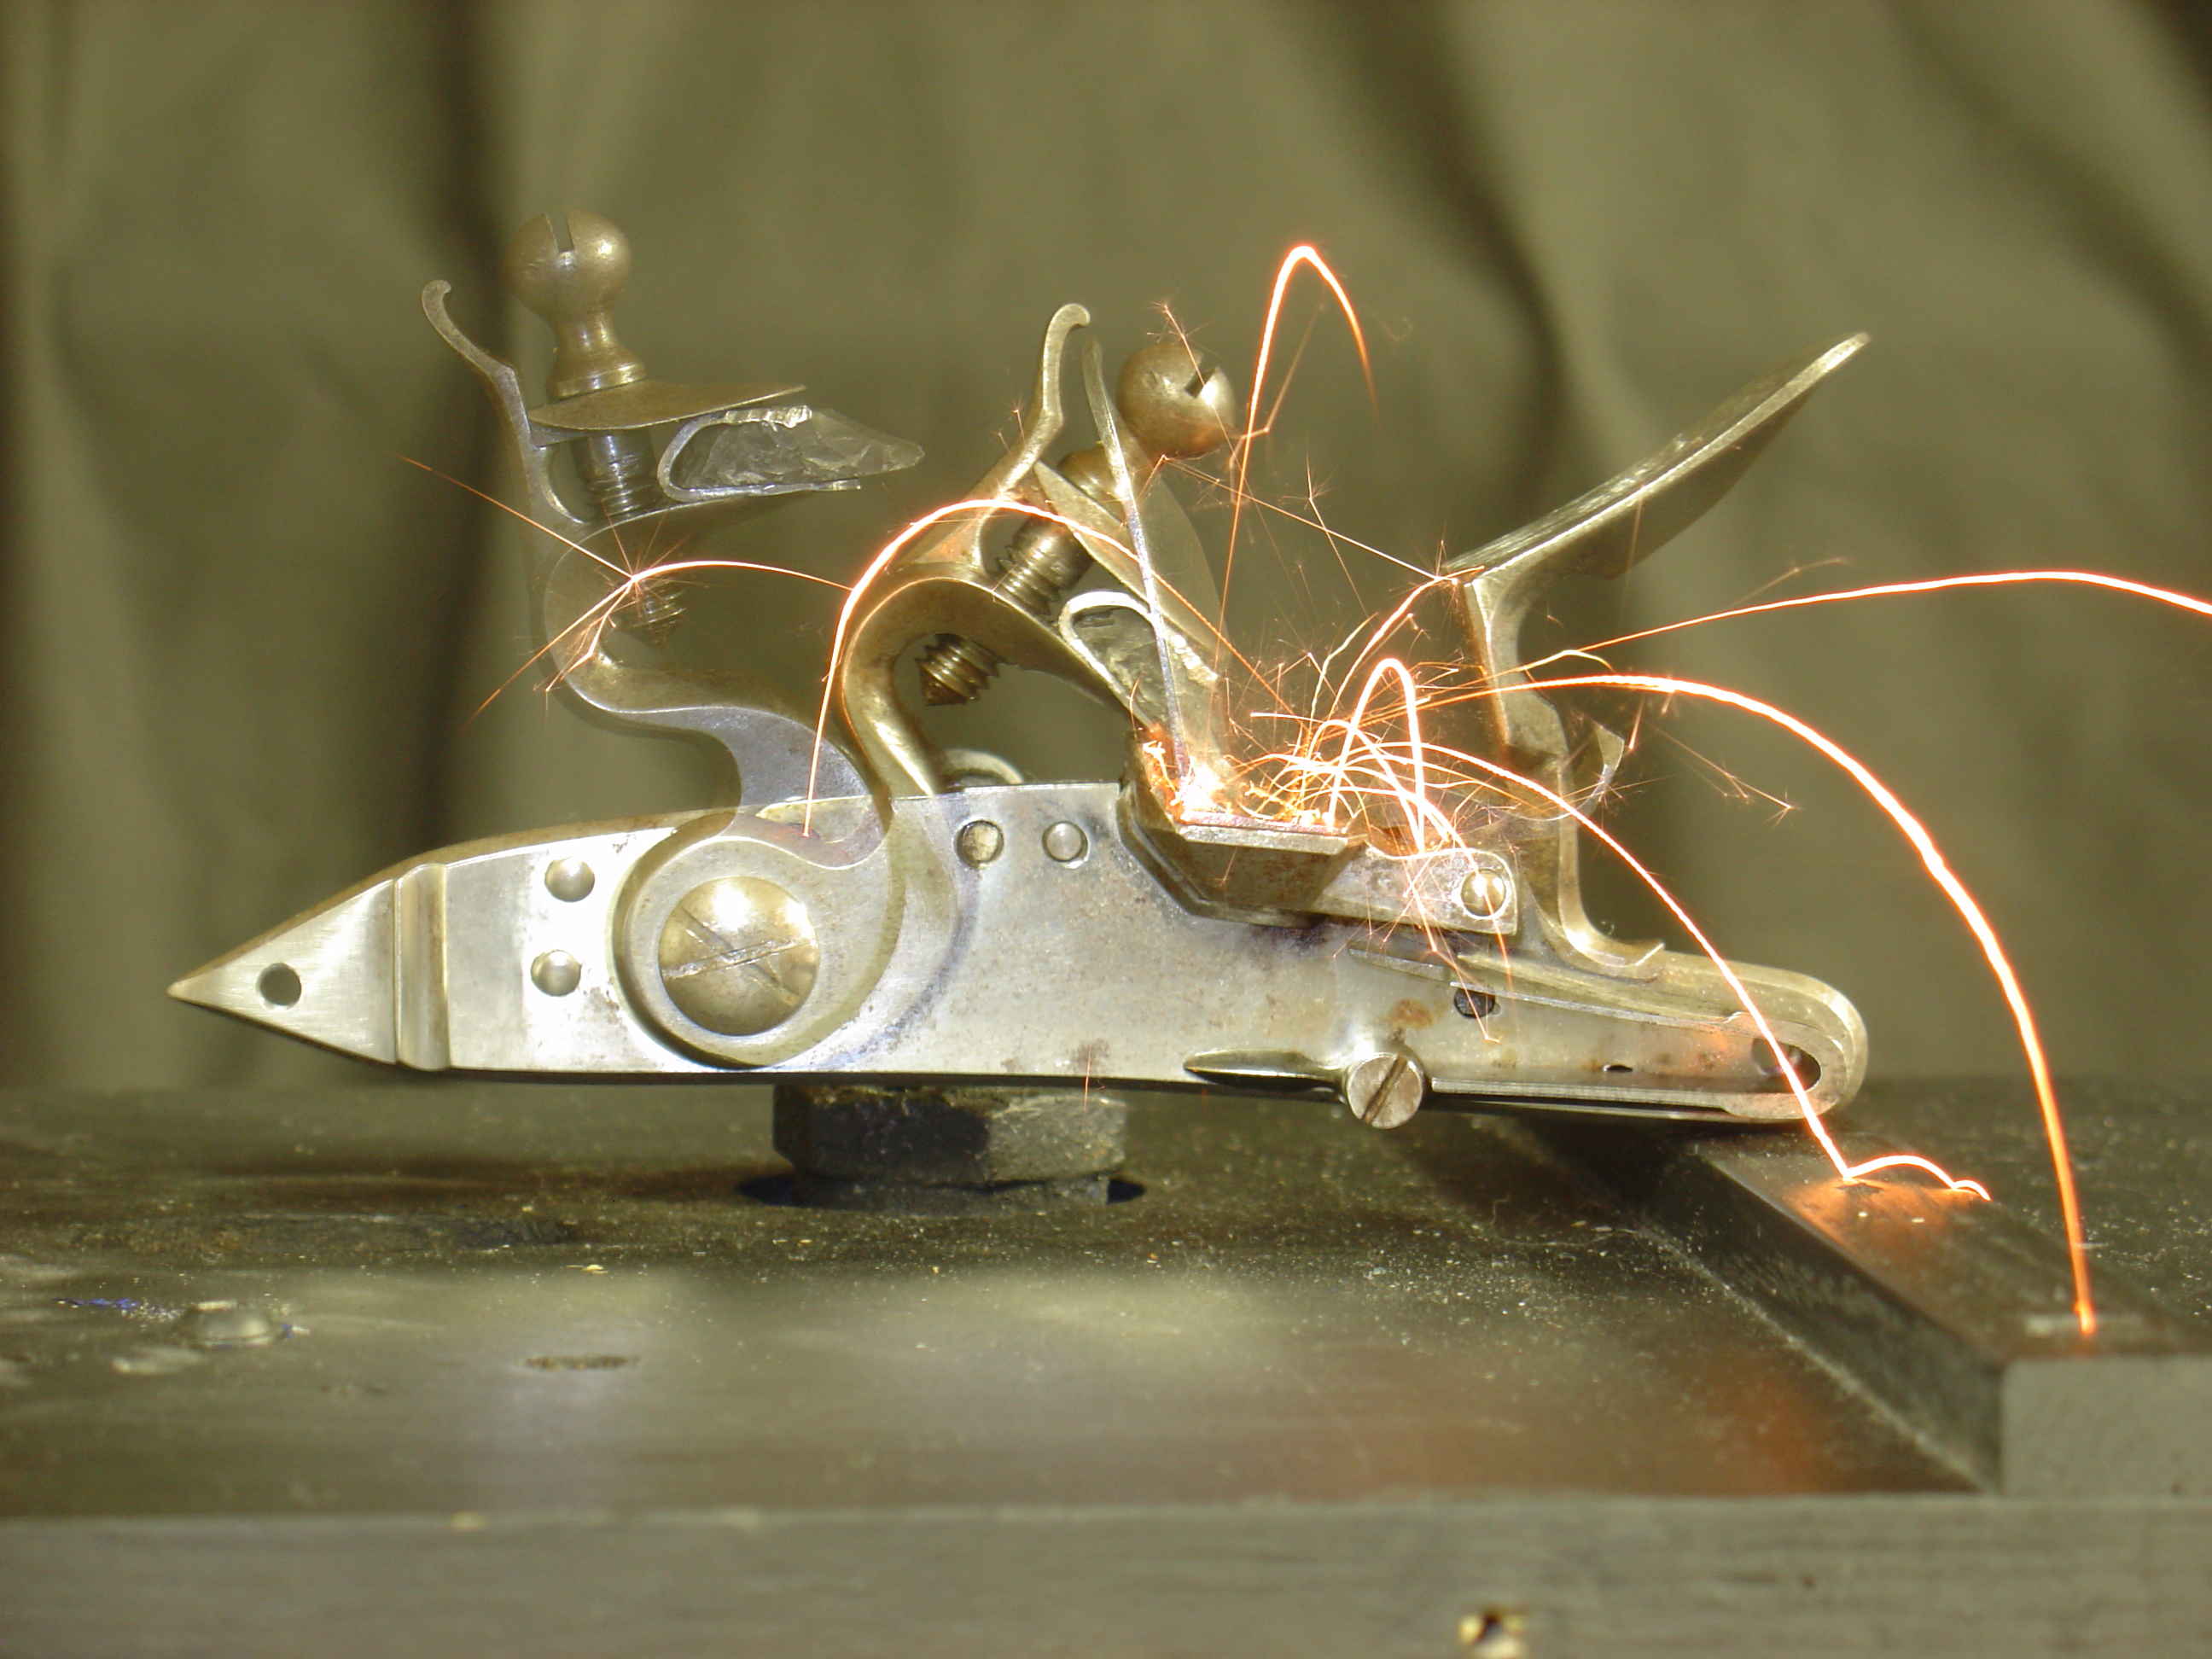
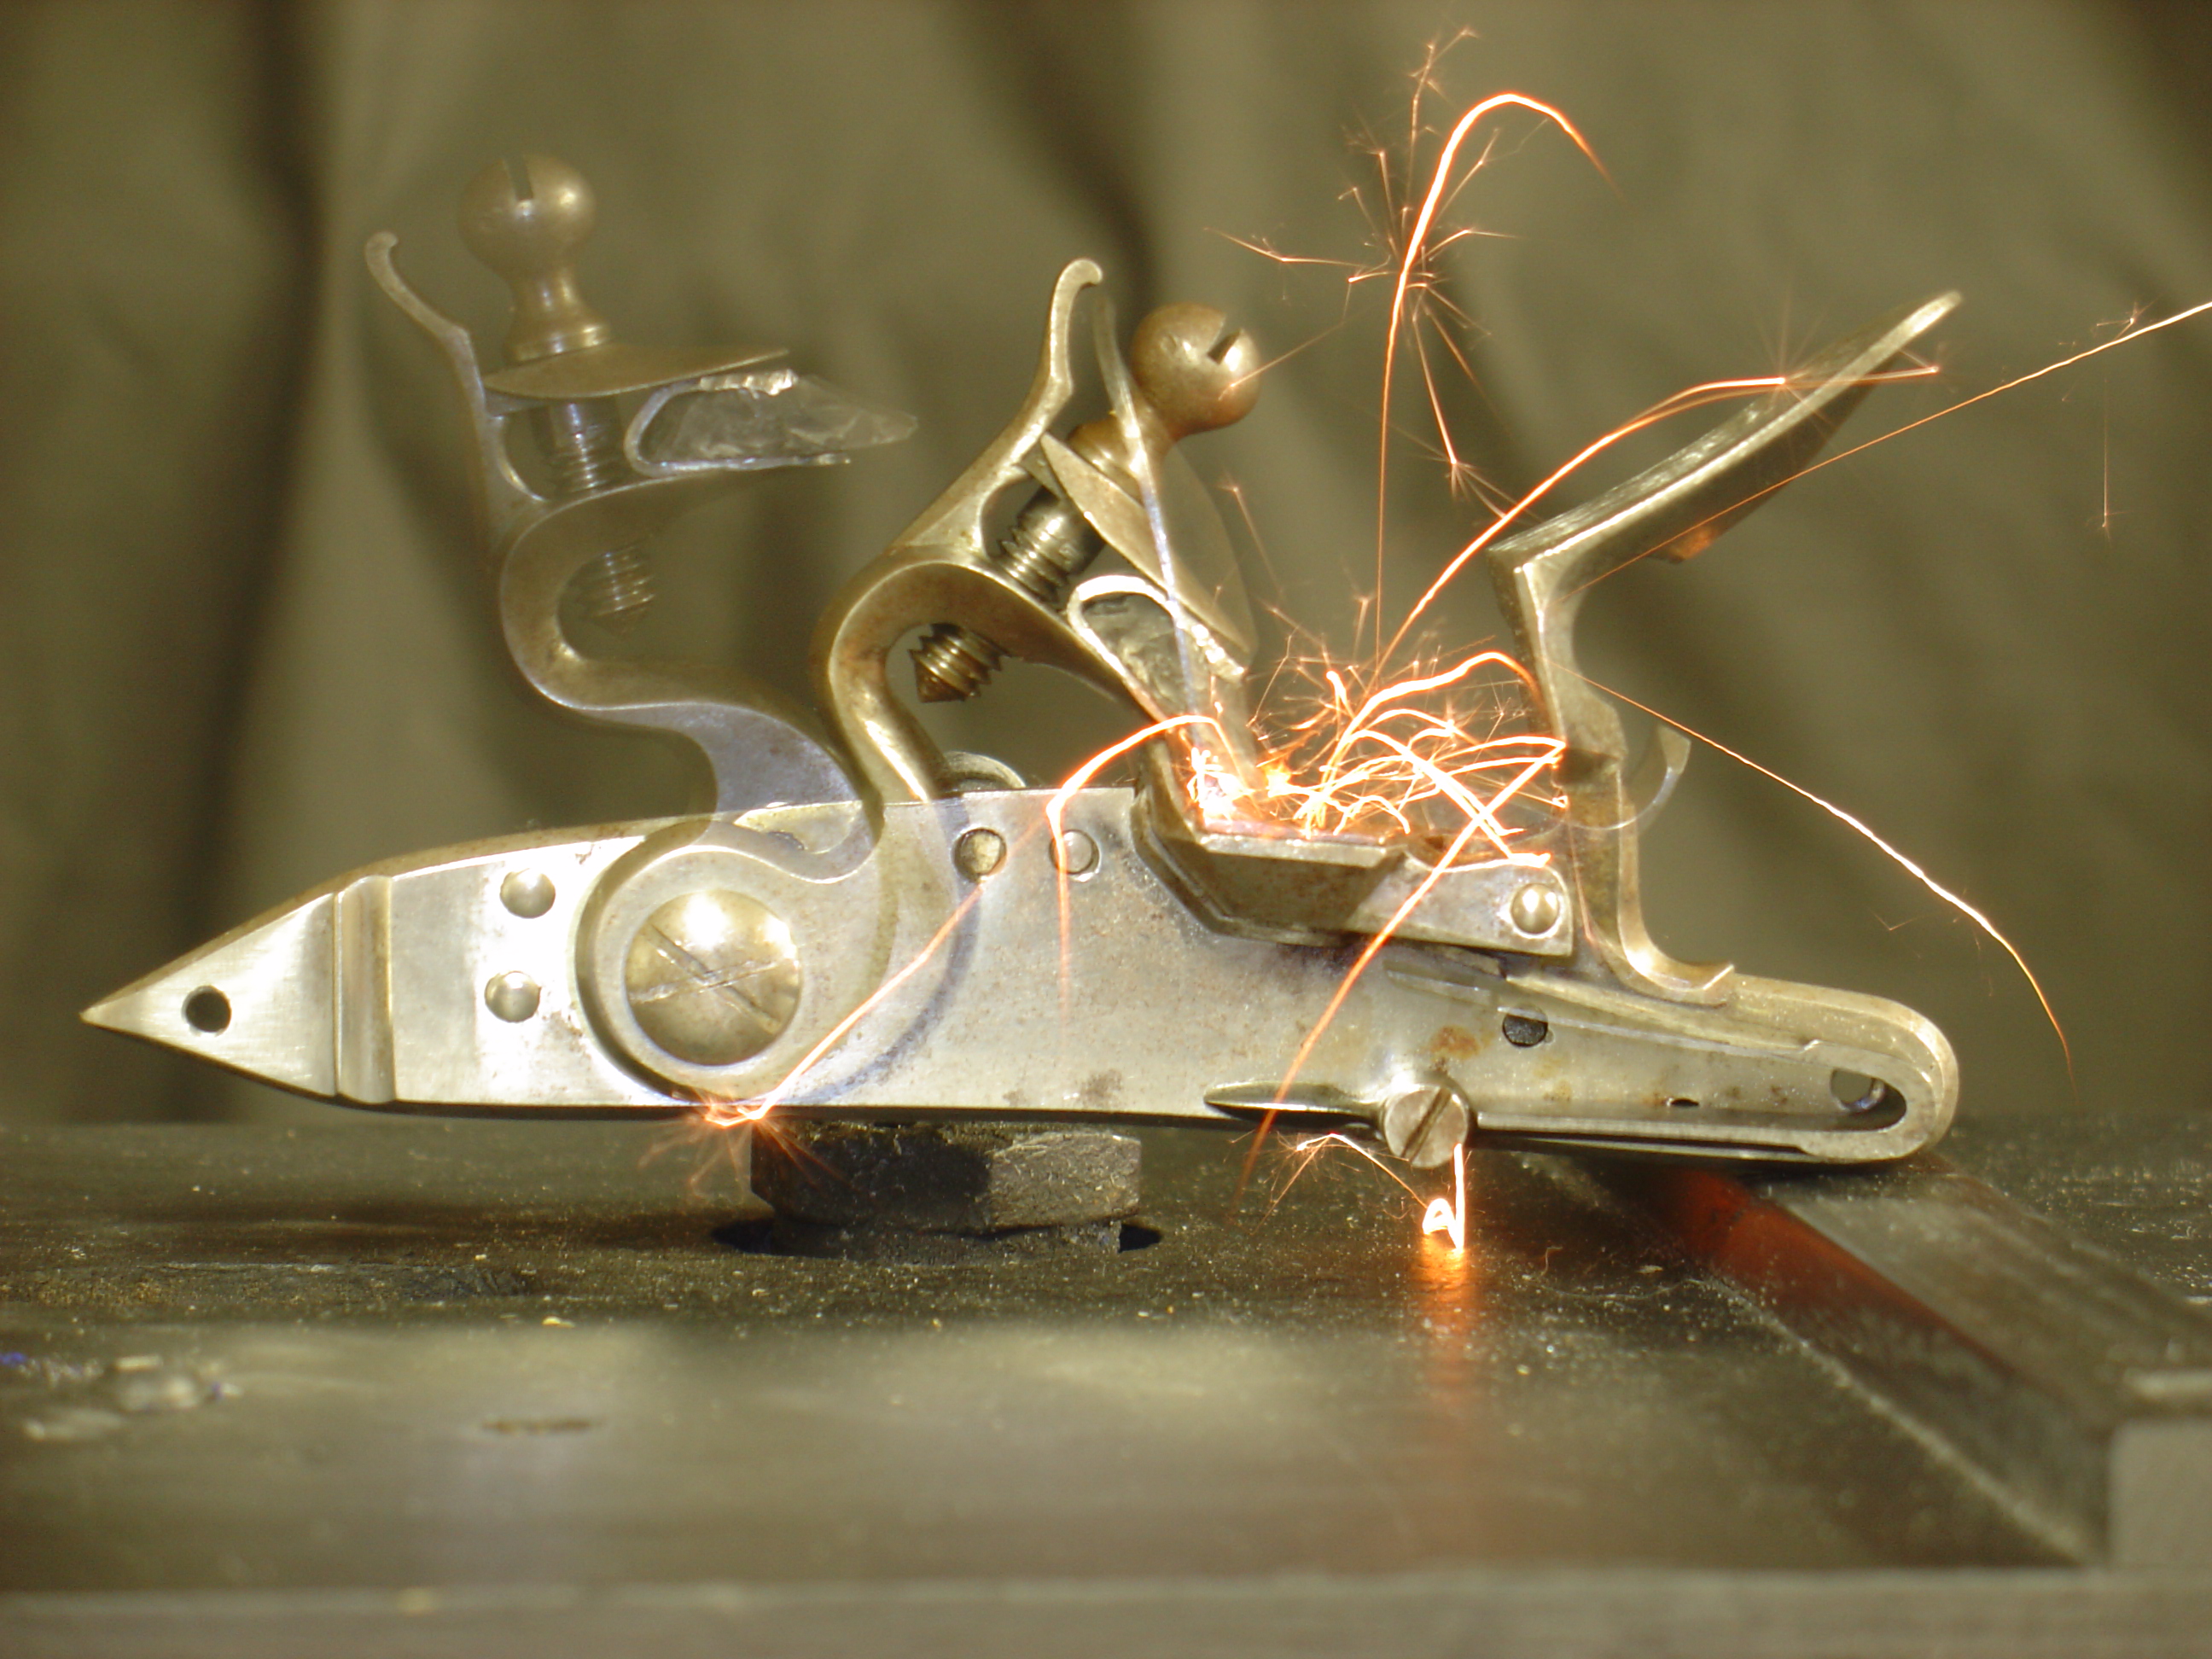
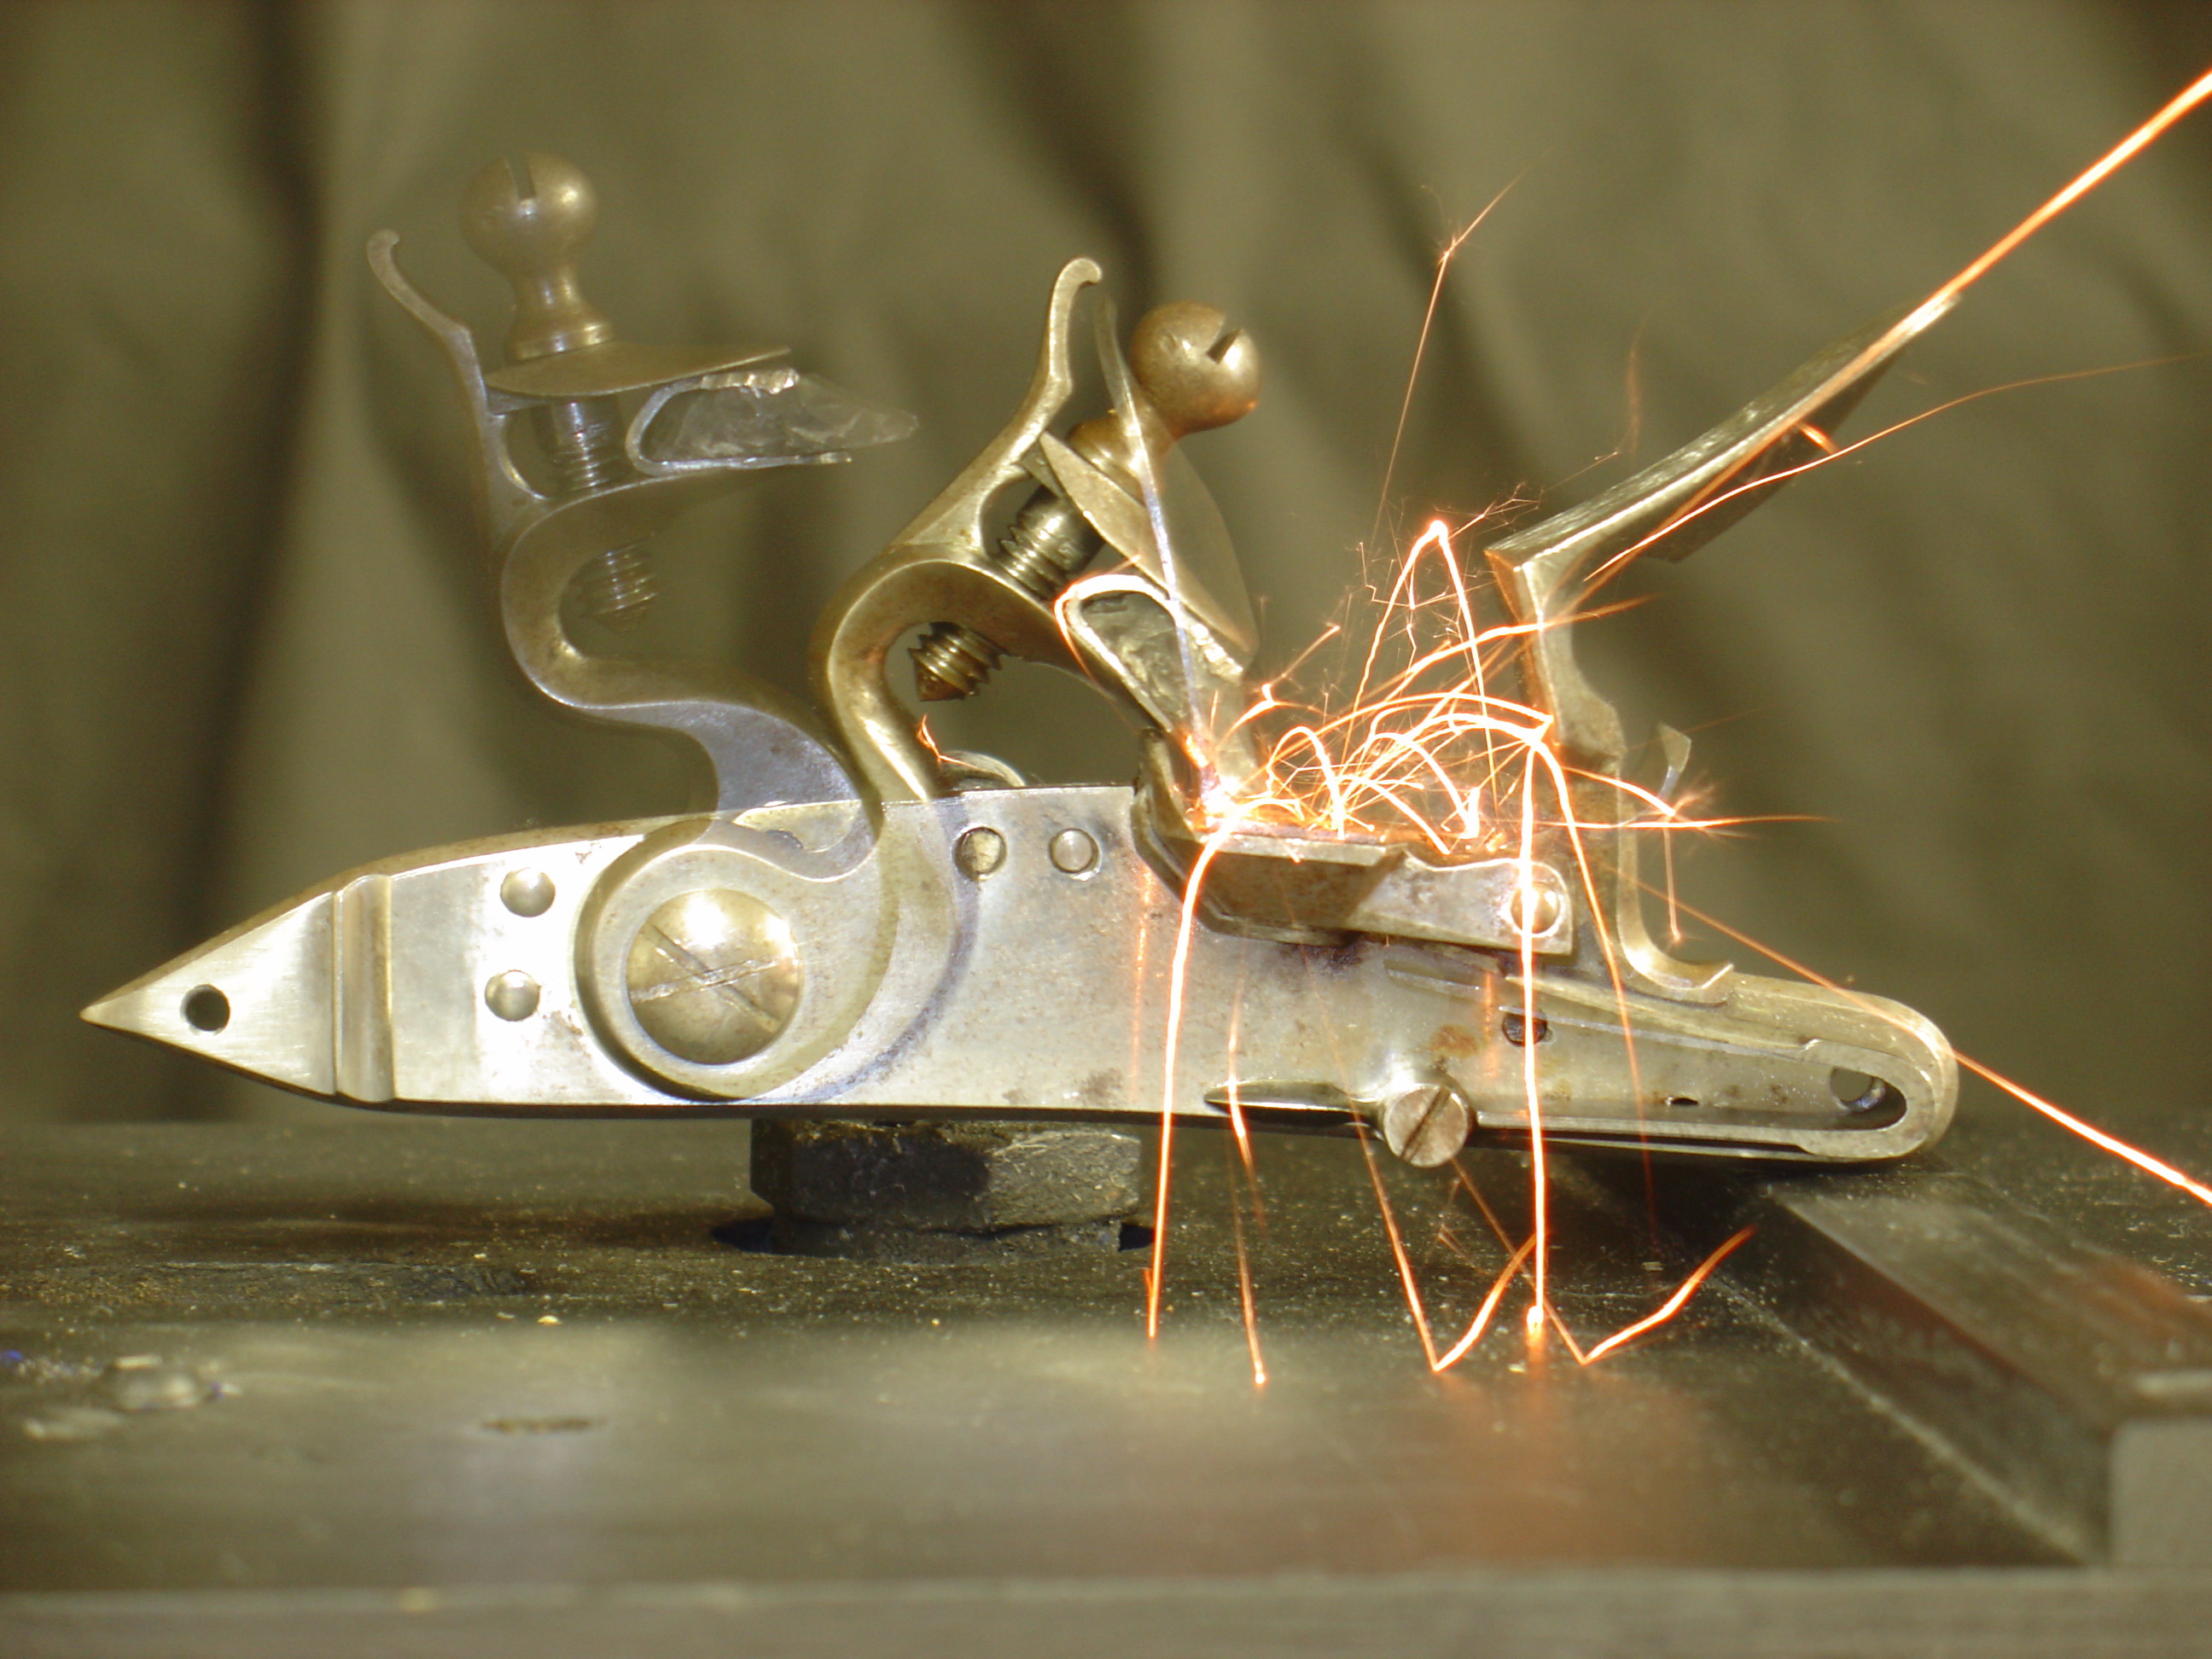
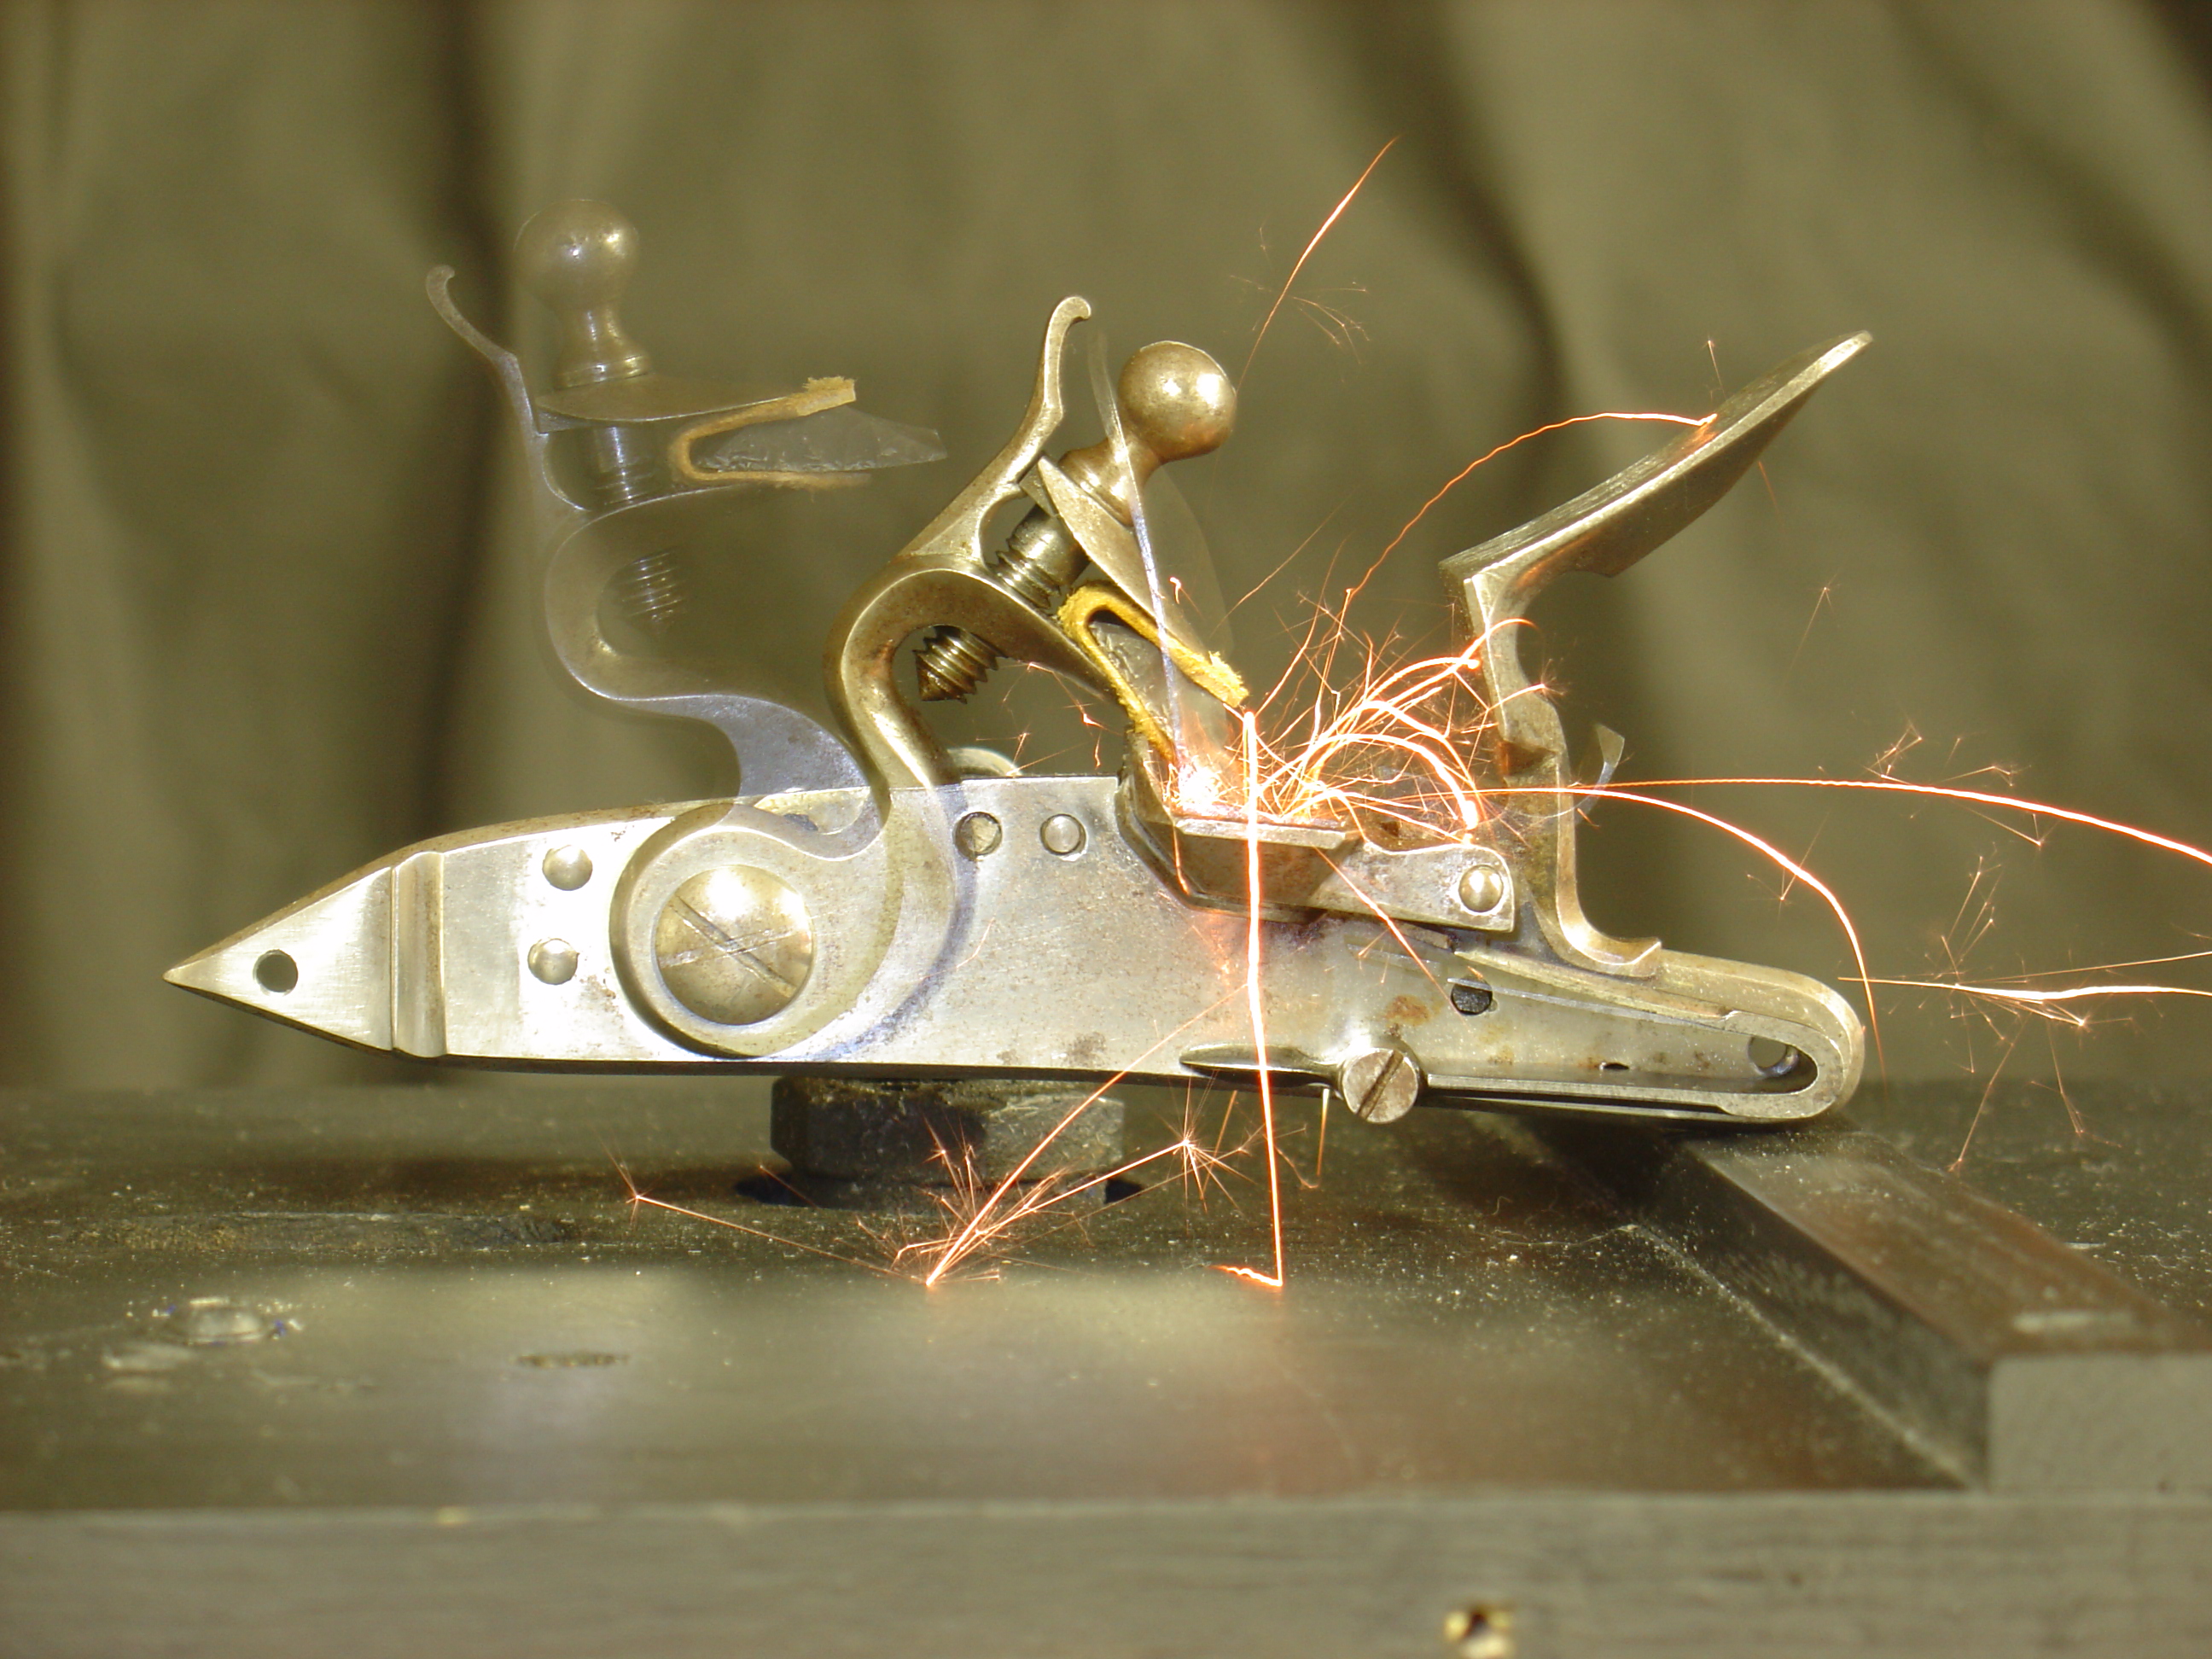
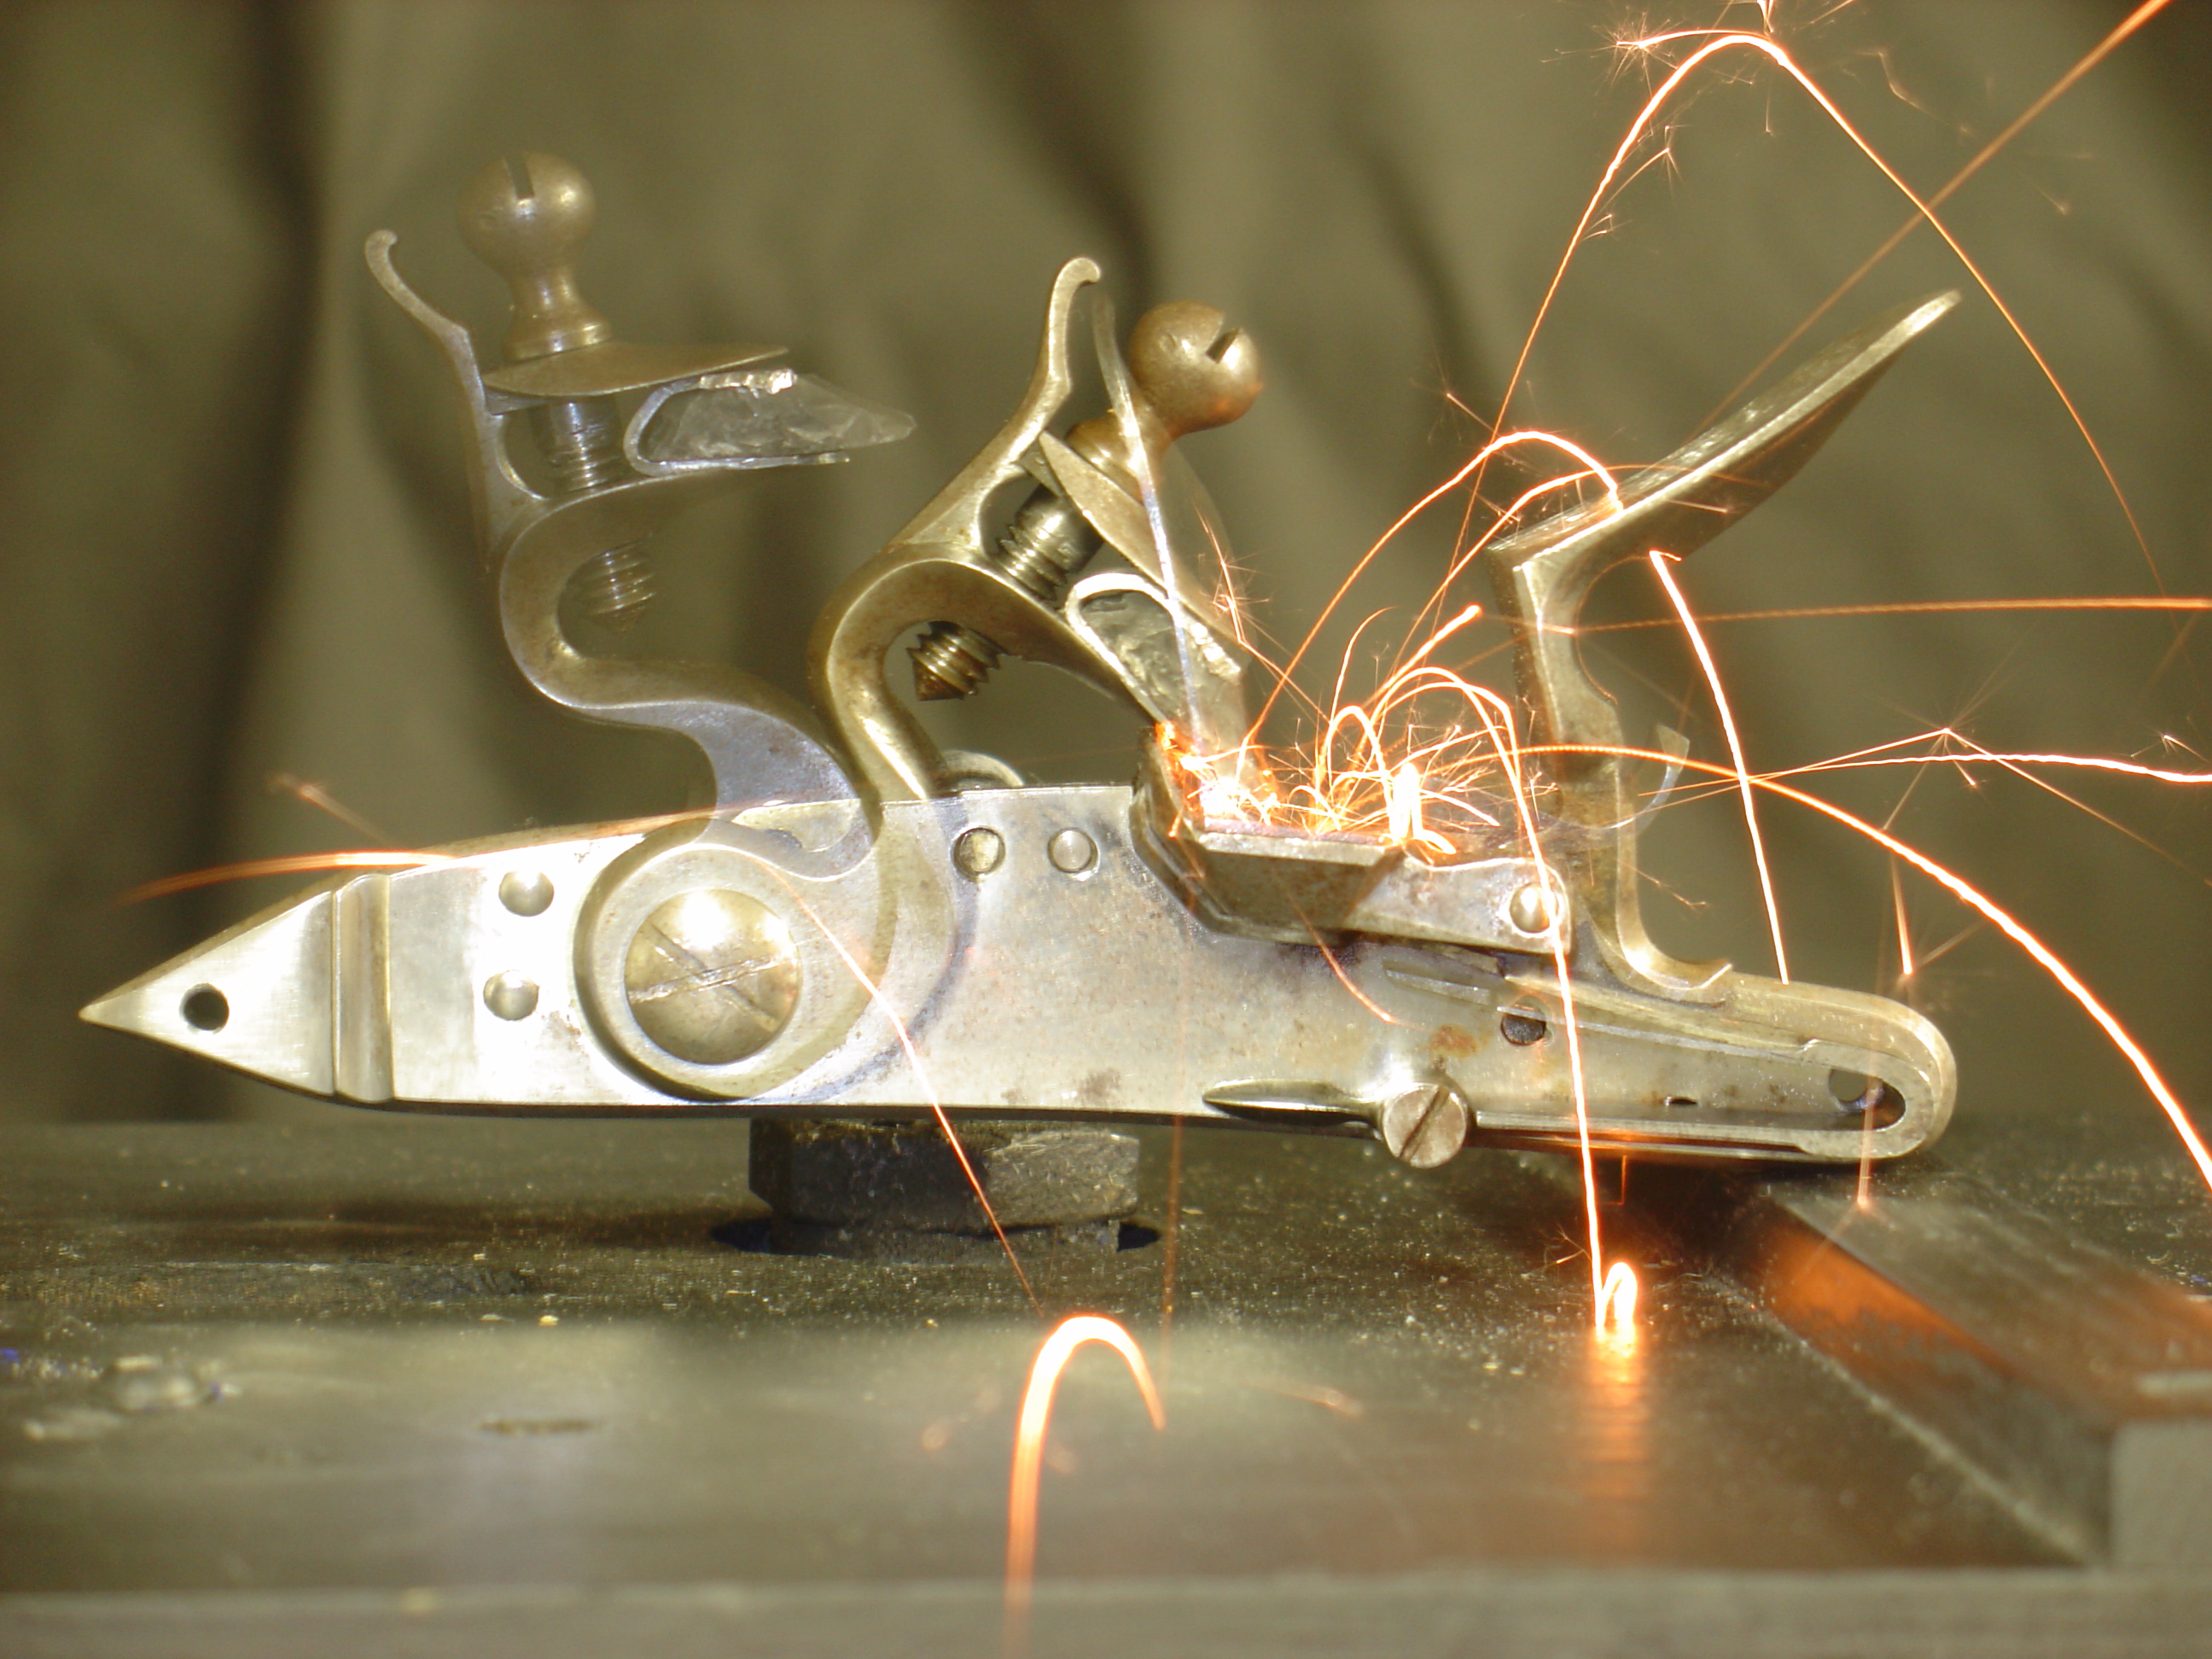
The priming powder used was Swiss Null B weighed on a balance scales. Since earlier testing showed its consistency, .75 gr was used. Because the placement of priming powder was the variable, care was used in its placement. The charge was poured into the pan and moved into the test positions using pencil with a rounded eraser. Powder could be pushed to the outer edge of the pan as well as very close to the vent. In both of these positions I felt that I was using more care in the powder placement than the normal firing of the lock in the gun. I realized that I chose the extremes in powder placement, and that a shooter would fall somewhere in between.
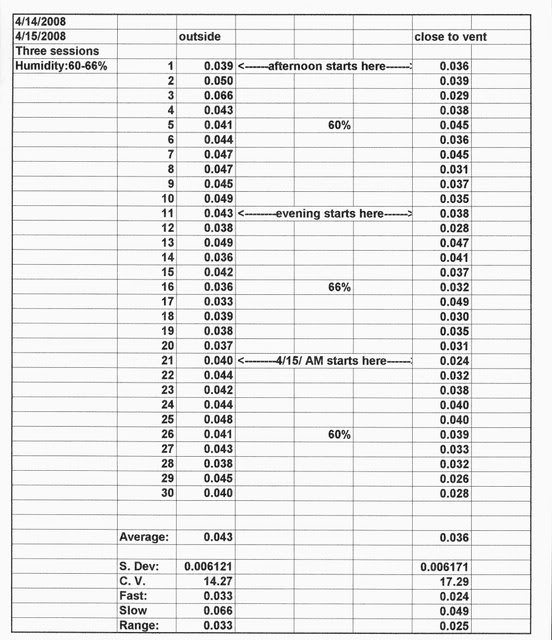
The tests were run in a 24 hour period with temperature controlled by thermostat. The day was picked with humidity in mind. The humidity varied within a range from 60 – 66 %. This is noted on the spreadsheets. Each battery of tests consisted of ten trials each – prime banked away from the vent, and prime placed as close to the vent as possible without covering it. To insure that no priming method had a unfair advantage, the trials were alternated so that a complete test battery included 10 trials each, alternated for a total of 20 trials.
At the end of the test session the ten trials for each priming method were recorded and all parts cleaned. Battery 1 was done in the afternoon at 60% humidity. Battery 2 was done in the evening at 66% humidity. The final battery was done the following morning at 60% humidity.
I made a short video that showed the processes involved:
The results are shown in the spreadsheet below.
The obvious conclusion is that banking the prime away from the vent doesn’t produce the most rapid ignition as we once thought. Banking the powder way from the vent actually reduced the ignition speed by 16%. This conclusion runs counter to conventional wisdom heard for years in muzzle loading circles. However, it is consistent with earlier tests where we saw photos with brighter fire from a close positioning of the prime.
While these results change the way I will prime my flintlock, there are other considerations that must be dealt with. In my tests the pan was ignited by a copper wire heated red hot. In the real flint world the sparks need a bed of powder on which to land, and this must be part of or priming procedure. This means that when I prime my locks, my emphasis will be close to the vent rather than away from it, but the bottom of the pan must have sufficient prime for sparks to land in. Thus, how well a lock places its sparks in the pan becomes an equally important consideration.
One other result of this experiment is that I have become increasingly skeptical of human senses in how I perceive flintlock ignition. And, there are more questions. What about low vent locations? This has always been rejected as a cause of slow ignition. Maybe we’re wrong about that as well. We’ll look at that in Part 6.
Low vs High Vent Test Phase . . . . Where should the vent be positioned for best black powder ignition? Again, conventional flintlock wisdom is tested.
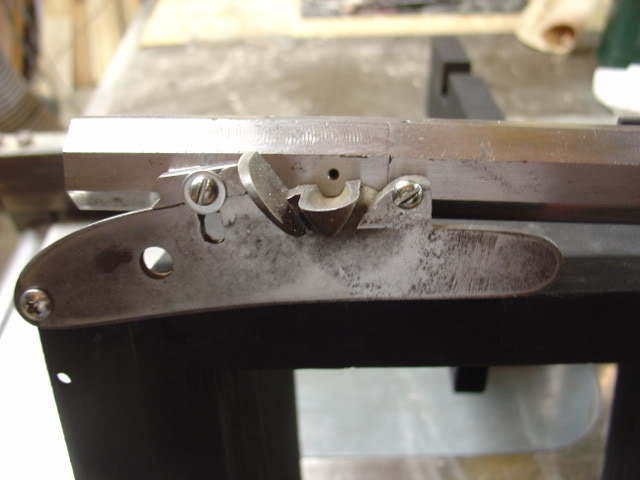
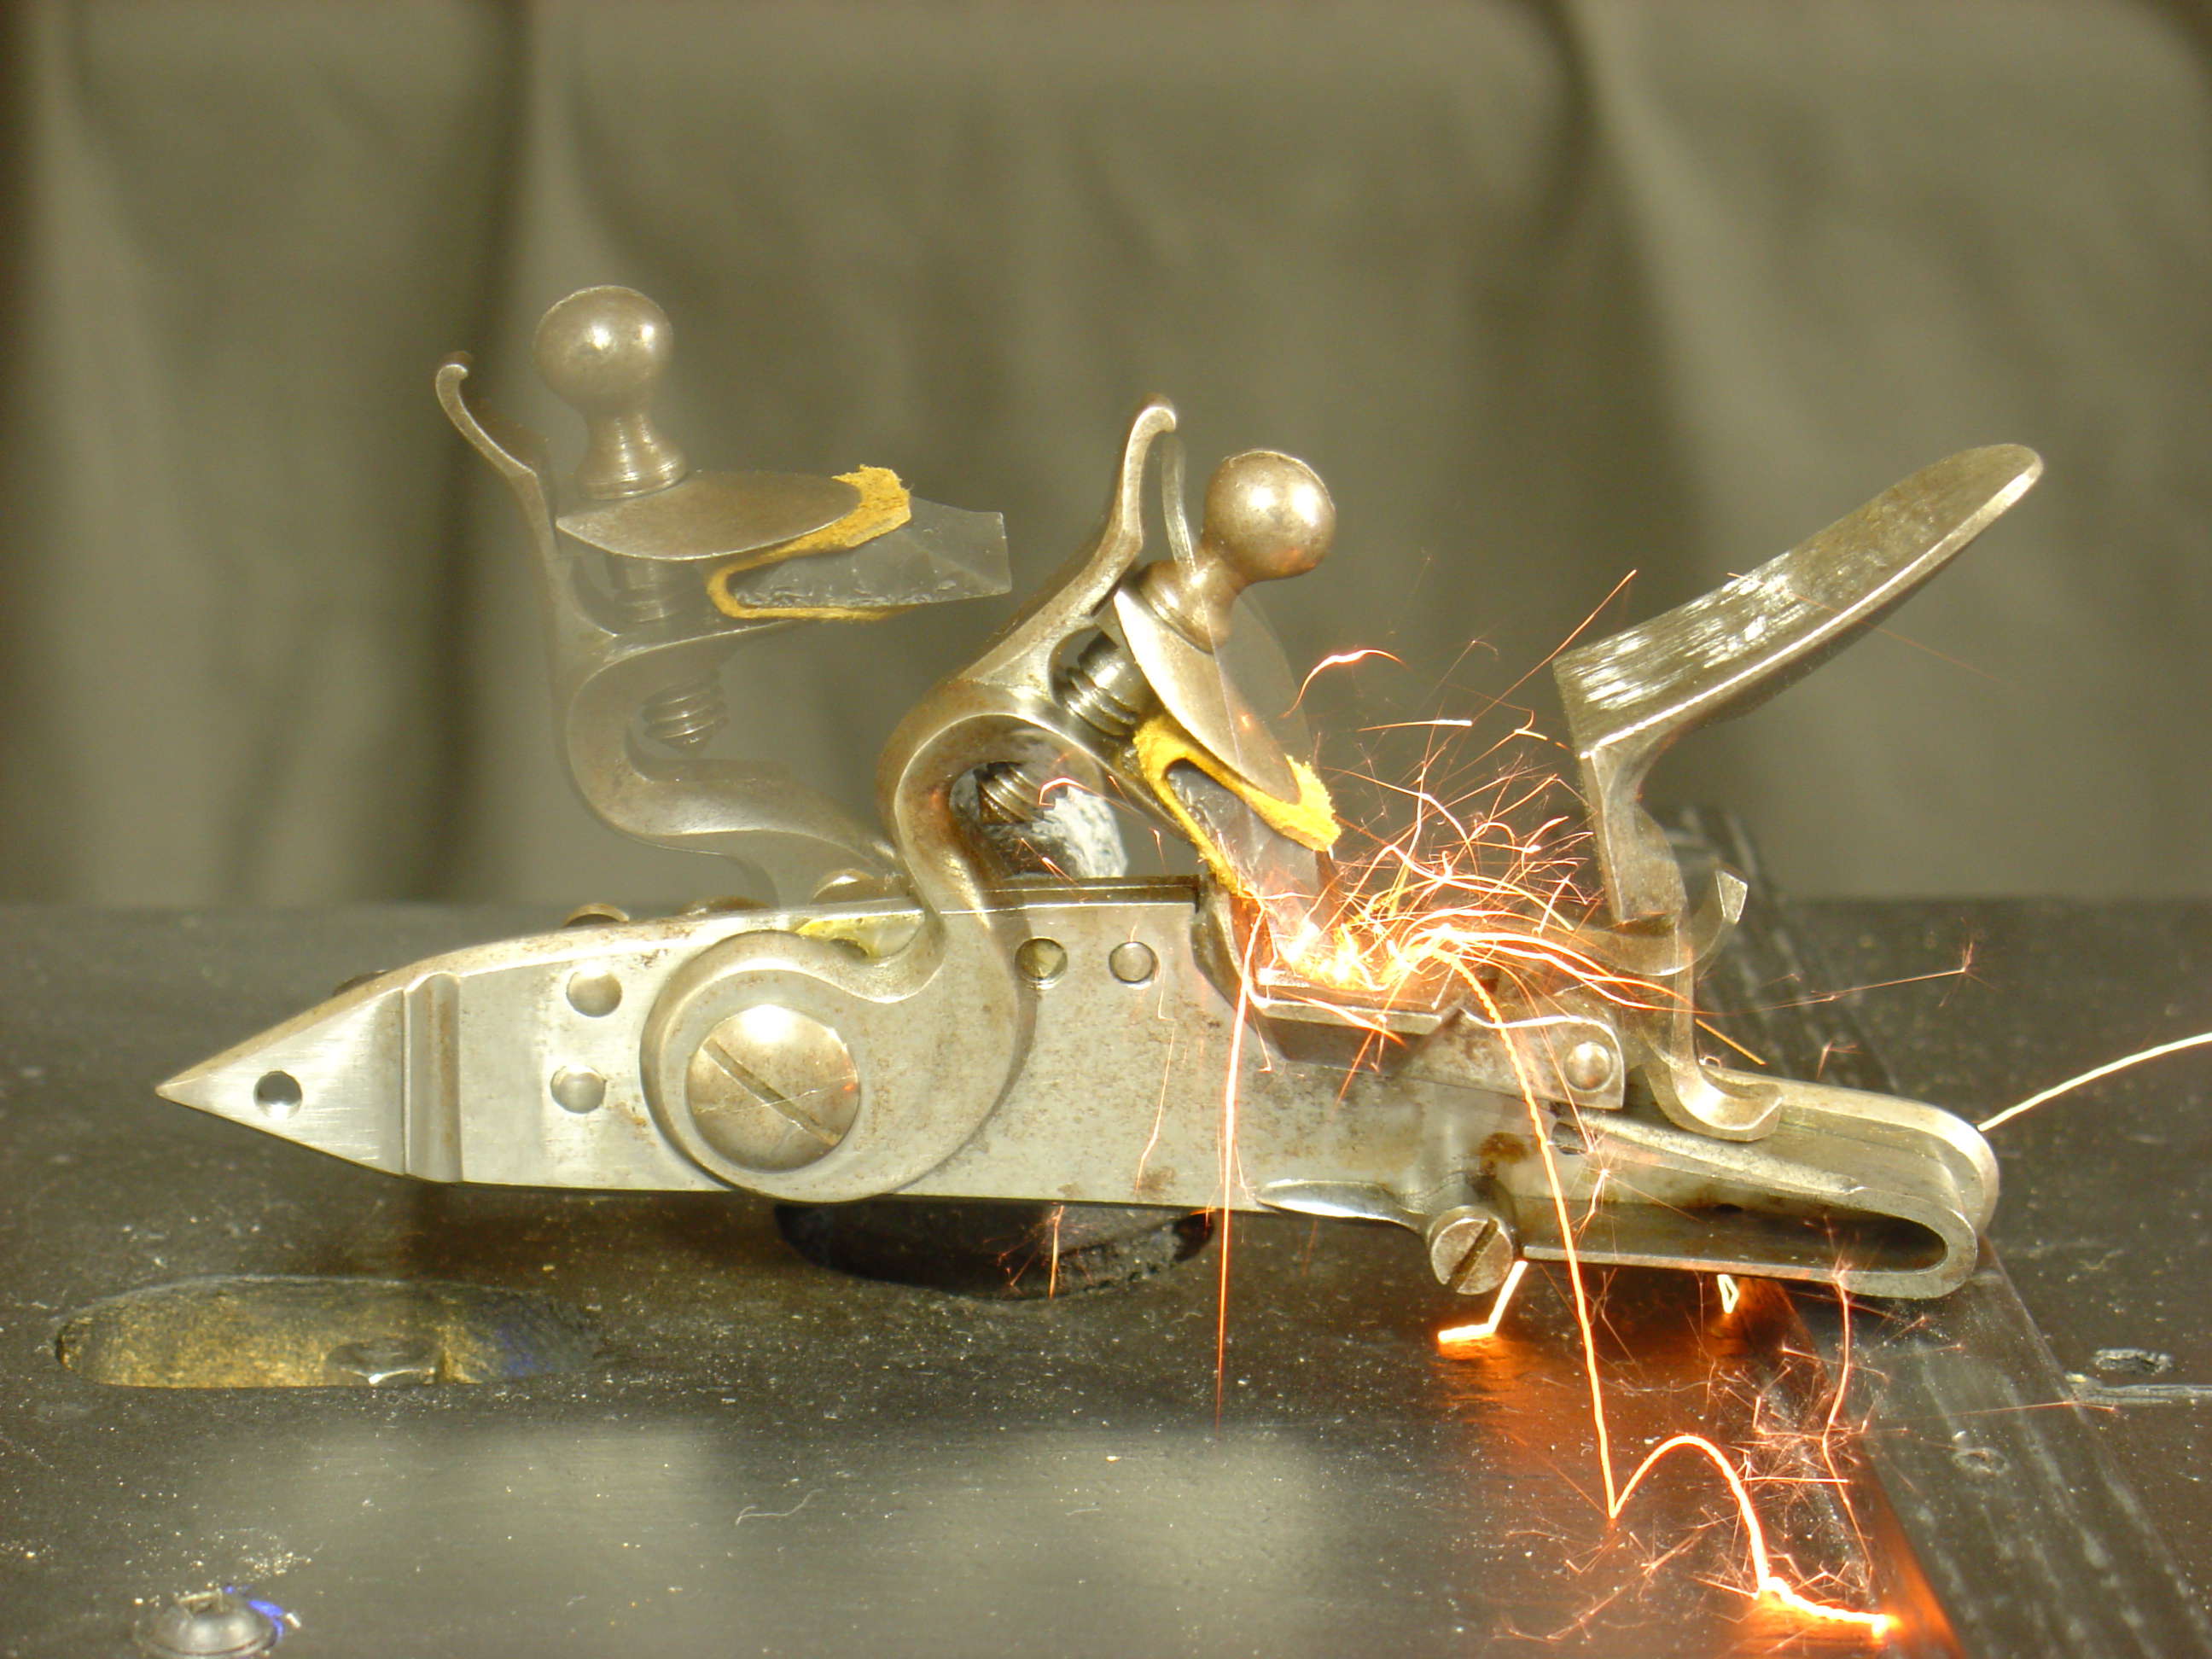
Up until this phase of the experiments the vent hole has been located level with the top of the pan. In those trials other variables were being examined. In this phase, the location of the ventis the variable. The lock plate has been adjusted to place the vent at the bottom of the pan. Actually the outside edge of the exterior cone is at the bottom of the pan.
Most shooters with this vent location use care to avoid covering the vent. In the first set of trials I primed three different ways:
1. Prime banked to the outside
2. Prime level in the pan (I tapped the fixture to level the prime.)
3. Prime close to the vent and covering it completely.
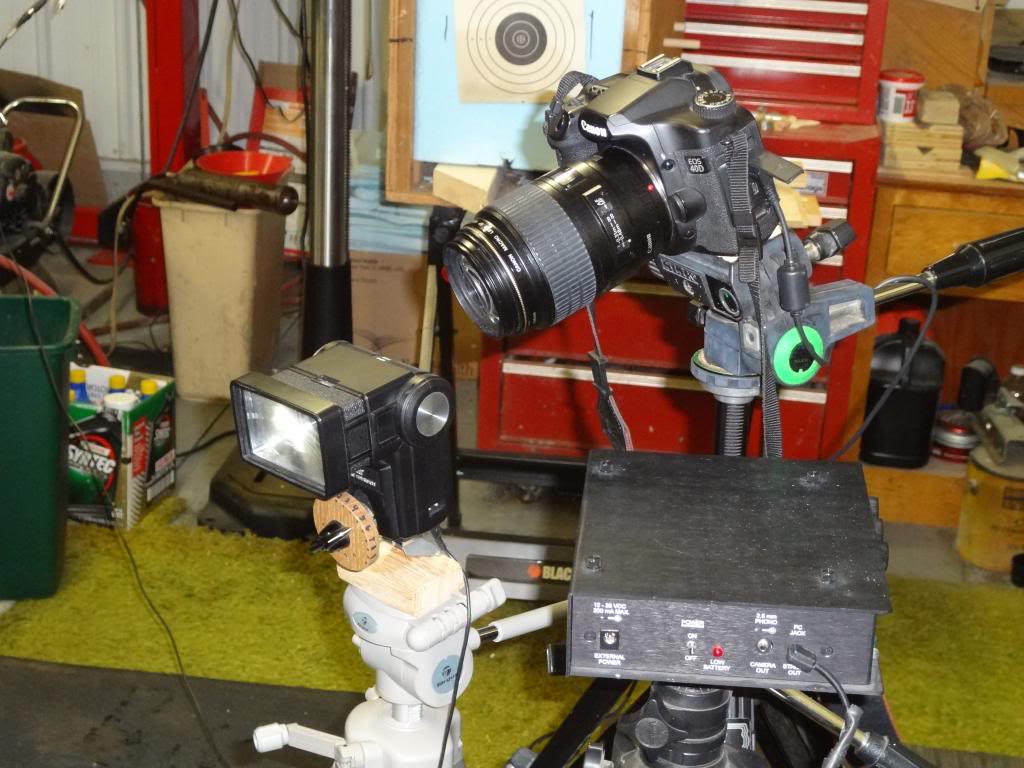
The equipment used was the same: computer, physics interface, photo cells, and the fixture for holding the barrel and lock plate. The location for the photocells remained the same. Priming charges were kept covered until they were used.
The amount of the prime for this test remains .75 grain of Swiss Null B priming powder. (This amount has been shown to be the most consistent in previous tests.) The methods used are the same as in earlier tests. The video link below shows the process. (This is the same video as in Part 5.)
Because I was worried about fouling causing unreliable data, every effort was used to eliminate it as a variable. As in the earlier tests, the following steps were used to prevent fouling from affecting the data:
Wipe barrel between shots.
Second cleaning rod designed to wipe the vent liner.
Pan brushed.
Pipe cleaner used through the vent.
Compressed air through the vent.
While these steps may seem unnecessary for normal shooting, I felt justified when trying to obtain meaningful data.
Below is the data gathered for the low vent test:
It is worth noting that the trials covering the vent and the level prime were as close as they were. I suspect that there is no statistical difference between these two variations. Both, however were faster than banked away. They were 15-20% faster, in fact. I’ll draw no further conclusions until the high vent location is timed.
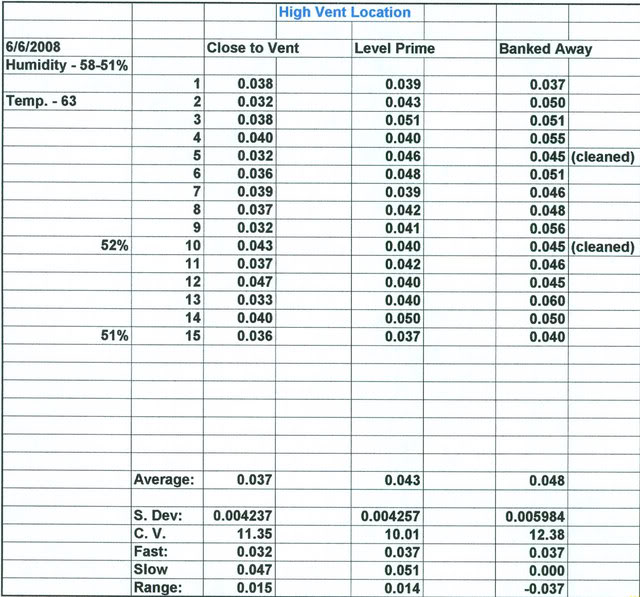
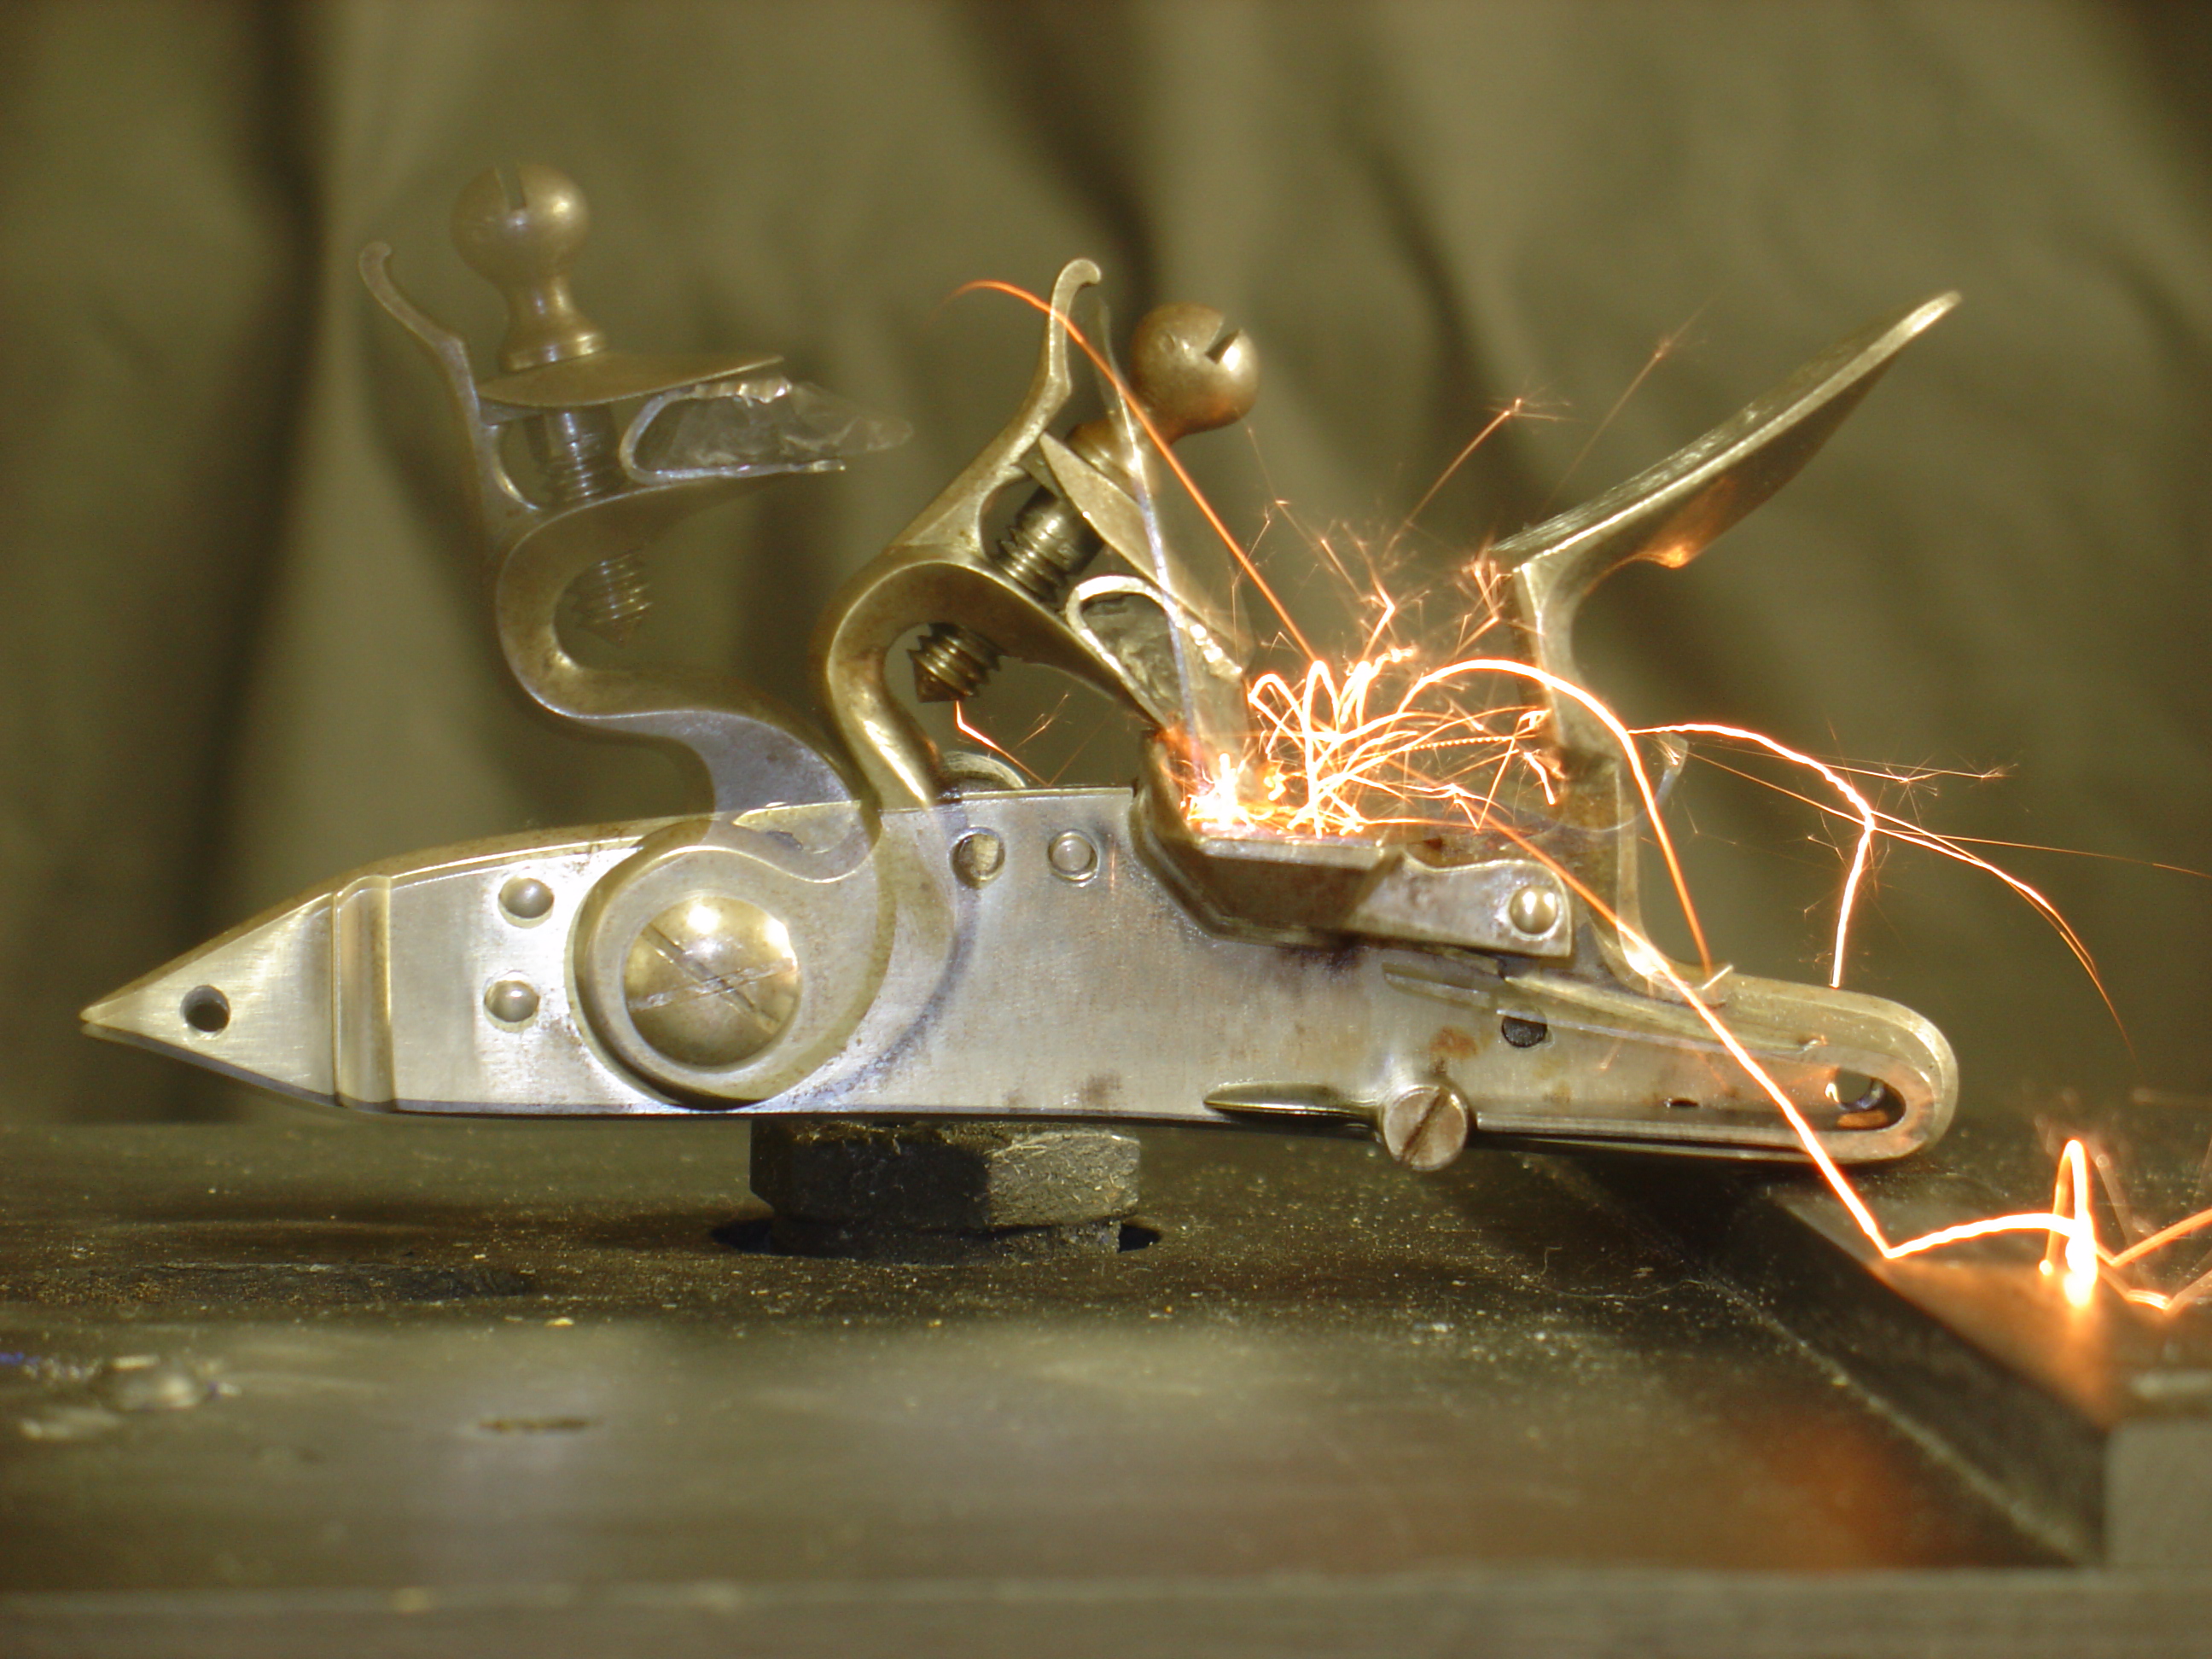
High Vent Test Phase
As I worked on the high vent phase, humidity became a concern. I was uncertain if I could maintain a comparable humidity when this phase was done. Earlier testing had been done with humidity in the 50-60% range. I waited for weather to help me, but found that by using an air conditioner in the garage I could keep the humidity within this range. Humidity at the beginning of the test was 58% dropping to 51% as the testing concluded. Temperature throughout testing was 63-64 degrees.
The only variable in this phase was the location of the vent. The lock plate and pan were rotated to place the vent as high as possible. The bottom edge of the exterior cone on the vent was well above the level of the pan. Please note the photo showing the vent hole.
The procedure was to time 15 tries with each of three powder locations in the pan – just as I did in the low vent tests. The tries were alternated as follows: powder banked away, level prime, and as close to the vent as possible. In this last location, I had intended to cover the vent, but .75 grain of powder was not enough with the vent located this high. I considered increasing the charge to 1.0 grains, but concluded that it would introduce another variable. I decided against that and used a pencil eraser to position the prime as close as possible.
After each location was timed 5 times, I removed the barrel and cleaned everything. Then I timed the next series. After 10 times I again cleaned, and then timed the last group.
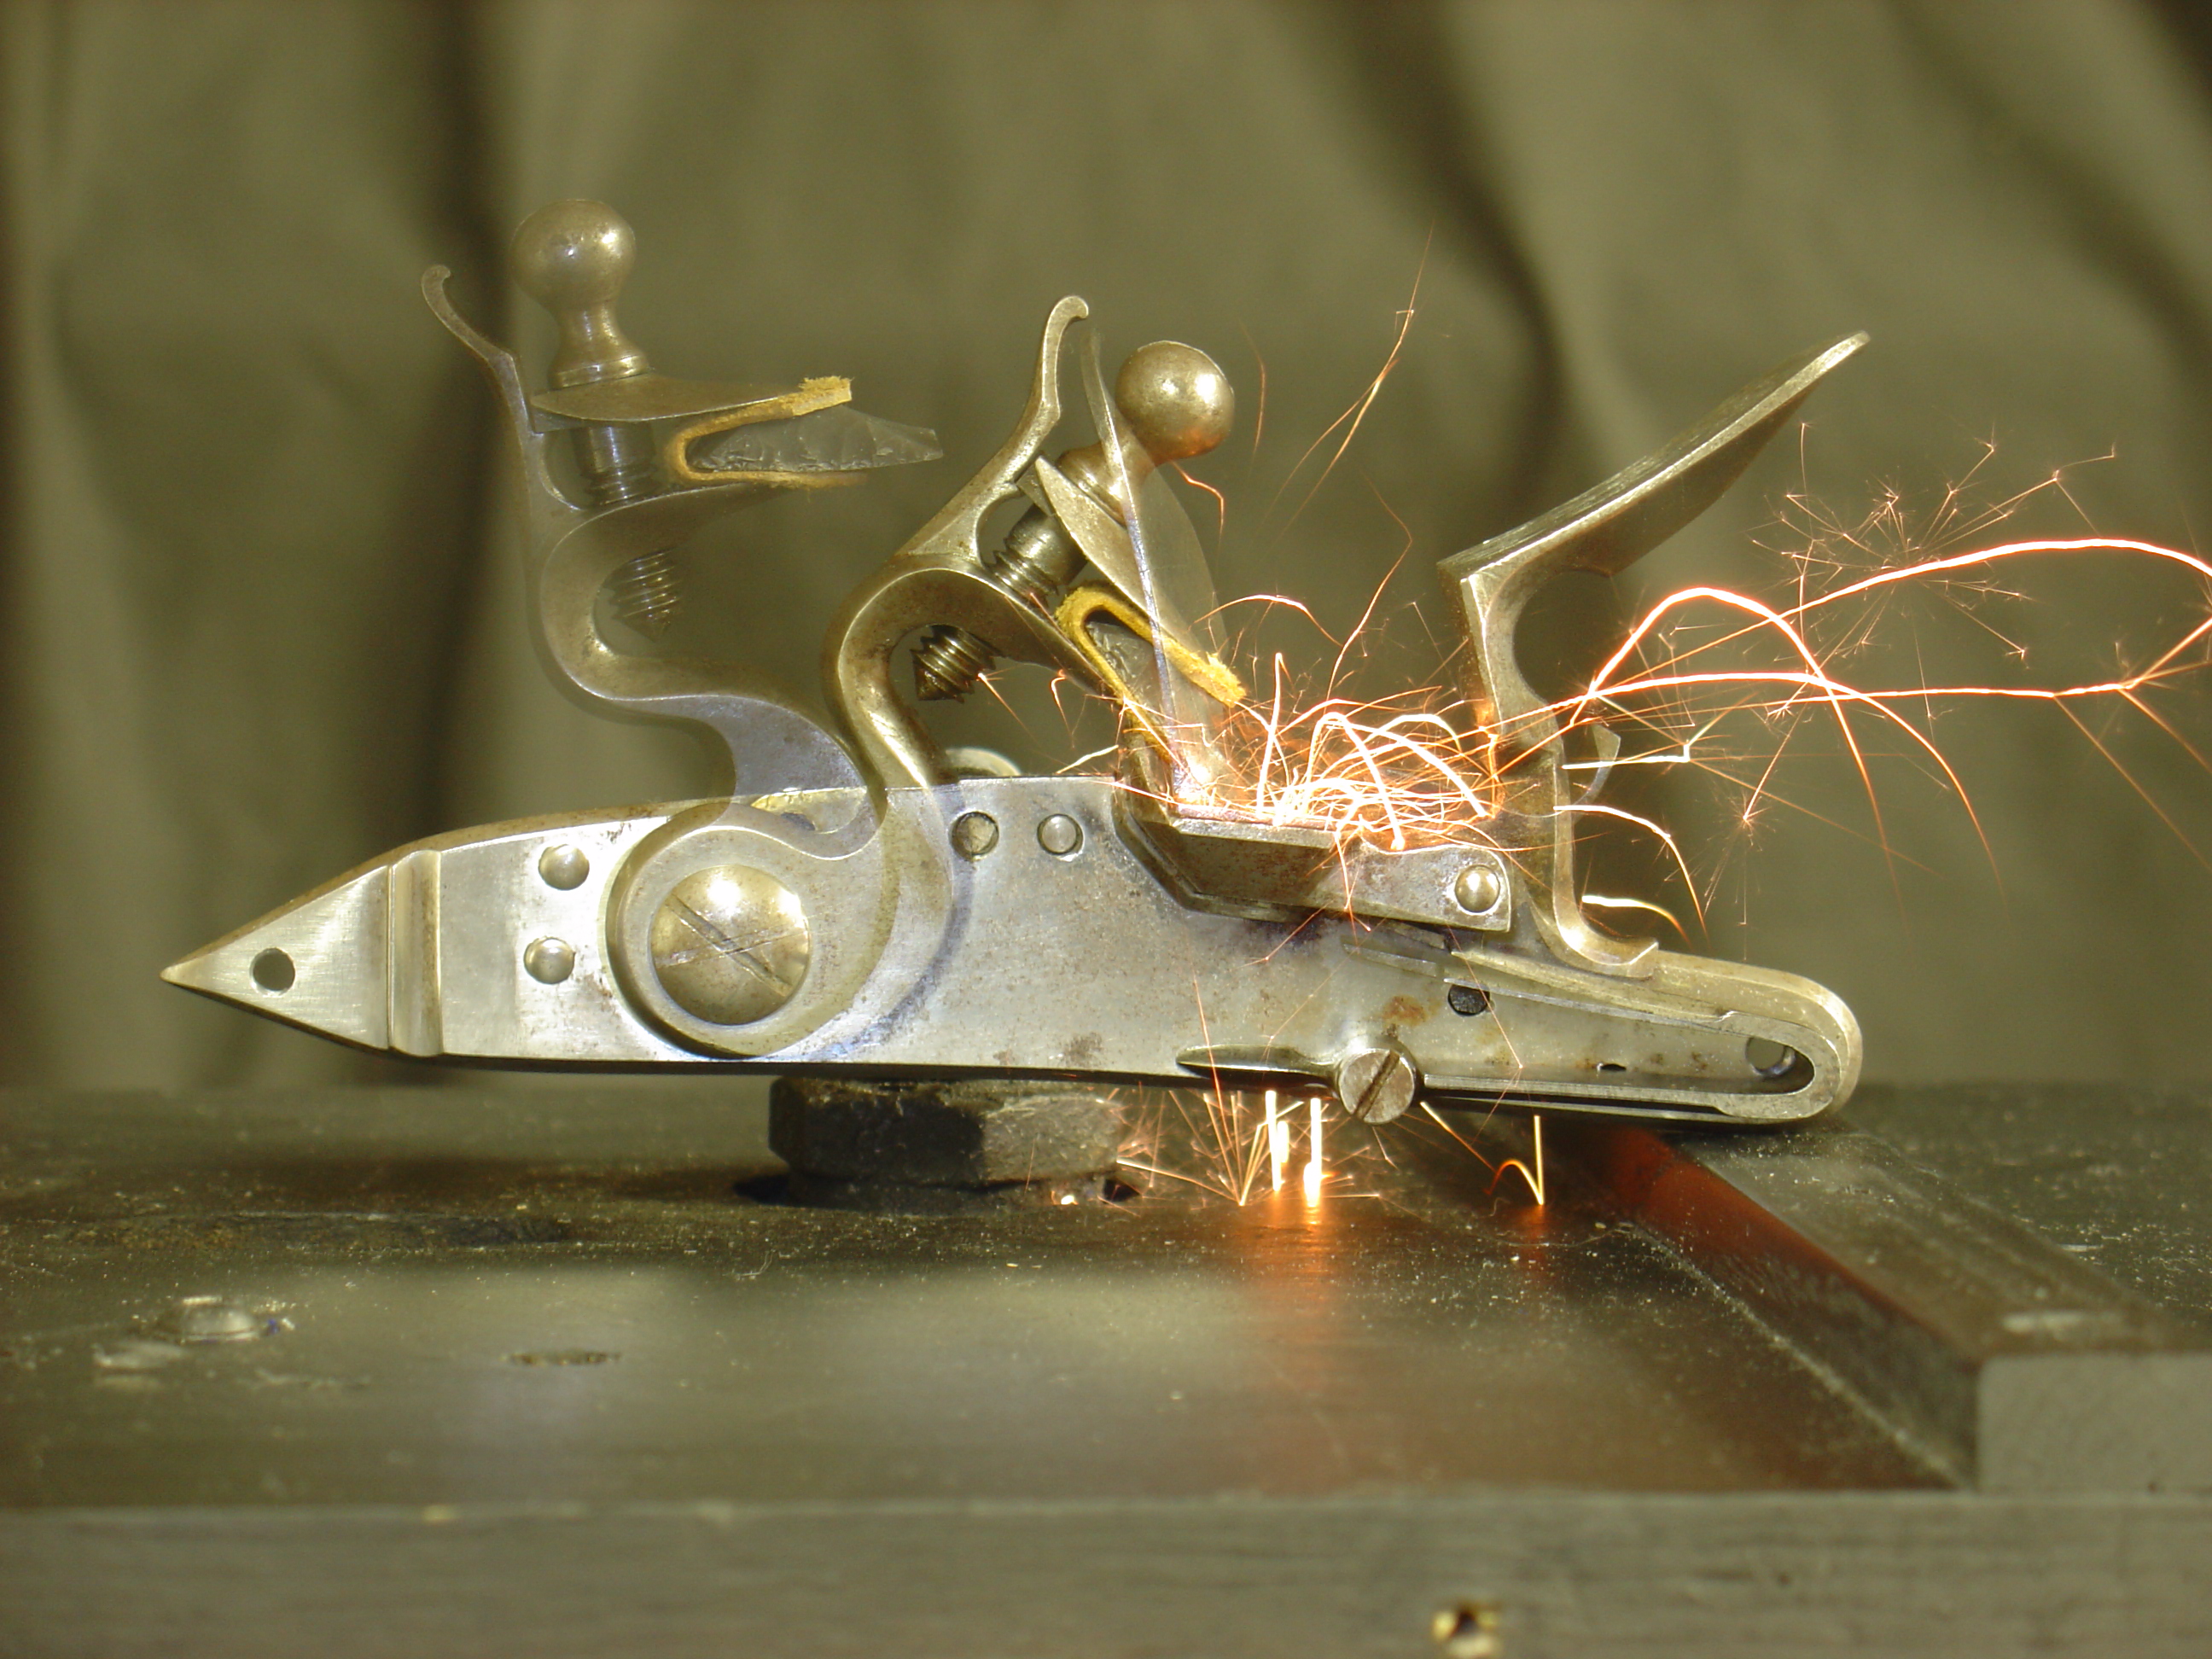
The chart that follows shows the data gathered. As happened in the low vent trials, banking the powder away was slower and less consistent than level or close to the vent. Close positioning of the prime was decidedly faster and more consistent.
Conclusions:
These conclusions are those of the experimenter. You may have different opinions.
I wish to point out that every trial produced a report that sounded as one sound. The fastest (.032) and the slowest (.060) sounded the same. Even though one was almost twice as fast as the other, the sounds were indistinguishable. So my first conclusion is that the human eye and ear are terrible tools to use to evaluate flintlock performance. If differences can be determined by human senses, then the trial was indeed very slow.
The idea to bank powder away from the vent to improve flint performance is flawed thinking. In every test I conducted, the banked away trials came in last. Percentages varied, but banking the powder away was always slower. I found no evidence to support the old “bank the prime away from the vent.” (In the low vent test, banking powder away was 17% slower; in the high vent test, banking powder away was 23% slower.)
The idea that one should not cover the vent with priming powder because of having to burn through the vent instead of flashing through seems equally flawed. While I did not try to fill the vent, covering the vent did not cause slower times. The closer I could get priming to the vent, the faster and more consistent the results. In fact the consistency I found in positioning the priming powder close to the vent occured at all vent positions – low, level, and high.
The last conclusion involves the reason for this whole experiment – proper location for the vent in relationship to the pan. I found that the location of the vent in relation to the pan is far more forgiving that we have believed. Tests when the vent was extremely low or high both gave quick reliable ignition. A look at the chart below shows that all vent positions gave fast ignition when primed close to the vent (This is what we learned in the preliminary tests.) Also all vent positions gave uniformly poor performance when the priming powder was banked away from the vent.
————————–Banked way—————-Level Prime—————-Close prime
Low Vent—————–.046—————————.037—————————-.038
Level Vent —————.043—————————- * —————————–.036
High Vent—————–.048—————————.043—————————-.037
*I did not time level priming when testing the level vent/pan position.
I began this series of test thinking that the big variable would be the vent location. However, I am now concluding that it is of minor concern compared to the location of the priming powder in the pan. I still like a vent level with the plan flat won’t loose sleep over a pan a little high or low.
All of the work represented here was based on igniting the powder “artifically” using a red-hot copper wire. This was done intentionally to remove the variables in amount, quality, and location of the sparks. In reality the flint shooter must manage his lock to minimize these variables. Regardless of what the experiments show us, the shooter must place priming powder where his sparks will land. Time with his gun will determine this. However the shooter need not be afraid of priming powder too close to the vent – that is to be encouraged. It is far better to have the prime too close than too far away.
In my earlier article called “Pan Vent Experiments”, I examined powder placement in the pan and timed vent locations. I found that pan placement was far more forgiving that we thought. I found that a vent covered with prime did NOT slow ignition as we once thought. In fact priming powder located as close as possible to the barrel was the fastest way to prime. In this photo article, I will look at the possibility that a vent can be placed too high.
The series of photos included here are in response to comments generated in a number of internet forums the author reads. I have timed low, level, and high vent locations and found no significant difference in ignition times. Questions still surface about the preferred location of the vent. Until these ignition tests and these photos, all we had to go by was human senses. The best gun makers in the world early or modern had no better tools of discovery. Decisions they made were made without the benefit of an ability to test their theories. If the performance of the flintlock passed their “human sense test”, it was deemed correct. Now we can actually review their decisions about vent placement with test results they never had.
All earlier photos that I took were with the vent in the “level” position. The purpose of those photos was to examine other variables. Here the only variable will be the height of the vent. I took three photos at each of the following vent locations:
a. vent located .030” above the top level of the pan
b. vent located level with the top of the pan
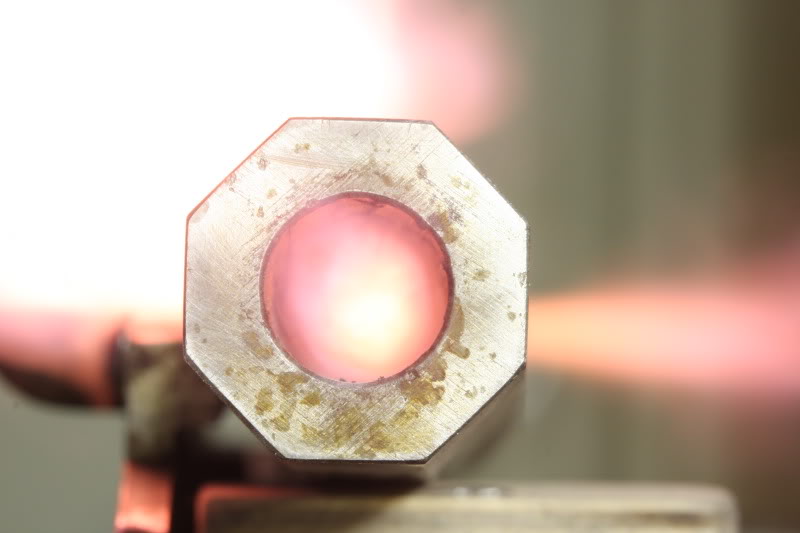
c. vent in the bottom of the pan
The reason for multiple photos is that I hated basing any conclusion on only one trial. I set the camera to look into the muzzle. The aperture was f13 and the shutter held the lens open for 4 seconds. A cable release was used to make the operation easier. I primed the pan with the powder as close as possible to the barrel. Earlier tests showed this to be anywhere from 15-25% faster. In the low vent position the prime covered the vent. This is of no concern – contrary to popular belief, this does NOT result in slower times.
The vent locations were photographed three times with 1/2 grain of Swiss and ¾ grain of Swiss. These charges were weighted. The results of the different amounts of powder were very similar. I chose to upload the ¾ grain photos. Here are the photos of the vent .030” above level with the pan top:
Here are the photos with the vent level with the pan top:
Here are the photos taken with the vent at the bottom of the pan:
One additional photo was taken because most shooters use more priming powder that the ¾ grain used in this test. My pan charger is advertized to throw 3 grains. I used it for this final trial in the low vent position:
Conclusions drawn here are based on these photos and the data collected in the earlier article. A strong argument can be made for the level vent location used by the majority of flint makers. Numerical data supports this, and these photos show a strong flame moving through the vent. My rifles use this location and I see no advantage in changing them.
An equally strong argument can be made for the low vent location. The photo evidence also shows an impressive flame front to go along with good timing numbers. If my rifle had a low vent, I would not change it.
I question the location tested here with the vent located .030″ higher than the top of the pan. The flame traveling through the vent is noticably less than the the other positions. I timed a high vent position earlier, but I did not specifically set the vent to the 030″ position photographed here. Since high vent data gathered earlier was not precisely placed, it may not be valid here. Based on the weak flame seen inside the barrel, I tend to conclude that .030″ may be too high for best ignition.
Reprinted with permission from Muzzleloader magazine, November-December 2008. For more information on this and other black powder topics visit the web site atwww.muzzleloadermag.com
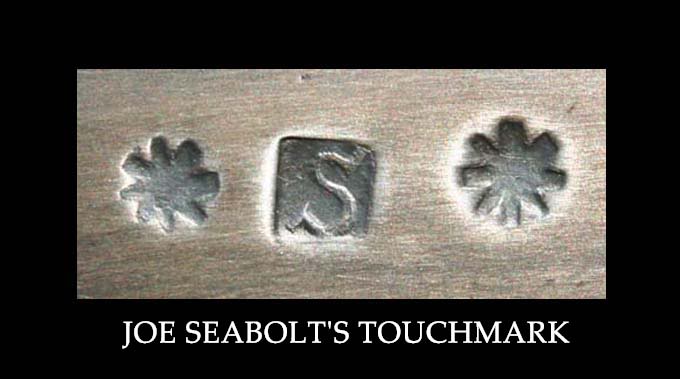
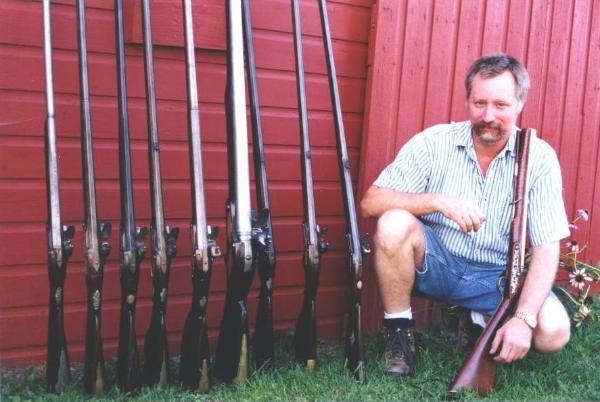
Joseph Edman Seabolt, native Cincinnatian, is a journeyman electrician by trade, and a blacksmith courtesy of Steve Marshall of Goodlettsville, Tennessee. His knife making is the product of the teachings of both Marshall and Hershel House, the latter, Seabolt states, “has become not only my mentor, but a close friend as well. House is ‘my inspiration.” Joe has attended four seminars at Canter’s Cave in Jackson, Ohio, taught by both Hershel and his brother, John House.
Joe has been married to Diane, an RN, for eighteen years and the couple lives in a log house, that he mostly built himself, in a woodland area near Goshen, Ohio. His current workplace is an old-fashioned barn, but in the summer of 2008, he began building a new blacksmith/workshop from logs taken from an old Virginia cabin for his Cedar Ridge Forge.
Seabolt grew up, like many of us, watching Fess Parker as Daniel Boone on TV, and often “went into the woods to try to emulate the great backwoodsman.” He began making knives at about age 10 by grinding down saw blades and crudely applying rough handles. In his late teens he “got a little better and was making blades using the stock removal method.” Joe began building custom made, hand forged knife blades in the early 1990s at Historic Mansker’s Station in Goodlettsville, Tennessee. Under the tutelage of Steve Marshall, the resident blacksmith at Mansker’s, Joe was taught to hand forge blades on a charcoal forge with a bellows and 18th century style tools. He subsequently set up his own forge and equipment and began making custom knives in this old-fashioned way.
Seabolt’s philosophy is that “knives are one of man’s oldest and most indispensable tools, and my goal is to make cutlery that not only has an 18th century look and feel, but is also a functional tool. Someone may have to depend upon a knife in an emergency, and I always keep this in mind. I want my knives to be historically accurate, but mostly they must feel good in the hand and be able to do the job for which they are intended.”
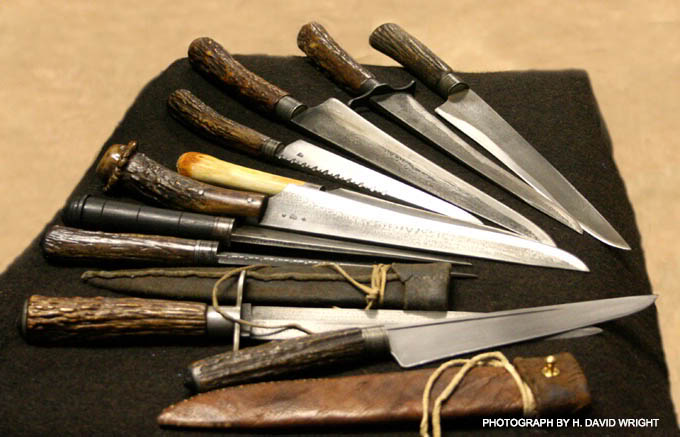
His artistry tends toward the Early Rifleman style with a long, graceful blade hammer forged from 1095 high carbon steel. Joe utilizes a special heat-treating that quenches the blade to make the spine softer than the edge, same way as the old time cutlers. This method produces a more flexible blade with maximum strength that makes it easy to sharpen and hold an edge longer than most. Seabolt states of his finished product, “No knife leaves my shop until it will shave hair!”
Joe’s knives are handled primarily with antler and bone, but he offers various American hardwoods and ebony as well. He states, “I carefully select antler for straightness and size and may look through 100 pieces to find five that meet my needs. When people pick up one of my knives, I want them to tell me it fits their hands so comfortably it’s as if it was made just for them” Joe uses a finish that gives the completed work a feel of age and toughness, but is still a beautiful example of the maker’s work. His sheaths are made with rawhide liners sewn with catgut and covered with either brain-tanned deer skin or bark-tanned leather sewn with linen thread.
Custom tomahawks and belt axes are also built by Seabolt, from the same hammer forged 1095 carbon steel, and are patterned after those of the 18th century Indian trade. These tools are handled in curly maple, hickory or American walnut. He uses only the best materials in both his knives and tomahawks, and they carry a lifetime guarantee from defects in workmanship.
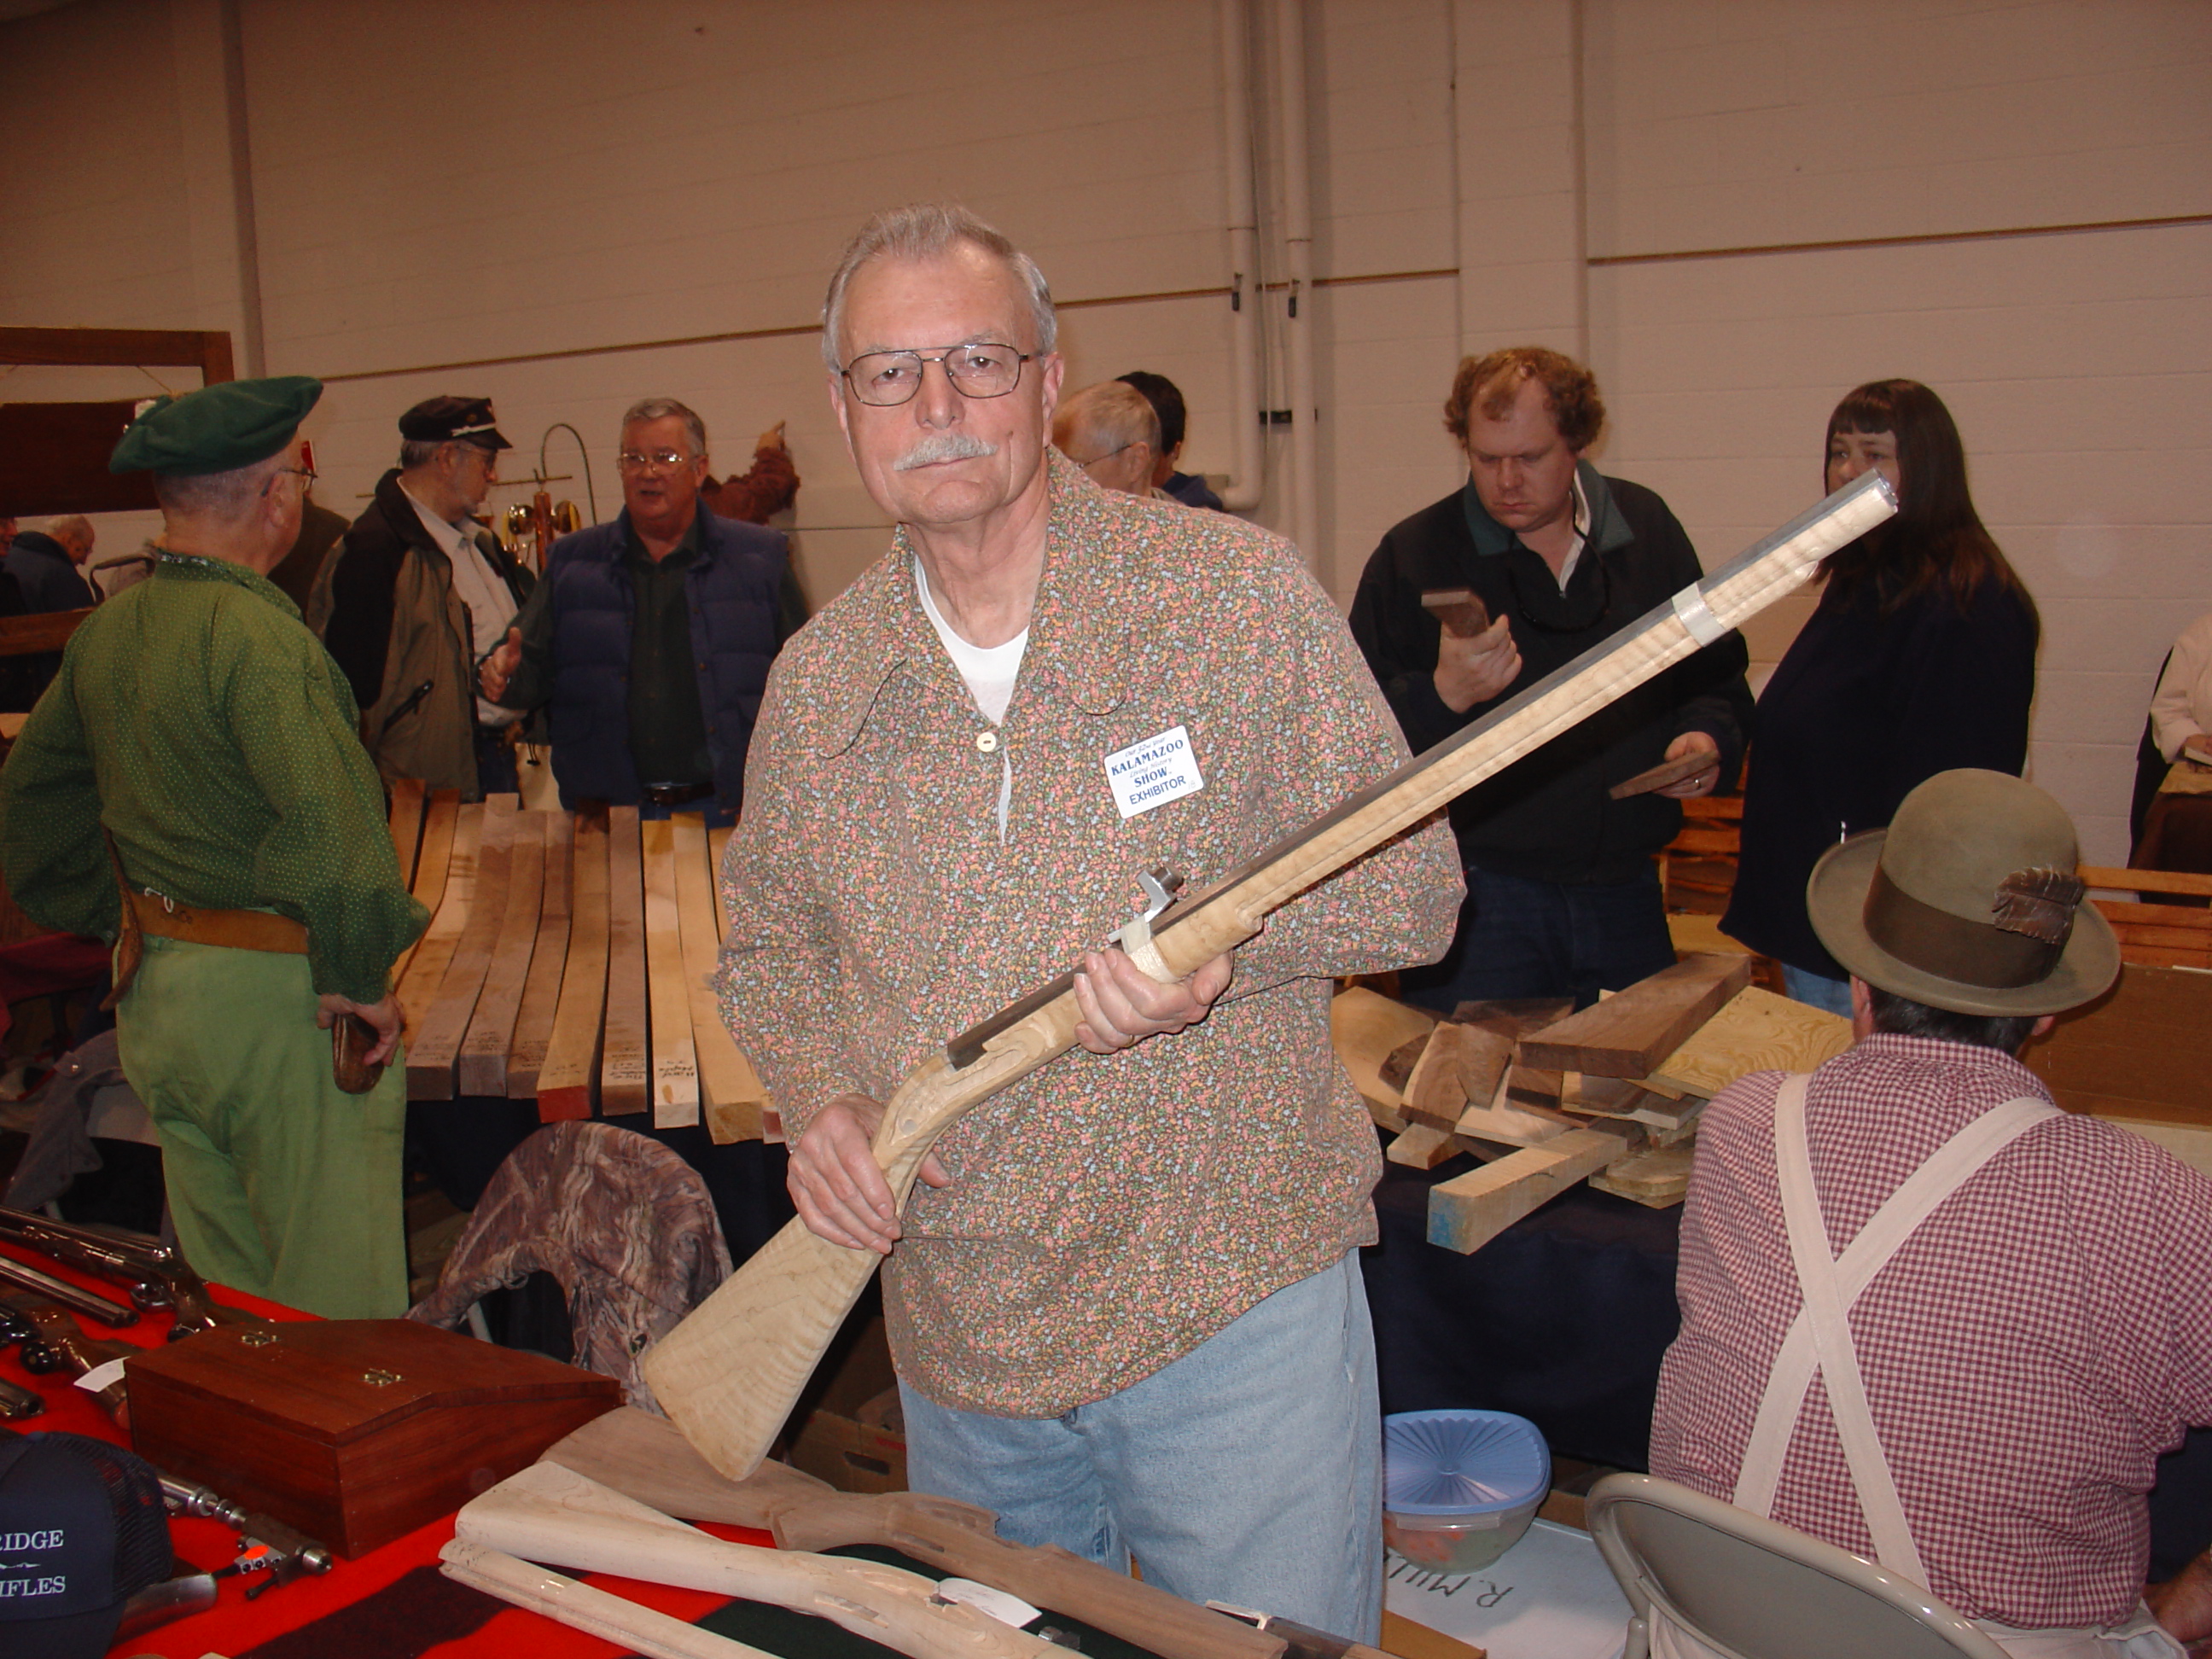
Joe sometimes builds custom longrifles, which he states are of the Woodbury School, but he personally prefers building custom knives and tomahawks. He began his riflemaking in 2006 after attending a seminar taught by Hershel House at Canter’s Cave in Jackson, Ohio. There, he polished his knowledge of hammer-forging rifle furniture – ramrod thimbles, side plate and nose cap – the style made popular in muzzleloading circles by the House brothers of Woodbury, Kentucky.
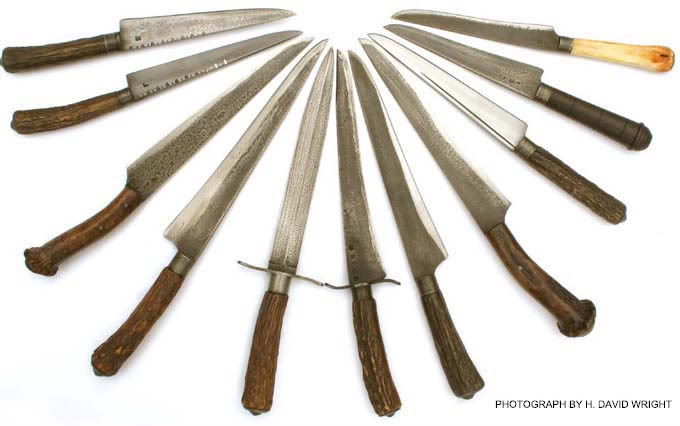
Since the early 1990s, Joe has made “hundreds of 18th century style knives.” This year he donated one of his Early Rifleman knives with custom leather sheath to the Contemporary Longrifle Association [CLA] for the organization’s live auction. The knife is described by the maker as a “turned handle trade knife.” It is hand forged of his usual 1095 high carbon steel with a full length tang riveted over a pommel washer, and is handled in ebony.”
In the words of fellow CLA artist and Live Auction Committee member, Tim Albert, “This knife is as beautiful as it is serviceable. Joe’s many years as a trekker have taught him the exact qualities needed in a functionally edged weapon and tool, and his experience at the anvil gives this Cedar Ridge Forge creation the durability, look and feel of a true 18th century original.”
Joe Seabolt is as generous as he is talented; he states of his fellow craftsmen, “Attending CLA shows and meeting the best artisans [from] around [the country] has really improved my own work…Joining the CLA has been one of the best things I have done….” He also belongs to the 2nd Company of the North Carolina Militia and attends living history events at Martin’s Station near Ewing, Virginia, The Fair at New Boston in Springfield, Ohio, and the shooting matches at the National Muzzle Loading Rifle Association’s Walter Cline Range in Friendship, Indiana, of which he is a member. He is a Life Member of the National Rifle Association and is one of that organization’s certified firearms instructors.
See all of Joe’s knife styles at the upcoming Contemporary Longrifle Association Annual Show and Meeting, August 20-21, 2010, in the Grand Ballroom of the Lexington Convention Center, in Lexington, Kentucky.
Seabolt can be reached at the following address and phone number: 6794 Gaynor Rd., Goshen OH 45122. (513) 722-4321.
About the author:
Sharon Cunningham worked for Dixie Gun Works for many years and was editor of Dixie Gun Works’ Black Powder Annual for several years. Now retired from Dixie, still retains a lively interest in black powder sports and is copy editor for the CLA’s new magazine AMERICAN TRADITION The Journal of the Contemporary Longrifle Association.
This is the complete flintlock video library of the high speed film done at Friendship during the spring of 2007. Earlier articles contained highlights – like the original Manton supplied by Jim Chambers. Finally they are all together. Now we can watch black powder ignite!
The video links in thie article are more of the film we did at Friendship. As in earlier video, the frame rate is 5000 frames per second. This rate allows us to watch lock parts and see the very beginning of the ignition sequence. In earlier videos we looked at an original Manton and a wheel lock. Here we pursue more locks of different types and makers, as well as a study of flint wear done by Lowell Gard.
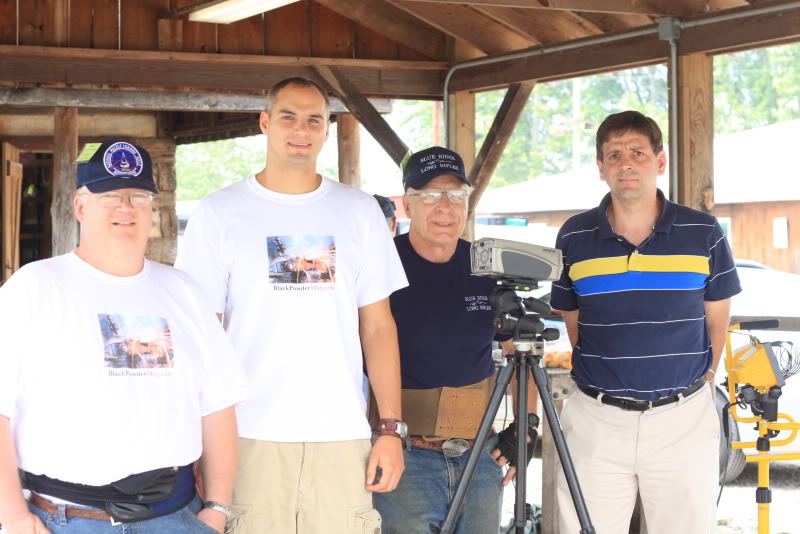
David Price has just fired a flintlock for the camera.
David Price does the honors again, firing the locks as Grant Ferguson does the camera work. Grant is the rep from Olympus. David was great help all day long. He felt, as did I, that the same person should prime all the locks.I appreciated having such experienced help.
Grant Ferguson, Olympus Industrial, is shown working with the camera interface.
From my experimenter’s point of view this was a great day. We gathered a wealth of material from which to draw data, and I think we proved that this media could be used to improve lock function. Another experimenter feels the same way. Lowell Gard of “Bevel Bros.” fame asked if we could video his lock with varying numbers of trials on the flint. He wanted to see if we could see the flint deteriorate as the trials increased. We started with a new flint and worked up to 50+ trials.
Lowell Gard (left) and David Price (center) discuss the project with another observer.
Below are five links to high speed videos in which a number of locks are grouped by type or maker. Start the links by clicking twice on the center arrow.
Ketland Group—- This group includes three locks. The first two are done by Dennis Preddy. His first is an unmodified late Ketland lock. The second was modified by Preddy. The remaining video is Lowell Gard’s experiment. We first did a video of his Late Ketland with a new flint. Lowell then snapped the lock 10 times and we did the next video. We continued this until we exceeded 60 snaps.
Priddy/Late Ketland (unmodified)
Priddy/Late Ketland (modified)
Gard/Late Ketland (new flint)
Gard/Late Ketland (11 snaps of flint)
Gard/Late Ketland (32 snaps of flint)
Gard/Late Ketland (63 snaps of flint)
The Chambers Group —- This group (below) came from Jim Chambers. It contains four locks. The original Manton came from a double fowler and is perhaps the most important lock we filmed.
Chambers Golden Age
Robert Harn
Round faced English
Original Manton (fowler w V pan)
The Kanger Group —- The Kanger group below has five locks. The Roller and Haddaway are important locks to study, in my view.
Kanger/Bob Roller
Kanger/Haddaway (note that there is no frizzen rebound)
Kanger/La Page
Chambers Round face
Chambers Round Face (up-side-down)
Pletcher/Jerry Eider
Assorted Group #1 —- The Assorted group (below) again has a number of locks:
Bauer left hand lock (maker ??)
Pedersoli
Pedersoli
L&R Trade lock
L&R Manton
Assorted Group #2 —- The locks included below are as follows:
Buckwalter Wheellock
Coggeshall (maker??)
Coggeshall (Chambers Roundface??)
Mortimer Pedersoli
Dale (L&R??)
Dale (Davis)
Dale (Sales)
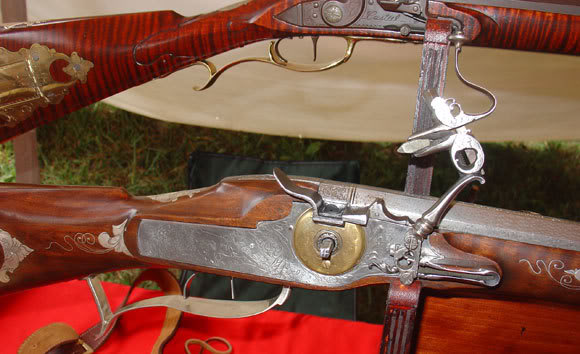
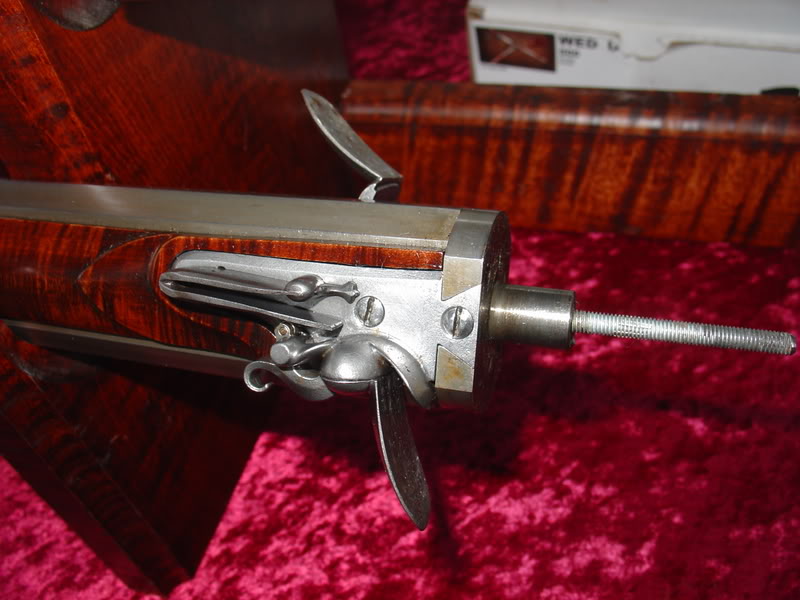
Locks and Swivel Guns by David Price —- This group of locks come from David Price – both conventional locks and those on his swivel breech guns. They include:
Price Double Rifle
Price large Siler
Price Siler 40
Price Siler Rifle
Same Price rifle (up-side-down)
I wish to thank Grant Ferguson for his effort in this project. Without his camera and special abilities, we certainly could not have attempted this. Grant, I hope we get a chance to work together again. David Price worked all day long with me, and I appreciate his help. I also thank him for the opportunity to handle his beautiful swivel breech. Thanks also to Barbie Chambers and Dick Miller for allowing us to work at Gun Makers’ Hall. And last of all, a thank you to all the shooters who brought locks for us to record. I appreciate your willingness to share your lock with us.
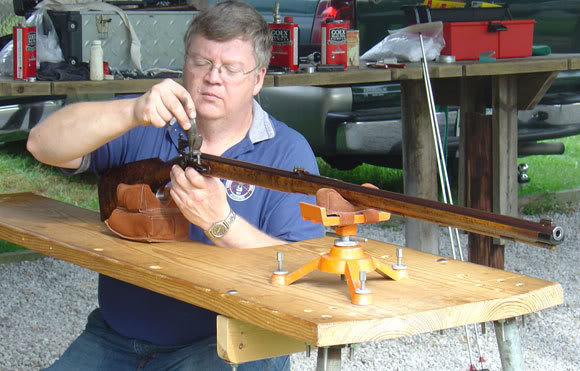
We attempt to measure the effect of seating pressure on black powder ignition in both percussion and flintlock rifles. – Larry Pletcher and Steve Chapman
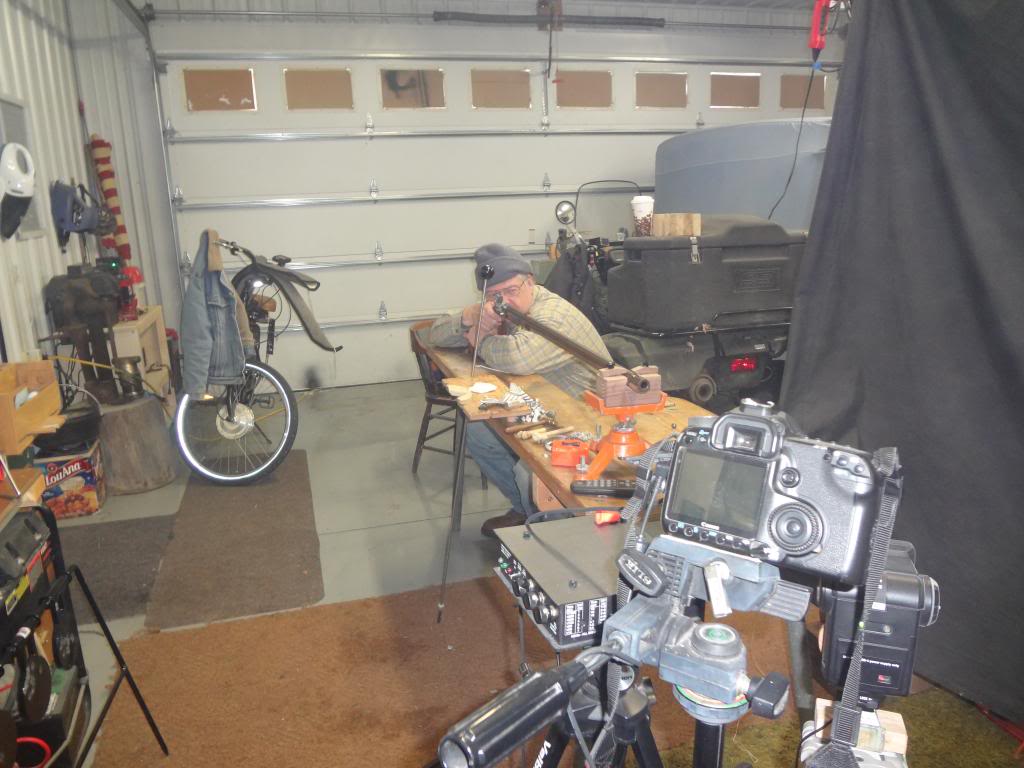
The purpose of these compression tests was to find out how flint and percussion rifles would react to changes in compression as the ball was seated on the powder. My personal method has been to use firm and consistent pressure whether I was shooting a percussion or a flint firearm. Many of my friends hold similar opinions. However I recently heard varying opinions and wanted to find a way to measure how different guns react to pressure changes.
I was pleased to have Steve Chapman, shown in the photos, help conduct these tests. Steve is a member of our local club and shoots at five other clubs. His shooting abilities eliminated variables that my shooting would have introduced. We also used his rifle which is convertible from flint to percussion. Having Steve and his rifle meant that all the gun handling was done by the same person, with the same rifle, and with the same equipment.
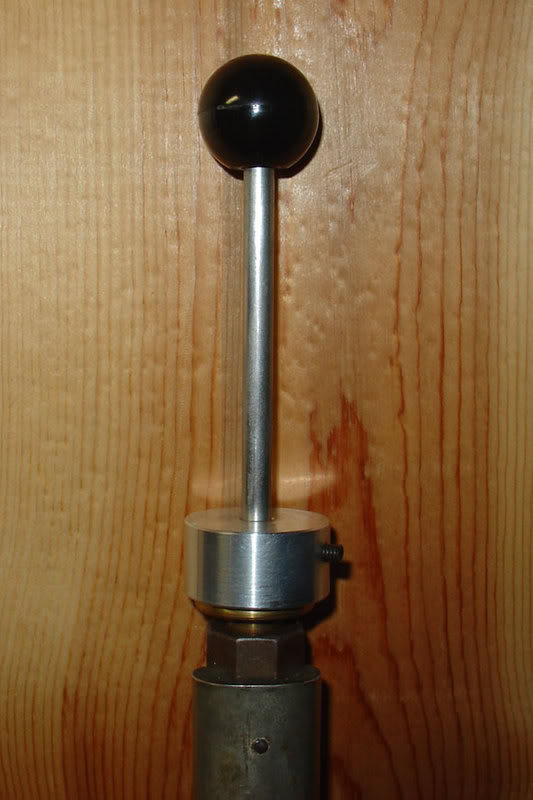
In order to load with identical seating pressures throughout a 5 shot group we adopted a method used by black powder cartridge shooters. We measured pressure not in pounds but in inches of compression. In our tests we used a stop on the ramrod that was set in the following 4 ways:
a. no compression
b. 1/16” of compression
c. 1/8” of compression
d. 3/16” of compression.
A collar was made with a set screw that could be firmly attached to a steel bench rod. This rod’s sole purpose was to seat the patched ball. The first setting was determined by seating a ball to just touch the powder. The collar was lowered 1/32 inch and attached. This left the ball “just a hair” above the powder. Each additional 5 shot group was loaded after adding a 1/16” shim between the muzzle and the collar and reattaching the collar.
The rifle was wiped with a wet and dry patch between shots. We were concerned that if the breech was not cleaned well, fouling would take up additional space, increasing the length of the powder charge, and alter the compression. We feel that thorough cleaning prevented this from happening.
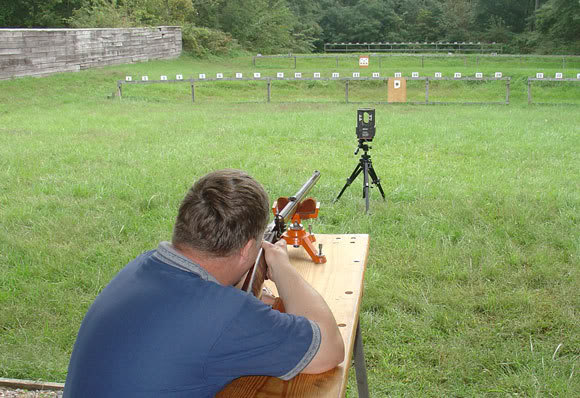
We fired the rifle at 25 yards off a bench and through a chronograph. We recorded the velocities of each shot and noted those velocities on the targets as they were done. Our load was a .400 cast ball (Lyman mold) and pocket drill for patches. The patches were lubed with Murphys oil soap and cut at the muzzle. A powder charge of 40 grains of Goex fffg was used throughout all testing. After the velocity and ball placement on the target were recorded, a piece of black target paper was placed behind the target to improve the sight picture for the shooter. In effect the target was a fresh one for each shot. After firing the four groups in the flint gun, the vent liner was replaced with a percussion nipple and a mule ear percussion lock was installed. Then we repeated the four groups with percussion ignition.
Each 5 shot group was measured at the widest point and the width of the ball was subtracted to arrive at a center-to-center group size. The following chart shows the group sizes and the compression:
Compression —————– Flint —————- Percussion
None ——————- .92 inch ————– .53 inch
1/16 inch —————.84 inch ————– .85 inch
1/8 inch —————–.85 inch ————– .55 inch
3/16 inch ————– .46 inch ————— .41 inch
Interpreting results can be tricky and should perhaps be left to the reader. My impression is that as a flintlock, the gun liked compression and responded to compression with smaller groups. The percussion version also liked compression but seemed a little more forgiving as far as the amount of compression used. The percussion shot far better with no compression, but when compression was added, both versions ended up essentially the same.
The obvious limitations of this test are that it was done on only one gun and only one powder brand. Will other guns or powder varieties respond the same way – only more testing will tell. Will this test change my loading? On flint guns the answer is probably yes. I will run more tests on my gun, but the seating pressure I normally use on my flint gun is too light based on this test.
Ideas for further tests might include:
Pre-weighing powder charges on a scales
Weighing and culling the balls
Using aperture sights
Attempt the test on a day with more consistent light conditions
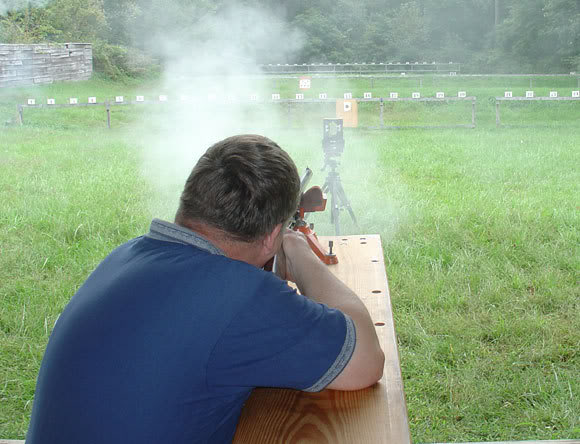
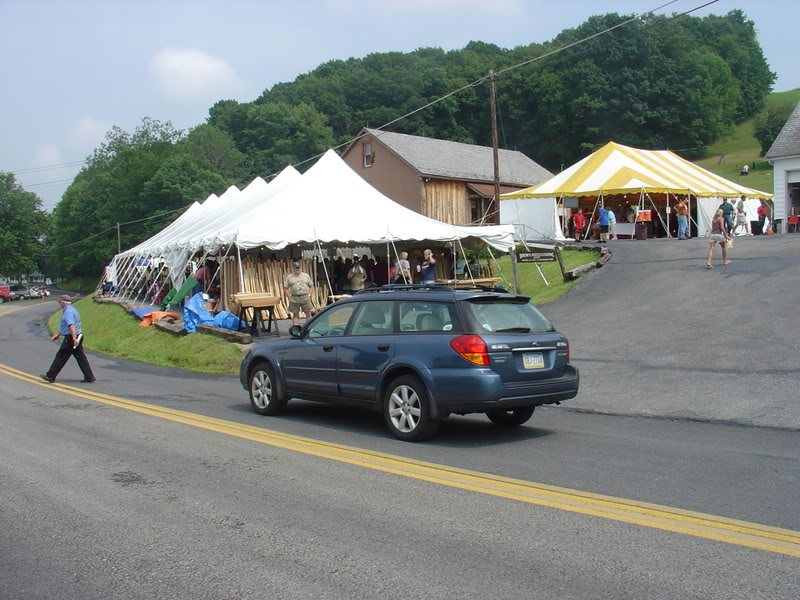
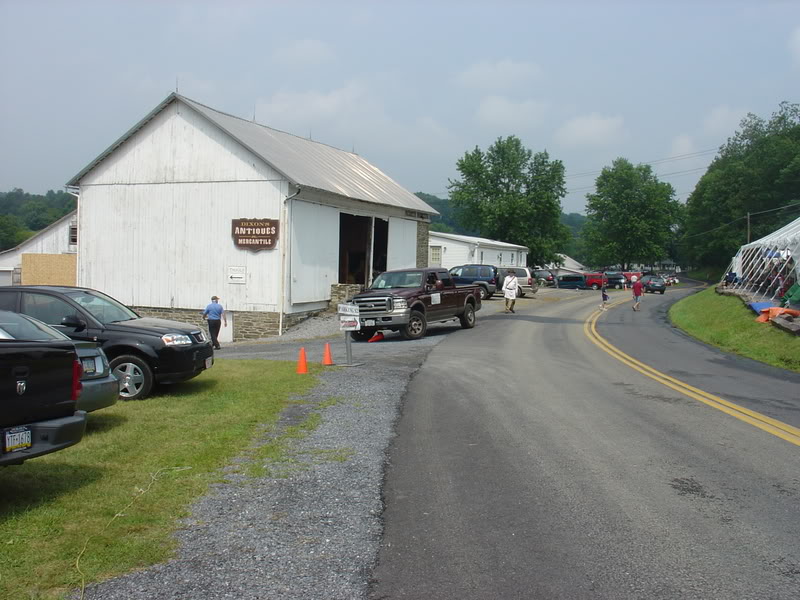
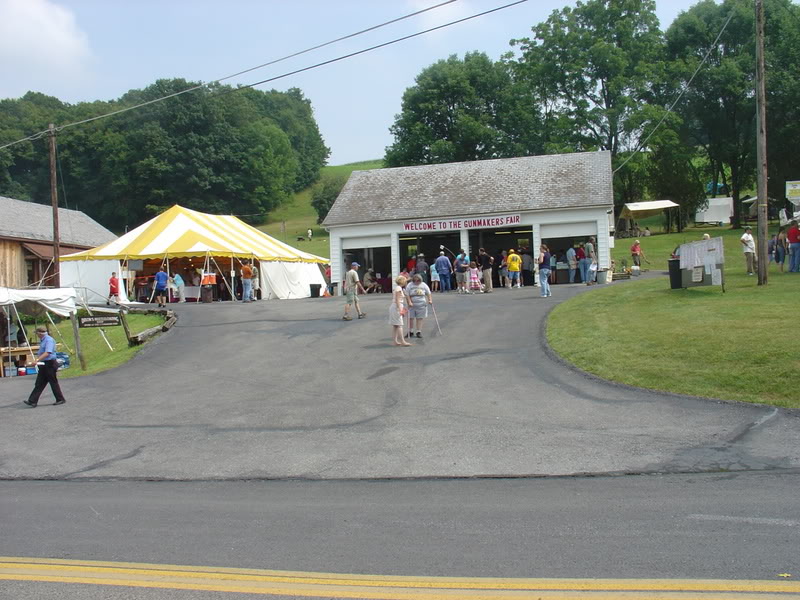
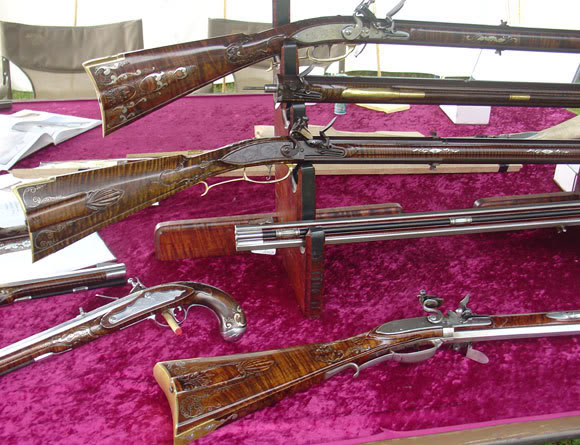
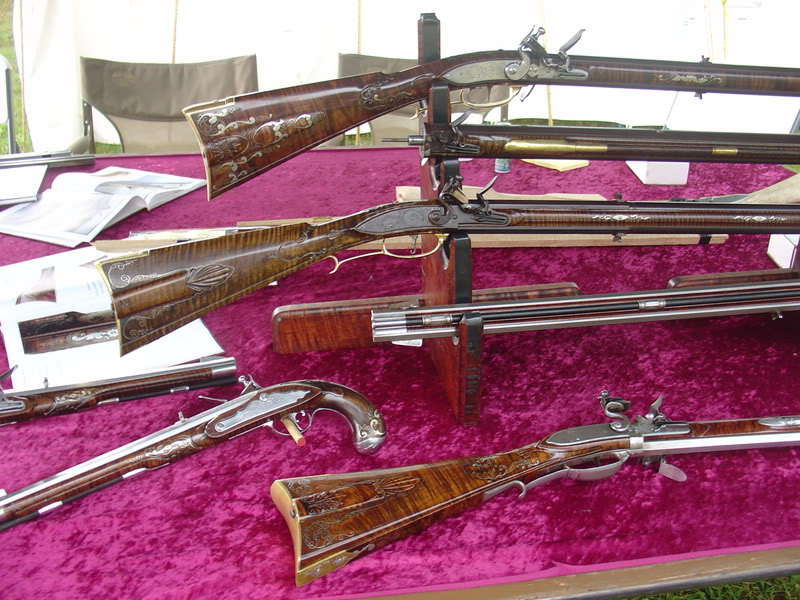
Dixon’s is the Mecca for all things relating to black powder and muzzleloading. Some of the most beautiful flintlocks in the world find their way here to be judged and displayed.
This was my first trip to Dixon’s Gunmakers’ Fair. While I could only spend one day, I certainly was not disappointed. It was all I had heard and more.
It was drizzling on the short drive heading from Allentown to Dixon’s, but it stopped as we parked the car. Not knowing where to start, we went to the first tent and found Don Getz, Wayne Dunlap, and Jim Chambers just inside. From there on everywhere we went there were old friends. Some I met before, and some were friends I learned to know through ALR.
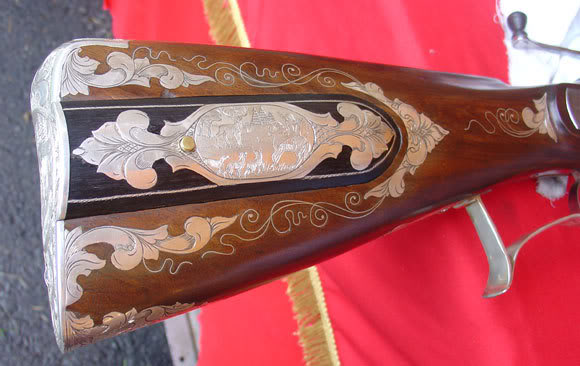
I intended to take many photos but as usual I got too involved in conversations to do that. The few posted here are among the better ones. For instance, one can’t look at Kieth Casteel’s wheellock without reaching for a camera. It is an amazing piece.
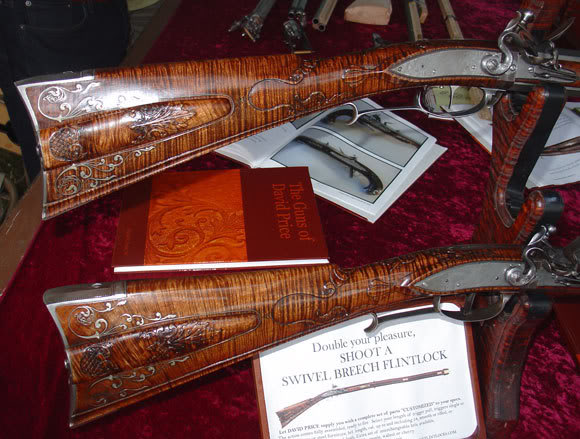
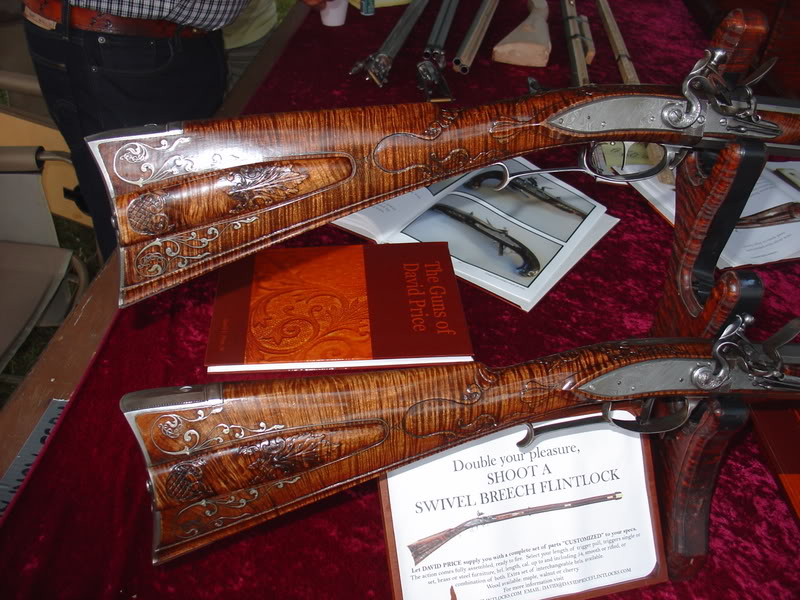
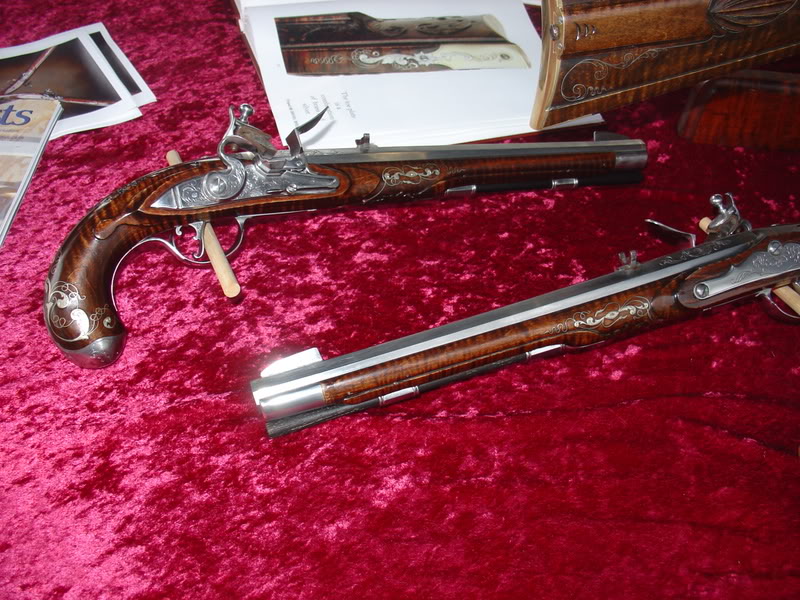
David Price’s table deserves a close look. David built the swivel breech for the raffle at the Fall Championships at Friendship. The raffle gun was the subject of his carving tutorial on the ALR site. He also helped me do the slow motion videos of locks during the Spring Shoot.
I remembered that Rich Pierce and Tom Curran mentioned being up the hill. As we headed to higher ground, the rain started. I heard a voice welcoming us out of the rain. The camp belonged to Gene Baldwin, one of the Susquehanna Rangers. This group does the F&I War reinactments. They made some of the cannon noise heard through out the day. The rain grew stronger and lasted perhaps 40 minutes. It gave us a chance to chew the fat with Gene. His group has a web site:www.susquehannarangers.com if you would like to become involved.
When the rain stopped we found the Pierce/Curran booth, but Rich and Tom were out and about. We happened by the horn tent. I didn’t know there were so many horn makers. Everywhere you looked there was outstanding examples of horn work.
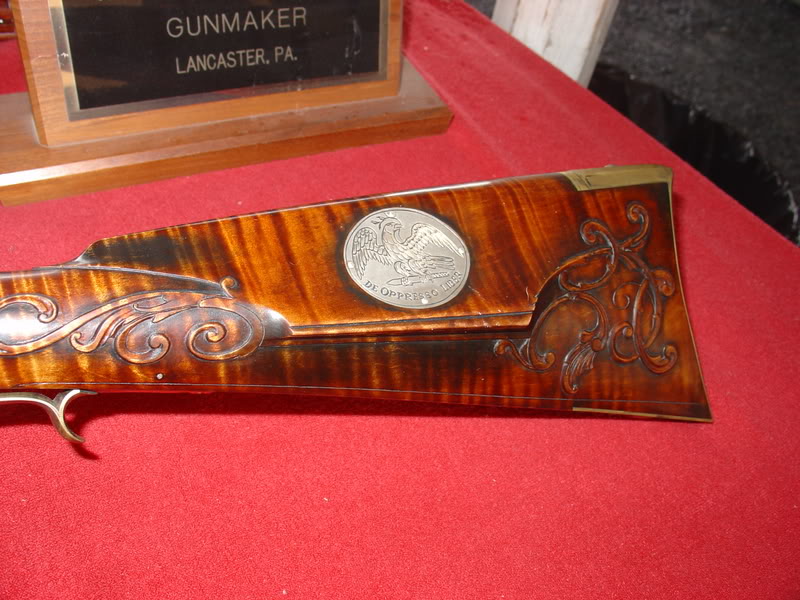
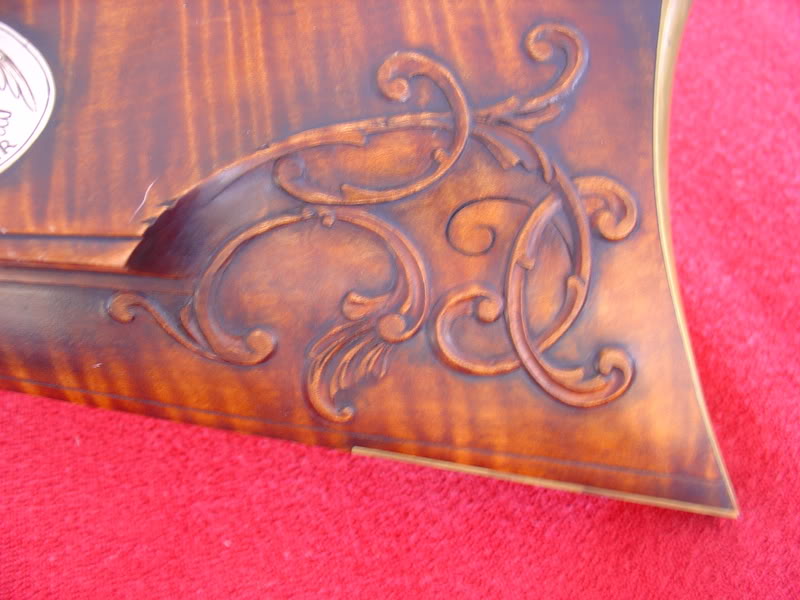
We continued on, retracing our steps. I hate to drop more names but we saw Allen Martin, Peter Alexander, Mark Wheland, and Larry Gardner. I found Bill Shipman’s table but missed Bill. Here are a couple of photos of one of Bill’s rifles.
Across the isle from Bill’s was Allen Martin. Allen had a couple of rifles that begged to be photographed. The top one was much discussed on ALR.
There were many people to speak with, if I try to name them all I surely will miss someone. It did seem like old home week. I regret not getting photos of more makers with their guns. I should have slowed Taylor, Cody, and Brian down long enough for a photo. If they come back from BC next year, I won’t make the same mistake.
Traveling to Dixon’s is worth the trip. For us it’s 660 miles one way. I’ll be back.
Are you interested in watching an original J. Manton flintlock in slow motion? How about a wheel lock? BlackPowderMag was able to do just that at Friendship this spring. With help from blackpowder riflemaker, David Price, and Grant Ferguson from Olympus, we filmed 30+ flintlocks at 5000 frames/second.
History was made at Gun Makers’ Hall during the Spring Nationals at Friendship this year. Blackpowdermag.com and Olympus Industrial collaborated on a slow motion project. Grant Ferguson from Olympus set up a digital video camera capable of 33,000 frames /second under the pavilion behind Gun Makers’ Hall. The goal was to tape as many flintlocks as we could, furnish the shooter with a CD copy, and give the NMLRA a copy of all our work. In all, we were able to give 33 different digital files to the NMLRA.
David Price has just fired a flintlock for the camera.
The background behind this project started back in the fall of 2006. In a phone conversation, Grant Ferguson and I first discussed the possibility of taping both locks and the firing of a rifle. After a number of conversations we agreed that it might be helpful to try this by ourselves instead of having onlookers present. If we failed, we would rather not have an audience.
In January of 2007 Grant brought his equipment to northern Indiana, and we had our first try in my garage. By juggling a couple antique cars around, we had a heated space to work. During this time we taped a large Siler that has been the subject of many experiments over the past 20 years. We digitally recorded this lock in a number of “flint/bevel/priming powder” combinations. The lock even got a chance to perform up-side-down. Besides taping another lock with no frizzen spring, we recorded a flint rifle from the front so we could see lock ignition, vent hole ignition, and the ball exiting the rifle. (Just in case you wondered, a years’ worth of “Guns and Ammo” duct-taped together makes a good bullet stop for a limited number of tries. Dixie Gun Works catalogs aren’t bad either. — Remember, don’t try this at home.)
Grant Ferguson, Olympus Industrial, is shown working with the camera interface.
Armed with the knowledge gained from this experience, I contacted Barbie Chambers, Dick Miller, and Roland Martin to get their take on the project. With their approval we looked for a date during the Spring Shoot. Barbie Chambers is the events planner for the Hall, and we soon had our date. As the time approached, I found a number of gun makers and ML fans willing to help. David Price, maker of the swivel breech raffle rifle, deserves much praise for his assistance. He volunteered to help me out, and as we were about to start, I mentioned that I hoped to use the same priming powder for all locks. David’s reply was, “I think the same person should prime all the locks too.” And he did just that. It allowed me to burn disks for the shooters and line up the next lock to record.
David Price (center) discusses the project with observers.
As we worked, the number of shooters grew and kept us busy most of the day. At one point Barbie came by with four locks from the Chambers booth. One was an original J. Manton from a fine smooth bore double. That had to be a highlight. Another was a wheellock. Leon Buckwalter’s lock is the only wheellock ever taped in slow motion – at least this slow. The frame speed we used for all locks was 5000 frames/second. At this speed it takes perhaps a minute to show the complete ignition sequence. An even faster frame rate could have been used, but the size of the screen would have been reduced. We felt this was a good compromise.
Leon Buckwalter prepares his wheel lock.
From my experimenter’s point of view this was a great day. We gathered a wealth of material from which to draw data, and I think we proved that this media could be used to improve lock function. Another experimenter feels the same way. Lowell Gard of “Bevel Bros.” fame asked if we could video his lock with varying numbers of trials on the flint. He wanted to see if we could see the flint deteriorate as the trials increased. We started with a new flint and worked up to 50+ trials.
All in all, it was a great day for students of the flintlock. I believe every lock owner received a working video of his locks. The NMLRA received them all. Lowell offered to place a few CDs at the Bevel Bros. booth if shooters were interested in purchasing the complete set. We may give that a shot this fall.
Patch box side of David Prices’s swivel breech rifle. This superb piece will be raffled in the fall..
I chose to include slow motion videos of the J. Manton and the Buckwalter wheel lock. The Manton locks from the late flint period are, in my opinion, the finest locks made. The wheel lock is included because I don’t think one has ever been photographed at this speed.
I wish to thank Grant Ferguson for his effort in this project. Without his camera and special abilities, we certainly could not have attempted this. Grant, I hope we get a chance to work together again. David Price worked all day long with me, and I appreciate his help. I also thank him for the opportunity to handle his beautiful swivel breech. Thanks also to Barbie Chambers and Dick Miller for allowing us to work at Gun Makers’ Hall. And last of all, a thank you to all the shooters who brought locks for us to record. I appreciate your willingness to share your lock with us.
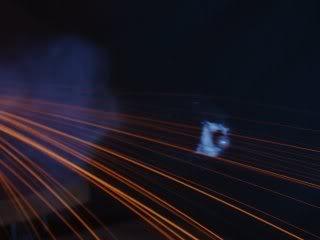
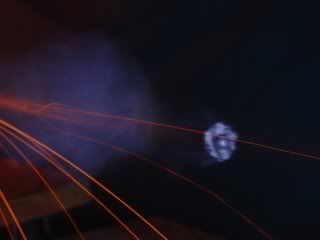
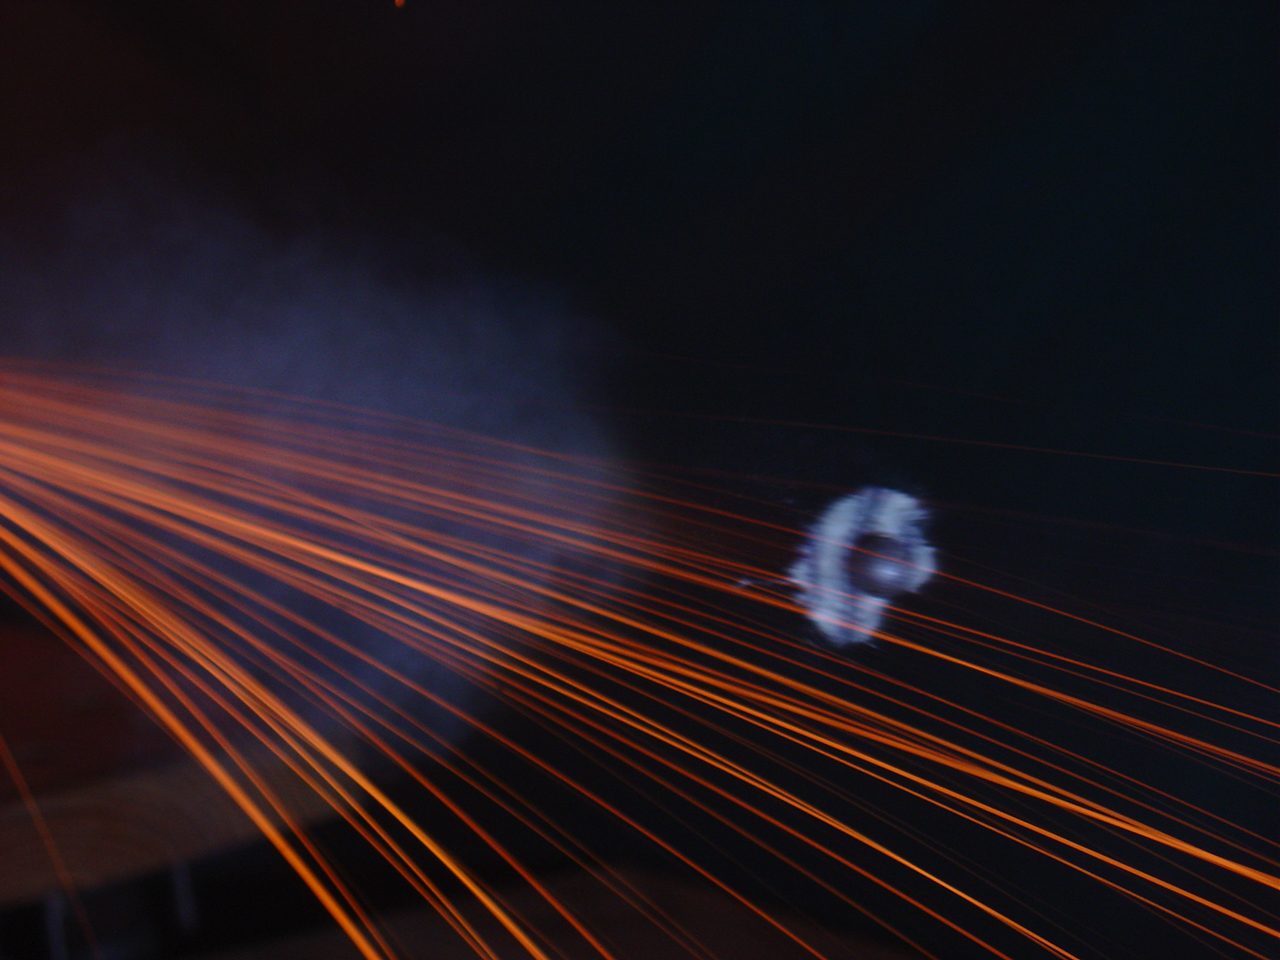
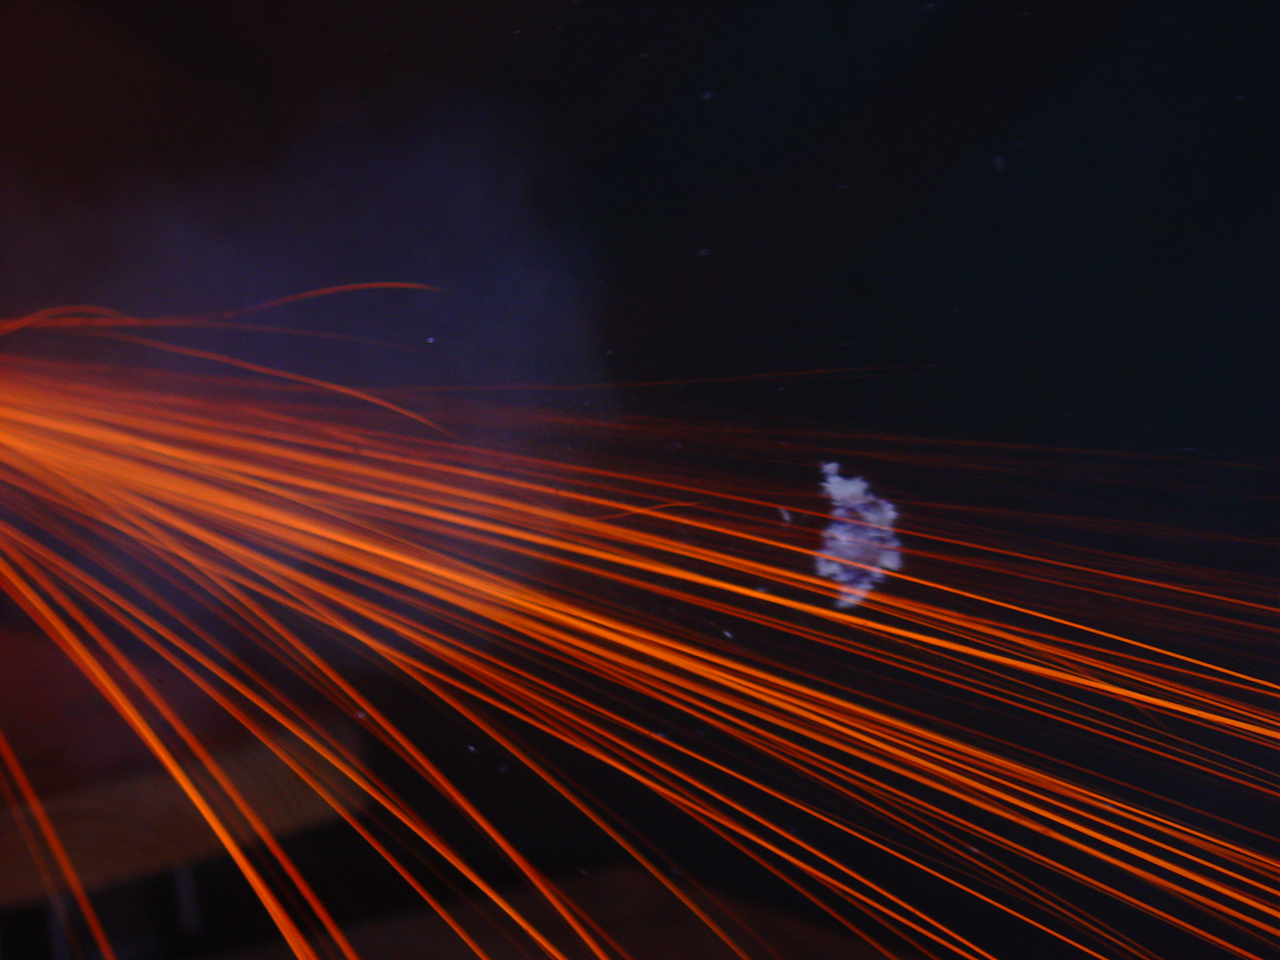
It’s finally ready! Flintlocks with multiple variables at 5000 frames/second. This movie will run at GunMakers’ Hall this spring. Here’s your chance to see it early. See if you can see individual blackpowder grains ignite.
Grant Ferguson makes adjustments to the Olympus HS camera
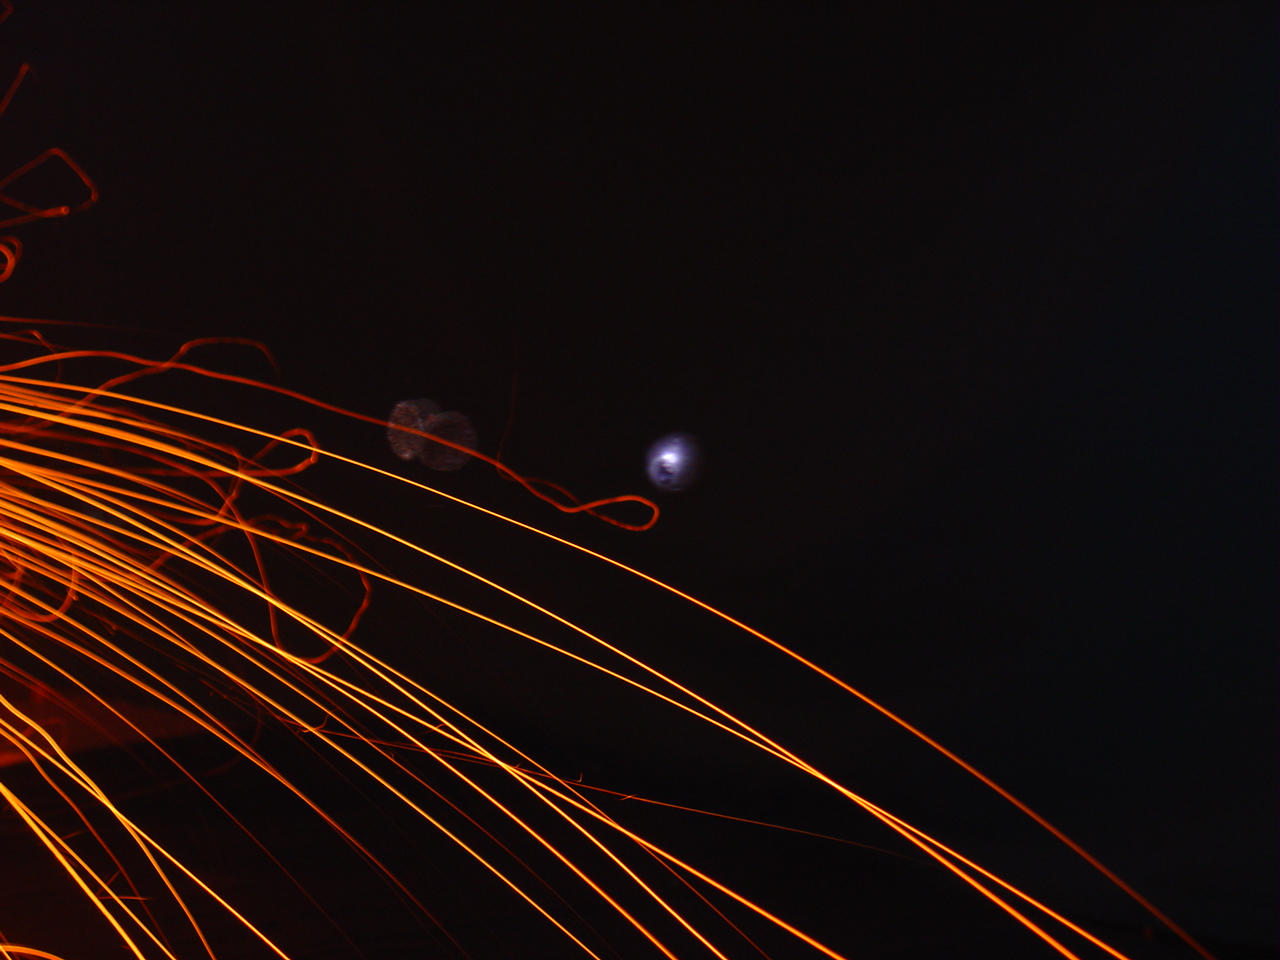
The accumulation of my high speed flintlock videos is finally finished. Because of over all size the movie is in two parts. Part A includes experiments with my old faithful large Siler lock using chipped English flints, sawn agates, Swiss Null B and Goex ffg priming powder. A video of a Chambers Round Face lock without a frizzen spring has also been included. Of particular interest is the trial with Goex ffg. The grains of powder can be seen flying in the air above the pan. The first ignition takes place above the flint almost even with the top jaw.
Part B includes a pair of high speed videos of a large Siler lock firing up side down. The lock is tried with chipped English flints bevel up and down. Swiss Null B is used in both trials.
Also included in Part B are three tries at video taping a flint rifle firing. The camera used was monochrome are 15,000 frames/second – three times faster than the rate used on the locks. Lighting was a tough problem. We used 3000 watts on the gun and wished for double or triple that amount. The frame rate means a very fast shutter. In the first two tries, we started the camera on the sound of the trigger. In the last we simply let the camera run and fired the rifle.
Bill Rose is one of the best men with a rifle that I know. I first met Bill at a Stones Trace Club match where he and I both attend. He also shoots at territorial matches that I scored. Bill recorded this interview the day after he cleaned the Production Inline Rifle Silhouette Match at the Spring Nationals in 2006. Bill brings to the table a wealth of experience gleaned from many different shooting games. His training methods and methods of match preparation are worth a listen.
Many shooters go to LC Rice to get a barrel. He and Liston make some of the best. I went to him for flintlock tuning. He tunes some of the best. . .
LC Rice Interview at Friendship – Spring 2006
LC Rice has to be one of the most knowledgable and entertaining characters at Friendship. Listen to his story about he and Liston beginning the L&R Lock Company and their eventual barrel-making business. When LC talks it’s a good idea to pay attention. While you think you are being entertained, he is teaching you a bunch. I’d try to use an example here, but you’re far better off listening to him on the recording.
As of the Spring 2007 Shoot, Rice Barrels is operated by Liston Rice. I spoke with Liston about the change. LC is tuning locks for Jim Chambers. LC is on his own clock now instead of the company clock. And, few men are his equal at lock-tuning.
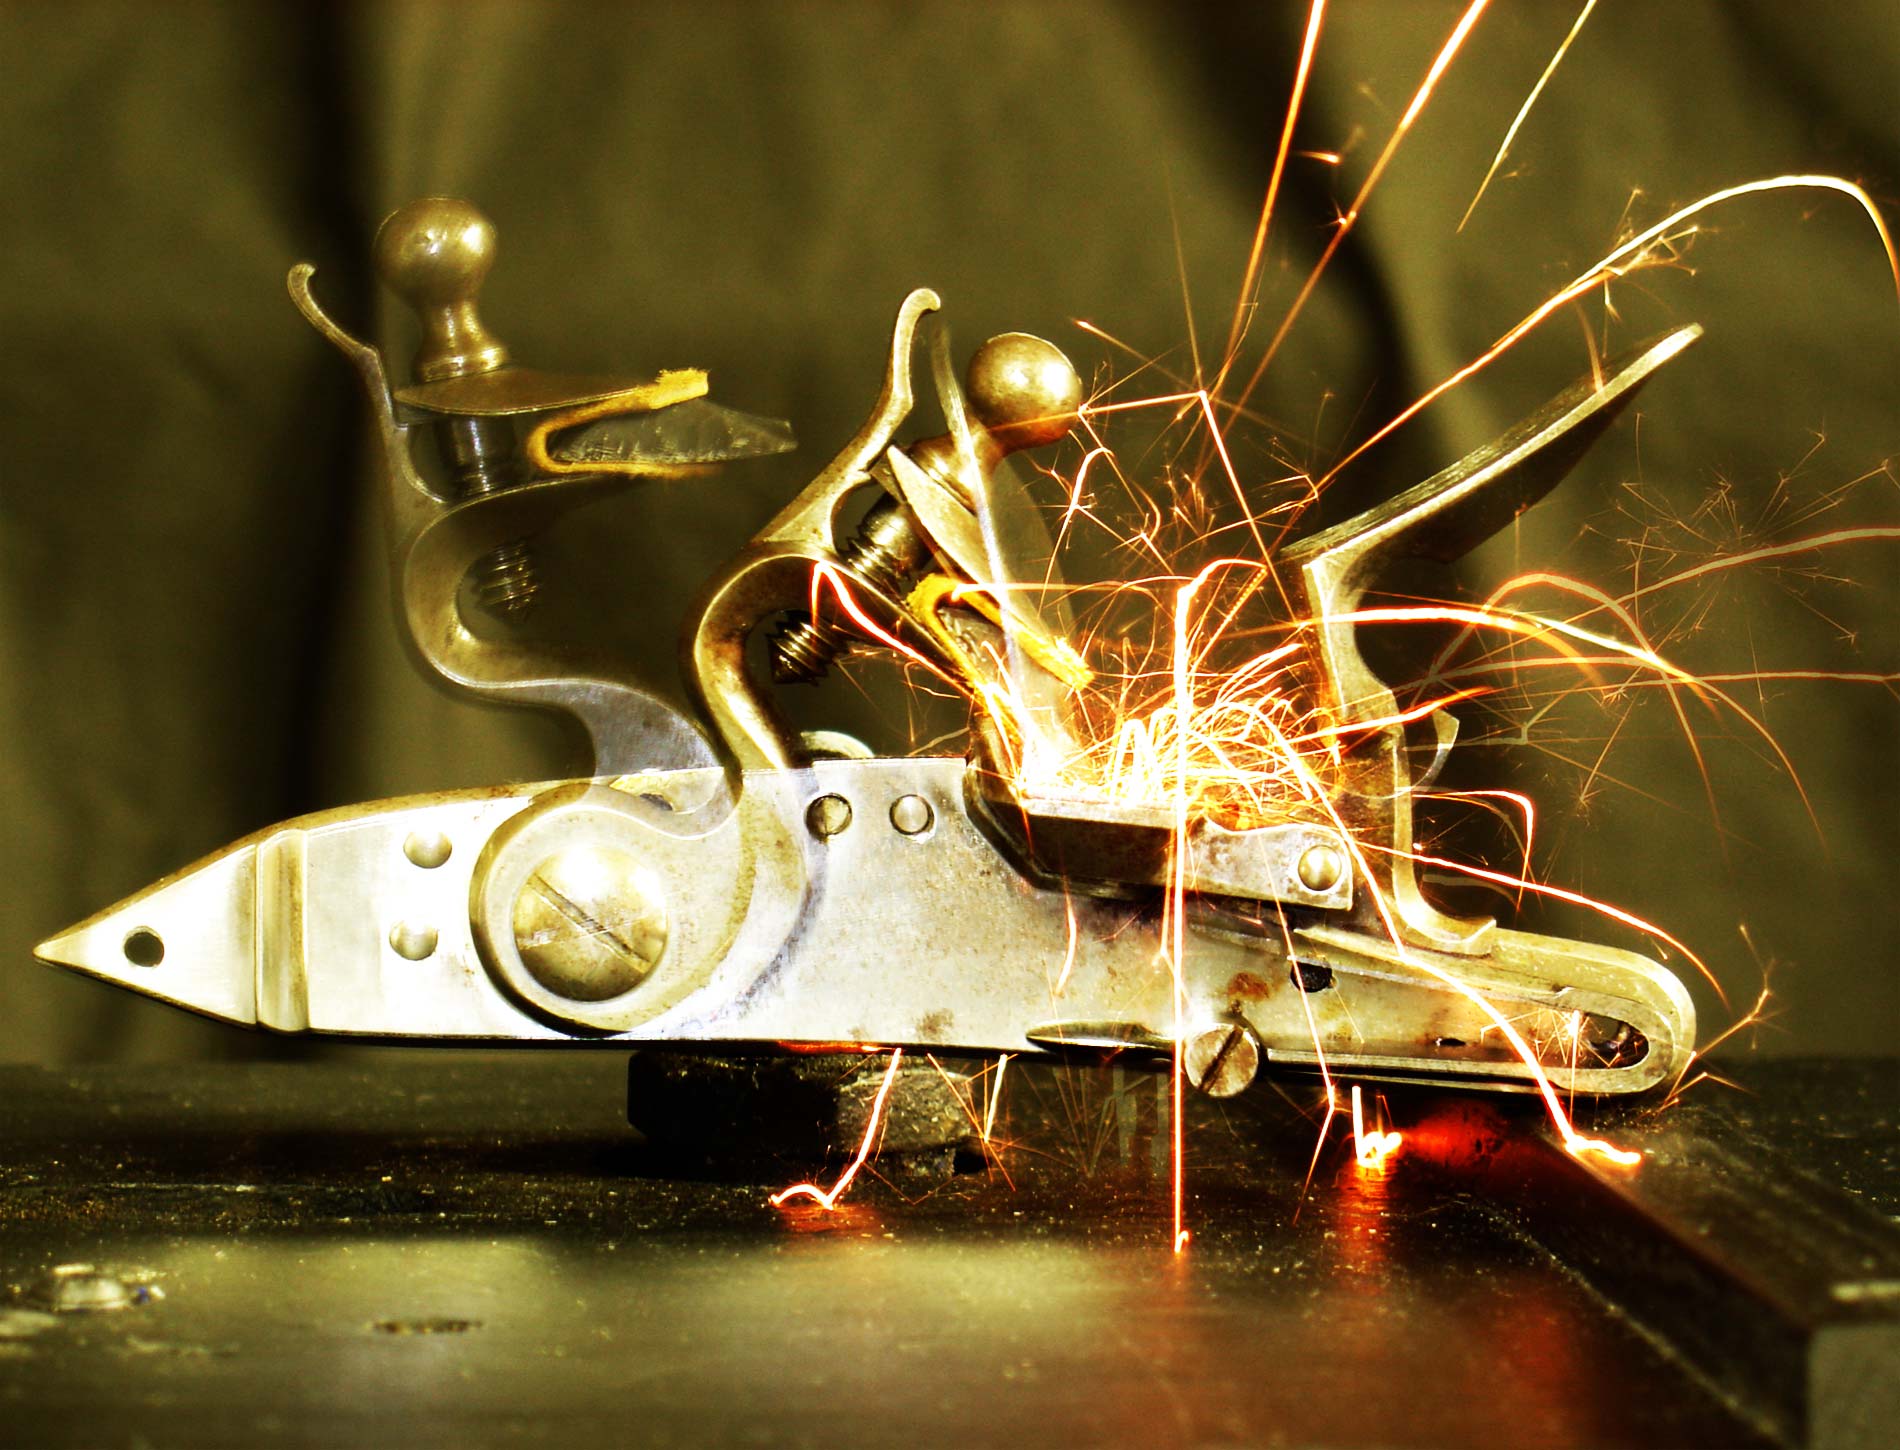
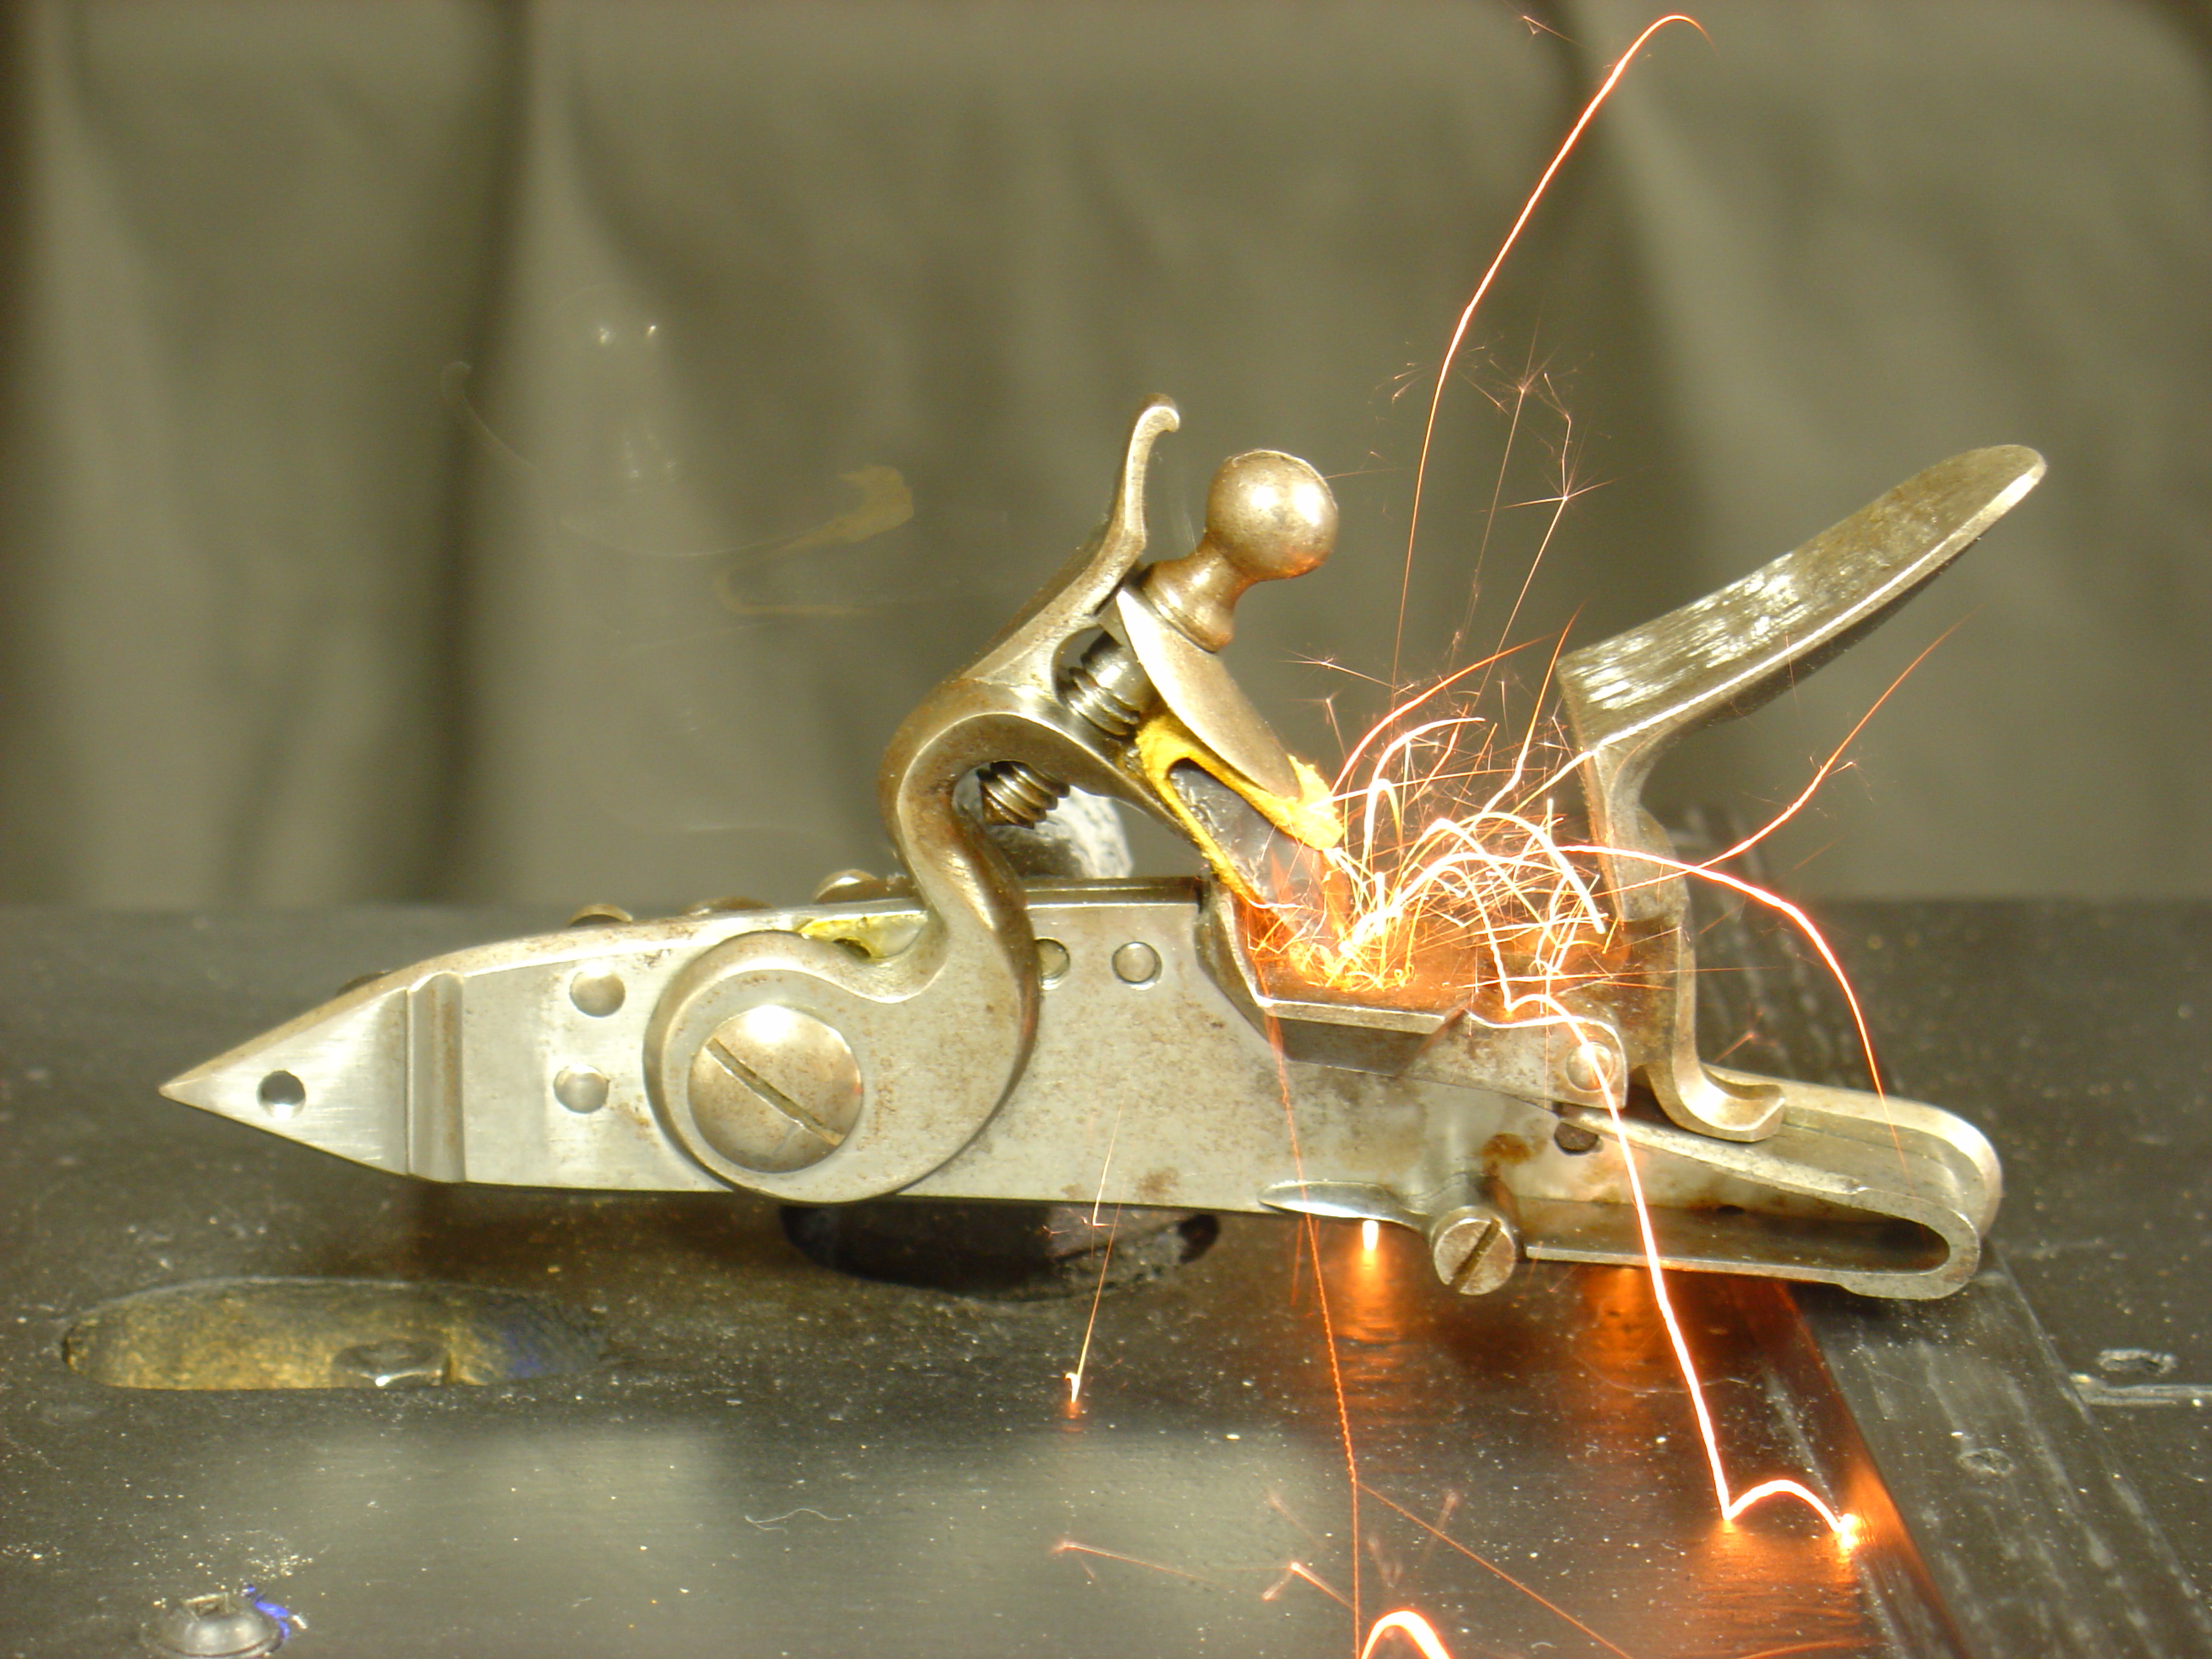
A flintlock needs a secure method of attaching the flint. There is spirited disagreement on the best way to do this. Whether to use lead or leather is the subject of this study. Perhaps this study will help your flintlock to ignite black powder more quickly. Because of the recent discussions about attaching flints with both lead and leather, I decided to see if I could use photographs to study the problem. An experimenter does not dare approach his work with a preconceived answer, and I assure you that I have “no dog in this fight.”
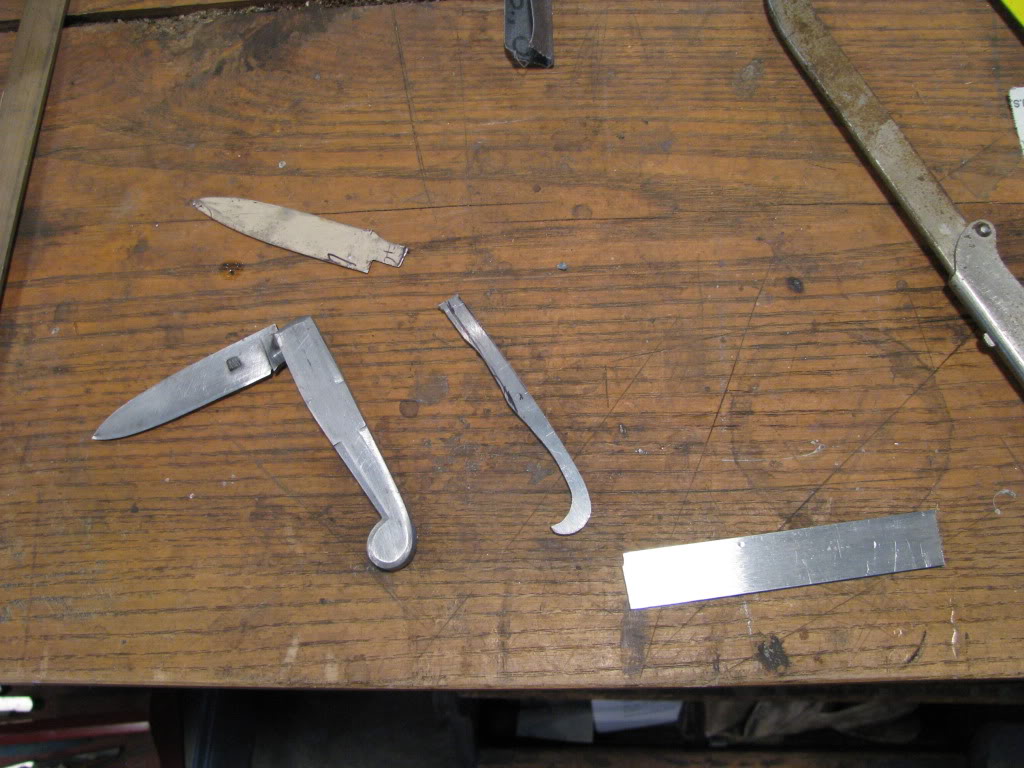
I began by selecting two chipped English flints as close to the same shape as I could. I glued a piece of leather to one and make a lead wrap for the other. I hammered the lead fairly thin and trimmed off all that was unnecessary.
Previous experience with timing locks has allowed me to conclude that the first strike of the flint is never the fastest in a series, so both flints were struck 3 times before the photography started.
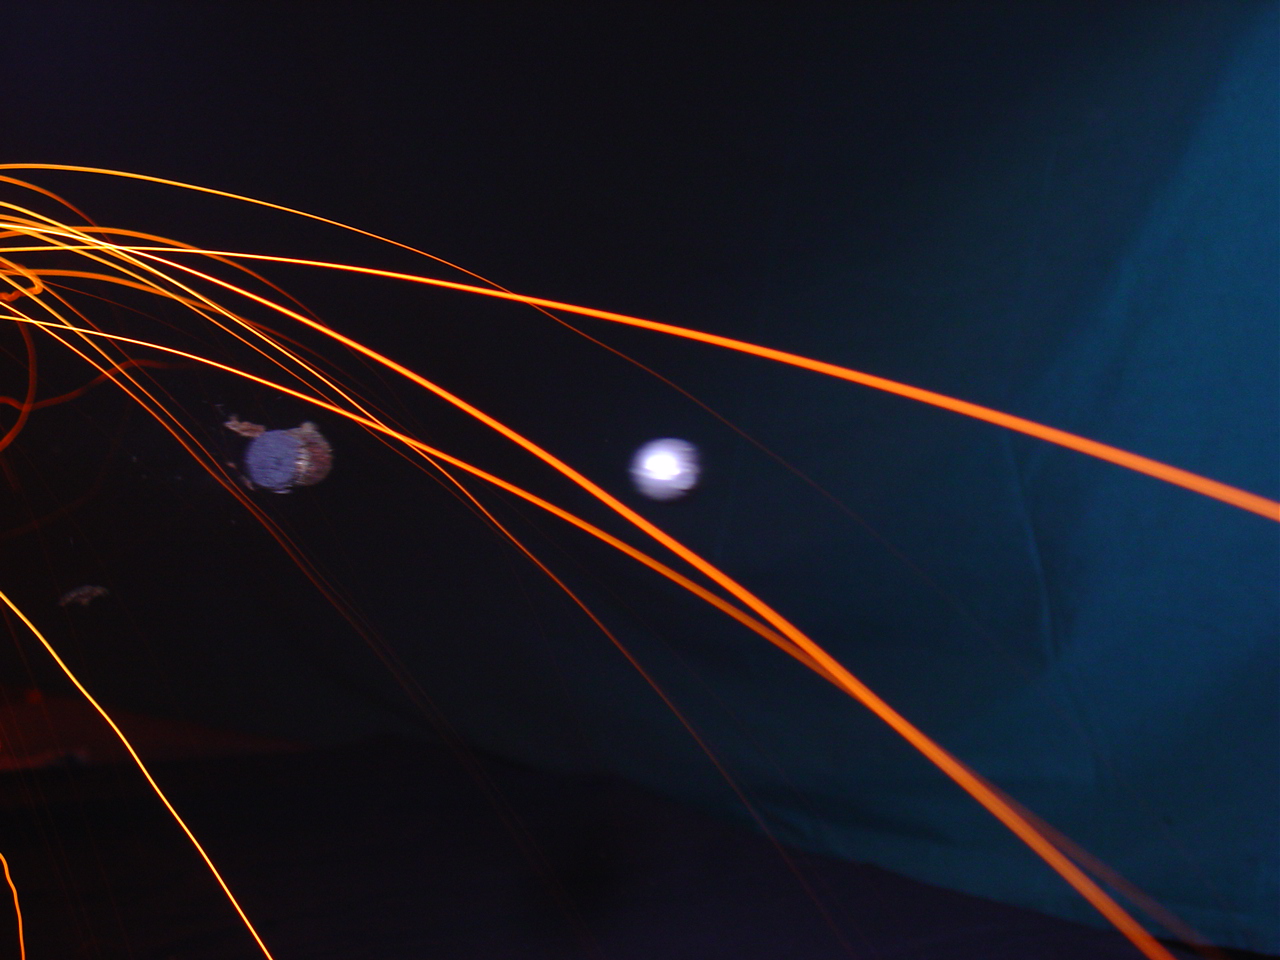
With the lock mounted in the fixture, I set the camera for a 4 second time exposure. I opened the shutter and fired the lock during the 4 second delay. All sparks made during the strike are shown in the pic.
During the first session I fired the lock 5 times and then turned the bevel down and fired 5 more. Then the other flint was installed and I repeated the process. Both flint/lock combinations worked slightly better with the bevel up.
In the following series of photos, Leather and Lead photos will appear in the order each group was taken. Leather will be first in a pair, followed by the Lead photo. Photo captions identify the method of attachment and the number of the trial.
Leather_Bevel up_Trial #1Lead_Bevel up_Trial #1
Leather_Bevel up_Trial #2Lead_Bevel up_Trial #2
Leather_Bevel up_Trial #3Lead_Bevel up_Trial #3
Leather_Bevel up_Trial #4Lead_Bevel up_Trial #4
Leather_Bevel up_Trial #5Lead_Bevel up_Trial #5
I did another set that continued the sequences until the flints were knapped. However, those showed nothing substantially different from the pics above.
In this experiment I tried to keep variables to a minimum. The same lock is used; BTW same lock that was used for the slow motion stuff earlier. The flints were mounted the same – as best I could. Photography methods were the same. The flints and the method of securing them were the variable. The fact that two flints were used means that they could wear at different rates.
If I were to draw a conclusion it would be that I can not see significant differences in the performance of the two methods. I doubt that I would be at a disadvantage with either method. However, this is a very well-made lock and others may act differently. Your conclusions and mileage may vary.
After shopping at Pecatonica for many years, it was fun to sit down and chat with Dick Greensides. I didn’t know until the interview that Dick grew up just a few miles of my home.
Dick Greensides Friendship – Spring 2006
Dick Greensides is another regular at Friendship. He started coming as a shooter, and his hobby became a vocation. Dick brought a few stocks to Friendship and grew the business until he now supplies stocks and parts for all kinds of muzzleloaders. Pecatonica River Long Rifle Supply Co. is a well known name in muzzleloading circles as simply Pecatonica. Dick Greensides is located in Rockford, IL.
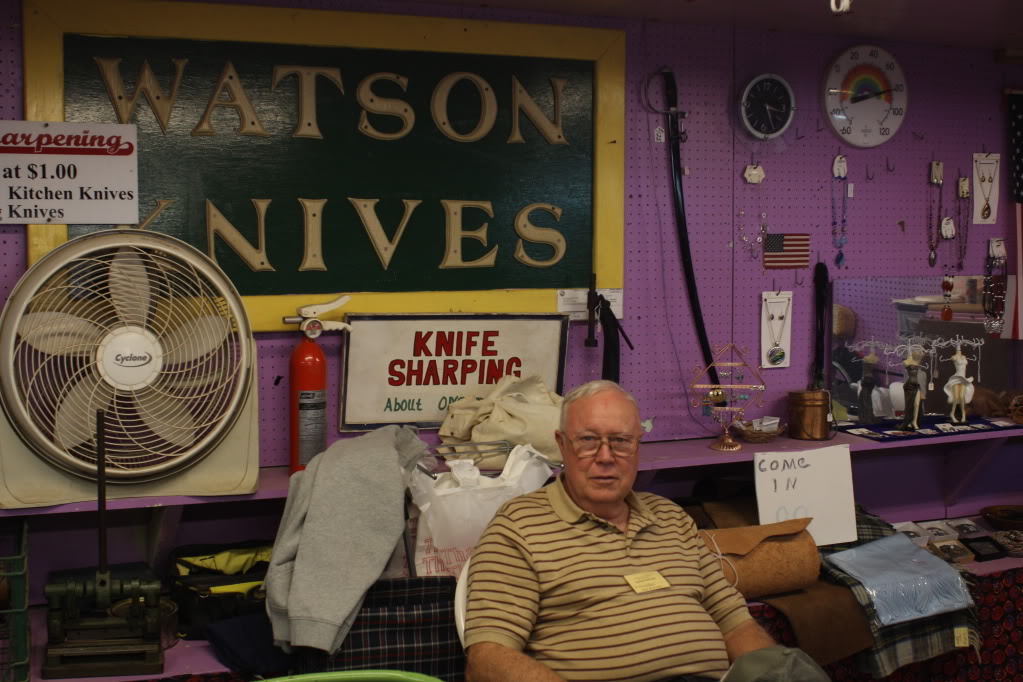
Billy Watson has been coming to friendship for many years. Billy simply makes great knives.
Billy Watson on Knife Making – Friendship Spring 2006
Billy Watson’s booth is a favorite stop of mine. He had made two of the knives I carry. I’m sure there will be others I can’t resist. While I have two of his folders, Billy does all kinds of knives. The selection is best early in the week before the choice knives are gone.
Well, you’ve done it. You had your first shooting session with your new rifle. You are smart enough to watch the old timer down the bench clean his rifle and he mentions that you shouldn’t forget to clean yours.
One of the first things a new shooter is told is to clean the gun after shooting is over. That is good advice, and today we will talk about cleaning your rifle after your first day of shooting.
Lets say that your still at the loading bench with all your newly acquired ML stuff. With everything out on the bench, let’s look at the things you’ll be using. Mixed in with all the loading supplies you probably have a pile of cleaning patches, a bottle of solvent, a jag that fits your rifle, and a bottle of oil. You may have bought these because a another shooter told you that you would need them.
Let’s have you begin by wetting a patch with solvent and wiping the barrel. This won’t get it clean, but it will convince you there is plenty more to get out. Since your rifle is percussion, fold a patch into quarters and lay it over the nipple. Lower the hammer on it. Now, squeeze some solvent into the barrel. Wet a patch also and run it up a down a few times. After a bit of scrubbing, bring the jag near the top of the top of the barrel, tip the rifle to one side, take the hammer back to half cock and remove the patch. A downward push with the ramrod will squirt the solvent out through the nipple. Run a clean patch and see what it looks like. If it comes out with black on it, you may need to repeat the process. The amount might be so small that a patch wet with solvent will finish. When the patch comes out clean, dry the barrel out with another patch or so.
You are ready to oil the barrel and see to the outside of the rifle. I often take a patch previously wet with solvent and wipe the lock and the barrel’s exterior. To oil the rifle I happen to like a product called Rem Oil. There are a number of good ones. Sheath is another that comes to mind. Squirt some oil down the barrel and on a patch. I run the patch up and down a few times. At the end I want to see a spray of oil come out the nipple. The oily patch is then used to wipe the lock, nipple, and barrel exterior.
Looks pretty clean and you might be done. But – check around the nipple and you will probably find some crud down deep in the crevices. A toothbrush is a good tool for getting at this. Sometimes I let this go until I get home. The problem is that sometimes I get lazy and the job doesn’t get done. Since you don’t have a toothbrush with you, I’ll just have to trust you to clean the crevices around the nipple when you get home. And . . .when you shoot the next time bring a old toothbrush with you.
There, I think you’re pretty much done. If your rifle sits in a vertical position between shoots, I have one more thing for you to do. Lower the hammer on a folded patch. If you have oil running out of the nipple, it won’t run down the stock.
That should leave you in pretty good shape. It’s never a bad idea to run an oil patch down the barrel in a few days to see if you really got it clean. Shouldn’t be too bad off though.
Now, there are many ways of cleaning your rifle. You have the basics, but things change if you are shooting from a pouch, on a primitive trek, or putting the gun away for an extended period of time. And every veteran shooter has a method he likes best. And he will have his pet solvents, oils, etc. So I’m leaving this open-ended. I hope my muzzle-loading friends on the forum will step in and comment on their cleaning tricks.
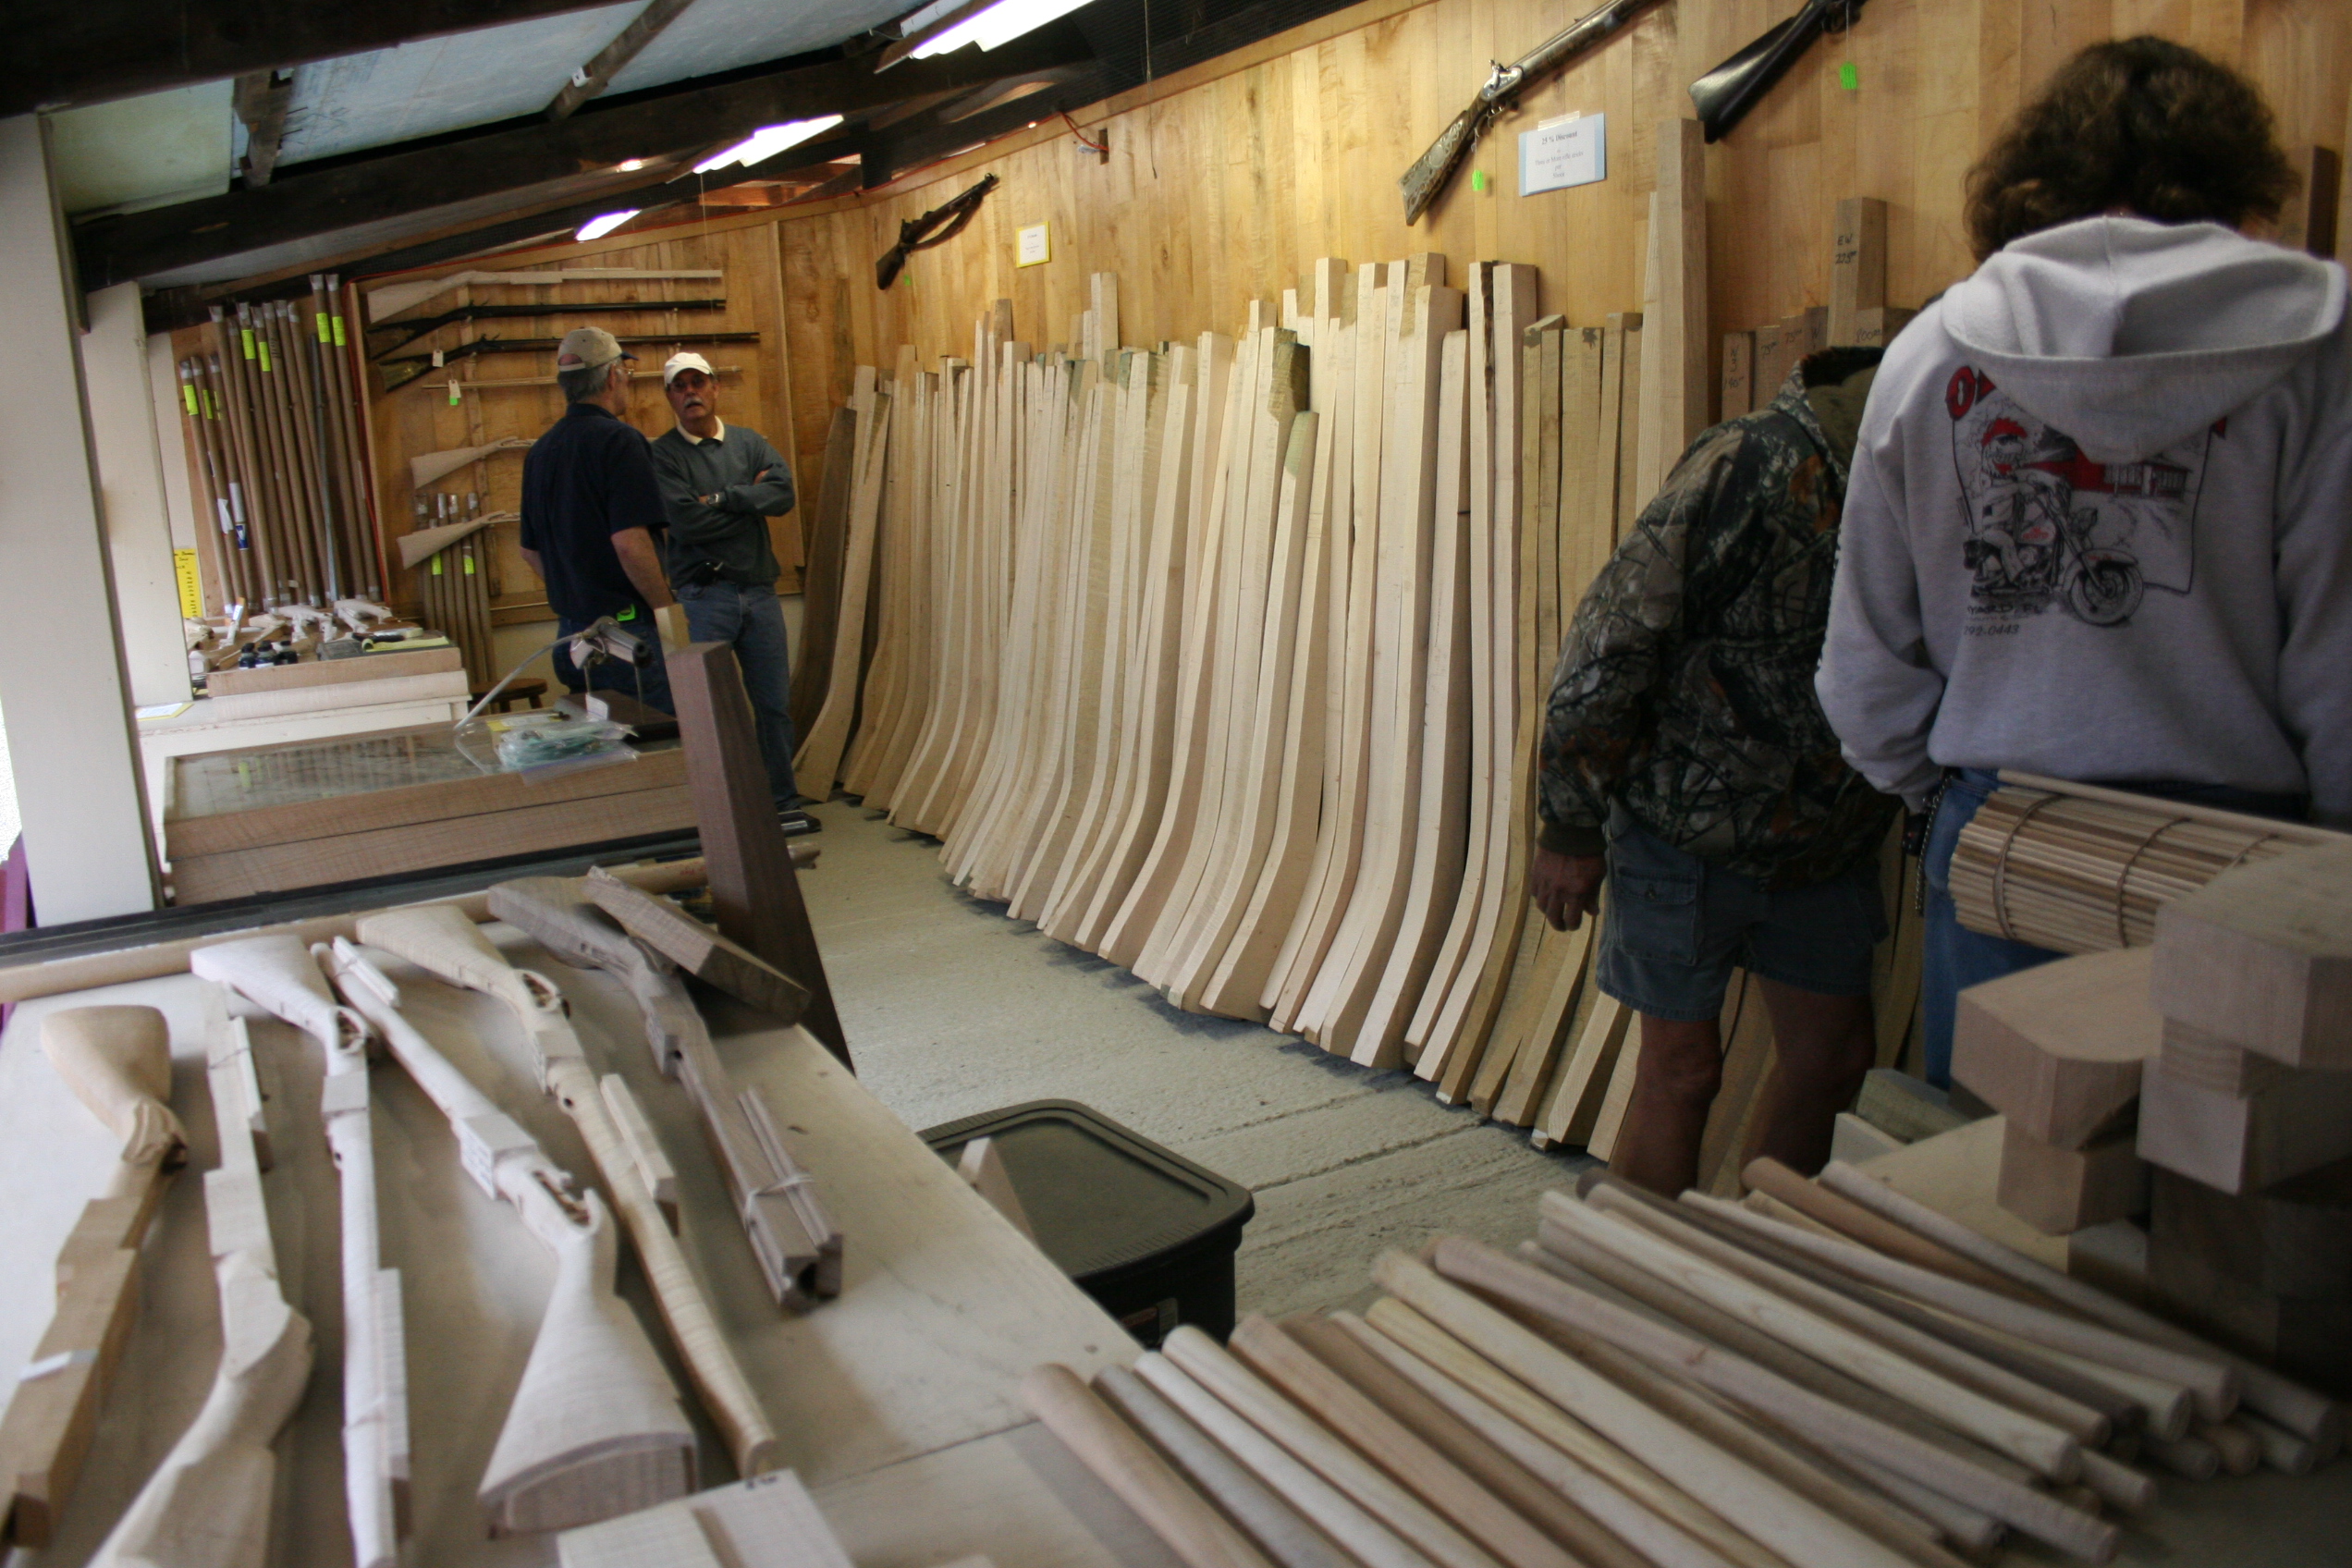
Need a beautiful piece of maple, walnut, etc for your next muzzloading project? You can’t do better than Wayne Dunlap.
Wayne Dunlap Wood Supplier at Friendship – Spring 2006
One cannot mention gun stocks at Friendship without mentioning Wayne Dunlap. Wayne brings a great selection of stock blanks to Friendship. Wayne is the kind of fellow you can learn a bunch from if you listen instead of talk. I learned a lot during this interview. While maple is a sizable part of Wayne’s inventory, he also has ash, cherry walnut, and other gun stock wood. If you’re looking for a nice band-sawed blank, check him out. Do it early; other makers also know of his great selection.
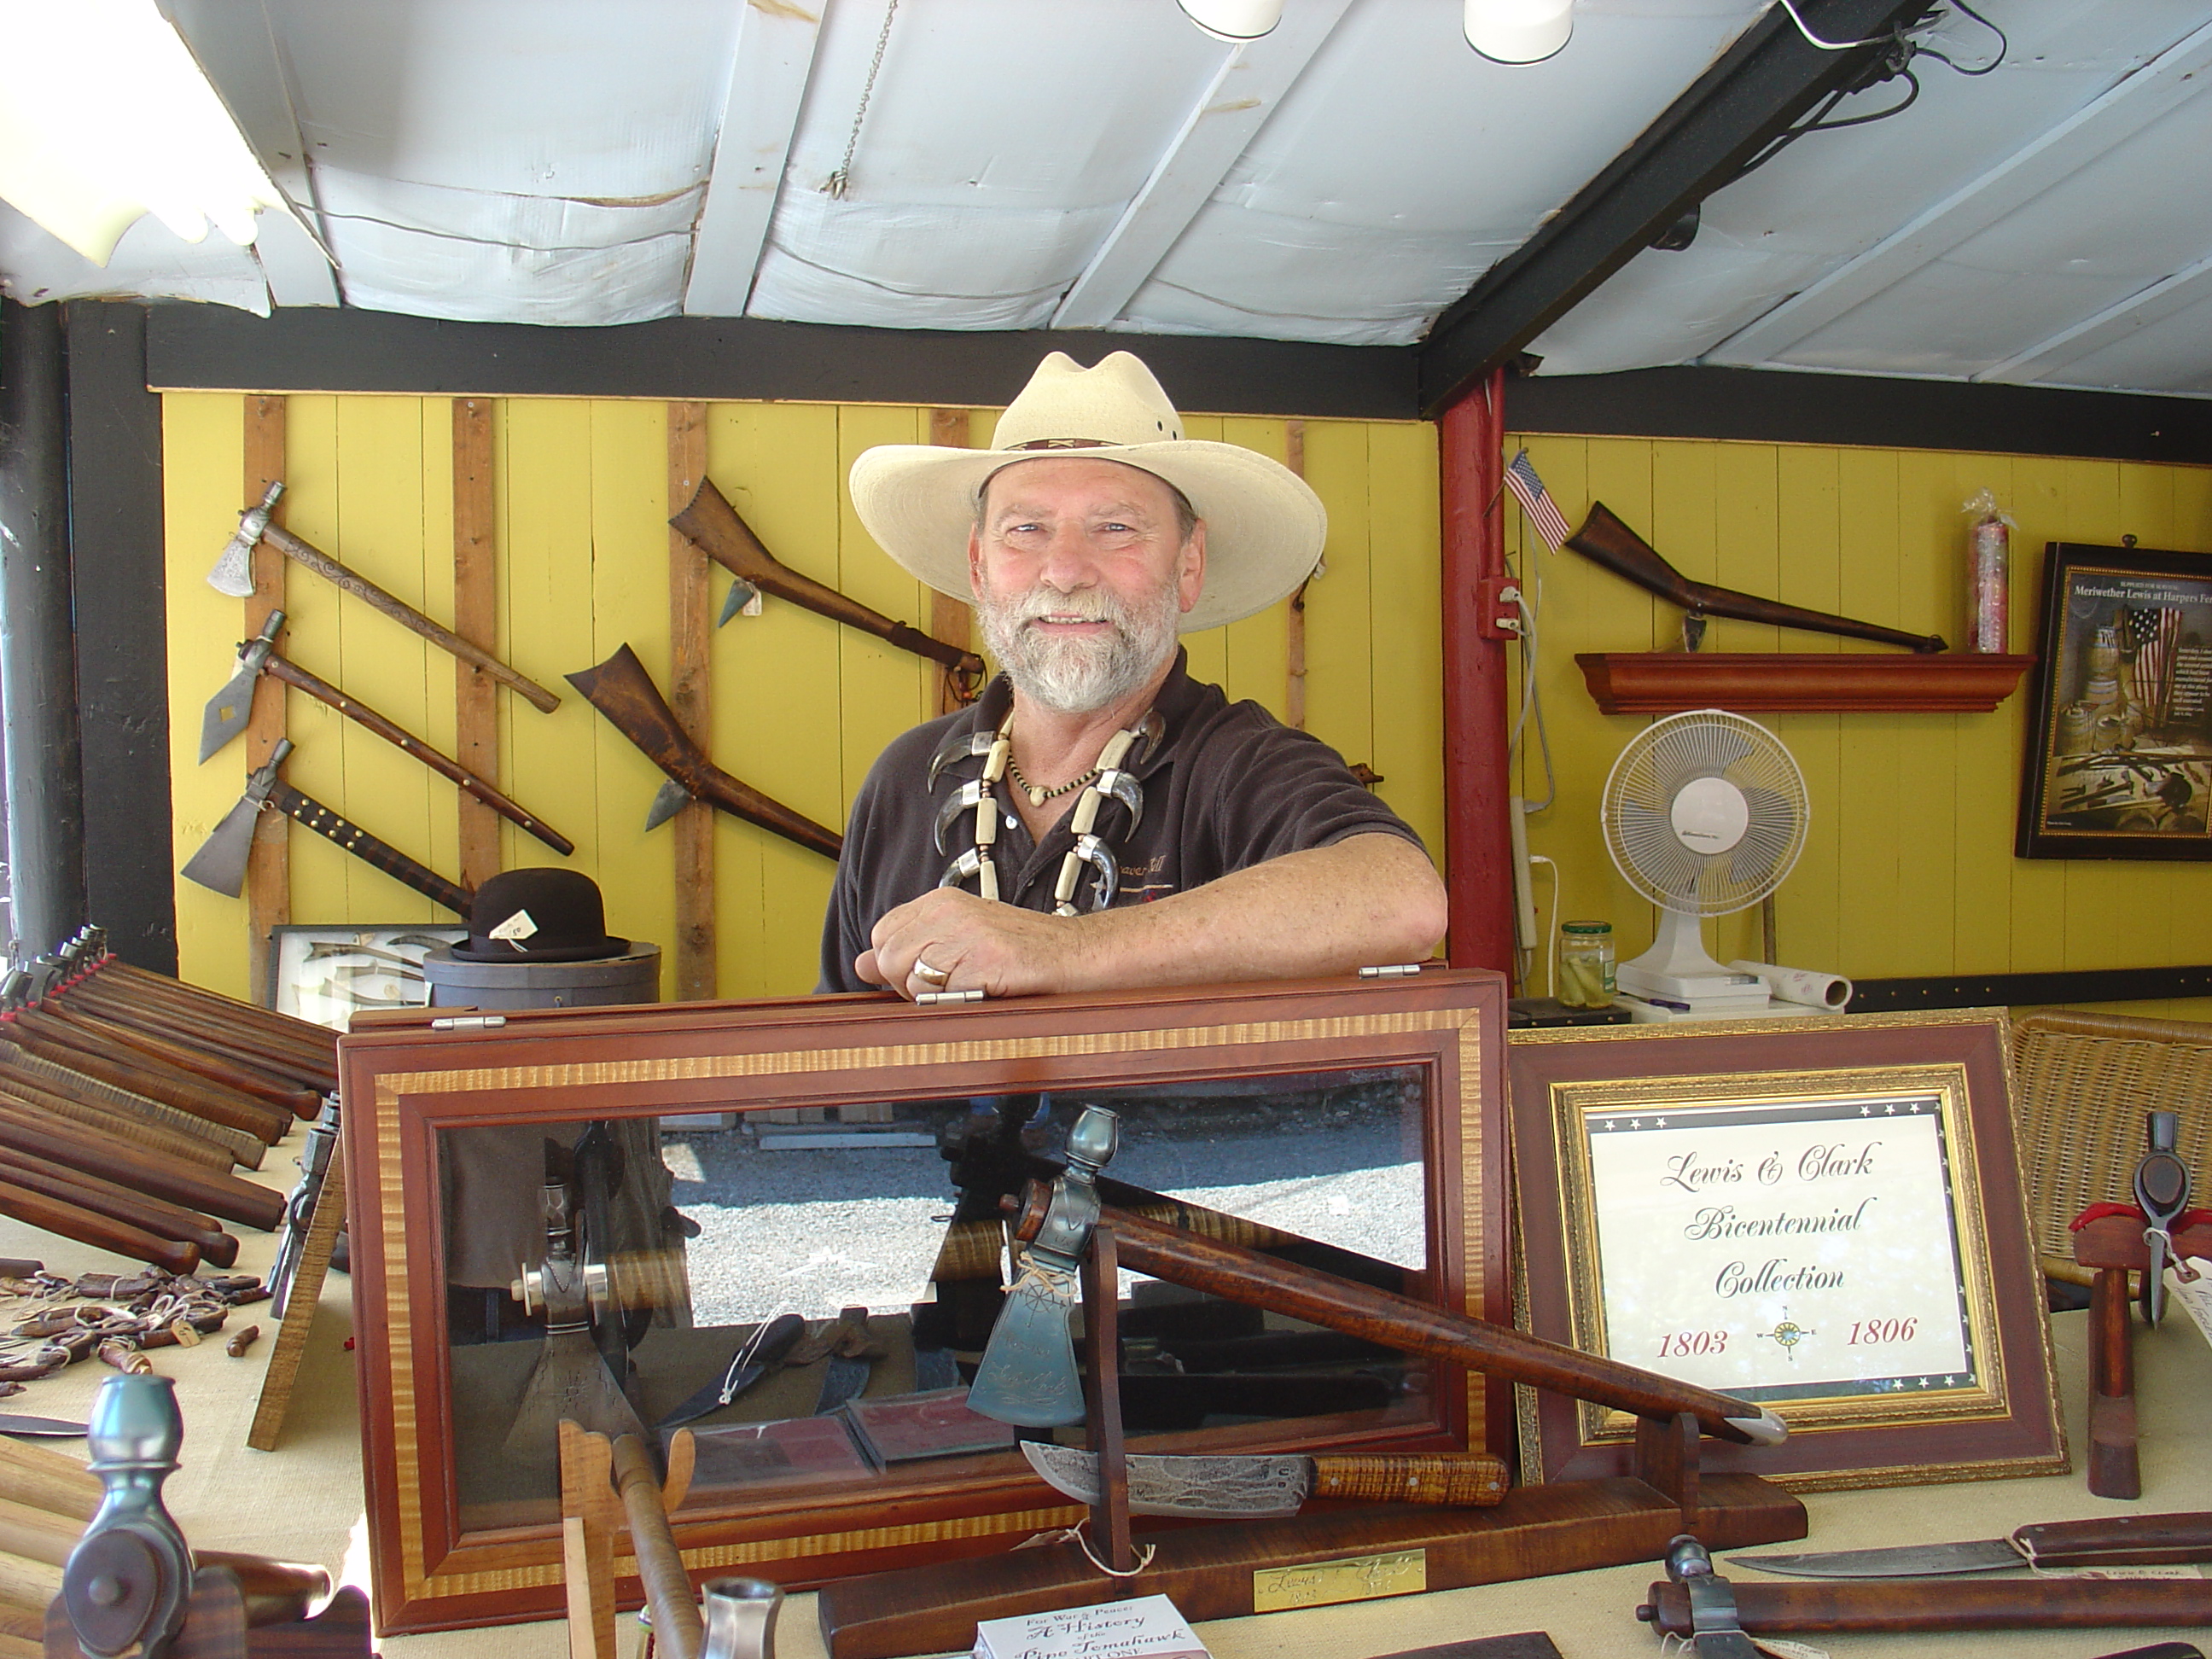
Whether you need edged tools for trekking or a museum quality replica of Little Turtle’s tomahawk, your single stop should be Bill Keeler. Beaver Bill makes about anything with a cutting edge.
Bill Keeler on Tomahawks at Friendship 2006
Beaver Bill’s booth is always one of my stops at Friendship. My chat with Bill covers his many years in muzzleloading. He speaks about his museum quality edged weapons. One of my favorites is copy belonging to Little Turtle. I was especially interested in his discussion of his Lewis and Clark project. I think you will enjoy it too.
The high speed flint video project is done. BPM, working with Grant Ferguson from Olympus, captured video of a flintlock using different grades of black powder as well as flint configurations.
The process was more complicated than I expected. We got some decent stuff with lighting our biggest problem. The higher the frame rate the more light is necessary. With over 3000 watts of halagons going, we still were limited in the frame rates we could use.
The shot of the rifle firing a ball worked at 15,000 fps. With more light we could have more options. As it is you can see the pan ignite, pause, barrel ignite, pause, then the ball exiting the muzzle. The cool thing here is that we could see the jet exiting the vent hole, then wait for evidence from the muzzle. On this shot we had to use monochrome instead of color camera because of the frame rate and lighting.
We did the locks at 5000 fps in color. We did chipped flint – bevel up and down, ffffg and ffg priming powder, sawn agate flint, lock upside down, and one with no frizzen spring. With the playback software I’m using I cannot count frames. Without a frame count I can’t make the comparisons I would like to make, but I’m still pleased with our first try. (A frame count would tell us how long it took the ball to exit the barrel after the barrel charge was lit.) In other sessions I will be prepared with another couple thousand watts to add to what we used.
The video below is a large Siler lock with a new chipped flint, bevel up. The priming powder is Swiss Null B. The video was done using a color high speed camera at 5000 fps. This lock has been timed many times by computer over the last 20 years. It averages .0388 seconds from the time the sear trips until the pan ignites.
There is much more to add. We will be posting prehaps a dozen more videos, most using this lock with different flints, priming, etc.
Dan Kindig, past president and long time Friendship attendee, discusses the old days. Dan Kindig has been a fixture for years. His booth hasn’t moved since I first came in 1977.
Dan Kindig Interview from Friendship – Spring 2006
Dan was a lot of fun to speak with. His Friendship experiences go back to his visits as a young boy when his father came. He has many stories about the early days. He can relate experiences as a shooter, president, and as a boy playing along the creek. He is one of “the sources” for all things related to black powder. As we taped the interview, the loud speaker came on to announce the noon menu. I told Dan I’d edit that out, but he said, “Oh no, that reminds me of the meals we used to eat made by the church ladies.” And suddenly we were back 60 years with another view of Friendship. Sounds like good times.
(The title photo was taken in January 2014 using the same methodology, but with a close-up lens.)
For some time I have wanted to take a high speed photo of a patched ball from a flintlock muzzleloader shedding its patch. This article documents the six month process of my attempts. Included are all the mistakes I made and what I learned about black powder as a result.
Jan. 11, 2006:
Today I video taped an experiment at the range to prepare for the “patched ball” photo. I wanted to see if I could tell about how far from the muzzle the patch began to separate. When shooting from the kneeling position, I found the patch about 12 feet away from the muzzle. The actual separation was undoubtedly a little closer than that. Off the bench I’ll start with the camera aimed about 10 feet from the muzzle and see whether the patch has separated.
I also tried the magazines as a bullet stop. At about 15 feet, the ball penetrated the fourth magazine. That should give me adequate ability to stop the ball. The stop will need checking after each shot. Blue insulation board will be used to prevent bouncing off the magazines. I don’t think this is necessary, but will err on the safe side.
The gun used is a 20 ga flint trade gun. The load tried today is 25 gr. fffg followed by an over-powder wad soaked in Crisco. The patched .595 ball is seated on the wad. The sound of this load is pretty weak.
Jan. 12, 2006:
Today the physical setup was completed. The infrared beam is ready. I can break the beam with a pencil and cause a flash. The shooting bench is set to give distances of 10, 11, and 12 feet from the beam. With the flintlock on the muzzle rest and aimed at the center of the stop, the ball will break the beam. The bullet stop has four times as many magazines as is necessary.
The next step is to actually fire the gun and see if the ball breaks the beam and triggers the flash. If that works, the camera will be set to have a shutter opening of 5 seconds of so. With the camera ready, the shooter will be primed. The lights will be shut off. The camera shutter will open, and the shot fired. The flash should have been triggered. The light is turned back on and the photo examined. The gun will be adjusted closer or farther away to get the patch falling away. This will take two people to do — one to do the shooting and the other to handle the camera and lights.
Jan 14, 2006:
Today was a process of prepping the camera and flash. The camera is a Sony Cyber-shot 5.0. It can be adjusted in the necessary ways, but it does require careful adjustments. The following are settings different from normal:
Camera:
Flash turned off
Shutter speed open to 5 seconds.
Auto focus turned off
Manual focus set to .5 meter.
Zoom is used but must be set at each session.
Flash:
1. Manually adjusted to 1/16 normal flash. This is variable as we see how the photos look. At first this would appear to be fast enough, in reality it may be too slow. If there is too much blur, I will substitute a variable resistor for the thermister. This allows a shorter flash, in fact the fastest I can get with present equipment. At that speed the flash output may be too dim to light up the ball. Since the resistor is variable, it may be possible to find a setting that solves both issues.
After these settings were done, I adjusted the infrared beam again. With the camera in place, I moved the ball until it broke the beam, causing the flash. I also took a photo of the ball to check the focus. Everything seems to work.
Jan. 18, 2006:
Fig. 1 shows the ball after the patch has been lost.
Fig. 1
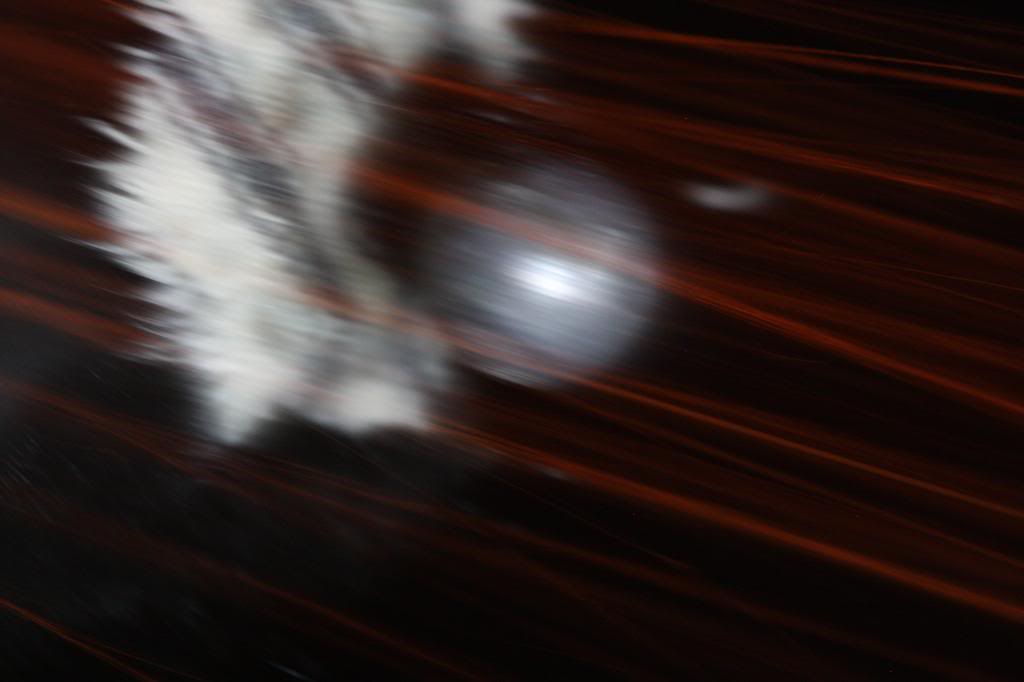
Patch has separated
Fig.2 shows the patch falling away. The ball is out of the camera view to the right. While I got an image, this session was less than a success. I learned that the patch seems to come off the ball between 8 and 9 feet from the muzzle. This will help us in the next try.
Fig. 2 (This photo was lost in 2013 when the files were damaged and the site rebuilt.)
Jan. 20, 2006:
Ed and I took another set of photos tonight. Both show the ball, no patch, but showing the over-powder wad. The ball in Fig. 3 had a felt marker mark placed on the sprue as a joke. But, the mark shows in the photo. These were taken at 9’3″ from the infrared beam. The over powder wad has apparently solved the problem of smoke covering the ball in flight. The orange lines do show grains of powder still burning after leaving the muzzle.
Fig. 3
Mark on ball
Fig. 4
Ball and wad
On our next try the distance will be to test the distances between 8 and 9 feet. We feel like we’re gaining on this. Five shots are about all we can do in the garage until the smoke gets too thick.
One key change that was necessary was that the 1/16 flash setting still too long duration. I installed a variable resistor. I adjusted the resistor as fast as I could without making it too dim. This seemed to work. I can still get a little shorter, but will sacrifice amount of light to do it.
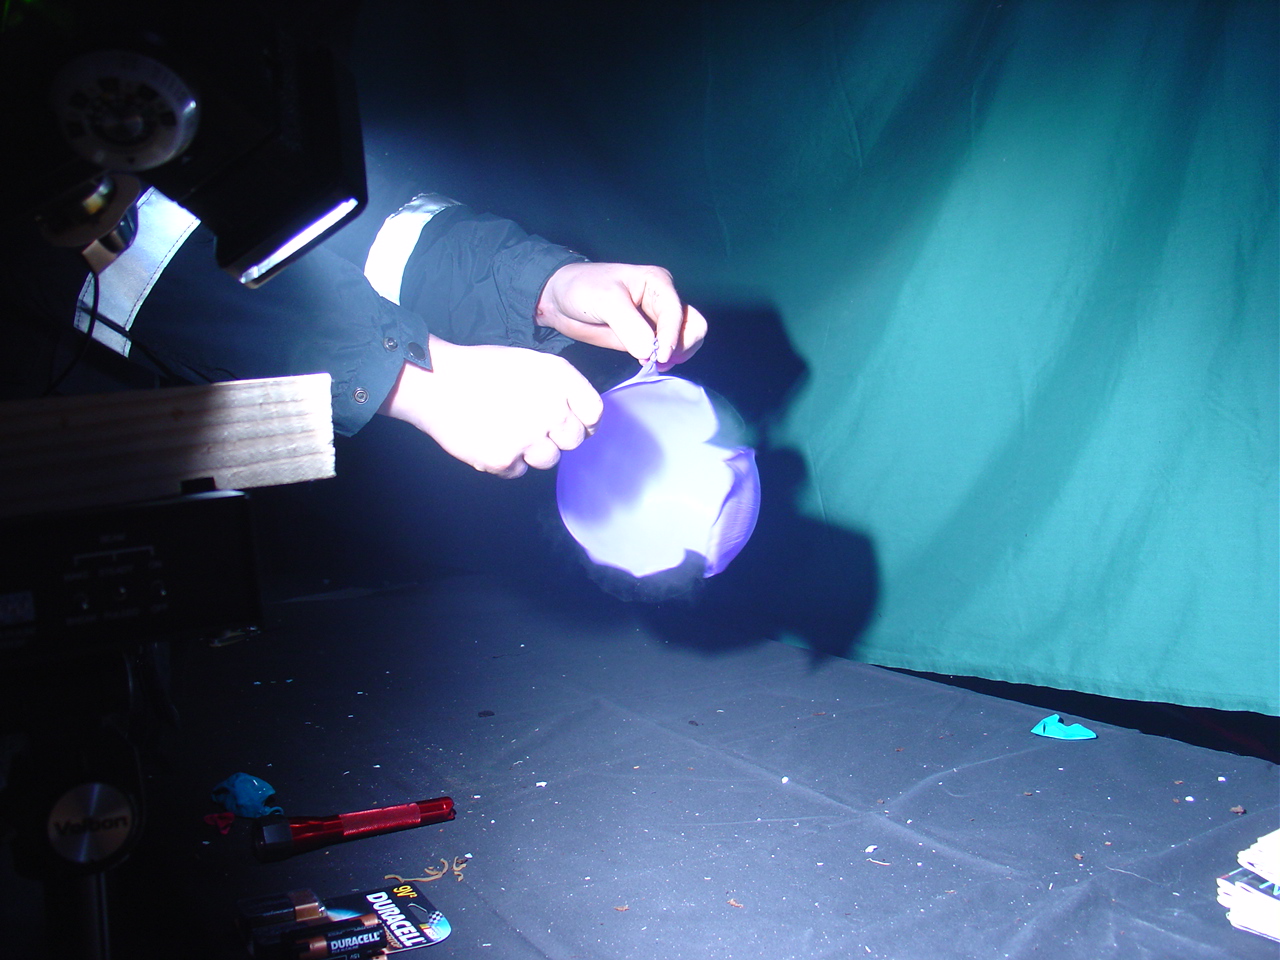
My friends Mark, Matt, and Doyle stopped by, and after we finished the patched ball session, we played with bursting balloons. In Fig. 5, Matt is doing the honors. The setup makes this type of photo easy to do.
Fig. 5
Jan. 27, 2006:
Fig. 6
Nothing but sparks
Tonight started well when Doyle brought popcorn. But the photo session was disappointing. Fig. 6 was taken when the flash didn’t cycle. All we got was sparks. The ball is in the center of the photo, but is invisible because there was no flash. Other pics seemed out of focus. Distances varied from 8 to 9 feet, but we couldn’t tell if the patch was on the ball – none of the pics were clear enough to be definitive.
Fig. 7 shows an interesting item. There is a shadow on the ball from a spark that is passing it. I speculate that this shadow is proof that gases expelled from the barrel are able to travel faster than the ball. In order to cast a shadow on the ball the spark has to be located between the flash and the ball. The flash is located slightly ahead of the infrared beam. The spark has to be slightly ahead of the ball to leave a shadow. It is my belief that initially the spark overtakes the ball, but as the spark slows, the ball overtakes it on the way to the bullet stop.
Fig. 7
The spark cast a shadow on the ball as it passed.
Fig. 8
This mistake shows the flash fixture on the left.
Fig. 8 was taken zoomed out and shows part of our photo setup. The rifle muzzle is hidden behind the flash mounting. We got the ball but didn’t learn from this one. The patch seems to separate inside if 8’6″, but we have yet to get a good photo it this.
Jan. 30, 2006:
The session on Friday left a bunch of questions. The duration of the flash is the largest cause, I think. I adjusted the flash duration twice, and each time over adjusted. To solve this I gave it a new graduated adjustment dial. I cut a disk out of wood and marked ¼” increments on the edge. Using Mumford Micro Systems’ Time Machine, I timed each increment. With the results printed out in a chart, I can adjust the flash duration close enough to do repeatable trials. The first 4 positions are so close in duration as to be unusable. However the rest of the dial settings give usable increments. Positions 5-8 yield increments faster than the fastest factory setting of 1/30 full flash. There are 4 more settings between 1/30 and 1/16 full flash. Flash durations slower than these are generally too slow to be of much experimental use.
During this week’s session we will first determine the best flash setting and then get to the business of photographing the separation of patch and ball. While last week’s tries were too blurry to be sure, it is my speculation that we will need to be closer than 8 feet – perhaps 5-6 feet to do this. If that is true, sparks from the muzzle may be a problem. Time will tell.
Feb. 2, 2006:
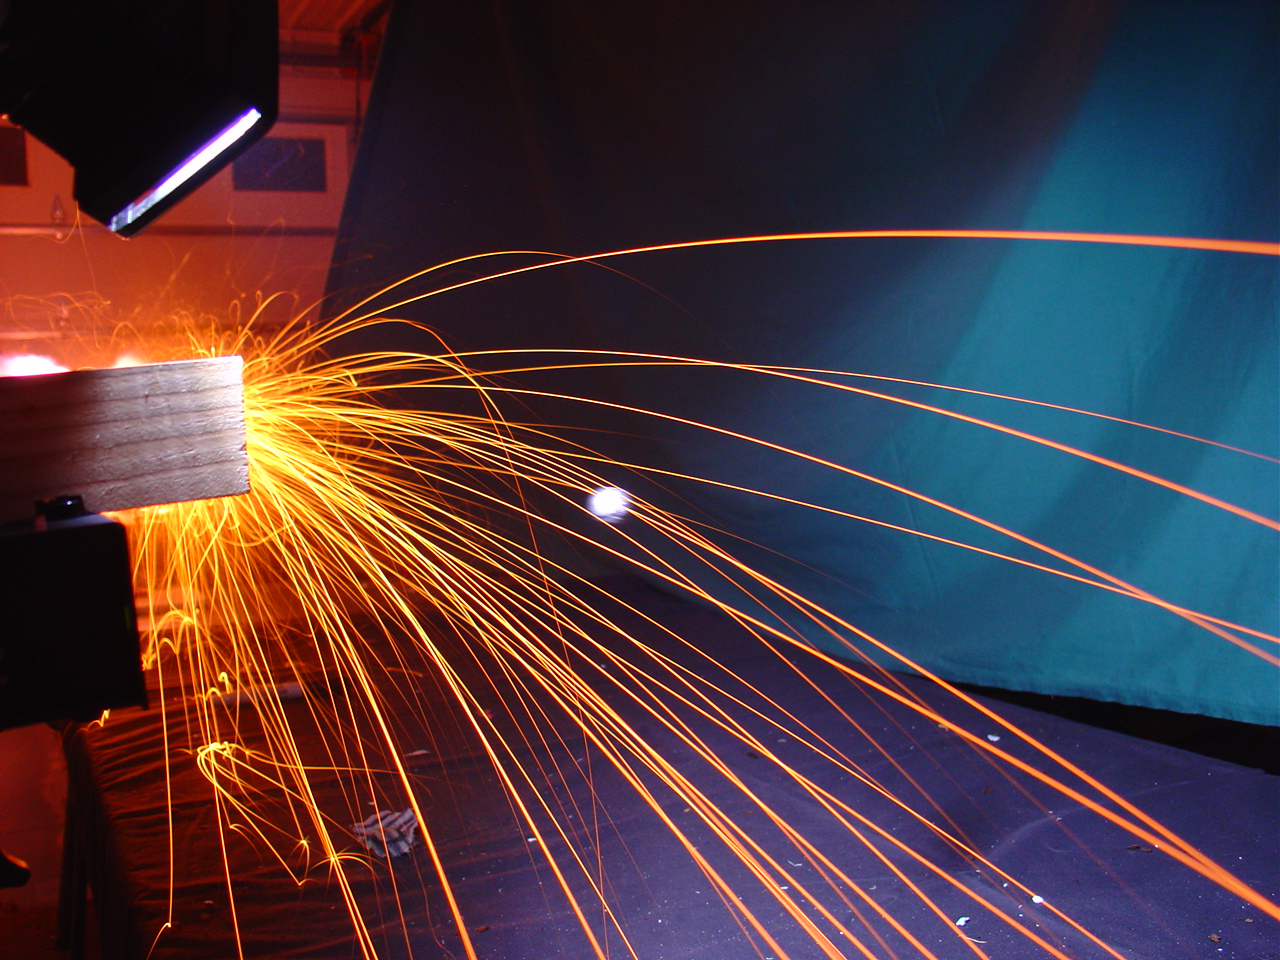
Tonight we decided to start our photo session with the muzzle 5 ft from the infrared beam. The resulting shot, Fig. 9, was completely filled with sparks. No ball could be seen. The ball should be in the right third of the photo and midway up and down. This photo gives no evidence as to where the patch begins to separate.
Fig. 9
Massive sparks with ffg at 5 ft.
For Fig. 10, we moved the gun back to 6 feet. We hoped to lessen the sparks and see the ball. The result was the same. The sparks were too intense to see the ball whether or not the patch had separated. Again the ball should be in the right third, midway top to bottom.
Fig. 10
Still too many sparks with ffg
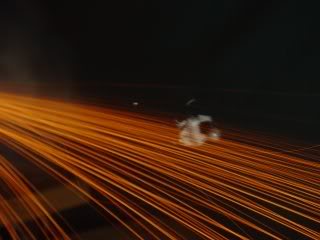
In Fig. 11 we moved the gun back to 7 feet. Again the sparks were intense. We can see the ball and tell that the patch had separated, but the sparks prevent us from seeing the patch. In one of these photos we added the over-powder wad to see if it would help to contain the sparks. However, it would be difficult to prove which of these used the wad. There seems to be no way to avoid the sparks problem.
Fig. 11
Seven feet away from muzzle
Our last try of the night, Fig. 12, was done to narrow the distance in which the patch might be separating. We moved the gun to from 7 feet to 6 feet 6 inches, hoping that we could see enough of the ball to tell if the patch had separated.
Fig. 12
Distance six feet six inches
It is our opinion that the ball in this photo has no patch. We believe, because of sparks, the ball cannot be seen closer than 6 feet 6 inches, and that by this distance the patch has already separated. We don’t think further photos will catch the patch and ball separating.
Fig. 13
When this project was begun, I believed that smoke would be our enemy. Sparks instead, were our downfall. We can say with authority that, in our experiments, the separation of the patch took place closer to the muzzle than 6 feet 6 inches. At distances closer than this, the sparks produced are too intense to capture the separation in a photo.
Several interesting sidebars came to light during our work:
At distances from 5-7 feet, the patch imbedded itself into the Styrofoam that made the first layer of the bullet-stop.
Photos show that some sparks overtake the ball and pass it. They also lose velocity faster than the ball does.
Smoke never played a part in our work, even though it was considered to be a problem at the outset.
Feb. 24, 2006:
Recent information from a muzzleloading friend means that I need to try the experiment with another powder. William Knight has impeccable credentials in the field of black powder. He recently performed experiments with Swiss, Elephant, and Goex brands of black powder. The experiment consisted of dissolving a measured amount of the various powders and examining the remains. Summarizing his results, Goex powder had 5% of the charcoal remain on top of his screen. Swiss had virtually nothing that did not dissolve.
Mr. Knight related to me that the difference was that the Swiss powder used charcoal that was ground almost to dust. Goex charcoal was not ground that finely. Mr. Knight suggested that the sparks seen in our photos were particles of charcoal burning after leaving the barrel. It was his opinion that Swiss powder would probably have noticeably less sparks.
I purchased a can of Swiss ffg powder and will set up to repeat the experiments. Mr. Knight’s information may still allow us to get a photo of the patch separating from the ball.
March 9, 2006:
Tonight we tried Swiss ffg powder to see if there was a reduction in sparks. Because of a couple of unrelated problems we fired only one shot. The charge was 25 grains of Swiss ffg — just as we had done with the Goex charge. The distance was 6 feet from the infrared beam. The result was a photo with a very substantial reduction in sparks. The photo was a failure from the standpoint of getting the ball on film. But it was a success regarding the powder. Our experience confirms Bill Knight’s findings that Swiss powder contains charcoal ground more finely than Goex charcoal. It also confirms that sparks in the Goex photo are caused by those charcoal particles. The lack of large charcoal particles in the Swiss powder leads us to believe that our goal of a photo of the patch separating from the ball is now finally possible.
Fig. 14 was taken with the Swiss ffg load at 6 feet. Compare this photo with Fig. 10, also taken at 6 feet but with Goex powder. The only variable in these two photos is the powder. The reduction is unmistakable.
Fig. 14
Taken with Swiss powder, there are significantly less sparks.
June 6, 2006:
This is the first photo session since changing to the .40 caliber flint rifle. We made the change because of a safety flaw found in the operation of the trade gun. The rifle used tonight has a Siler lock, Douglas barrel, and Davis triggers. I have a high level of confidence in it. The last entry explained the reason of the change to Swiss black powder. As we worked tonight, the noticeable decrease in sparks was extremely helpful. We could photograph the ball more than twice as close as when using Goex.
The procedure used was largely the same as in previous attempts, with the exceptions noted above. The shot is fired in total darkness. The rifle is loaded with 10 grains of Swiss ffg powder and a .395 caliber ball. Breaking the infrared beam triggers the flash. Once everything is ready, the rifle is aimed, lights switched off, camera shutter is opened, rifle is fired, and finally the camera shutter is closed. After examining the resulting digital photo, adjustments are made, and the next shot is prepared.
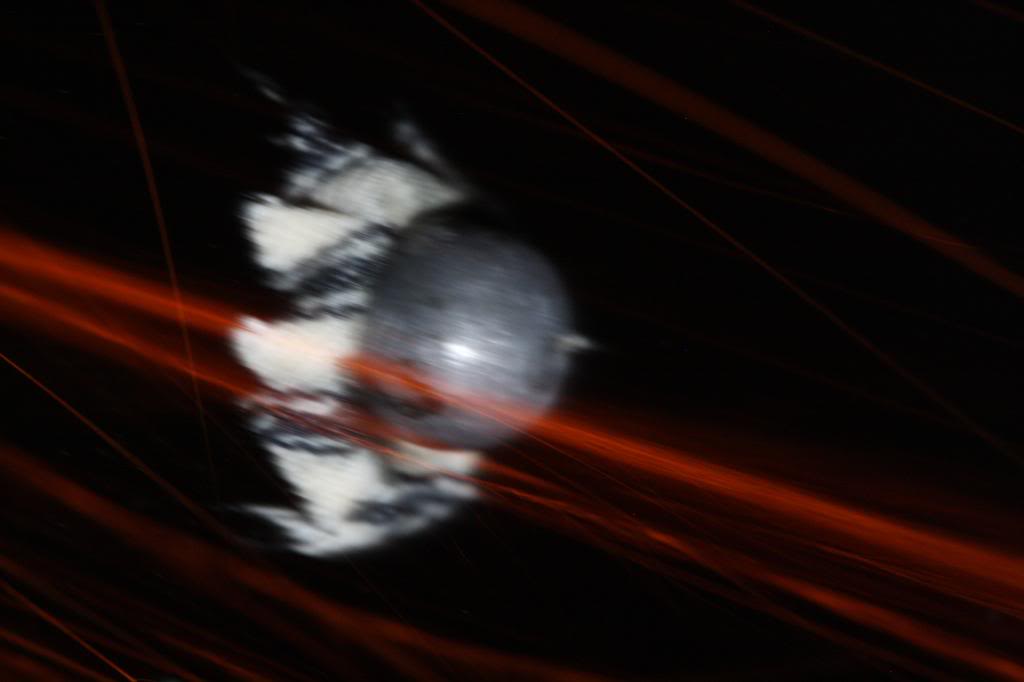
In Fig. 15, the muzzle of the rifle was 30 inches from the beam. One can see the spacing between the ball and the patch. In Fig. 16, the rifle was moved closer- this time 26 inches from the beam.
Fig. 15
Swiss ffg 30 inches from the muzzle
Fig. 16
Taken 26 inches from the muzzle, the photo shows the patch very close to the ball.
This photo is indistinct, but does show that the patch and ball are much closer together. We felt that we were on the right track and decided to bring the rifle closer.
Fig. 17
20 inches from muzzle
Fig. 18
20 inches from the muzzle
Our next try, Fig. 17 was fired with the muzzle 24 inches from the beam. In this shot the patch has just separated from the ball, but the distance is so small that the ball still casts a shadow on the patch. After another try at this distance, Fig. 18, we moved the muzzle to 20 inches. At the 20 inch distance, the patch still contacts the ball. We took Fig. 19 and Fig. 20 at this distance. While they each vary slightly, they all show the patch and ball in contact with each other. These photos met our goal at the beginning of the project.
Fig. 19
20 inches from muzzle
Fig. 20
20 inches from muzzle
We did move to 17 inches to see if the patch could be photographed tightly wrapped around the ball. This last photo shows the patch still wrapped around the ball, but the ball is difficult to see.
Fig. 21
Here the patch still surrounds the ball.
It is interesting to note that there were less sparks at 17 inches with Swiss powder than there were at 60 inches using Goex.
My good friend Ed Harting was the trigger man in all of our trials. It was his job to fire the benched rifle in total darkness. With all equipment ready, Ed would aim the rifle. When he was anchored well, I would turn out the lights and open the camera lens. Ed would then fire the shot. I was probably more comfortable with Ed behind the gun than he was with me out in front. Ed’s barber shop was also the center for the planning of the experimentation and methodology used. We would examine the photos and plot our next session. A fair number of Ed’s customers became actively involved in our progress. Thanks, Ed for your help and support.
(Ed died of cancer since the project was completed. He was a good friend is greatly missed.)
———–
In 2014, Steve Chapman and I decided to duplicate the work Ed and I did earlier. We used a different camera and lens, hoping to get larger images. The title image is one of this later group. Below are more patch/ball images and also photos of the equipment.
The Conner Prairie 17th Annual Traditional Arts and Arms Making Workshop is history. Flintlock fans came from California to New England to learn from a core of talented instructors. A majority of the students come back year after year. Take a look at what you missed and what is in store for next year. If you shoot black powder, you’ll want to see this.
I had heard about the Conner Prairie classes for quite a number of years. I knew some of the instructors because of visits to the National Shoots at Friendship. I learned about the date for this year’s classes from Lee Larkin at the Fall Shoot. Lee gave me a folder describing the classes and encouraged me to come. Lee’s class on horn-building would be one of many classes offered this year, many of which I would like to take. I decided to make arrangements to do an article for BlackPowderMag, reporting on the classes this fall and to help promote the class offerings for the fall of 2007. Nathan Allen is the Manager of Historic Trades at Conner Prairie. He liked the idea of promoting the classes, and we arranged for me to visit on Tuesday.
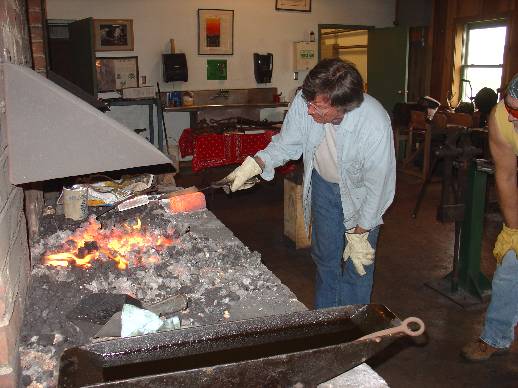
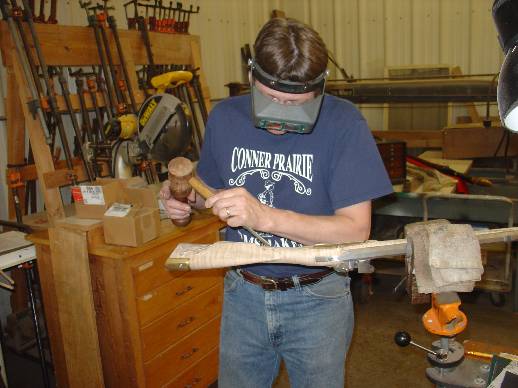
When I first walked in I was surprised at the facilities. The blacksmith shop is the best place for teaching blacksmithing that I’ve seen. Boasting 10 forges with electric blowers, the shop was extremely well equipped. With an instructor for every 6-8 students, the opportunity for learning couldn’t have been better. Nathan Allen and Melvin Lytton were the instructors for tomahawk making. I had a chance to photograph students and instructors as they worked. Each of the students would make four tomahawks during the week. Each step in the process would be completed on all four hawks at once, giving the student a chance to become proficient at that step before beginning the next step. In the five day hawk class, the students made four Fort Meigs style hawks. On the previous 2-day weekend class, students made four pipe tomahawks. It would have been easy to stay here and learn, but there were more cool things to photograph. I walked away thinking that I need to take this class.
Nathan Allen was in charge of the tomahawk forging
Hershel House at the forgeAnother photo of Hershel
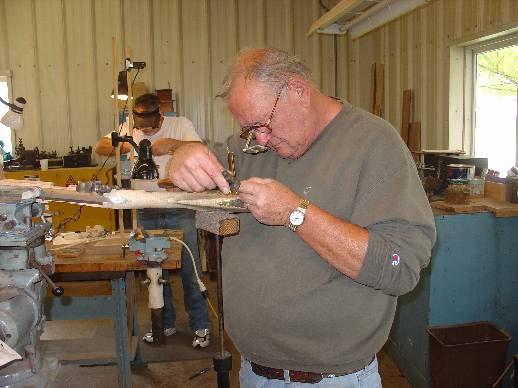
Next to the hawk forges were the fellows making knives under the supervision of Hershel House. I knew Hershel from the rifle-building seminars at Bowling Green Kentucky, but I was only one of many students Hershel has taught, and I’m not sure he remembered me. But, he treated me like one of the family and invited me to get involved. He was about to draw the temper on a blade, and in a moment the students and I were watching colors showing in the blade. As I looked at the various knives being made, I noticed that while the knives were all unique, they all had hand forged blades and many had antler handles. The students’ knives varied in size from quite large to delicate little patch knives. Again I came away thinking that this was another class I need to take.
Lee Larken with his students
My next stop was the horners’ corner. Lee’s students were shaping the horns and finishing the plugs. Dye was being heated, and the horns began to take on that 200 year old look. I took photos throughout the day, returning to see the students ready for a new step. Again, a small student/teacher ratio paid off as students got much individual attention. On one of my last trips to watch the horners, Larkin was showing his class tips and tricks for engraving their horns. From blade shapes and sharpening to actual cutting techniques, Lee’s students seemed well prepared for the engraving step. I regretted that I would not see their finished products. It’s another class I need to take.
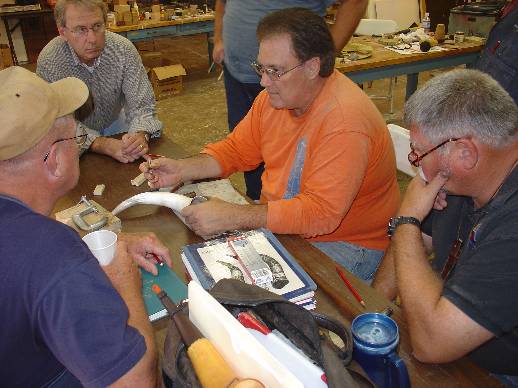
Jim and Mike in conversation
Through the next door is the kit assembly class. Here Jim Chambers, Mike Brooks, and John Weston assisted students to get the rifle components together correctly. Jim and Mike are subjects of BlackPowderMag interviews elsewhere on this site. I have known each since the ‘80s. All three are very capable instructors, stepping in frequently to show the students their techniques. If a student needed extra inspiration, he would only need to walk over to a rack of finished guns brought by the instructors. Among them is perhaps the most beautiful flintlock rifle I have ever seen. This rifle was on a tour of various art exhibits, including Conner Prairie called: “Three Centuries of Tradition: The Renaissance of Custom Sporting Arms in America”. Jim Chambers can be justifiably proud of it. As I was looking at it, I heard one of the instructors say, “That is the finest flintlock in America.” I won’t argue with him.
Jim at the bench
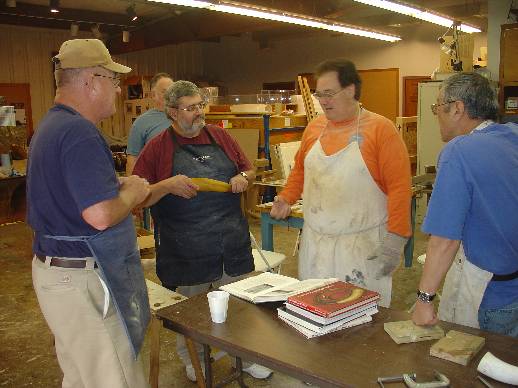
The next class is stock carving. Here James Klein has a group of students at work on various styles of stock decorating. Some are working on “Quaker” stocks, while others are working on a stock from a project at home. James also has a stock to carve as he works with the students. They can see Klein demonstrate the technique before they attempt it. These students also have the advantage of working with a unique swivel vise that Conner Prairie has provided. It allows the builder to hold the stock in about any angle he chooses. I had a chance to see students working on about every phase of stock carving from the drawing the pattern to contouring the raised parts of the carving.
John Schippers
The engraving class was nearby. John Schippers was the instructor. John has retired from Conner Prairie, but returns to teach. In earlier years John had much to do with the development of this program. Besides his early contribution, the class benefits greatly when John returns to teach engraving. He and his students use an elevated vice that permits a straight back while working. As in other classes the small student /teacher ratio helps students make great progress during the week. In addition to the personal attention John can give students, he is working on a book which will allow the student additional access to John’s engraving skills. His book, called Custom Engraving, is soon to be published. Other instructors spoke highly of John’s book, one saying he knew he could learn from it.
Glen Sutt hard at work
Down the hall was the last of the five day classes. The trade silver class was taught by Don Secondine. Students again benefited from a small student/teacher ratio. Don first assisted the class in making a battery of punches to use in decorating the silver project. When I was there the students were finishing the punches and beginning the layout of their project. Some had begun stamping. This class contained a number of women who were interested in making trade silver. Some had husbands in other classes and decided to accompany them, enrolling in a class of their own. As in other classes, it would have been good to see the students’ work at the end of the class instead of just the second day. I’m sure the pride of completing the project would have been worth getting on film.
Barbie working on a bowl
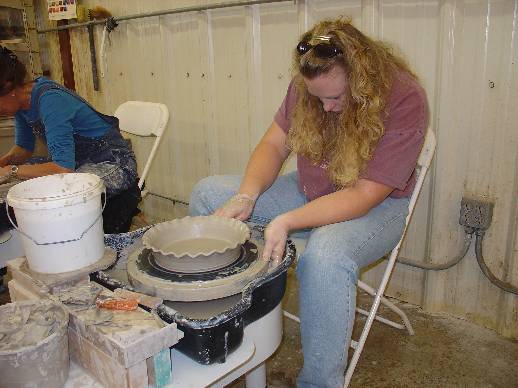
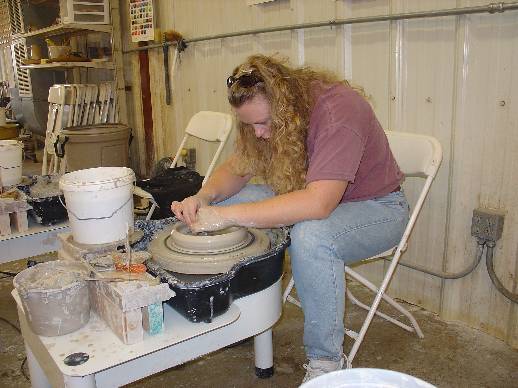
The pottery class is another of the three day classes. The instruction here was one to one as Larry Gilliam and his assistant had only two students. Both were working on wheels when I was there. Barbie Chambers, Jim’s daughter was working on a deep pie pan. Photos in the gallery of this magazine will give some idea of the variety available in the class. I was impressed with how well the students managed the wheels.
There were two classes that did not meet until the last half of the week. Ken Scott will teach a class making leather pouches and bags. I have seen Ken’s work at gun shows and wish I had not missed his class. Robin Scott will teach a course in quill work during the second half of the week. This is another skill where I have little knowledge, but for which I have great admiration.
This was an impressive week. The instructors were superb and must have had fun working with such motivated students. The equipment and environment provided by Conner Prairie was second to none. As I moved from class to class, I often felt that I need to come next year and take classes. Many of the students voiced this opinion. A high percentage of the students are returning former students. One student had been here for nine years. If there could be a better endorsement I don’t know what it would be.
Examine the grain when selecting a wooden ramrod…… When I choose a ramrod I look for one in which the grain in the wood doesn’t run out the side. Good rods are made from split blanks; made this way the grain should follow the length of the rod without running out the side. Don’t be afraid to sort through a bunch to find a good one. A good straight-grained hickory rod will last a long time if not abused.
Your first time shooting at a National Shoot in Friendship should be a highlight. If you are inexperienced, it would be good to introduce yourself to the Range officer. He is interested in your safety as well as everyone else. His suggestions will assist you. Developing safe habits as you practice are strongly recommended.
Here are some examples:
The muzzle of your firearm should be pointed up and be higher than your head as you move from the loading bench to the firing line and BACK.
Capping or priming of your gun is done only at the firing line.
Your powder is to be covered at all times. Many shooters simply set their powder measure over the can’s spout.
Report any malfunctions of your gun to the range officer.
Listen and obey range instructions.
This is not meant to be an exhaustive list, but may help you feel more prepared as you gain experience. One final thought is to register to shoot the day before you intend to compete. Then spend time watching the operation of the range. Get a feel for how things work. This should help you to be more at ease when you compete.
Raising a front sight lowers where the bullet will hit. . . “I filed and filed on my front sight and it still shoots high.” This line was an inside joke at our muzzleloading range years ago. The rule of thumb should be to move the front sight the opposite direct you wish to move the bullet’s impact. Raising a front sight lowers where the bullet will hit. Lowering the front raises the impact point. An ideal situation would be to fire your new muzzleloader and find it hits low on the target. Now, filing the front sight raises the impact of the bullet. Before you file too much, it would be good to fire at different distances. File too much and you’re in the opening scenario, and a replacement front is necessary.
Move the front sight the opposite direction you want to move the impact. . . Adjusting windage on a front sight uses the same thinking process as in the tip above. Moving a front sight left moves the impact to the right. Care should be used as you drift your sights, front or back. Hopefully your sights are movable with a modest blow. A brass drift pin is ideal. If your sight moves too easily, you may be able to tighten the fit by striking the dove tail nock with a center punch, making a dimple or two. This raises the metal around the dimple and tightens the fit of the sight.
Dry-firing a percussion firearm. . . . Care should be used in dry-firing a percussion firearm. If the hammer is dropped on an empty nipple, the nipple is very likely to upset and develop an oversized rim. Caps may no longer fit properly. (The only exception to this that I know of is the Ruger Old Army, whose hammer is stopped just short of the empty nipple.) A common sign of this is that a cap may not fire the first time the hammer falls. The first fall of the hammer may actually seat the cap, and the cap may fire with the second hammer fall. If this happens, check the nipple to be sure that the cap still seats correctly. Light dressing of the nipple with a file may be in order.
Your ramrod is a safety tool …….. One of the first tricks that I was taught years ago was marking my ramrod. Place your ramrod into the barrel. We want the ramrod tip resting on the breech plug, with the barrel empty. Make a scratch mark on the ramrod even with the muzzle. I lay a sharp knife across the muzzle and rotate the ramrod against the blade. I want a visible mark all the way around. This is your indicator of an empty barrel. Now load your rifle using your normal load. Repeat the procedure marking the barrel again. These two marks will help in a number of ways. It’s always easy to verify that your barrel is empty or loaded. It’s too easy to be distracted as you load. A marked ramrod can quickly verify where you are in the loading process. In some situations you may be asked to demonstrate that your rifle is empty. Your ramrod is the tool to use.
Shooting black powder is addictive. While there are many kinds of shooting to be enjoyed in America, shooting black powder, especially in a good flintlock, is my favorite. To many like me, hunting with a black powder gun, whether it be a rifle, shotgun or pistol, adds immensely to the sport.
No matter what type of hunting we do, we all enjoy the chance to be out opening day. I like getting to my stand quite a while before the legal hour. I enjoy having to wait until my eyes are used to the dark. Having walked this path before, I know what the path is supposed to look like. When I get to the stand I know my gun isn’t primed; I can’t see my sights yet. Even after getting settled in my stand I don’t prime my flintlock. It will be 30 minutes before I can see my front sight. I listen for the woods to wake up. It seems that the woods wakes up in small steps. Maybe it’s a couple of small birds. Maybe it’s an opossum wandering under my tree. I hear him a long way off and wonder if he’s a deer. As time passes I can finally see the front sight on the flintlock. I prime my lock with 4fg black powder and continue to wait for the shooting time to arrive.
Part of the satisfaction in hunting with black powder firearms comes from the extra challenges. Is my priming powder dry? Will my flintlock or set trigger make a click the deer can hear? Will the deer detect the flash in the pan and “jump the flash”? (We still argue about that one.) Am I in tune enough with my rifle to take my deer without a second shot, without telescopic sights, or with the poor ballistics which a round lead ball affords? Because of all this, game taken with a flintlock has always been a memorable time. I probably can’t tell you about my first deer; but I can write a story about my first deer with a flintlock rifle.
Hunting deer with black powder is just getting your feet wet though. Think of hunting rabbits with a good beagle and a double barrel black powder shotgun. Mine used percussion caps instead of flint. No matter. After shooting at the rabbit you learn to step to one side to look around the smoke to see if you connected. Hunting with a black powder shotgun is a bit more leisurely; your friends need to wait a bit longer while you reload. My black powder shotgun was just the thing for quail and pheasant too.
Hunting with black powder sooner or later leads to target shooting. Almost anywhere you might live, there is a black powder club near by. Our club range has provisions for target shooting at 25, 50, and 100 yards. Monthly shooting competitions may include targets for flint and percussion rifles, pistols, and chunk or bench guns. After a match is over someone might pull out his portable trap, and the muzzleloading shotguns begin to speak. We may even have a flint smoothbore in the group.
If any of this grabs your attention, contact your local black powder club. You will find members that want to help you with the challenges that traditional black powder shooting can bring. You might get so involved that you want to acquire the woods skills of a Simon Kenton, Daniel Boone, or John Colter. Someone in your local club can show you how to manage your new flintlock, make a flint/steel fire, and cast lead balls.
There, maybe you haven’t realized it yet, but you have just been reeled in. Maybe it was deer hunting with a flinter, maybe it was the black powder shotgunning, or maybe it was shooting X’s on a paper target. But you have been caught just the same. When you have been hooked, set the bait for your friends. Better yet, troll the black powder “bait” in front of kids. Teach your son or daughter to shoot a black powder gun. Whether you call it muzzle loading or black powder, it’s a great family sport.
Larry Pletcher has been actively involved in black powder shooting sports for almost 30 years and has written articles for MuzzleBlasts, the NMLRA’s monthly magazine. While he enjoys all shooting sports, his passion is the flintlock.
I didn’t meet the eight o’clock turtle until the 2014 Spring Shoot. He was probably there for years, but I never looked for him. He seems to live under the bridge at the entrance to the NMLRA grounds. I saw him first on Saturday morning at 8:00 am. (Wait, he may be a she. I don’t know, but from here on the eight o’clock turtle will be a he. )
He was sitting in the shallow water at the southeast corner of the bridge. His shell was maybe 9-10 inches front to back; pretty big for a painter. He was motionless with the top of his head just above the surface. I took his picture and went on my way; I had people to meet and figured I wouldn’t see him again. An hour later, when I went back to the camper he wasn’t there. I crossed the bridge a number of times later in the day, but he was gone.
The next day I happened by the bridge about 8:00, and there he was. He was in the same spot, motionless, with his head just breaking the surface. I began to think this was part of his routine. At 9:00 he was gone. Maybe that was part of his routine too.
I looked for him at 8:20 the next day, but he wasn’t there. He only came by at 8:00. I never saw him after that. I couldn’t seem to hit his narrow schedule. I never saw him arrive or leave. I only know that at 8:00 AM he was there.
I related the eight o’clock turtle’s story to campers near us at an evening campfire. A friend told me she saw him at 8:00 one morning too. Between us, we had three sightings, but all were at 8:00 in the morning. Where he spends the rest of the day, we don’t know.
With the spring shoot over, I won’t have a chance to check on the eight o’clock turtle for some time. However, I plan to be at the bridge on the opening day of the 2014 Fall Shoot at 8:00 AM.
(This turtle story takes me back some 30+ years when my son, Kevin, went with me to Friendship. We saved a box turtle on the Friendship Road on that trip and others on successive trips. Kevin still remembers the box turtle but couldn’t go to Friendship this year, so he missed the eight o’clock turtle.)
As Mike and I began this conversation, we realized that we had attended the same rifle-building seminar at Bowling Green. I was involved in timing flintlocks, and he was into tuning them. It was kind of fun to compare notes again. As you will realize as you listen, Mike loves to build fowlers. His last count was over 200 made. I like his approach to his relationship with the customer. I think some of his ideas will surprise you. You won’t be surprised by what he loves to shoot.