Blog

  • John House — CLA FEATURED ARTIST

    John House — CLA FEATURED ARTIST

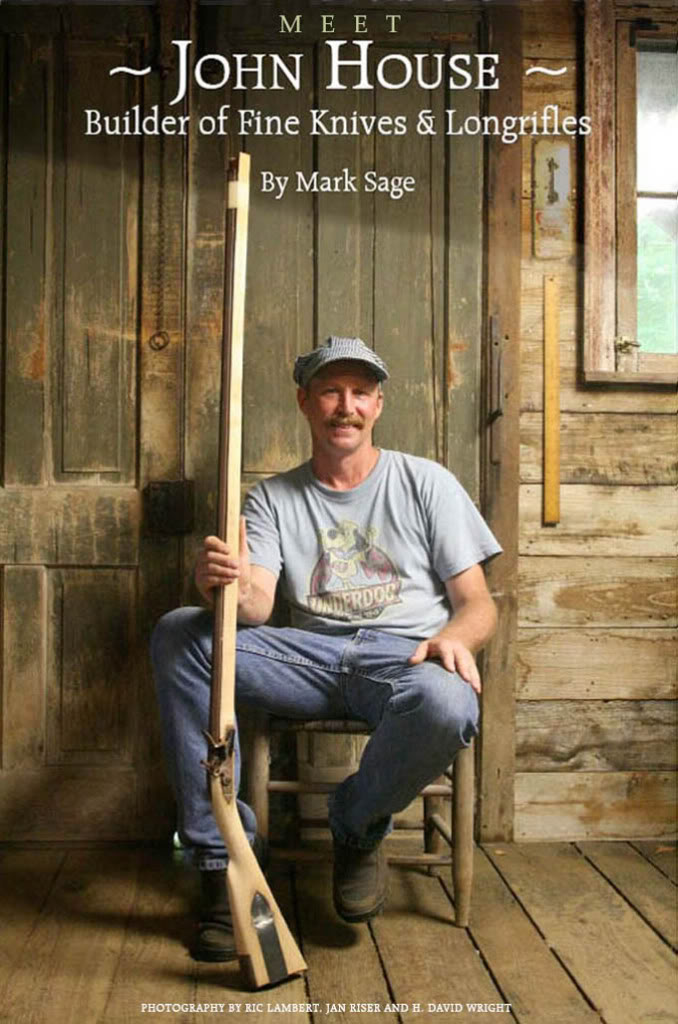
    Meet John House, Builder of Fine Knives and Longrifles . . . By Mark Sage

    Photography by Ric Lambert, Jan Riser, and H. David Wright

    Reprinted by permission of the National Muzzle Loading Rifle Association/ Muzzle Blasts magazine, March 2009. For information on the NMLRA and other black powder topics please visit the website at www.nmlra.org

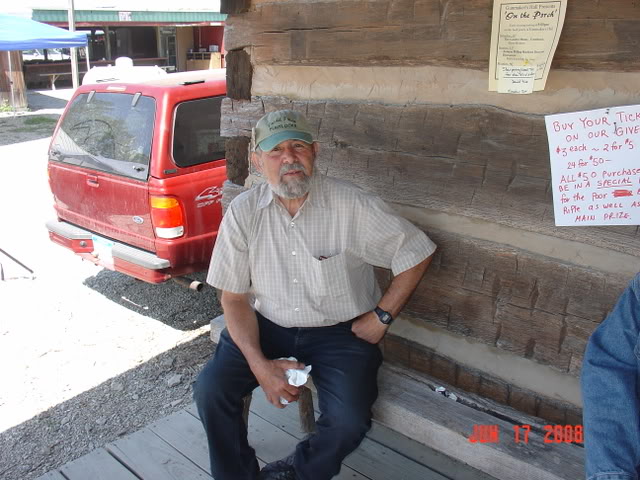
    In Woodbury, Kentucky, near the Green River, is a very neat and efficient shop, reconstructed from an old general store that John House frequented when he was a boy.

    It was a sentimental restoration project for John and he did 98% of the work himself with very few modern tools and even less money. John dismantled the old store piece by piece, found another similar building to help make up for some of the rotten wood and restored the relic from his early childhood that held so many pleasant memories for him.

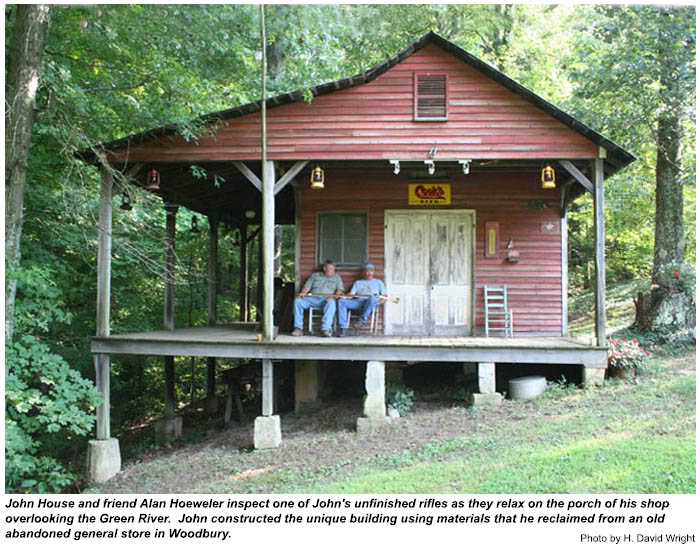
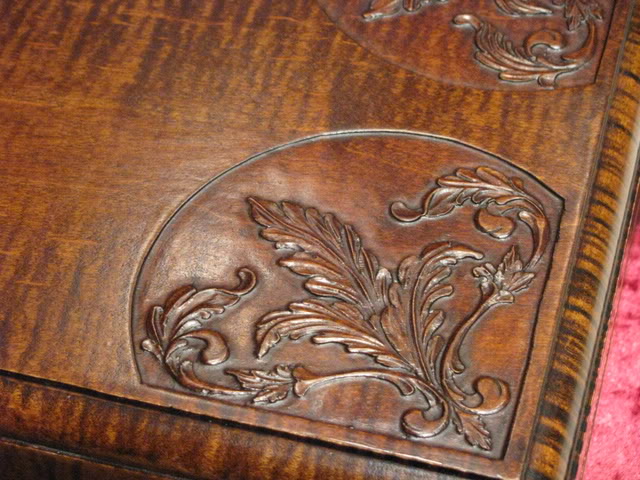
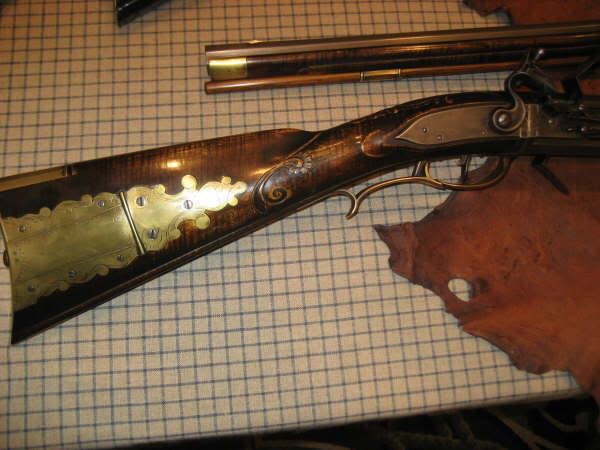
    The final result is a charming, well-built structure that is neither shiny nor pretentious – sporting the old patina on the siding and exuding an earlier era in Kentucky’s history. This resurrected building is a strong and stunning reflection of a man possessing considerable artistic talent, attention to detail and a gifted ability to meld wood and metal craft into a thing of beauty and functionality, while at the same time coaxing the past into sharp and harmonious focus. It is this commitment to patience, solid construction methods and historic realism that guides everything he does—whether it be a hand forged knife or a fine longrifle or even a willow back chair.

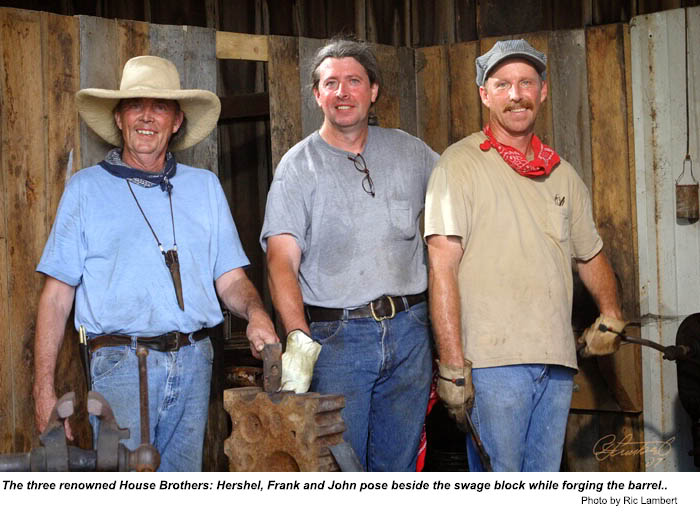
    Yes, John is related to Hershel and Frank House. He is the youngest male sibling in the family and the three of them (they are close-knit) form a trinity of talent that have turned out many knives, firearms and accoutrements of exceptional quality and beauty.

    We should not be surprised. Their father was a hard working man and a boilermaker for 42 years, providing a good work ethic and example for the family. The real stream of artistic talent, however, flows through their mother Coweta’s lineage. She is a musician and professional song writer that has marketed her music to people like Faron Young, Bobby Vinton and LeAnne Rhymes. John’s grandfather, on his mother’s side, Hershel Finney was an iron worker/riveter with talent also. He made beautiful willow furniture, wooden boxes and furniture, providing income during the depression. John also is an accomplished musician, playing guitar (mostly bass) and leading with his vocals. John doesn’t compose like his mother. He calls himself a “clean up writer,” meaning he likes to help refine the lyrics once the song has been written. Presently, he is working on a 14 song CD.

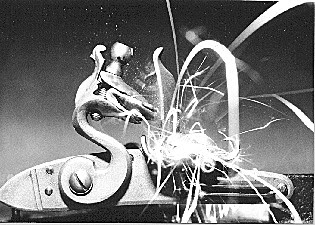
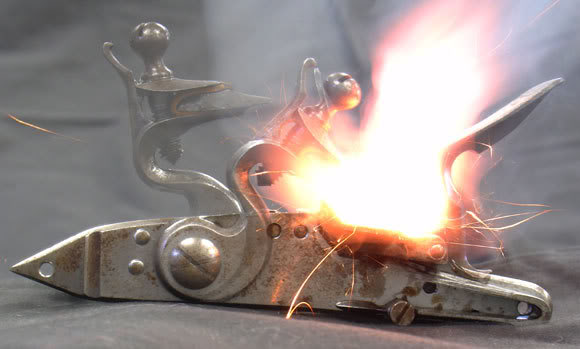
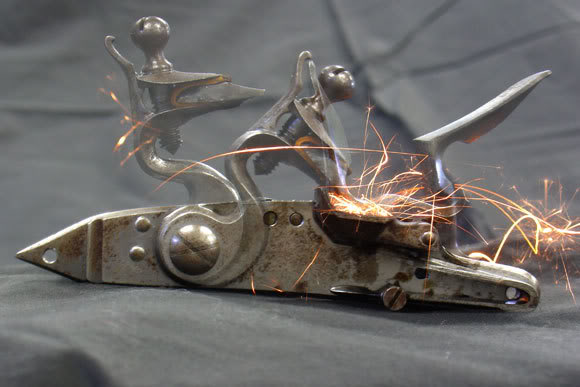
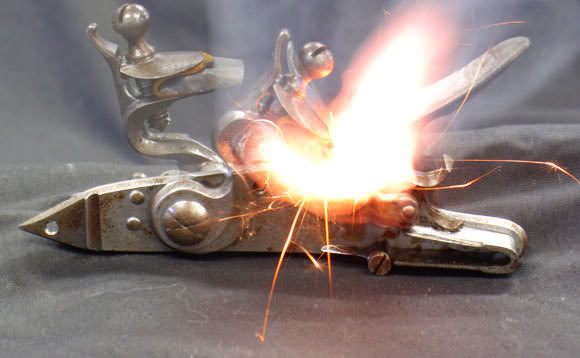
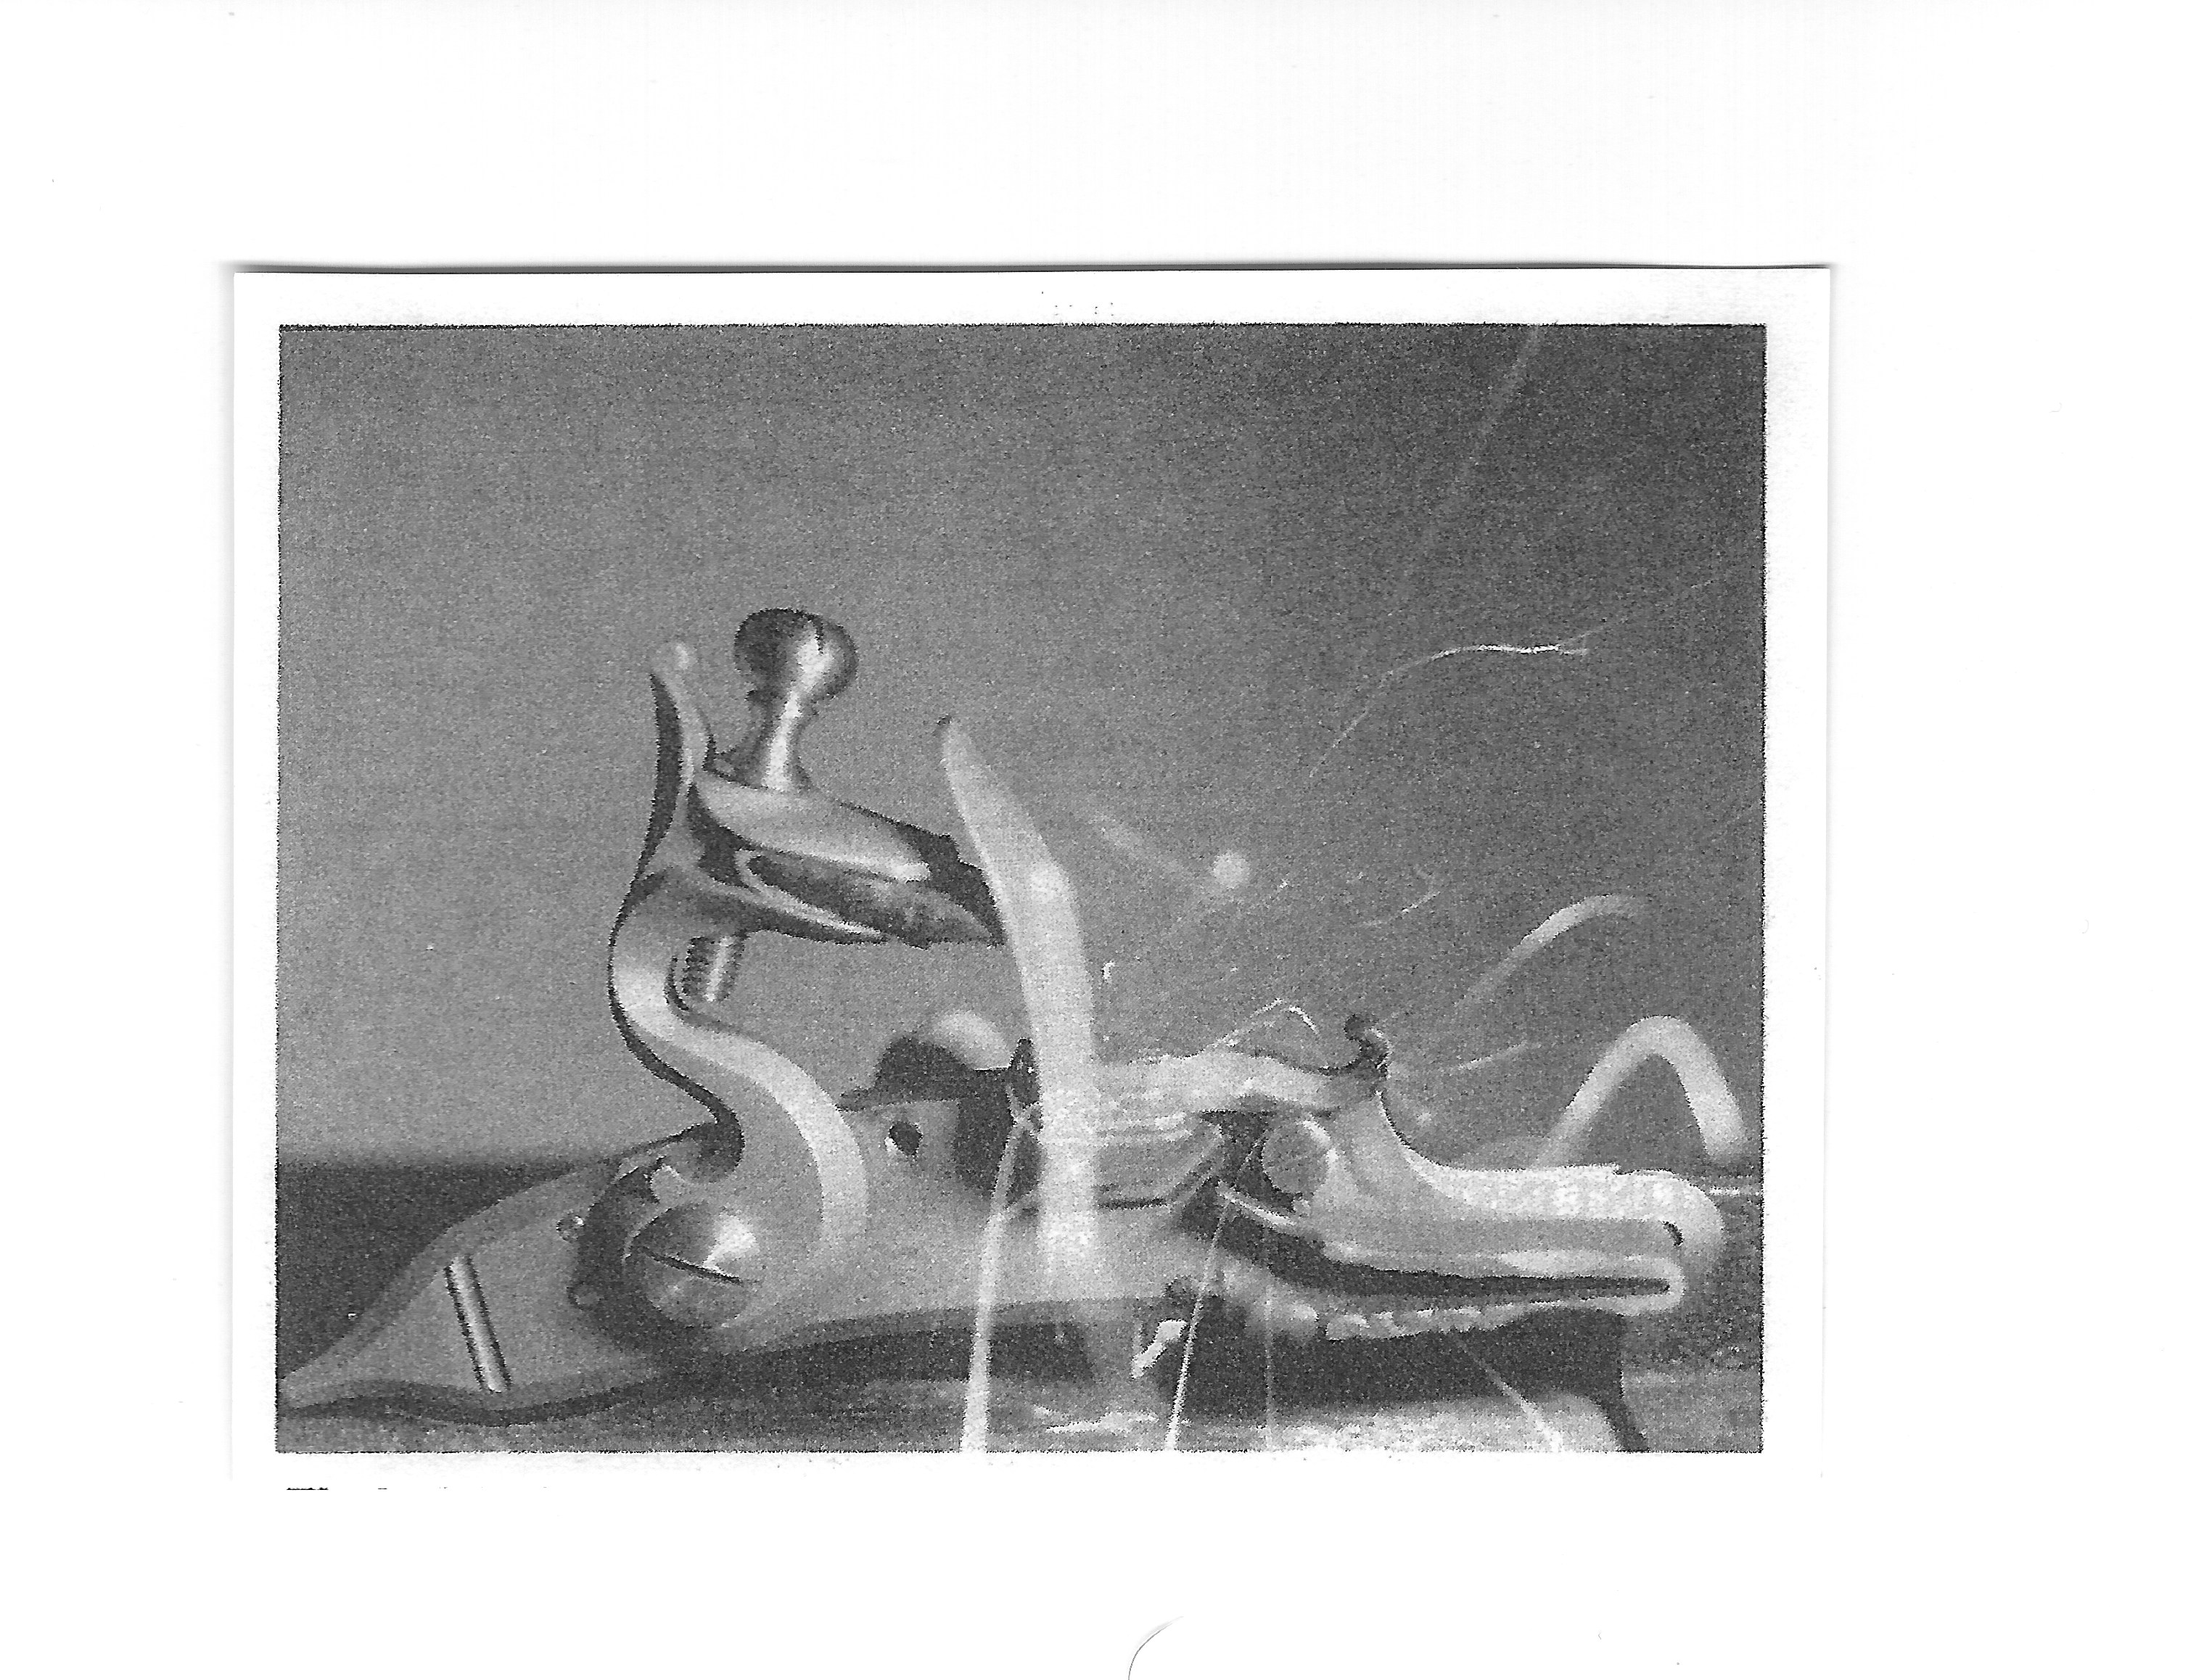
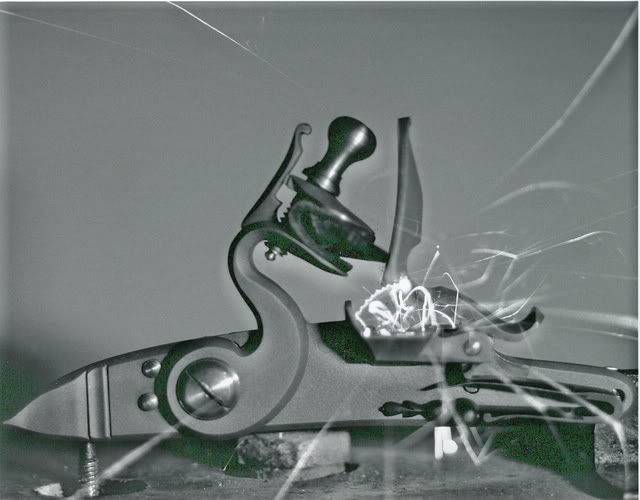
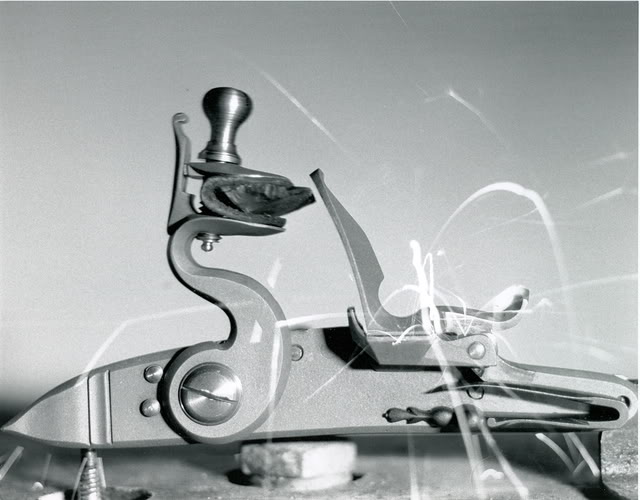
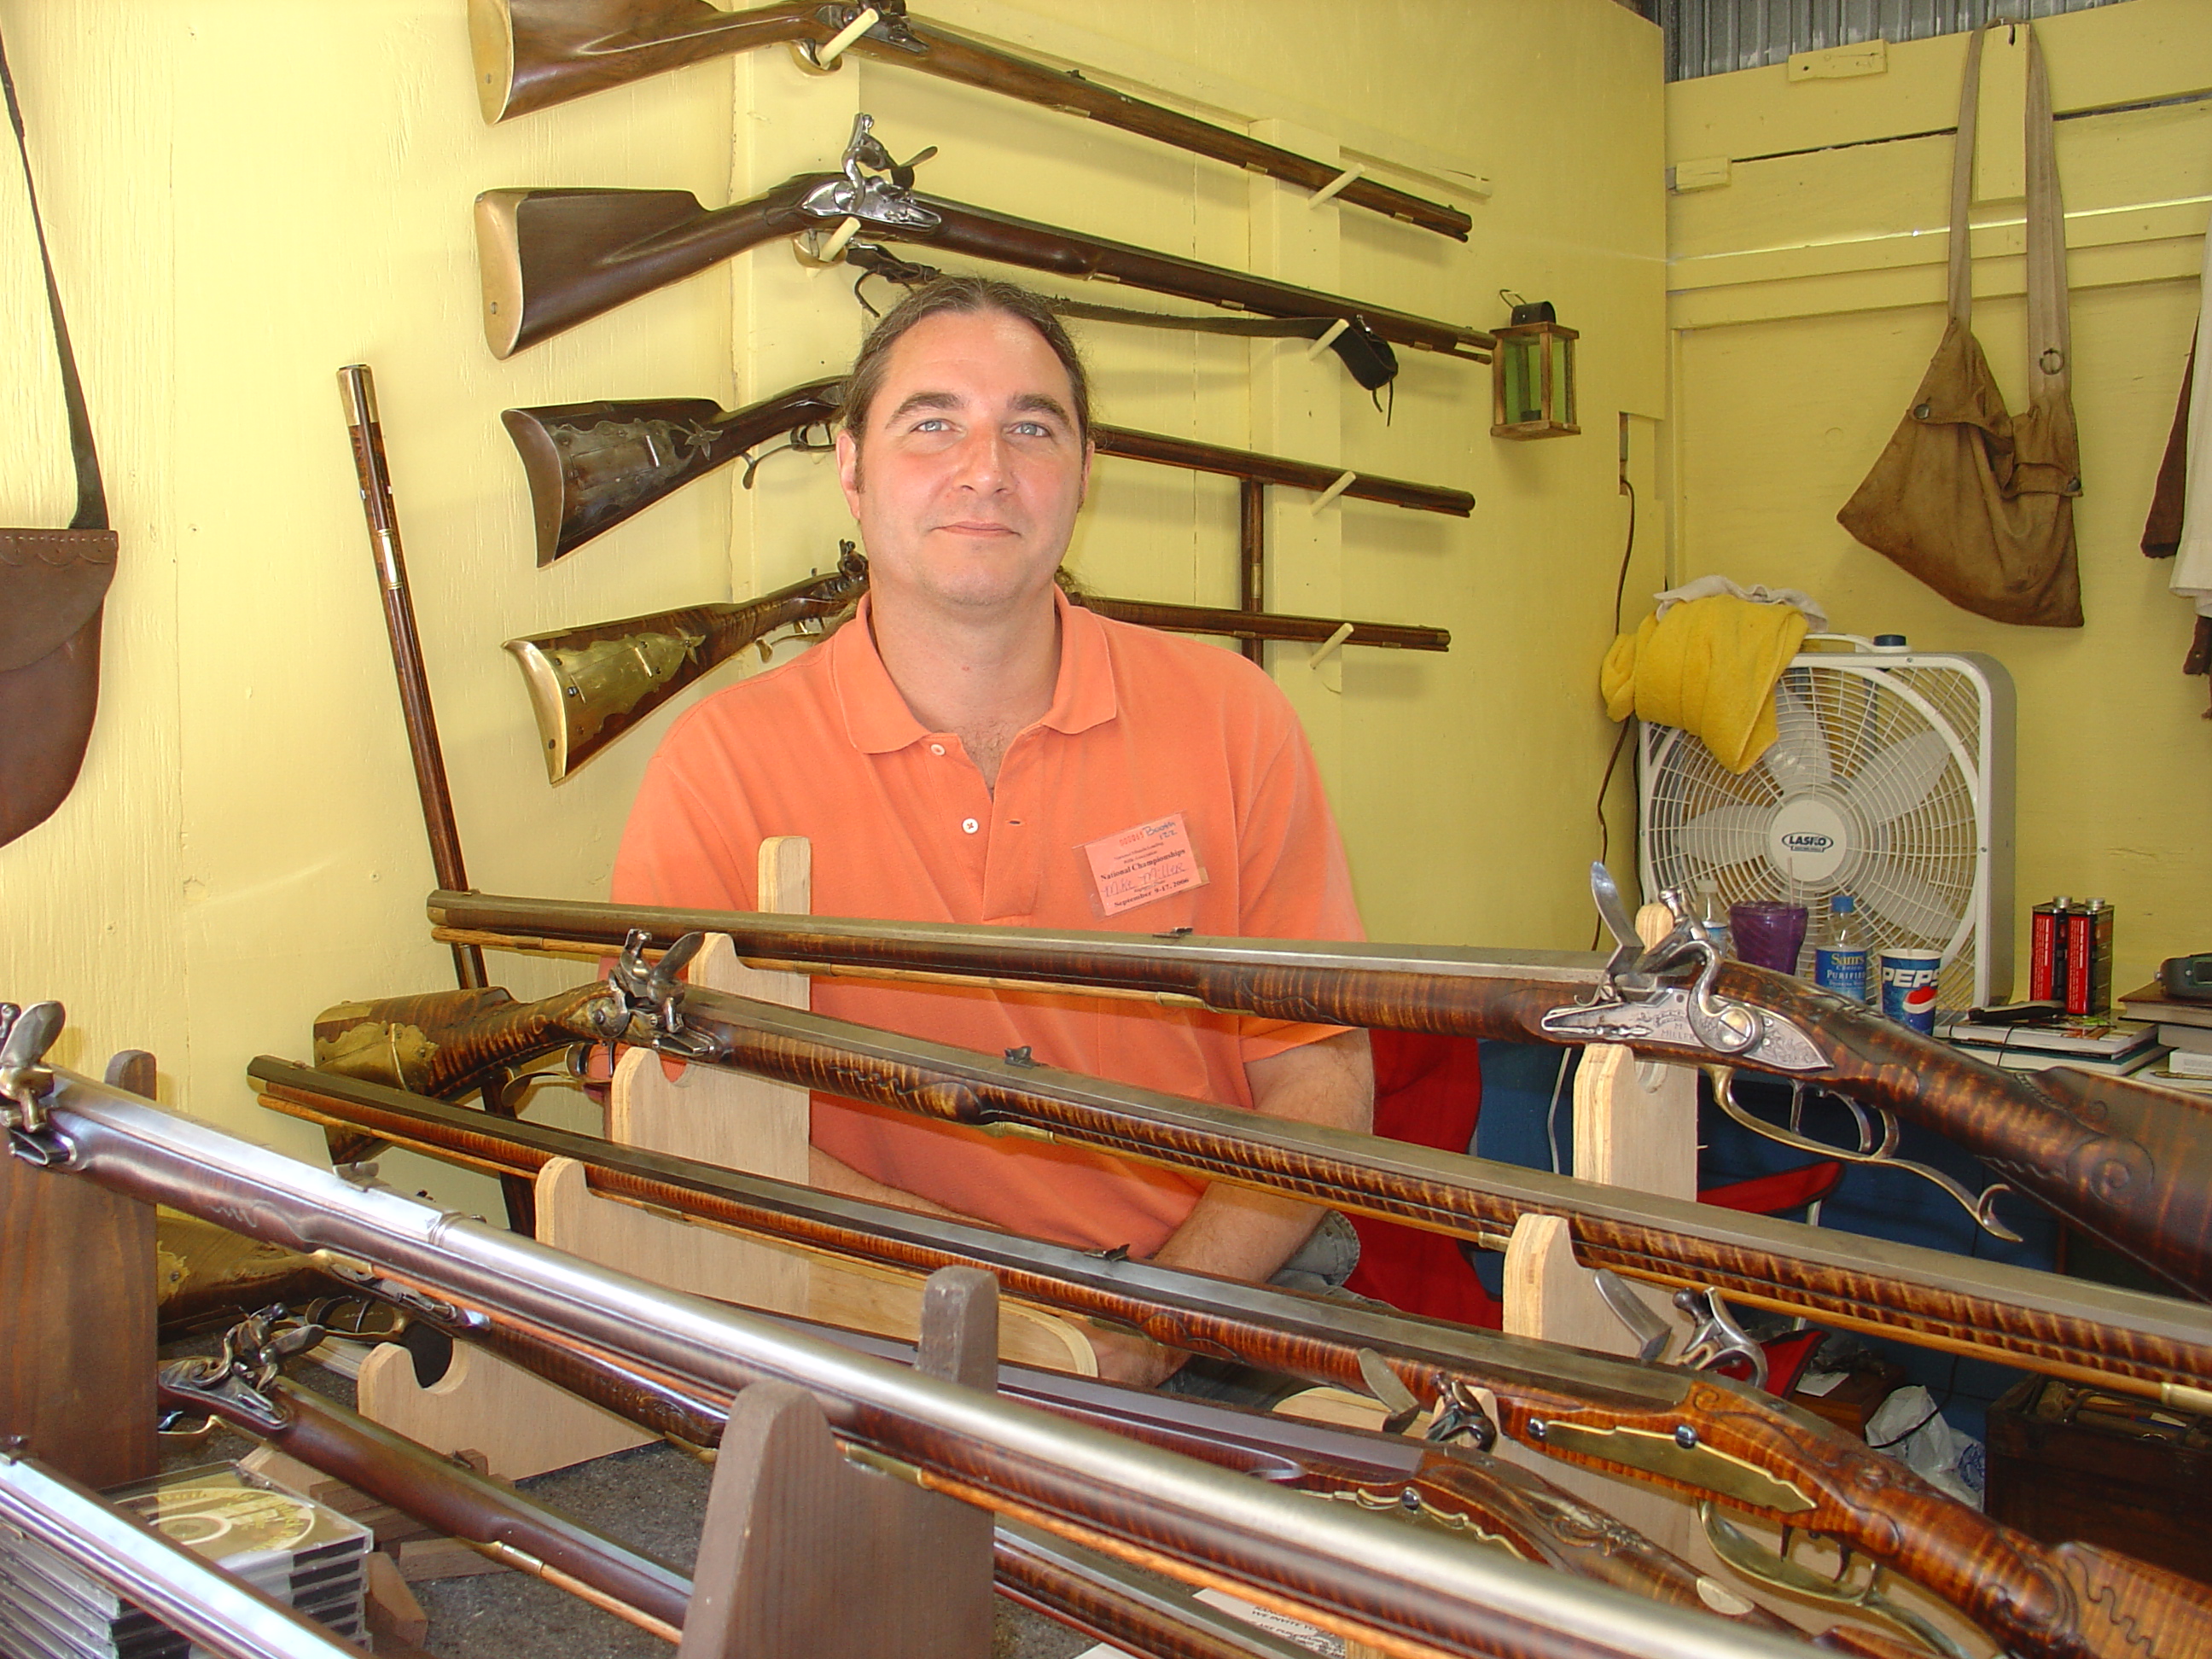
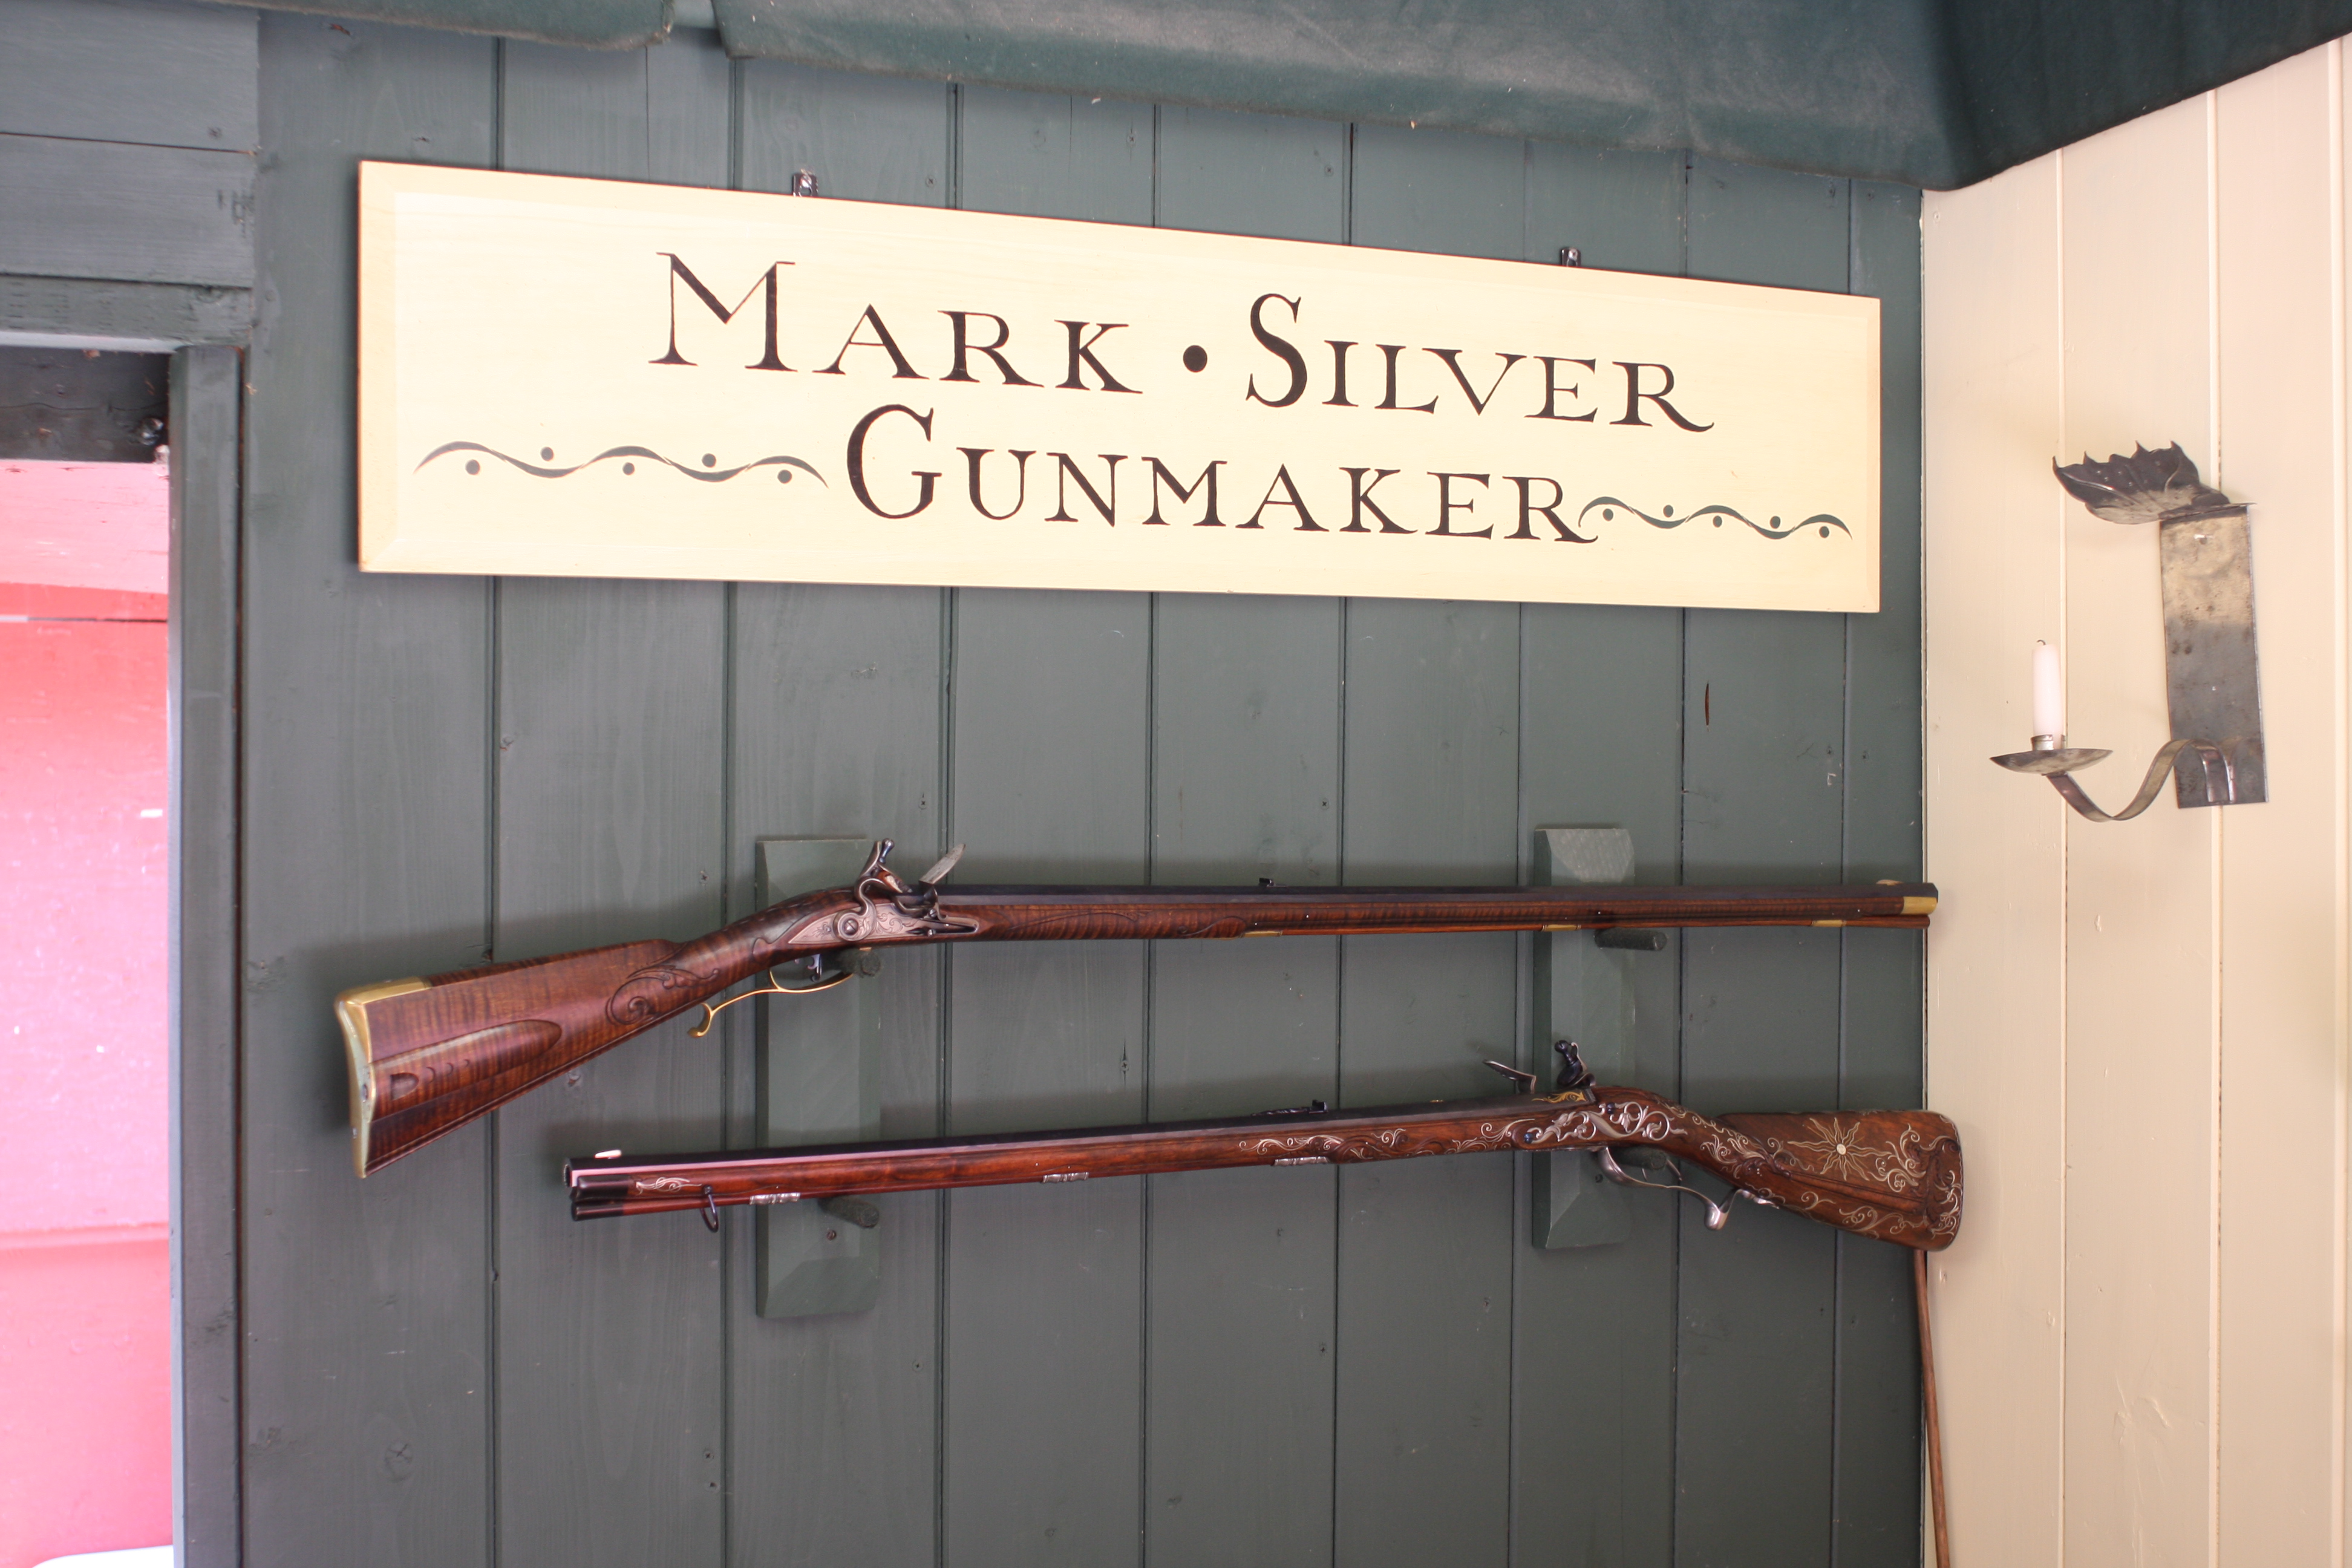
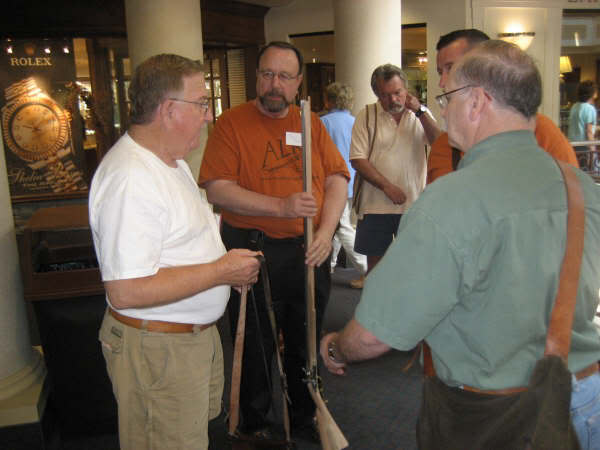
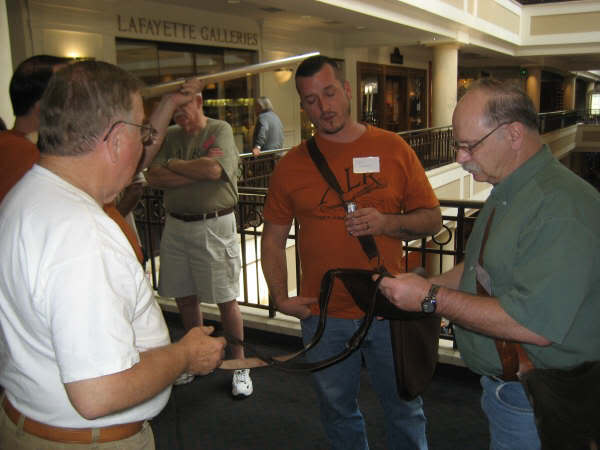
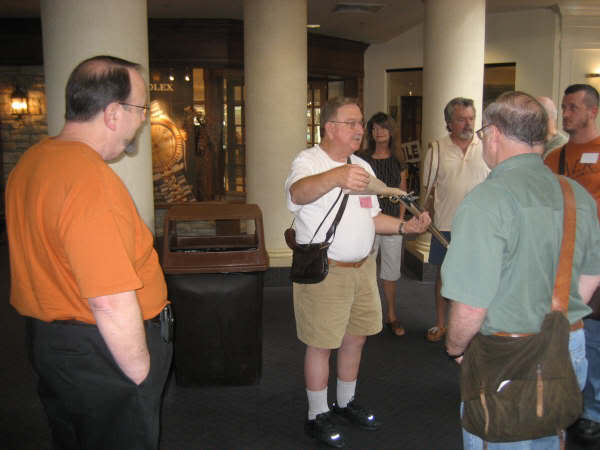
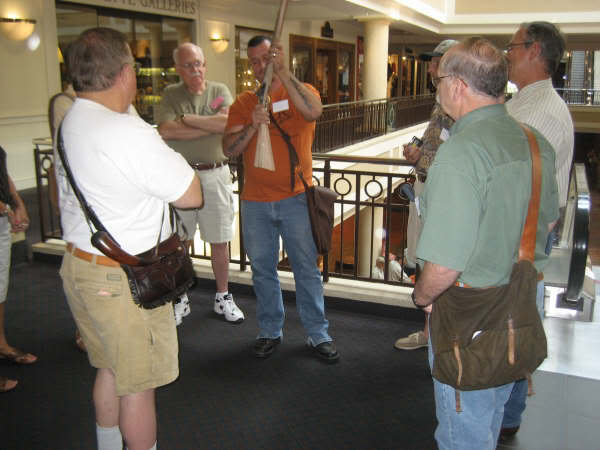
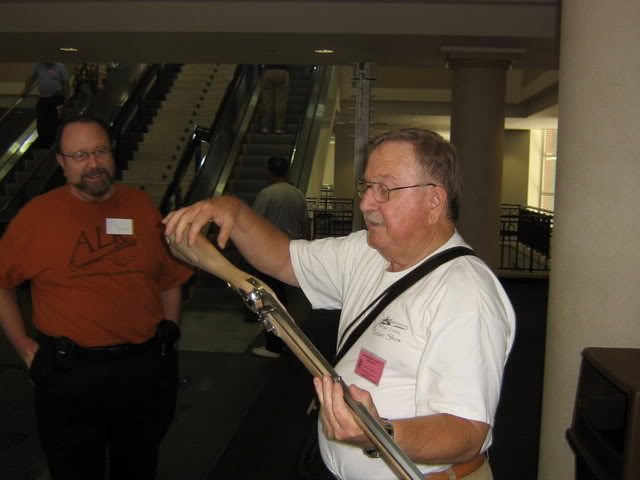
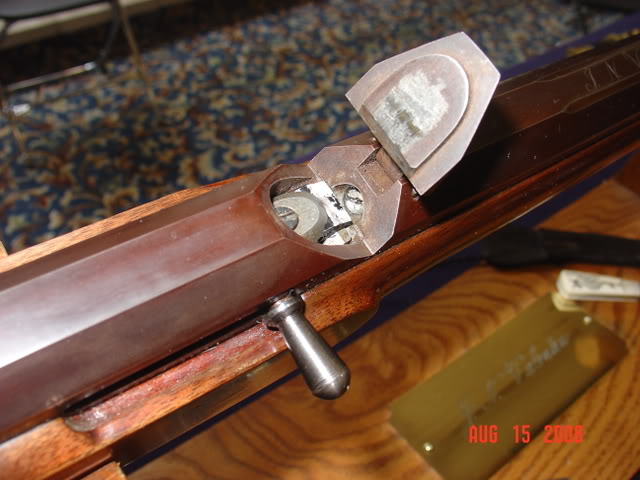
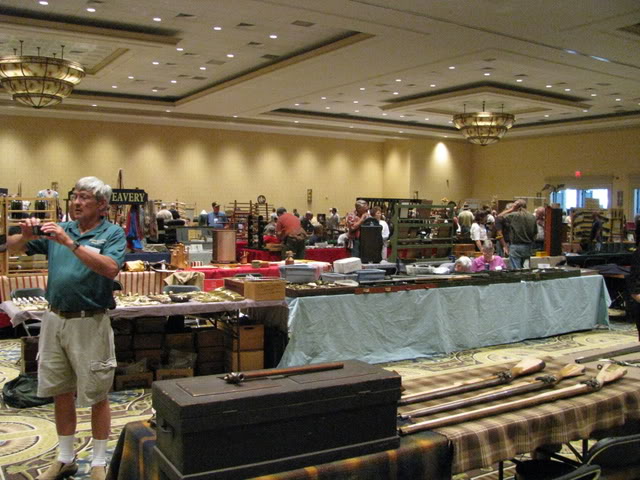
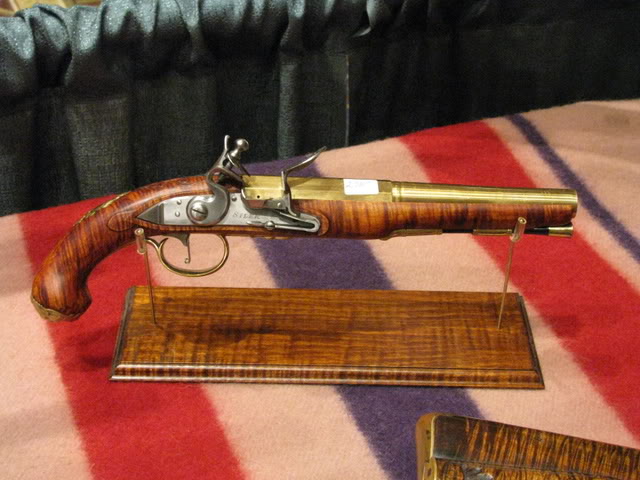
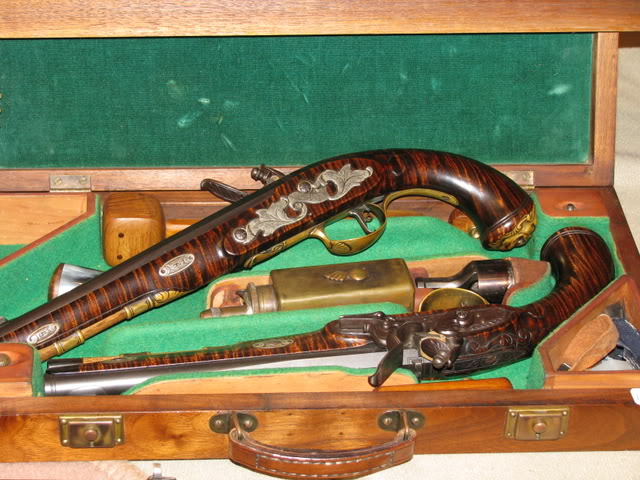
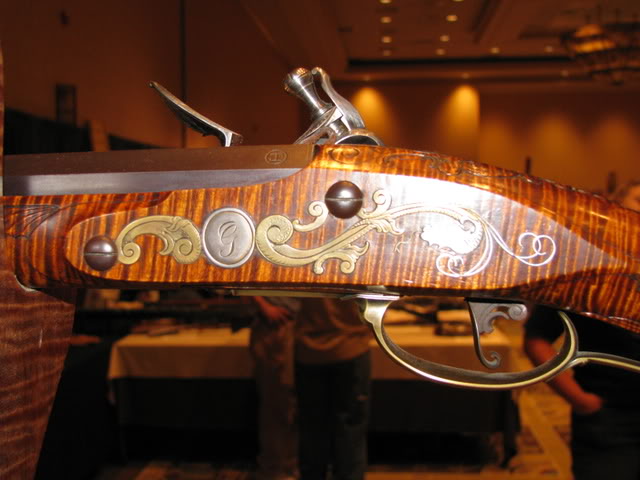
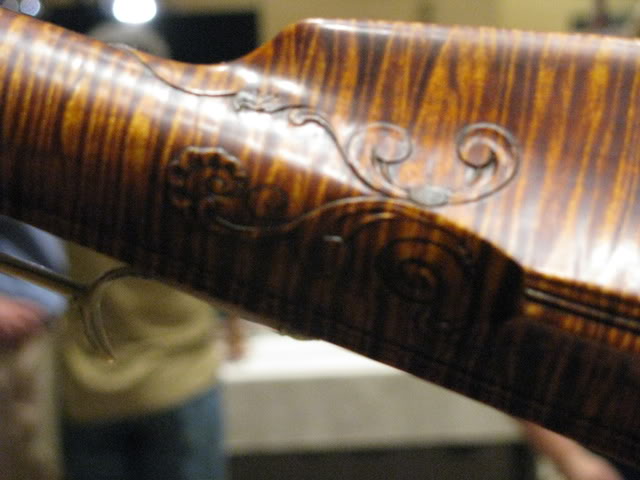
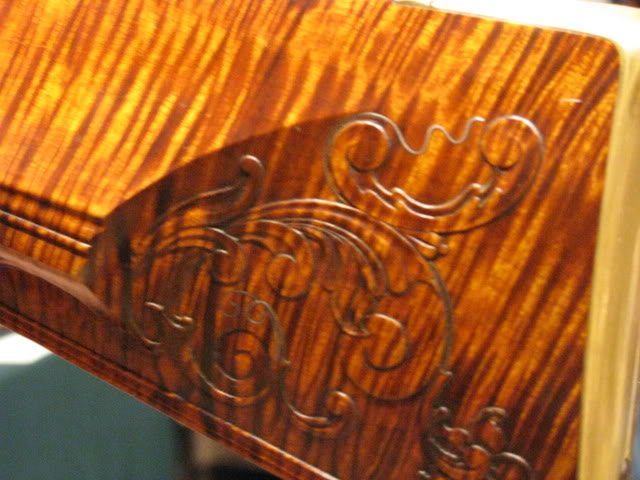
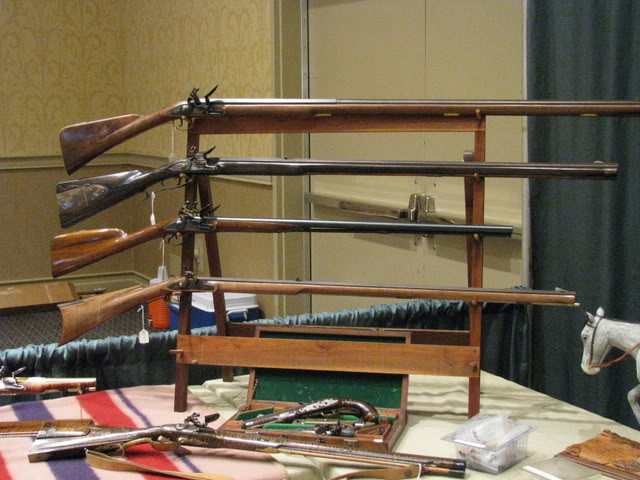
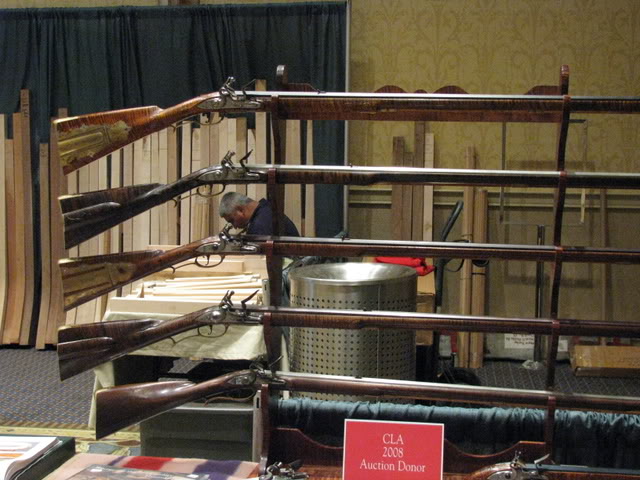
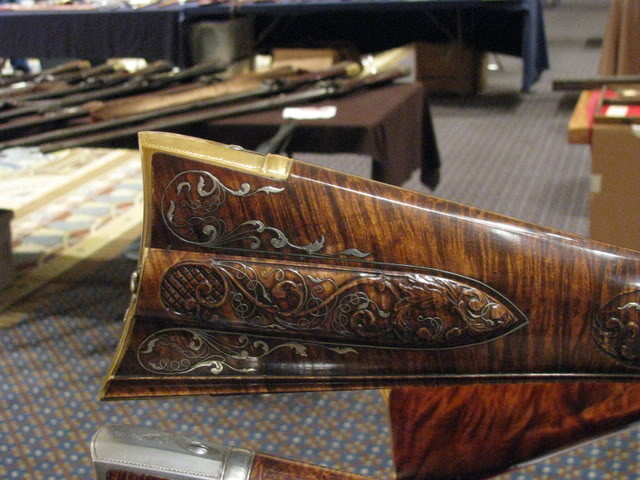
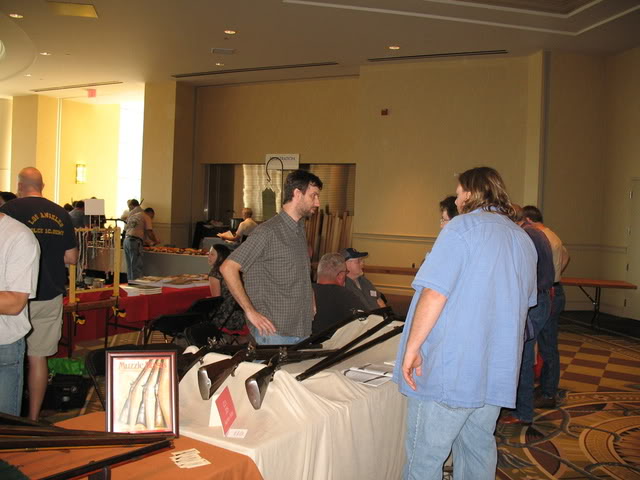
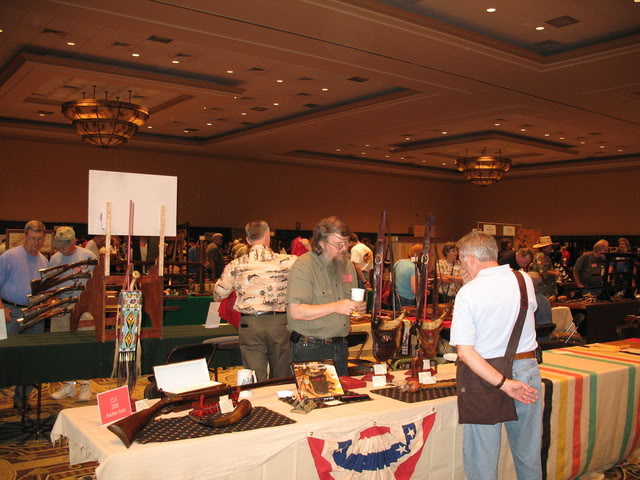
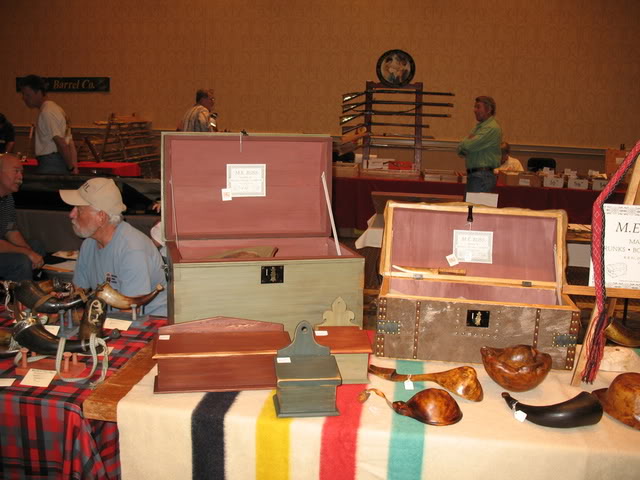
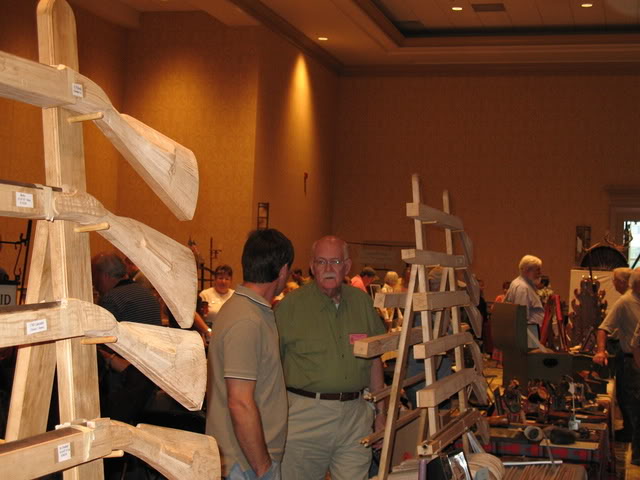
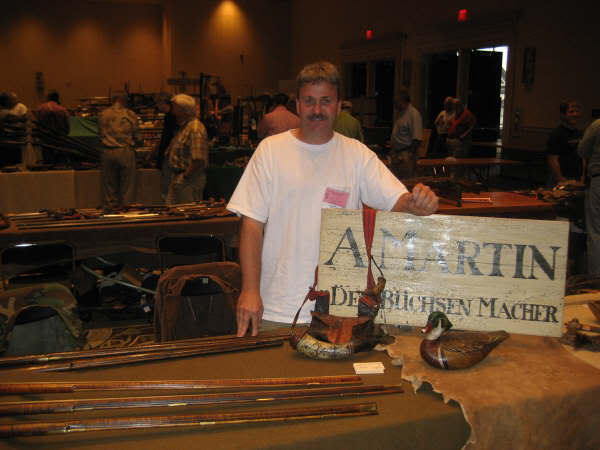
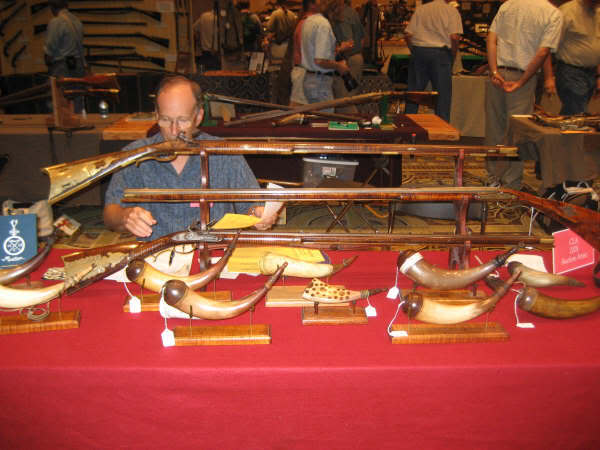
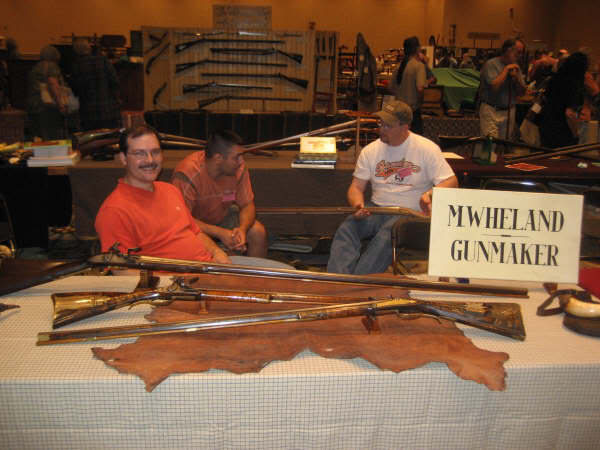
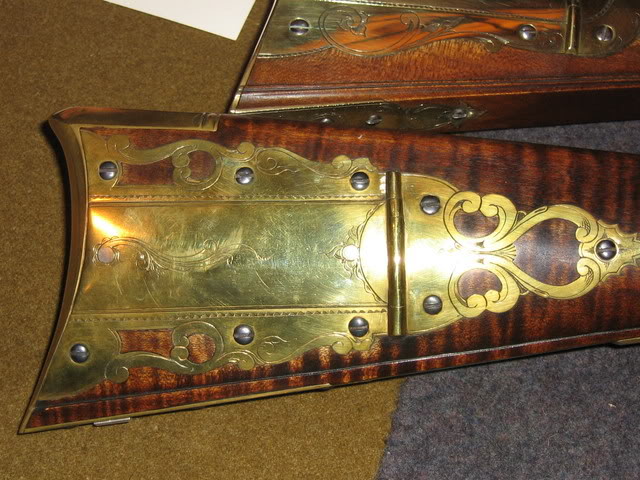
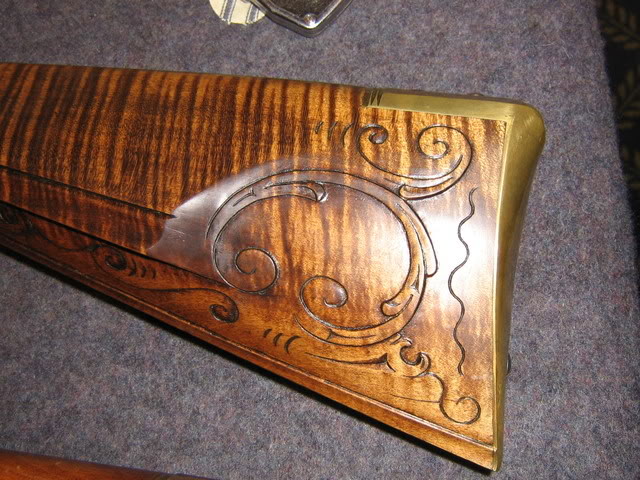
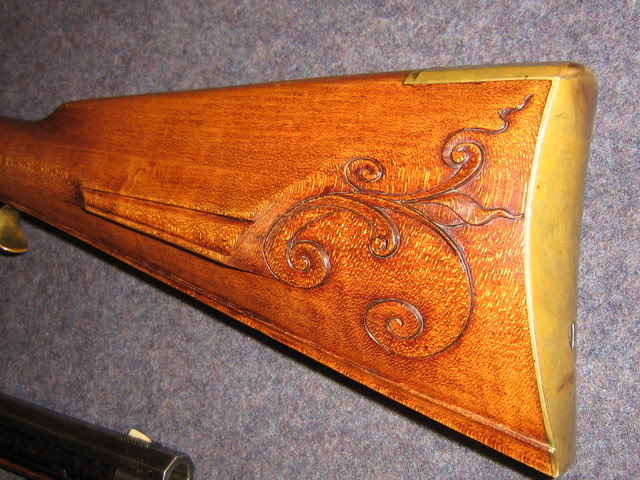
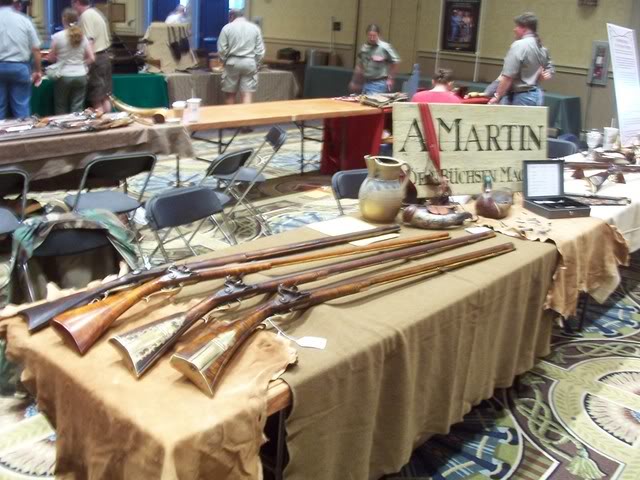
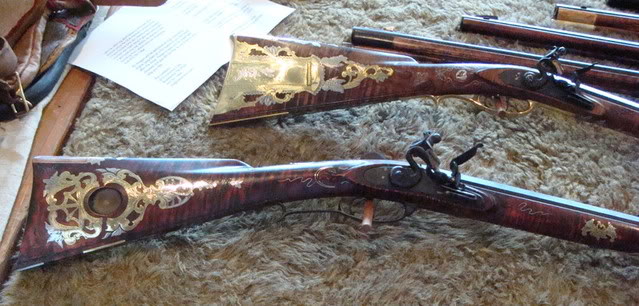
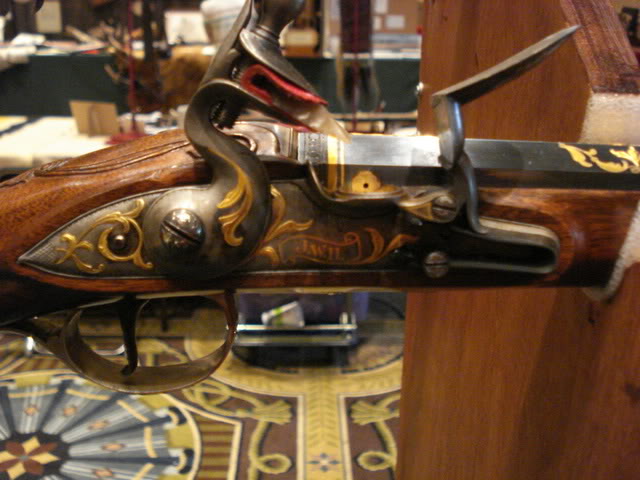
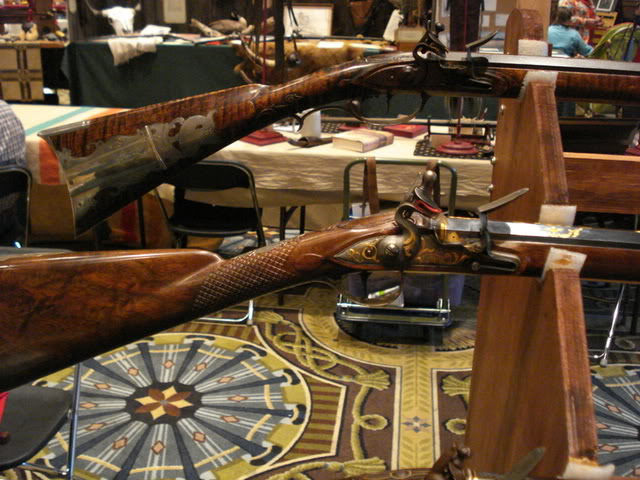
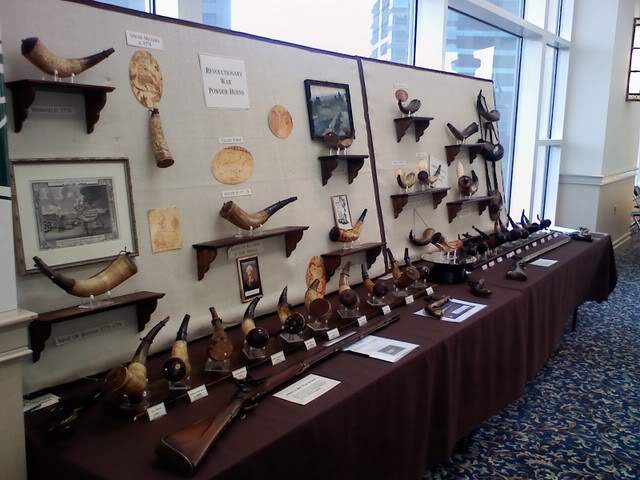
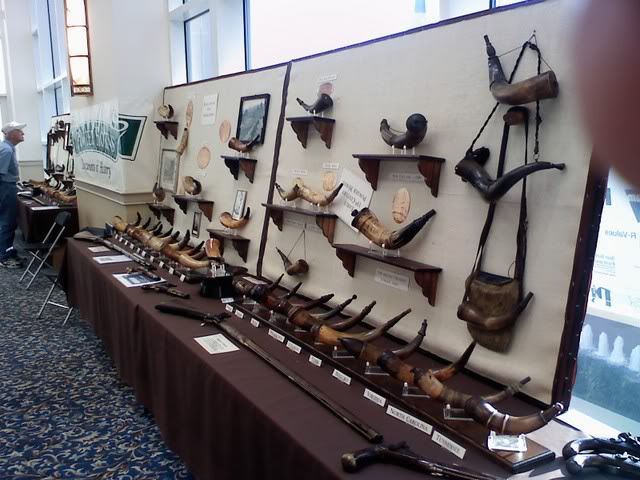
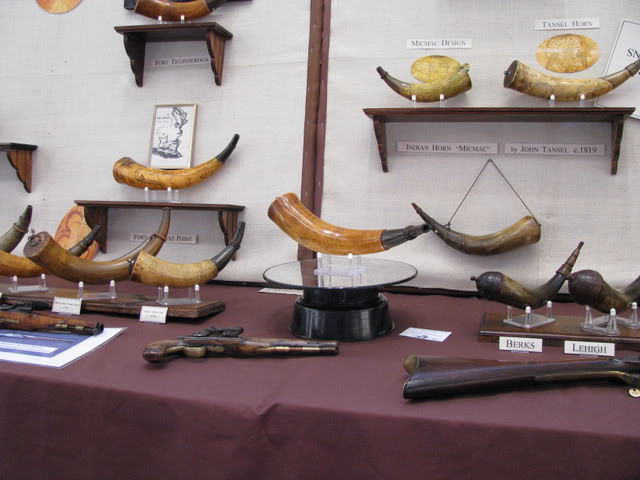
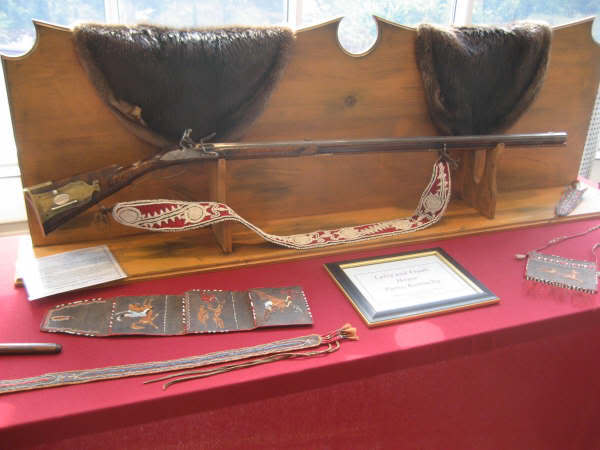
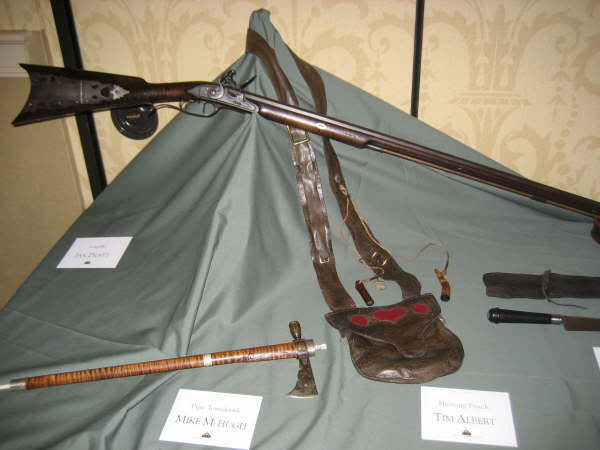
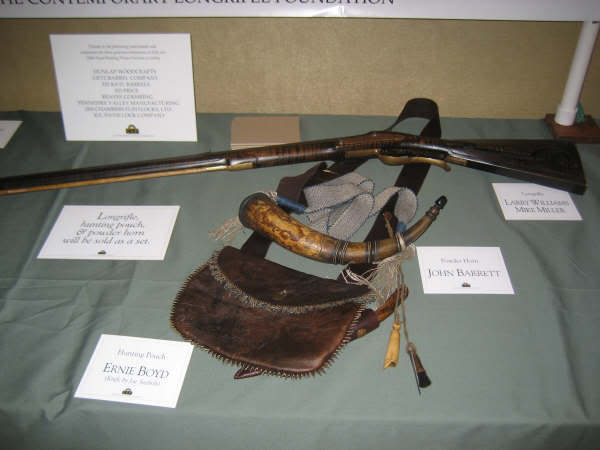
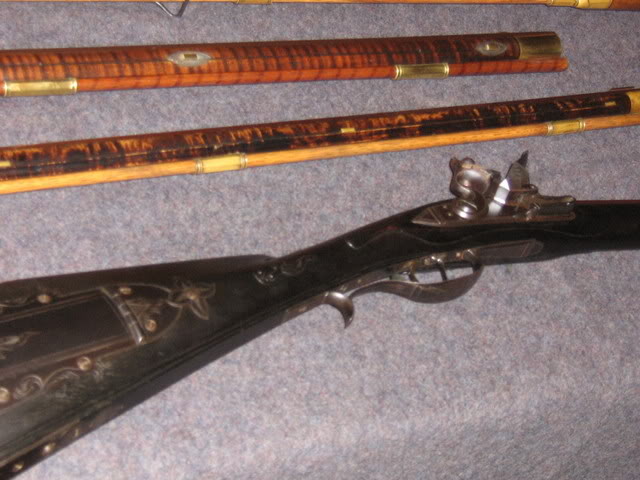
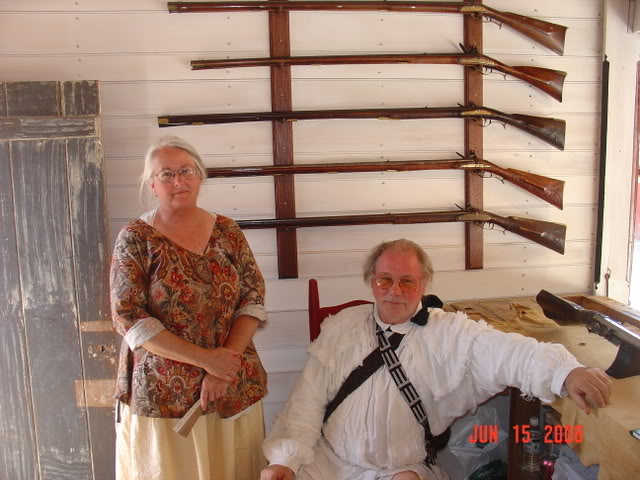
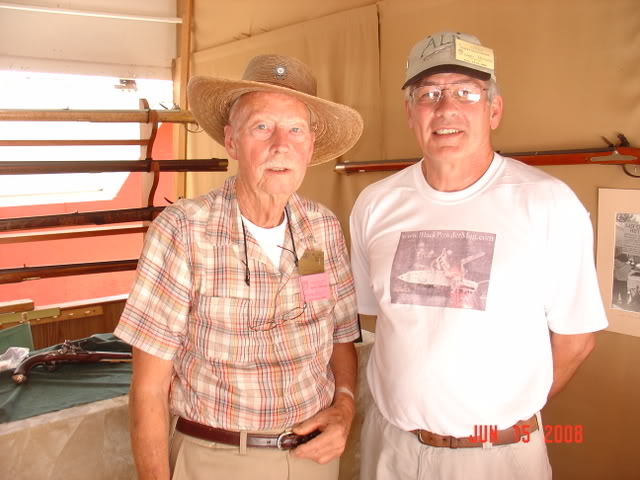
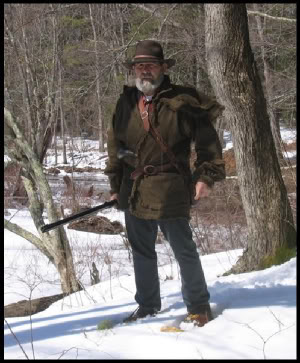
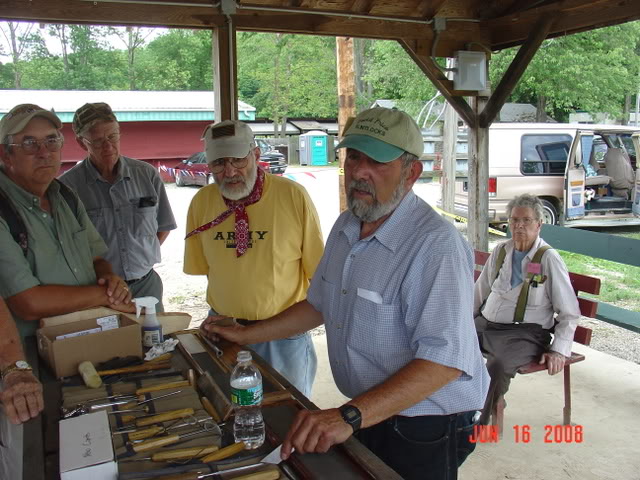
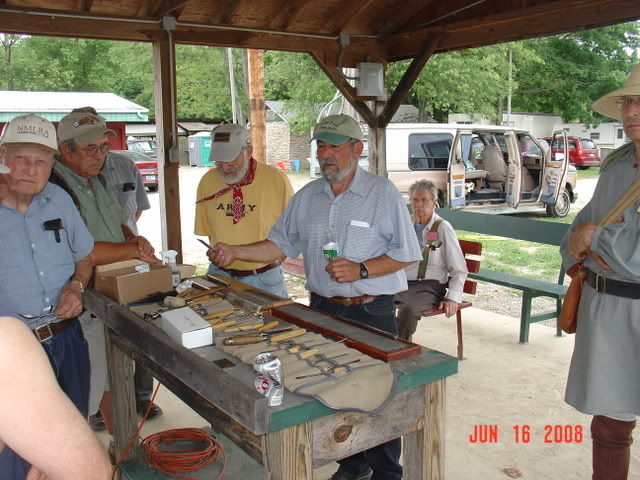
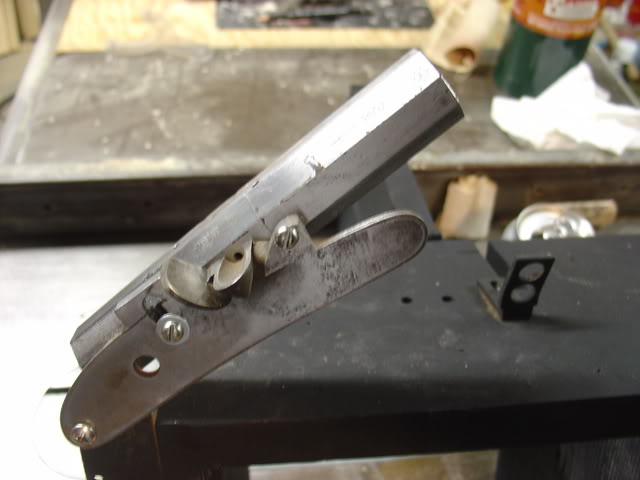
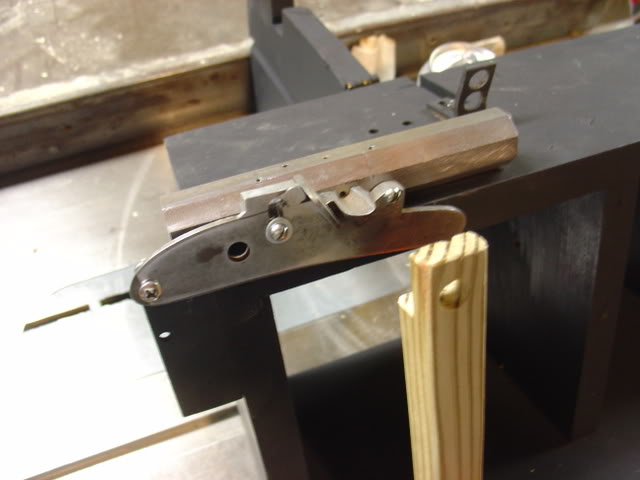
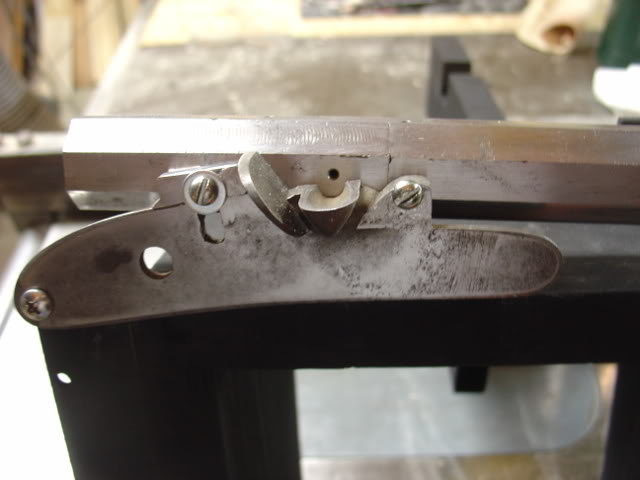
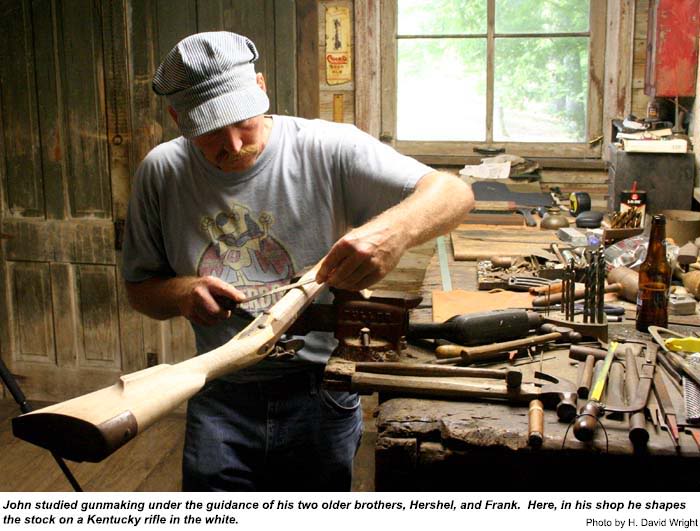
    Hershel’s and Frank’s work with longrifles and knives are legendary, but John has emerged as very fine bladesmith and gunsmith with his own distinctive style and flavor. The pictures accompanying this article show a few examples. Here is his story.

    John House was born in Woodbury, Kentucky in 1961. Raised in an old lock house on the Green River, John describes his childhood as idyllic with Hershel being a strong roll model and mentor for both him and Frank. John explains:

    “Hershel spent a lot of time with us when he came back from the Marines. Though he was twenty years my senior (Frank is a little older than me) he would take us down to the river every day he could and teach us to both fish and swim. We would also go camping. Hershel would make us little knives and things and we grew up watching him work—it’s amazing what you can pick up as a kid by accident. As teenagers, Frank and I would go out there a lot, skipping school often, working on the lathe, making knives and beating and banging on the forge. Those were great times for us. Our skipping got to be such a problem that when the school principal was contacted all he could comment was: ‘I’m not really worried about them going out there and learning all that stuff because they sure as h*ll aren’t learning anything here!’”

    So John House learned, first hand, the fundamentals of wood and metal work under Hershel’s tutelage, but did not step out as a gun and knife builder till the late 1980’s.

    John enumerates: “I remember back in the late eighties I hadn’t done much art or knife work and I lost my full-time job. I hung out at Hershel’s a lot and told him I didn’t know what I was going to do. Hershel told me he would show me and I watched and worked with him about four or five days. Then, I just sort of fired up the forge and took off. I have learned much since then, but I needed a push to get me going and so I started building knives.”

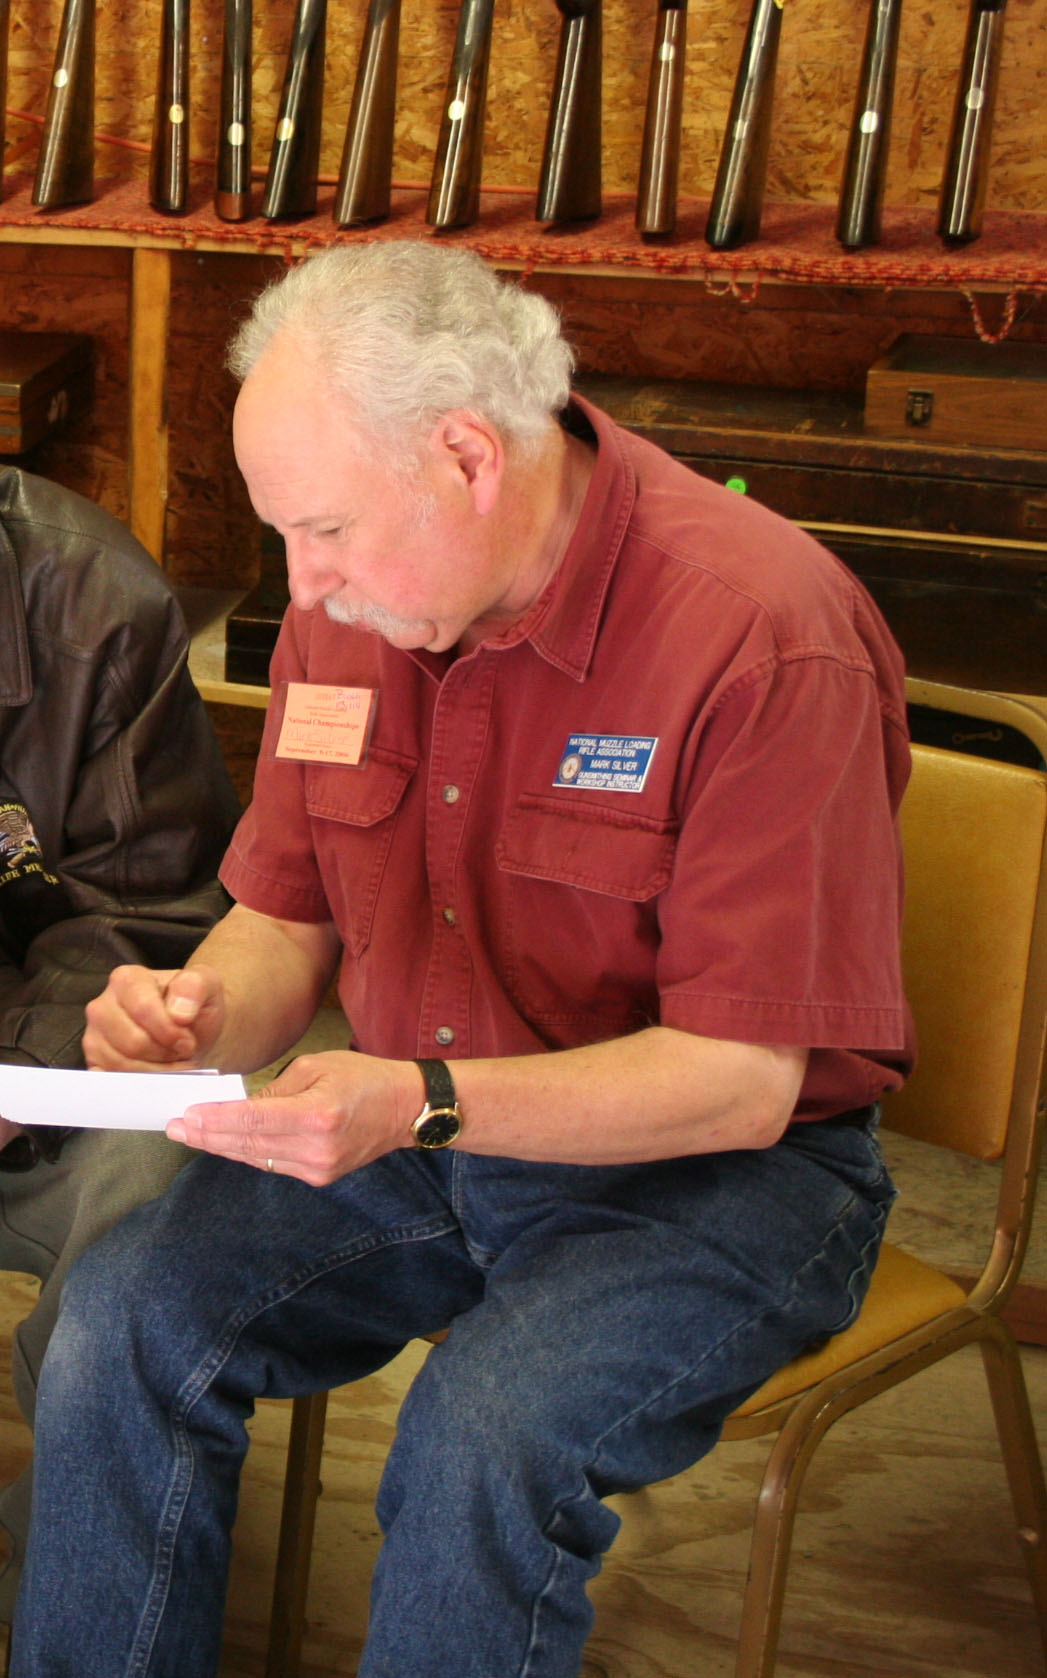
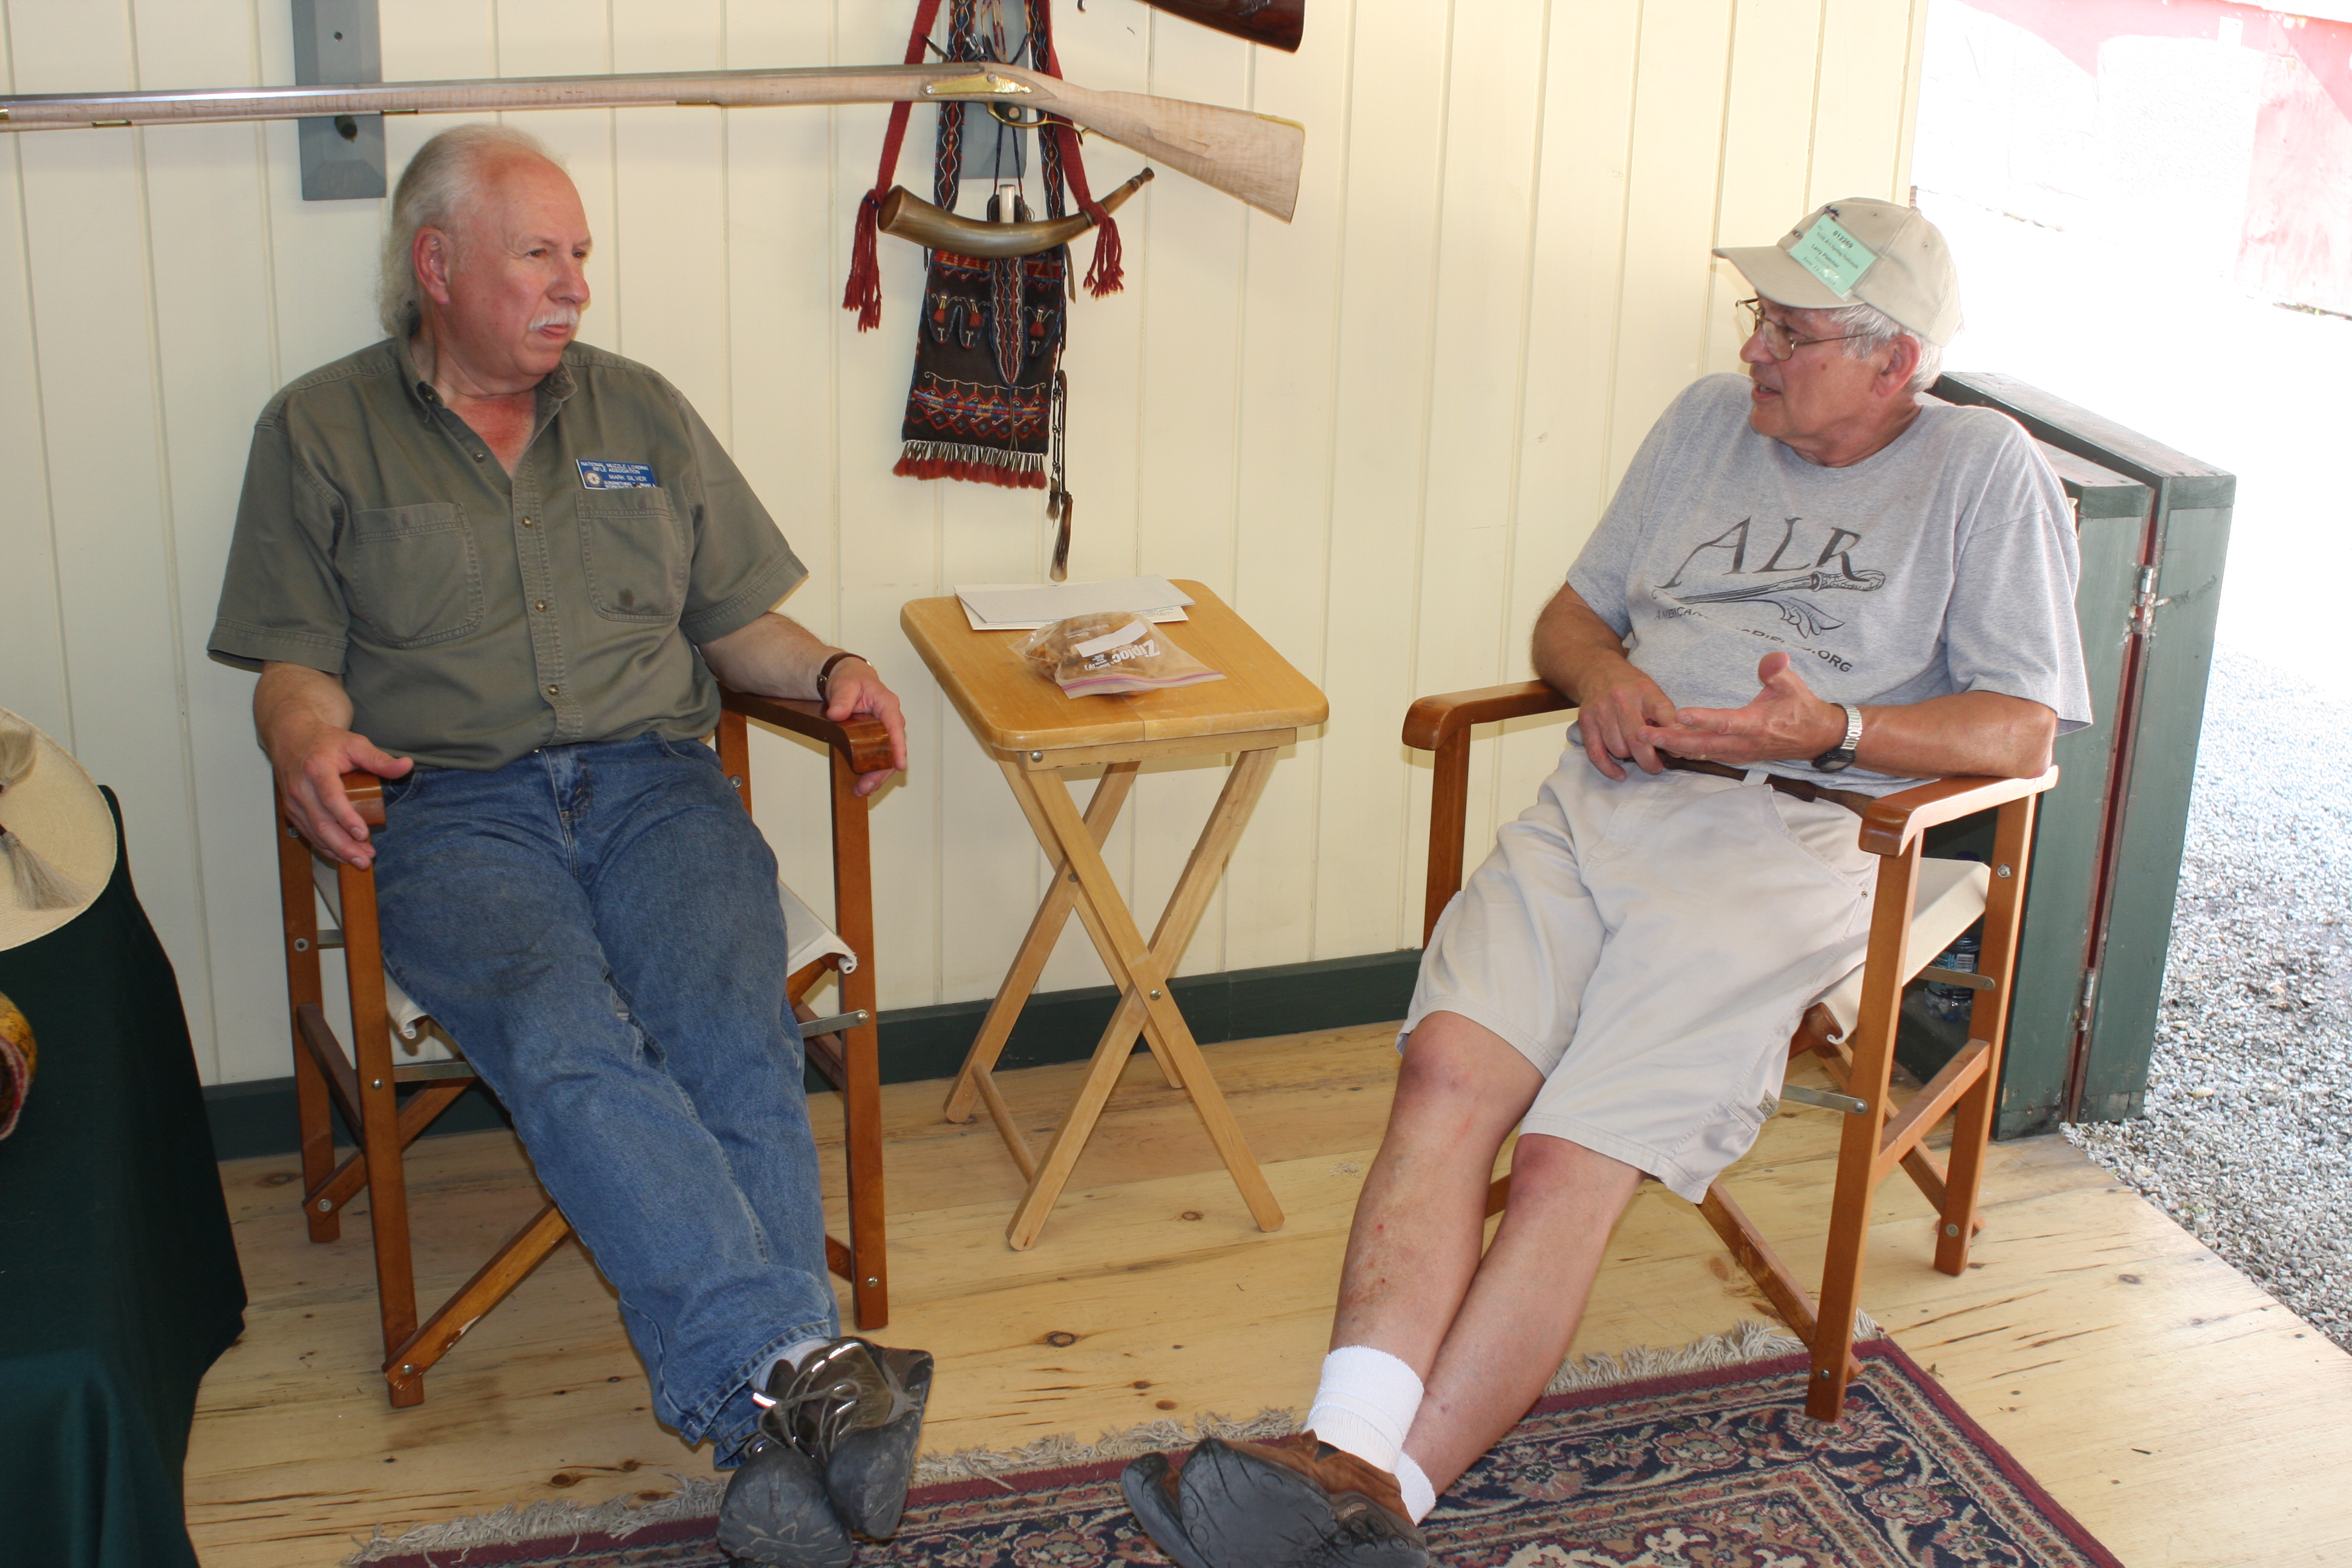
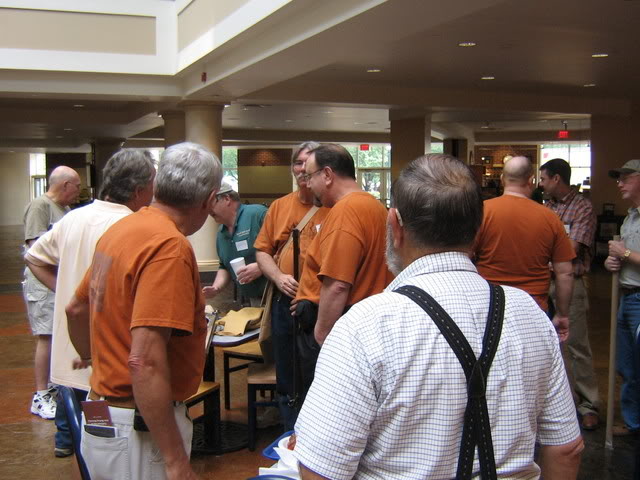
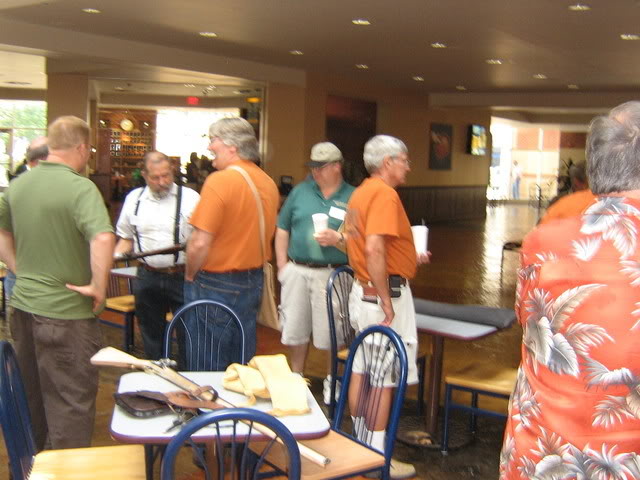
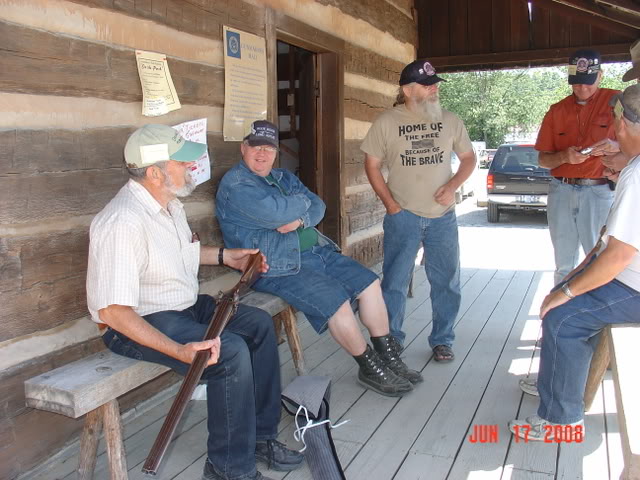
    These days, John and Hershel conduct gun and knife building seminars together and freely share their knowledge, skill, and expertise. This summer the three brothers are conducting their first gunmaking workshop together at Hershel’s shop in Woodbury. John says he has made many great friends along the way.

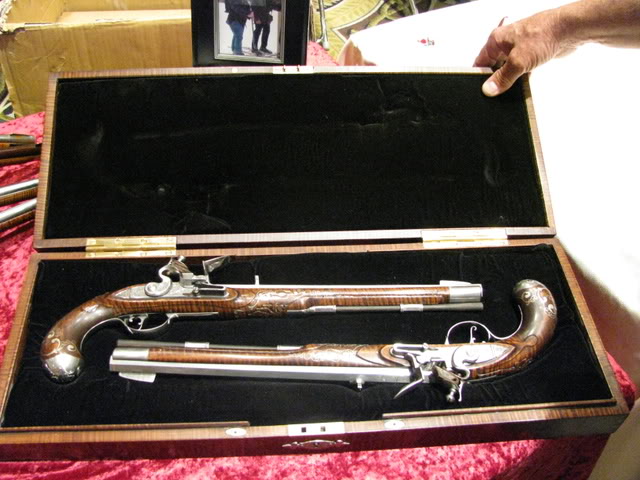
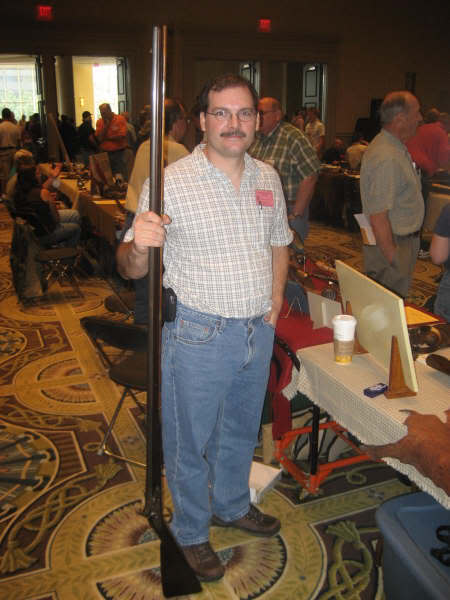
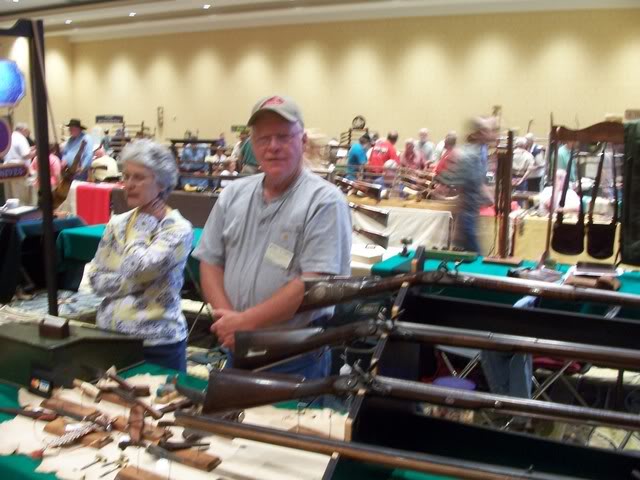
    But what about John’s longrifles? In addition to Hershel’s influence, Frank played a significant part in his development as a gun builder. He says: “I built my first rifle with Frank in his shop. Frank at that time was a journeymen boilermaker and a great welder, but had decided to go into gunsmithing on his own and had a small shop in Woodbury. At the time, I was making willow furniture and one day he said to me, ‘Look, I know you have the eye to do this!’ So, I started working with Frank and we built a brass mounted, walnut stocked, Virginia rifle. The next gun we built was an early, iron mounted, 62 caliber, long-barreled, curly maple stocked beauty. I nicknamed it Summertime, because it took all of one summer to build. I found out later that old Summertime went out to California and won a state championship. I was a real proud of that.”

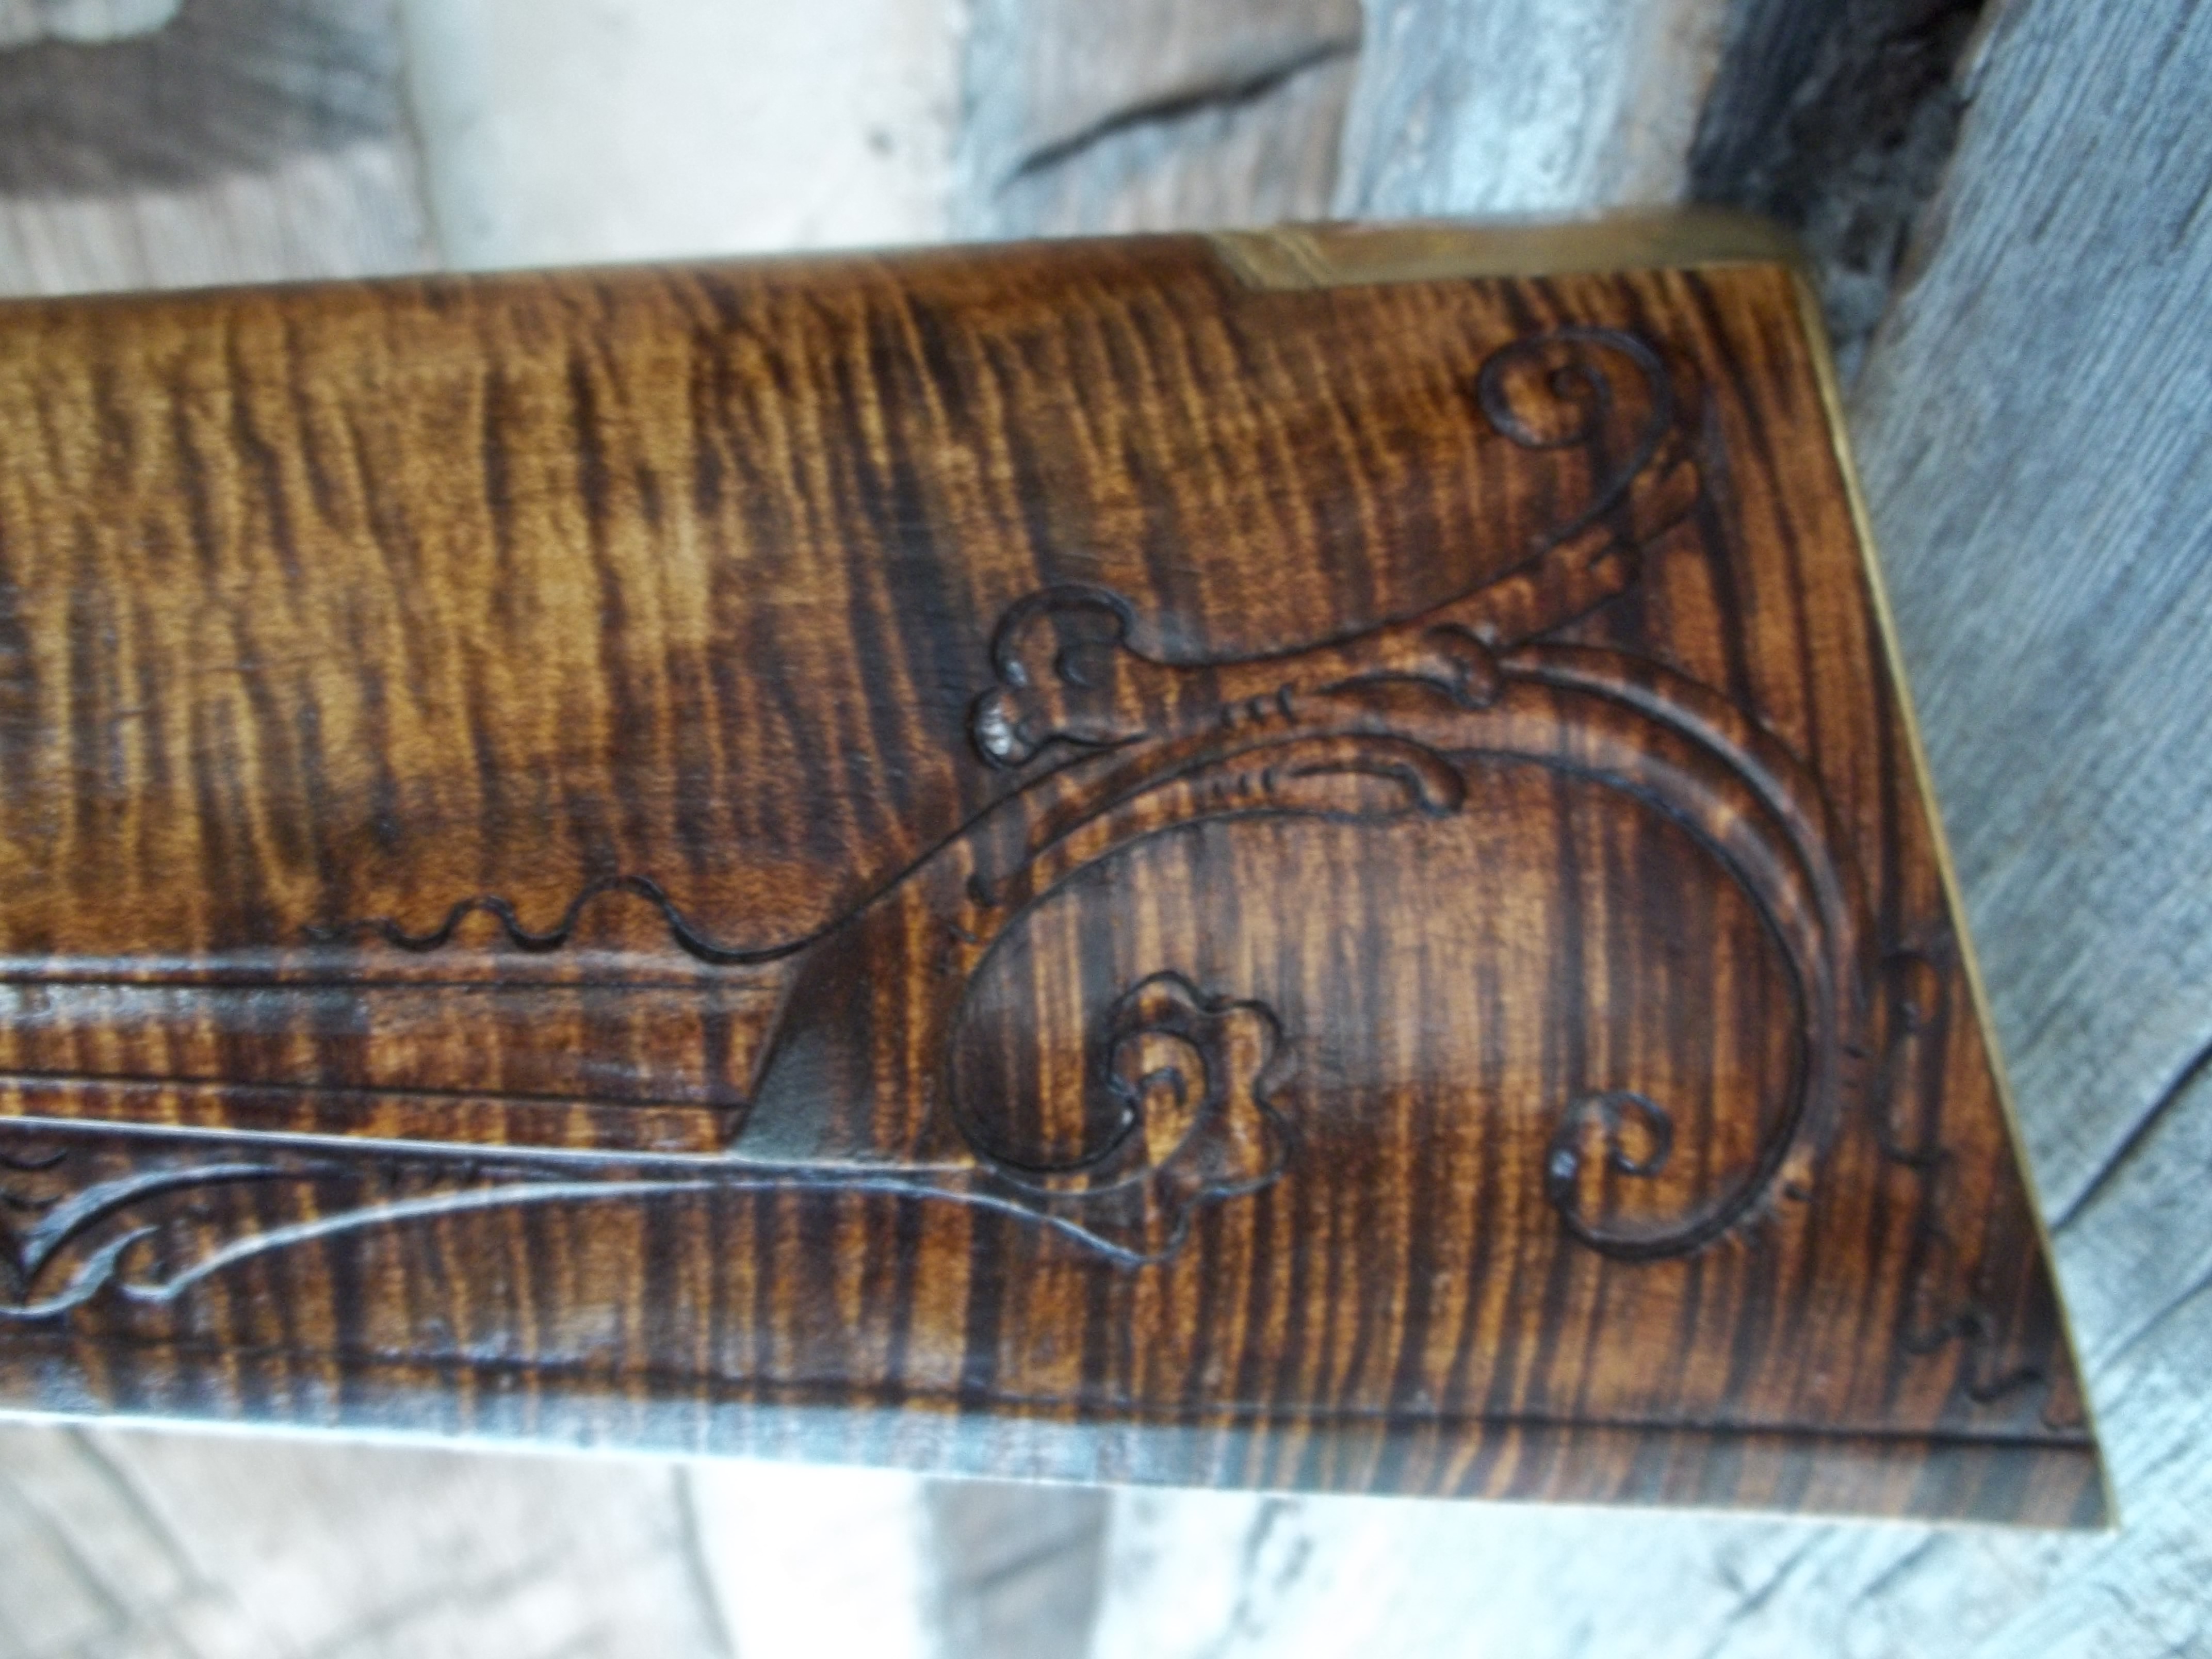
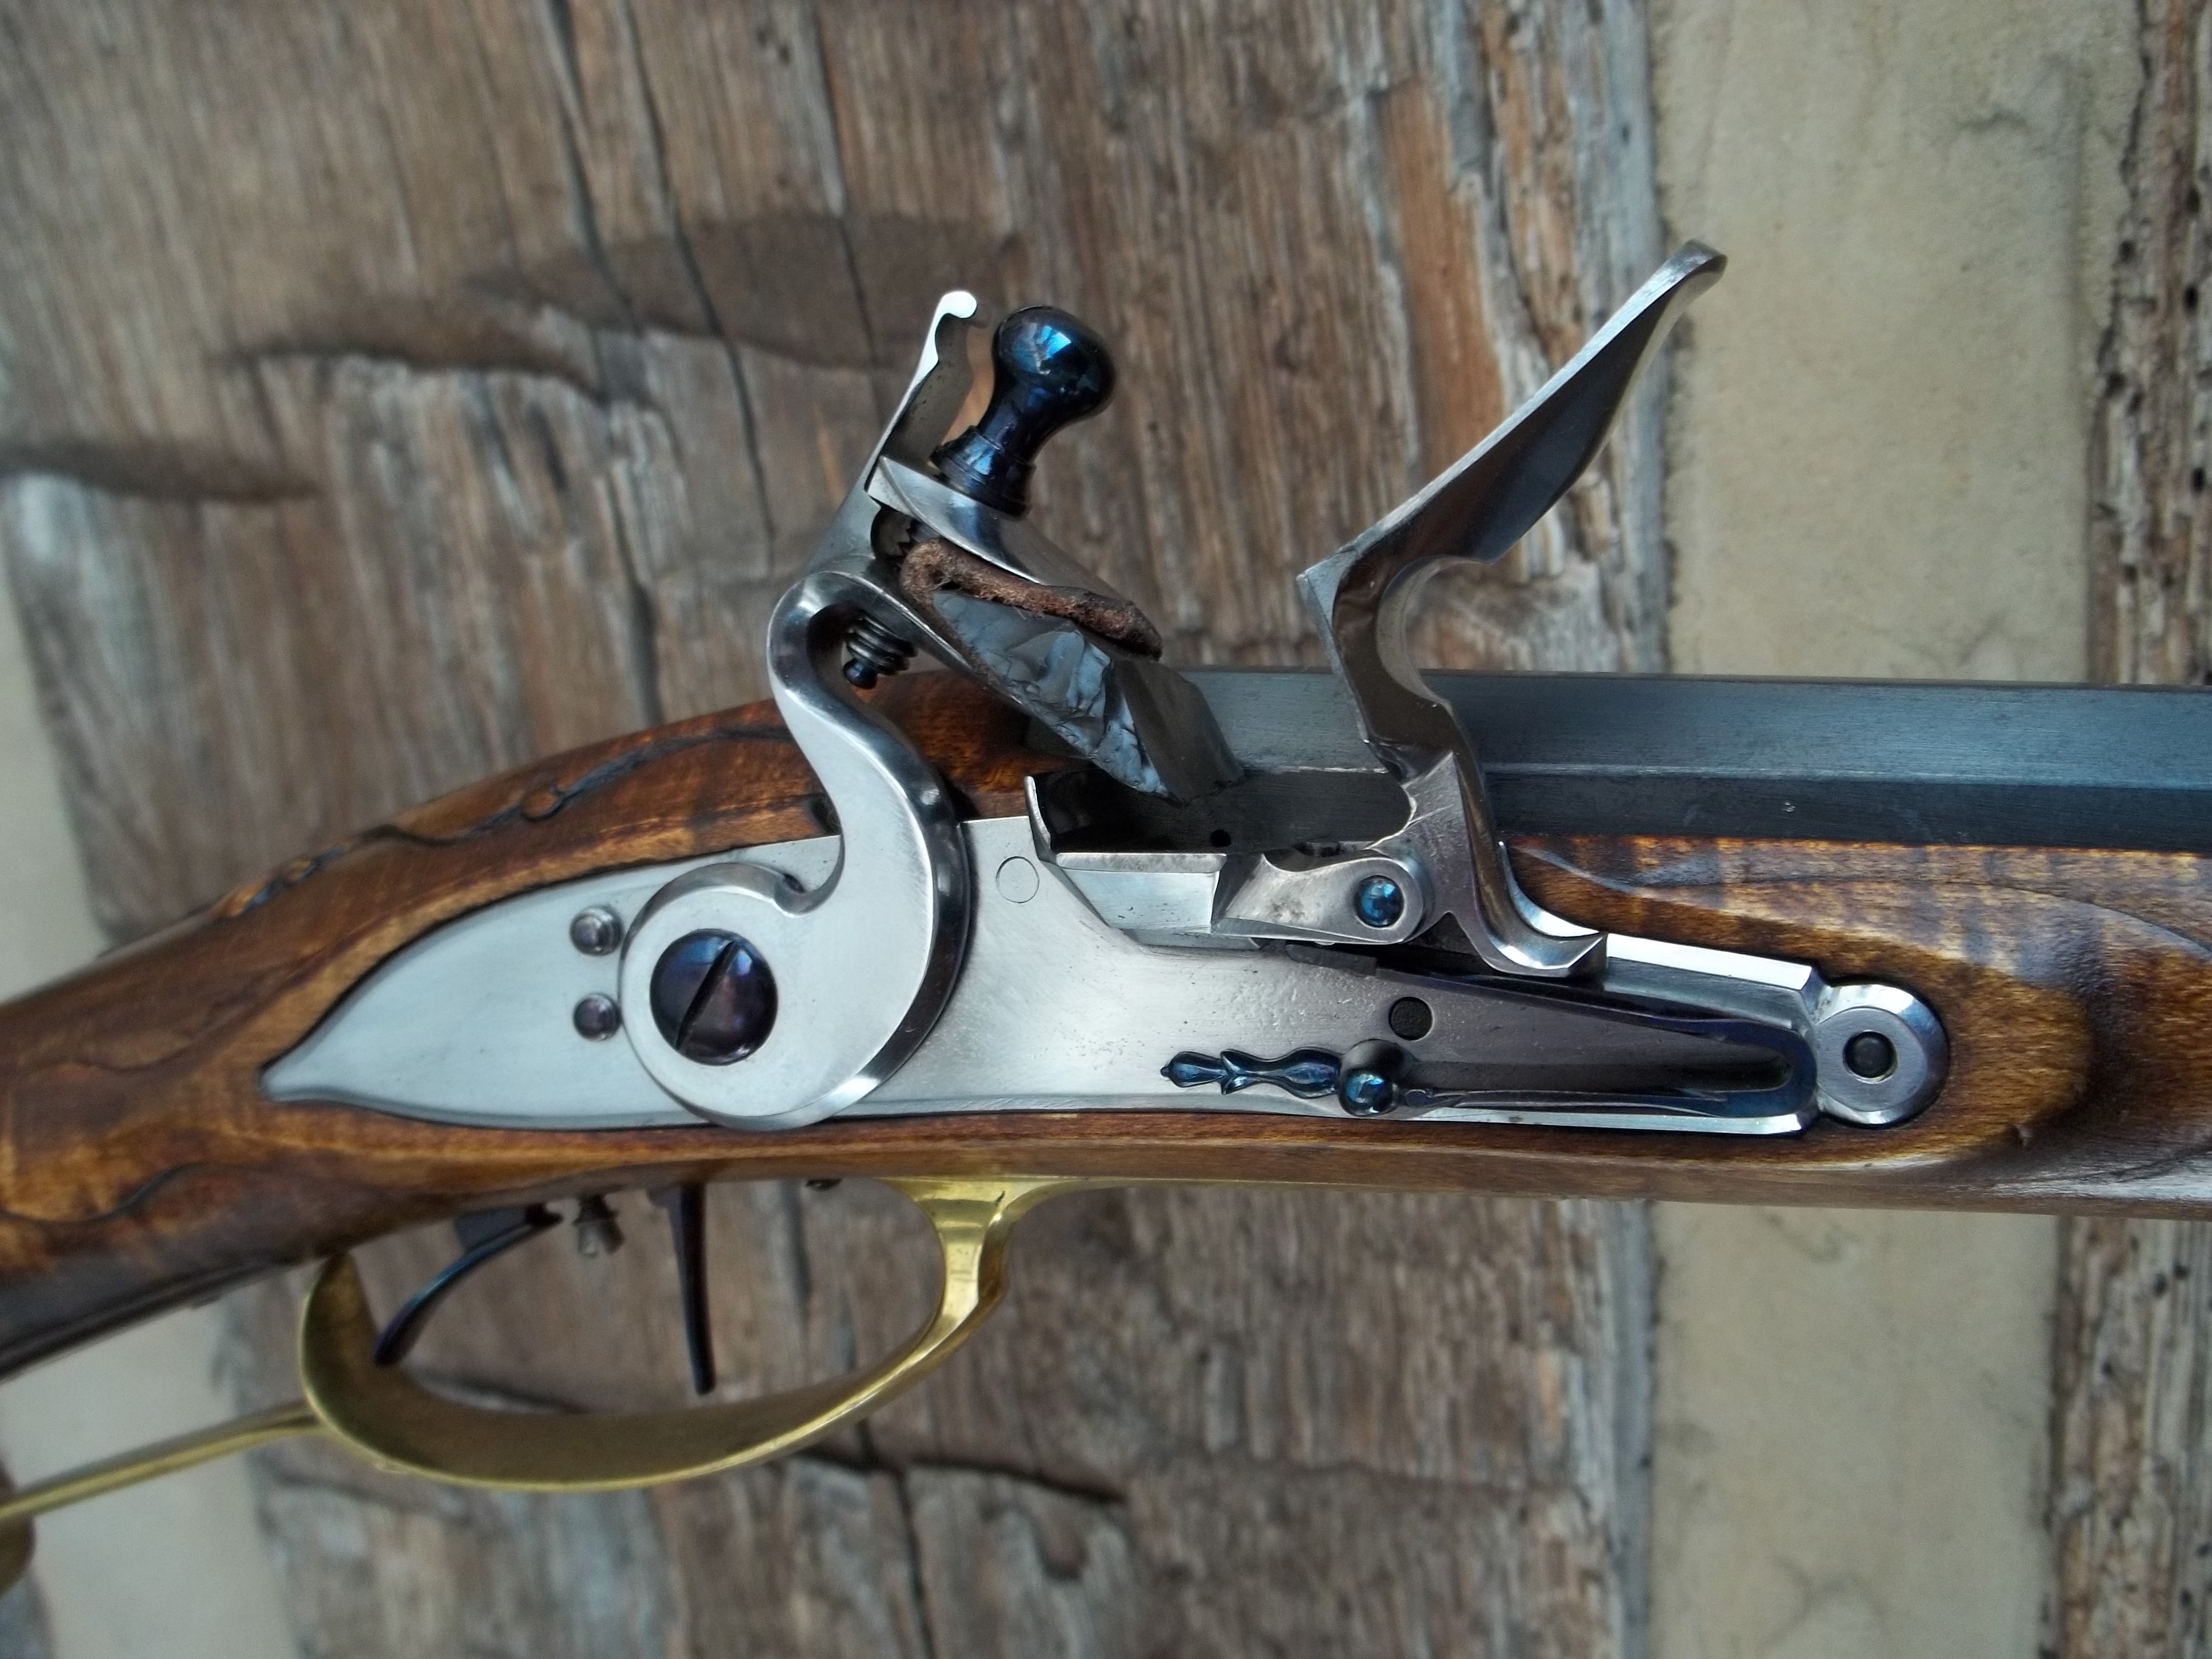
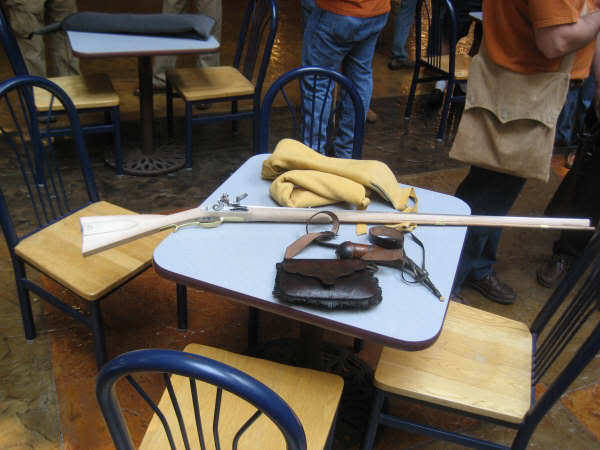
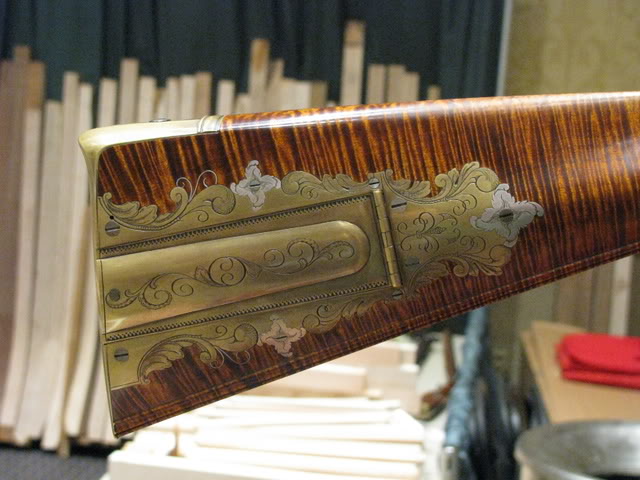
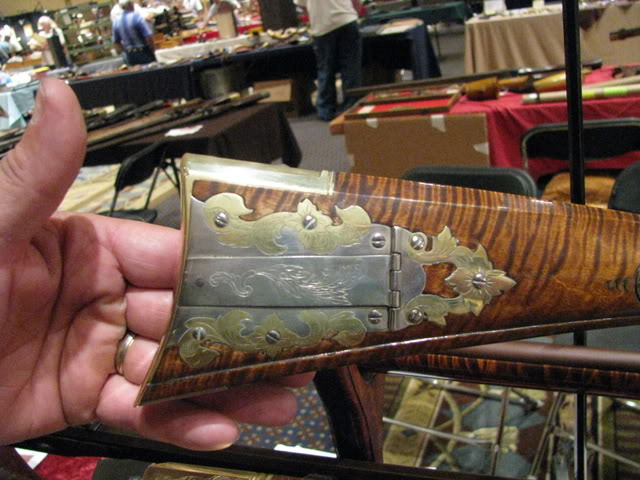
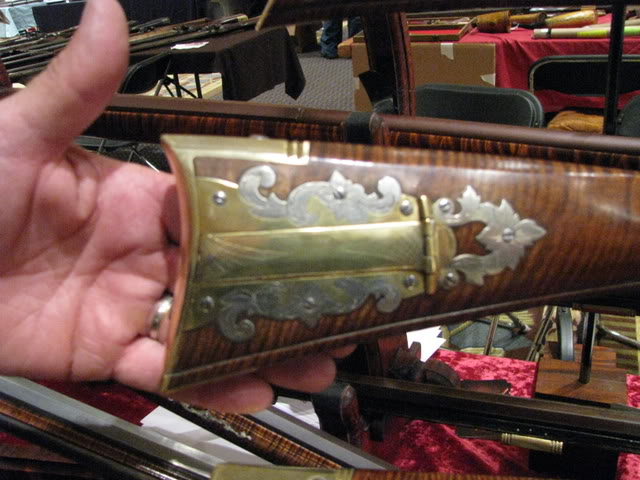
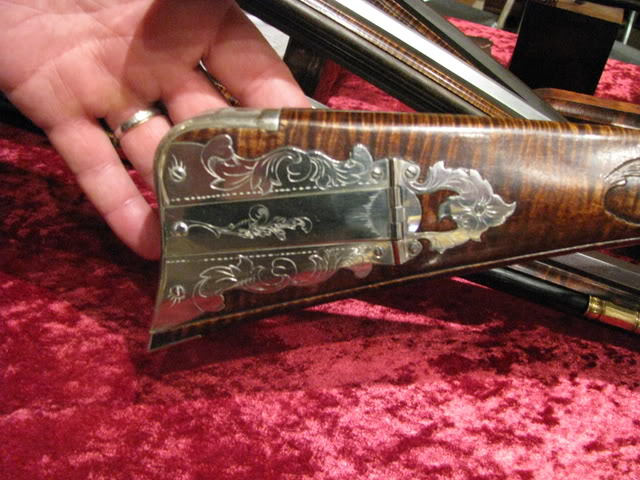
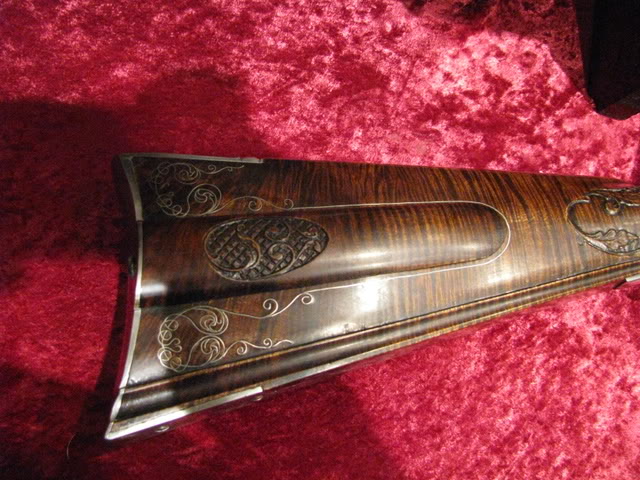
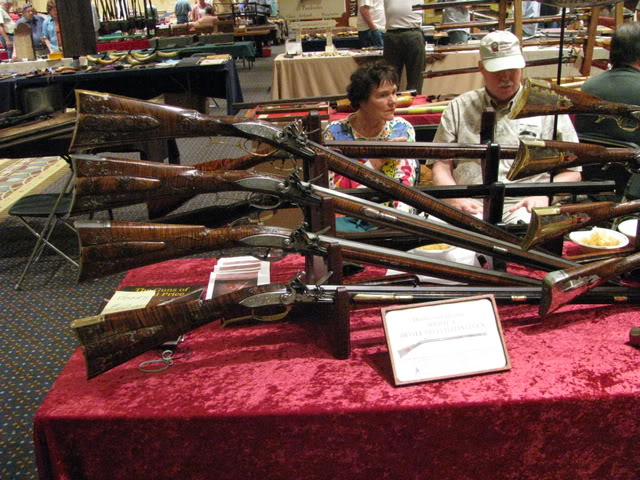
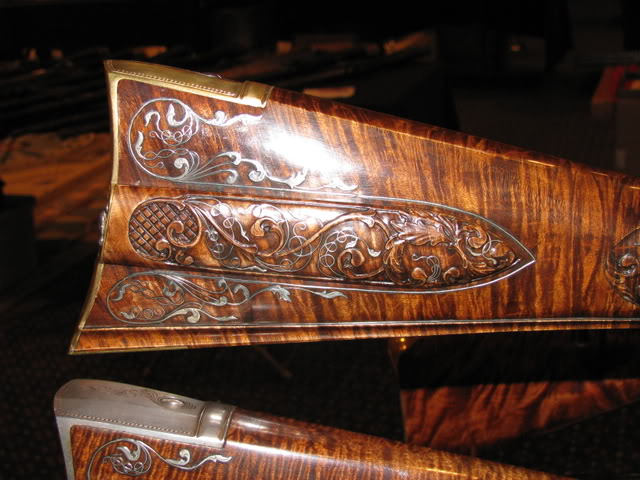
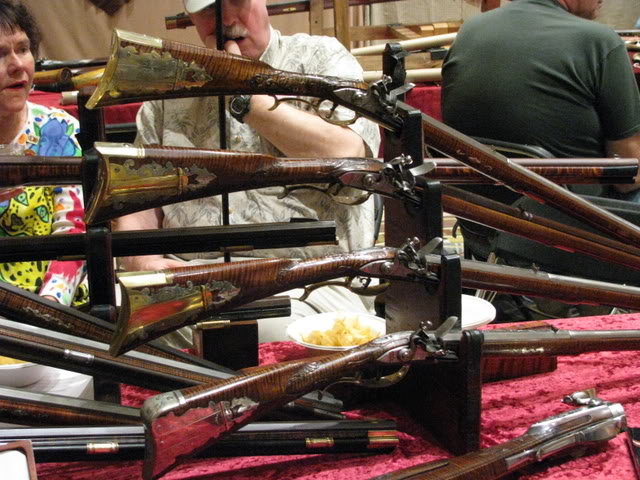
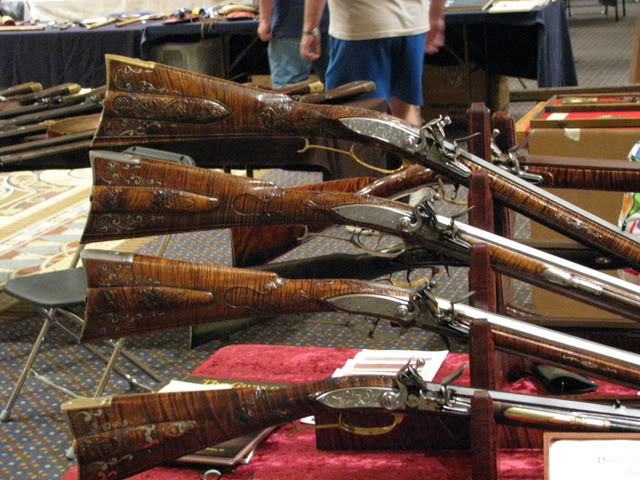
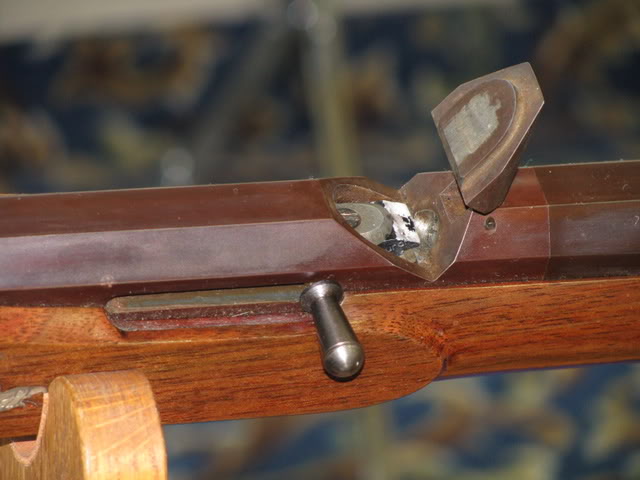
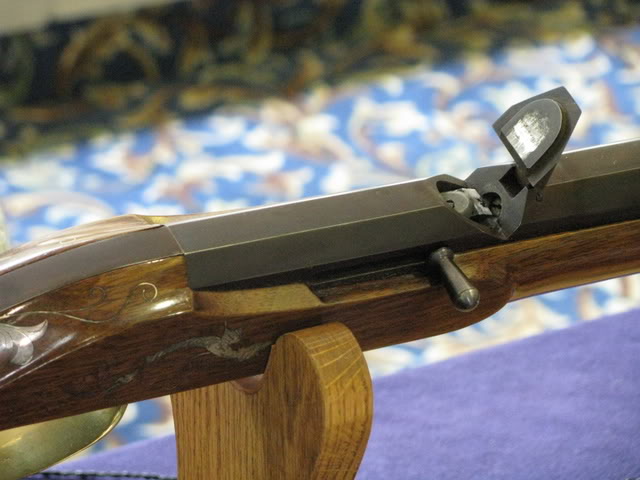
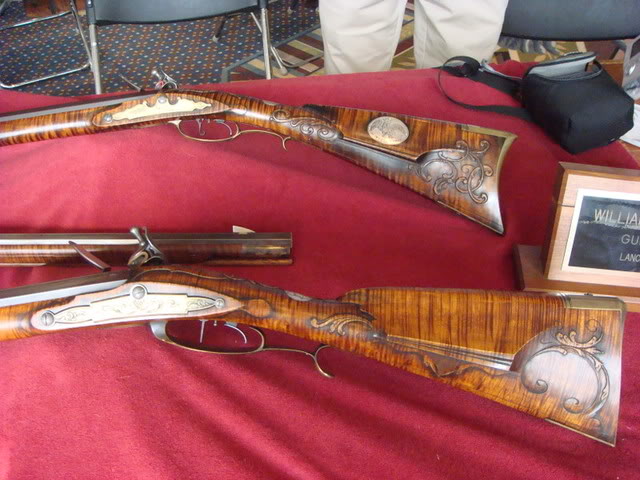
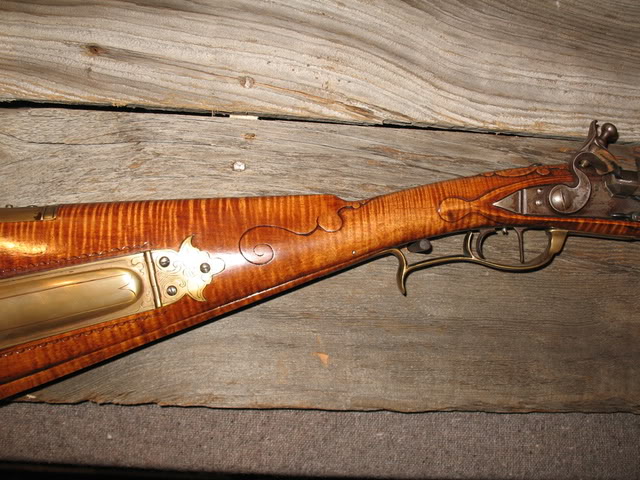
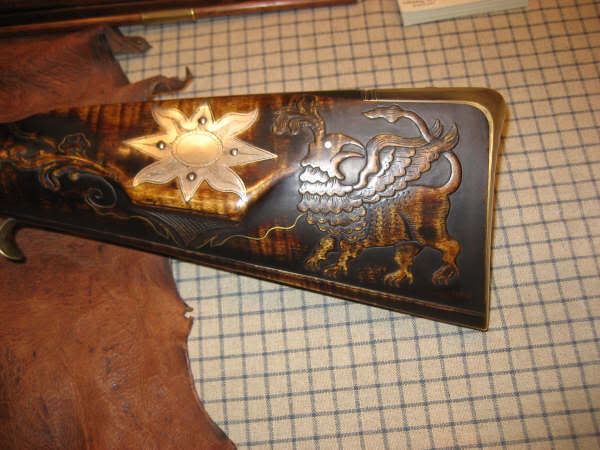
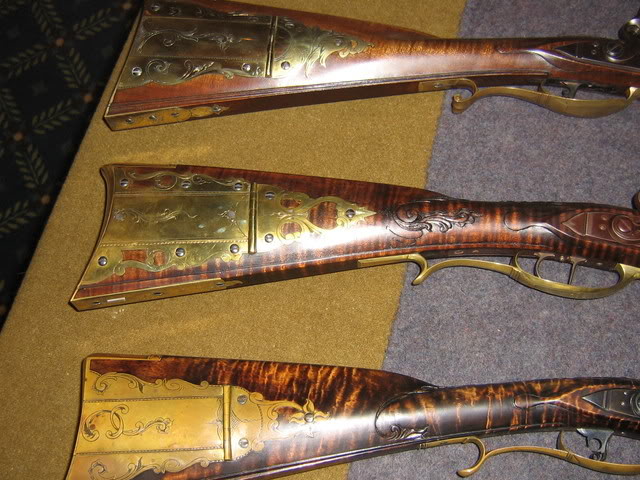
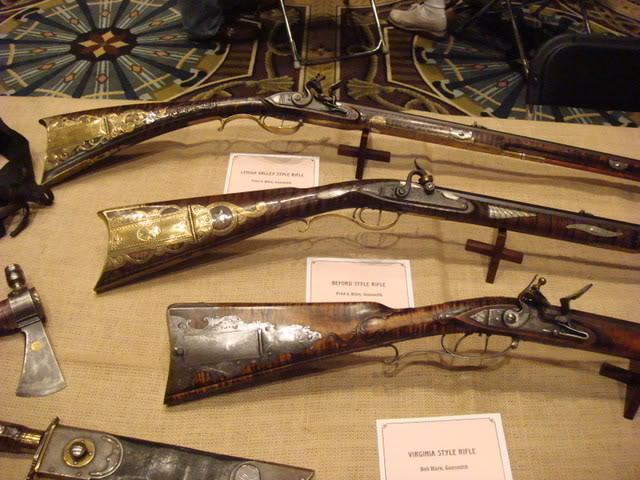
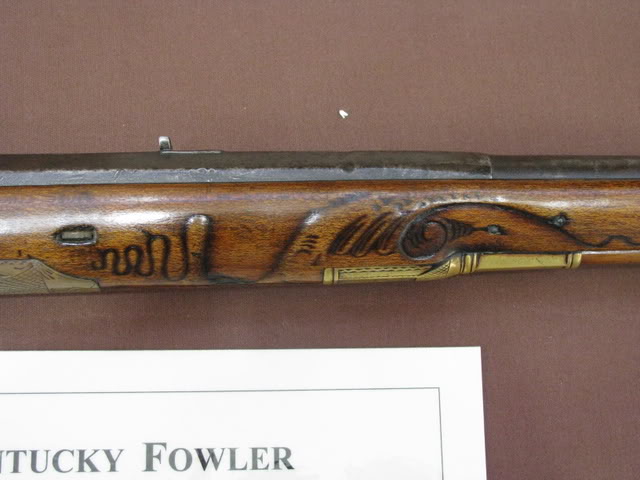
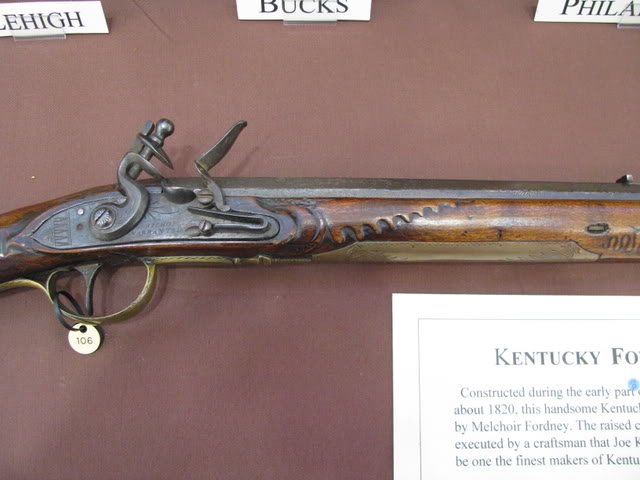
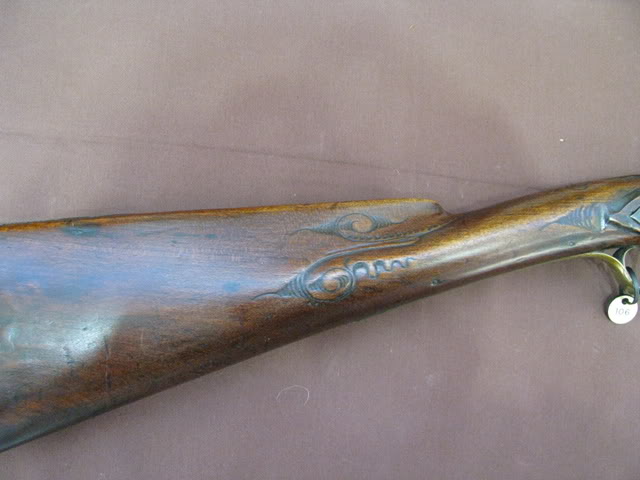
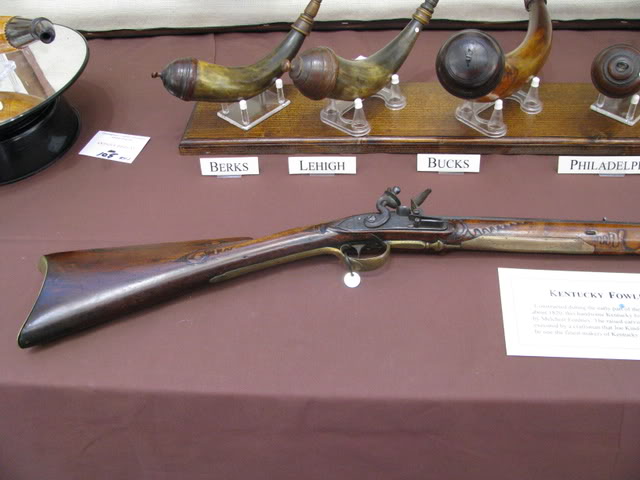
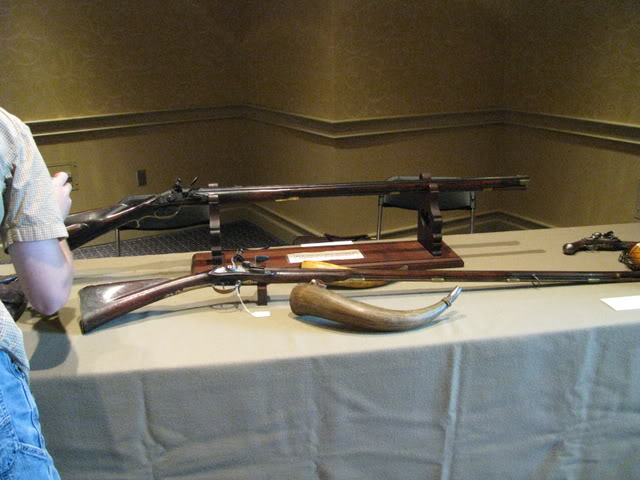
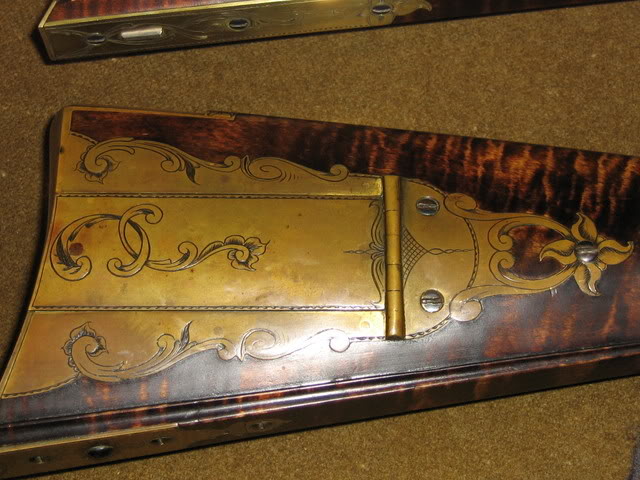
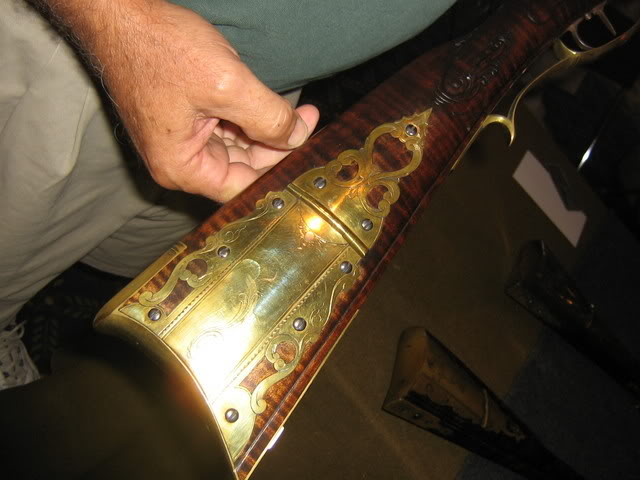
    Although John likes to build early American flintlock rifles, his favorite style is the later period, flintlock mountain rifle.

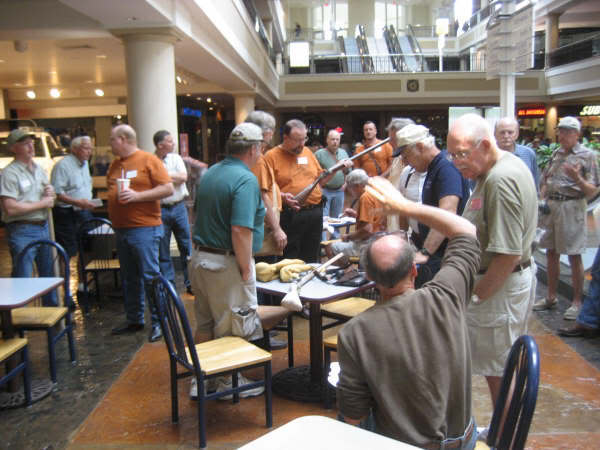
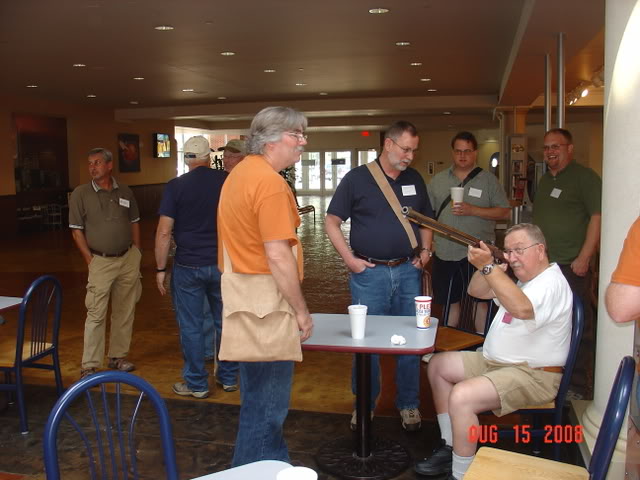
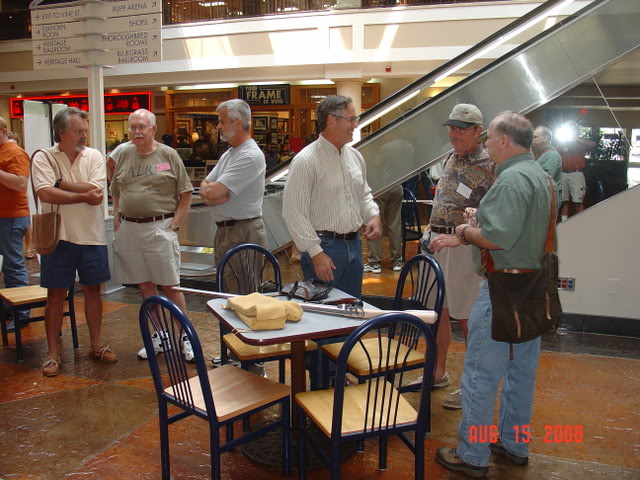
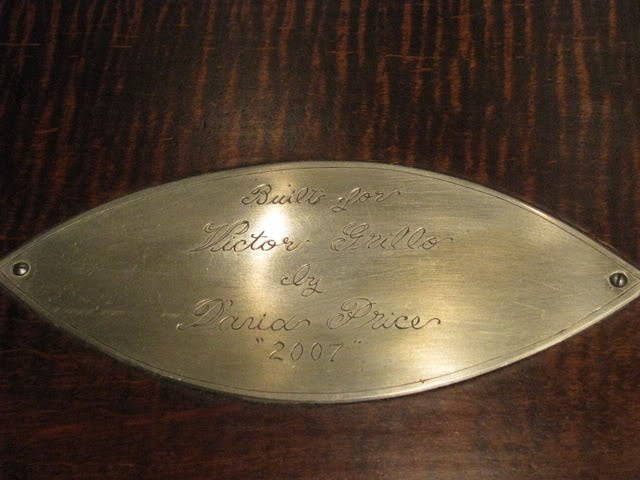
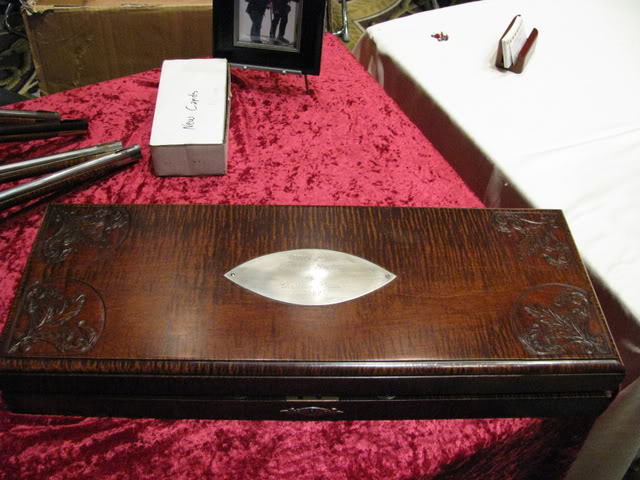
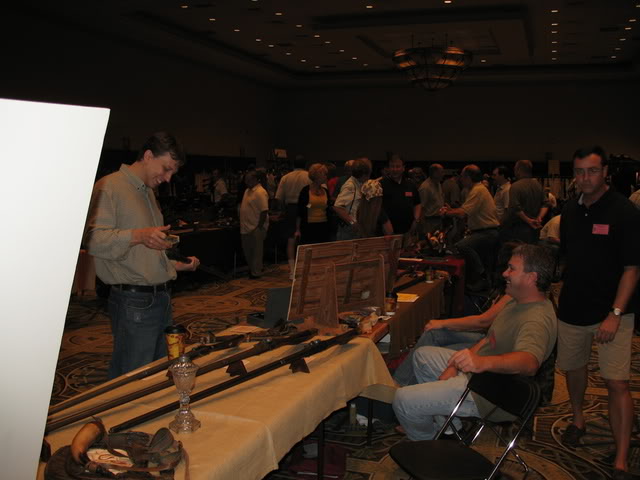
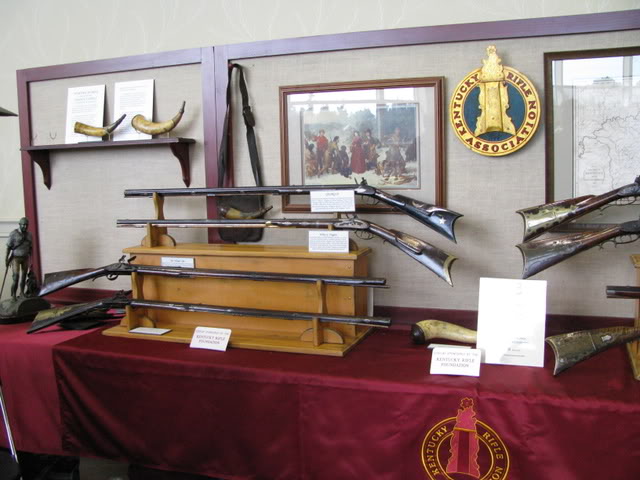
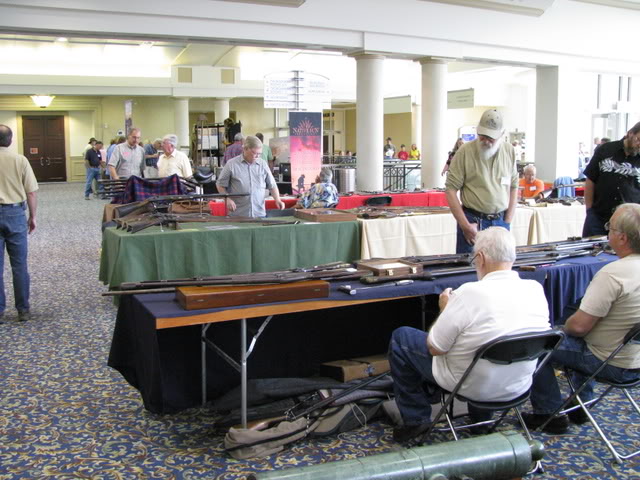
    Recently, the House brothers teamed up to build an exquisite Kentucky longrifle completely from scratch—lock, stock and barrel. This rifle is being raffled as a fundraiser titled “An American Tradition” for the Contemporary Longrifle Foundation. The Foundation’s purpose is to raise funds to promote the art and history of the Contemporary Kentucky Longrifle and related arts through educational publications, museum exhibits, and grants; and to promote contemporary artists of the Longrifle Culture.
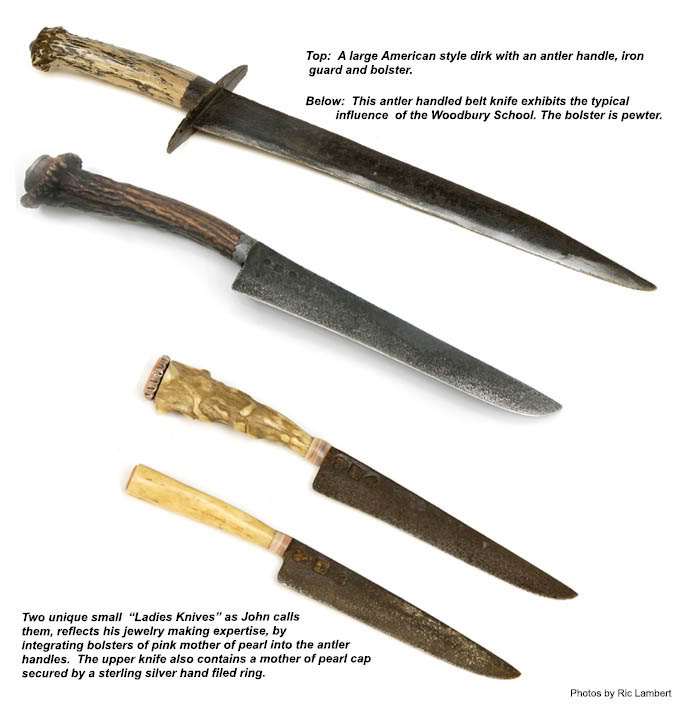
You can read about this remarkable project at the CLA’s web sites: www.longrifle.ws andwww.housebrothersproject.com and view photos of this superb longrifle and the three of them at work on this gun, stage by stage. For John House, this was an especially meaningful project on a number of levels. He says: “It was really special to me and an honor to get to build this rifle with my brothers. It makes me awful proud and we always seem to have a lot of fun when we work together.”

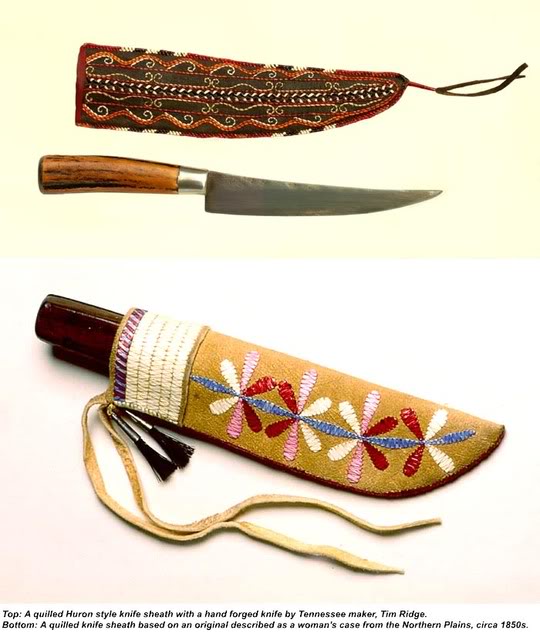
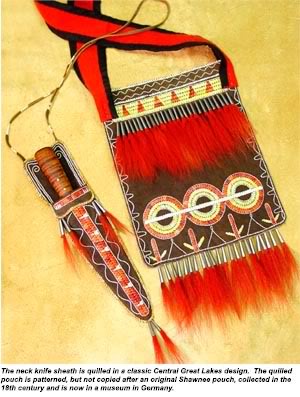
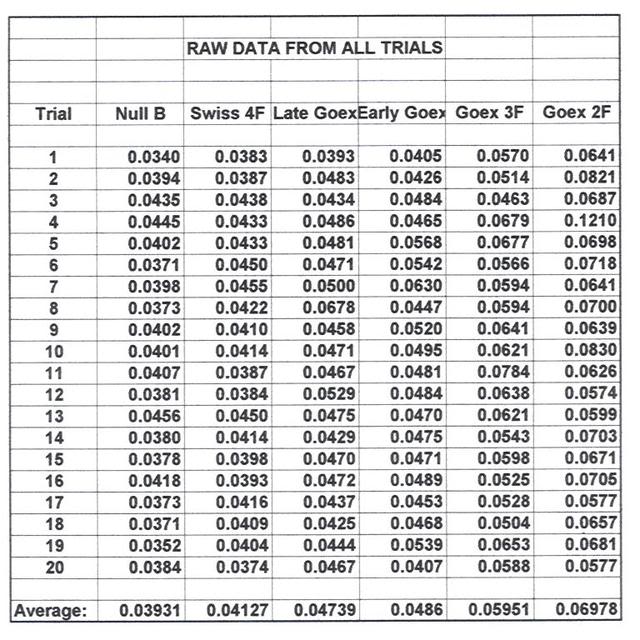
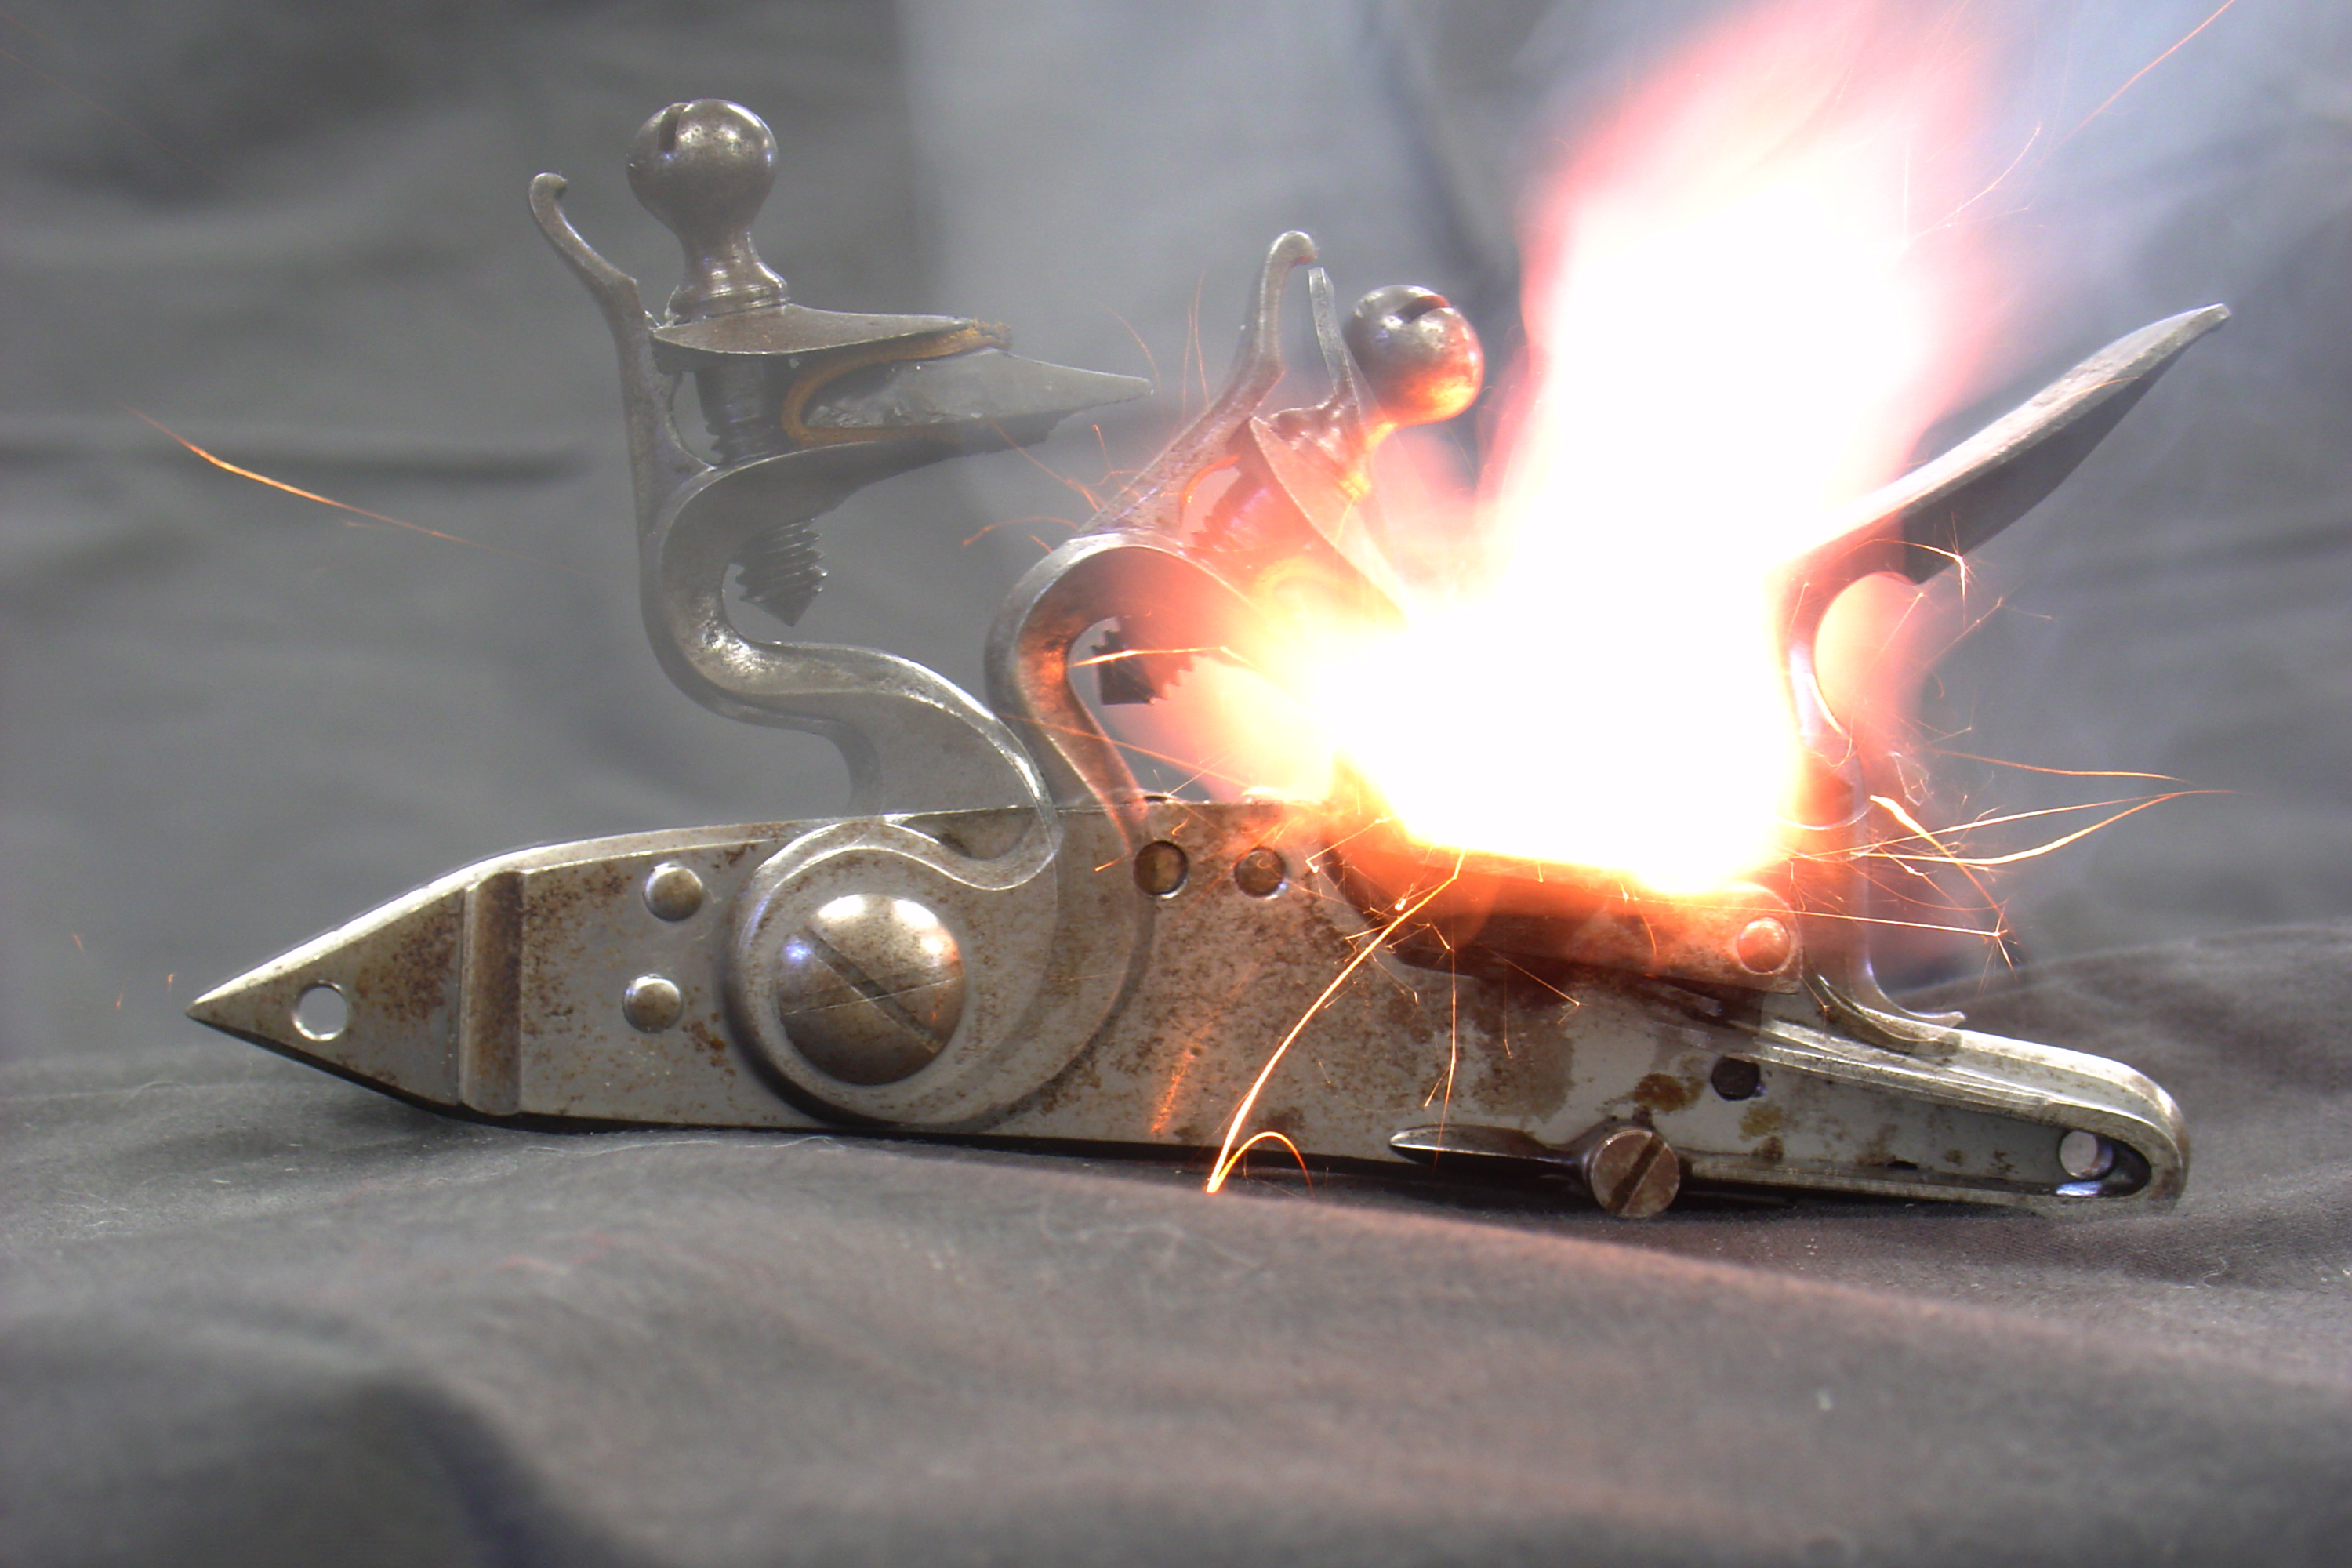
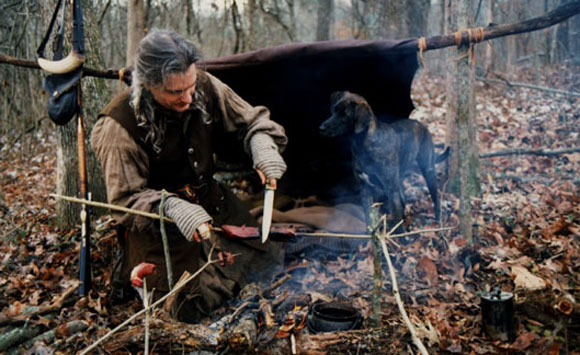
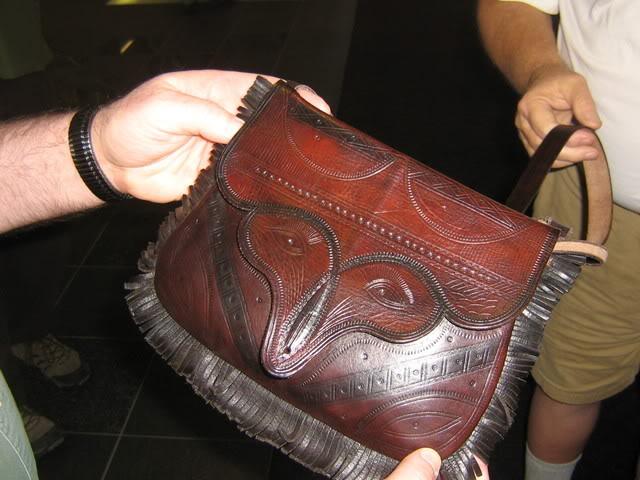
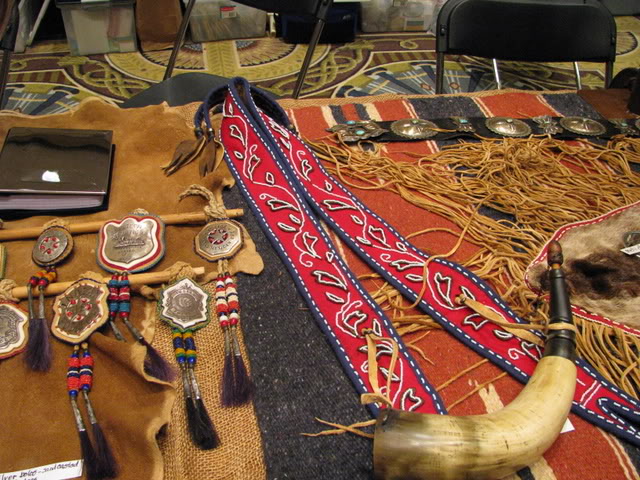
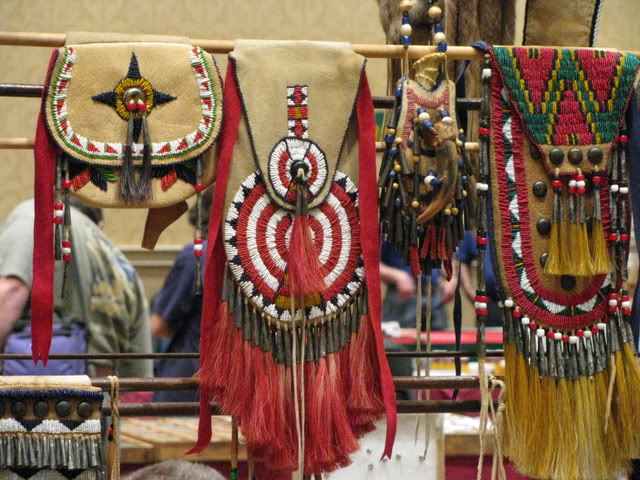
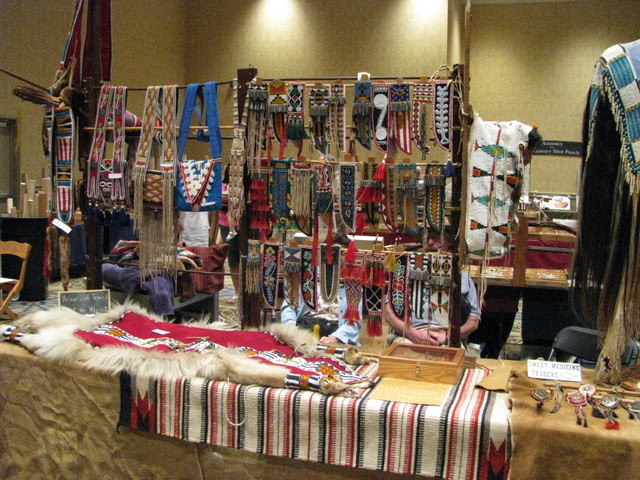
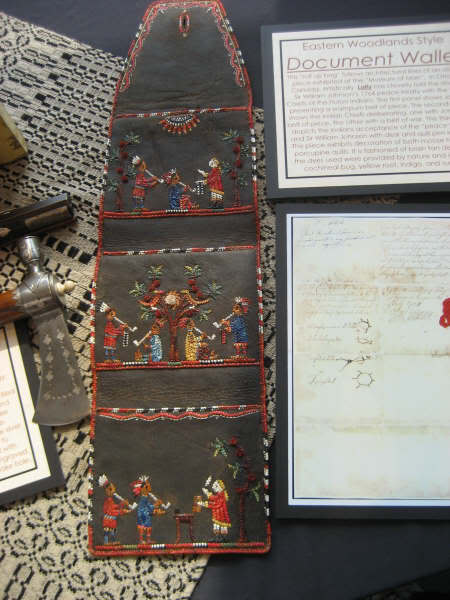
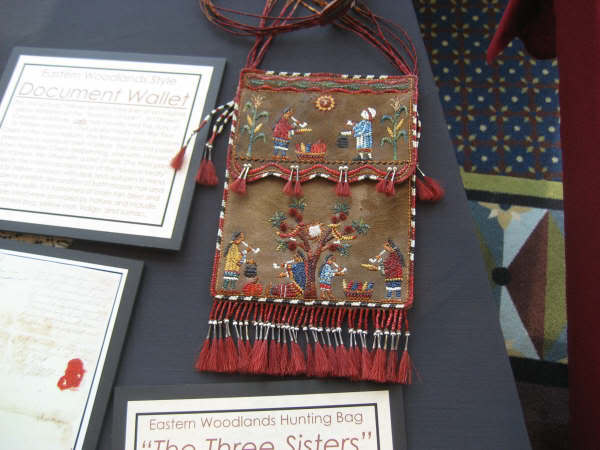
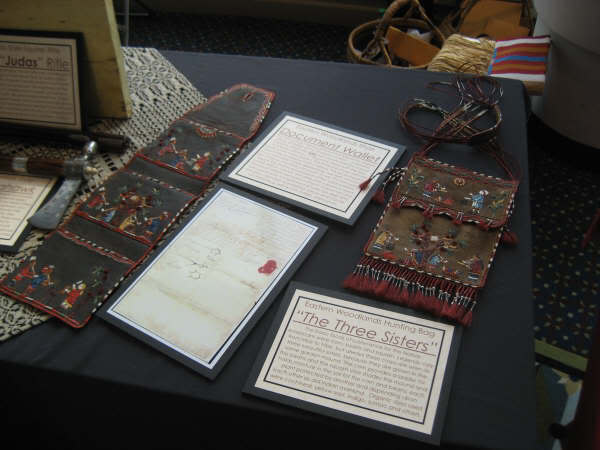
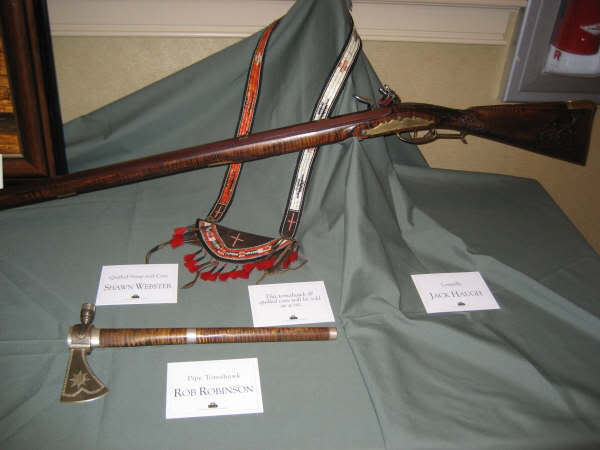
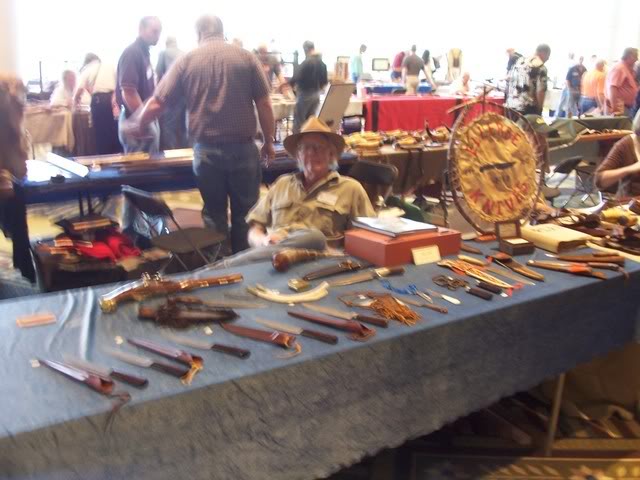
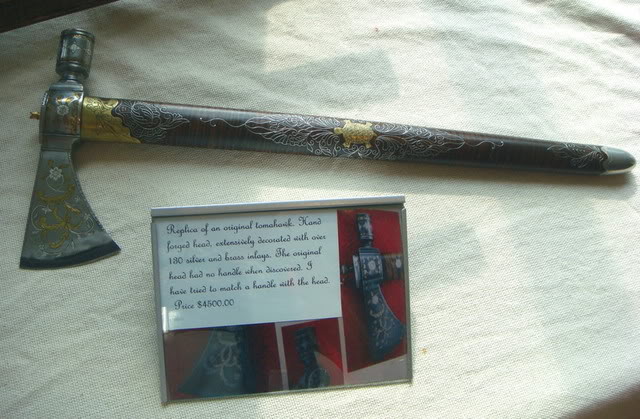
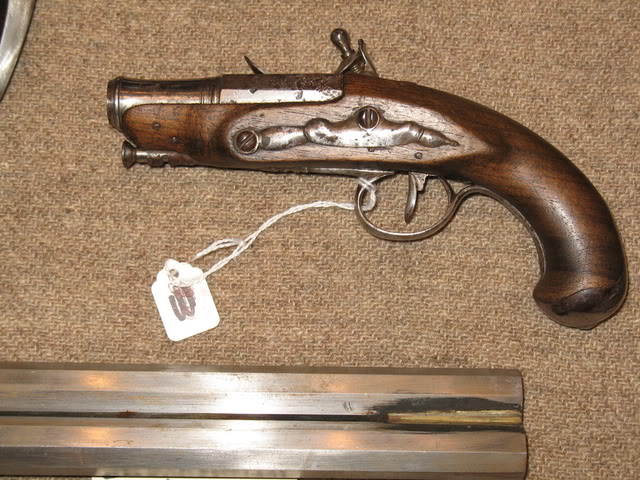
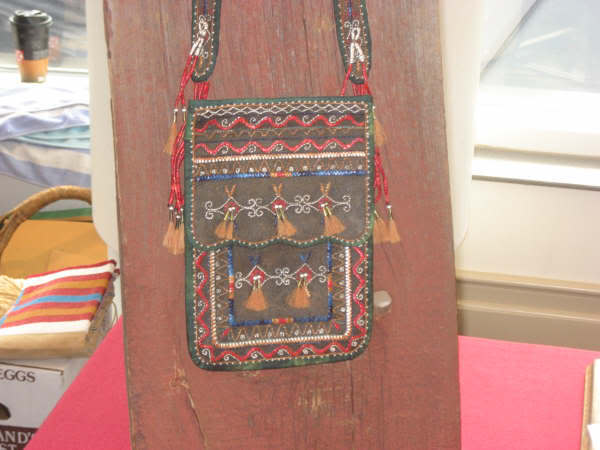
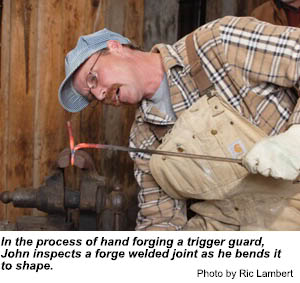
    John’s gift and interests are first building knives, then longrifles. Over the years, John has built over 100 knives, including belt knives, dirks, and neck knives. In the beginning, buggy and truck springs were used, but today he prefers using 1084 or 1095 cutlery steal because it comes soft and can be shaped and tempered nicely. John says: “We always like to do French and Indian stuff. I like to beat the metal down close because that’s how they used to do it and that means leaving a little scale in order to come up with a good style. I have made belt knives, neck knives and daggers. A knife should have texture and character—I don’t like stuff that is too shiny. I also make my own knife sheaths. That way, the buyer can wear the knife right away and not just stick it in a drawer somewhere. I like to see my knives and guns used.”
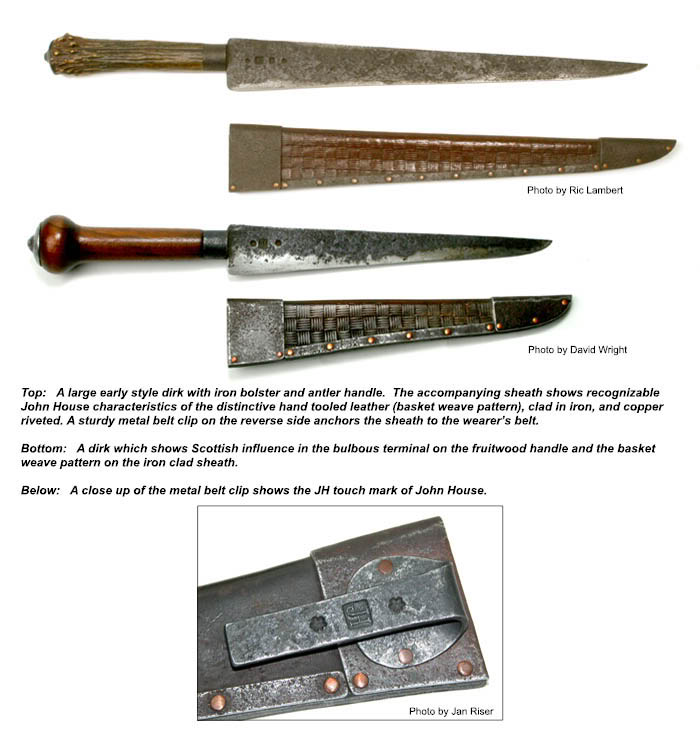
If you are looking for a historically correct longrifle or knife of heirloom quality, contact John by letter. Prices vary, but are reasonable considering the quality and historical accuracy of anything John builds. Be aware that John is an artisan who prefers to build from inspiration, so give him a general picture of what you are looking for and let him run with it—or he might even have a knife on hand you your liking! You won’t be disappointed.

    John’s Address is: PO Box 11 Woodbury, KY 42288

    About The author:

    Mark Sage fired his first muzzleloading rifle in 1979 and since then, the pursuit of understanding American history has been a one of the most powerful drivers in his life.  He enjoys muzzleloading hunting, trekking, building firearms, powder horns and accoutrements.  As an author and a public speaker on radio and television, he has spoken at a variety of venues about our early frontier history. Visit his website: www.portalsintimeinc.com

  • Shawn Webster — CLA FEATURED ARTIST

    Shawn Webster — CLA FEATURED ARTIST

    SHAWN WEBSTER: Artist and Author . . . By Paul Jones

    Photography by Ric Lambert

    Reprinted by permission of the National Muzzle Loading Rifle Association/ Muzzle Blasts magazine, February 2008. For information on the NMLRA and other black powder topics please visit the website at www.nmlra.org

    Much has been written in the past about Shawn Webster, but in recent years there have been some changes although much remains the same in the life of this talented artist and enthusiast of early American lifestyle.

    Shawn still lives in the mountains of Utah, near Cedar City, still hunts with a muzzleloader, fishes and traps in the 18th and19th century manner following in the shadows of Jim Bridger, Jedediah Smith and Joe Meek. He still tans all of his own hides for use in his work using both the bark and brain tanning methods.

    But there have been some exciting new developments for Shawn. Among other things, he has authored a chapter on 19th century beaver trapping in the Book of Buckskinning VIII, but even more ambitiously, he has published a book titled In The Image of A. J. Miller, a full color volume uniquely showcasing the art of Alfred Jacob Miller and Shawn’s recreations of the clothing shown in those paintings.

    In 1837 Baltimore artist Alfred Jacob Miller went west with an expedition headed up by the famed Scotsman, Sir William Drummond Stewart. Miller was to chronicle the trip in sketches for Stewart in order to later work his sketches into finished paintings. Miller attended the ’37 rendezvous in the Rocky Mountains and was the only artist to ever depict one of these events. During this journey Miller did a large number of drawings and paintings of the mountain men, Indians, and geographic locales he encountered. Shawn has taken a selection of Miller’s art, had well known artist frontier artist Lee Teter duplicate these works, and then faithfully recreated the clothing and accessories shown in the paintings. He has placed Miller’s subject on one page and a photo of his reproductions duplicating the painting on the facing page for comparison. It is a very interesting concept, and most useful to anyone depicting this period of frontier history.

    Notably, Shawn’s quillwork was included in a successful 2004 museum exhibit, The Art of the American Frontier at the Owensboro Museum of Fine Art (Owensboro, Kentucky), curated by Russell Young. This unique and cutting edge exhibit featured both antique art and outstanding works by 41 of today’s leading contemporary makers.

    The quality of his work steadily improves as he faithfully reproduces the techniques passed down by generations of quillworkers. But also as a creative artist, he develops new styles which express his own ideas, all the while being cognizant to preserve the traditions of the past. Shawn is well known for his exquisite quillwork and beautifully brain tanned hides, though he is interested in all forms of early American art. He is constantly seeking out new formats through which to express his art.

    One of the most demanding of these new works of art was inspired by renowned frontier artist H. David Wright. David commissioned Shawn to make a quilled coat in the style of 19th century Metis coats. Says Wright, “We wanted this to be an exceptional work of art, so Shawn and I researched Metis coats in collections throughout North America and Europe. I photographed many coats for construction techniques and quill designs and we then selected what we felt was the best of the best. Shawn beautifully incorporated all our research into a fine, beautiful work of art.”This coat was featured in the Owensboro Museum exhibit catalog with a full page color photo. It is also shown in this article. Beautifully quilled and made from six brain tanned hides smoked in two colors, the coat is truly a work of art. David has been seen wearing this fabulous coat at his gallery shows and events throughout the country. As a result, Shawn’s reputation continues to grow in many areas of the art world. According to Shawn, he is in the process of finishing another of these coats, the first one to be offered on the open market.

    Several years ago, Wright also commissioned him to make a copy of an 18th century Huron pouch that is in the Canadian Museum of Civilization in Ottawa, Canada. Wright had photographed the pouch in 1987 in preparation for article he wrote on American Indian quilled art. He made detailed photographs and obtained information about the construction techniques used in the bag by examining the original during a trip to the museum (then known as the Museum of Man). Much to Wright’s chagrin, after he commissioned Shawn to duplicate the pouch, he later learned that the pouch contained moosehair embroidery, which he had misinterpreted as quillwork. However, because Shawn’s quilling techniques are so finite, the quilled bag looks to be an exact duplicate of the original. Wright reflected that… “Shawn took the information I furnished him and faithfully reproduced it in quillwork. Because moosehair embroidery is sometimes difficult to identify from fine quillwork, I’m the one who misinterpreted the original art. Shawn did a fine job with his work and it’s almost impossible to tell the difference.” The pouch is featured in this article.

    Since pouches are one of the most practical canvases on which Native Americans placed their designs, it follows that when writing an article on an artist working in this medium, those would be one of the most common forms to illustrate. As such, we have chosen four to be illustrated here: the Huron pouch previously mentioned; a copy of an 18th century Ottawa pouch; one with a Shawnee design, and one collected by Sir John Caldwell during the American Revolution. The Ottawa pouch features the “underwater panther” design. This motif holds great spiritual meaning for Native Americans and thus many contemporary quillworkers are reluctant to recreate it. This pouch is a prime example of the work Shawn does in that it is true to its heritage, and is beautifully aged to give it that eye appeal so liked by re-enactors as well as collectors. Additionally, it is constructed and quilled in such a way as to be completely compatible with hard use. The strap is backed and the bag is lined with hand-woven linen. It is, in all ways, serviceable while maintaining that authentic, period look – a must for those living history buffs who use these works in the field.

    The third pouch we have chosen is what is generally accepted as a Shawnee design. Again, while faithfully and painstakingly maintaining authentic design our artist has recreated a product that will provide service for those who wish to use it as part of their persona in re-enacting or present a focal point for any collection of Native American art. The original which influenced this design is in a museum in Germany.

    The fourth pouch is a copy of another quilled pouch that resides in the Canadian Museum of Civilization. It was collected by Sir John Caldwell, an Irish baronet. As an officer in the British 8th Regiment of Foot, Caldwell was assigned to Niagara and Detroit between 1774 and 1780. His position demanded frequent official visits to Indian villages, and he took part in several Indian councils. It was during these trips that he amassed a superb collection of Native objects, which he took back with him to Ireland in 1780.

    Of equal importance in items of decoration to early Native Americans was the knife sheath. Whether it be made for the larger belt knife or what is termed a “neck knife”, these sheaths provided an ideal platform on which to display their art. The neck knife sheath pictured next to the Shawnee bag is of the classic Central Great Lakes design.

    The larger belt knife sheath is of Huron influence but is freely designed by Shawn. It is a belt size, 9” sheath with a stiff bark tanned liner covered with brain tan deerskin. All of the quills Shawn uses in his work are dyed with natural dyes. The knife is an English style trade knife hand-made by well known Crossville, Tennessee knife maker Tim Ridge. (More about Tim in a later article.) Also shown is a woman’s knife and sheath based on an example collected in the Upper Missouri region in the 1850s.

    Shawn is active in support of organizations that share his interests: The National Muzzleloading Rifle Association, The Contemporary Longrifle Association, the American Mountain Men and the National Rifle Association.

    Shawn Webster’s art continues to improve as he researches his subjects and applies his knowledge to his art form. He is always excited about taking on new challenges and is willing to talk about any project if you will call him at (435) 592-5090 or email him at shawnwquillwork@yahoo.com .

    Author bio: Paul Jones began his interest in living history in 1960 with Ralph Marcum and Randy Cochran, he was a charter member of the Kentucky Corps of Longrifles and began attending Friendship in 1959. His interest in contemporary makers started in the 1970’s when Dr. Glen Marsh introduced him to the work of Gary Birch and Jud Brennan. For many years he has contributed articles for publication in Muzzle Blasts and authored “From the Hands of the Master Craftsmen” for Muzzleloader magazine.

    Larry Pletcher, editor

  • Flintlock Timing, MuzzleBlasts January 1990

    Flintlock Timing, MuzzleBlasts January 1990

    [box type=”note” align=”aligncenter” ]Reprinted from MuzzleBlasts January 1990 by Larry Pletcher —- This article is the first in a series of three reprinted articles that measure a flintlock’s ability to ignite black powder. L&R’s Durs Egg and Manton locks are the subject of this article. Both performed well and provide a standard of comparison for flintlocks in future articles.[/box]

    During the past two years I have had the opportunity to measure the ignition time on a number of different flintlocks. The locks varied from superb original locks to modern day reproduction locks. Some were in mint condition, while others were somewhat used.

    The equipment that I use to time locks consists of a computer and interface made to scientifically measure time in a high school or college physics lab. It has the ability to measure times to the nearest ten thousandths of a second. The lock is fired electrically, and time is measured until a flash in the pan triggers a photoelectric cell, stopping the clock.

    The time taken by the computer interface is monitored and deducted from the lock time. The system seems to work well, and I have confidence in it.

    The Manton and Durs Egg flintlocks, made by L & R Lock Company, were used for this article, the first of a series of articles dealing with the timing of locks in current production. I received the Manton in the mail and the Durs Egg at Friendship. To my knowledge, neither lock received any special treatment beyond normal care during production.

    The locks were primed with FFFFG powder, measured with a small dipper. The flint and frizzen were cleaned after each firing. Each series of 20 trials was begun with a new flint. Flints were knapped when they became dull during the test.

    A series of 20 trials on both locks was done with the flint bevel up and again with the bevel down. I felt that most locks work better one way than the other, and I needed to report both ways. The following chart contains the results:

    Summary_flintlock_timing
    Chart of times recorded

    I found myself liking both of these locks. With flints installed to their best advantage, they worked very well. Neither lock seemed to be hard on flints. Little knapping was required while running the tests.

    The Durs Egg lock showed a preference for flints installed bevel down (up side down to most of us). Its best average was obtained in this way. Its variation was twice as small with the bevel down. Also, the standard deviation with the bevel down was half that when the bevel was up. If I were shooting a rifle with this lock, I would place the flint bevel down.

    The Manton lock had a different preference in flint installation. It performed best with the flint bevel up (right side up). However it worked quite consistently with the bevel down too. Its variation shows that it was quite uniform in its operation. I would probably shoot the Manton bevel up, but would not be at a disadvantage if the bevel were down.

    I think it’s interesting to note that the best average from each of the locks were only .0010 seconds apart. This is, of course, impossible to detect with human senses. In fact, after watching probably more than 800 trials with different locks, I cannot tell the difference between a normal time (.0390) and one twice as large (.0780). In order for me to visually detect a slow time, it has to be over .1000 seconds.

    The point of all this is that if a shooter analyses a shot and thinks to himself, “That sure was slow”, it must have been VERY slow, probably three or four times as slow as usual. Anything less than this, the shooter would not have noticed. It is also possible that a slow shot was not caused by the lock at all. I am convinced that problems with touch holes cause more “slow” shots than poor lock ignition.

    I believe that there is much to be learned about lock timing. This article just scratches the surface. In future articles I would like to study and time other locks currently available to shooters. I would be interested in ideas or study methods that others might have to extend what we know about lock ignition.

    Photo #1

    Egg1

    Shown .011 seconds after firing, the flint has just struck the frizzen. Notice the flint chips spraying off the contact area.

    Photo #2

    Egg2

    At .013 seconds the flint is nearing the bottom of the frizzen. Flint chips are still flying. Top jaw screw shadow shows where the parts will be when the lock is at rest.

    Photo #3

    Egg3

    At .015 seconds, the flint movement is almost finished. However, the frizzen has considerable travel left.

    (Standard Deviation insert)

    Standard deviation is a measure of consistency of the statistics. High standard deviations indicate large deviations from the average. The more uniform the trials are, the lower the standard deviation should be. Sixty-six percent of the times should fall within one standard deviation from the average.

    (Photo explanation)

    The photos were taken with the shutter open in a dark room. The computer fired the lock, caused a measured delay, and then fired the electronic flash. A faint shadow can be seen where the parts come to rest (top jaw screw and frizzen). The sparks are illuminated not by the flash but by their own light. They were not formed at the time the flash was fired. They show because the shutter remained open after the flash ended.

  • Priming Powder Timing

    Priming Powder Timing

    [box type=”note” align=”aligncenter” ]Reprinted from MuzzleBlasts April 2005 by Larry Pletcher —- This article is another in a series of reprinted articles that measure a flintlock’s ability to ignite black powder. This article compares ignition time of black powder varieties used for priming the flintlock pan.[/box]

    As a retired educator and a student of the flintlock, I am fascinated with what we can learn by applying technology to the field of black powder. This is another in a series of articles that uses a computer interface to experiment with our black powder hobby. The first articles (1990-1992) described experiments timing various flintlocks. Another article (2000) described the timing of touch holes. This article explores the timing of different grades of black powder used for flintlock priming.


    My initial goal was to compare priming powder. Two samples of Goex 4fg were included. The ’89 Goex sample came from the plant before the plant explosion and will be referred to as “Early Goex”. The second Goex sample, “Late Goex”, was produced after the plant was relocated.

    Two Swiss samples were included as well. These were purchased at Friendship at the fall 2004 shoot. One sample is the normal Swiss 4fg priming powder. The other sample is called Null B. This powder is reputed to be the tailings (sweepings) left from production runs of the other grades of Swiss. Finishing the test group were Goex samples of 2fg and 3fg. Because 3fg and 2fg powder are at times used as priming powder, it seemed logical to include these grades of powder as well.


    In experimentation of any kind, controlling variables is a very important responsibility. In tests involving a flintlock, this is especially difficult. In this experiment, the variable we wish to test is the powder, and it is important to control all remaining variables.

    Humidity is one of the variables which I wished to control. Since I had no means to manipulate the humidity up or down, I took a number of steps to minimize its fluctuation. These tests were completed in an insulated garage used to store antique cars. An exhaust fan was used to remove the smoke. The day for the testing was chosen with humidity in mind. I noted humidity at the beginning and end of each powder test group. The humidity was 63% when I began testing, and dropped to 48% by the time testing was complete. I felt this range was acceptable and was probably the best I could do. Without the fan, the humidity might have been more uniform, but firing a flintlock 140 times in an enclosed garage would have obvious disadvantages. The physical equipment remained the same as the apparatus used in the earlier testing. It has remained unchanged for years, but more important, it was unchanged throughout all six powder tests. The software and lock also remained unchanged throughout all testing. The lock is a large Siler that has been a workhorse in my years of testing. The Siler has been a benchmark for my work and is the lock I have tested the most.


    The variable that is the most difficult to control is the flint edge. In an ideal world the flint edge would be identical throughout all trials. In reality the edge is different on every trial. Every strike against the frizzen leaves a different edge because of the flint fragments that break off with each try. Flint shooters also recognize this problem and strive to manage it. During the testing, I took a number of steps to minimize this variable. Every powder test group was begun with a new flint. Every powder test group was begun with the lock removed and cleaned. The flint edge and frizzen were cleaned between each individual trial. The flint was knapped whenever the elapsed time or my experience made me feel it was necessary. The way powder is placed in the pan can also be a variable. However, in these tests the only concern is to provide a uniform powder area for sparks’ landing. The procedure used was to fill the pan level full. In this way, sparks from every trial have the identical bed of powder on which to land.

    The fixture that holds the lock is largely unchanged for the last 10 years. The lock is mounted in the fixture locating the sear bar directly over a 12 volt solenoid. A photo cell is mounted so that it “looks” into the pan. Both the solenoid and the photo cell are attached to the computer, using a high school physics interface. The computer program controls the firing of the solenoid, sensing the photo cell, and measuring the time in between the two. After the lock is prepared for firing, pressing the space bar on the computer fires the lock and starts the machine language timing routine. When the pan flashes, the photo cell stops the timer which reads to the nearest ten thousandths of a second.


    The times for 20 trials are recorded on a spreadsheet. The spreadsheet subtracts the time it takes for the solenoid to reach the sear. The remaining time begins as the sear is tripped and ends with pan ignition. The spreadsheet then finds the fast time, slow time, variation, average, and standard deviation. Beginning and ending humidity are noted. These stats are the basis for the article. The powders’ spreadsheets are included at the end of the article. Summary sheets and graphs were made for comparison.

    A summary of all the tests can be seen in the following Chart. In this chart you can see all trials for each powder in the order they were fired. Each powder’s average is shown at the bottom.


    The next chart shows the averages for each group as a bar graph. One can see a gradual decrease in the times of the four priming powders. Then the times increase as the fffg and ffg powders are displayed. It is worth noting that the fastest powder (Null B) also had the finest granule, and the slowest powder (ffg) had the largest granule.


    The aqua and yellow on the scattergram indicate the two Swiss powders. It should be obvious that these powders were the fastest and the most consistent of all the powders tested. The variations between fast and slow times were every small. From the experimenter’s standpoint, these powders look very good. They were so consistent that it was difficult to tell if or when the flints needed knapping. The Null B powder was marginally faster. However, any trial from one of these powders would fit nicely in the other. The slowest time in each was within .0001 of each other. Each powder has an advantage when one looks at the results closely. The Null B has the fastest average, and the Swiss 4fg has the smallest variation and standard deviation. In fact, the variation for the 4fg is astonishingly small at .0081 of a second. This very small variation gives it the edge in standard deviation also. (Standard deviation can be thought of as a measure of consistency. The more consistent the trials, the lower the standard deviation will be. Sixty-six percent of the trials should fall within one standard deviation of the average. Ninety-six percent fall within two standard deviations.)

    The red and blue represent Goex ffffg priming powder before and after their factory accident. These powders compare well together. A quick summary would be to say that the early Goex was slightly more consistent, and the late Goex was slightly faster. Both of these powders are slightly slower than the Swiss powders. About three quarters of the Goex times fall outside of the high to low interval on the Swiss chart.

    The colors violet and brown represent the Goex 3fg and 2fg powder. While these powders are not considered priming powder, both are used as prime especially in military applications where paper cartridges are used. While it is apparent that these powders are slower than the various priming powders, one also notices that they are much less consistent than the rest. The variation between fast and slow times was considerably larger.


    In comparing the 2fg and 3fg powders to each other, one can see that while the fffg Goex powder averaged faster than the 2fg Goex, it also had a big advantage in consistency. The 2fg powder had a particularly large variation due mainly to a very slow ignition in one trial. This trial seems uncharacteristic based upon the rest of the times, but is reported in the interest of accuracy. Knapping the flint produced a faster subsequent trial. The question, “Why didn’t I knap the flint one shot sooner?” is a problem for the experimenter as well as the flintlock shooter.

    When making comparisons between these powders and the priming powders, one can see that the true priming powders hold a substantial advantage. For instance, the fastest 3fg time is slower than the slowest of the Swiss times. Variations from high to low are greater as well. Drawing conclusions after the experimentation requires great care. One conclusion deals with the comparison of priming and non-priming powder. While there was a significant difference, I could not discern this difference with human senses. Friends, who report that their ignition with regular horn powder is just as fast, support this. Their ignition is slower, I believe, but we cannot detect the difference without scientific means.

    The results from timing the four priming powder samples were even closer. While this experiment can measure differences in the ignition speeds of these samples, the human eye and ear cannot tell the difference. The variations between the priming powders tested here are simply too small for human senses to detect. That said, one piece of anecdotal information was gathered this fall at Friendship. A good friend who is a rifle and horn builder from Duck River, TN, told me that he thought the new Null B powder was extremely consistent shot to shot. He is not wrong.

    At the end of my first article in 1990, I wrote, “This article just scratches the surface.” I feel the same way today. There are many things about the way black powder ignites which need more study. As an example, the humidity range that shooters encounter is far wider than the relatively narrow humidity range in this experiment. If this experiment would be repeated at either humidity extreme, the results may give us more insight about these powder samples. I am interested in any study methods that help add to our knowledge. Readers with ideas may reach me at 4595 E. Woodland Acres, Syracuse, IN 46567.

  • Flintlock Timing Part 2, MuzzleBlasts September 1992

    Flintlock Timing Part 2, MuzzleBlasts September 1992

    [box type=”note” align=”aligncenter” ]Reprinted from MuzzleBlasts September 1992 by Larry Pletcher —- This article is the second in a series of three reprinted articles that measure a flintlock’s ability to ignite black powder. R. E. Davis Company, black powder vendor in Pleasantville, Ohio provided the flintlocks used in this article.[/box]

    Most of the testing and timing of flintlocks completed at this time has been done with modern reproduction locks. Because of their value, original locks should not be subjected to an extensive number of tests. Lock makers of today can’t help wondering how their work compares with the work done during the flint era. The Journal of Historic Armsmaking Technology Vol. IV has attempted to shed some light on this subject. The originals tested in Vol. IV can now be used as a benchmark by which reproduction locks may be compared.

    The three flintlocks tested in this article were made by R.E. Davis Company in Pleasantville, Ohio. The first, the Davis Yeager lock, which has an unbridled frizzen and a fly in the tumbler, can be found on many Yeager styled reproductions. The familiar banana shaped lockplate measures 6” by 1”. The lock would look at home on early German styled arms. Its Davis catalog number is #017.

    The second lock is described by Davis as an Early Large Flintlock. It, too, is a large lock measuring 5 9/16” by 1 1/8”, and has an unbridled frizzen and a fly in the tumbler. The lock has Germanic styling and would by appropriate on transitional pieces. Its catalog number is #040.

    The third lock tested in the Twigg lock (catalog #201). This English styled lock is 5 5/8 inches long with a bridled frizzen on which a roller has been installed. A stirrup is used on the tumbler. A pronounced camming effect can be felt as the cock is drawn back with little pressure required to move from half to full cock.

    Testing was done with a measured amount of Goex 4Fg blackpowder. (The powder was stored at room temperature in a dry environment). Both flint and frizzen were cleaned between trials and flints were knapped when any noticeable change in their operation developed.

    Photo 1


    Yeager
    The Yeager illuminated by its own sparks. Notice the spark bursts at the left and upper parts of the photo. Also notice how well the sparks are directed into the pan.


    Since previous experience indicates that locks may show a preference for a particular way on installing flints, I again tested each lock with the flint bevels installed up and down. A series of 20 tests was conducted in each configuration. The complete test for each lock is in the appendix at the end of the article. The test results are summarized in the following chart:

    Fig.1

    summary
    Summary of the tests conducted

    The test summary showed that the first two locks had a preference for the flint to be installed with the bevel down. This was especially true for the Yeager. Its average, variation and standard deviation were all improved substantially with the bevel down.

    Photo 2

    Yeager
    The lock is shown .010 seconds after the sear was tripped.

    While the difference in performance was too small to be detected by human limitations, I would shoot this lock with the bevel down. My reason would be more for the improved variation than for the improvement in speed. I was very impressed with the Yeager’s variation and standard deviation.

    Photo 3

    Yeager2
    The Yeager lock .002 seconds later.

    The Early Large Flintlock was slower than the Yeager. Its average, variation and standard deviation were equal to the Yeager with the bevel up. This lock preferred the bevel down, but not to the same degree as the Yeager. I would probably shoot this lock bevel down, but I’m sure the difference would not be detected when firing. Its performance was quite satisfactory.

    In analyzing the Twigg lock, one can see that the average times were almost identical. However, positioning the bevel up brought about the best standard deviation. The lock was almost twice as consistent this way. I would shoot this lock with the bevel up to take advantage of the improved standard deviation. Because the Twigg likes a long flint, I had to make sure the flint installation did not allow the top jaw screw to hit the frizzen. I liked this lock almost as much as the Yeager.

    When shooters discuss the speeds of various locks on the market, one often hears the theory that large locks are slower than small locks because there is more mass to accelerate. While this theory may hold some truth, the Yeager looks like the exception. In spite of its size, the Yeager (with the bevel down) performed as well as a number of smaller locks I have tested. With the flint installed bevel up, its performance was slower and more nearly what I would have expected of a larger lock.

    * * *

    The accompanying photos allow another statistic to be measured. I attempted to calculate the speed of the flint as it travels down the frizzen by measuring the distance the flint traveled in photos. A proportion was set up using the following format:

    Fig .2 – Proportion used to calculate flint speeds

    Photo Frizzen Length                            Photo Flint Travel

    ————————-              as           ———————–

    Actual Frizzen Length                            Actual Flint Travel


    Fig.3  – Speeds of flint desending the frizzens of the Yeager and Twigg

    Lock:                     Upper Flint:                        Lower Flint:

    Yeager                   15.6 ft/sec                            12.1 ft/sec

    Twigg                      13.2 ft/sec                           20.7ft/sec

    The Yeager flint is apparently slowing down as it travels down the frizzen, while the Twigg’s camming effect allows it to overcome friction and actually accelerate. This did not prevent the Yeager from out-performing the Twigg both in speed and consistency, however. Apparently, raw flint speed is not the answer to lock performance. So far, I have tried to measure flint speeds on only three locks. I hope tests such as these can be substantiated by additional testing.

    I hope these lock-timing experiments will cause us to think about the factors that cause locks to perform well. Obviously, there are considerations which we have not measured and perhaps can never isolate. Maybe by experimenting with different modifications, we can identify some characteristics of successful locks. In a future article I will report on modifications done to one of the popular locks on the market.

  • Flintlock Timing Part 3, MuzzleBlasts December 1992

    Flintlock Timing Part 3, MuzzleBlasts December 1992

    [box type=”note” align=”aligncenter” ]Reprinted from MuzzleBlasts December 1992 by Larry Pletcher —- This article is the third in a series of three reprinted articles that measure a flintlock’s ability to ignite black powder. This article deals experimental Siler flintlock components from Jim Chambers, riflemaker and vendor of black powder parts.[/box]

    Most of us, at one time or another, have wondered what factors cause locks to produce good results. Obviously, there are considerations which we have not been able to measure and maybe can never isolate. In this article, I would like to look at some factors


    Photo 1: The flint is just about to begin contact with the frizzen. Two thirds of the mechanical time is complete.

    which have not yet been measured. By experimenting with different modifications, perhaps we can identify some characteristics of successful locks.

    This month’s experiment was done with the help of Jim Chambers. He supplied me with a large Siler lock with replaceable tumblers and cocks. This gave me a chance to alter one variable at a time to see what change it would make. I was provided with the following:

    		a Siler lock assembled by Mr. Chambers
    		a stock Siler tumbler 
    		a modified Siler tumbler
    		a Chambers tumbler
    		a stock Siler cock
    		a Chambers cock

    (The mainspring needed to be repositioned depending on which tumbler was installed. Mr. Chambers modified the lockplate allowing this change to be made easily).

    With these parts to use, six possible combinations could be tested. I began by testing to see which way the flint bevel should be placed to work the best. The flint installed with the bevel up provided the best performance. Each test thereafter was done this way.


    Photo 2: This photo was taken .002 seconds later than Photo 1.


    Photo 3: This photo was taken .002 seconds after the previous one. The flint fragment located just below the flint in the photo demonstrates a variable always present – a constantly changing flint edge.

    As in earlier articles, testing was done with a measured amount of Goex 4Fg powder. (The powder had been stored at room temperature in a dry environment). The flint and frizzen were cleaned between trials. Flints were knapped when any noticeable change in operation developed.

    A series of 20 trials were conducted with each possible combination. The following chart provide a summary of trials:


    An examination of the charts leads to a number of conclusions. First of all, the modified Siler tumber (test 2,4) had a pronounced camming effect as the lock was brought to full cock. In fact, one had to practice finding the half cock notch. The Chambers tumbler had a camming effect to a lesser degree; the stock Siler tumbler had none. Since the difference in results 1,2,3 were so small, the camming effect may not add a great deal to the functioning of the lock.

    The Chambers cock seems to make a difference in the speed and standard deviation in these tests. Wile the tumbler does make a small difference, the first three combinations (in both speed and standard deviation) used the Chamber cock. This

    cock had a lightly longer throw than the Siler cock. The extra length seems to be achieved by lengthening the neck; the angle of the jaws of the cock does not appear to have been changed. Whatever the difference, the Chambers cock appears to be an improvement. If I were buying a lock from Jim Chambers, I would specify the modified tumbler and Chambers cock.

    The standard deviation in each combination seems to increase as the time increases. (Tests 1 and 2 were the only ones which did not follow that pattern). The standard deviation on tests 2 and 3 were very good. They would compare favorably with most locks today.

    In June of 1990, I attended the NMLRA’s Gunsmithing Workshop & Seminar held at Northern Kentucky University. One topic discussed dealt with position of sparks when a flintlock is fired. One instructor proved to us, using ultra high speed video, that sparks from a well-made lock literally coat the pan! Photo Number 4 demonstrates this phenomenon quite well. This photo is illuminated only by sparks produced by the lock. Note that the pan is white with sparks.


    Photo 4: Taken without any flash, this photo is lit only by sparks. It is safe to say that this lock puts the sparks in the right place.

    Another spark phenomenon discussed was a secondary burst. The spark appears to fly away only to burst into three or four new sparks. This can be seen in two of the photos.

    Measurements from the photos can be used to determine the speed of the flint as it travels down the frizzen. Using photos 2 and 3, I measured the distance traveled during the .002 seconds that elapsed. I set up a proportion to convert distance to the scale of the lock. This gave a flint speed of 24.2 feet per second. By measuring other locks in the same way, perhaps we can determine how much effect flint speed has on spark production.

    As I have stated before in other articles, I think we are just scratching the surface in learning what makes locks work well. There is much to learn. As before, suggestions are welcome and may be sent to 4595 E. Woodland Acres, Syracuse, IN 46567.

  • New High Speed Video from Friendship 2009

    New High Speed Video from Friendship 2009

    Blackpowdermag.com and Olympus Industrial bring you more flintlock videos. The frame rate is 5000 fps.

    This page will be a work in progress but the videos should work. The taping was done at Gun Makers’ Hall during the Spring Nationals at Friendship. Monday June 15th was the big day. We taped 47 locks with the help of Norman Baumgartner from Olympus Industrial. Thanks Norm for all you do for us.

    All the videos we taped will eventually be included here, but for the short term we will up load a sample. There will be chances to study this collection with new playback software, allowing more new knowledge.

    Here is the first installment of large Siler locks. Six are included here with another batch of six to follow:

    Here is the second batch of six large Silers:

    Here is another batch of Chambers locks:

    Next is the first group of six L&R Locks:

    Here is the second group of L&R Locks:

    Here is a group of locks from RE Davis Lock Company:

    This last group of locks includes a huge wall gun lock, as well as an original Tower:

    The locks below are the original uploads. This a a good place to examine one lock at a time.

    This is a Custom Large Siler by LC Rice.

    Shingler Wall Gun – front side

    Shingler Wall Gun – back side with Cannon Grade

    Lisle small Siler with a bronze bushing

    This is the Everly ball bearing Siler firing Swiss Null B. Watch the lock plate do a wheelie. Jim C and I think its the lack of friction that is the cause.

    This is the workhorse Siler up-side-down firing Null B.

    This is the workhorse Siler up-side-down firing Cannon grade priming powder.

    The video is a small Siler with Zippo lighter parts installed.

    Lowell Gard installed a nipple on a small Siler percussion.

  • Jim Chambers Discusses Gun Making and the Lock Business

    Jim Chambers Discusses Gun Making and the Lock Business

    Jim Chambers has been a friend of mine for many years. I stopped in his booth and enjoyed a chat with him.

    Jim told me about his start in muzzleloading and his work with John Bivins. You’ll enjoy Jim’s story of his interview with John. He also tells about acquiring the Siler lock-making business from Bud Siler. Jim tells how the kit business actually began with ideas as far back as the Bicentennial. It was especially fun for me to hear about what Jim likes to do more than anything else in muzzleloading. It shouldn’t be a surprise.

    Visit Jim Chamber’s website www.flintlocks.com

  • Gunmaker Mike Miller Interviewed at Friendship 2006

    Gunmaker Mike Miller Interviewed at Friendship 2006

    Mike Miller Interviewed at Friendship 2006

    When I stopped by Mike’s booth there was a lot of activity. Noise from customers and shooting are in the background. As a former investigator, Mike is a far better interviewer than I am. I enjoyed his comments about his start in gunmaking and how he acquired his skills. Mike offered good advice when it comes to a customer planning to have a rifle built. He can help you develop your ideas even if you aren’t sure yourself.

    I also liked his philosophy about copying original pieces. Mike has a common sense approach to this issue. I think you will enjoy his thinking. There were a number of beautiful rifles displayed in Mike’s booth, perhaps most notable was one owned by Mark Baker of trekking fame.

    Below are some photos of a rifle Mike made for me:

    Dickert by Miller
    Dickert by Miller
    Dickert style rifle by Mike Miller
    Dickert style rifle by Mike Miller


  • Mark Silver Discusses Gun Making

    Mark Silver Discusses Gun Making

    Mark Silver discusses rifle making during the 2006 Spring Shoot.

    Friendship – Spring 2006

    I stopped by Mark’s booth just before I had to leave Friendship. I thought I had missed him. He’s another long-time friend. I was lucky enough to take one of his classes at the rifle-making Seminar.

    Mark is another of today’s makers who worked for John Bivins. Mark is on my short list of men whom I consider authorities on the flintlock. I greatly admire his work. I hope you enjoy our conversation as much as I did. We taped this conversation in a booth at Friendship where there were a few interruptions. I left them in the recording feeling that they added to the atmosphere.

    Mark Silver
    Mark Silver
    Mark Silver
    Mark Silver and I talk in his booth at Friendship

    Visit: Mark Silver’s Website

  • Mark Baker Talks About Trekking

    Mark Baker Talks About Trekking

    I’m sitting in the back of Mike Miller’s booth at Friendship. There are a bunch of fellows interested in Mike’s guns. You can hear the bench guns at the firing line, but I’m doing the interview anyway. I lucked into a chance to talk with Mark Baker. Widely known in trekking circles, Mark just happened to be there when I walked by. I couldn’t miss this chance.

    Mention trekking to black powder enthusists and the name Mark Baker is sure to come up. Mark spoke with me at the Spring Nationals in 2006. Mark’s passion for wilderness living using ways from the 1700’s is evident in this interview.

    Mark and I come from an educational background, but his knowledge of primitive ways quickly leaves me behind. I envy him all the rich experiences which he has enjoyed living in the past. I hope you find his conversation as enjoyable as I did.

  • Tom Schiffer Discusses all Things Muzzle Loading

    Tom Schiffer has been a fixture around Friendship for many years. It’s fun to hear fellows like Tom talk about the “old days” when business was conducted out of the trunks of cars.

    Tom Schiffer Interview, Friendship 2006

    I’m reminded of the fabled gun writer who wrote the book “Hell, I Was There”. Tom truely was there. In the interview Tom talks about his first muzzleloader and his experience firing the first shot. Tom also discusses the additions to shooting over the years and one of his favorites, the long range silhouettes. He mentions his friendship with Bill Roberts and Bill’s contributions to long range shooting.

  • Ron Ehlert Interview on Rifle and Horn Making

    Ron Ehlert discusses rifle and horn making with BPM.

    Rifle Maker, Ron Ehlert Interview at Friendship 2006

    Ron Ehlert is another long time friend that I met at Friendship. For the last few years Ron has shown me his progress on his German yeager project. The chiseled lock and barrel are incredible. In the interview he talked about his start in gun building, some other pet projects, and of course the yeager project. Ron is on the Board of Director of the NMLRA and talked about his views the association’s future.


  • 2008 CLA Show — ALR noon meeting

    2008 CLA Show — ALR noon meeting

    The biggest CLA show ever is now over. While the number of CLA exhibitors grew from years past, the original displays done by the Kentucky Rifle Association made an immense contribution. Following is a collection of photos from a number of sources. We hope you enjoy them.

    I decided to use a series of slide shows because of the number of photos to be included. I wish to thank those who gave permission for their photos to be used. In no particular order they are Steve ChapmanTim CrosbyChris LandisTim BooneEric FleisherPaul Kinder, and Ron Winfield aka “kyflinter”.

    It has become a tradition for members of the  American Longrifles forum to meet in the Food Court to talk and do a little “Show and Tell”.  This gallery contains photos from the ALR noon meeting.  Other galleries from the 2008 show will follow

    CLA_2008_-_ALR_06 CLA_2008_-_ALR_05 Boone_3 DSC03090 DSC03089 DSC03088 CLA_2008_-_ALR_04 CLA_2008_-_ALR_03 CLA_2008_-_ALR_02 CLA_2008_-_ALR_01 Lew_902 Lew_900 Lew_0903


  • Reaves Goehring: supplier of fine riflemaking castings

    Reaves Goehring: supplier of fine riflemaking castings

    Riflemakers look to Reaves Goehring for the best castings for their flintlocks. His care in providing the correct parts for the various schools of muzzloading makes him widely respected. Reaves tells Tom Curran some of his story. This interview takes place on July 27, 2008, at Dixon’s Gunmaker’s Fair, Kempton, PA,

    Reaves gives us a bit of background details of his life, and some of the story behind his marvelous longrifle castings. While Reaves refers to his castings as “his hobby”, I think it cannot mask the passion he feels for the longrifle. When you see his table of brass and steel castings, you know he takes his “hobby” seriously with every fiber of his being. Reaves gets incredibly fired up when talking about original guns. He loves to talk about where he bought a certain gun, unusual features of a particular gun, what he had to go through to get the patterns made, and who he has met along the way. Reaves is such a gracious and generous man, a gentleman in the truest sense of the word.

    Reaves supplies us gunbuilders with patterns taken directly off original guns, in a beautiful soft brass, for a very reasonable price. When you shop at his table for parts, he points out which guard came with a certain buttplate, yet may show you several other guards which would be appropriate for your design. He vividly remembers details of guns he has taken patterns from, and shares any information he can recall. When I go the Fair, I always stop to visit with Reaves. He like a lantern in the darkness, shedding goodwill and knowledge upon anyone who asks. I have seldom met such an enthusiastic and energetic supporter of the art of the longrifle. Thank you, Reaves Goehring.

    (Previous photos unavailable)

    BlackPowderMag wishes to thank Mr. Goehring for his interview, and to thank Tom Curran for conducting the interview for us. When I interview someone I worry about my inexperience in the interview process. Tom expressed that to me as well. I am quite confident in Tom’s interview skills. The thing I like very much about this one is that it sounds like two old friends chatting. I suspect that is actually the case. Thanks again, Acer. —–(Larry Pletcher)

    (Title Photo: Reaves at Dixon’s 2008 – Photo: Tom Curran)


  • 2008 CLA Show — general group #1

    2008 CLA Show — general group #1

    This group includes, in no particular order, photos taken by a number of ALR members.  I thank them all for their permission and support.

    DSC03091 903a IMG_0242 IMG_0241 IMG_0240 IMG_0239 IMG_0238 IMG_0237 IMG_0236 IMG_0235 IMG_0233 IMG_0231 IMG_0230 IMG_0219 IMG_0218 IMG_0217 IMG_0216 IMG_0215 IMG_0214 IMG_0213 IMG_0212 (1) IMG_0212


    IMG_0211 IMG_0210


  • 2008 CLA Show — general group #2

    2008 CLA Show — general group #2

    This group of photos are mostly from the main room.

    IMG_0198 IMG_0197 IMG_0196 IMG_0195 IMG_0194 IMG_0191 IMG_0189 IMG_0187 IMG_0186 IMG_0184 IMG_0183 IMG_0182 IMG_0181 IMG_0180 IMG_0179 IMG_0178 IMG_0177 IMG_0175 Crosby_9 Crosby_6 Crosby_5 Crosby_4 Crosby_3


  • 2008 CLA Show — general group #3

    2008 CLA Show — general group #3

    This last group has  number of ALR members and their work.

    Crosby_2 Crosby_11 Crosby_10 Crosby_1 CLA_2008_02 CLA_2008_-_Allen_2 CLA_2008_-_Allen_1 CLA_2008_-_House_5 CLA_2008_-_House_4 CLA_2008_-_House_3 CLA_2008_-_Auction_1 CLA_2008_-_Art_DeCamp_1 CLA_2008_-_Mark_12 CLA_2008_-_Mark_04 CLA_2008_-_Mark_02 CLA_2008_-_Mark_01 IMG_0234-1 Lew_912 Lew_910 Lew_908 Lew_907 KYF_9 KYF_7 KYF_6 KYF_5 KYF_4 KYF_13 KYF_12 Kinder_3 Kinder_2 Kinder_1 Kinder_4 Boone_2 Boone_1


  • 2008 CLA SHOW Horn Displays

    2008 CLA SHOW Horn Displays

    Most regional styles are represented here.


    810a 810 809 IMG_0209 IMG_0208 IMG_0206 IMG_0205 IMG_0204 IMG_0203 IMG_0202 IMG_0201 IMG_0200 IMG_0199

  • 2008 CLA Show  KRA and Originals

    2008 CLA Show KRA and Originals

    The KRA had many original horns and firearms.


    IMG_0232 IMG_0229 IMG_0228 IMG_0227 IMG_0226 Crosby_12 CLA_2008_-_House_2 CLA_2008_-_House_1 CLA_2008_-_Auction_3 CLA_2008_-_Auction_2 Lew_911 Lew_906 Lew_904 KYF_3

  • Jack Haugh — CLA FEATURED ARTISTS

    Jack Haugh — CLA FEATURED ARTISTS

    Jack T. Haugh — Fit & Finish to the Highest Degree . . . By Mel Hankla

    Photography by Ric Lambert, Mel Hankla, and David Wright

    Reprinted by permission of the National Muzzle Loading Rifle Association/ Muzzle Blasts magazine, July, 2008. For information on the NMLRA and other black powder topics please visit the website at www.nmlra.org

    Jack Theodore Haugh was born February 1931 in Lincoln Park, Michigan during The Great Depression. He came from a farming family; however his father, not wanting to work on the farm, moved north to find work in the factories. Soon after the death of his grandfather in 1933, the Family moved back to Tiffin, Seneca County, Ohio. Jack says that during his teenage years, Ohio half stock percussion rifles were abundant and that he and his friends got great pleasure out of repairing and getting them to shoot, and the first rifles he produced were of this style.

    Rather ironically, his first job was trimming trees, and just last year at 76 years old he fell out of a tree while trimming limbs and about broke his back, having to wear an aggravating turtle shell brace for several months.

    Jack and his wife Barbara were married May, 1950 in Greenup, Kentucky. In 1951 he started working at the Webster Foundry in Tiffin, Ohio and worked there for 20 years. During this time, Jack states, “I started building guns full time in 1954, and from then on I held down two jobs. I worked at the foundry during the day and came home and worked building guns to 1:00 or 2:00 o’clock in the morning, always getting up and going back to the foundry the next day…” He still embraces that work ethic to this day. Recently Jack discovered from his daughter’s research into family genealogy, that his Great-Grandfather was a blacksmith and lived just outside of Frederick, Maryland. He says this was somewhat of a surprise as his Grandfather was an educator and while he amassed and managed many acres of rich Seneca county farmland, he was by profession a professor at historic Tiffin University.

    Through the years, Jack has been most influenced by English firearms, both muzzleloading and cartridge guns. Early on Jack worked with Jim Houston and Tilton Bowden at “H & B Forge”, famous for their throwing knives and tomahawks. In order to make financial ends meet he built several rather simple, unadorned rifles and produced a cast pipe tomahawk that H&B Forge still markets today. However, his true interest was soon focused upon European firearms and finer more artistic fowlers, jaegers, and English rifles. Jack had family in Colorado and moved there in 1972 after leaving the foundry in Ohio, but in 1975 he moved from Fort Collins, Colorado to the little town of Elrod, Indiana on the ridge above Friendship, home of the National Muzzle Loading Rifle Association. Staying there only a short while, he soon moved to the town of Friendship and established his muzzle-loading career at that location. He quickly became quite a legend and his shop was a famous hang out for the best contemporary muzzleloading artists of the day. In 1982 after another short stint in Fort Collins, he moved to his current abode, 30 or so miles away in Milan, Indiana. Here he has made a name for himself as a builder of fine muzzleloading firearms, exclusive cartridge rifles, and as a restoration artist of fine European firearms.

    Becoming a Legend

    In 1976, Jack Haugh became a household name in the muzzleloading world when he along with John Bivins, assisted by Monte Mandarino and Mark Silver, produced a much publicized series of longrifles in honor and celebration of the bi-centennial of America’s independence. The odd numbered rifles were signed by Bivins and the even numbers by Haugh, and were accompanied by engraved powder horns by Tom White. These Pennsylvania styled rifles are highly sought by contemporary longrifle collectors today.

    Jack has always been known for his superior handmade locks. However about 1980, he became interested in 18th century English guns by makers such as Twigg, Manton, Durs Egg and others. At that time he decided to recreate some examples of their work. Mike Parish, long time friend and student of Jack’s sums it up, “The guns of London were fit & finished to the highest degree of ability by a team of craftsmen. Jack simply decided to re-create these masterpieces. For one man to build the lock, make the masters and cast the silver mounts, is a tremendous undertaking. Then to also, fit, finish and engrave, literally fashioning the entire piece is almost unbelievable!”

    When interviewed in 1979 by Robert Weil for his landmark book, “Contemporary Makers of Muzzle Loading Firearms”, Jack stated, “I once was a documentarion, but that is uncreative and a repetition of the same mistakes…” Remaining true to this statement throughout the years, Jack Haugh’s work has indeed shown much individualism. It has ultimately become the epitome of European styled contemporary firearms. He spearheaded the study and recreation of this style of work in today’s contemporary gunbuilding fraternity. His creations have provided the benchmark that all other work has been compared to, one often hearing the phrase, “Jack Haugh Quality” when in conversation about fine contemporary firearms. Many of today’s better known and esteemed makers consider Jack a mentor and give him credit for influencing their careers. The Contemporary Longrifle Association provides an annual venue for gunmakers to present their latest creations. There we see many interpretations of American gunmaking styles, but few artists have the talent, intuition and ability to improve upon original designs from the guilds of fine European gunmakers. Jack Haugh is such an individual.

    The Gunsmith Trade

    Haugh is well known and respected through the full spectrum of the gunsmith trade. For the last 15 years or so, he has focused on modern cartridge guns and the restoration of fine English sporting arms and is considered top in his field. When ask why he evolved away from muzzleloaders, he replied that the market was rather slim for the high art firearms that he wanted to build saying, “they just took too much time, and cost too much for most folks to afford.” Unlike many of today’s builders, Jack always felt that to be fair to the patron, to keep a log and charge by the hour was the only realistic method of putting an honest price on a particular piece of work. With exception of the barrel, he usually makes each and every part, with the lock alone often taking as much as a 150 hours of bench time. Thus at the hourly wage of $20 per hour back in the 1990’s, a finished firearm could easily reach $6,000 to $8,000 dollars. These days his wage is $30 an hour.

    During the fall and winter of 2006 Jack built his first muzzleloader in 11 years. The commission was for a pistol that would be an icon of his work, a comprehensive yet concise artistic statement of the gunsmiths’ art and craft. When closely perusing this elegant pistol, (featured on the cover) one detects influence from the noted English gunmaker John Twigg, but also readily notices that it is not a copy. The distinctive flintlock of this silver mounted pistol closely resembles one by lock maker, Thwaits of Bath, plate #104, in Neal & Black’s, “Great British Gunmakers, 1740 -1790” and is designed with a unique anti-friction link attached to the tail of the frizzen pan-cover with its base acting upon the dip in the feather-spring.

    Jack commented with his friendly chuckle, “I’d always wanted to see if I could make one of those…” All the silver mountings: guard, butt-cap, thimbles, thumb escutcheon, sculpted sideplate, were fashioned from sheet, hand chiseled and engraved by Jack. This grand pistol far and above exceeded the highest expectations of the client and will indeed serve as a definitive representation of the work of Jack Haugh thru the ages. It has become an integral component of a collection of pistols that is being assembled to stand as record of the many fine artisans working in the field today.

    A New Era

    At the 2007 annual meeting of the Contemporary Longrifle Association held in Lexington, Kentucky, Jack was recognized as one of the forerunners of the contemporary movement and was bestowed with the coveted CLA Distinguished Service Award.

    He was also honored with the presentation of an educational exhibit of his life’s work, telling his story with graphics and examples of work from the 1960’s to his most recent piece completed during the winter of 2006/2007. This experience obviously made a great impact on this humble gunsmith. He was so impressed by the overall excitement and enthusiasm of the artists and collectors of the CLA, that he approached the Board of Directors of the Contemporary Longrifle Foundation, the fund raising faction of the CLA, about a very generous donation. He wanted to build and donate a rifle, complete with hand-made lock and triggers, to be auctioned for the benefit of the organization. Stating, “I want to do something, something to help this great organization continue in its diligent support of this muzzle-loading discipline; something that will hopefully add fuel to this movement, this phenomenon in the world of the Contemporary Rifle.” He spent more than a month of bench time on the flintlock alone, and also hand made the double set triggers, one piece nose cap, thimbles, sideplate and patchbox, with a total of 550 hours invested overall in the entire project. The lines of the piece are readily recognized to be that of a rifle from the Lancaster County area of Pennsylvania, and it feels much like the work of Isaac Haines. However, it is neither a copy of any one gun nor the work of any particular maker. It’s a “Jack Haugh”, a product from his heart and his hands and will forever stand as testament to his life, his talent, and his passion. Jack told me, “I felt my age on this one”, however all who have had the opportunity to fondle this extraordinary example of contemporary art wish that even at our prime we would have had the talent and ability to produce such a fine rifle.

    Appreciation

    Speaking for the association and the whole of the longrifle culture, Jack, we want to say thank you, so very much for this exceedingly generous contribution of your life’s work and we truly honor you for all you’ve done to teach and influence us throughout the years. We look forward to the opportunity of enjoying the creativity of your passion yet to come.

    Jack turned 78 years old in February of 2009 and still has the work ethic of a seasoned European workman. He works along side his wife Barbara; known for her barrel finishes, in a wonderful shop in Milan, Indiana.

    ABOUT MEL HANKLA

    Mel Hankla is a charter member of the Contemporary Longrifle Association and a noted collector of House brothers rifles, tomahawks and knives. Hankla has worked with the Kentucky Humanities Council as a Chautauqua-Living History Character portraying Simon Kenton and George Rogers Clark since 1995. He also portrays Kentucky’s first governor, Isaac Shelby and Benjamin Franklin in other venues. A noted writer, he has contributed articles to many publications. Visit his website:www.americanhistoricservices.com

    Larry Pletcher, editor

  • Wallace Gusler Chats about Colonial Gun-making

    Wallace Gusler Chats about Colonial Gun-making

    Few men have had as large an effect on the muzzleloading sport as Wallace Gusler. To many he is the man in “the video” who makes a rifle from a skelp of iron, a plank of maple, and a bucket of scrap brass. Wallace Gusler made the video as the first full-time master of the Williamsburg Gun Shop. His influence doesn’t stop there. Since then his research and writing have added to our understanding of colonial firearms.

    I first met Wallace at the Seminars in Bowling Green in the late ’80s. I have had occasion to learn from him numerous times since then. I never stop at his booth without learning something. I had the chance to tape the panel discussion in which he participated at GunMakers’ Hall at Friendship. (Parts 1-6 of the interview are located on another page of this site.)

    As wide as Wallace’s interests are he still finds time to make beautiful guns. Some are shown in “Three Centuries of the Tradition” in which he also shared in the writing.

    I am pleased to be able to add Wallace’s interview to this site.


  • Riflemaker, Homer Dangler talks with Black Powder Mag

    Riflemaker, Homer Dangler talks with Black Powder Mag

    One cannot think of flint riflemakers without including Homer Dangler. A maker of muzzleloaders for decades, Homer is widely respected for his work. Home Dangler has been a part of Friendship for many years. He began attending Friendship when I was 10 years old. His booth has been a stop of mine since I began attending in 1977. There are always neat guns to look at and drool over. Although Homer is 82, he is still active whether it’s making fine guns, building airplanes, or flying them. Home and I sat down and recorded an interview, and we also took photos of some of his recent gun projects. The recording failed in our first try. We arranged to meet at the CLA show in Lexington in August. Our second interview was done there near the finest display of original and contemporary long rifles in the world. Included here are some of the photos we took of Homer and his work.


    Some were done at Friendship, with the last few taken at CLA.PhotobucketPhotobucketPhotobucketPhotobucketPhotobucket


  • David Price talks with Black Powder Mag

    David Price talks with Black Powder Mag

    David Price makes beautiful guns. His speciality is the Swivel Breech. In the years I have known him, I have had the chance to look at many of his guns. His work is on numerous magazine covers, at Dixons, at Friendship, and as the raffle gun for GunMakers’ Hall.


    David is man with the desire and ability of teach others what he knows. His web site,  The Flintlock Shop, has tutorials on carving and wire inlay. He teaches classes in his shop, Dixons, and at Friendship. As an example after attending one of his classes on tool sharpening, I know what “sharp” is.


    Our first try at an interview suffered from technical difficulties. Below is the interview just completed (2014 Spring Shoot).

    I spent a particularily enjoyable afternoon when David helped me with the high speed video of locks at GunMakers’ Hall. When we discussed our plans I mentioned that I thought we should use the same powder for each trial, David said, “I think the same guy should do all the priming.” And then he did just that – removing another variable in our work.

    In all of this David and I have become good friends. Besides his abilities as a gunmaker, David is a good story-teller and has a great sense of humor. And – I treasure the book he gave me containing photos of his work.


    David granted me permission to use photos from his book. Here is one I especially like.


  • Chuck Dixon Chats with Tom Curran

    Chuck Dixon Chats with Tom Curran

    Tom Curran caught Chuck Dixon in the shop and collected this interview for Black Powder Mag. Even if you know Chuck you are likely to learn more listening to the interview. (Larry Pletcher)

    I had tried to call ahead to make an appointment to meet Chuck for this interview, but I don’t believe my message got through, judging from Chuck’s reaction when I asked him if he would grant me an interview. Everyone who knows Chuck knows how willing he is to talk, but never about himself.

    Having already had these thoughts, I arrived at the shop, to find one customer being served by Chuck himself. No one else was around. When the transacton was done, and it was my turn, I stepped up to the counter and introduced myself. When I mentioned my mission, Chuck got this terrified look, and said, “Oh, no, you’d be better off talking with my son, Greg”. I told Chuck that wasn’t going to work, because this was kind of a living history, similar to Foxfire, and I wanted to hear his story. Chuck’s face lit up, and he ran over to the book section, and started piling books up on the counter. “There,” he said with a smile. “There’s the whole story.”

    I thanked him for the books and explained what I wanted was to capture his voice. By now I can see he’s cornered and doesn’t know what to do. At this point, I asked him HOW he got interested in the longrifle. That was all it took to get Chuck into his element. Please sit back and let Chuck take you on a little tour of his story. by Tom Curran

    Photobucket

    Above is the sign one sees pulling into Dixon’s. The fair started in 1983 and has been going strong since then. (Photo used with Permission)Photobucket

    (Photo – Tom Curran)

    The following is the intro of “Ten Years of Dedication”, Remembrances of Dixon’s Gunmaker’s Fair by T. E. Ames. It helps to put into words Chuck’s dedication to the Pennsylvania rifle. Used with permission.

    Photobucket

    (Photo – Tom Curran)

    Directions: If you have a fast connection, simply click on the link “Download MP3“. If you are on a dialup connection, right click the link. You will get a menu that contains “save target as”. Here you can save the audio file to your hard drive. It should then play in real time.The interview has been divided into two parts. Click on the blue link below to begin Part 1.

    Tom and Chuck took a break here. When they start Part 2, Chuck talked to Tom about conversations with Charlie Cole, a local farmer and friend. These chats, the new flintlock deer season, and the coming Bi-Centennial all resulted in Chuck’s decision to start Dixon’s Gun Shop.


    Chuck was recognized as an inductee into the NMLRA Muzzleloading Hall of Fame for 2008. He was one of two inductees this year. Congratulations, Chuck!

    Black Powder Mag also wishes to thank Tom Curran for conducting this interview. Tom’s interviews have been a valuable asset, and we understand there may be more to come. Thanks, Tom, for your contributions.

    Chuck, thanks for being a part of the interview process. I enjoyed setting up the page and hope to meet you next year at the fair.

  • Pan Vent Experiments – An Introduction

    Pan Vent Experiments – An Introduction

    [box type=”note” align=”aligncenter” ]Learning how black powder ignites in a flintlock has been a passion of mine for 20 years. In this series of tests we examine the way fire travels from the pan to the barrel. The process involves the use of camera, computers, and a physics interface. What we learn may change the way we think about flintlock tradition.[/box]

    Introduction

    This series of experiments has evolved into one of greater scope than originally intended. Earlier intentions were to examine the ignition qualities when the position of the vent hole varied up or down in relation to the pan. The methods to investigate included a computer timing procedure used to measure times from a barrel stub and lock plate with a pan attached.

    An L&R plate was chosen because the pan was attached. The plate was drilled and attached to a barrel stub with screws. The rear screw is attached to the barrel through a vertical slot in the lock plate. This allows for adjusting the height of the vent hole in relation to the plate.

    At the rear of the plate a hole was drilled to provide a pivot point so that the barrel could be rotated to vertical for loading. The barrel is two inches long but is breeched by using a plug with an octagon shape, providing the same dimensions as the barrel.

    The computer equipment used included a science interface designed for use in high school physics classes. The hardware was designed and built in the late 80’s. The computer is of similar vintage, but the combination allows measuring time intervals to the nearest 10,000th of a second.

    This photo shows the fixture holding the barrel and the photo cells positioned at the pan and muzzle.


    Pan Ignition Experiments

    The experimentation has been broken into phases. The results of each section will be used in successive testing. The plan is to learn enough to control variables for our final experiment, which will be to the measure and evaluate of different vent locations. Each of the following parts is a link to the actual experiment. Methodologies used will be discussed as well as the experiment and the results.

    Part 1 — Black Powder Ignition Characteristics

    (Powder on sheets)  This phase of testing was suggested to me by Mr. Bill Knight. Its purpose is to identify how the ignition travels across blackpowder exposed to the air as in a flint pan.

    Part 2 — Initial Pan Experiments

    (Card between barrel and pan)  The card test was designed to determine the intensity of the flame at the vent. An index card was cut and pinched between the lock plate and the barrel. The pan was primed in three different positions.

    Part 3 — Photography through the muzzle

    In this phase I wanted to see if there was a visible difference in the amount of fire traveling through the vent. I used a digital camera to photograph the fire coming through the vent as seen from the muzzle. The camera is aimed to look directly into the barrel muzzle.

    Part 4 — Priming Powder https://www.blackpowdermag.com/part-4-priming-powder-amount-by-weight/Amount by Weight

    In this part we will examine the amount of priming powder used. Weighed amounts of powder will be timed. Plans call for .5 grains, .75 grains, and 1.0 grains of swiss Null B priming powder.

    Part 5 — Timing Powder locations in Pan (Is it better to bank the powder away from the vent?)

    The technique is to use photo cells to detect pan ignition and start the time. A second photo cell detects fire at the muzzle of the 2 inch barrel and stops the clock.. The methodology for this phase needed careful thought. Informal trials yielded some times that were out of predictable bounds. I suspect they were caused by an unknown variable, perhaps fouling.

    Part 6 — Timing Vent locations (high, medium, low)

    This final test will explore the ignition speed when the location of the vent hole is varied vertically. The test will start with the vent centered on the top of the pan. Other tests will be conducted with the vent as low in the pan as one could expect to find and with the vent located well above the pan center line.

  • Part 1 — Black Powder Ignition Characteristics

    Part 1 — Black Powder Ignition Characteristics

    Black powder ignition in a flintlock pan is different than inside the barrel. Here we look at black powder ignition in open air.

    (Powder on sheets)

    This phase of testing was suggested to me by Mr. Bill Knight. He has been a valued advisor for many years. I poured a measured amount of black powder on a sheet of paper. The powder was ignited by a red hot copper wire in different locations around the pile of powder – center, right, and left. My result was the same as Mr. Knight described. When ignited in the center the burn traveled in all directions equally. In those where the powder was ignited on the edge of the powder, the fire traveled from the ignition point toward the farthest side, away from the starting point. Included here are photos showing this.

    Photo 1 — The burn radiates from the center as we would expect.

    Photo 2 — Burn marks indicate the strongest direction is to the left, away from the ignition point on the right.

    Photo 3 — Burn marks indicate the strongest direction is to the right, away from the ignition point on the left.

    The burns marks above extended well past the area where the powder was placed. In the photos where the pile was ignited to the side, the burn marks extended considerably farther than marks left on the center ignition photo. This test was done with fffg (shown here), ffg, and ffffg powder. Each size left similar burn marks. When testing the ffg powder, I laid out all three sheets of paper side by side, thinking that I would then ignite them one at a time. When I ignited the sheet with the right side ignition, the fire moving to the left was strong enough to jump to the next sheet.

    This test caused me to reconsider the long-held advice to place priming powder at the opposite end from the vent hole. This thought has been around for much longer than I have been involved in black powder. My concern is that if powder is near the outer edge of the pan, it is likely that sparks will land inboard of the powder. The experiment we just did caused me to think that the strongest part of the flame would be from the sparks across the powder- the opposite direction we want. What we desire is for the strongest flame to be at the vent end of the pan.

    Pan Vent Experiments — Introduction

    Part 2 — Initial Pan Experiments

    Part 3 — Photography Through the Muzzle

    Part 4 — Priming Powder Amount by Weight

    Part 5 — Timing Powder locations in Pan

    Part 6 — High and Low Vent Experiments


  • Part 2 — Initial Pan Experiments

    Part 2 — Initial Pan Experiments

    Burn marks on a card help us to determine the intensity of the black powder burn in the flintlock pan. This was a preliminary step to help determine how to prime the pan.

    The card test was designed to determine the intensity of the flame at the vent. An index card was cut and pinched between the lock plate and the barrel. The pan was primed in three different positions. The first was banked away from the vent as tradition suggests. The second was to place the powder in the center of the pan. In last position, the powder was placed as close to the vent as possible without touching. The powder was ignited as in the first test.

    Photo 1 shows the fixture, barrel, and the index card in place for the first test.

    Photo 2 shows the burn marks left on the index card with the priming powder banked to the outer edge of the pan.

    Photo 3 shows the burn marks left on the index card with the priming powder placed in the center of the pan.

    Photo 4 shows the burn marks left on the index card with the priming powder placed in the pan as close to the vent as possible without covering the vent.

    From the first two experiments I am beginning to conclude that is might be best to prime closer to the vent. The next test was designed to gather more information about this possibility.

    Pan Vent Experiments — Introduction

    Part 1 — Black Powder Ignition Characteristics

    Part 3 — Photography through the muzzle

    Part 4 — Priming Powder Amount by Weight

    Part 5 — Timing Powder locations in Pan

    Part 6 — High and Low Vent Experiments


  • Part 3 — Photography through the Muzzle

    Part 3 — Photography through the Muzzle

    Comparing the strength of the black powder burn by looking through the barrel muzzle. Here we see that where the black powder is placed in a flintlock pan is crucial.

    In this phase I used a digital camera to photograph the fire coming through the vent. The barrel is mounted on a fixture and the camera installed on the tripod. Height was adjusted until the camera looked directly into the muzzle. In this position the barrel in centered in the camera and the pan is to the left. On the right side of the barrel directly opposite the vent is a cleanout hole. (The cleanout is important as you view the photos.)

    The pan was primed with .5 grain of Swiss Null B priming powder in three pan positions: banked to the outside, close to the vent, and as close as possible without blocking the vent. The pan powder was carefully positioned using a pencil with a round eraser. Since the eraser was the same shape as the pan bottom, this worked very well.

    The camera was set to have the shutter open for 4 seconds. Once the pan was primed, the procedure was to fire the camera and then ignite the pan. The pan was ignited as earlier with a red hot copper wire. (There is NO barrel powder used until the last phase.)

    Photo 1 shows the muzzle shot taken with .5 gr of Swiss Null B priming powder banked away from the vent.

    Photo 2 shows the muzzle shot taken with .5 gr of Swiss Null B priming powder positioned close to the vent.

    Photo 3 shows the muzzle shot taken with .5 gr of Swiss Null B priming powder positioned as close to the vent as possible without covering it.

    Examination of the photos add evidence for stronger ignition with closer placement of the pan powder. Comparing the photos showing the close position and the “banked away” position shows a clearly stronger fire in the barrel and also traveling through the cleanout hole on the far side. While evidence continues to support a close priming of the pan, only timing of the positions will provide conclusive proof. That comes next.

    Pan Vent Experiments — Introduction

    Part 1 — Black Powder Ignition Characteristics

    Part 2 — Initial Pan Experiments

    Part 4 — Priming Powder Amount by Weight

    Part 5 — Timing Powder locations in Pan

    Part 6 — High and Low Vent Experiments

  • Part 4 — Priming Powder Amount by Weight

    Part 4 — Priming Powder Amount by Weight

    Determining the amount of black powder to be used in testing. Since flintlock pans are of different size, I felt that this was a necessary step in our process.

    In this phase of testing I timed different amounts of priming powder. Ten amounts each of .5 grains, .75 grains, and 1.0 grains of Swiss Null B priming powder were weighed to the nearest tenth of a grain. These were timed in the fixture to see if varying the amount of prime affects the speed or consistency.

    The fixture allowed the barrel to be rotated to vertical to load 15 grains of Swiss fffg for the barrel powder. The barrel was then rotated to level and the pan primed. Photo cells were checked to make sure they are pointed at the pan and the muzzle. The last step was to make sure the computer was ready. The pan was ignited with a hot copper wire and the readings recorded. The barrel was wiped between trials.

    Photos of the fixture are shown below.

    These two fixture photos also show the range of movement that can be used to test the location of the vent hole in relation to the pan. The top photo shows the hole in it’s lowest location, while the bottom photo shows highest location. For all tests so far, the vent hole has been centered on a line level with the top of the pan.

    The graph below shows the trials with the three different priming powder amounts:

    In evaluating the results of this test, I found Joe Sharber to be of great help. Joe, a fellow blackpowder fan with statistical experience, provided help with the number crunching. He pointed out that there is no statistically significant difference in the average ignition times. However he also noted that the variability or standard deviation was statistically significant.

    Joe suggested that the term “Coefficient of Variation” * may be of value as a measure of consistency. The CV listed in the chart helps to show the advantage in consistency of the trials done with .75 grain priming powder. Because of this .75 grain will be the powder amount used in future tests.

    * Coeficient of Variation is defined as 100 x (standard deviation divided by the mean). It is given as a percent. My thanks to Mr. Sharber for his assistance.

    Pan Vent Experiments — Introduction

    Part 1 — Black Powder Ignition Characteristics

    Part 2 — Initial Pan Experiments

    Part 3 — Photography through the muzzle


    Part 5 — Timing Powder locations in Pan

    Part 6 — High and Low Vent Experiments