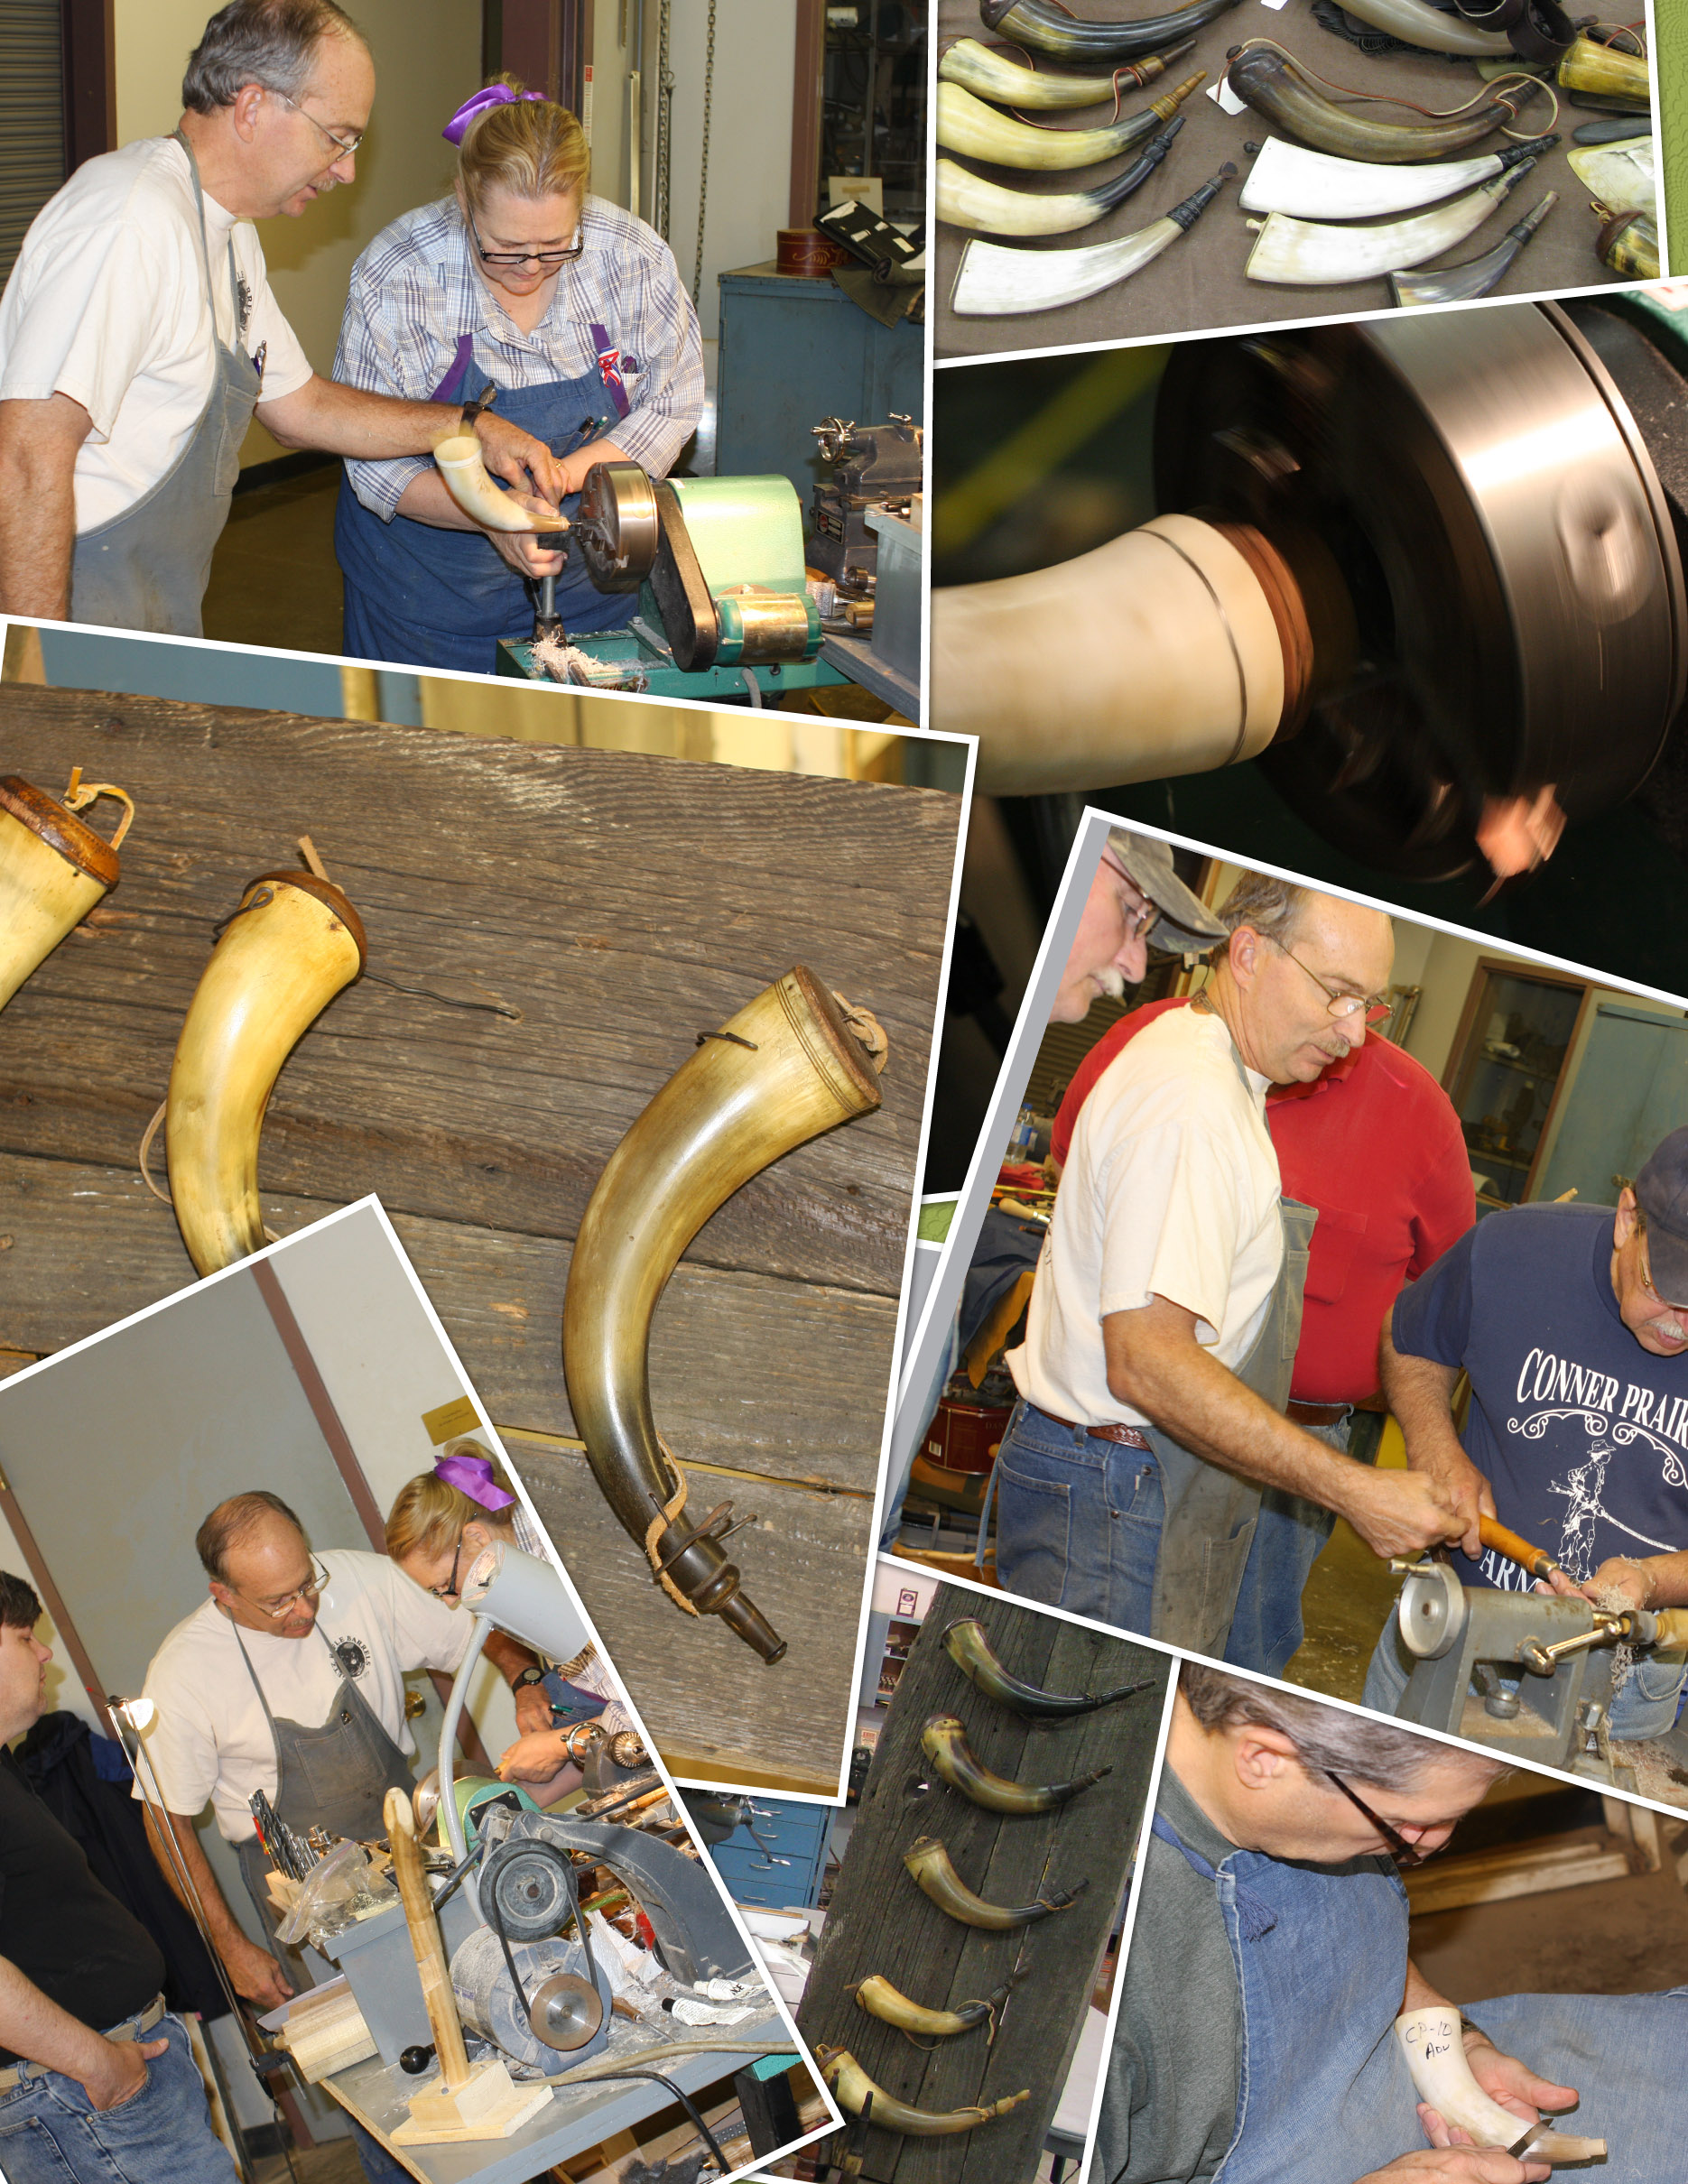
Conner Prairie 21st Annual Art and Arms Making Workshop
Larry Pletcher, Editor — Photo Credit: Steve Chapman, Larry Pletcher


(Use your “back” button to return to the article.)
Conner Prairie 21st Annual Art and Arms Making Workshop
Larry Pletcher, Editor — Photo Credit: Steve Chapman, Larry Pletcher
(Use your “back” button to return to the article.)
Larry Pletcher, Editor — Photo Credit: Steve Chapman, Larry Pletcher


(Use your “back” button to return to the article.)

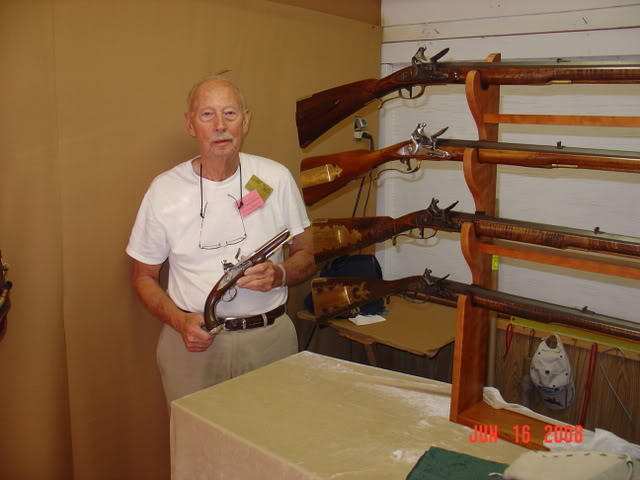
Conner Prairie 21st Annual Art and Arms Making Workshop
Larry Pletcher, Editor — Photo Credit: Steve Chapman, Larry Pletcher


(Use your “back” button to return to the article.)
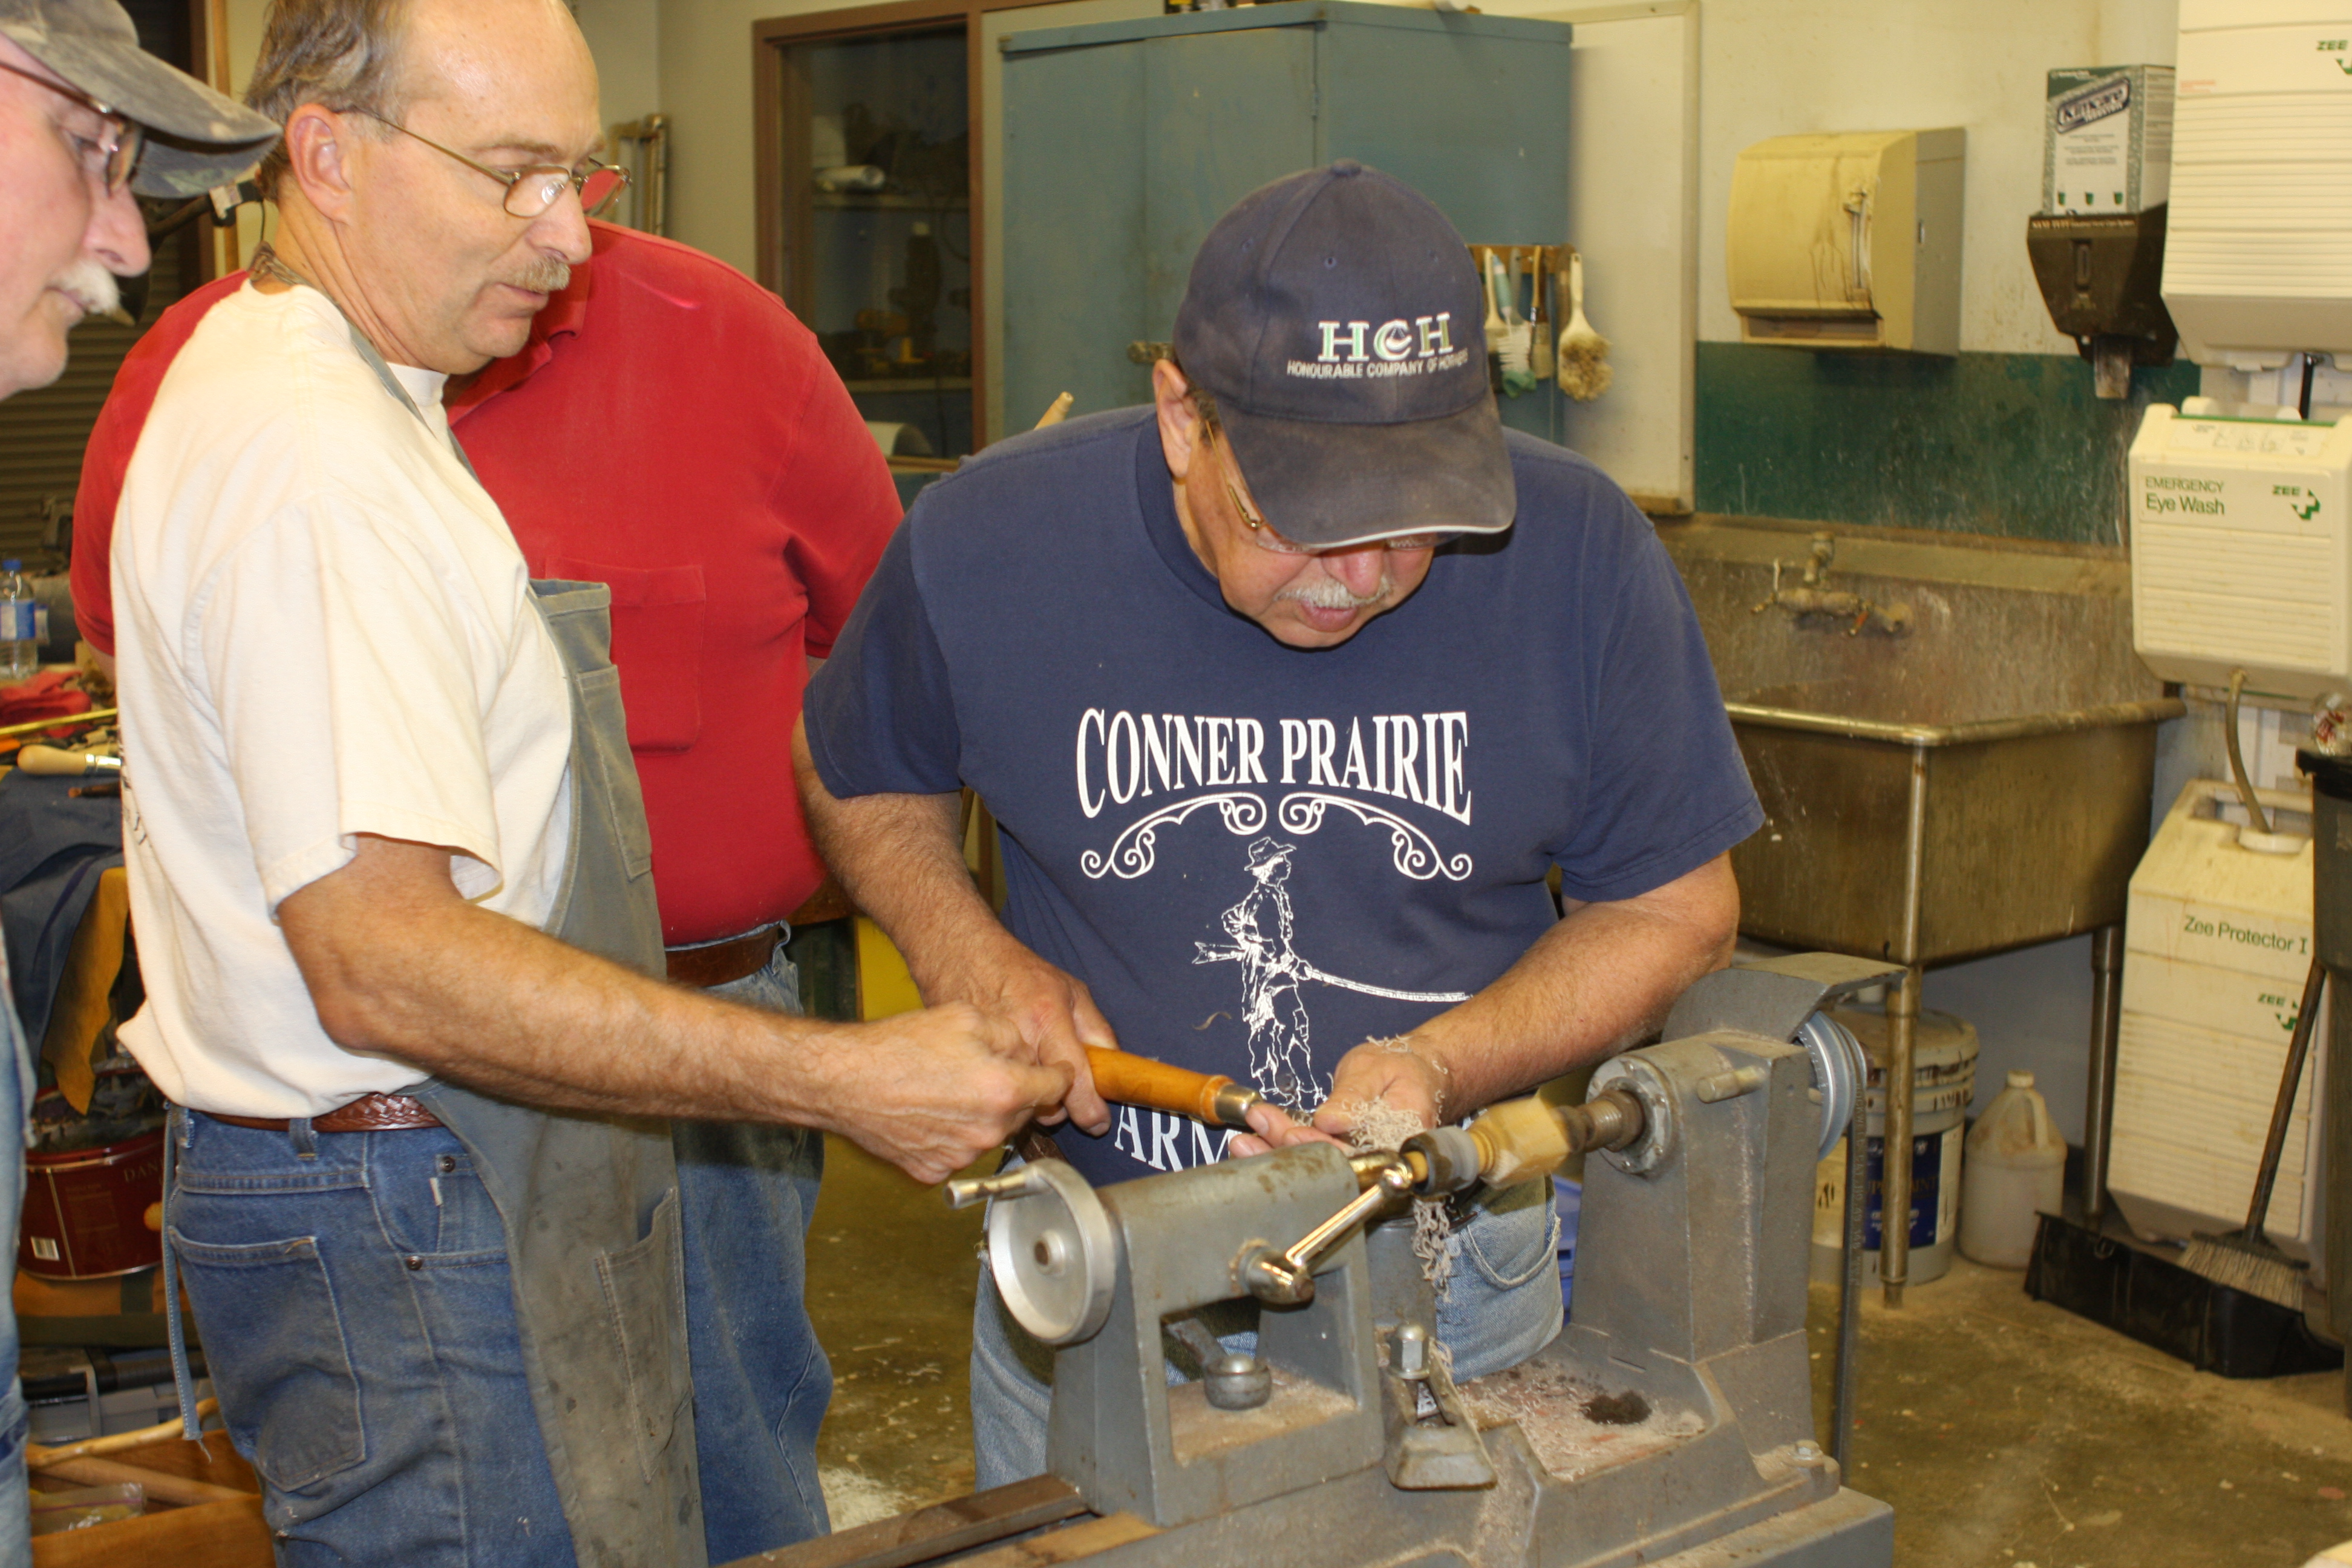
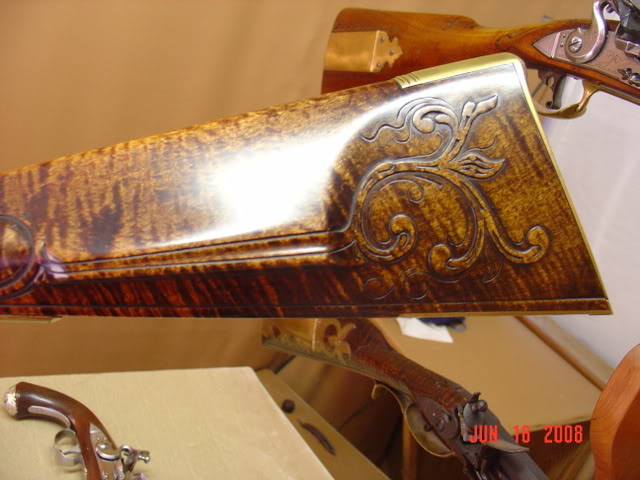
Conner Prairie 21st Annual Art and Arms Making Workshop
Larry Pletcher, Editor — Photo Credit: Steve Chapman, Larry Pletcher


(Use your “back” button to return to the article.)

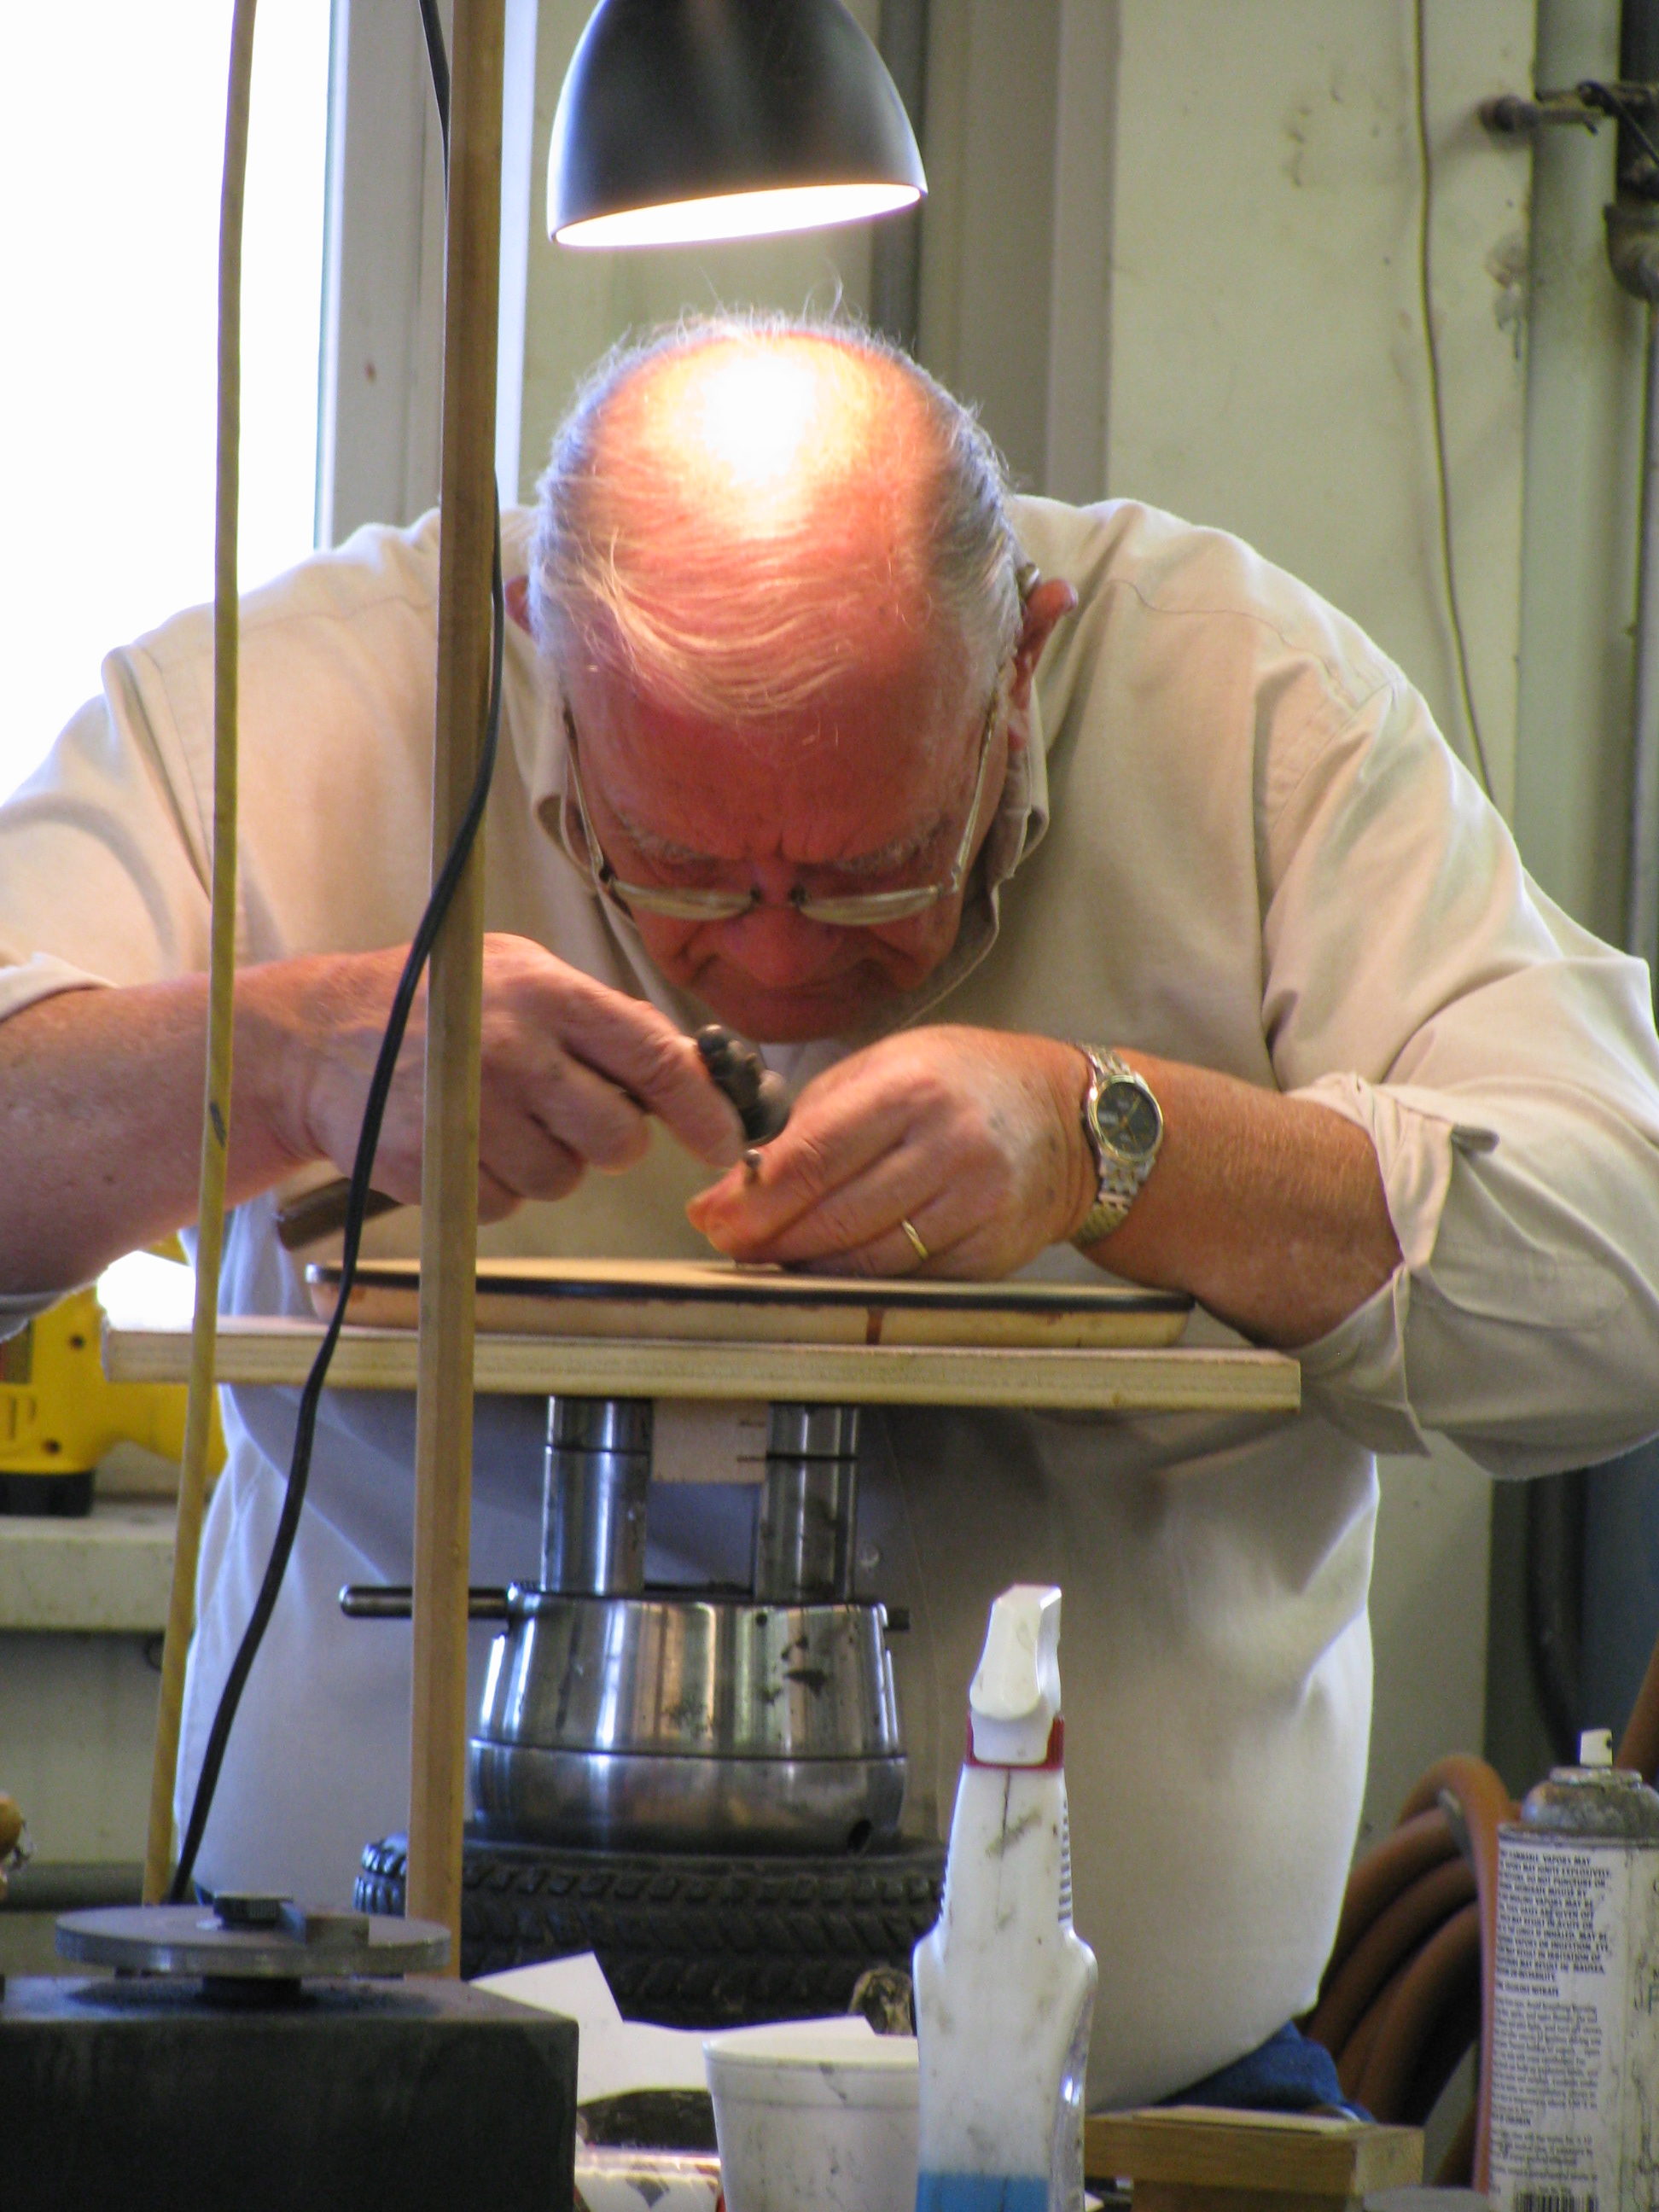
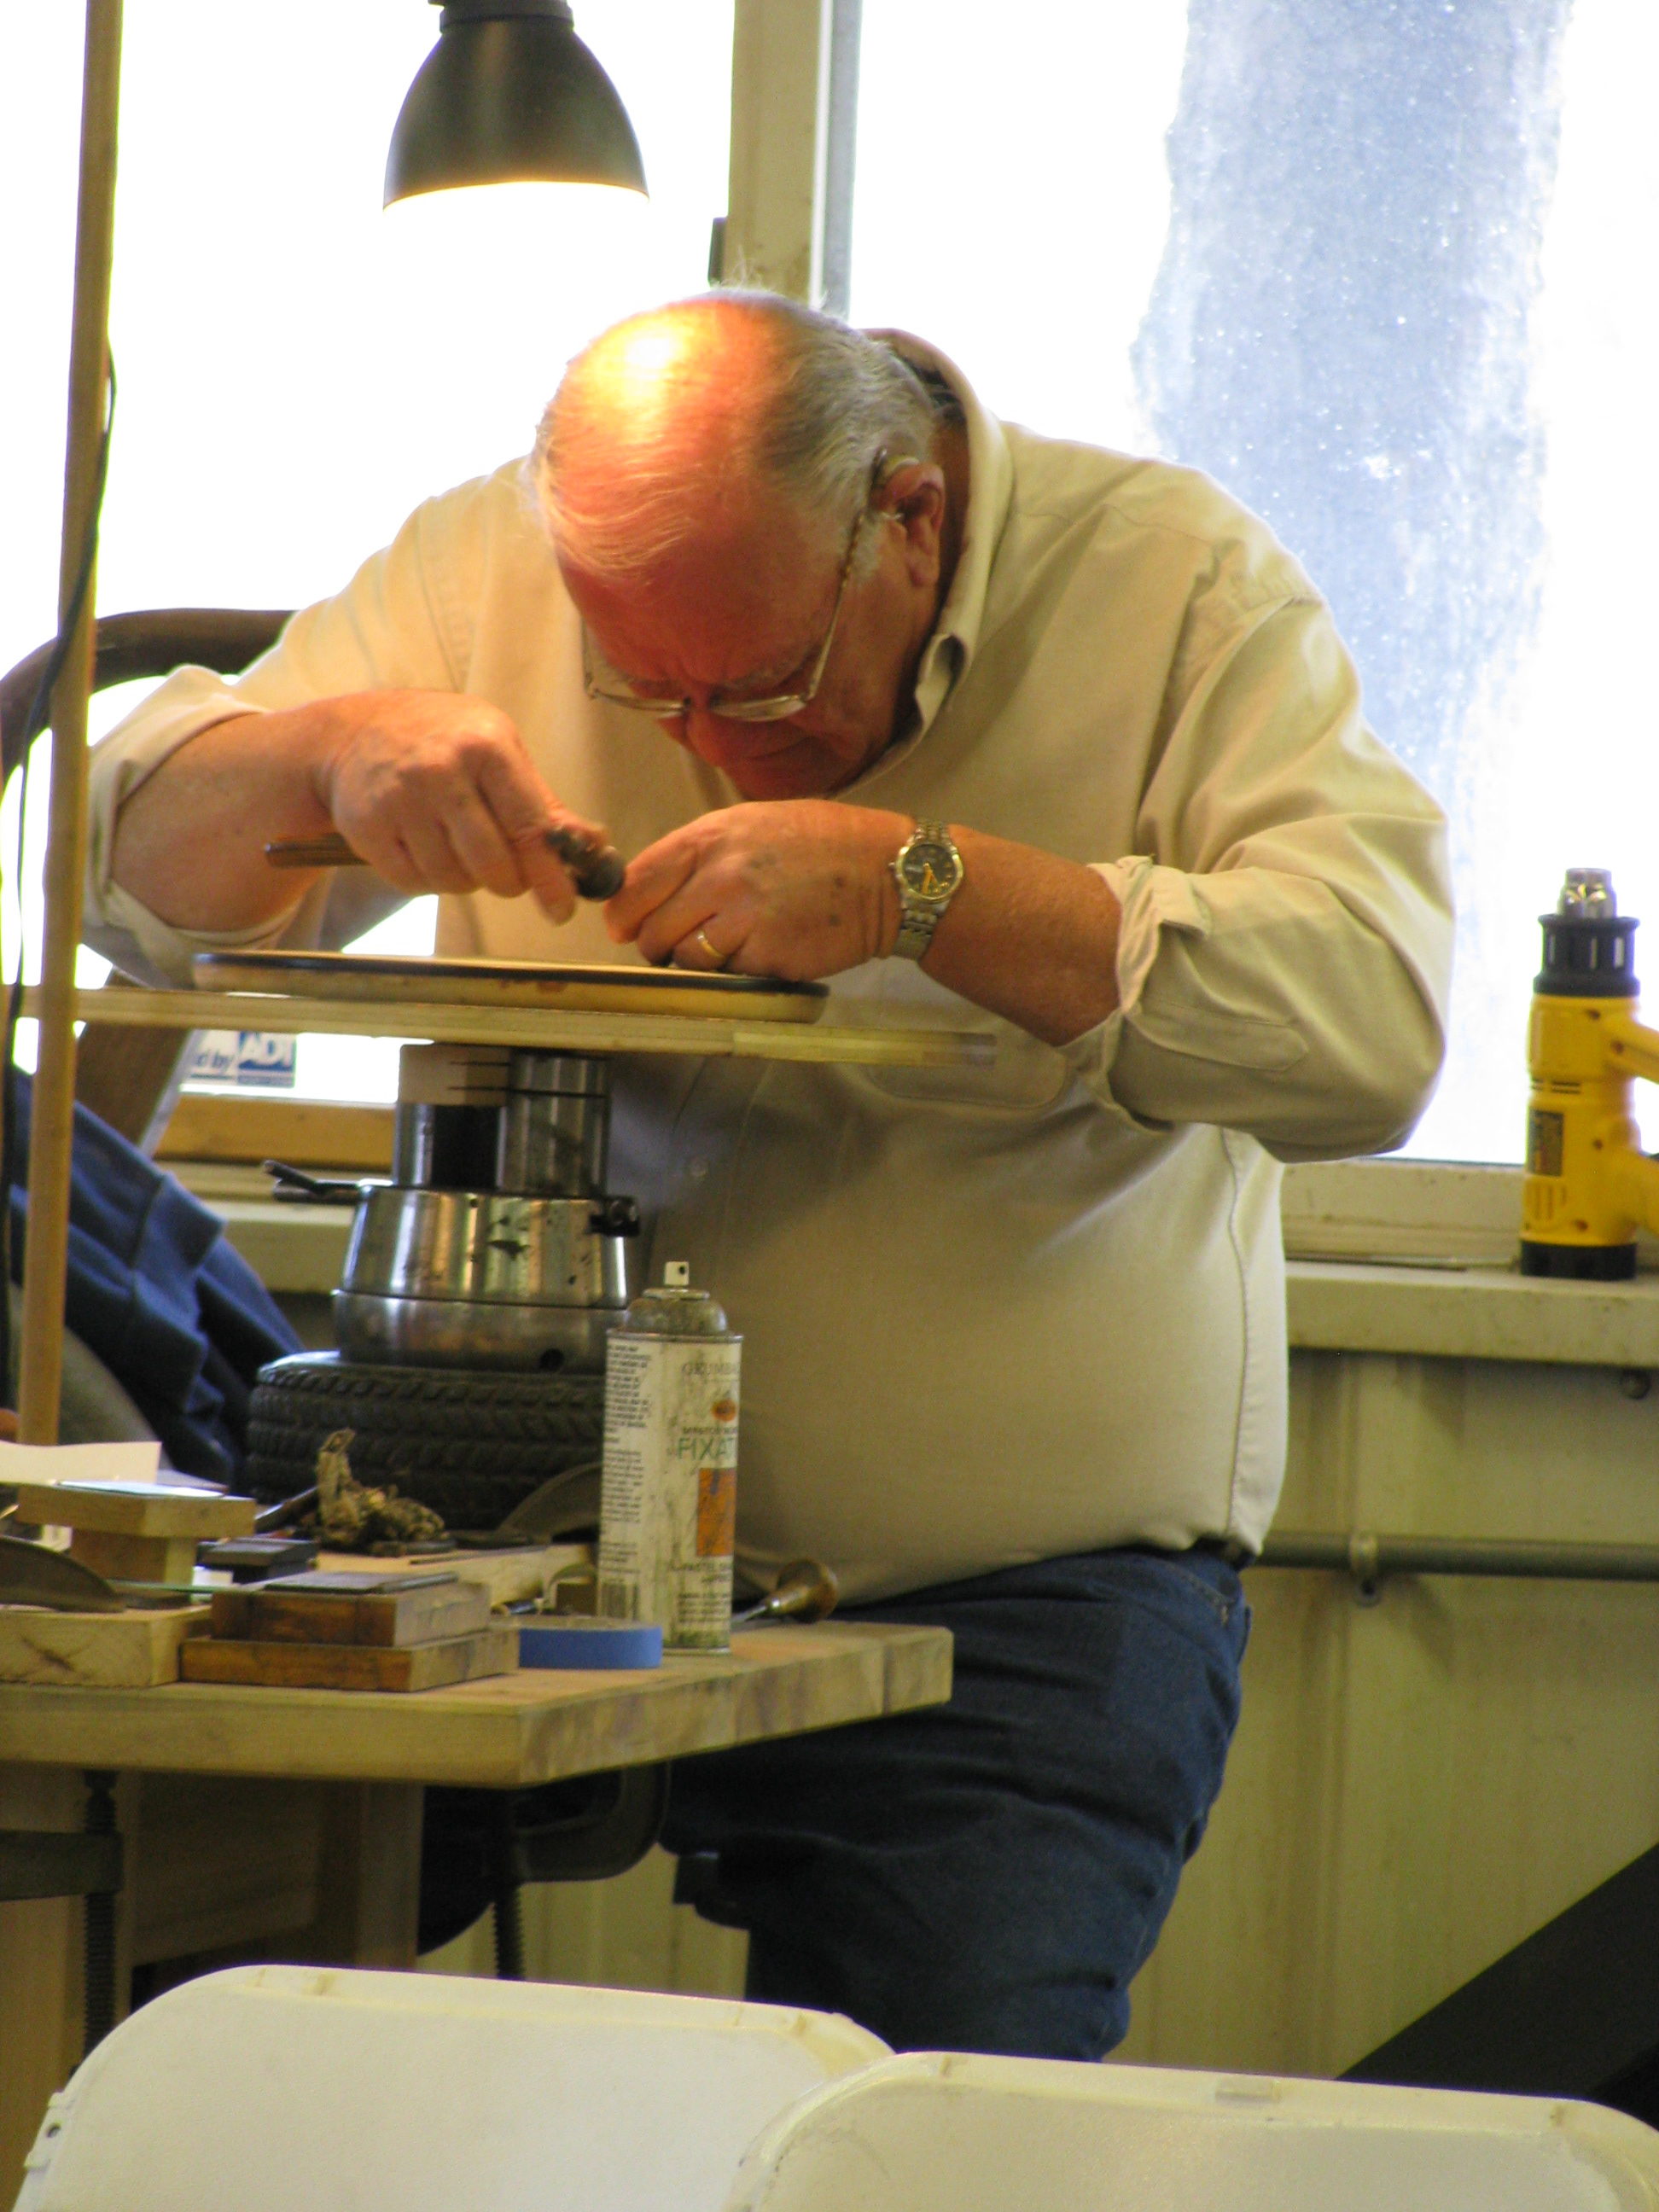
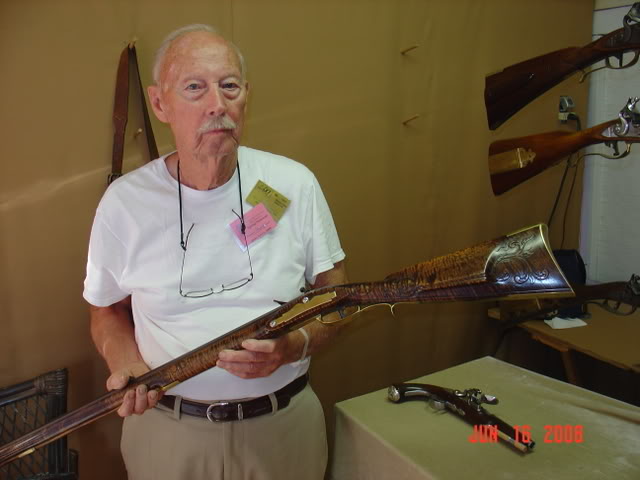
Conner Prairie 21st Annual Art and Arms Making Workshop
Larry Pletcher, Editor — Photo Credit: Steve Chapman, Larry Pletcher
(Use your “back” button to return to the article.)
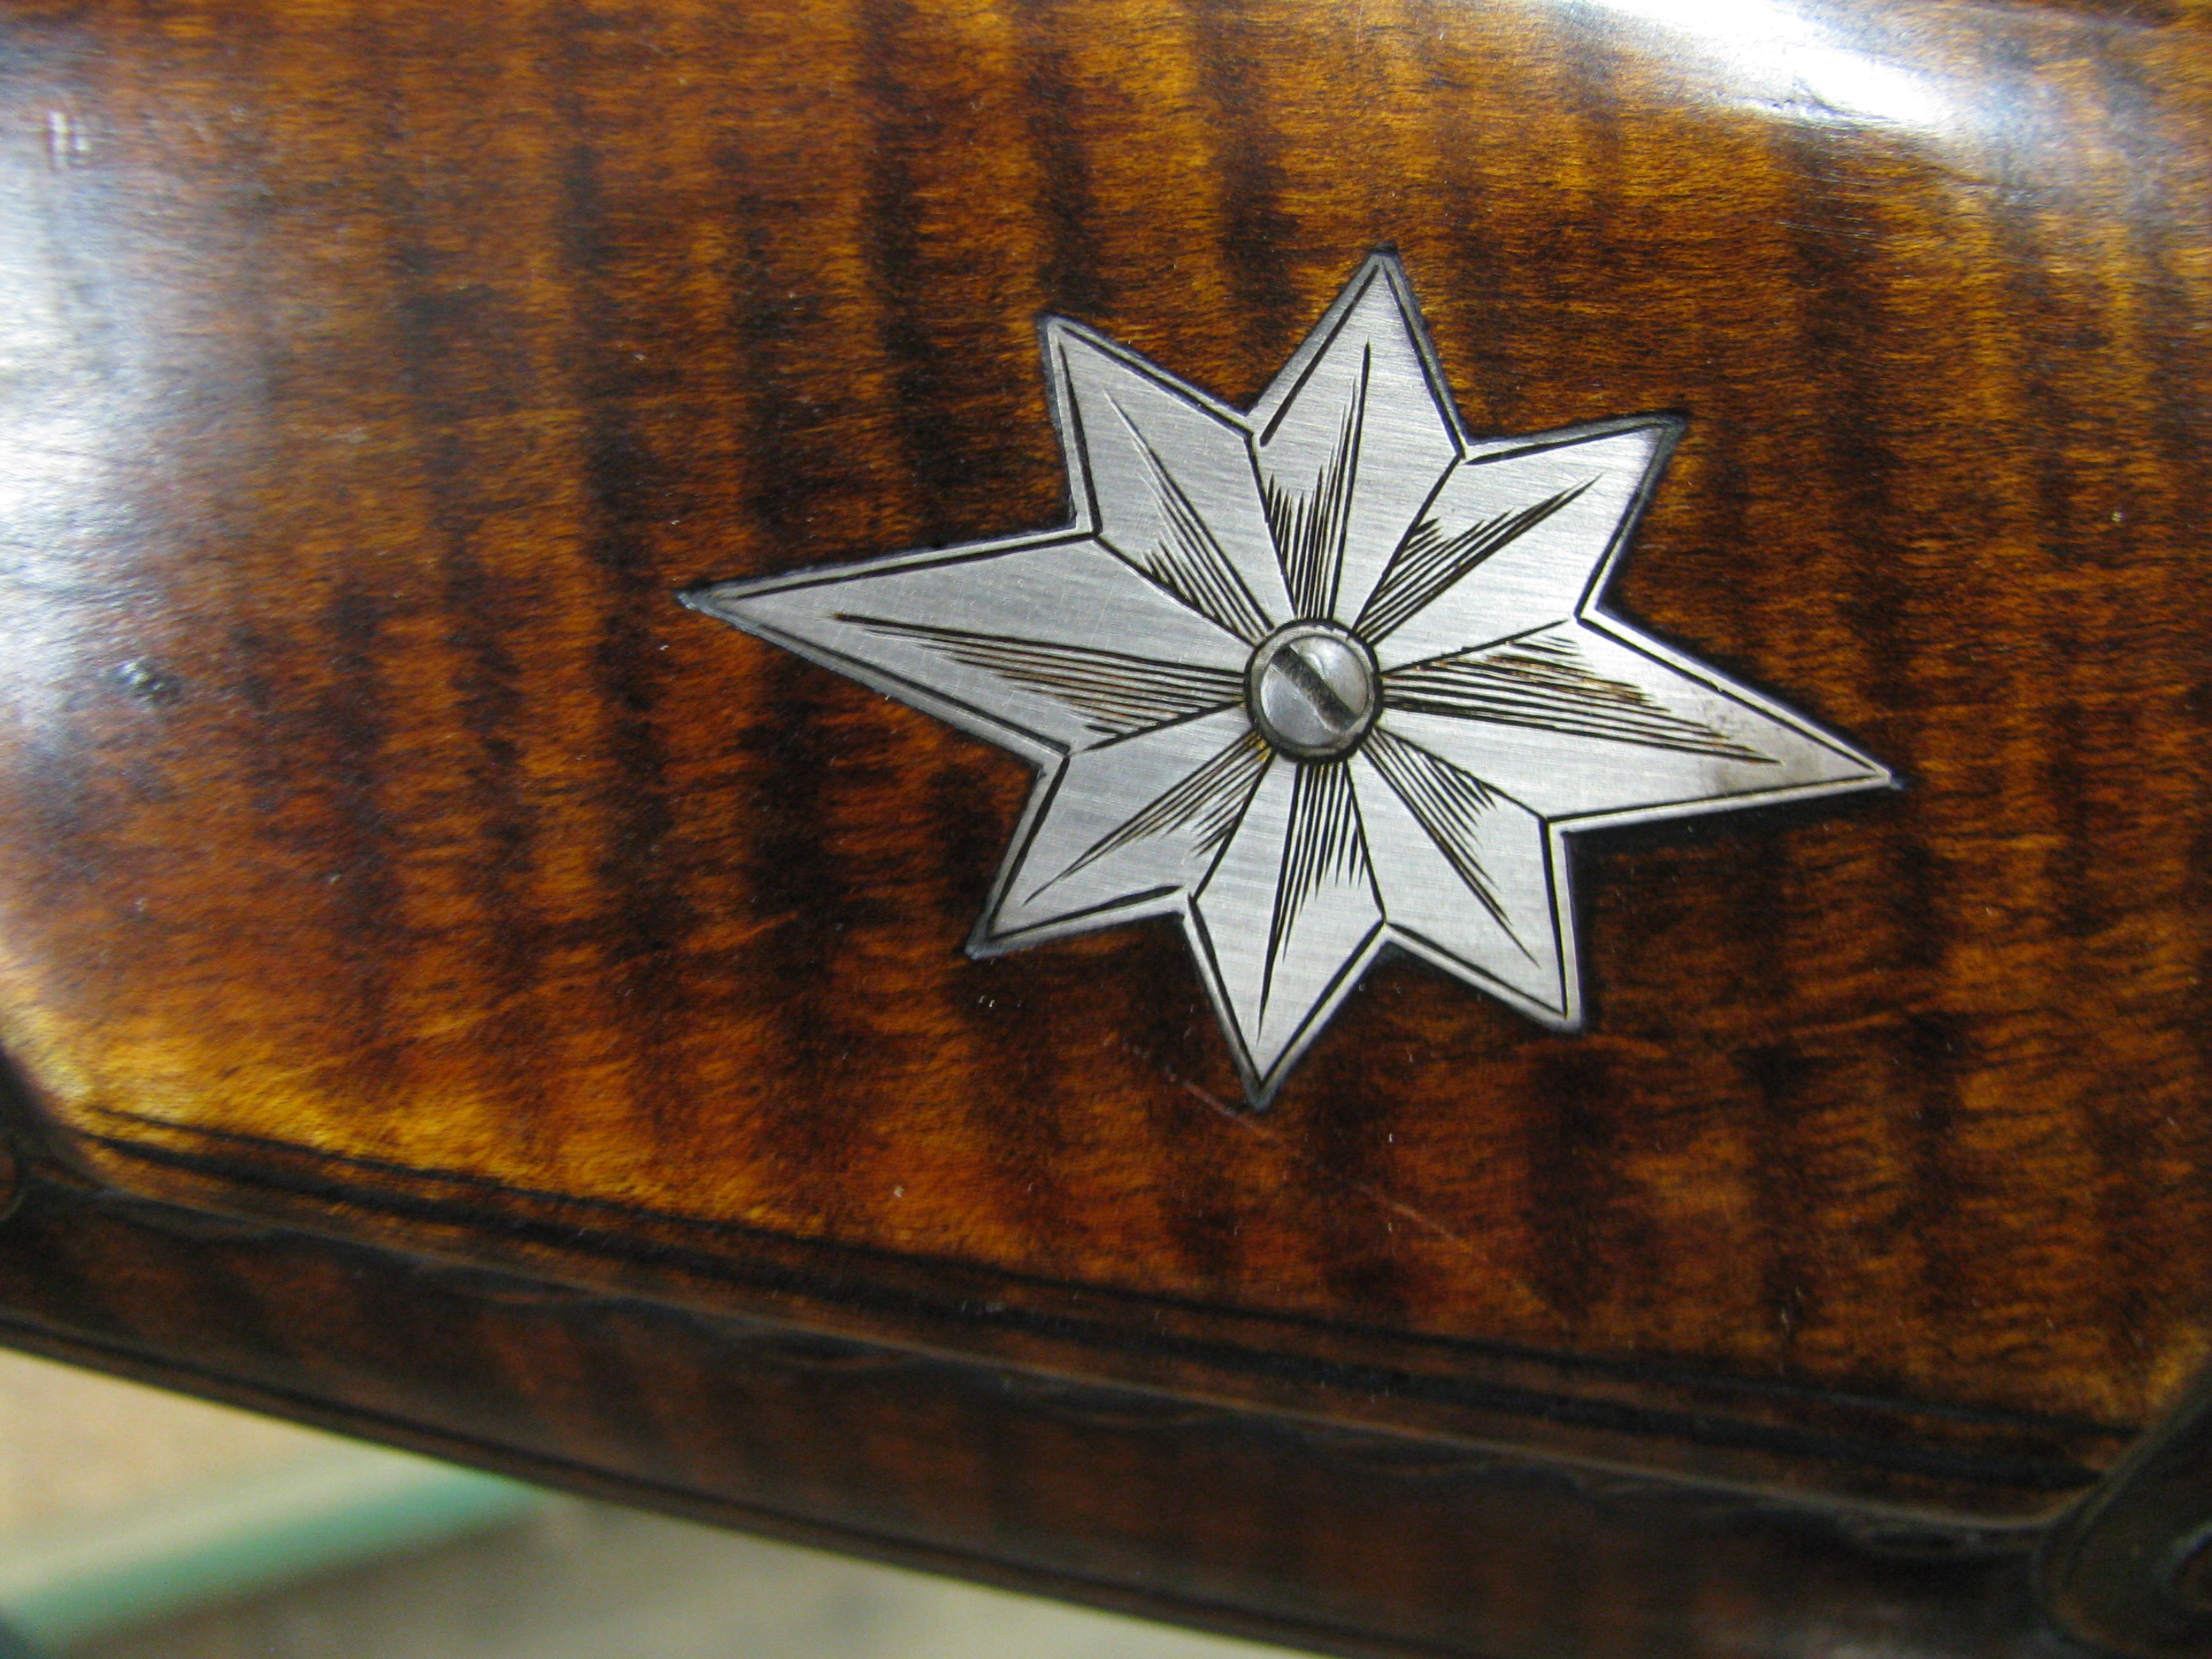
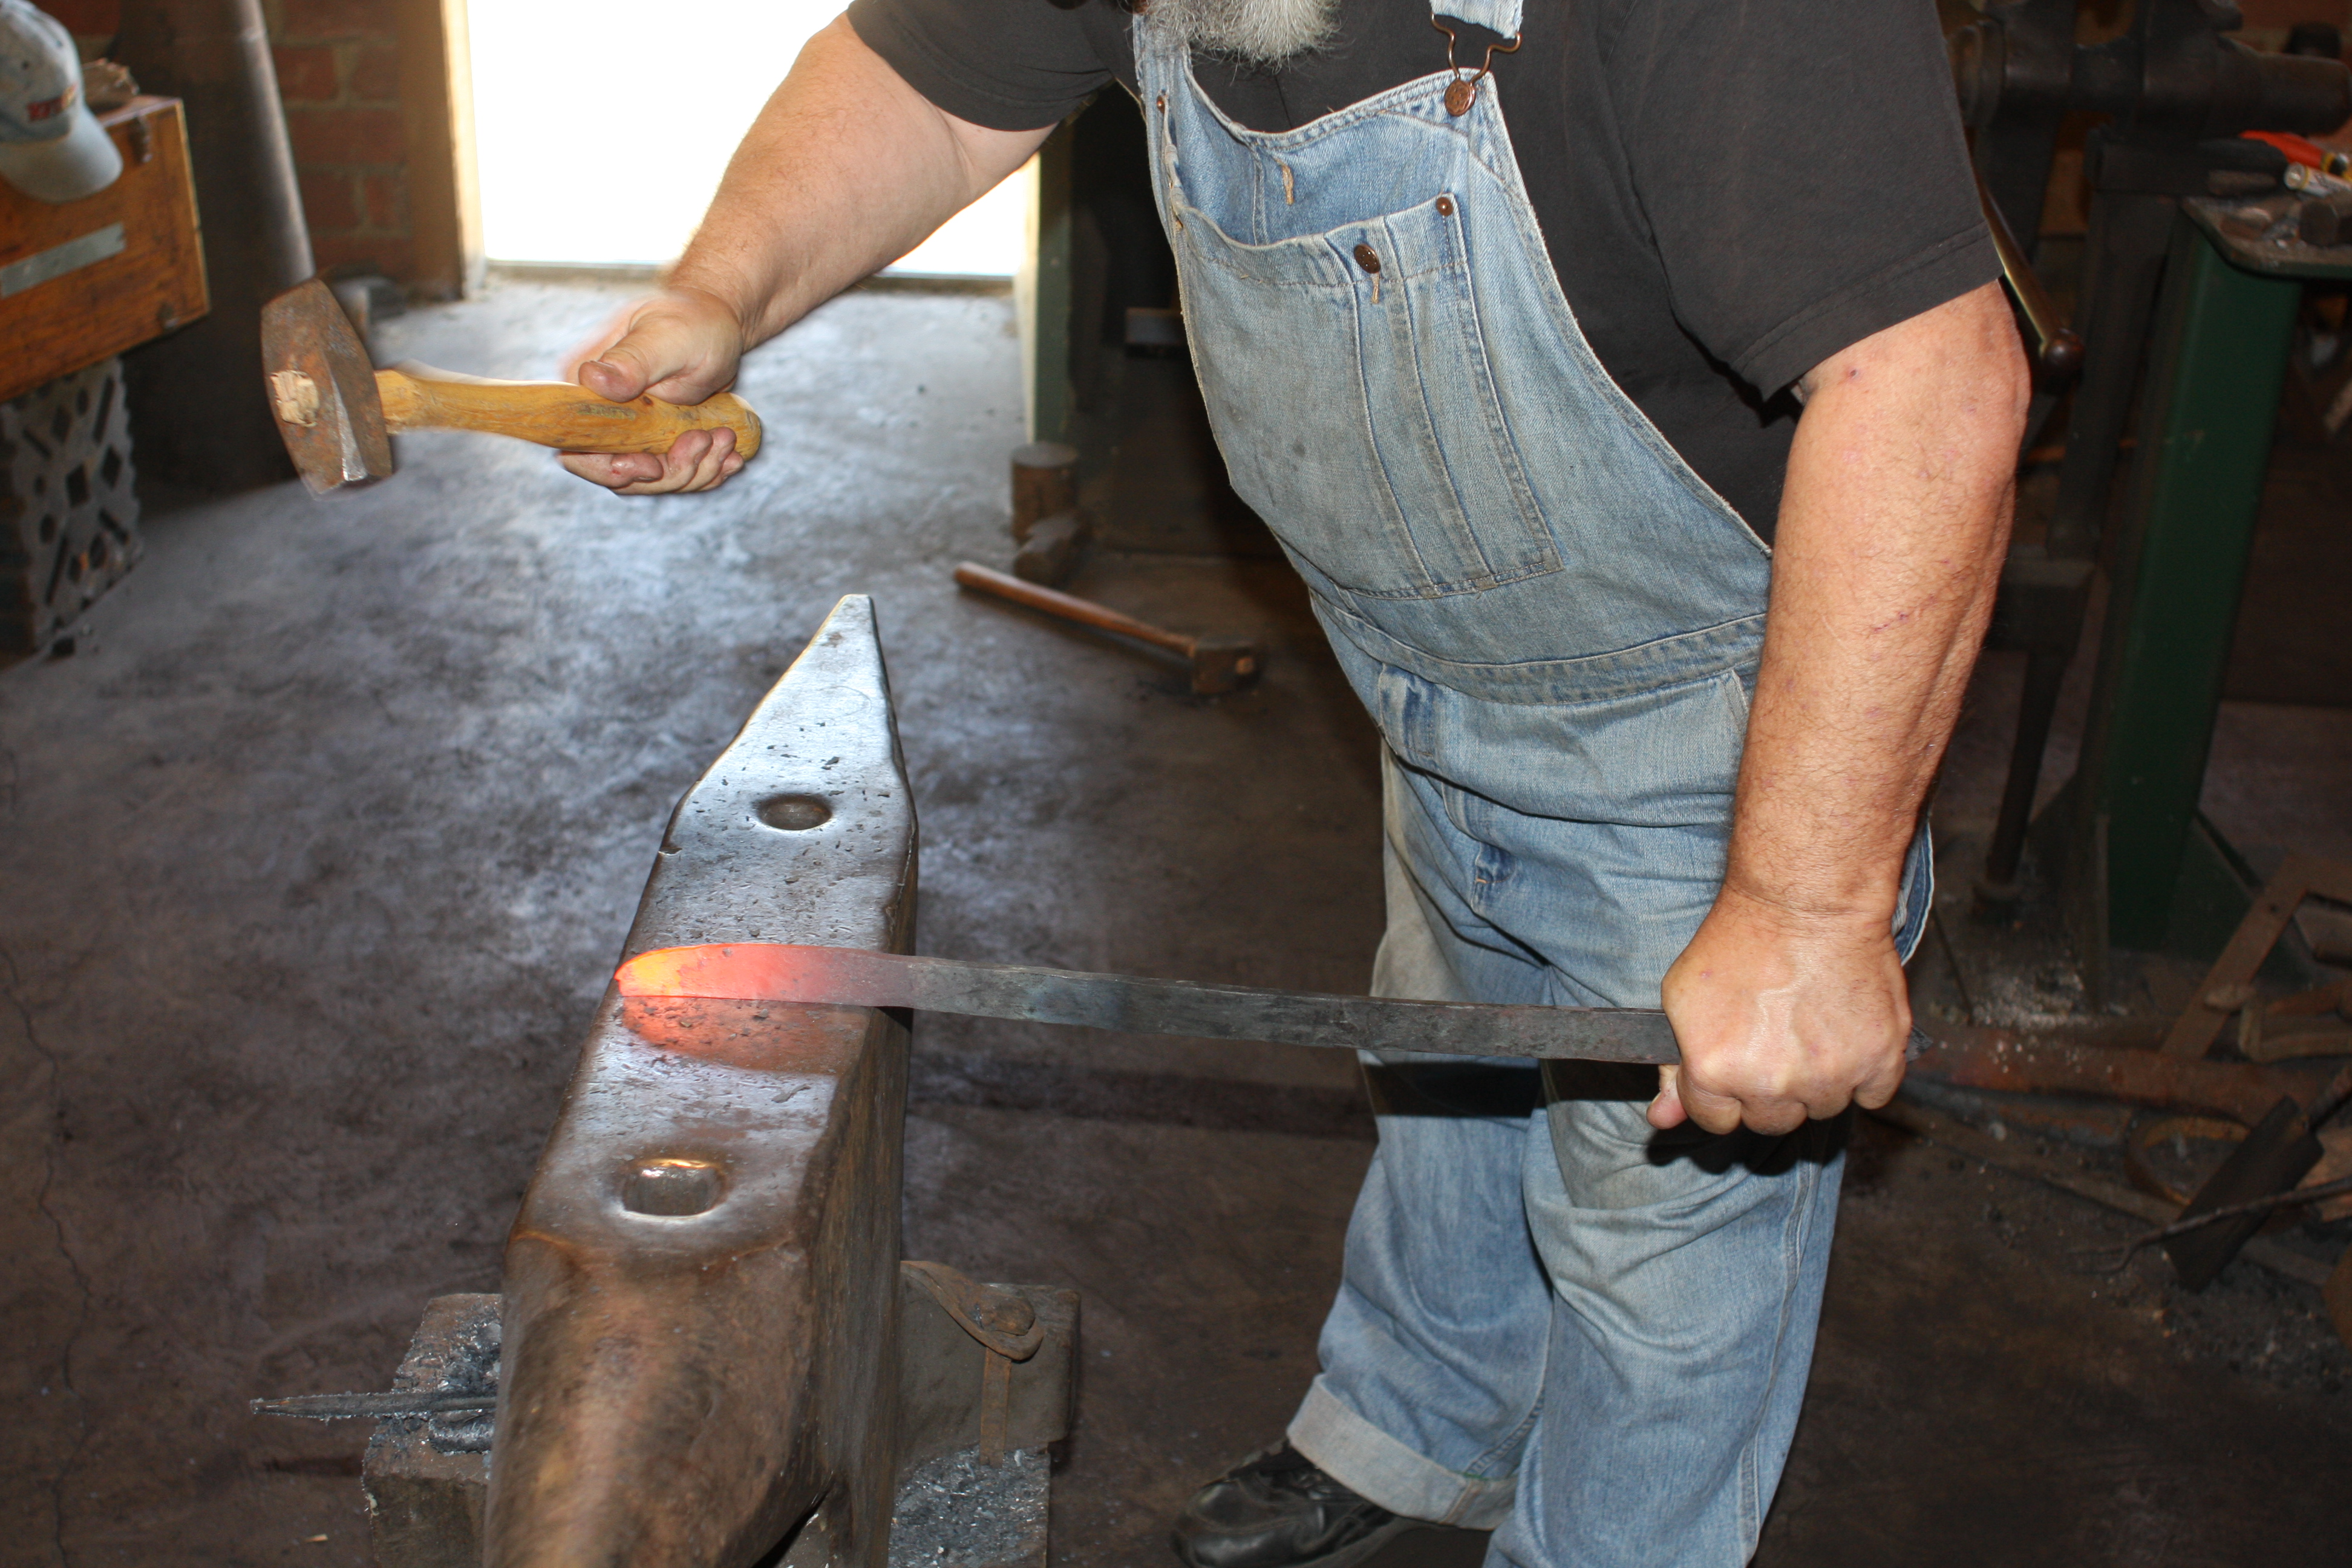
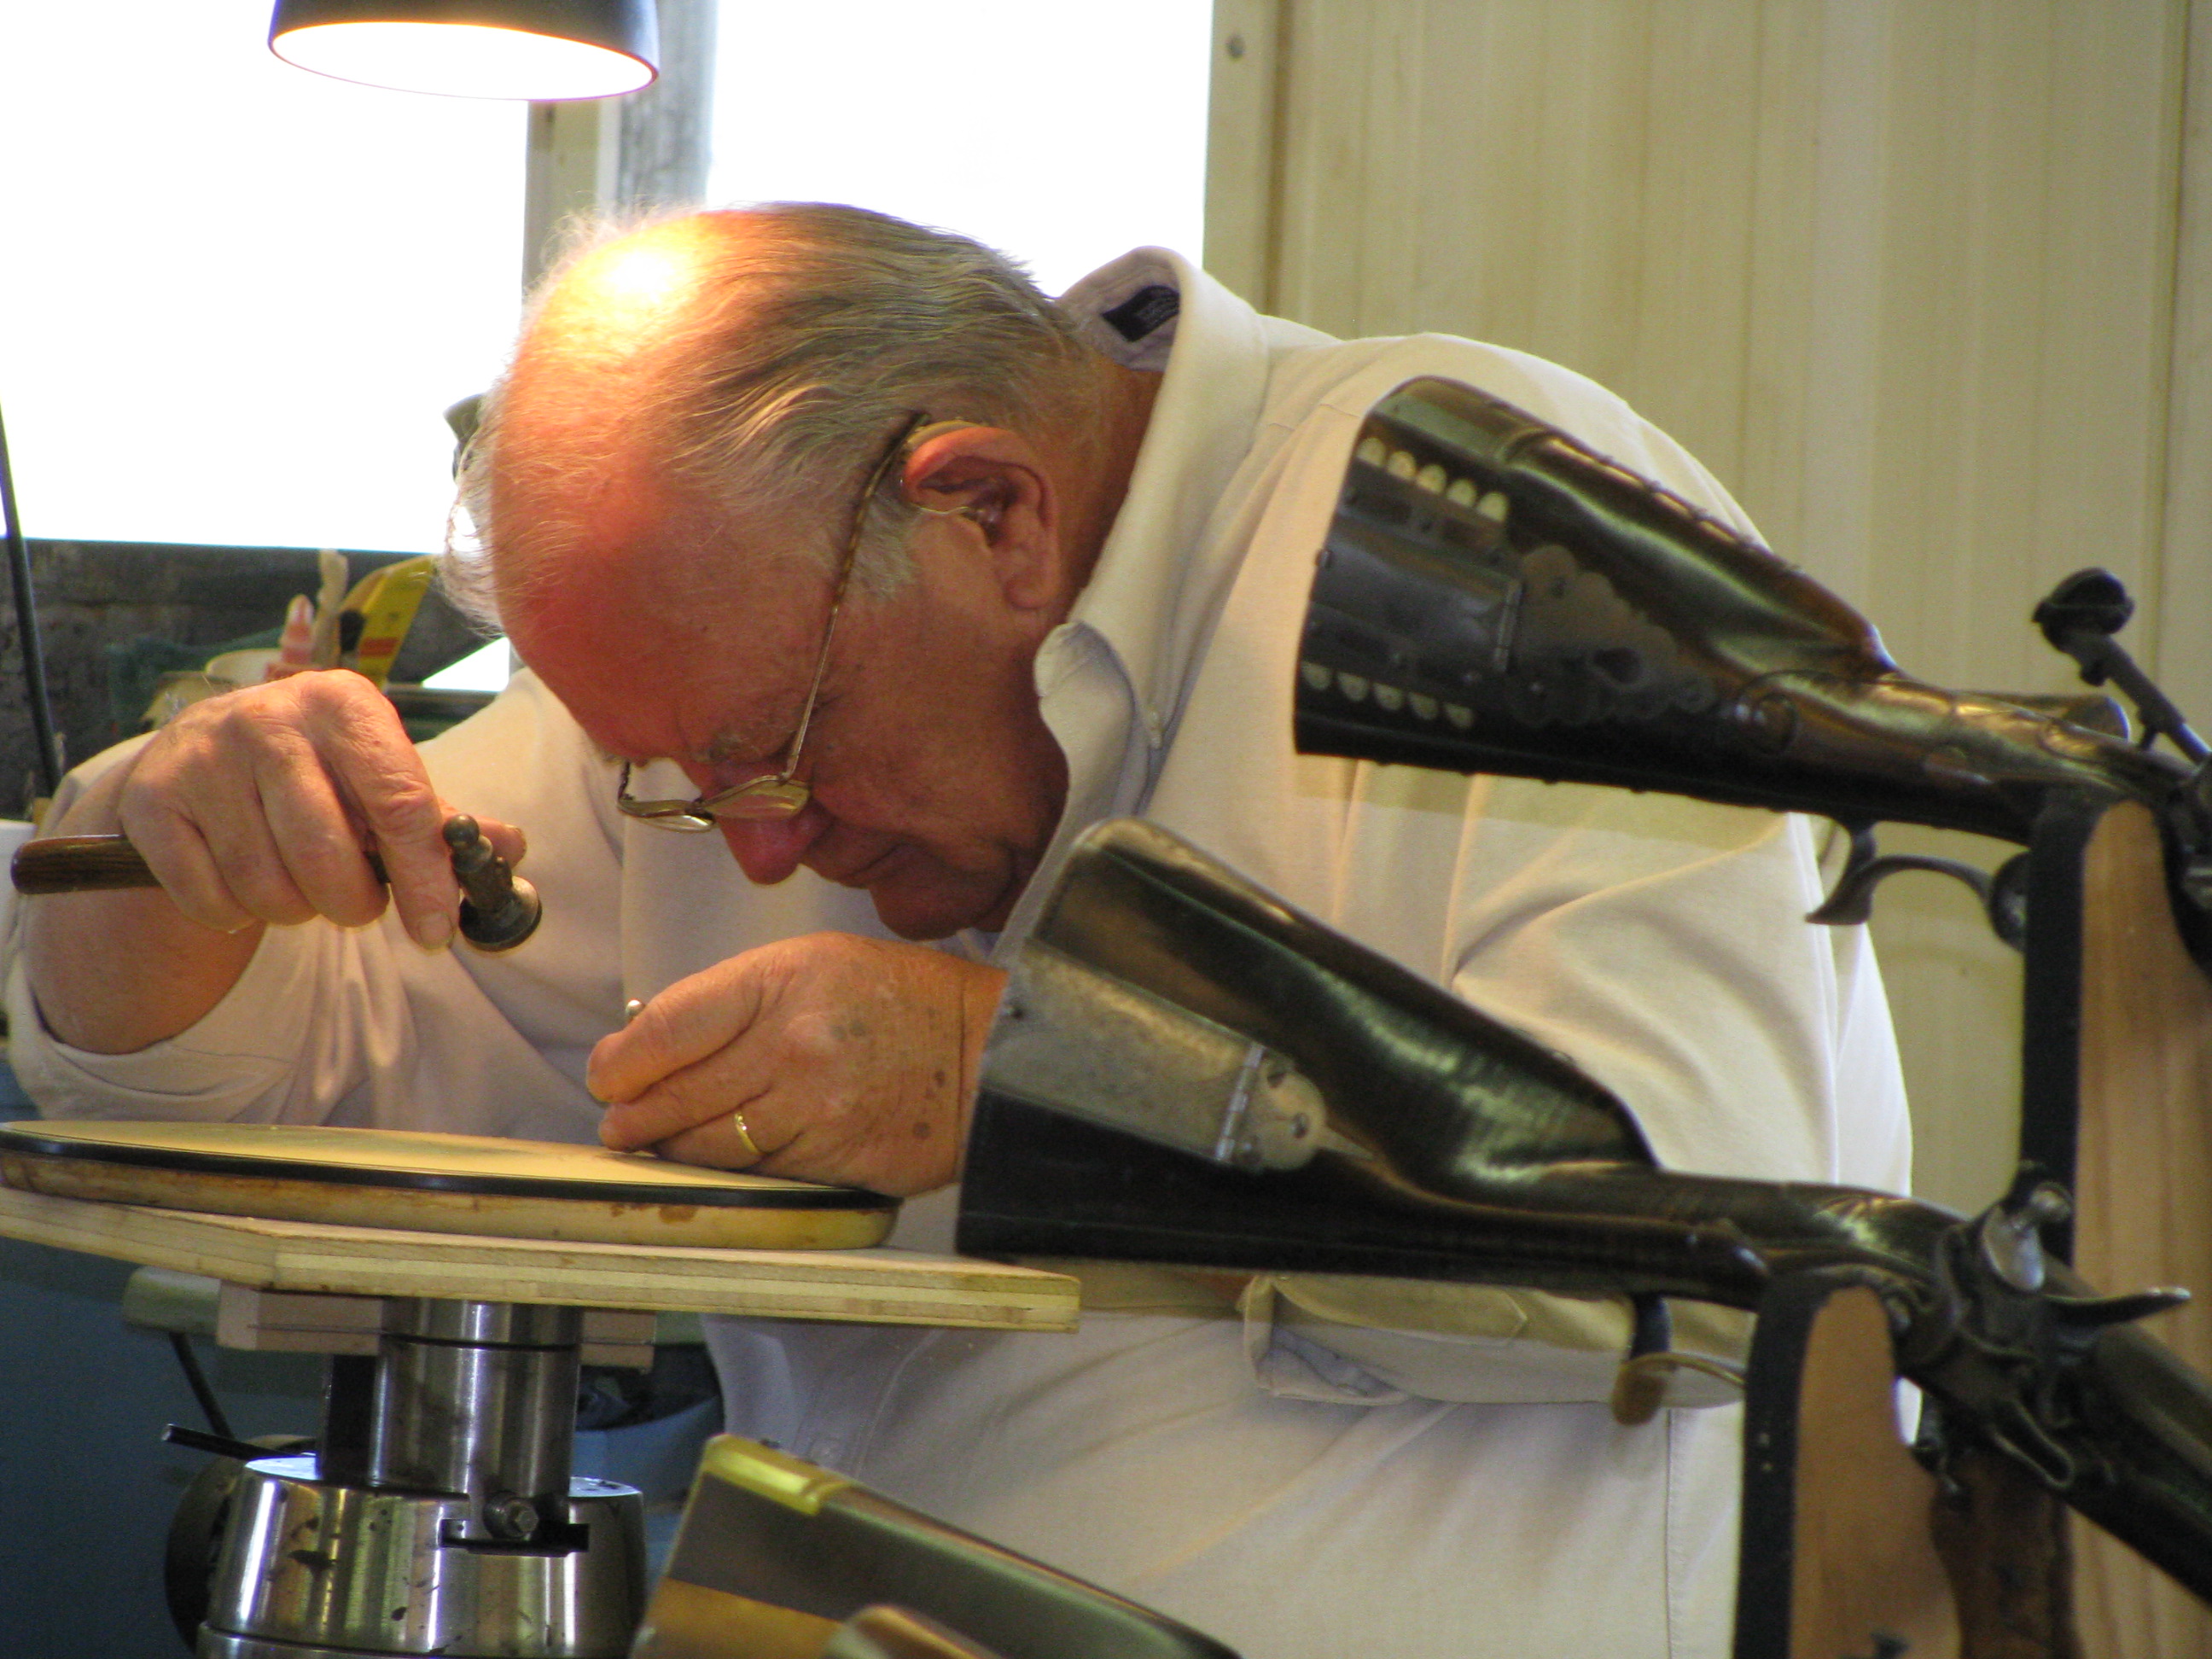
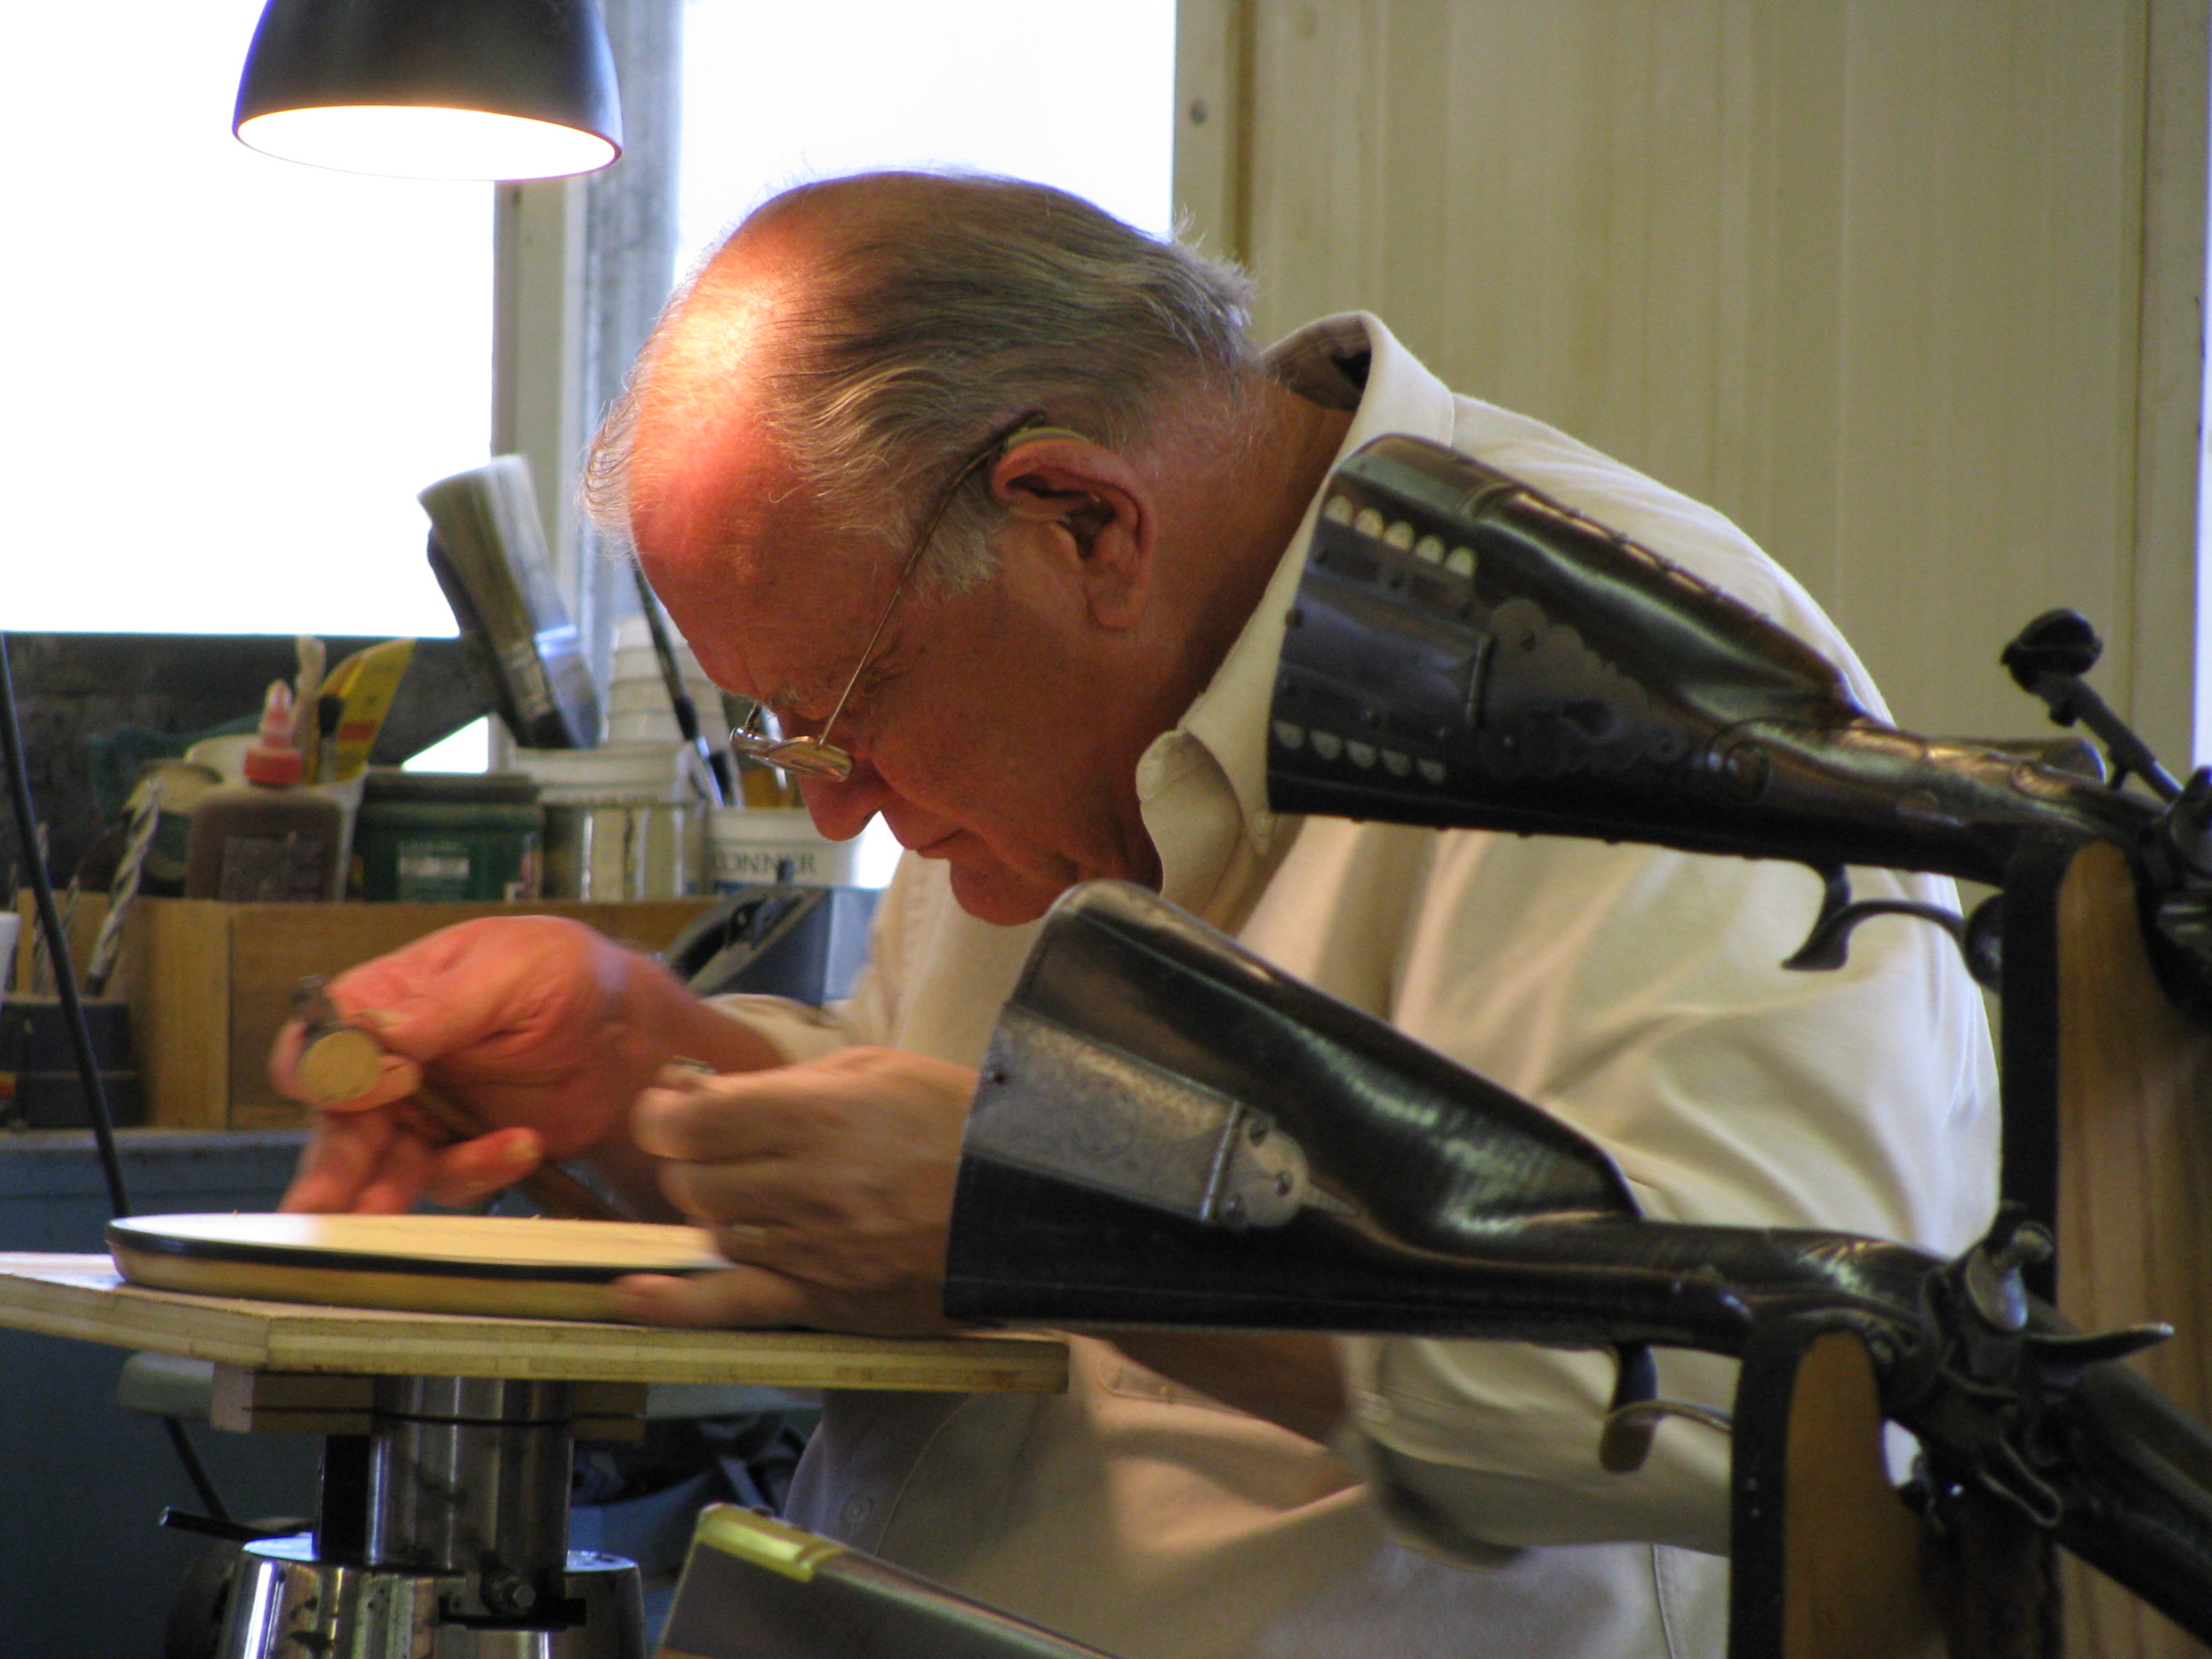
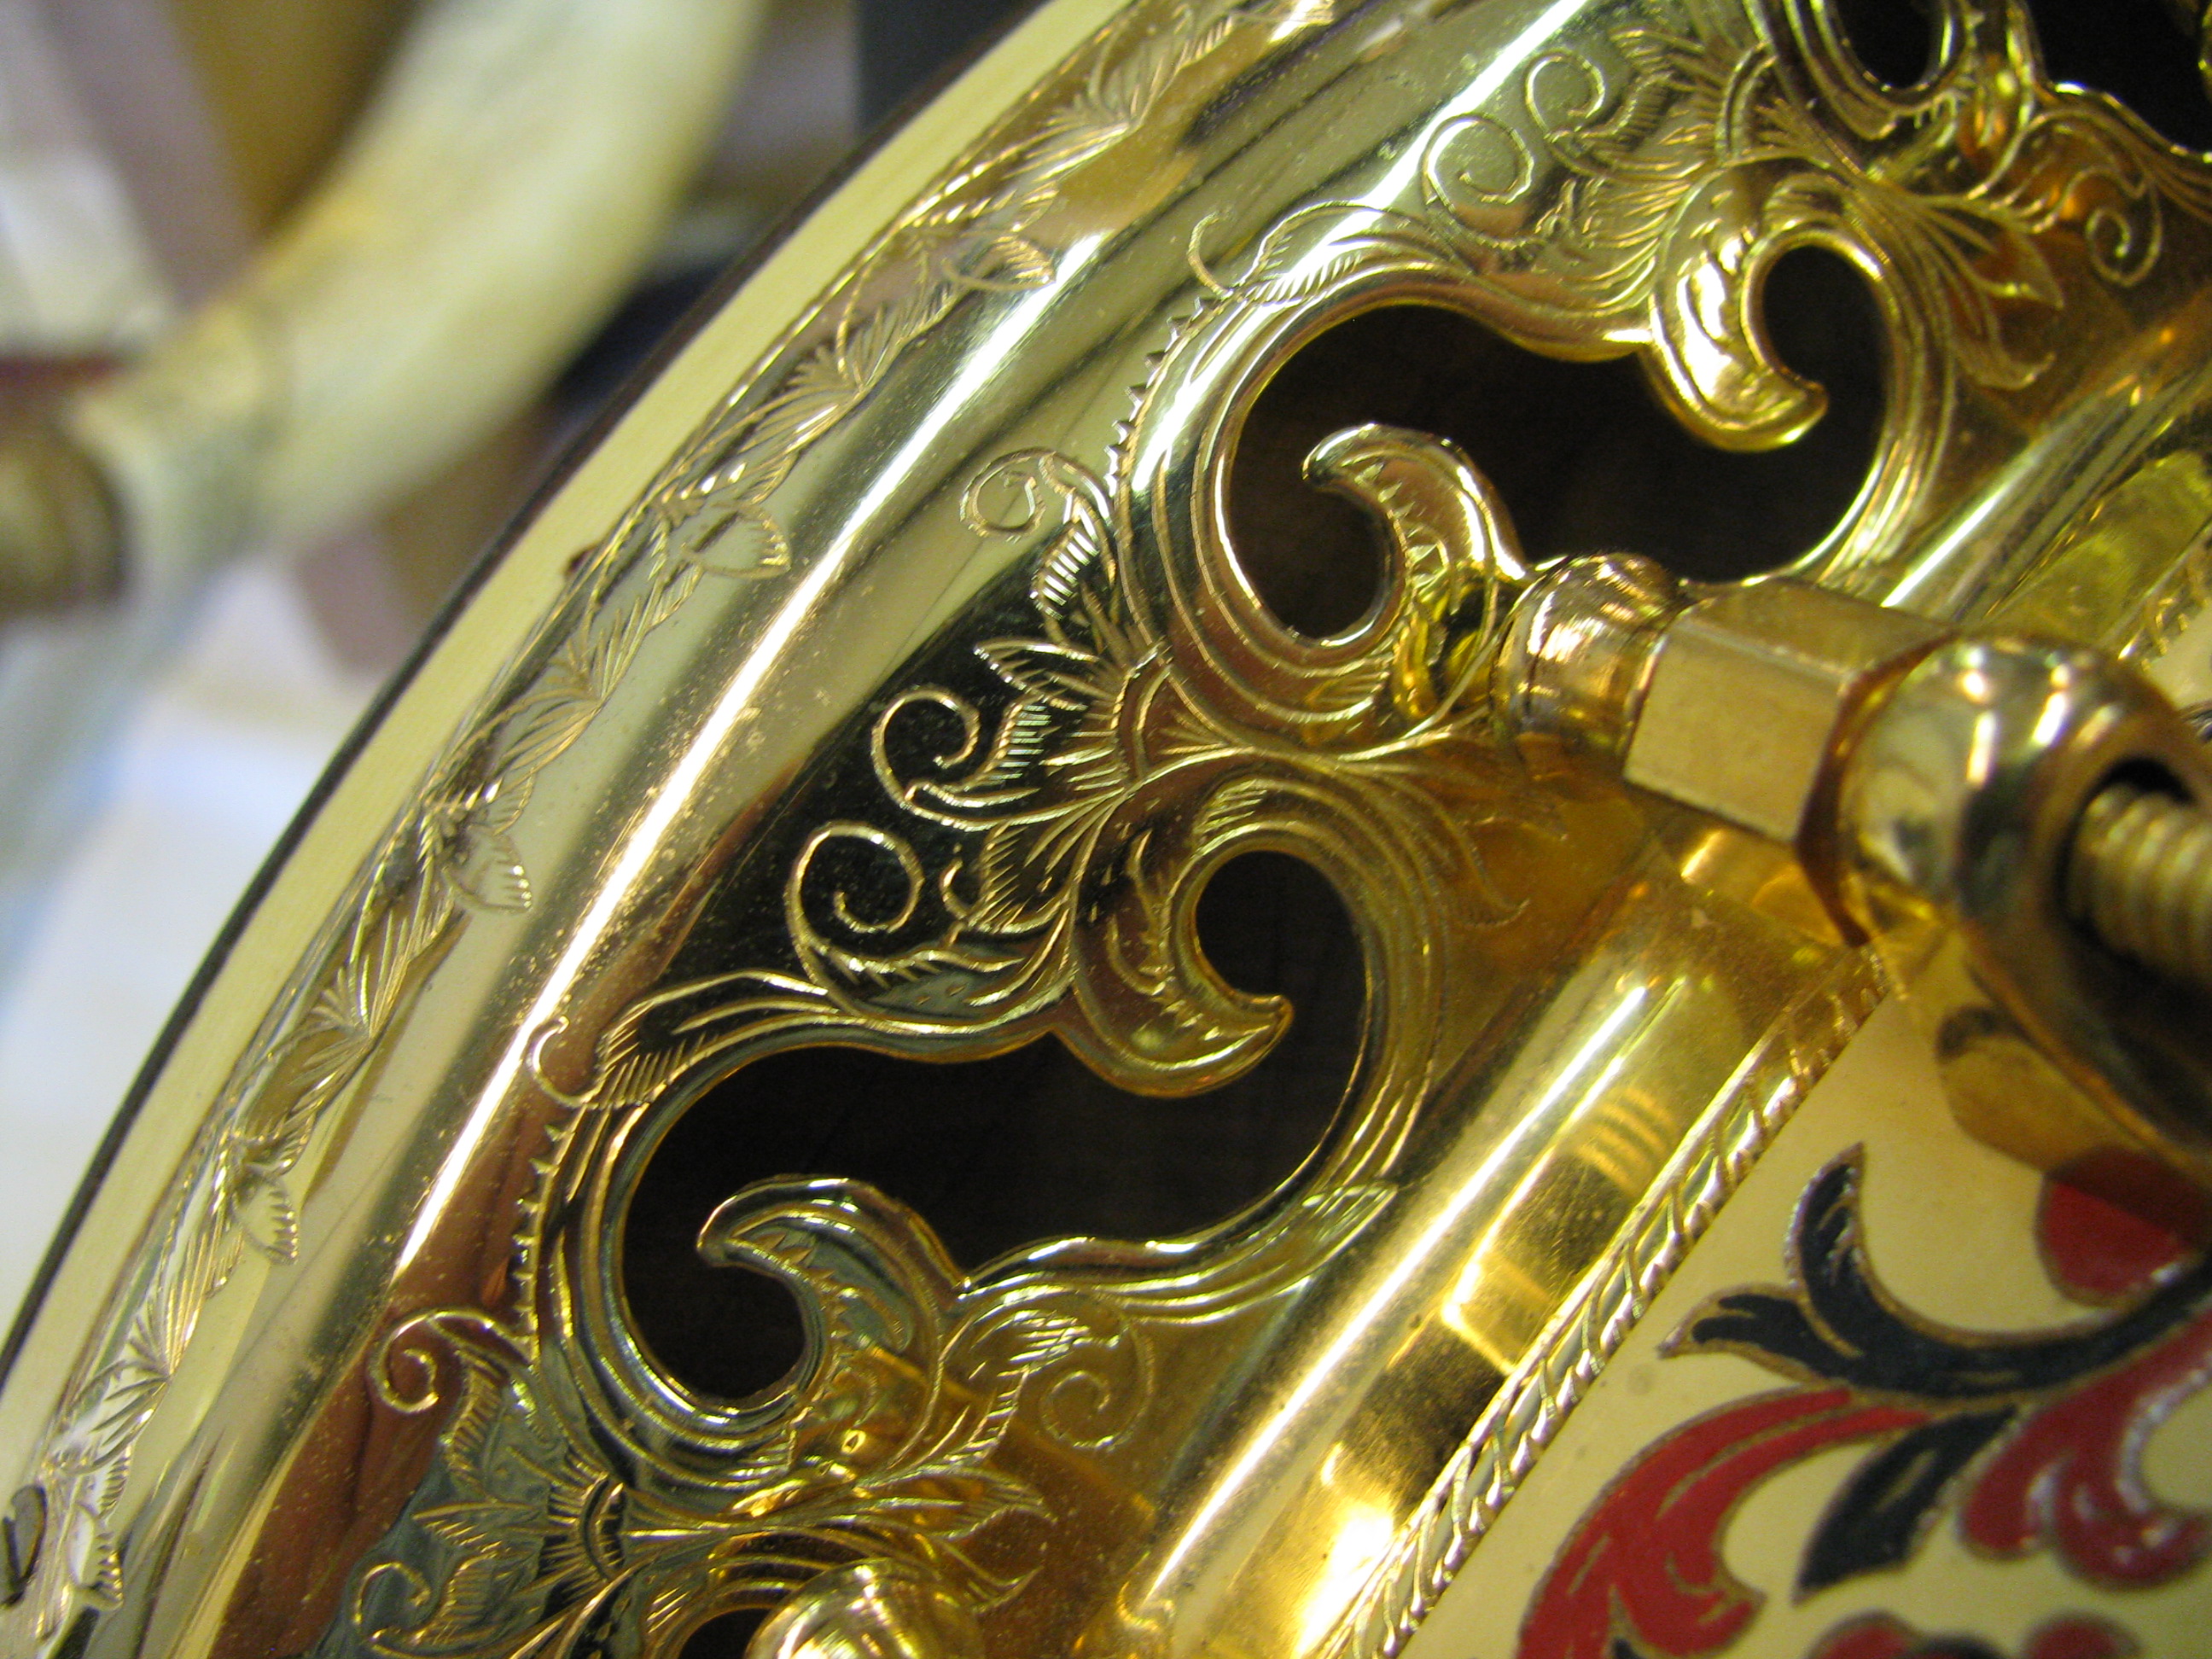
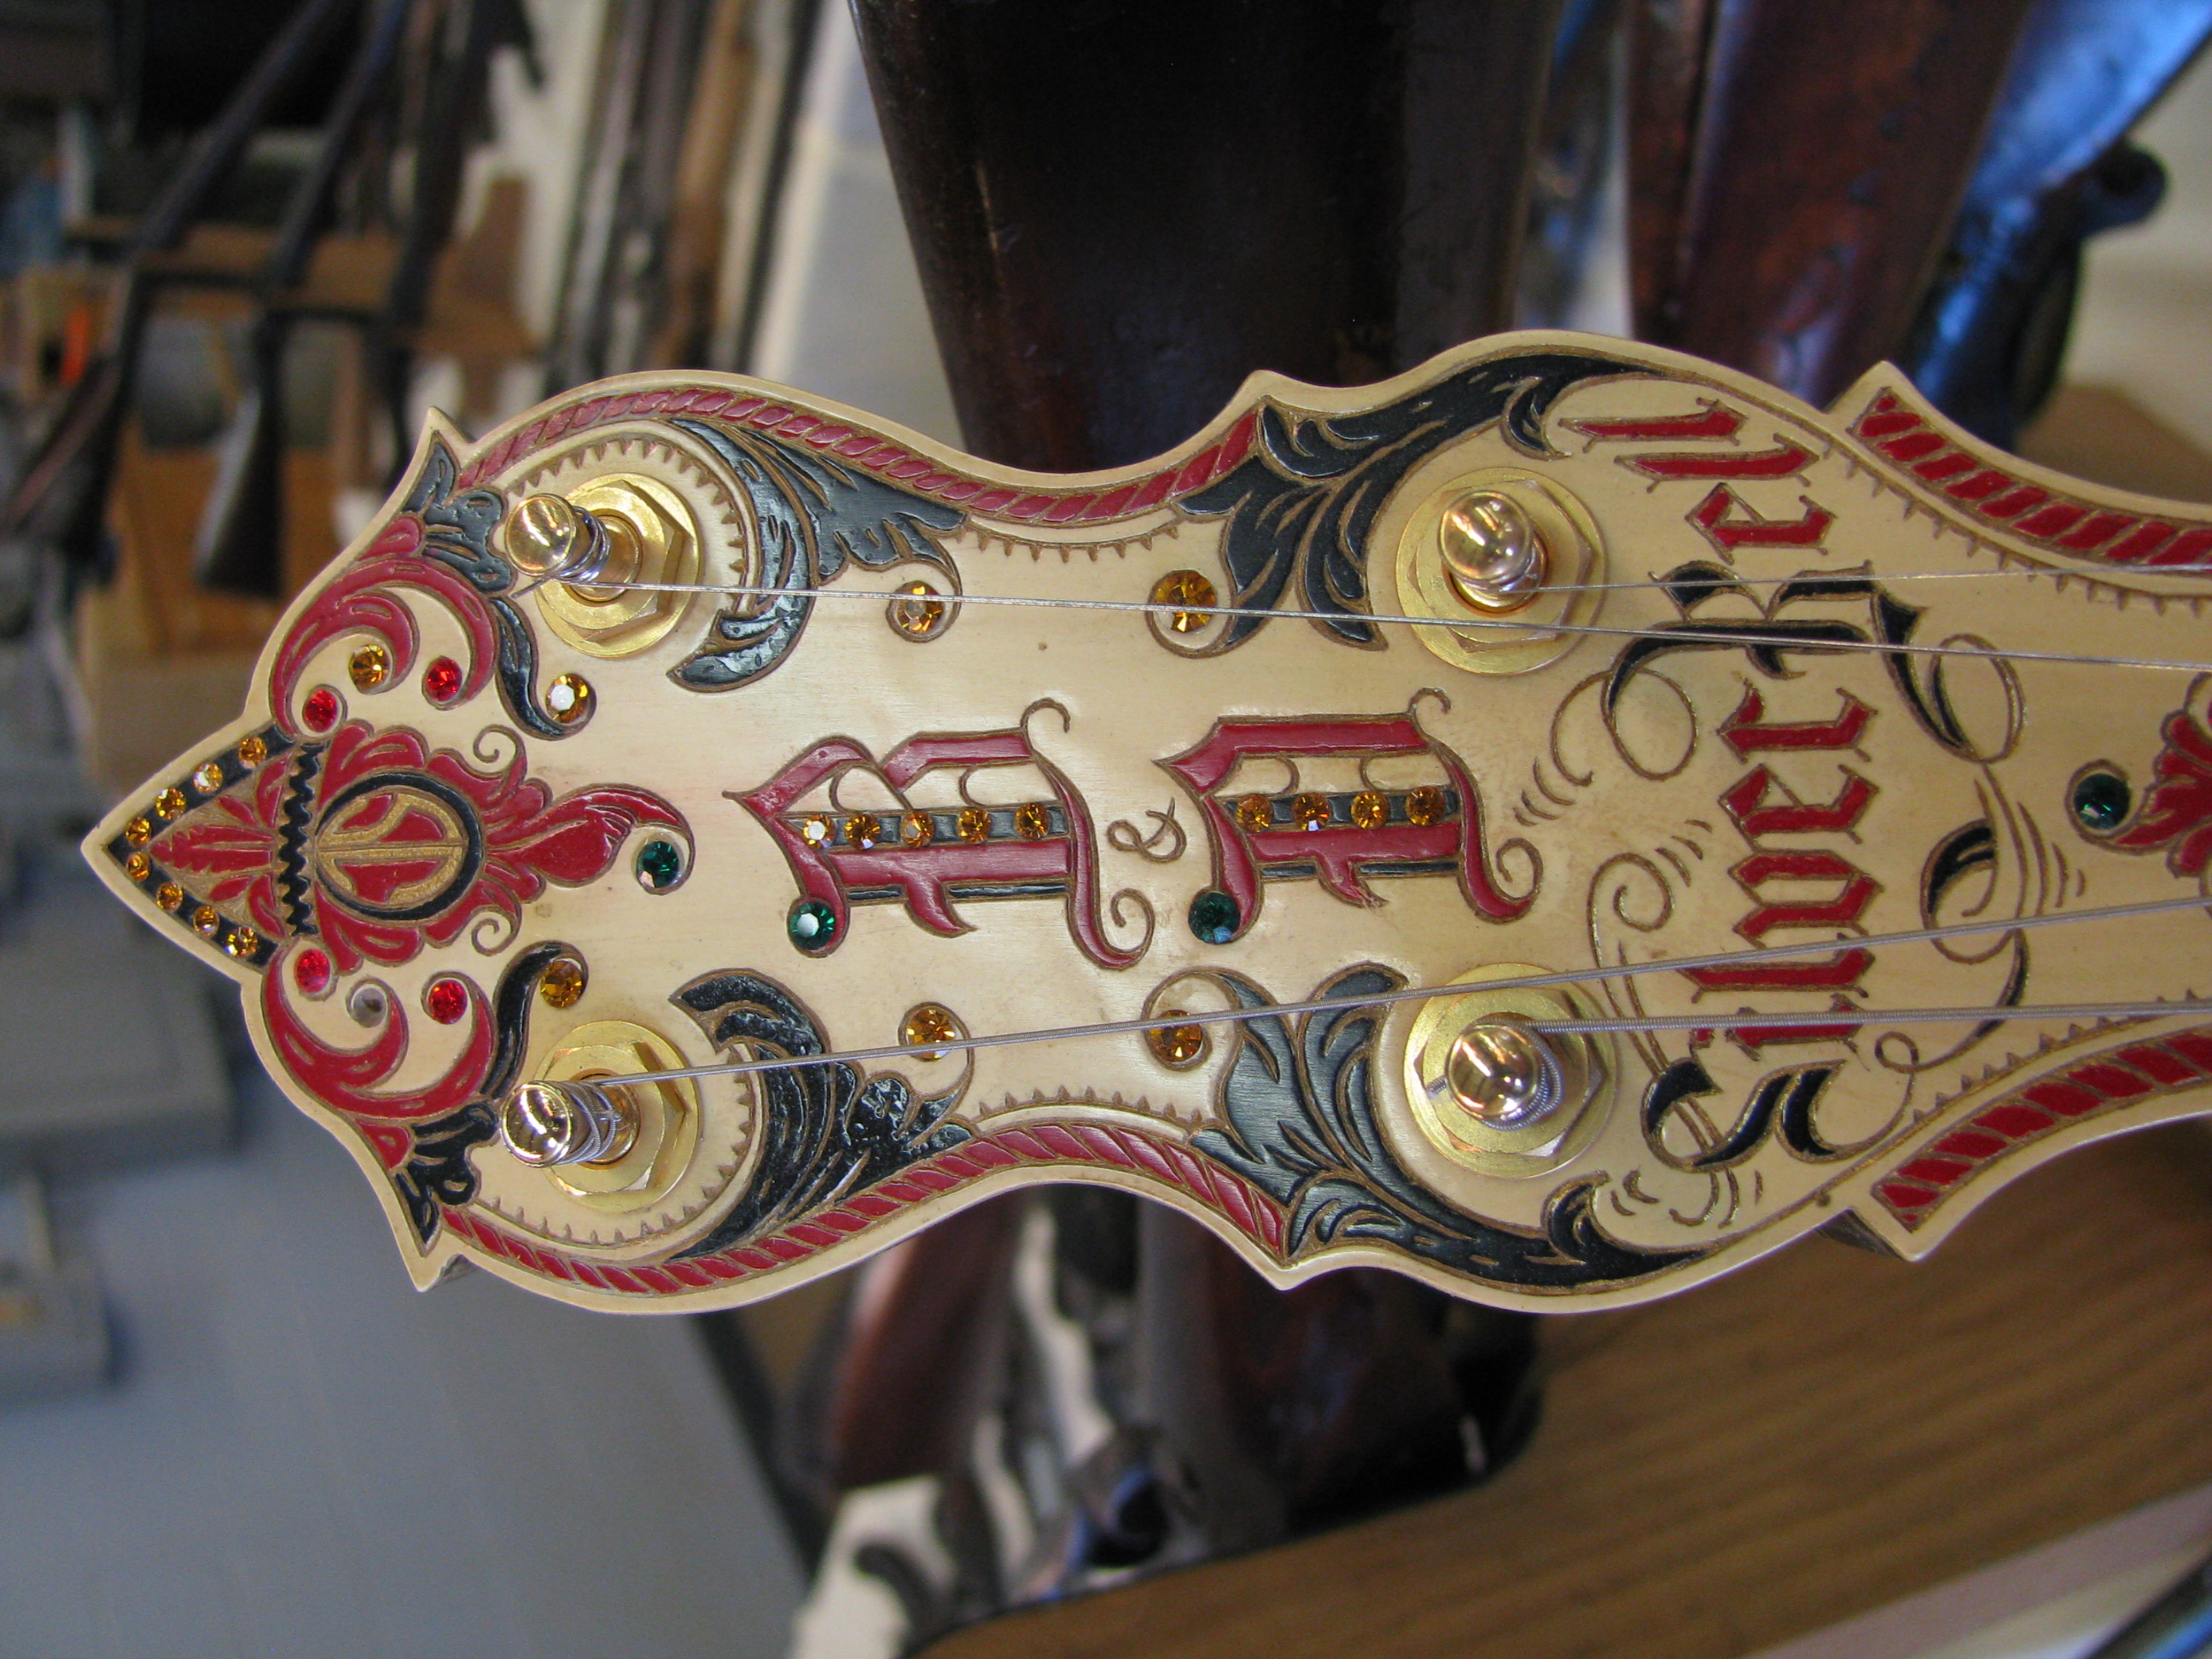
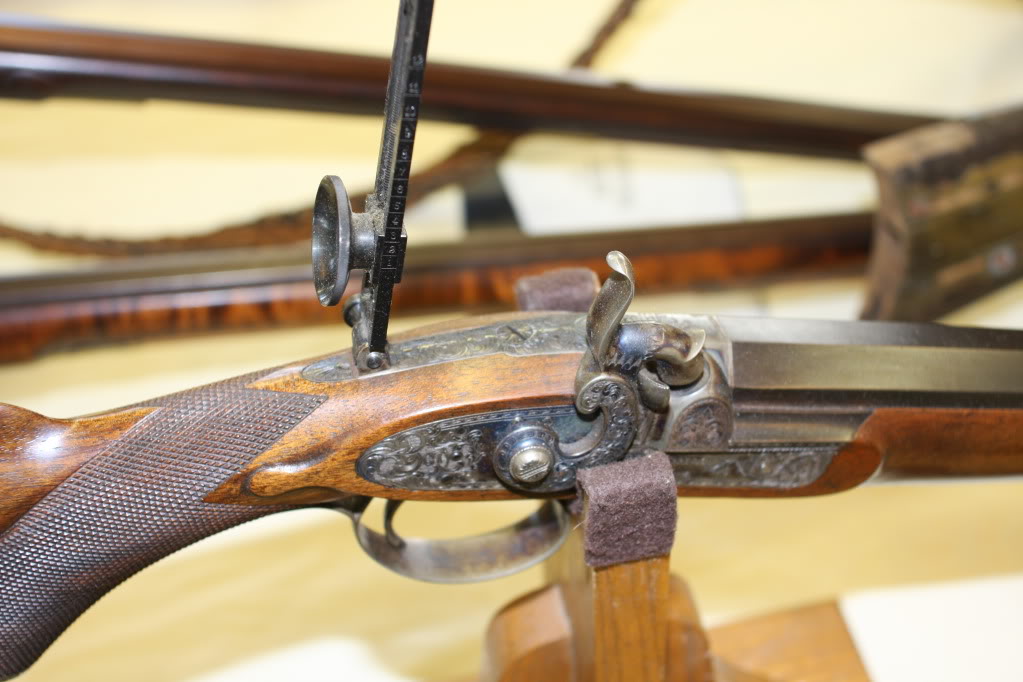
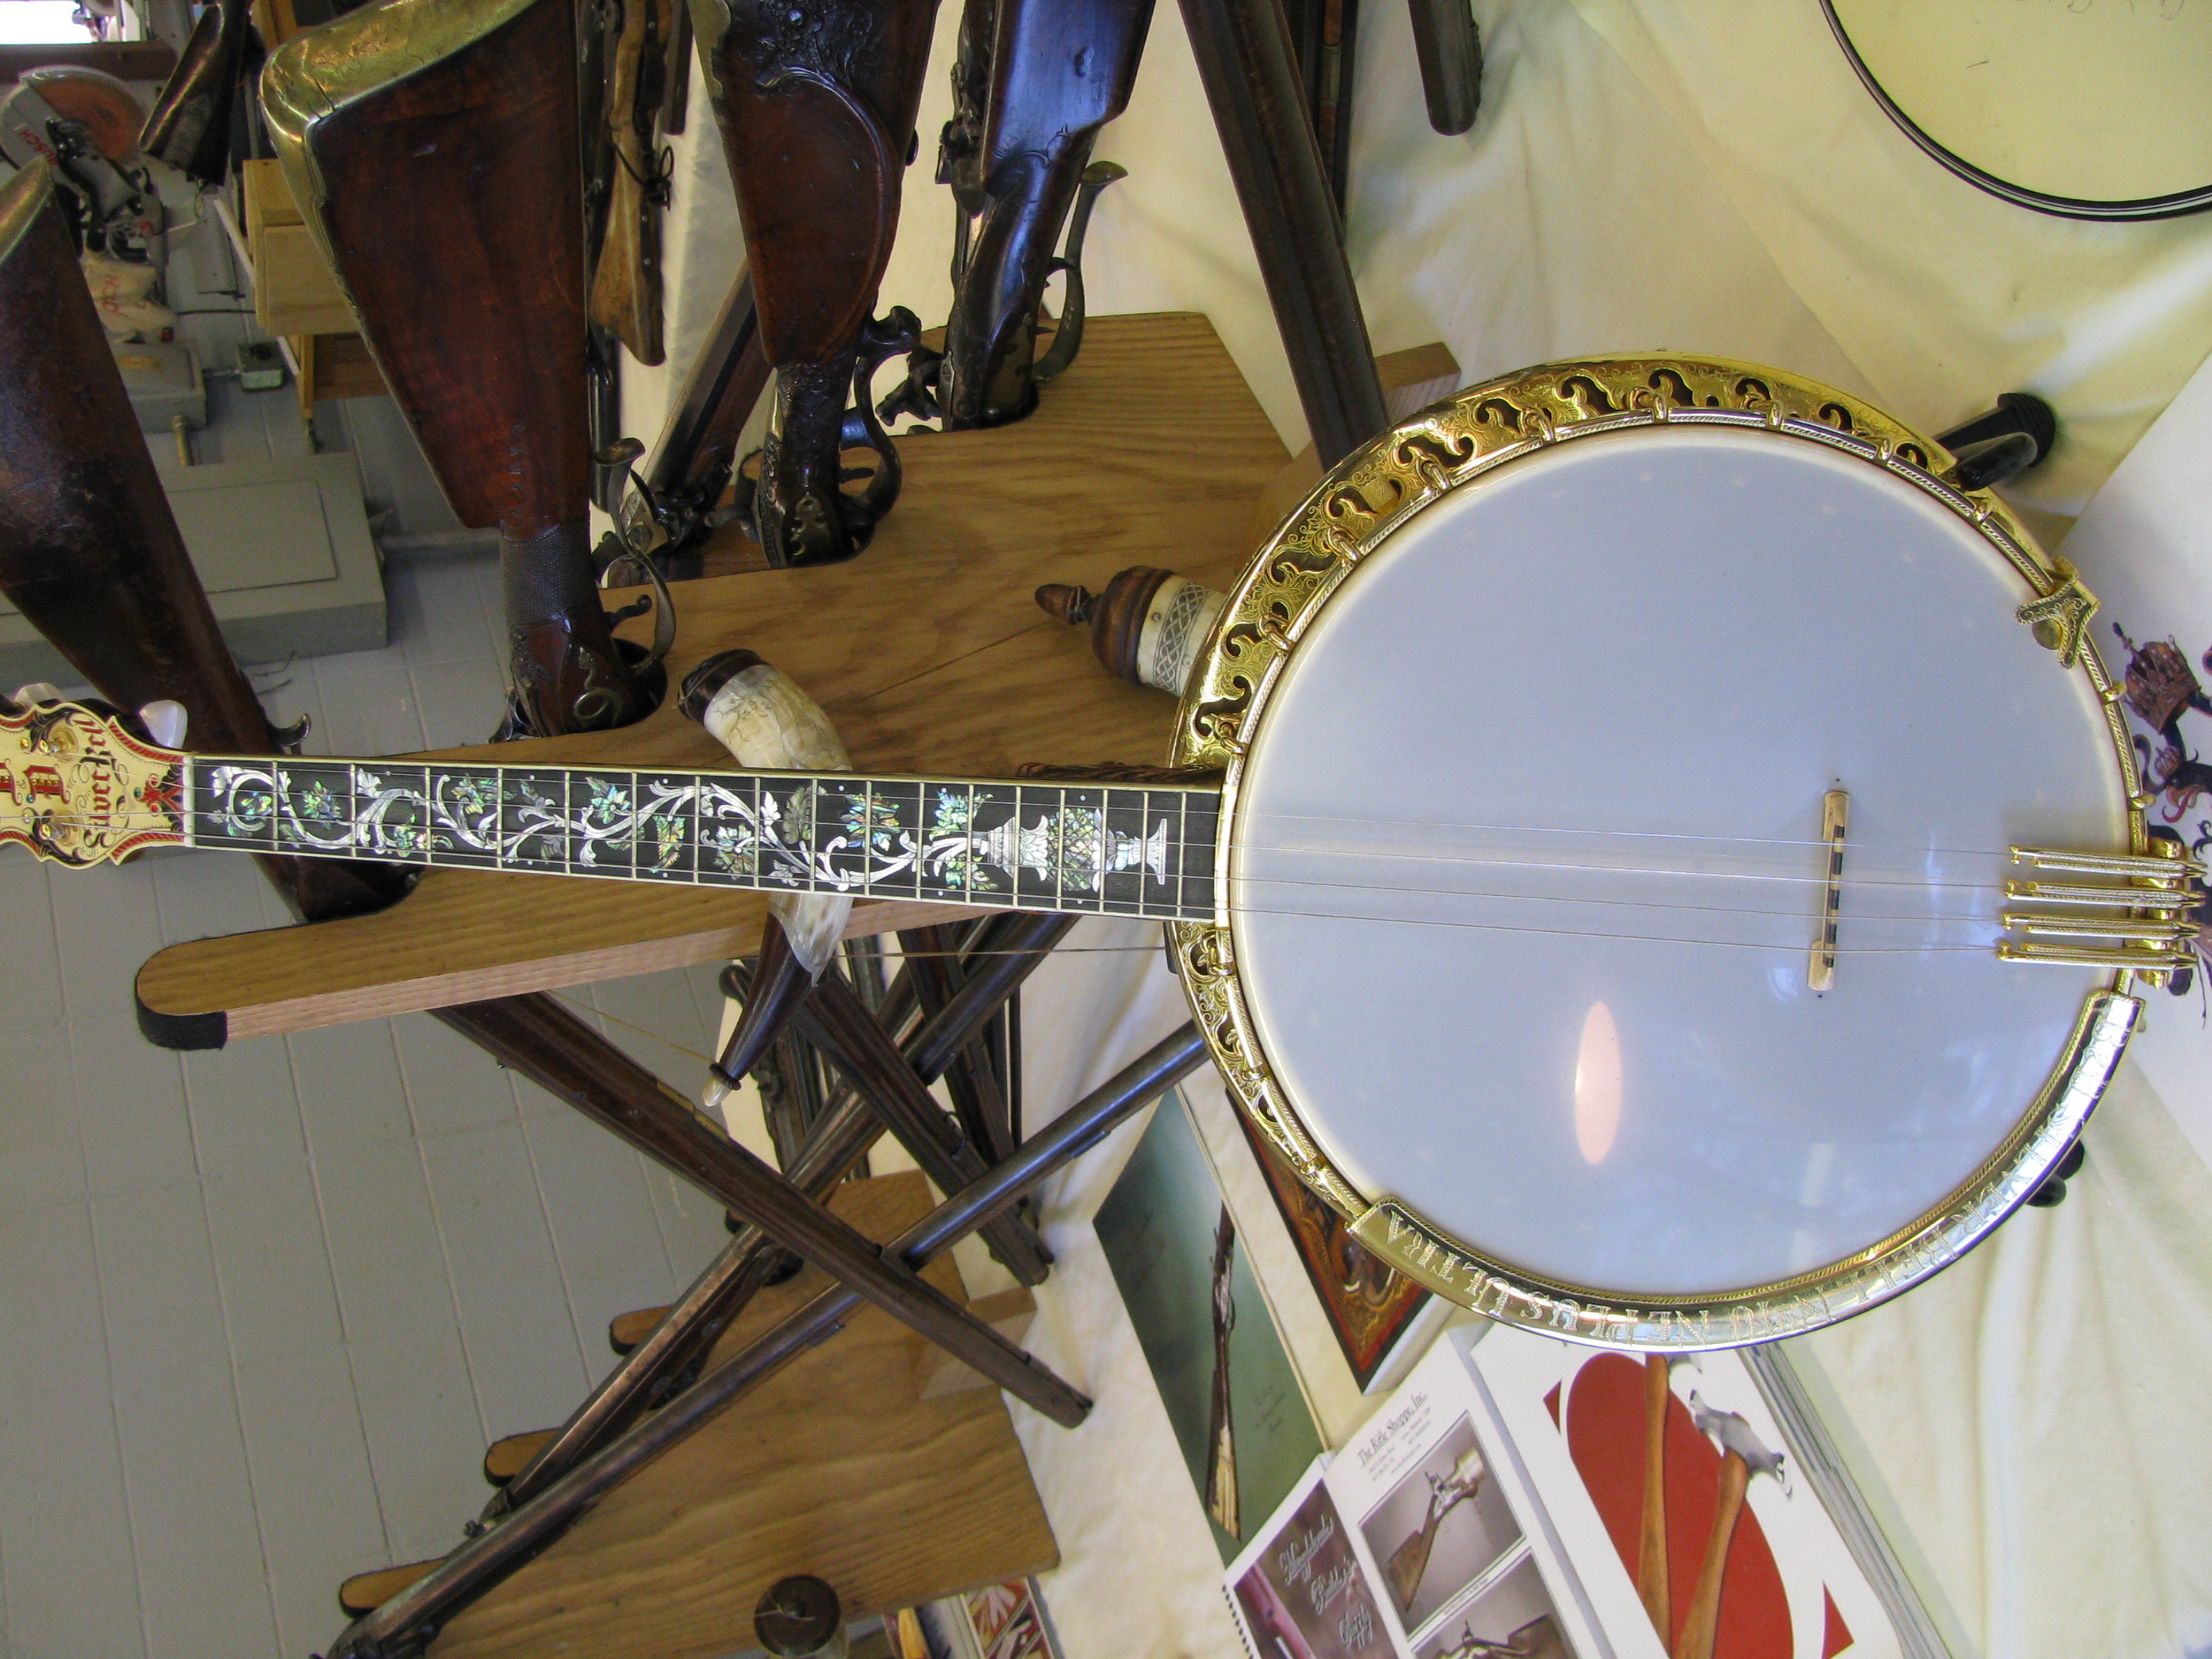
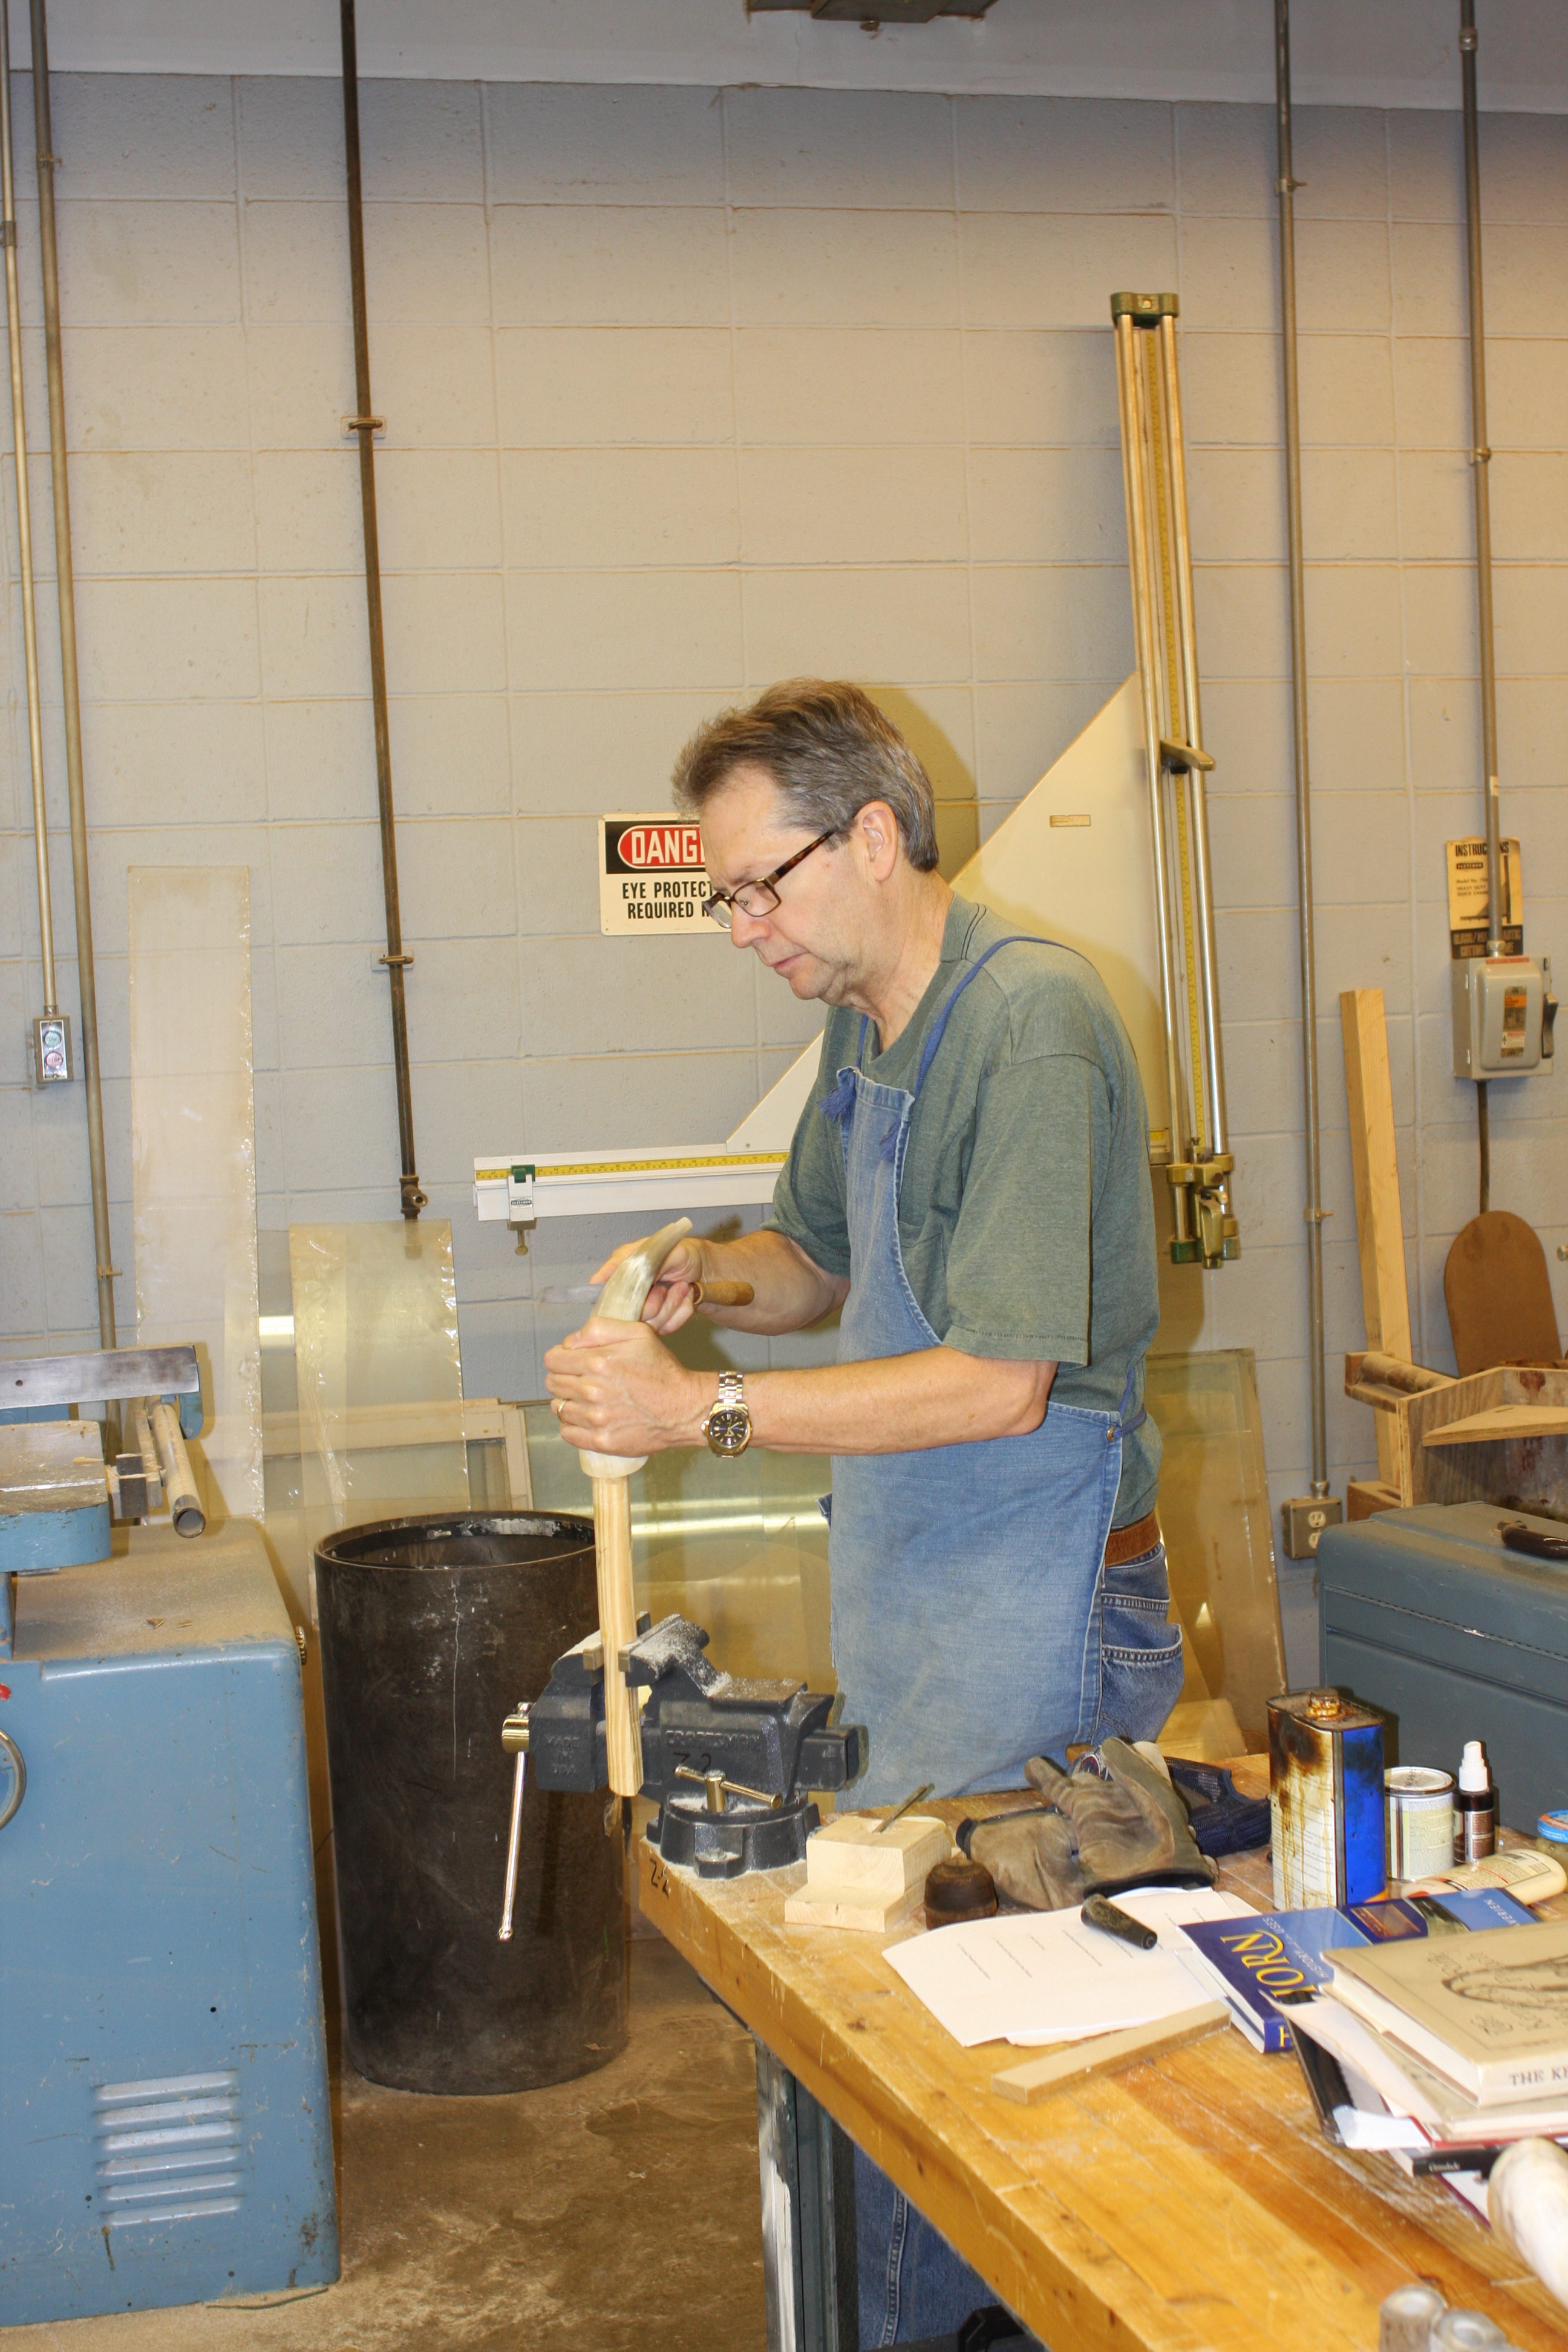
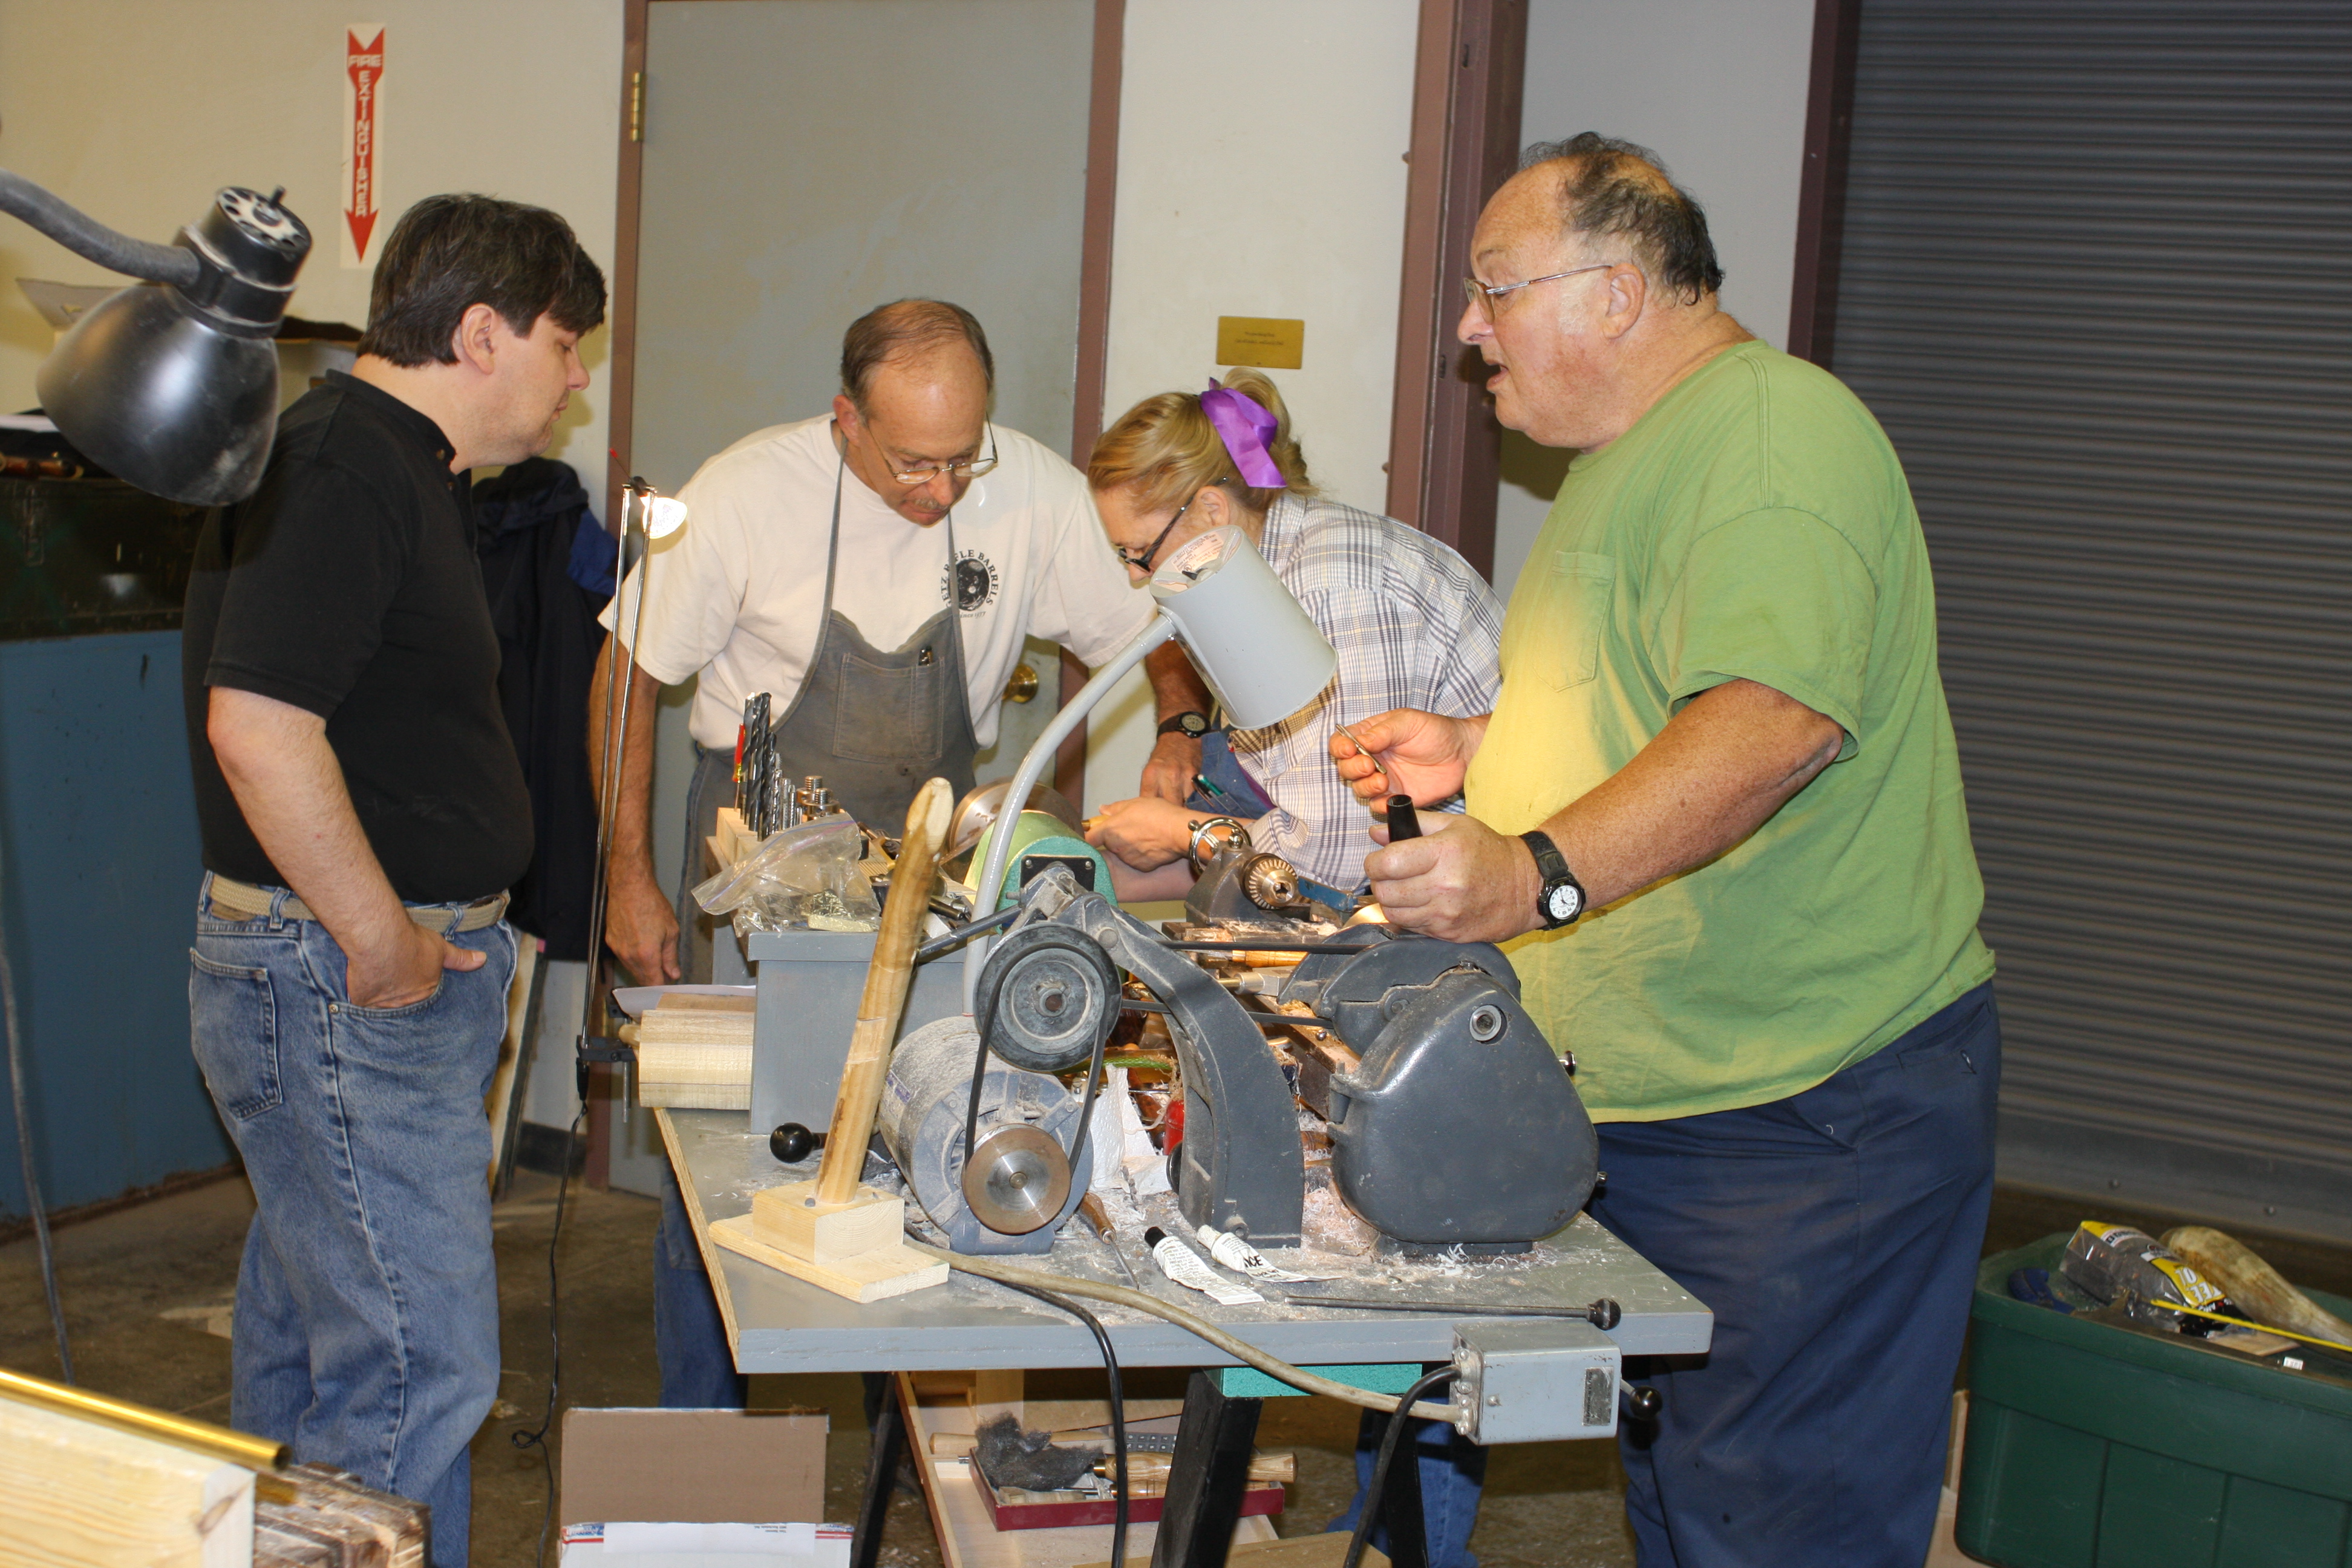
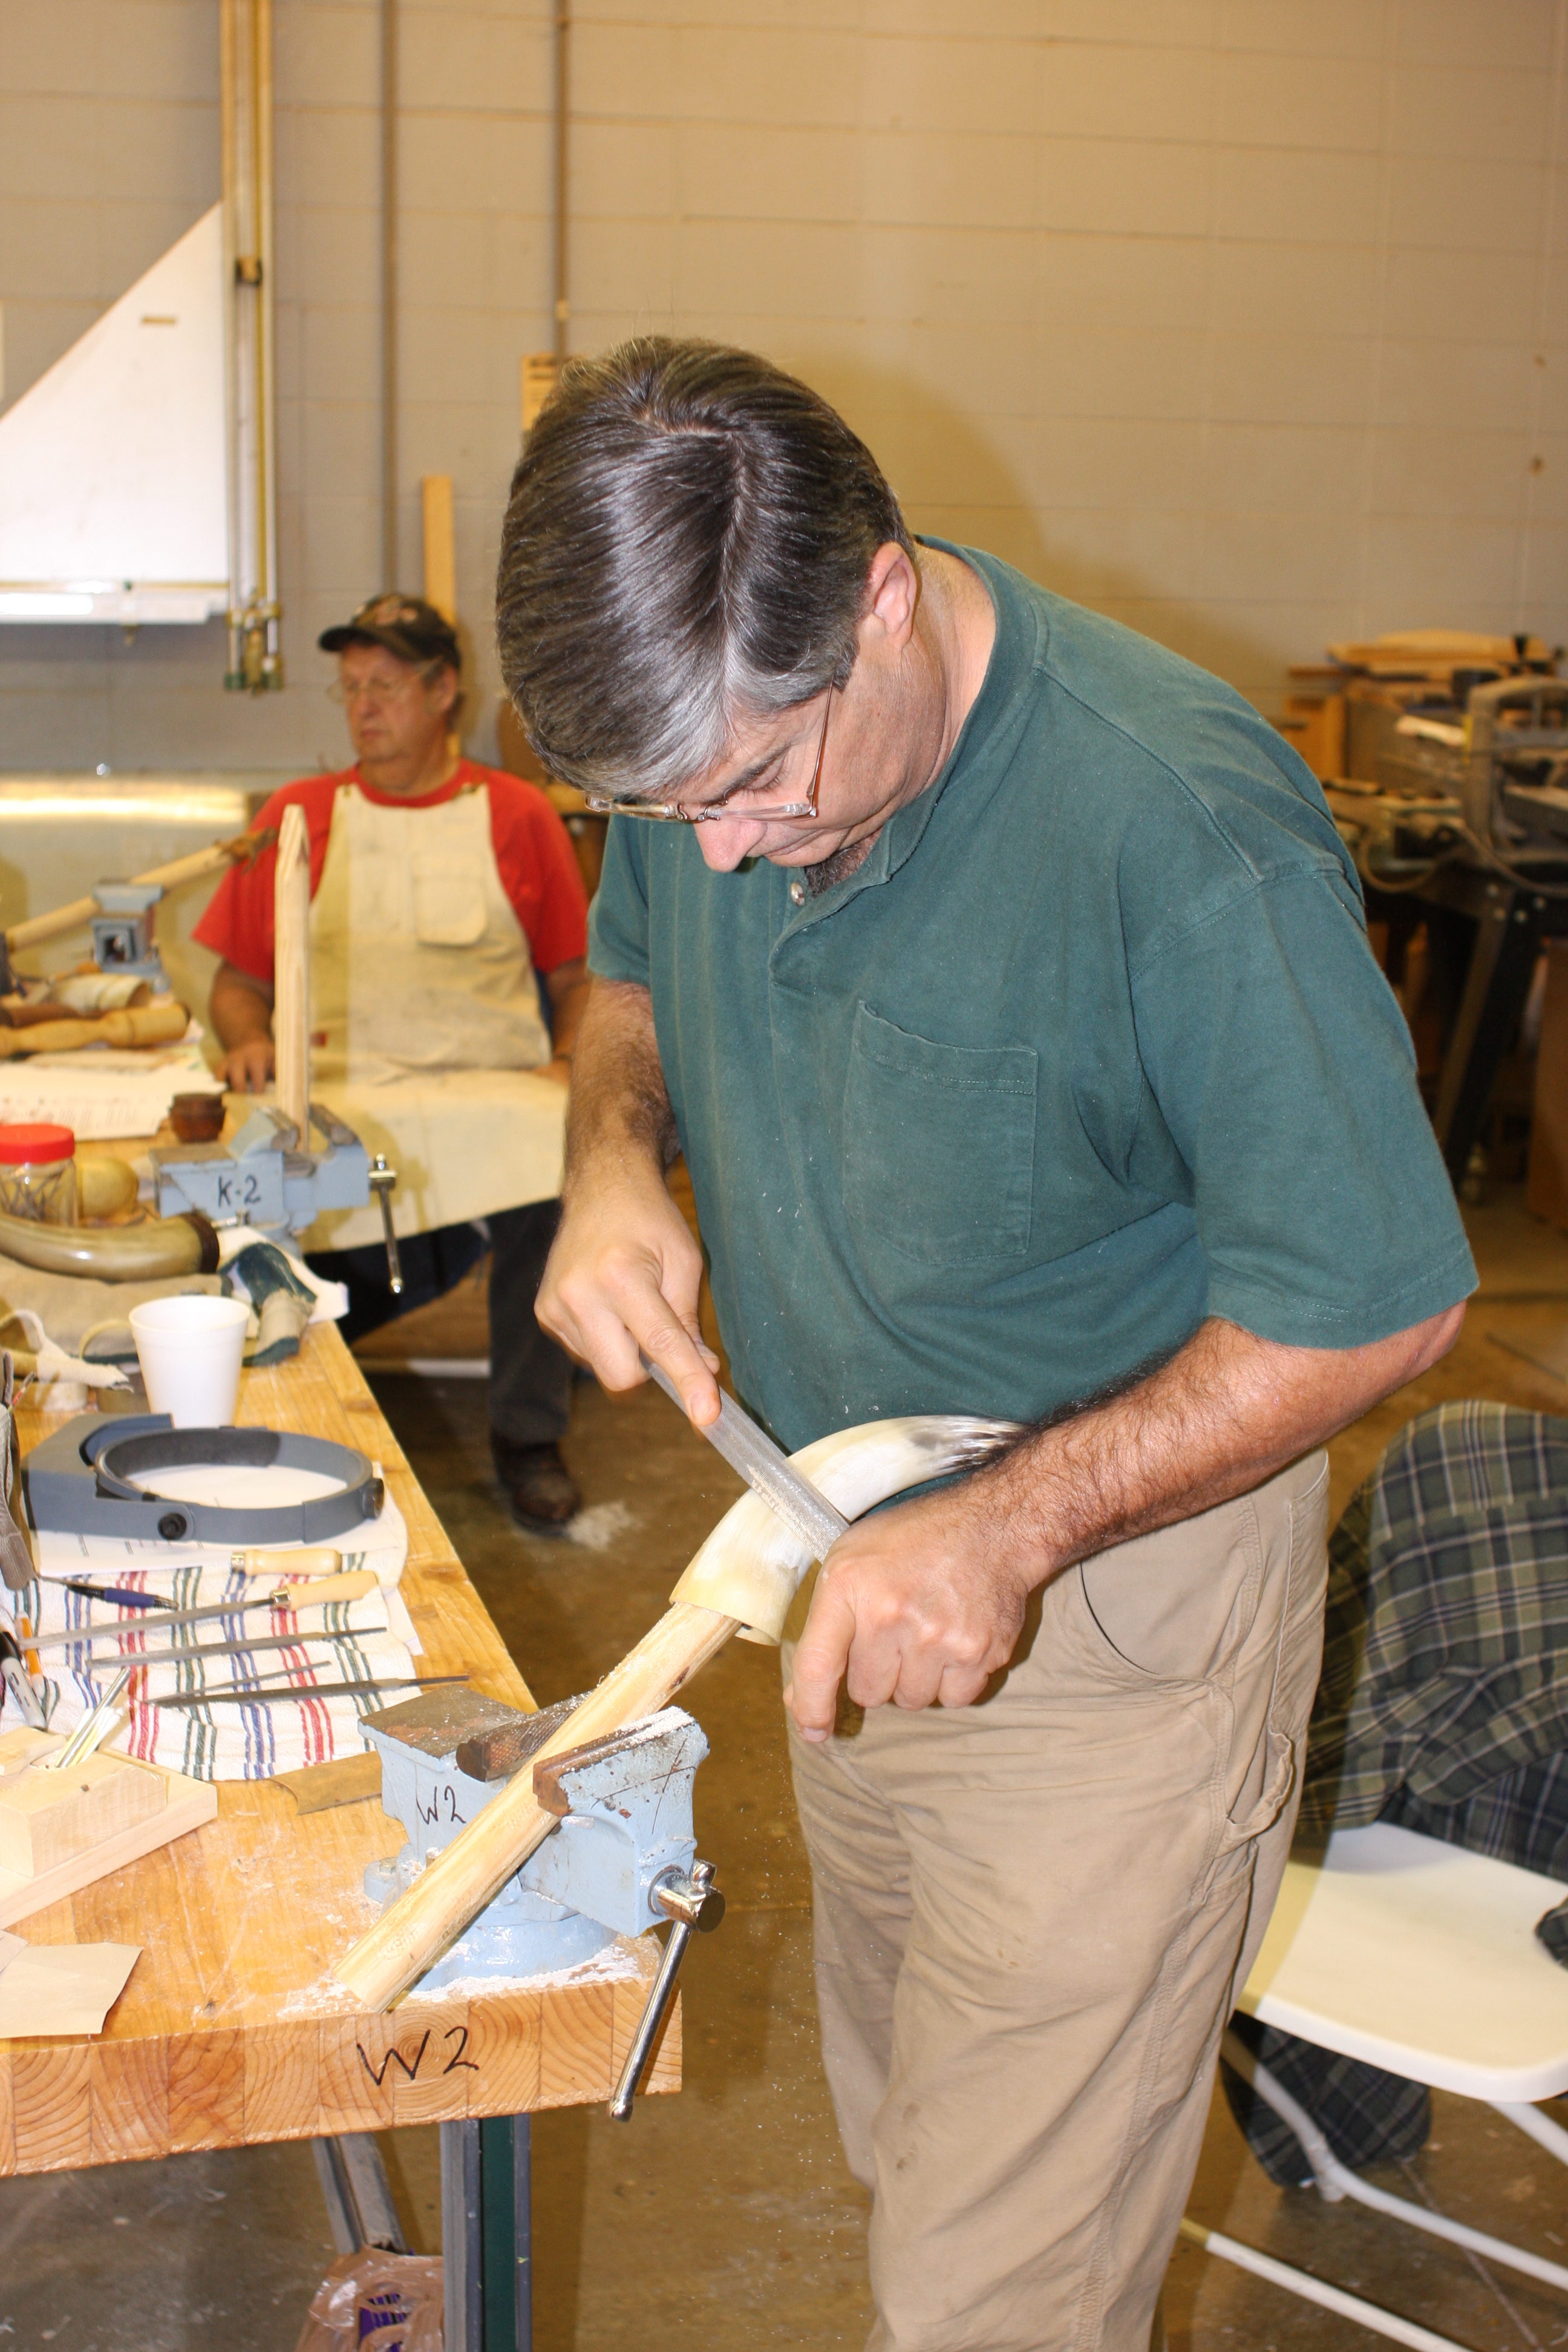
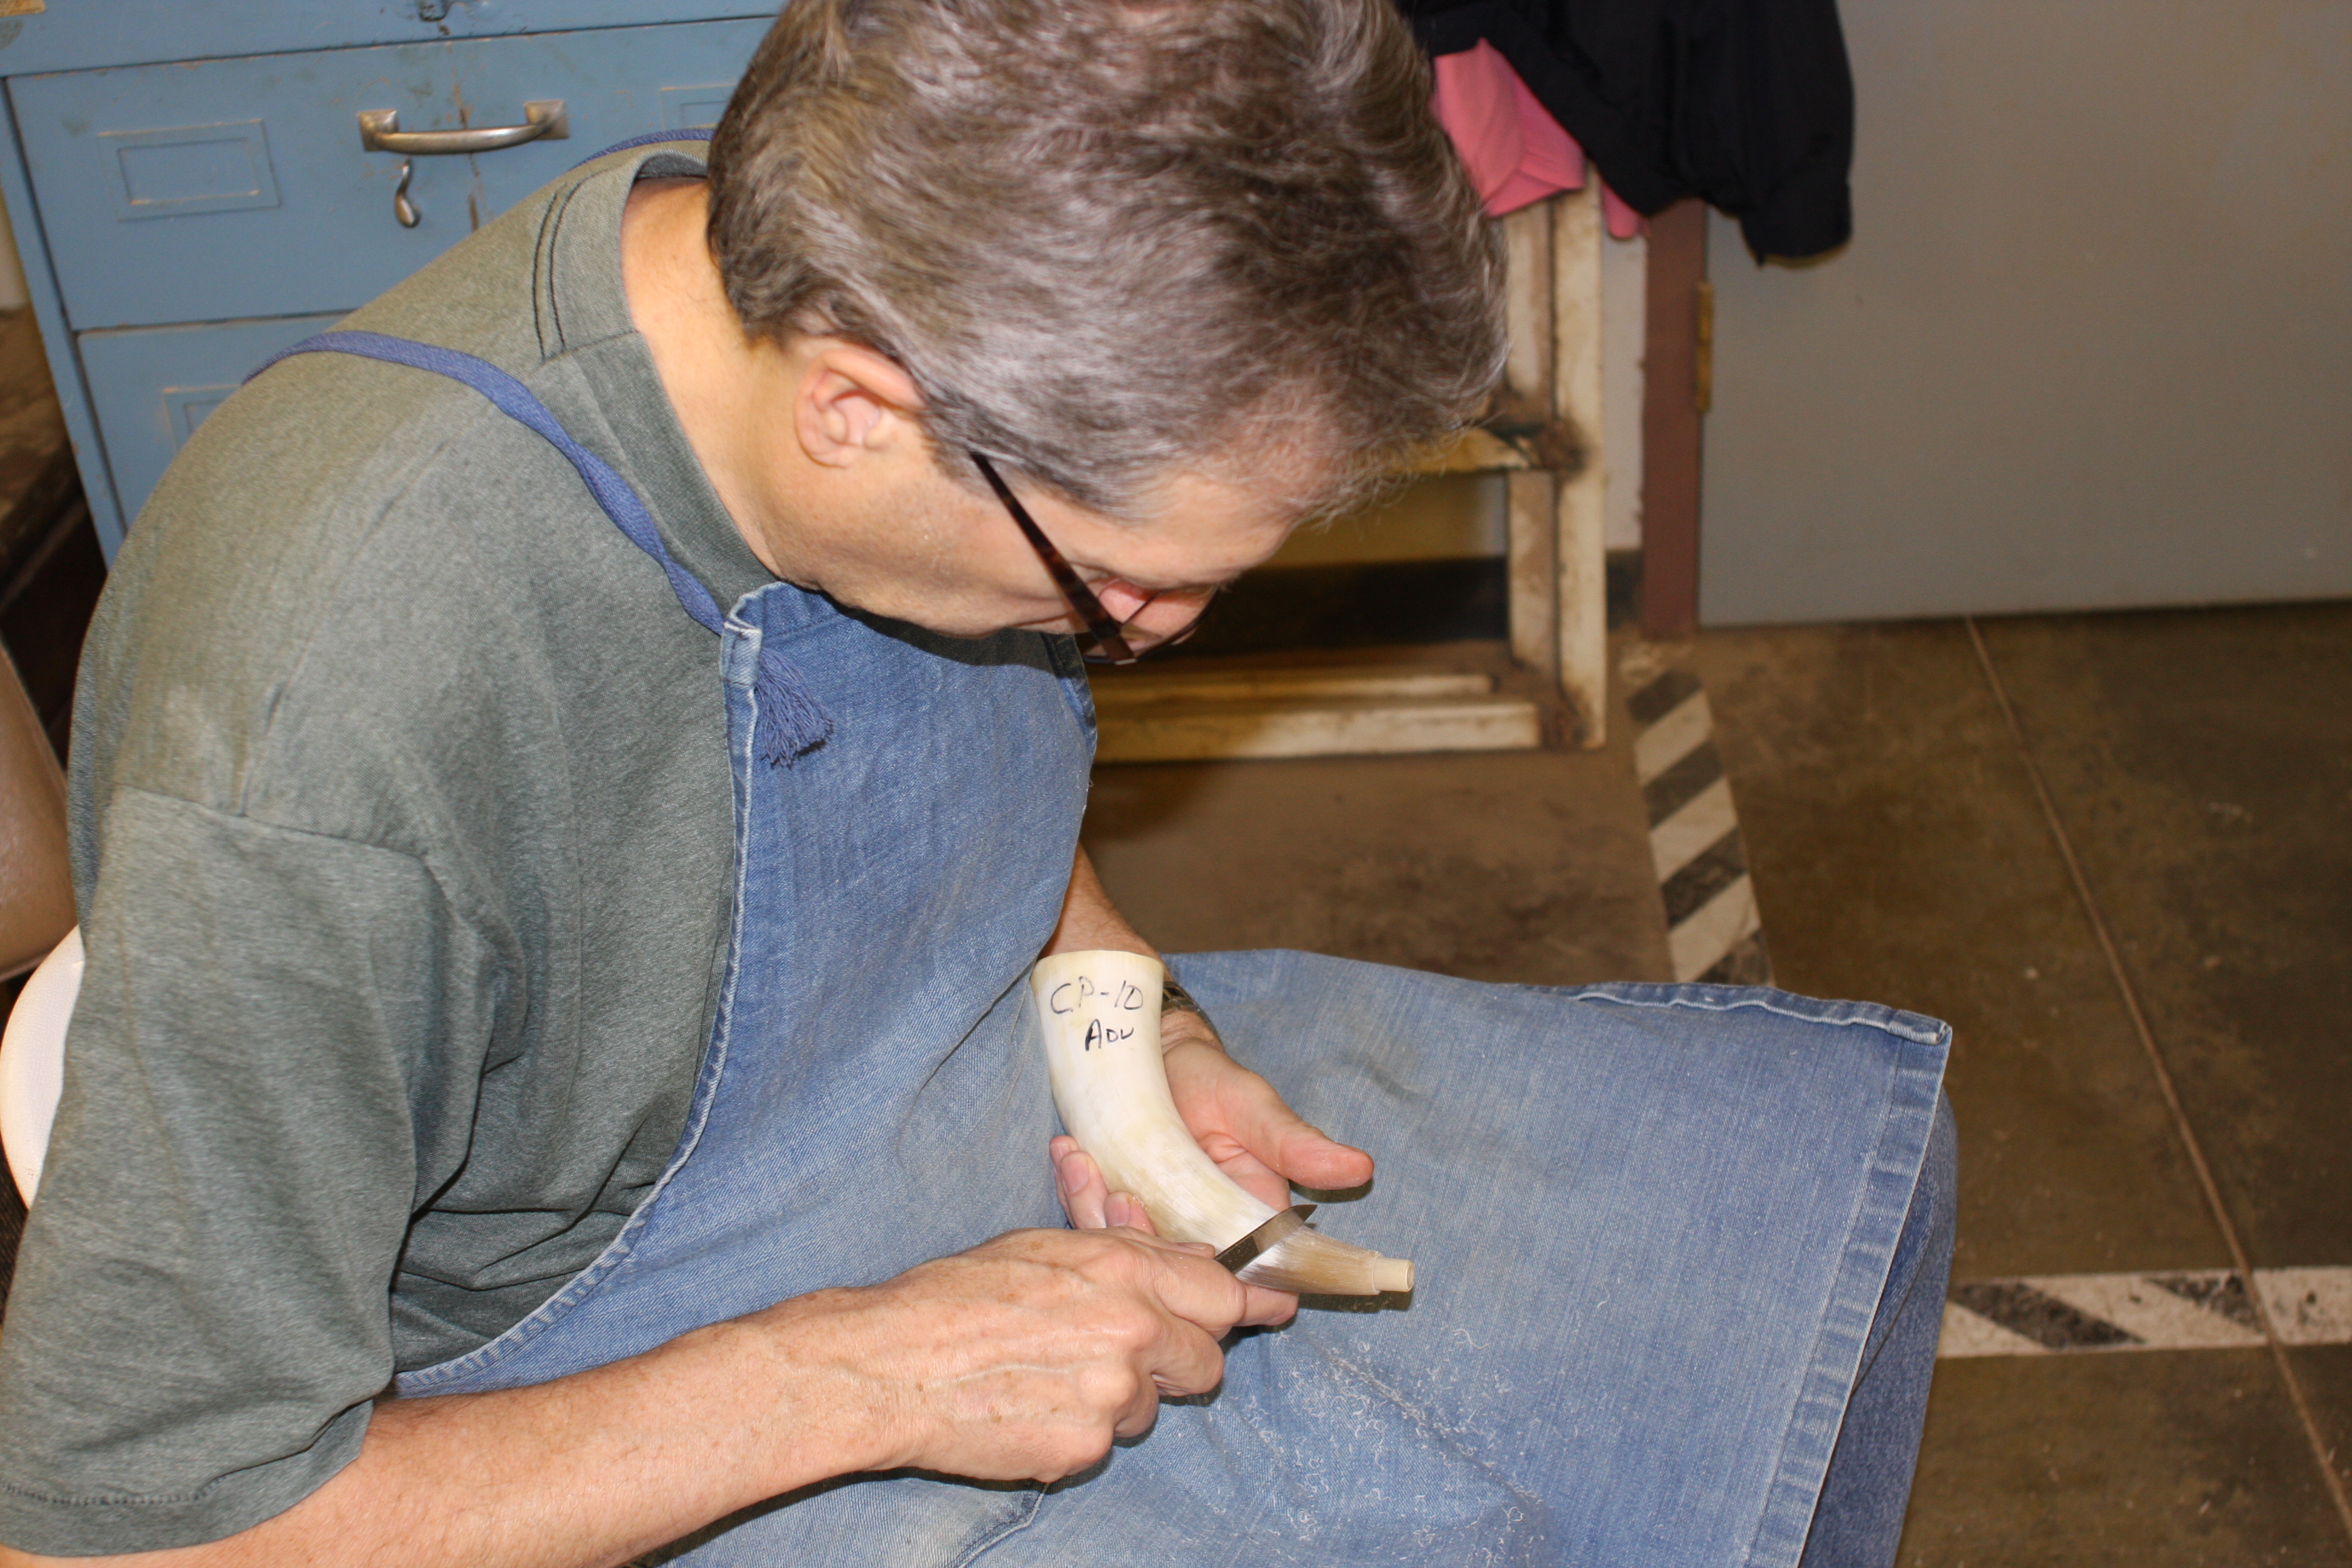
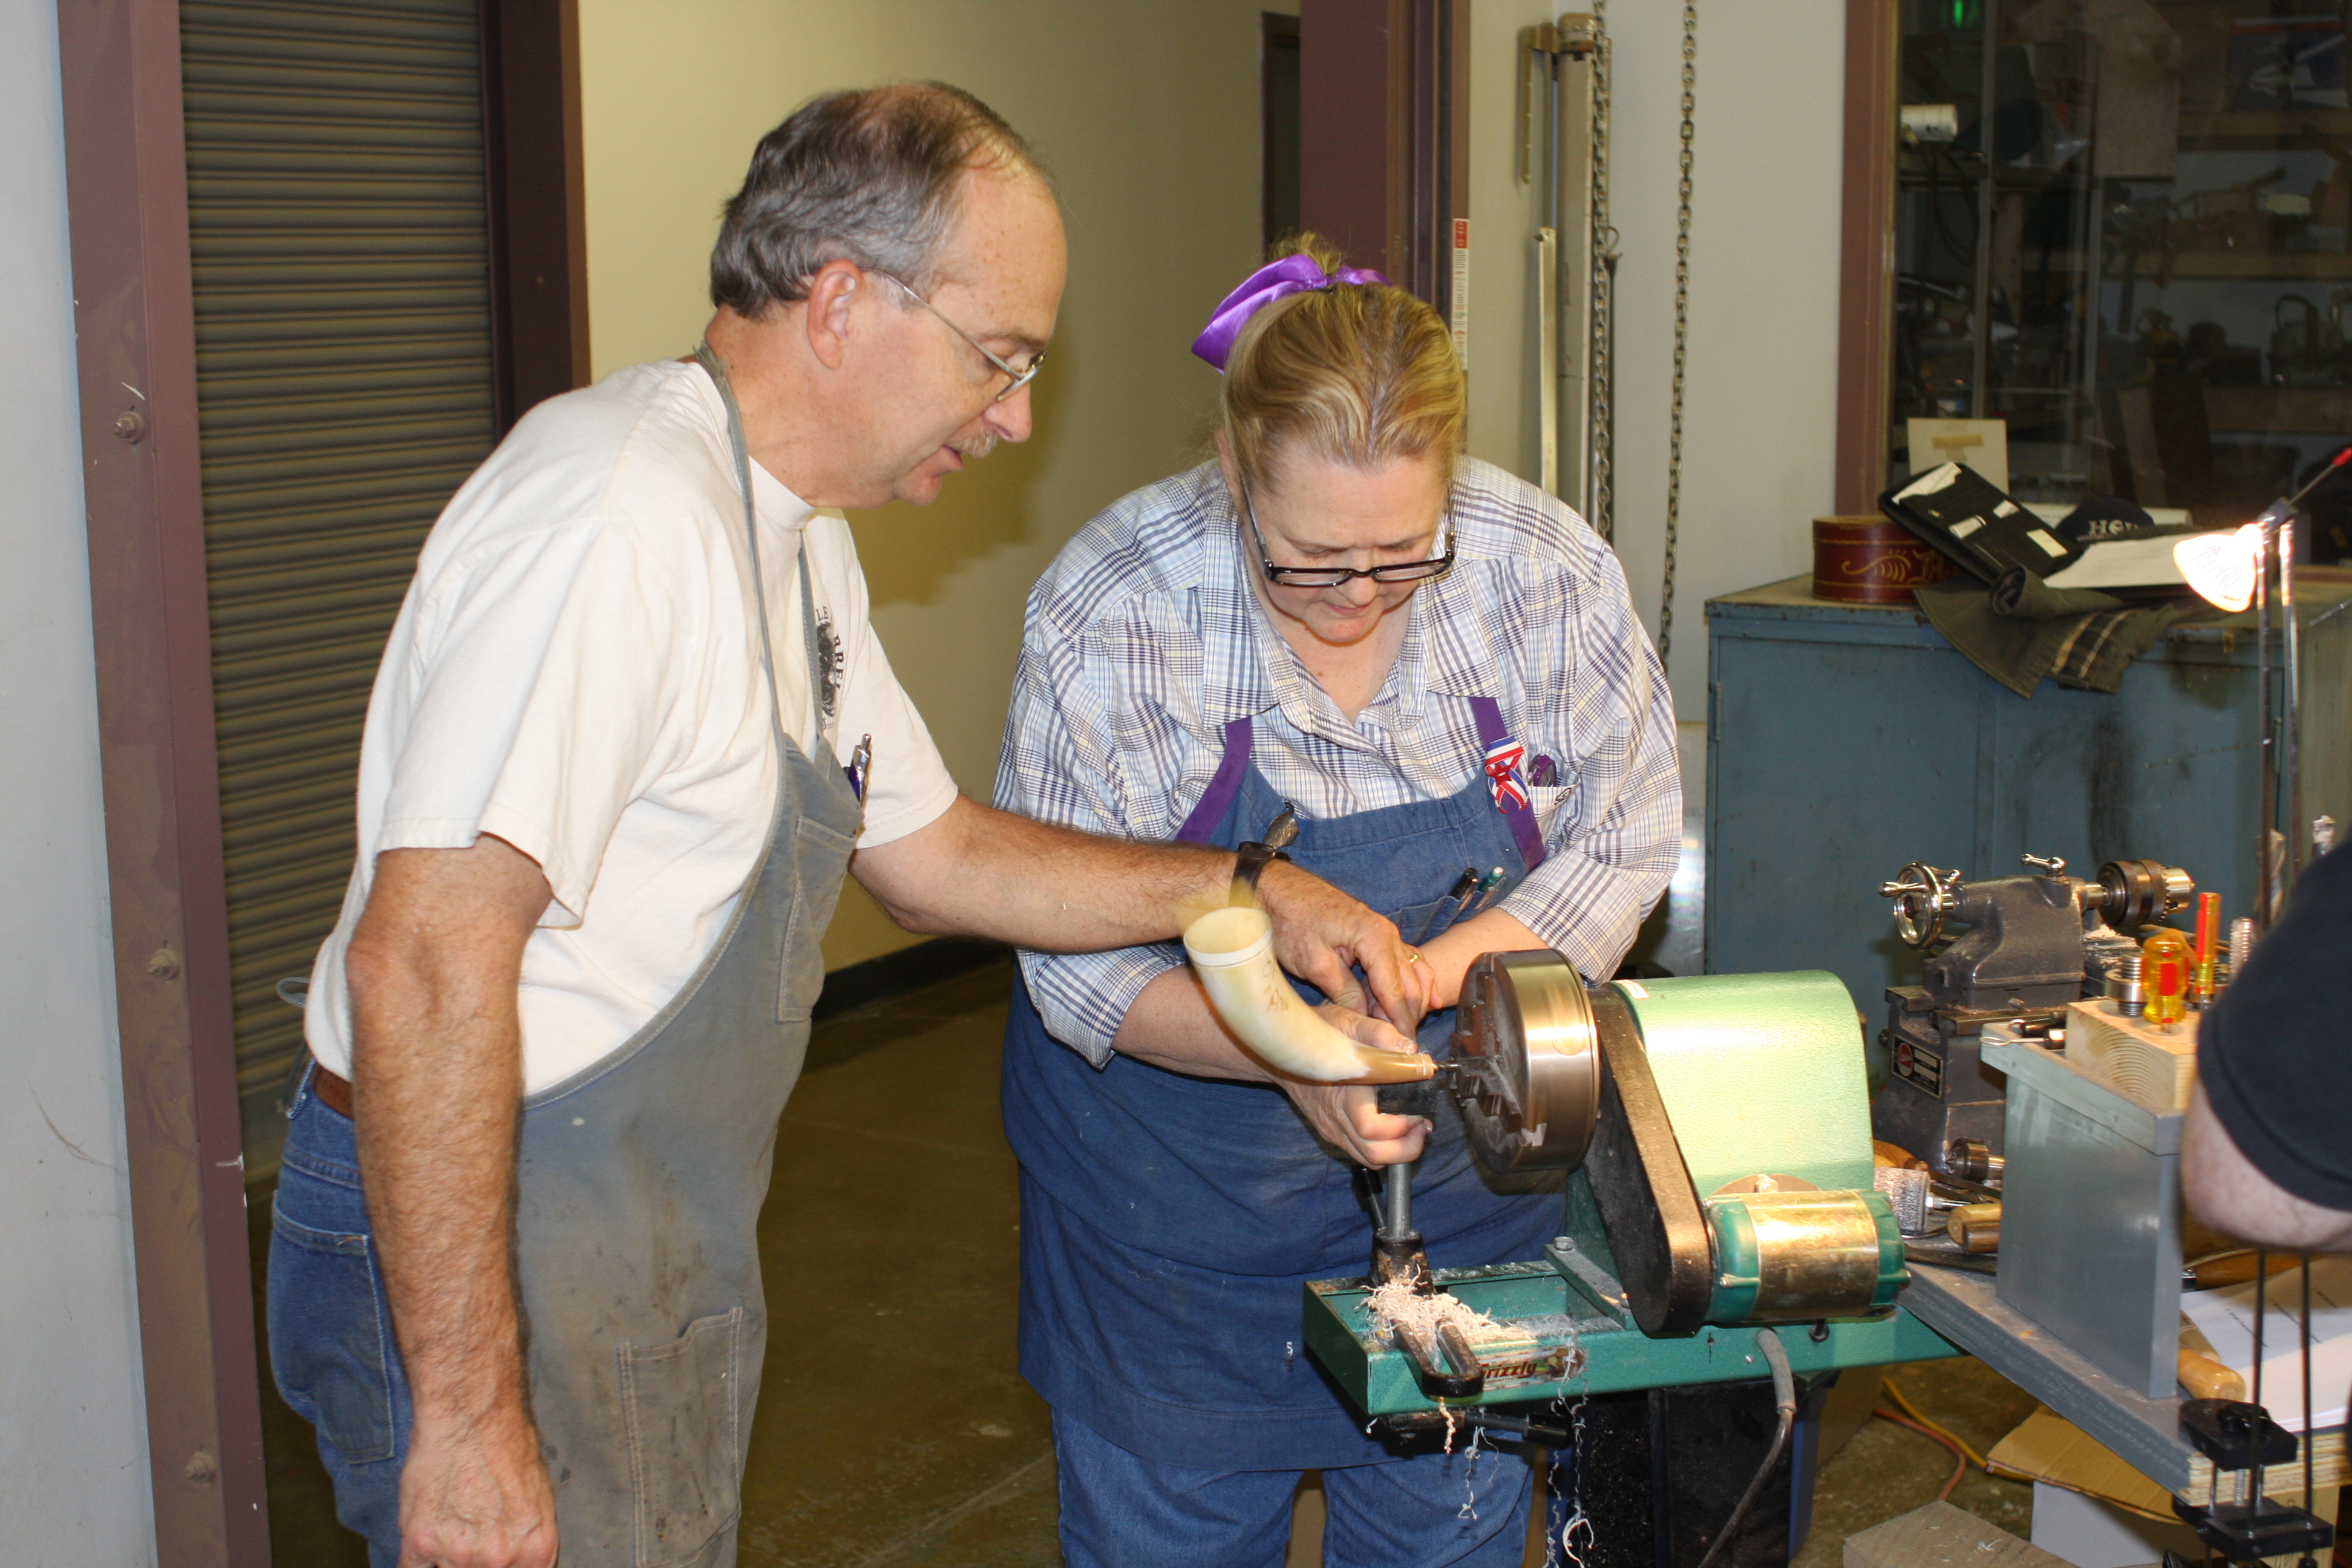
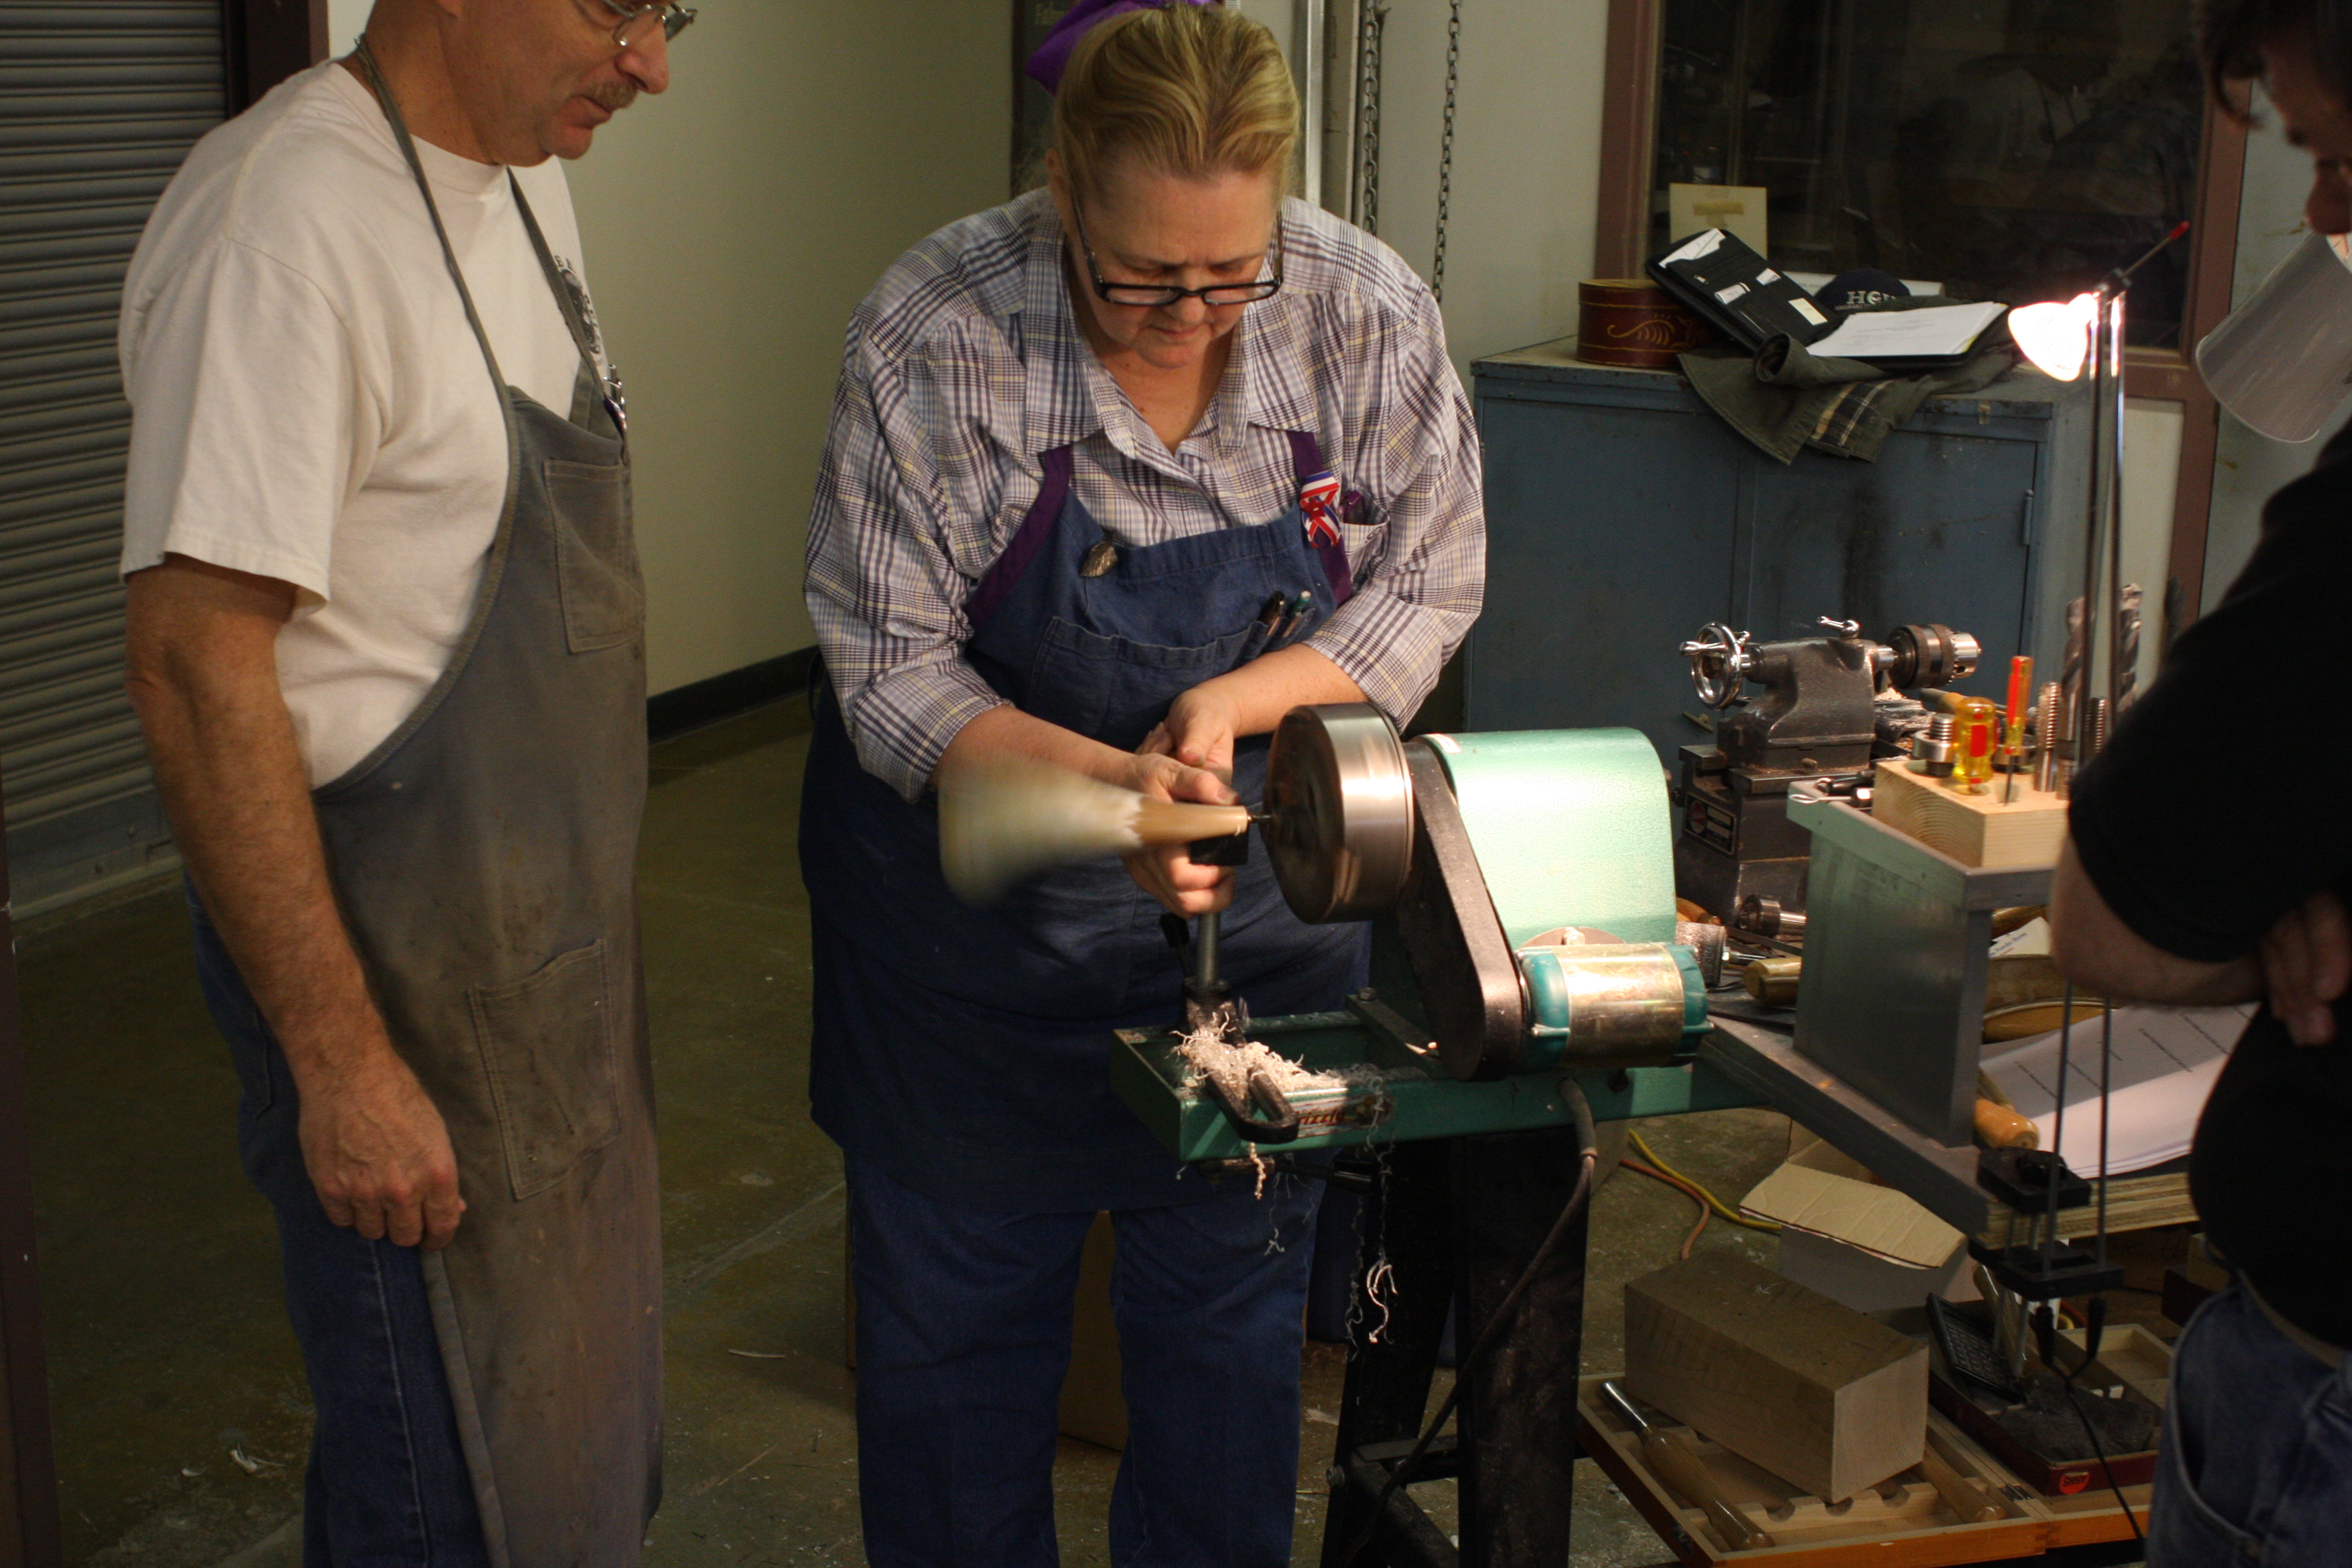
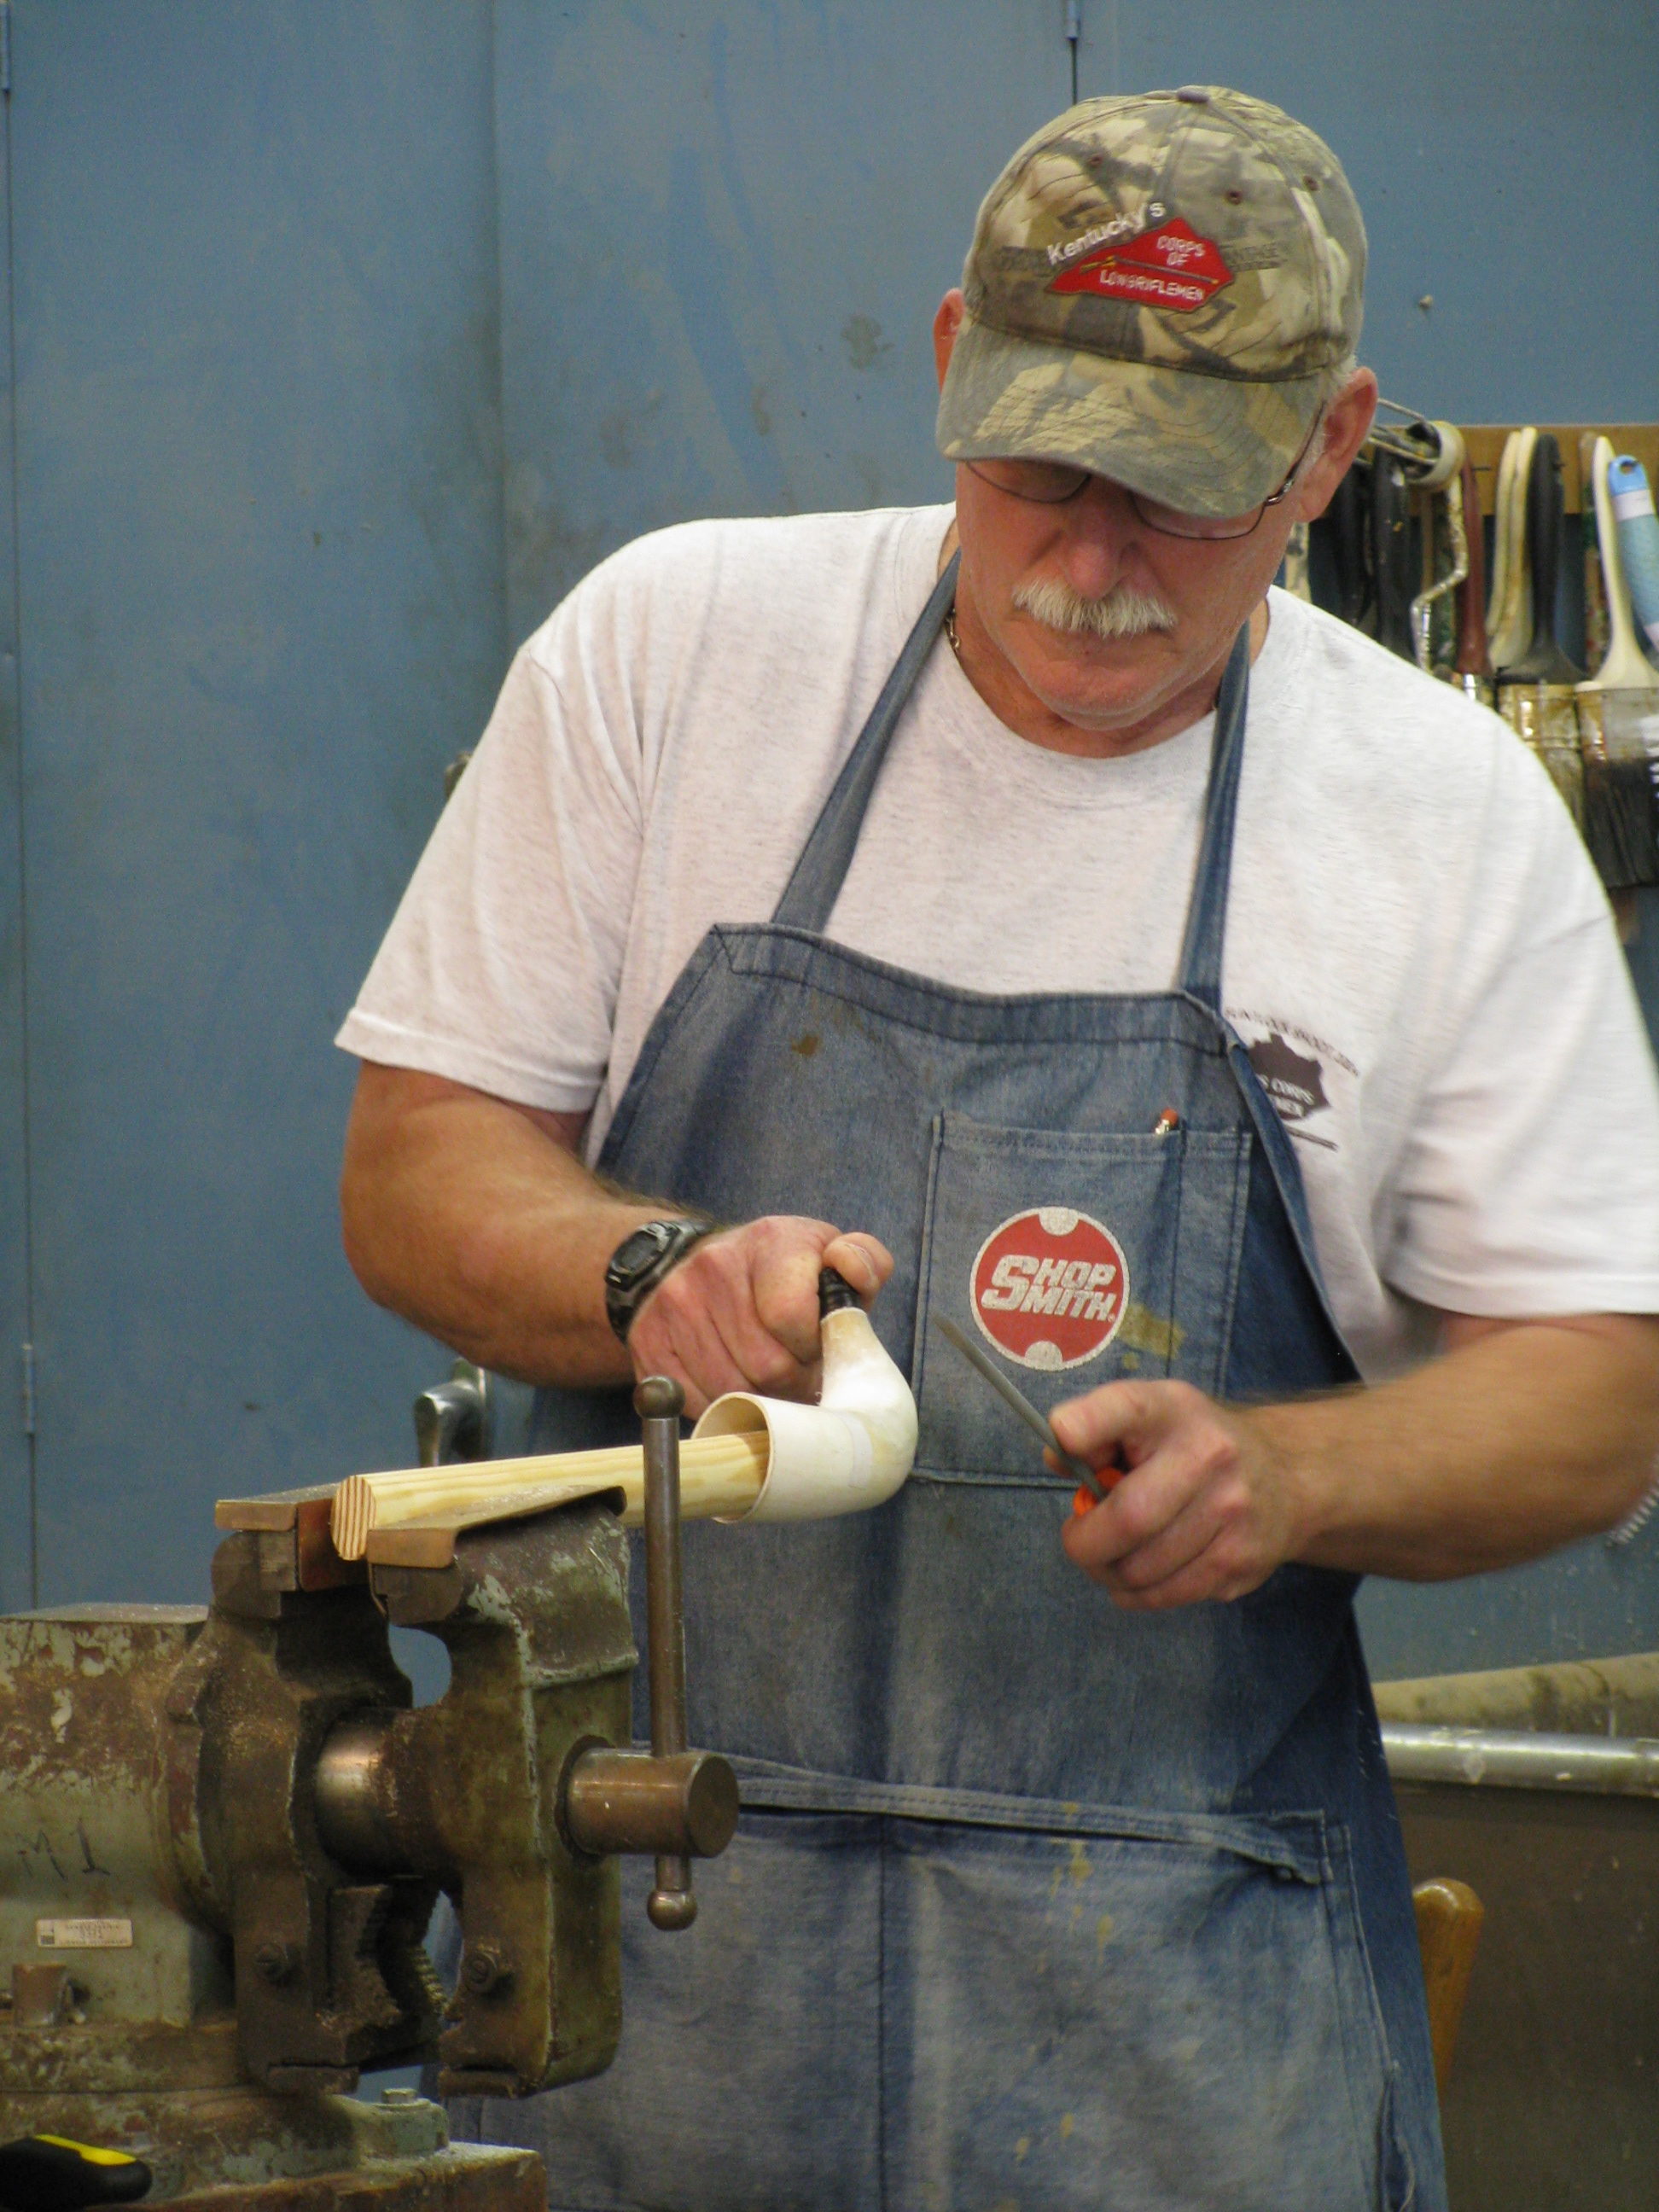
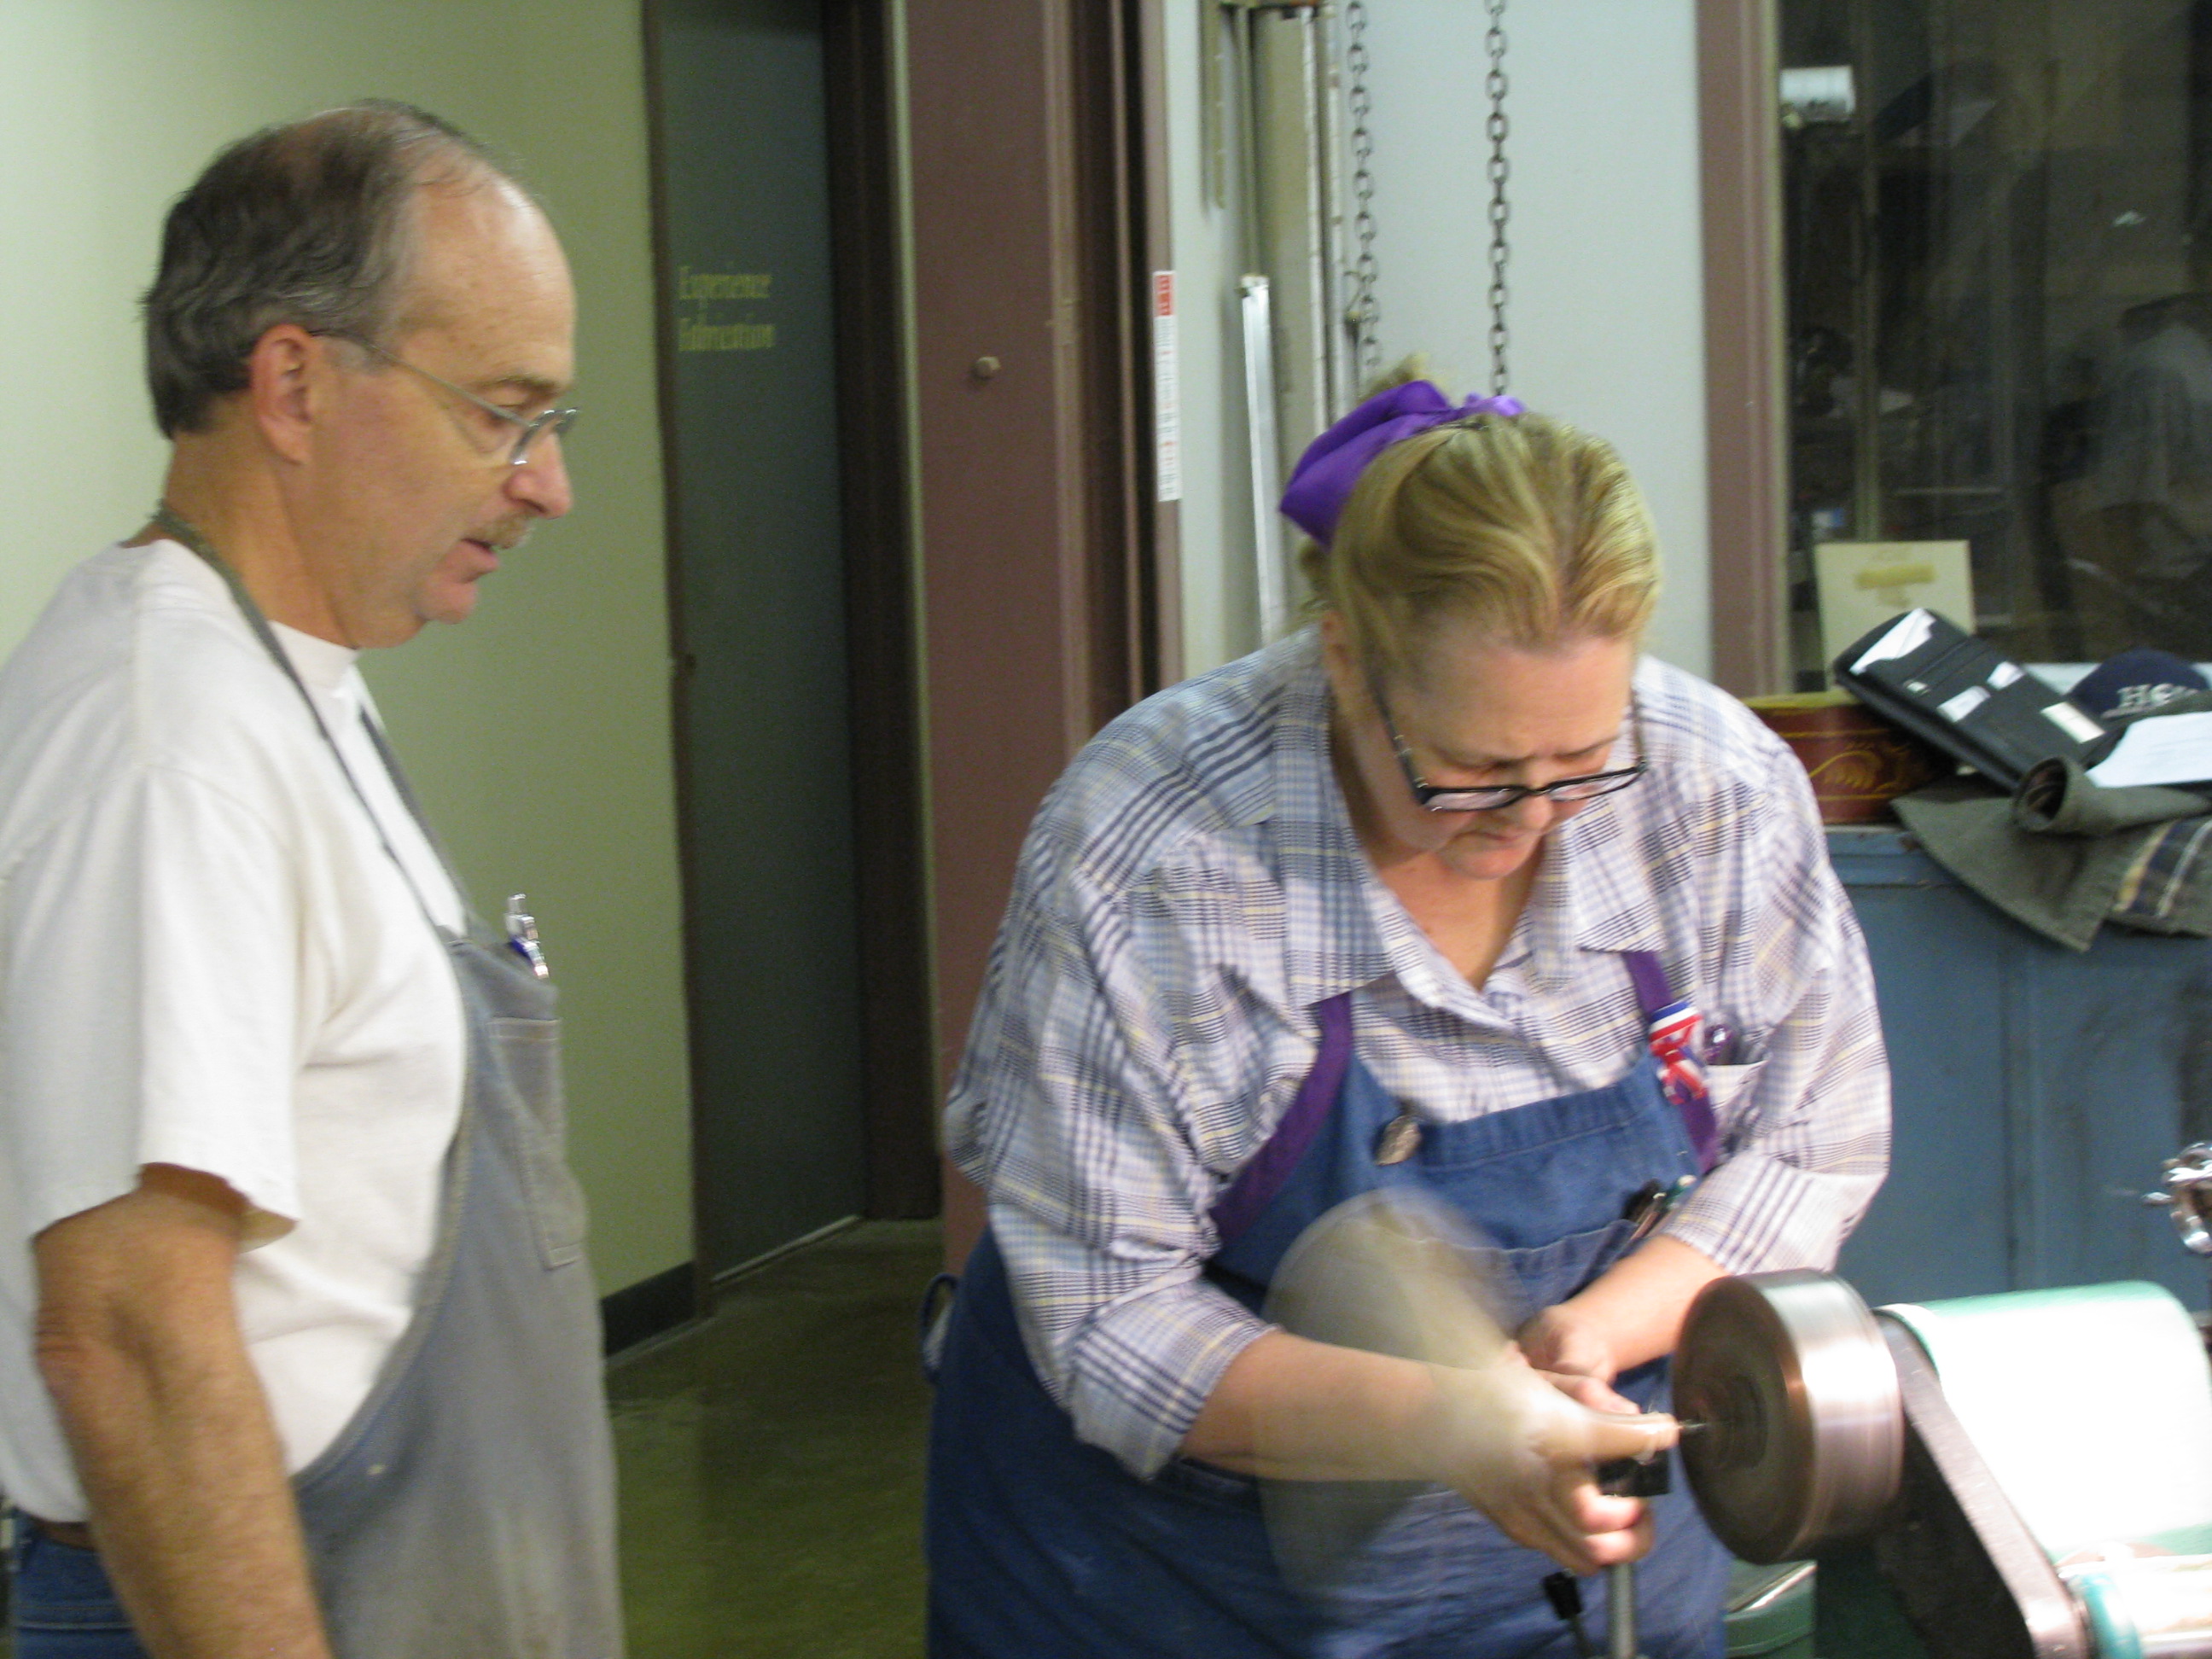
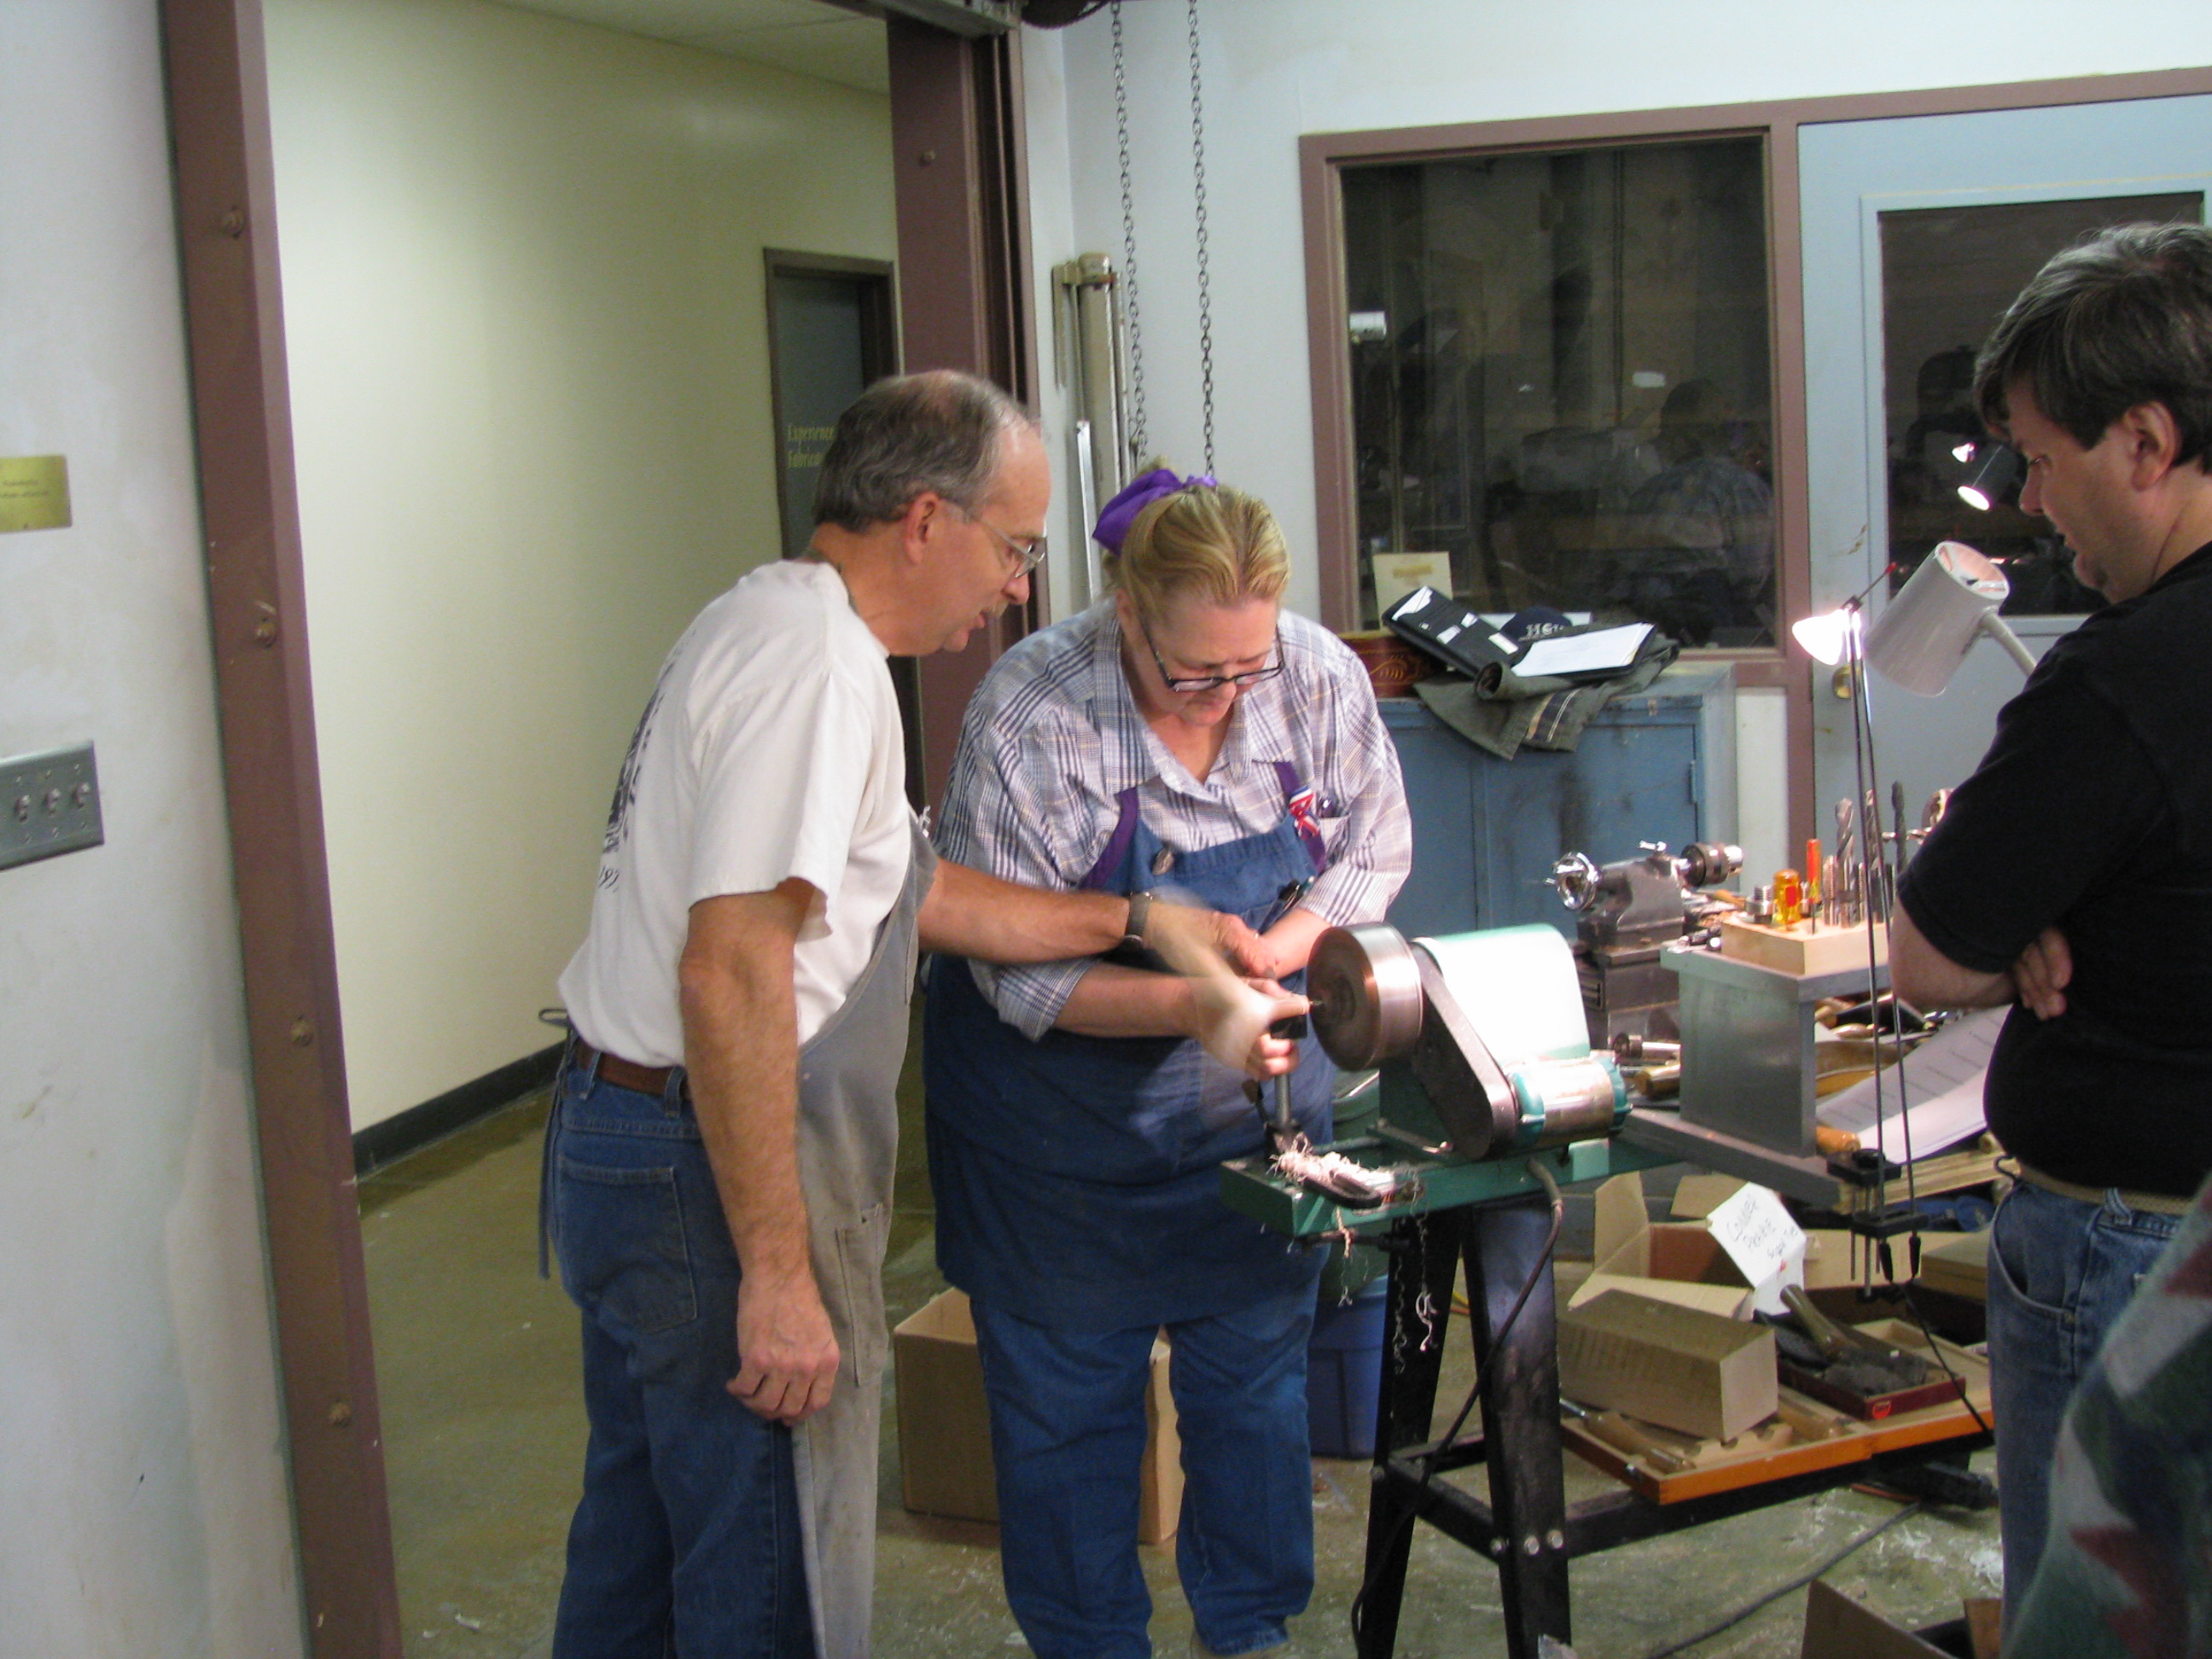
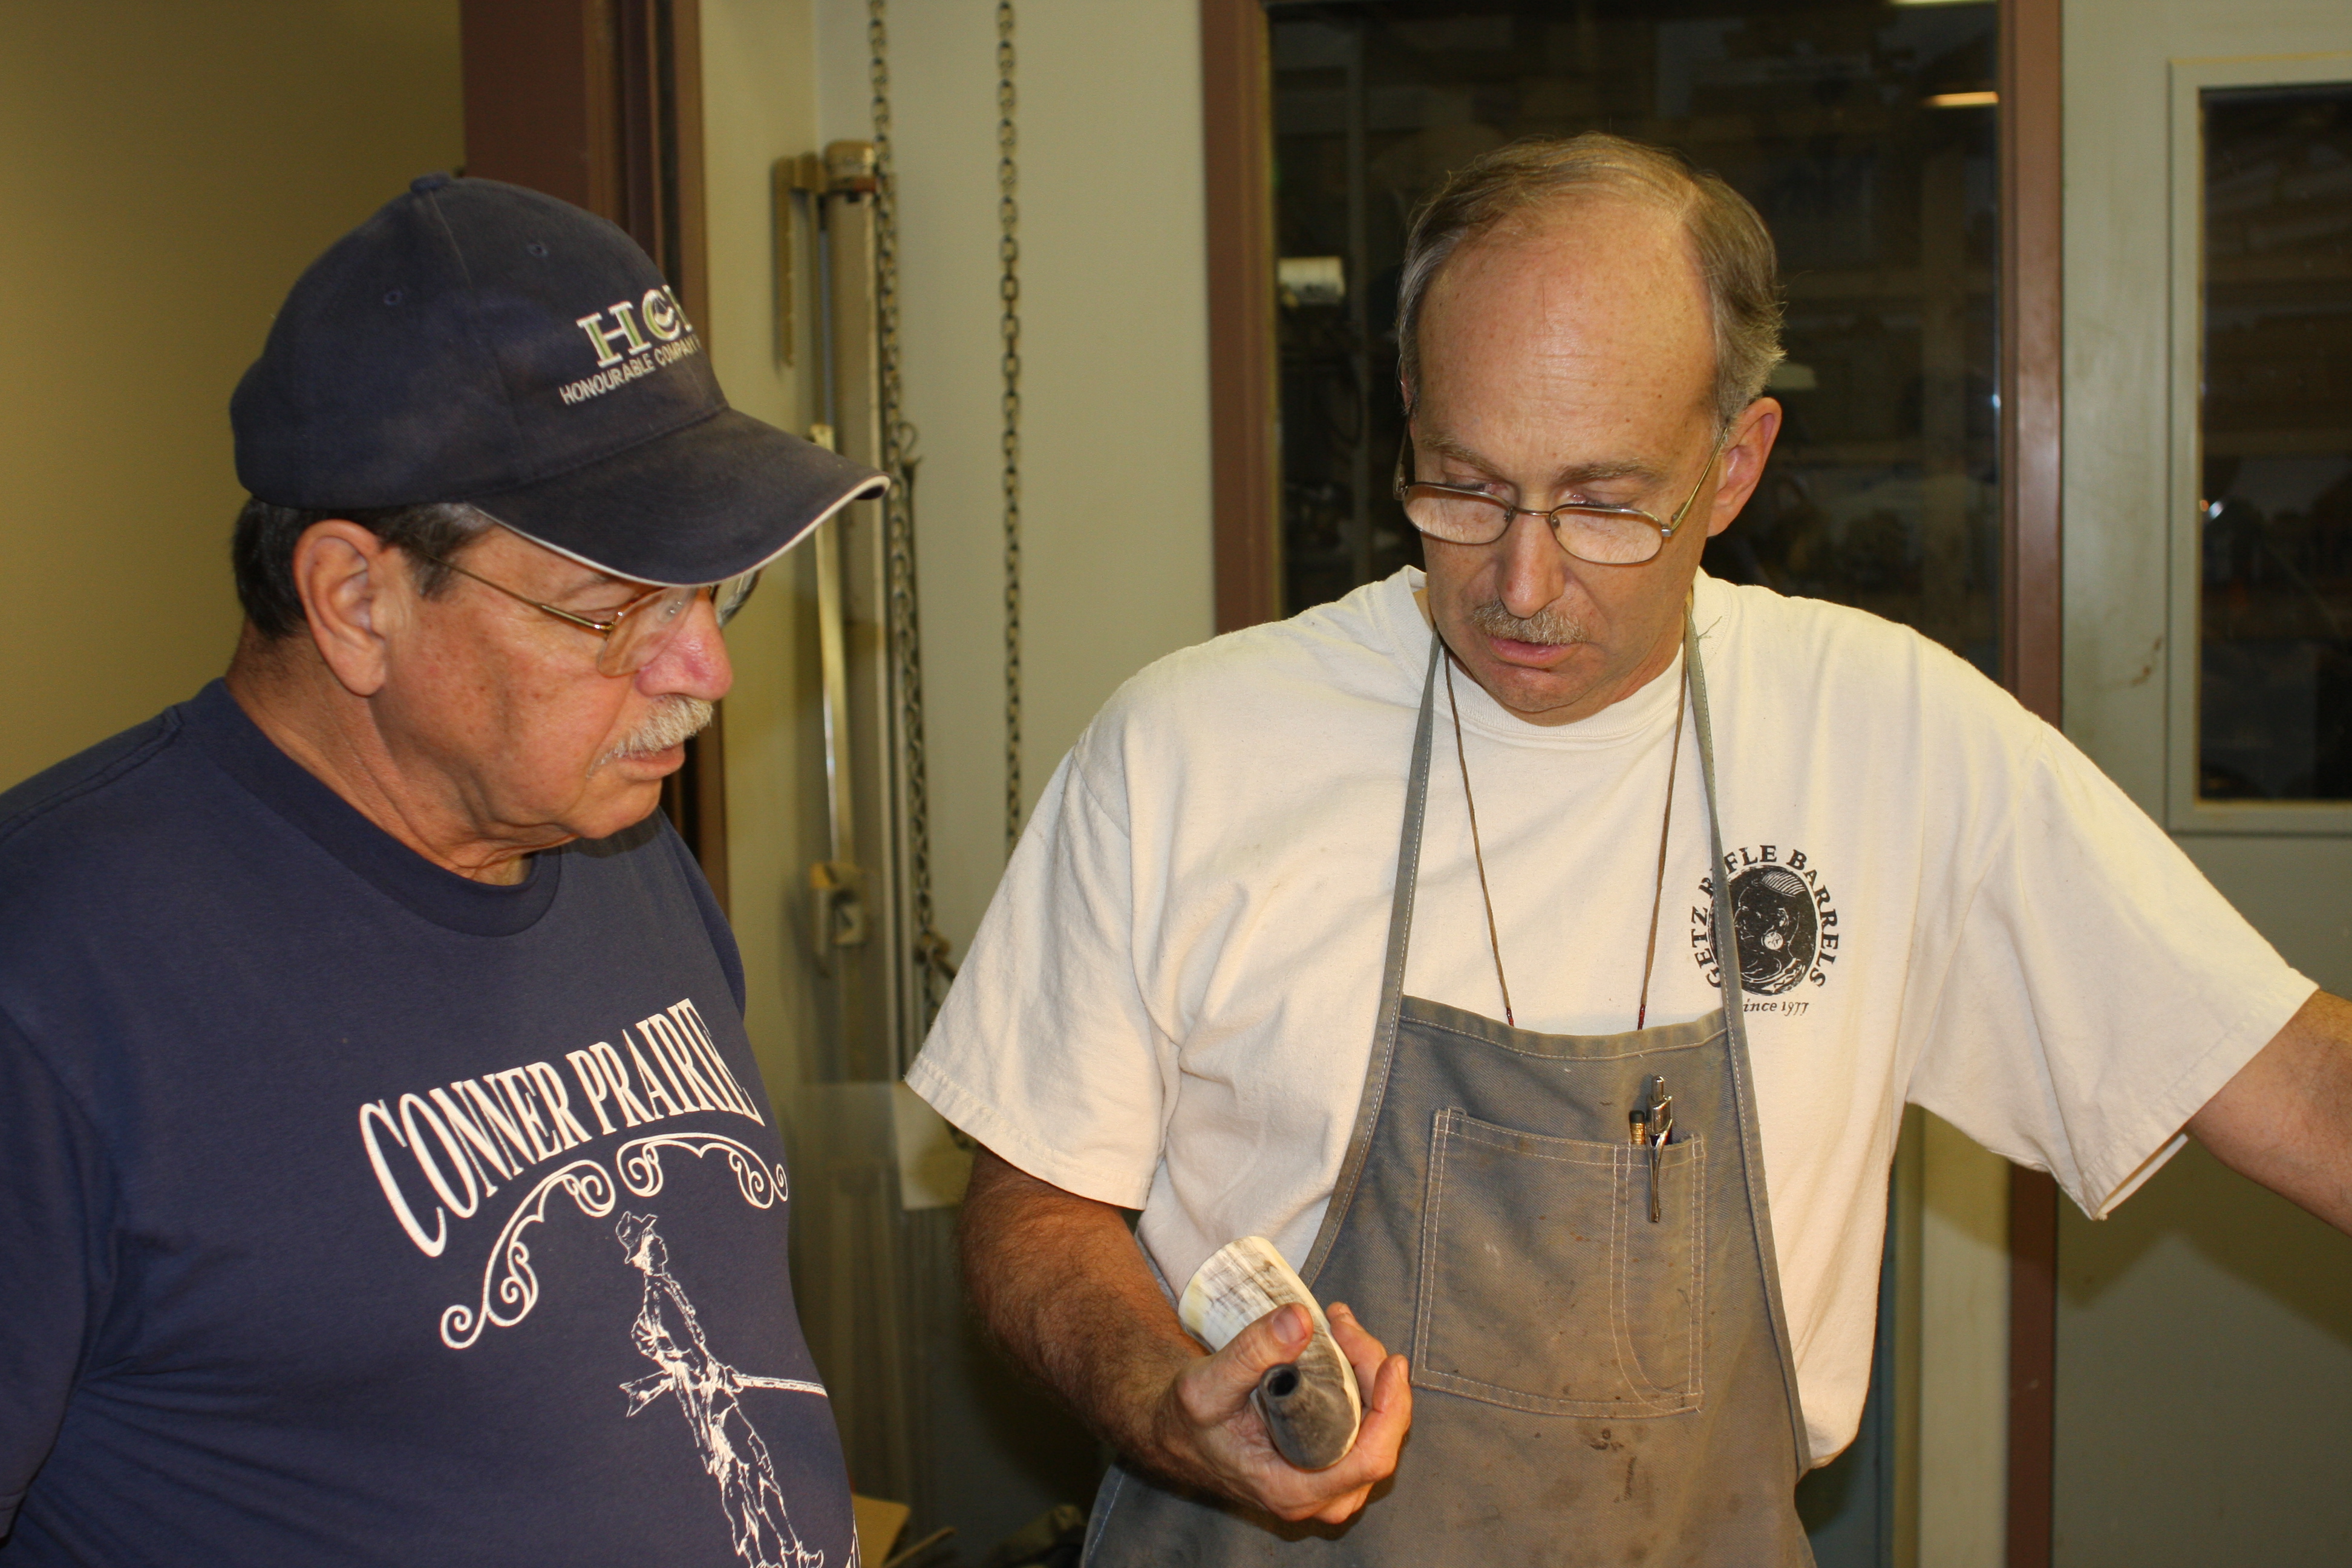
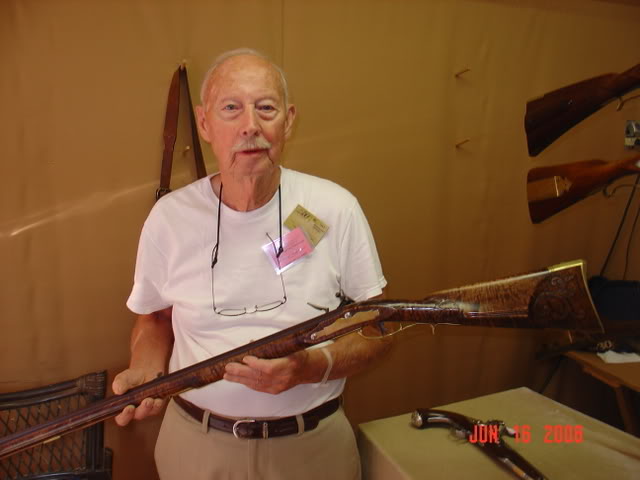
Conner Prairie 21st Annual Art and Arms Making Workshop


Larry Pletcher, Editor — Photo Credit: Steve Chapman, Larry Pletcher
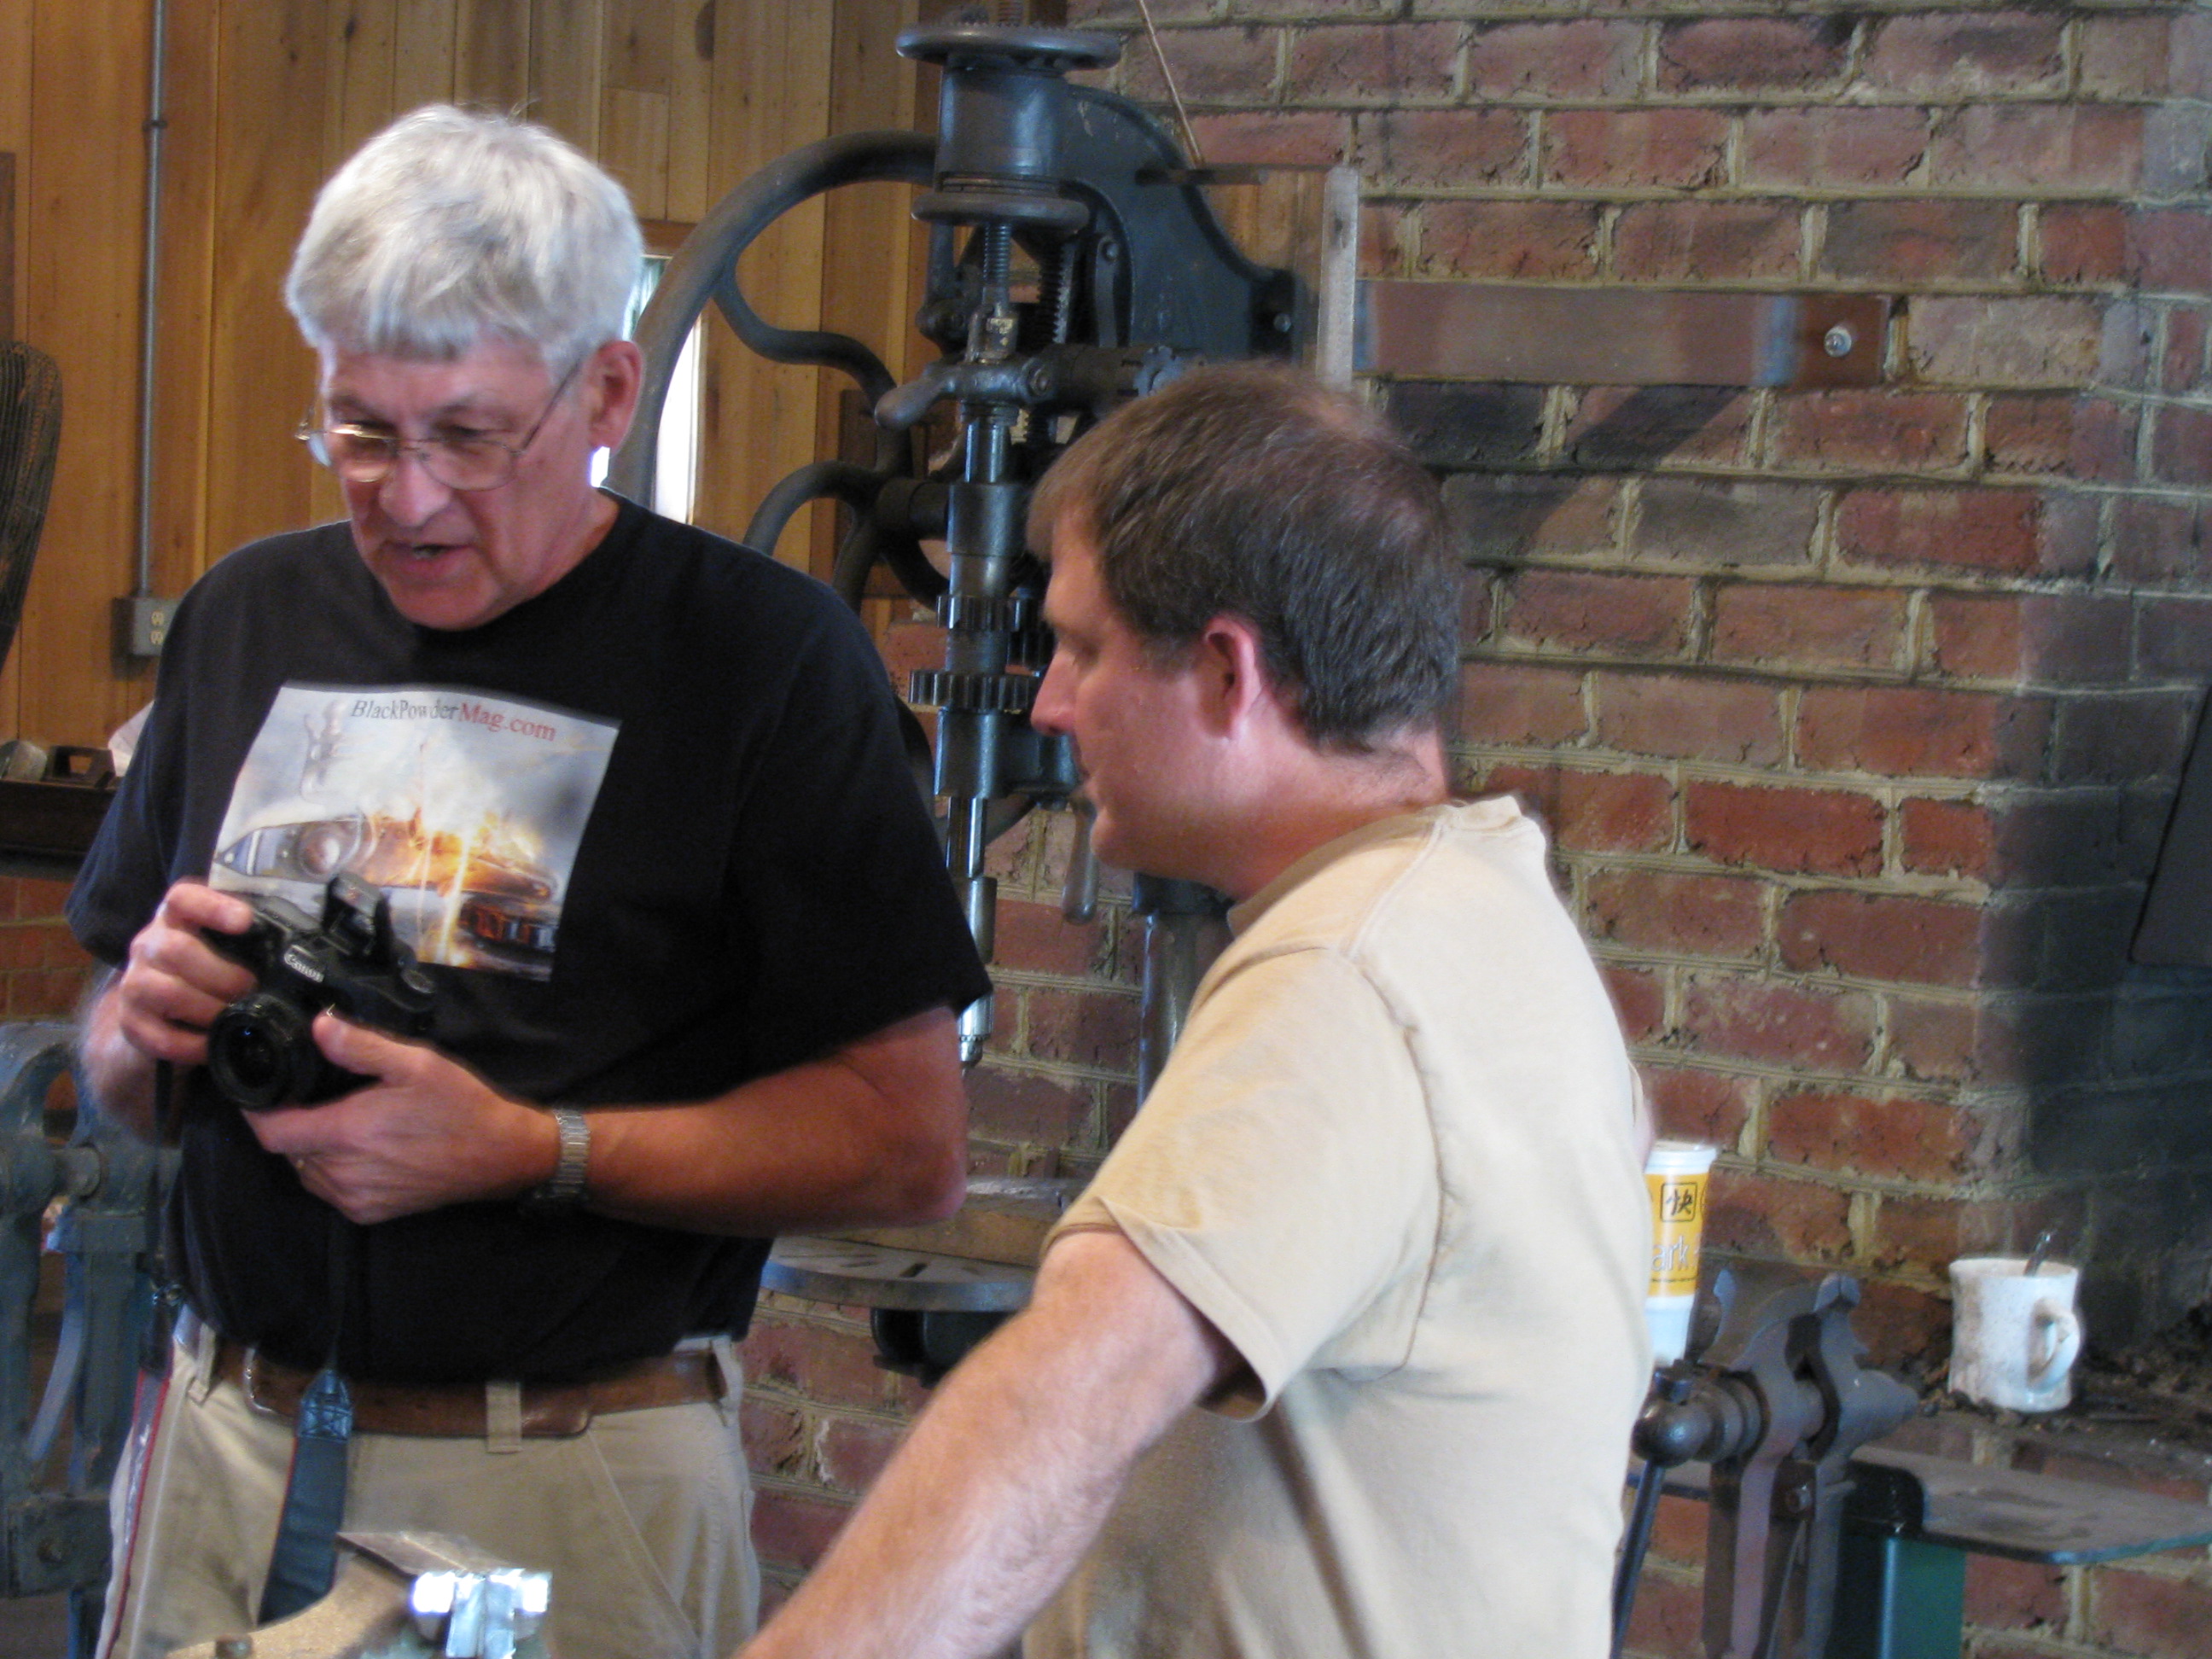
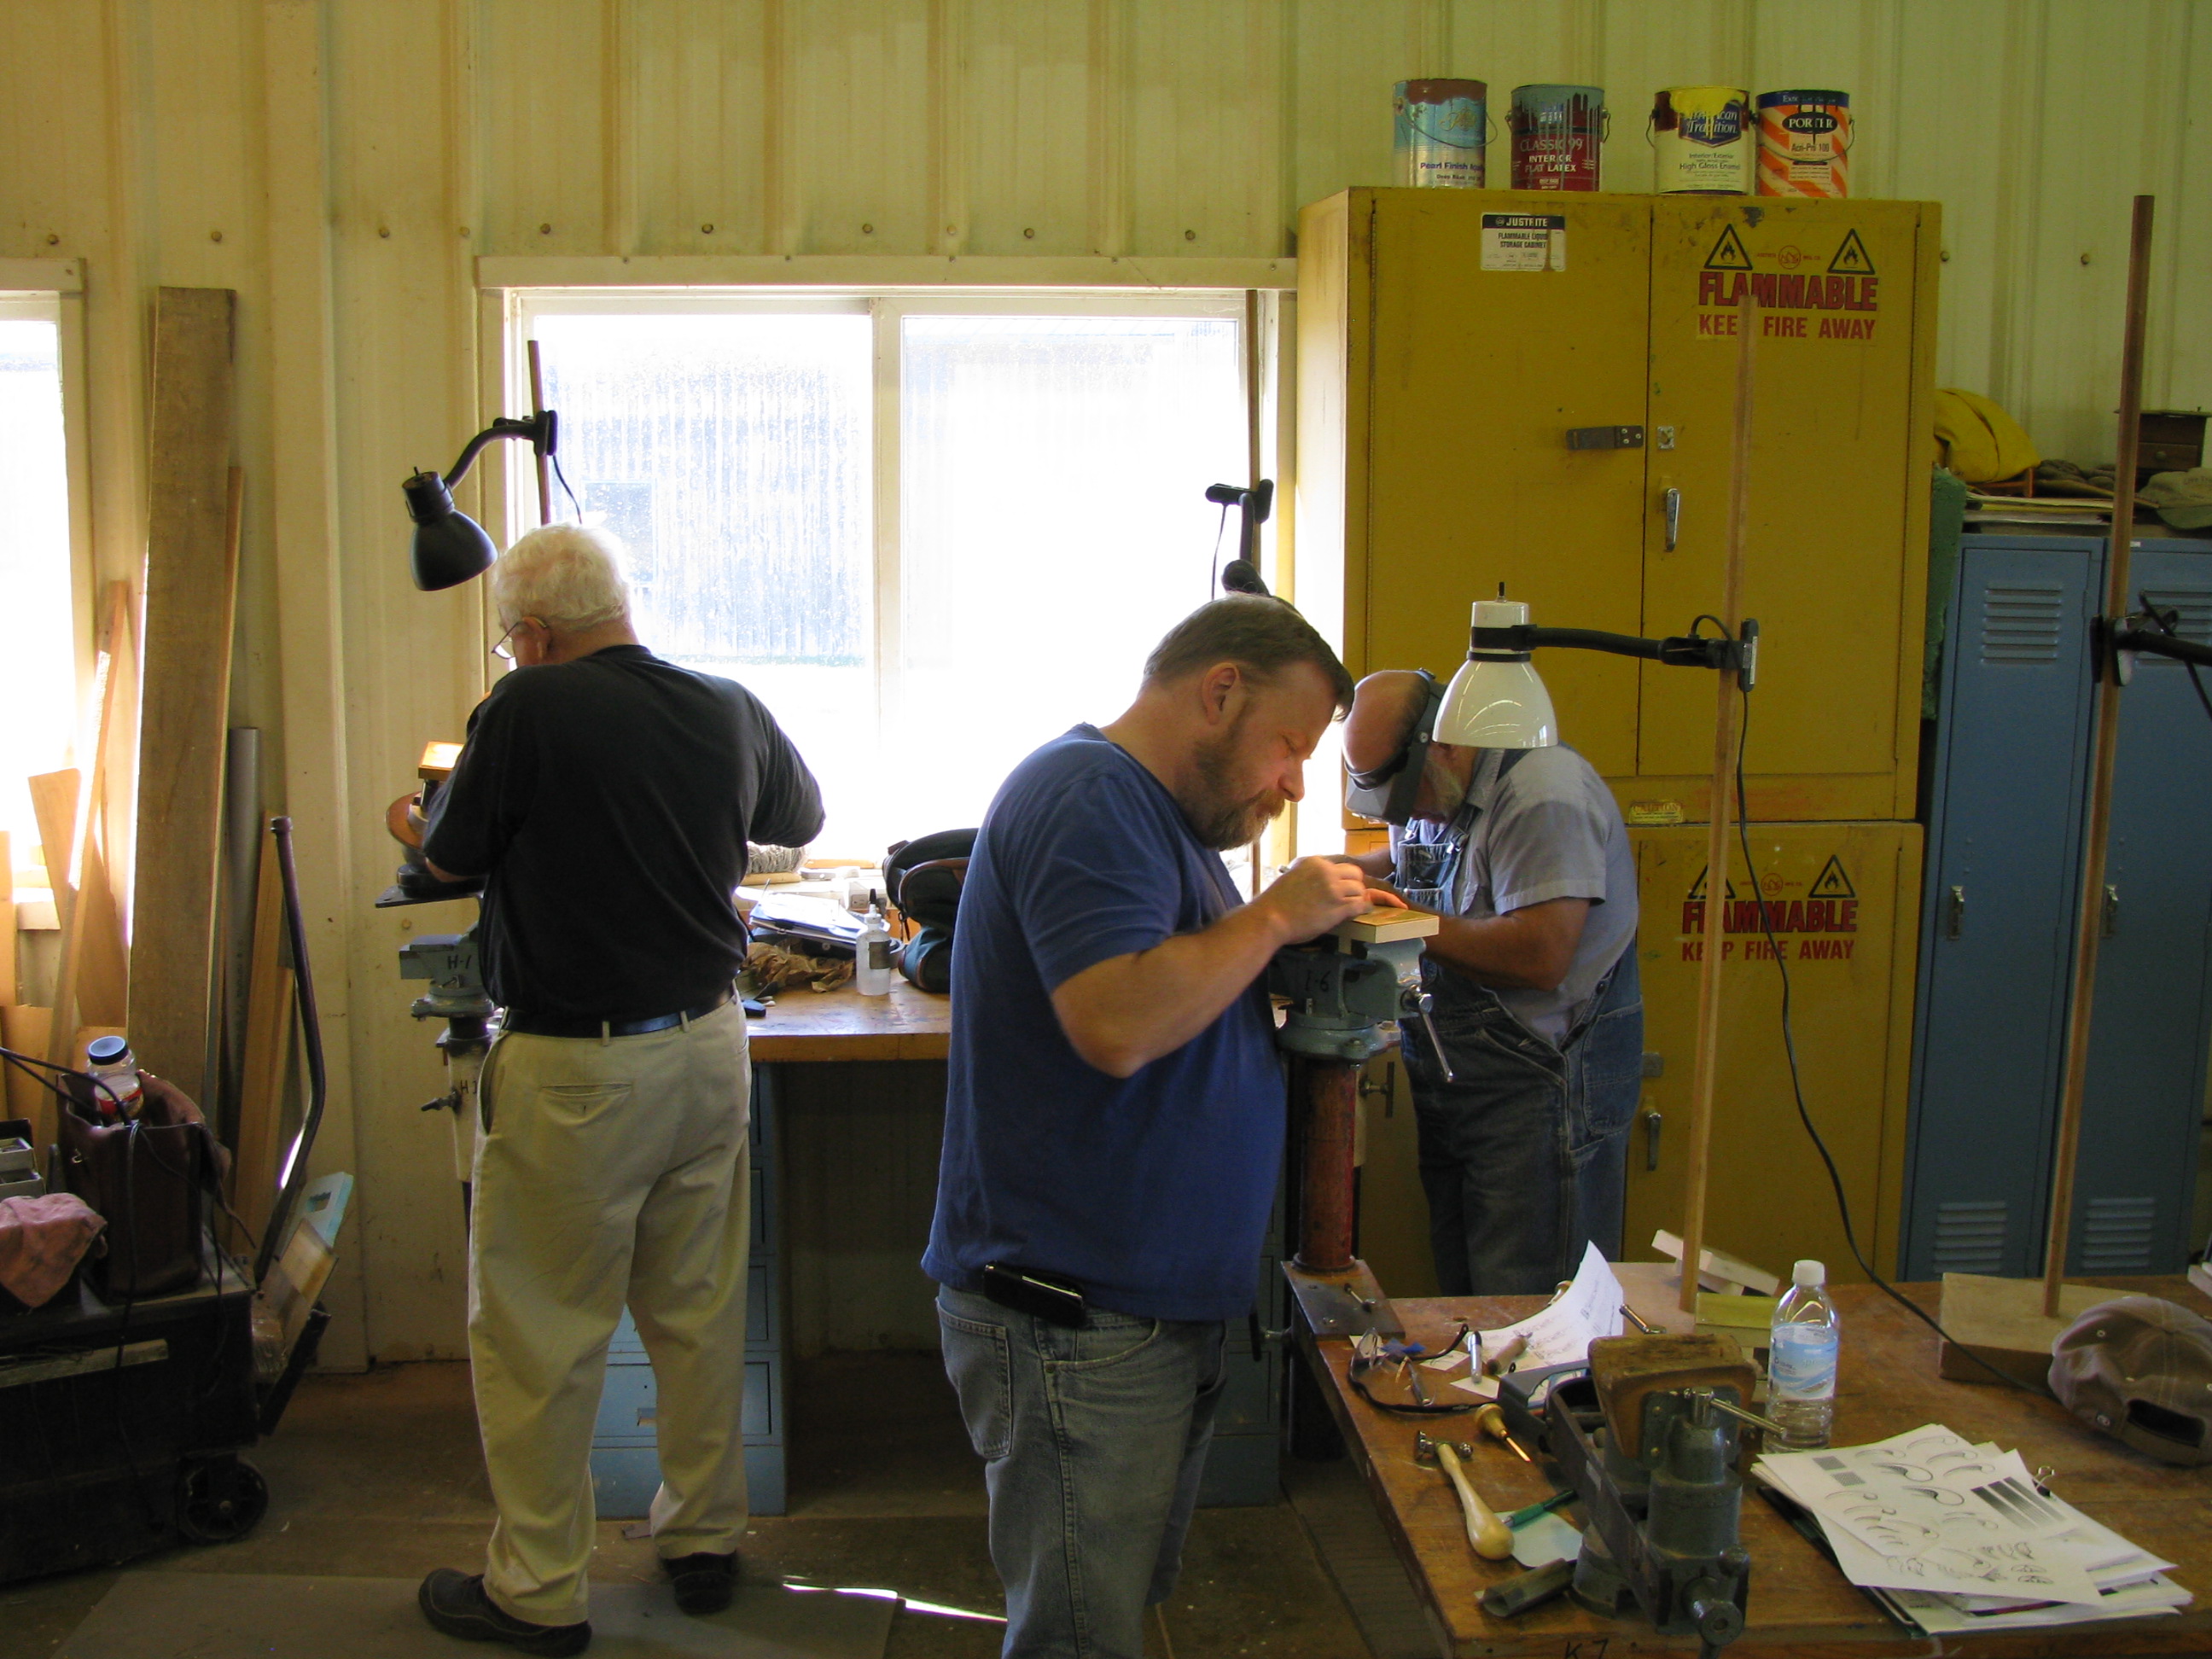
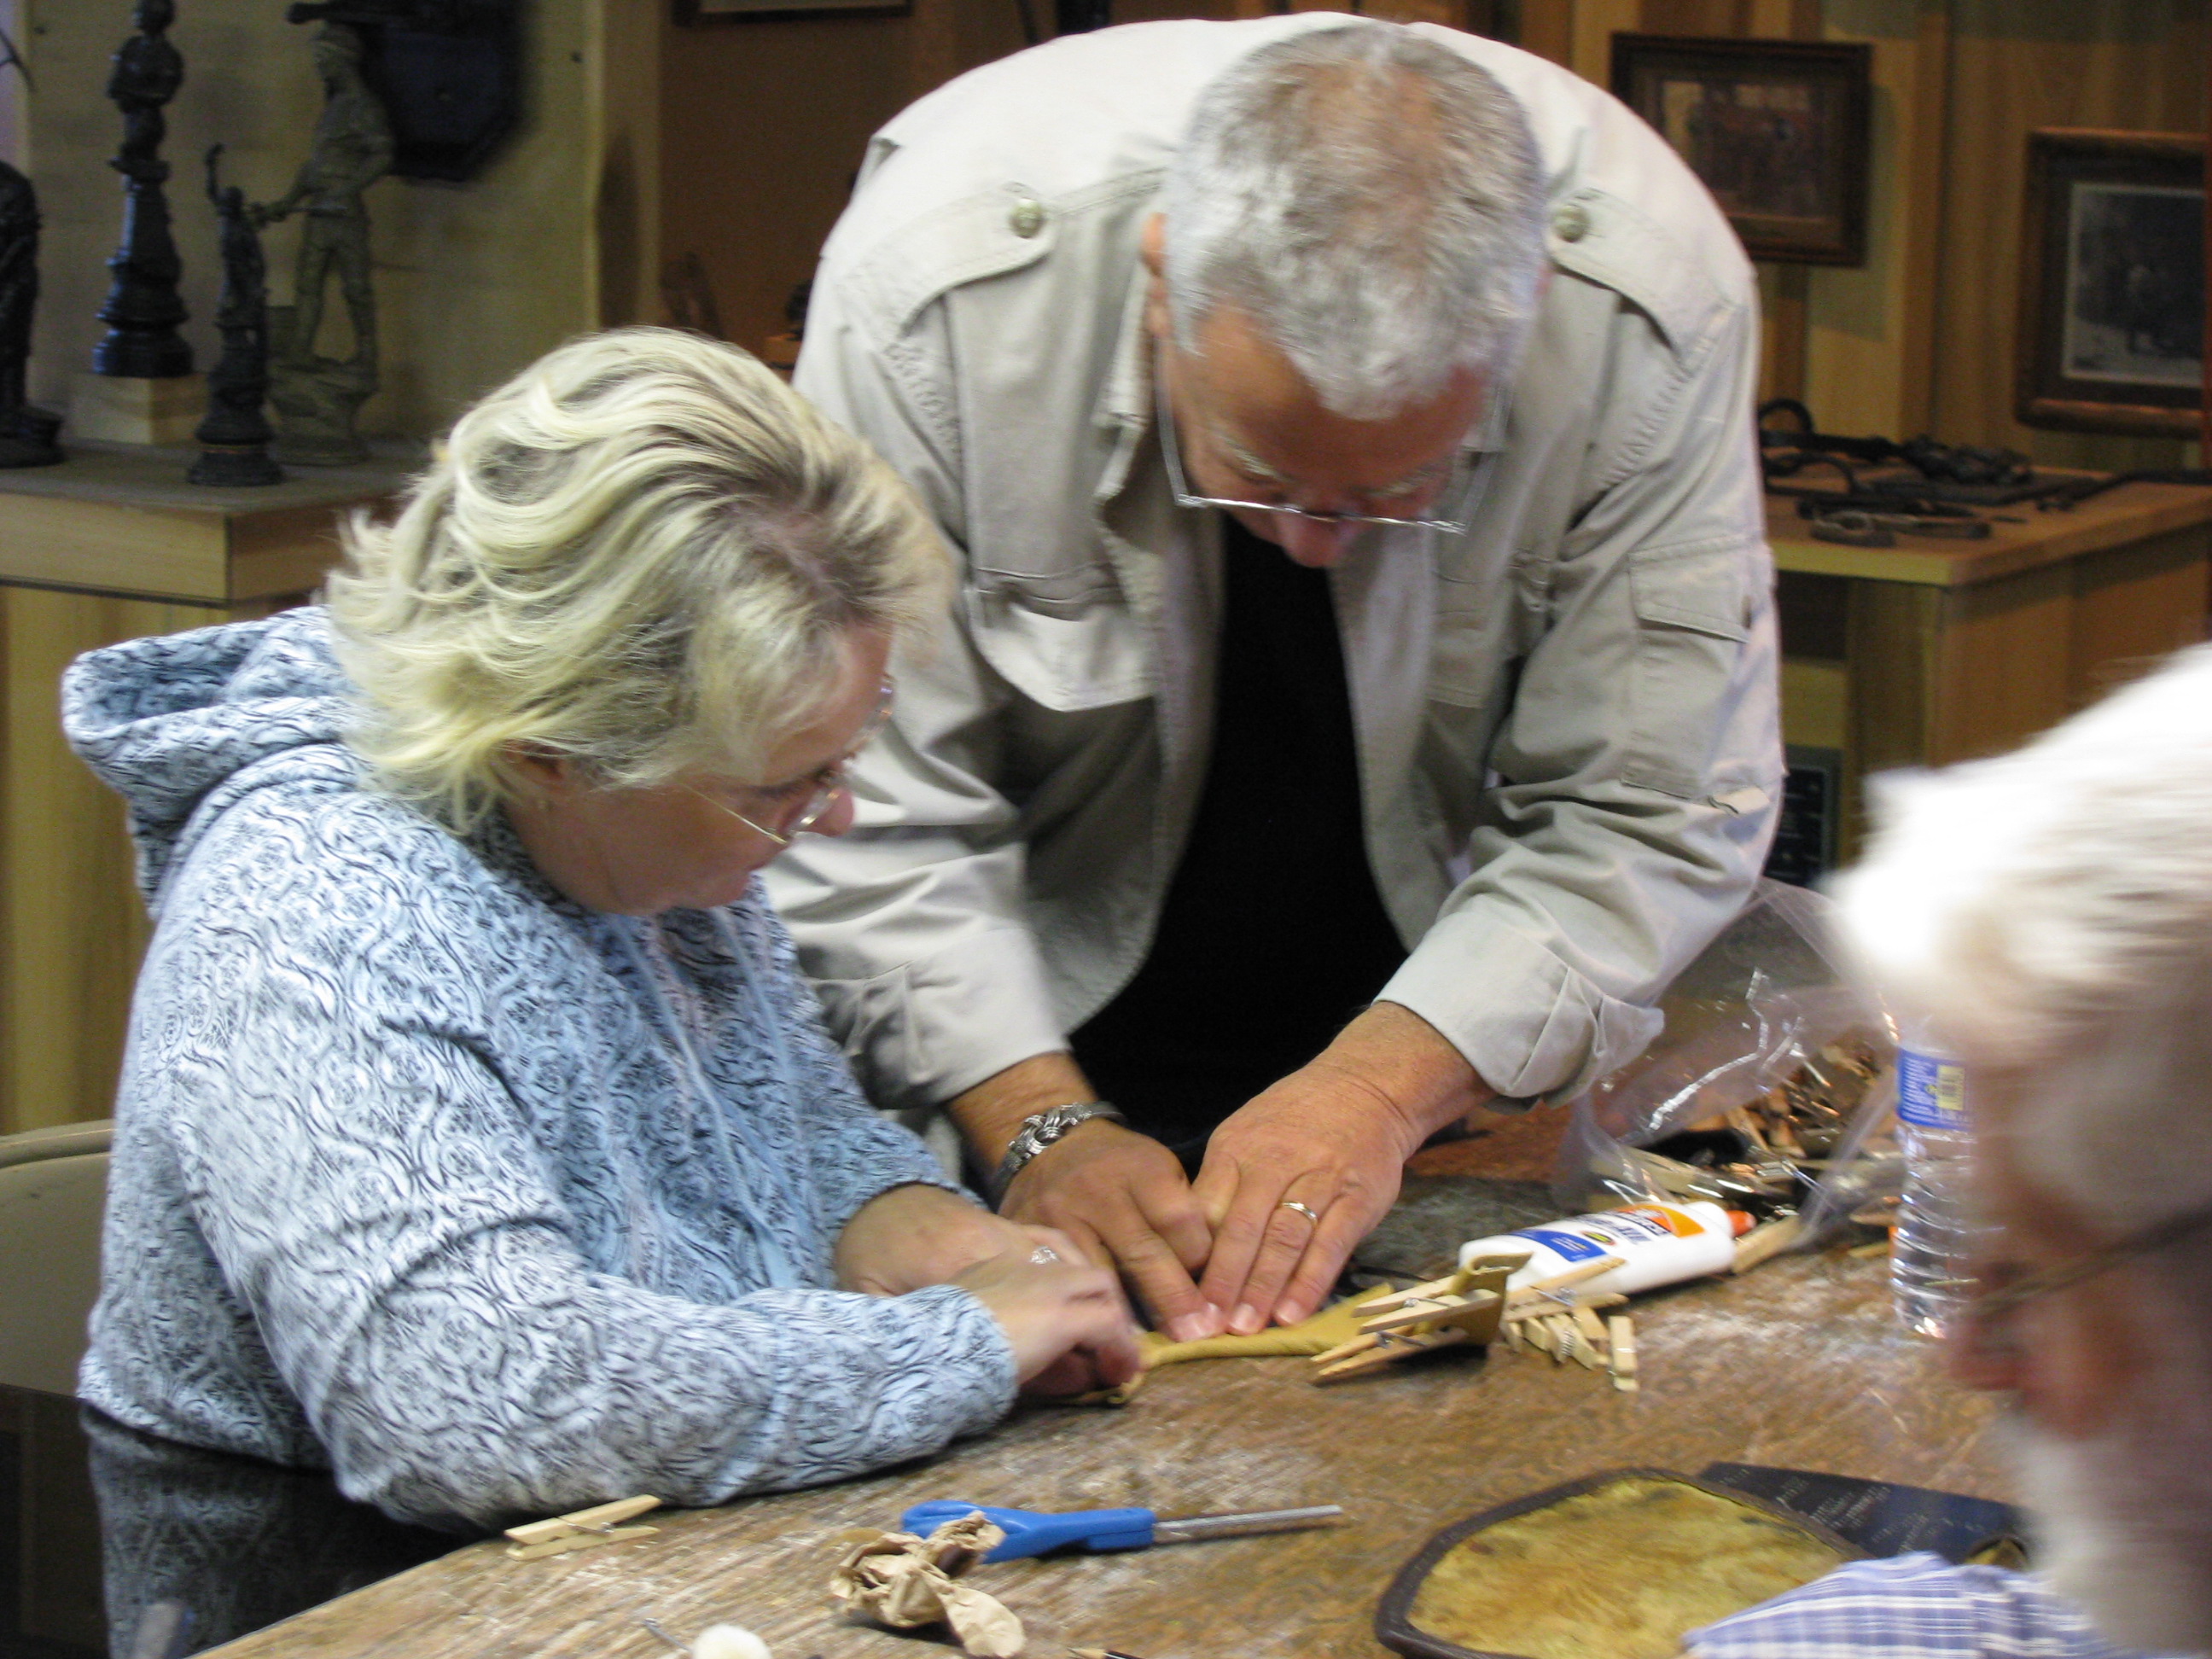
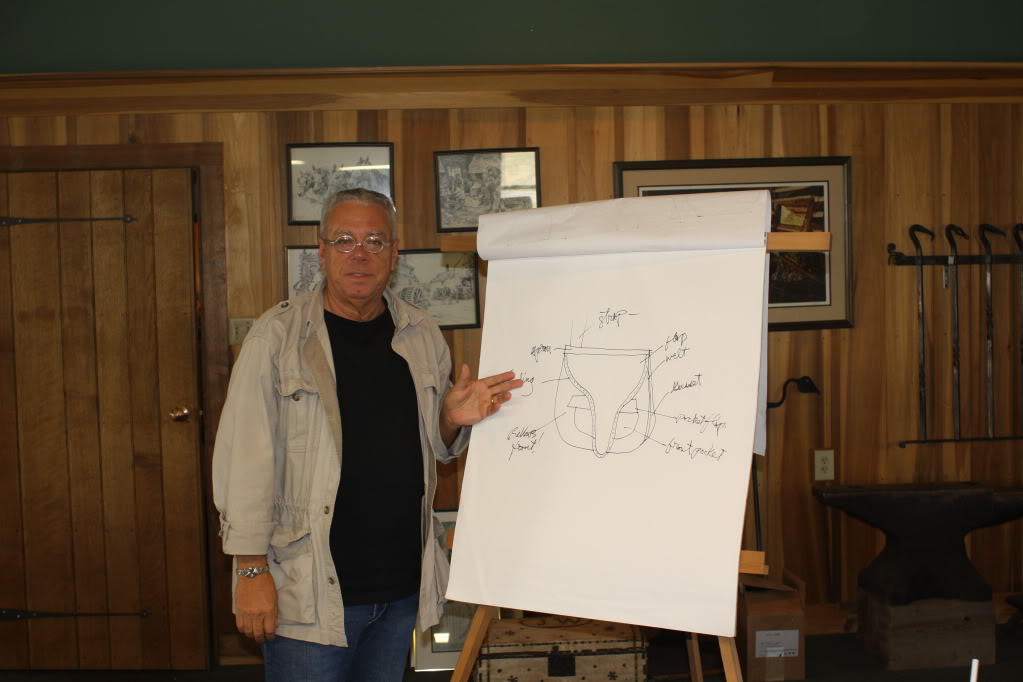
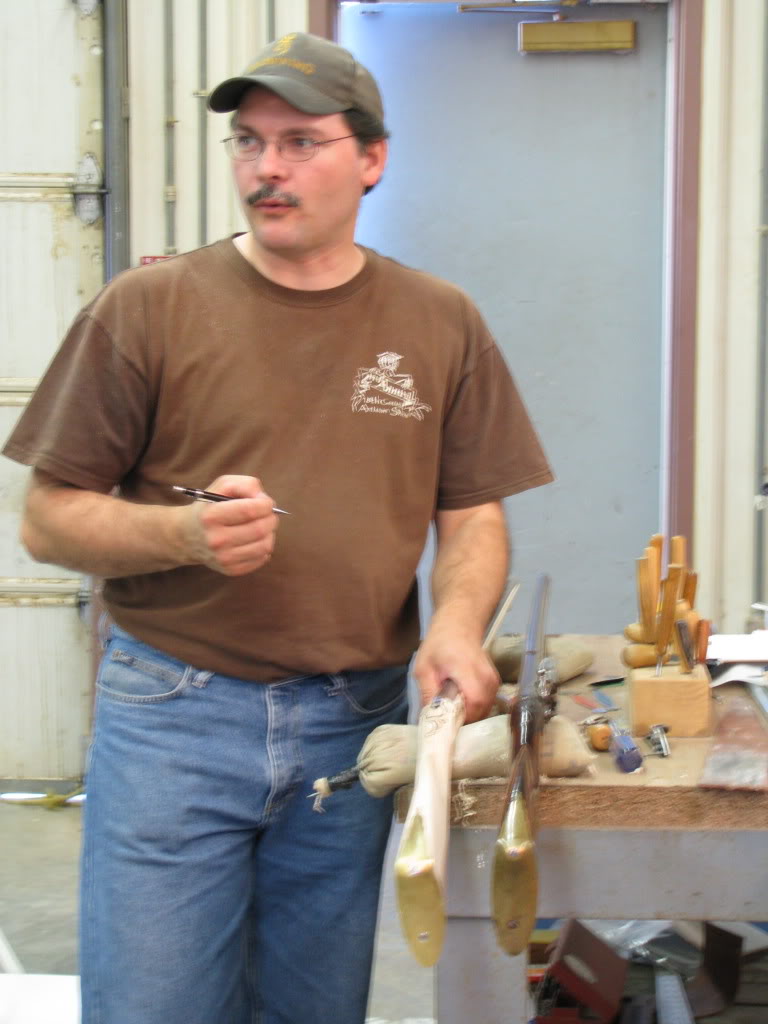
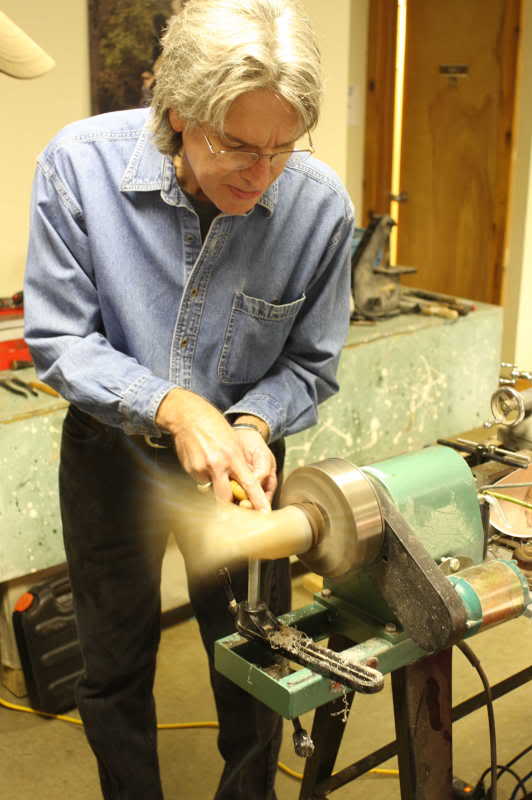
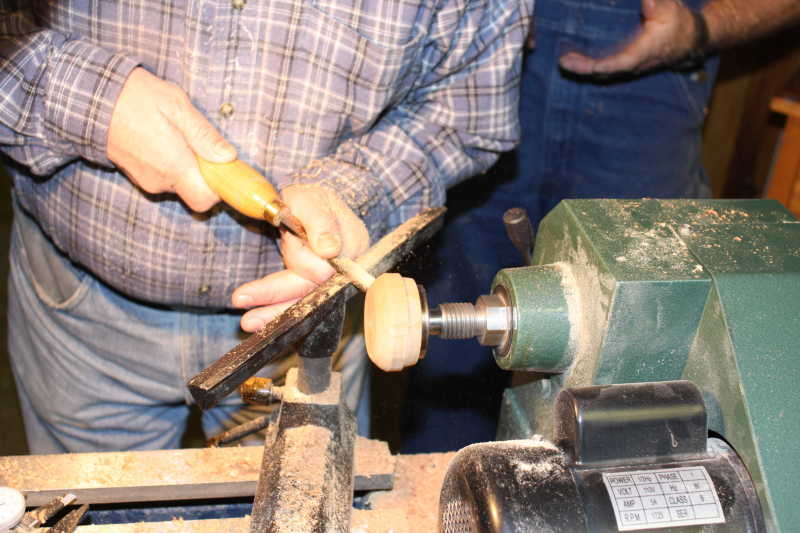
Ken Scott, Instructor
(Use your “back” button to return to the article.)

October 2010 – vol.5, Larry Pletcher, editor
I first met Ken Scott at the Conner Prairie Gun Show in 2001. I bought at journal from him.
Since then I have seen and admired his work at many muzzleloading events. His bags are, in my opinion, the benchmark by which other bags are compared.
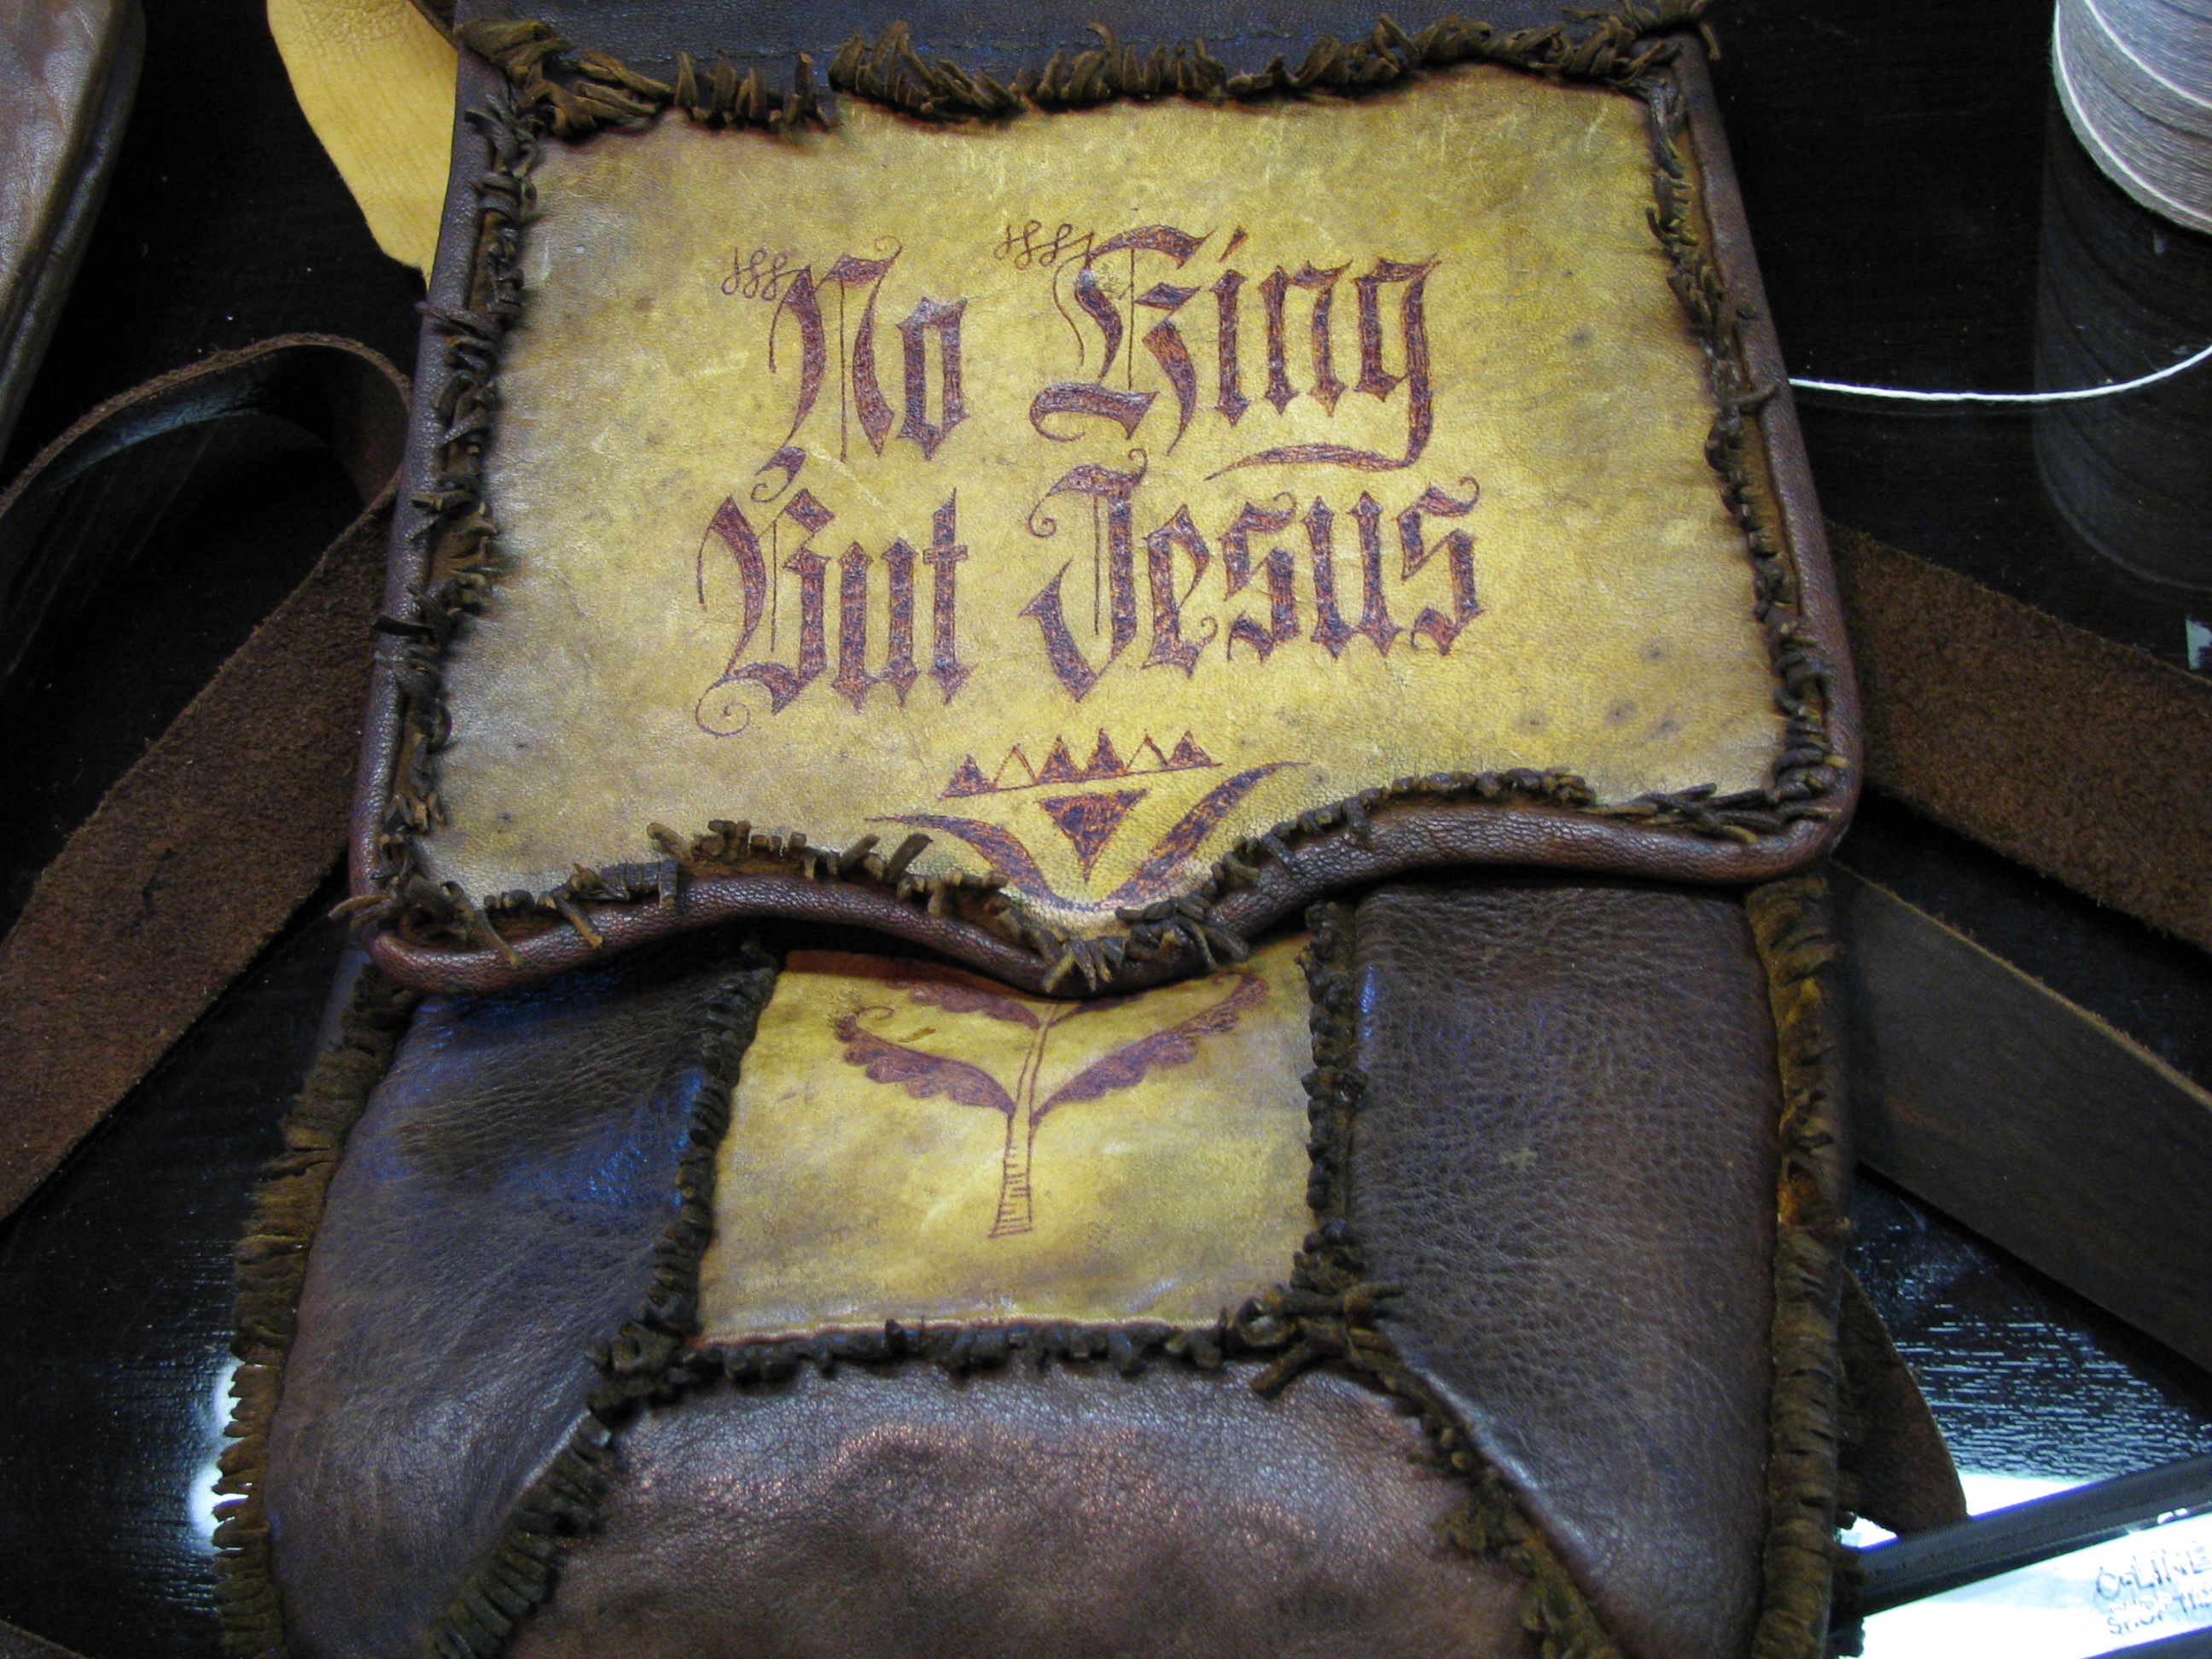
Ken’s bags caught my eye at the CLA show this August. His bag “No King by Jesus” is a favorite of mine.
Among Ken’s other products are folk art prints, and Records of Births and Marriages.
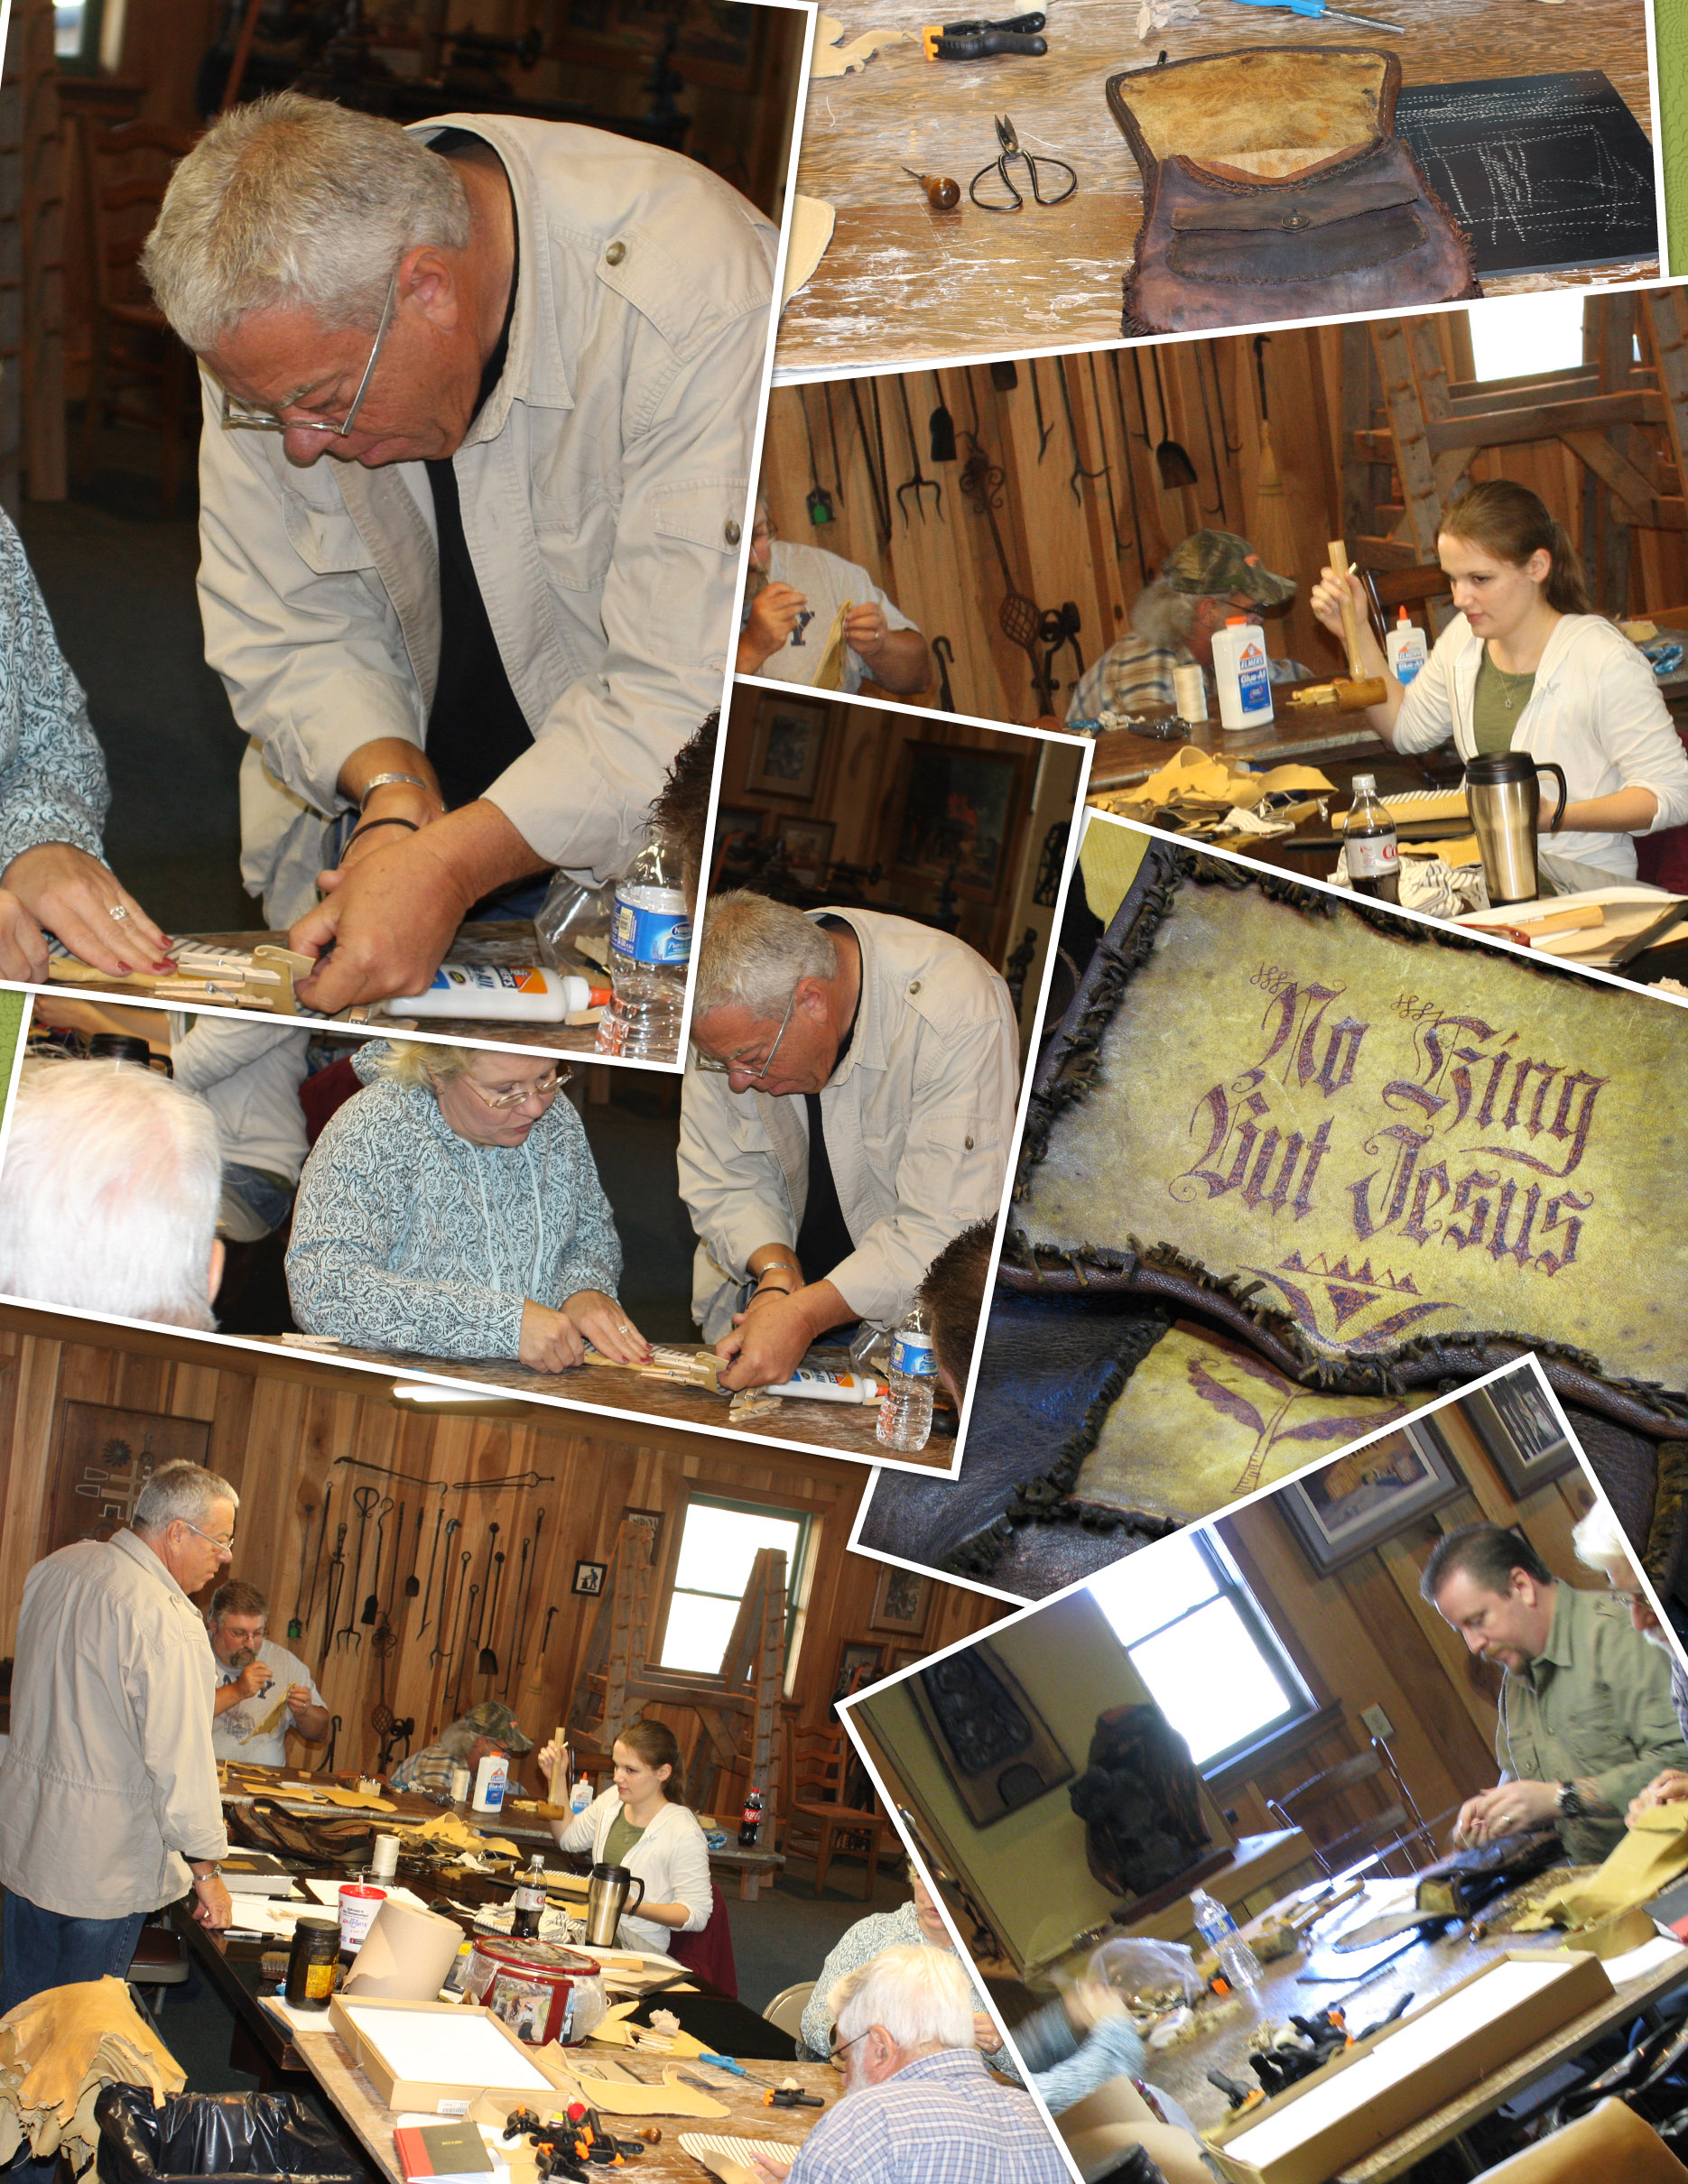
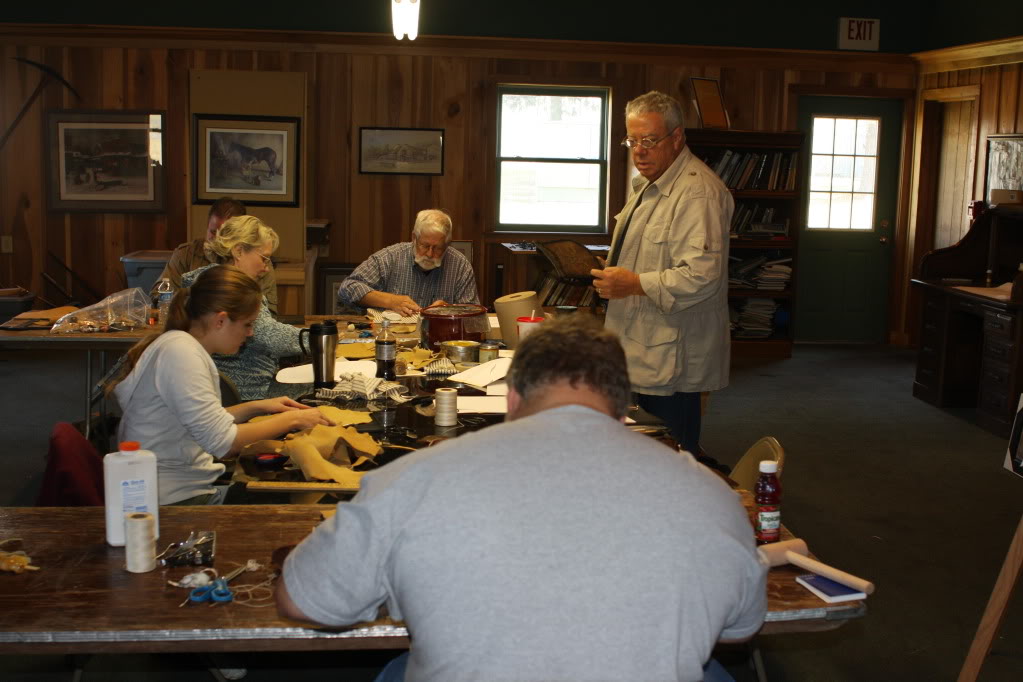
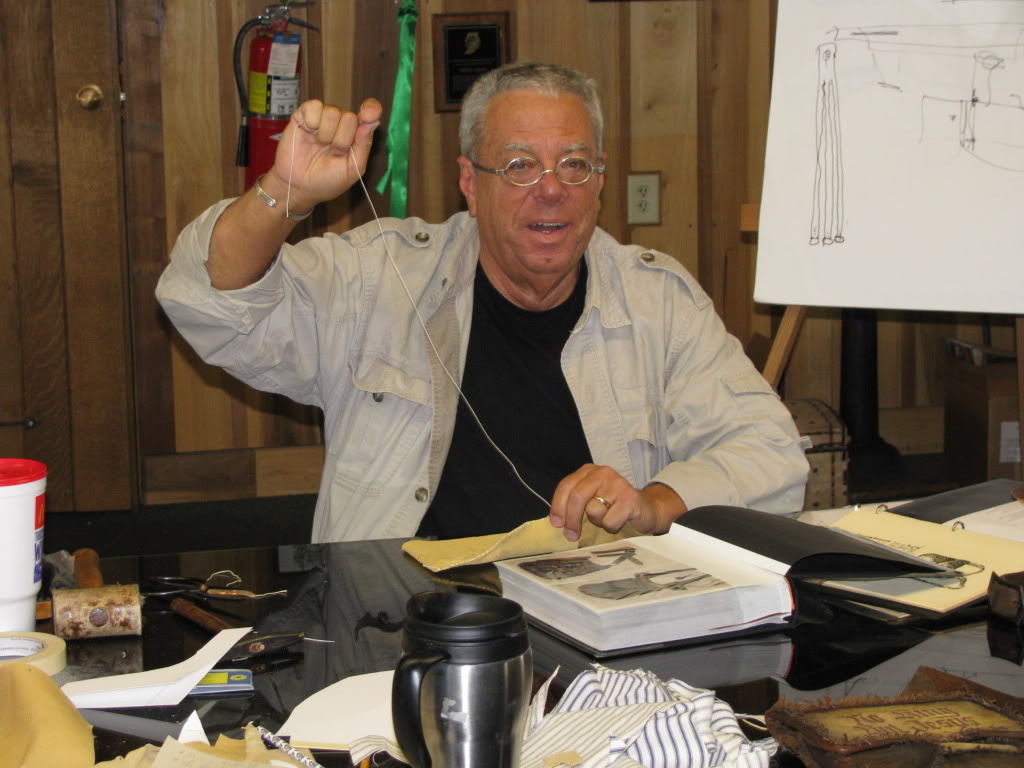
This past week I had the opportunity to see Ken teaching his class on bag making at Conner Prairie. His class and the others there will be covered in a photographic article coming up on Blackpowdermag.com. Below are a couple of photos of Ken with his class:


Ken’s web sites with more photos and contact information are below:
http://www.americanfrontierart.blogspot.com
http://kenscottpouches.blogspot.com
photo credits: Steve Chapman, Larry Pletcher
Conner Prairie 21st Annual Art and Arms Making Workshop
Larry Pletcher, Editor — Photo Credit: Steve Chapman, Larry Pletcher

 Digg it!
  Bookmark this on Del.icio.us
Blackpowdermag editor, Larry Pletcher
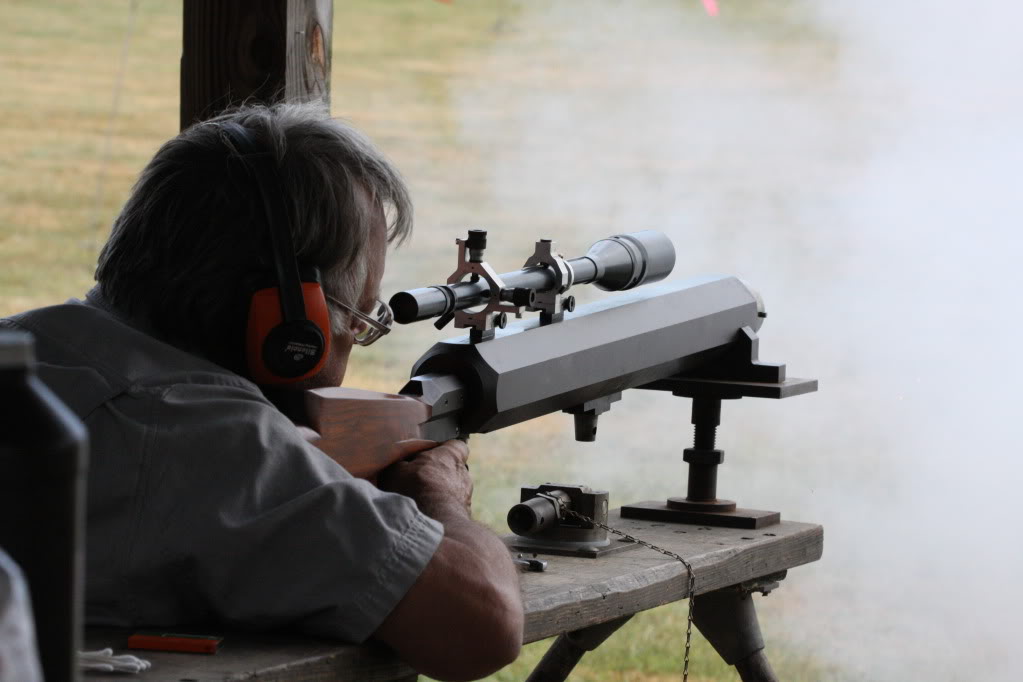
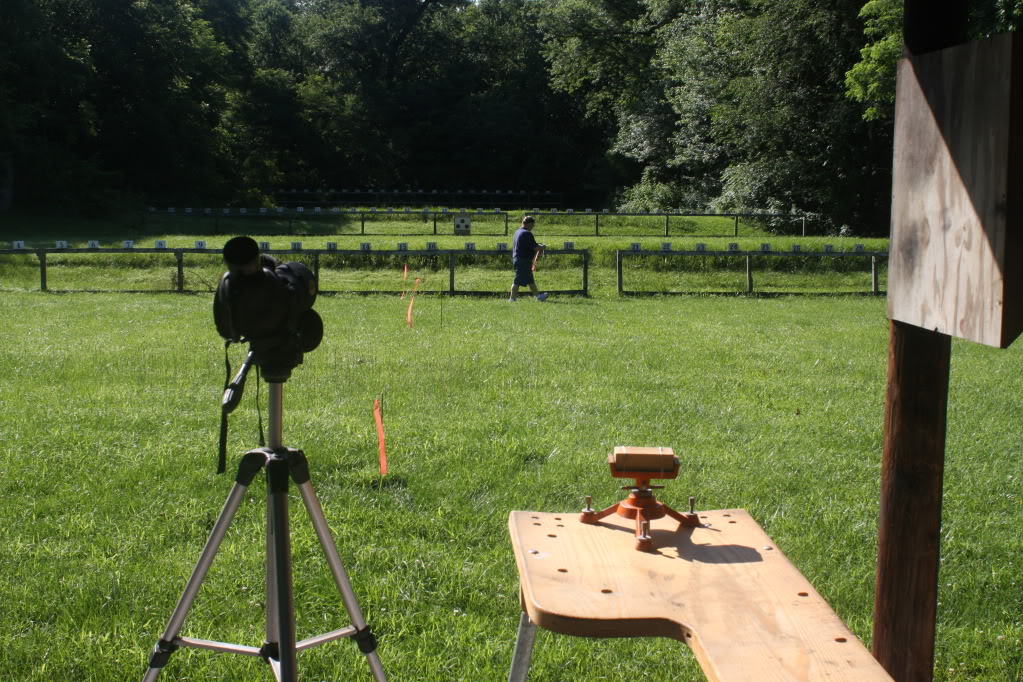
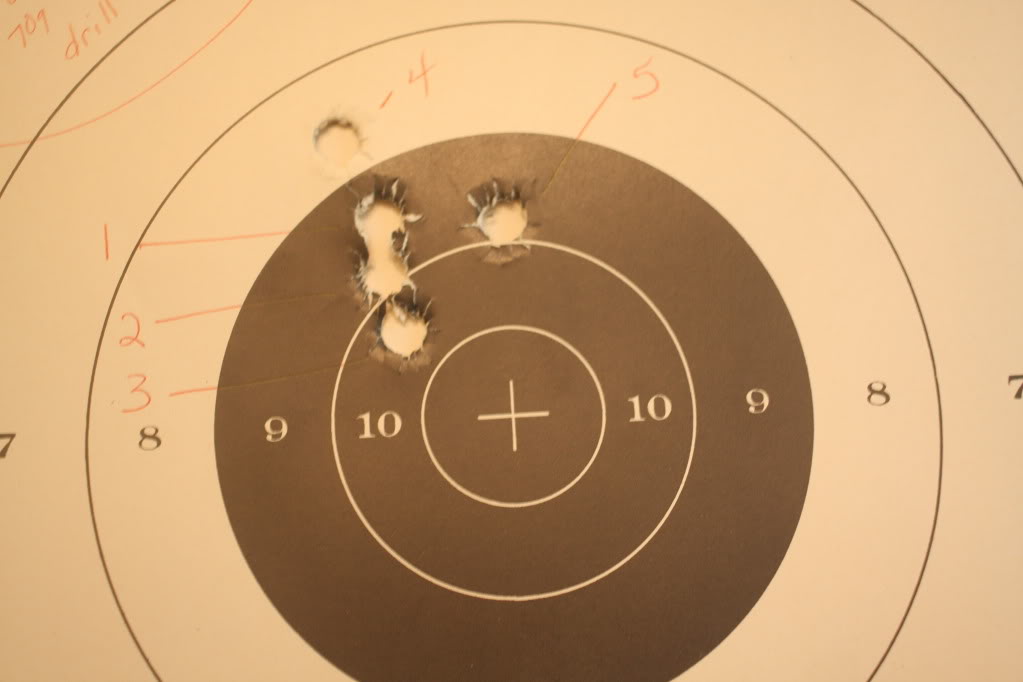
For years I’ve been fascinated with the slug guns during the Muzzleloading Championships at Friendship. This year I decided to do an article on these remarkable guns. This article is the first in a two part series on slug guns. The second will look at the largest slug gun I have ever seen.
Slug gun shooting has a long tradition in the NMLRA. During my 30+ years of trips to Friendship, visits to the slug gun range have been a part of my plans. This year I decided to write up my experiences
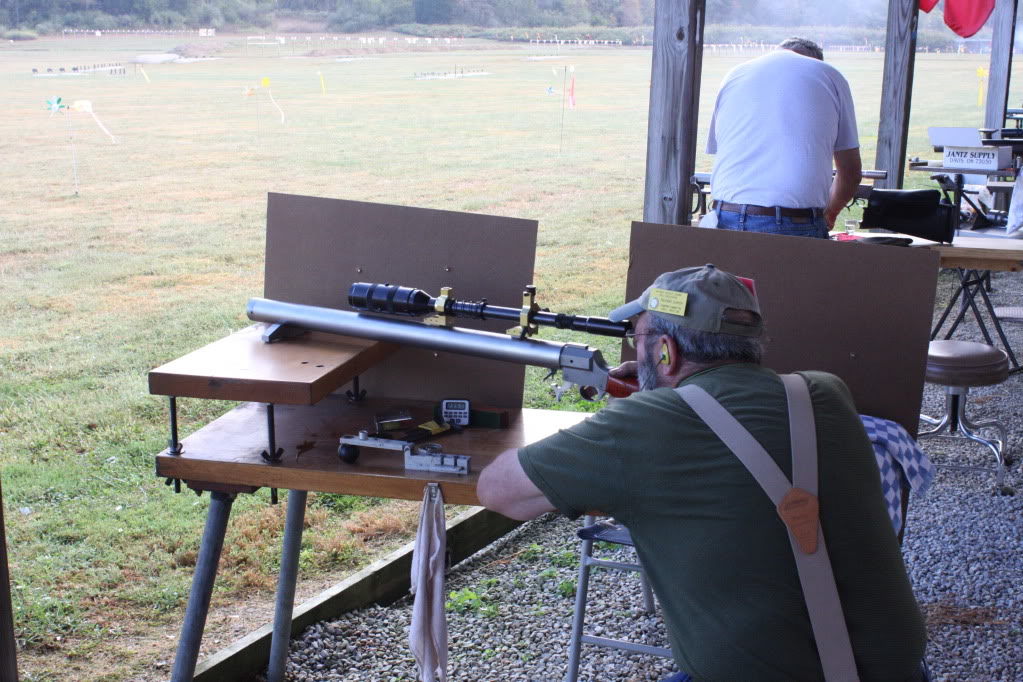
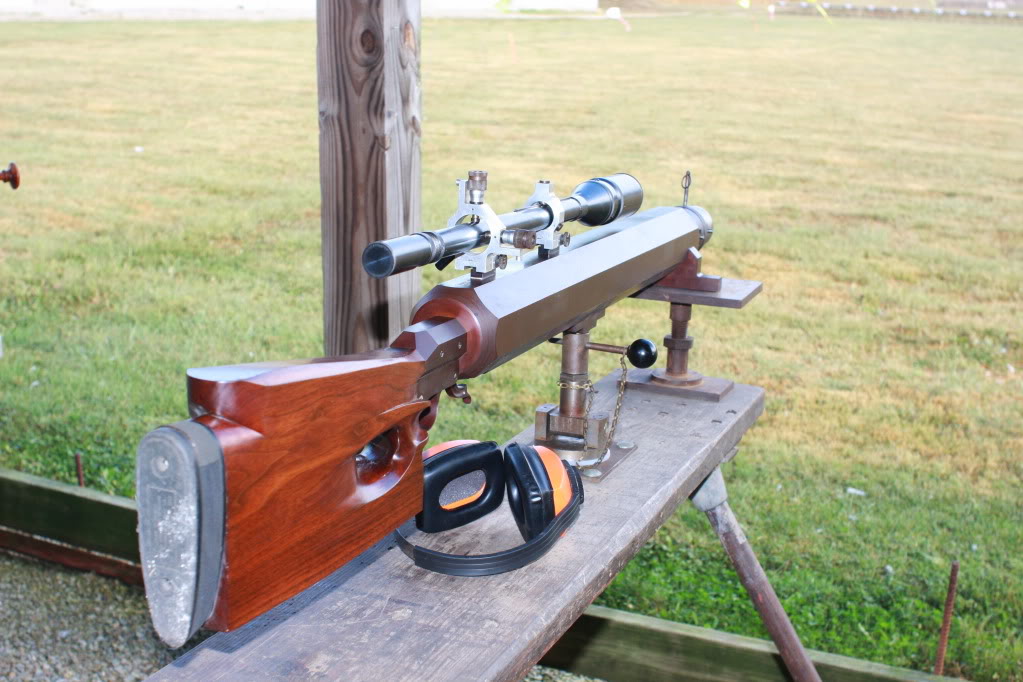
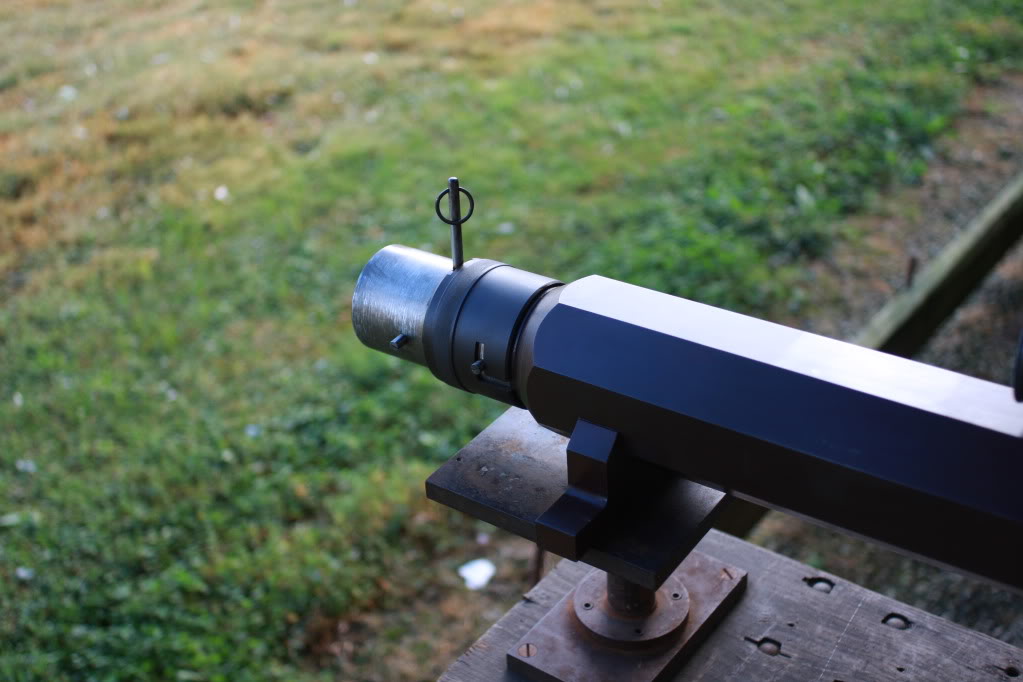
The slug gun is unique among the various types of blackpowder guns. The typical muzzleloading slug gun is heavy often 30-40 pounds. The largest known slug guns exceed 100 pounds. One of these amazing guns was shot this year. The barrels are large diameter, shorter than round ball bench gun barrels, but do use a false muzzle. The actions are the underhammer variety with sealed ignitions. (Sealed ignitions completely enclose the cap, preventing gases from escaping the barrel at the nipple.)

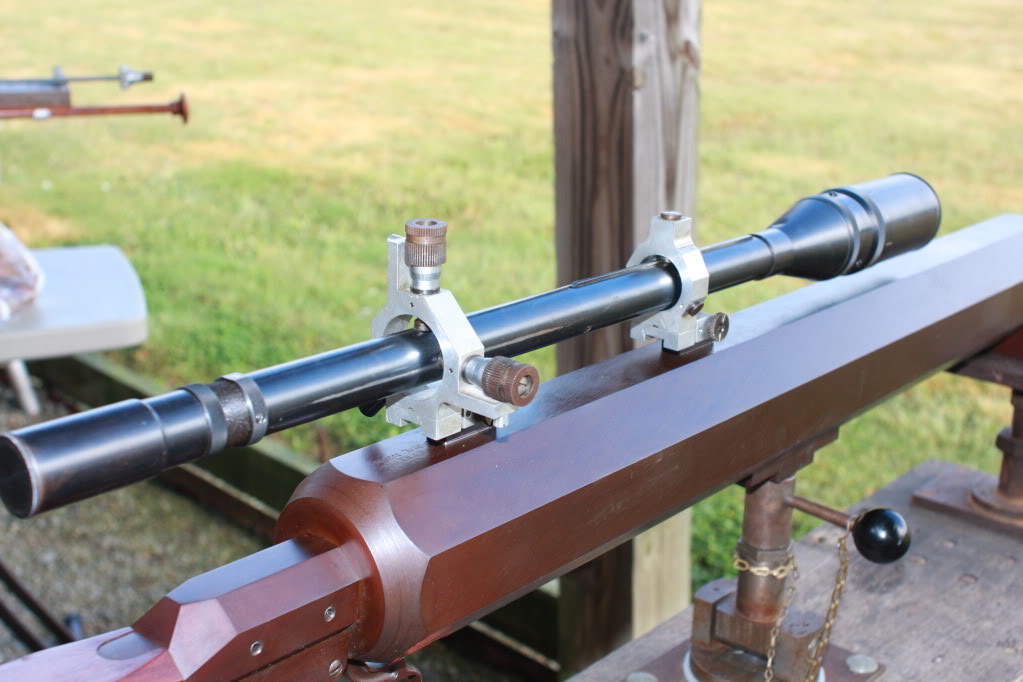
Typical barrels are rifled for a .45 bullet with a 1 turn in 18” twist. Other calibers are seen at Friendship from .40s to the huge .69 caliber that appeared this year. Mounted on the barrel is a target quality telescopic sight. These vary in power; 24x seems to be the optimum for this type of shooting. (Higher powers tend to have greater problems with mirage.) Scope adjustments are in the mounts.


The typical .45 caliber bullet weighs 550 grains while the .69 caliber bullet weighed more than three times as much. The bullet is normally swaged from two pieces – a harder nose swaged to a softer base. This prevents the nose from deforming but allows the base to bump up into the rifling. Many shooters design their own bullets, casting their own cores, and swaging the complete bullet. A typical bullet design would use three calibers as the length.
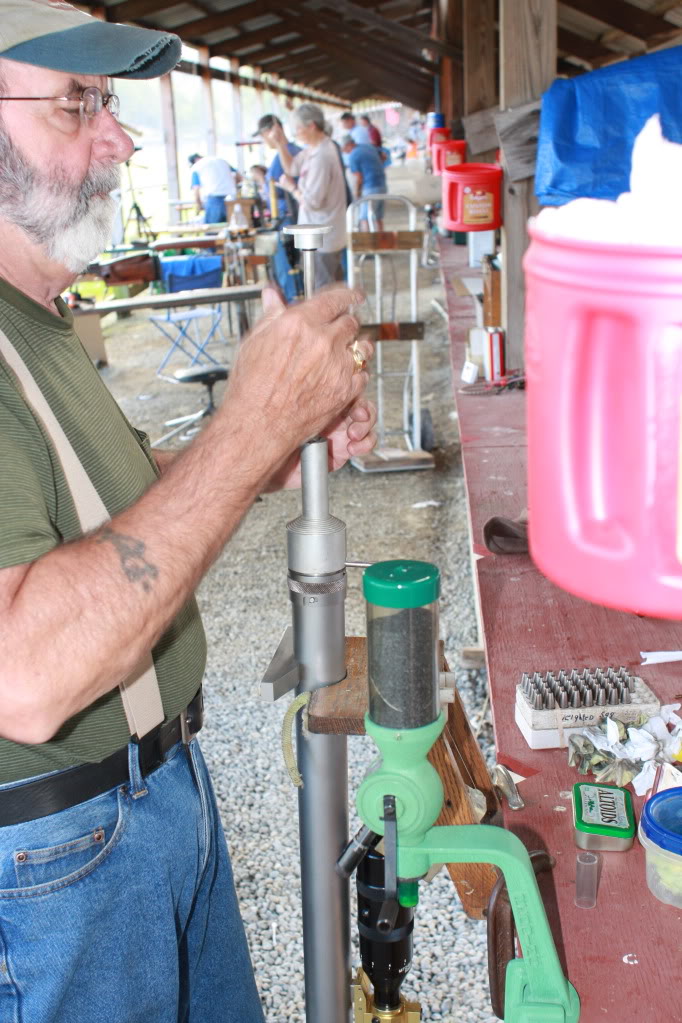
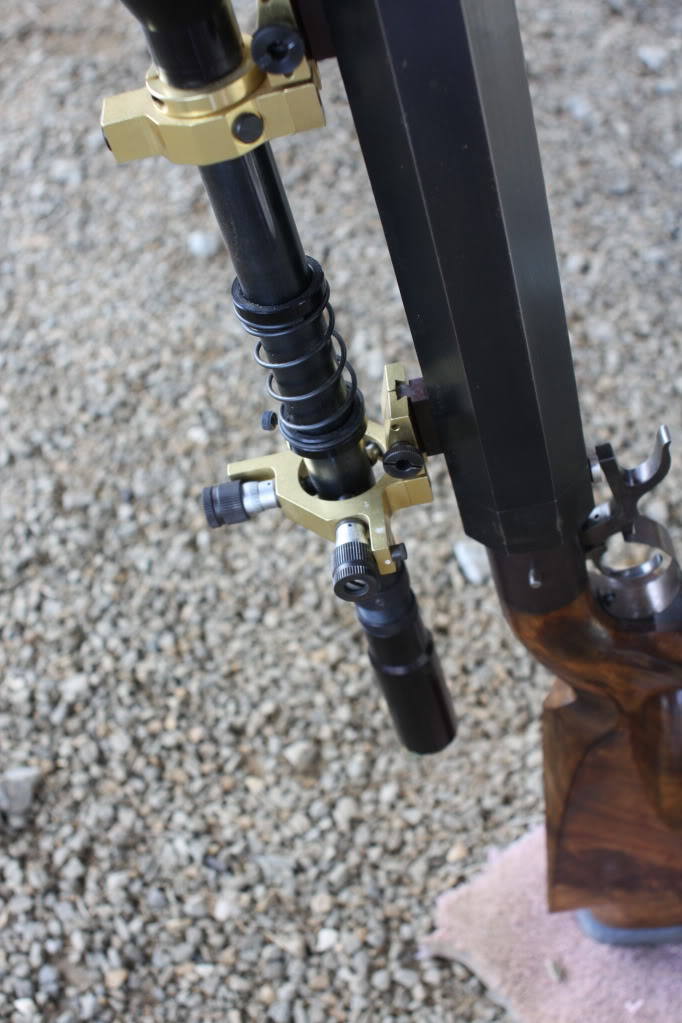
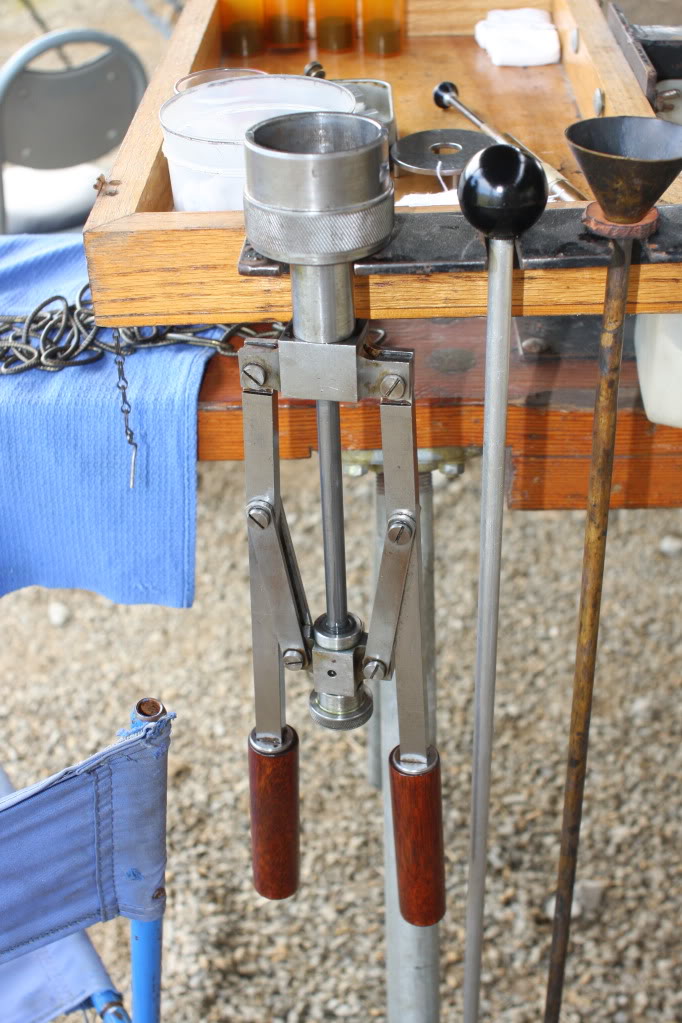
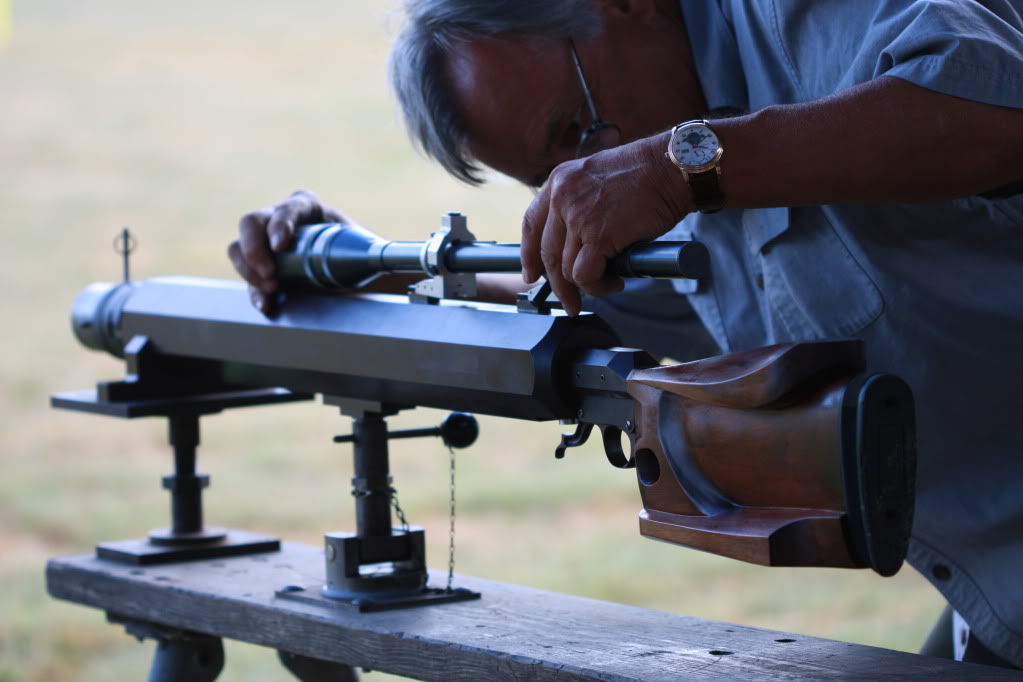
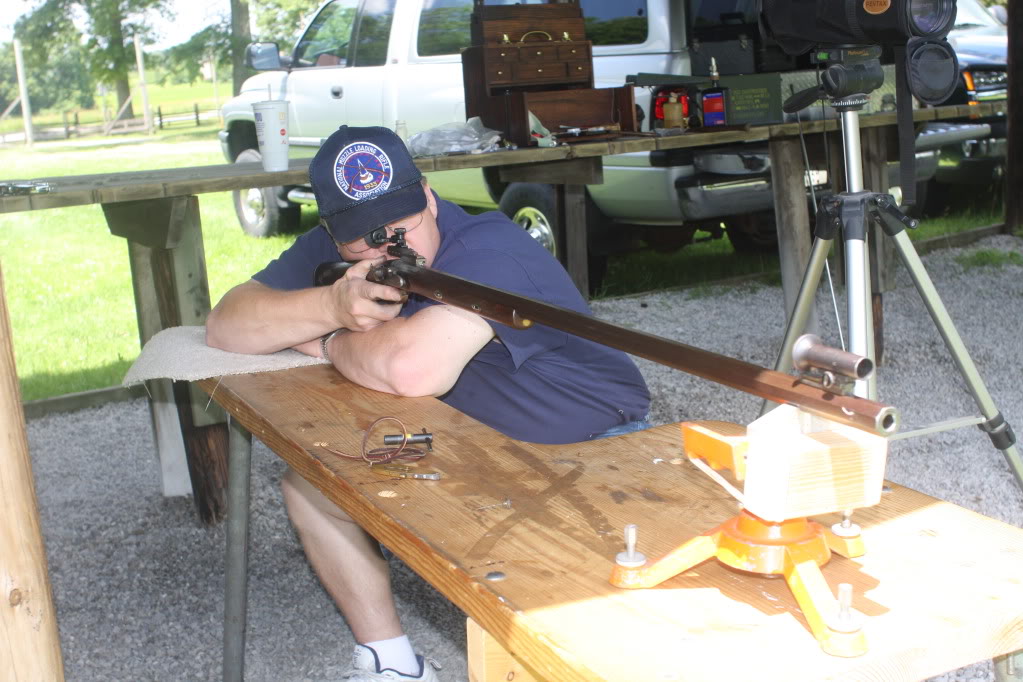
The bullet is wrapped in a paper patch. Most shooters use the cross patch method. Narrow strips of paper are positioned on the false muzzle, the bullet placed on top, and the bullet carefully seated with a mechanical seating tool. The seating device may be a plunger whose nose is machined to fit the nose of the bullet. Another device uses levers to provide mechanical advantage.


Every trick is used to produce the smallest groups. Even though bullets are swaged, they are culled very close tolerances. Powder is pre-weighed. I saw one shooter with an enclosed weighing and charging station, designed to prevent a breeze from changing the delicate scale’s reading.
Shooting a slug gun involves many skills, among those is the ability to handle the wind. The ability to read wind flags is not unique to slug gun shooting, but shooting paper targets at 500 yards requires a shooter to develop these skills. That being said, George Mitchell, who shoots the 100 pound, .69 caliber gun, said he didn’t worry about wind too much. He probably does, but his huge, 1785 grain, bullet does have wind-bucking abilities.
I found the slug gun shooters a helpful group when I gathered information for this article. I was careful to wait for relays to end before asking questions. I was allowed access to take pictures and to develop the loading sequences shone in the photos. All were free with details about their guns, scopes, loading equipment, and bullets.
The guns, equipment, and the shooters make slug gun shooting a truly unique experience at Friendship. Take the time to visit the slug gun range. Part 2 of this Slug Gun series will zero in on the largest gun at Friendship this fall. The photo below, I hope will whet your appetite.
Slug Guns Part 2 allows a unique look into the world of slug guns. Blackpowdermag.com is pleased to bring you this look at the “Mother of all Slug Guns.”
Blackpowdermag editor, Larry Pletcher
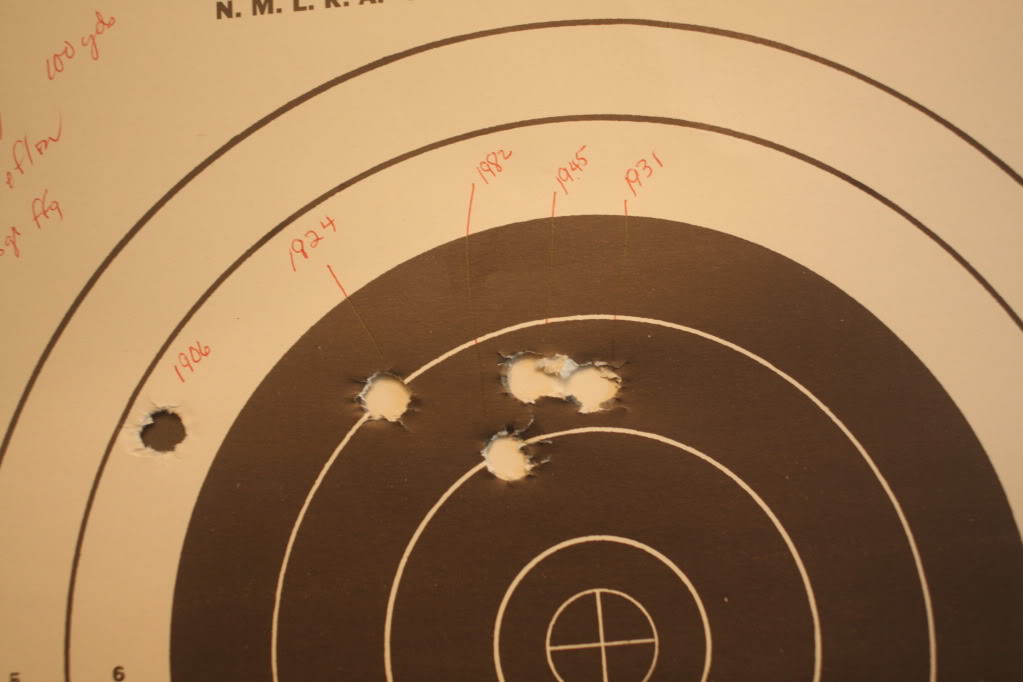
In Part 1 the topic was slug guns in general; Part 2 zeroes in on one of the largest slug guns ever to be fired at Friendship. This gun, built by George Mitchell, is one of four guns in existence made in .69 caliber. All four of these guns are very heavy. The Mitchell gun is over 100 pounds, and it may be the heaviest of the four. It is the only one of the four currently in use.
The gun uses a Morse underhammer action and a sealed ignition. The barrel has a 1 turn in 28 inch twist and uses .004″ deep rifling. The telescopic sight is also built by Mr. Mitchell (Mitchell optics). In fact Mitchell scopes were seen on many of the slug guns shooters on the line.
In most cases these scopes are 24X because larger powers tend to increase the effect of mirage. The adjustment of these scopes is in the mounts like the Unertl target scopes.
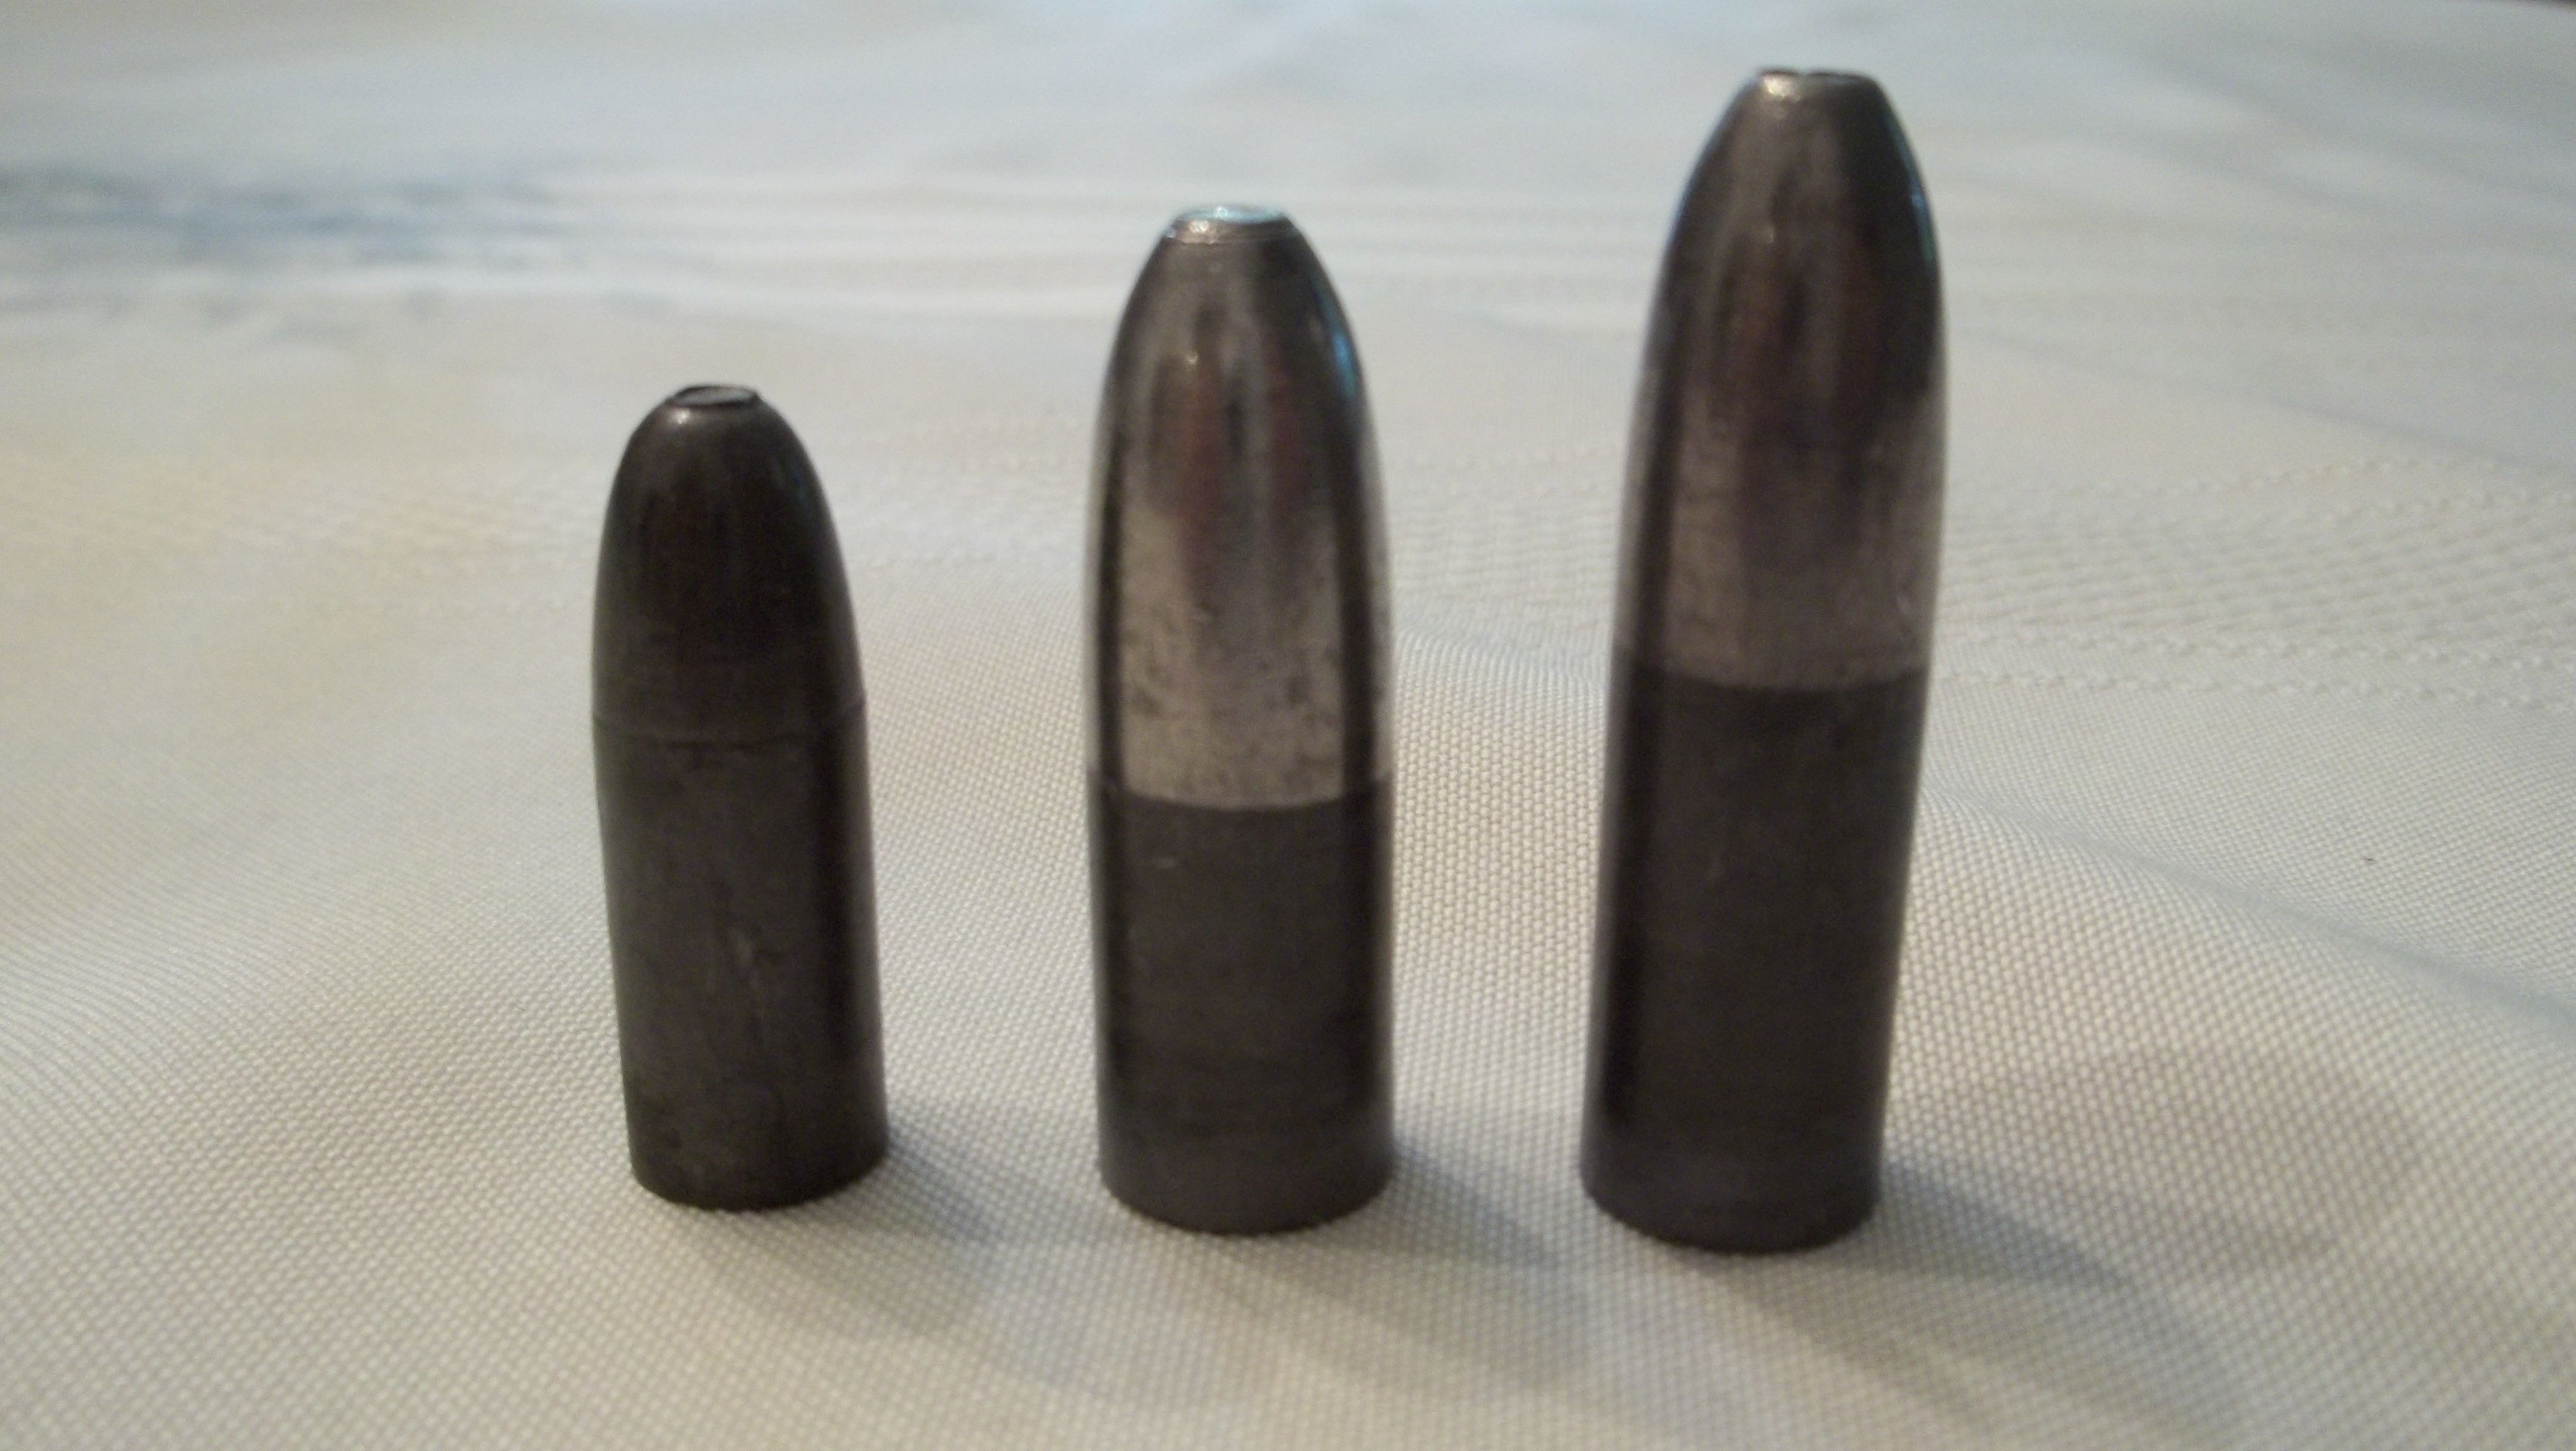
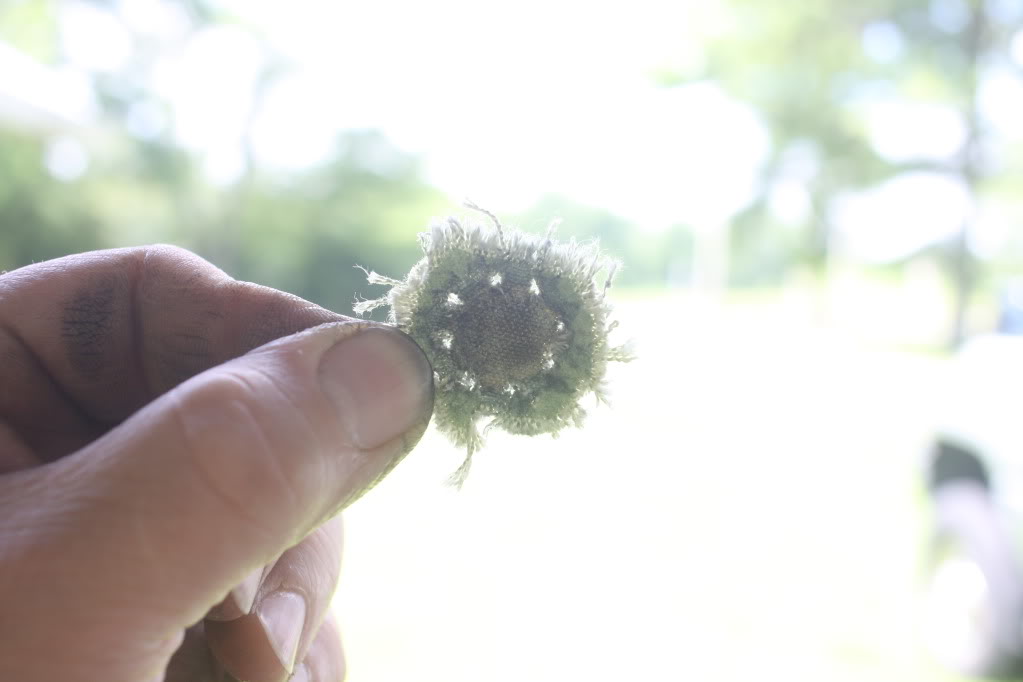
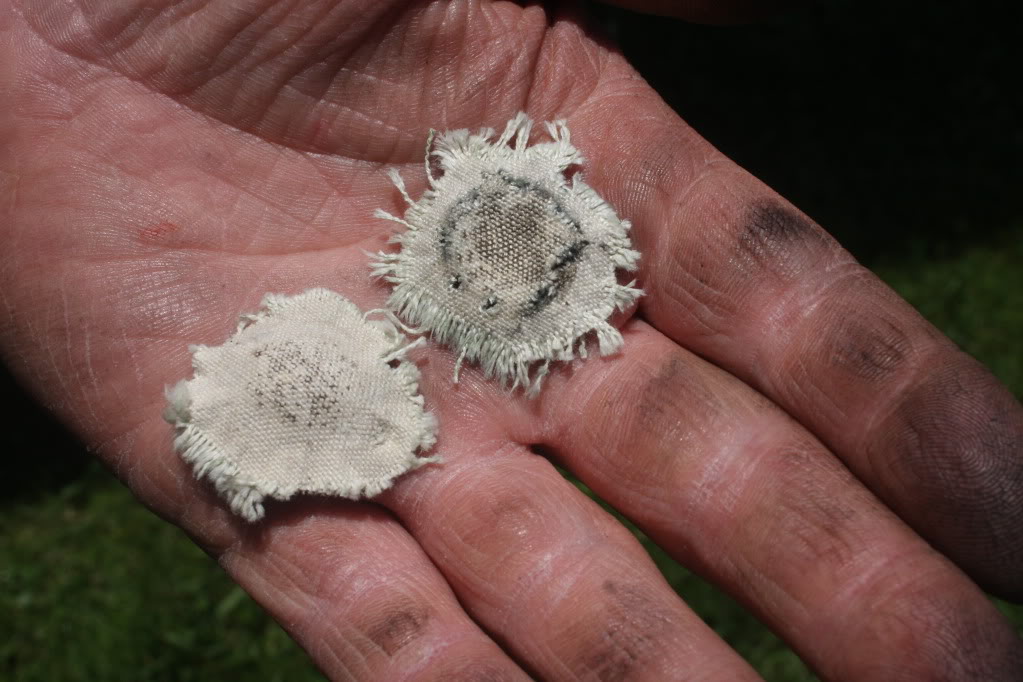
Caption: The bullet on the left is 550 gr. .45 caliber ; on the right is the 1785 gr bullet for the Mitchell gun.
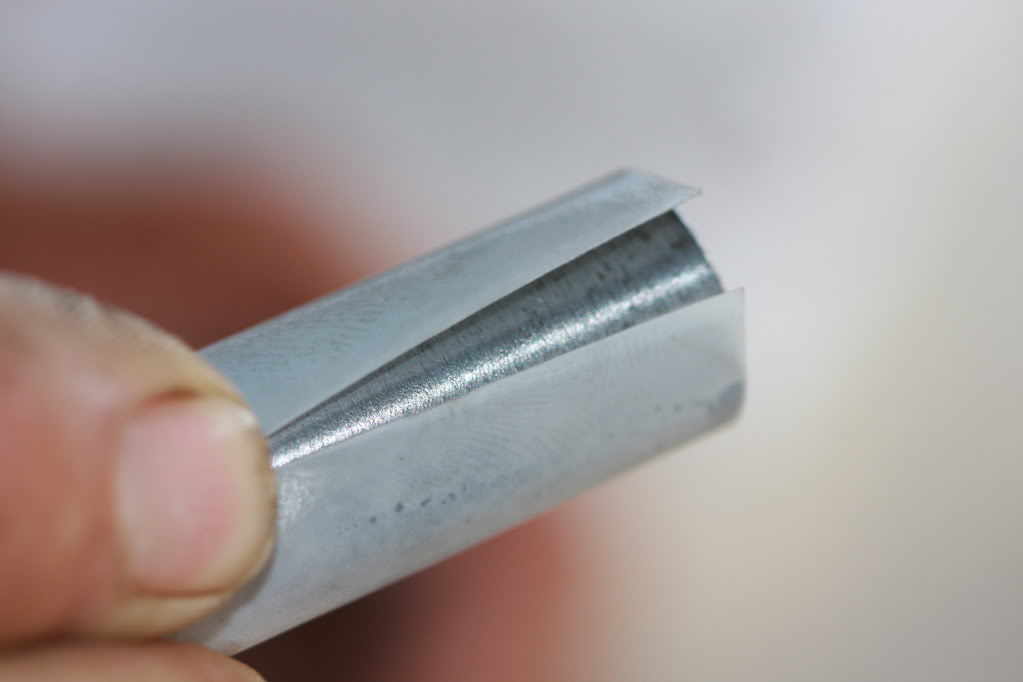
The Mitchell gun uses the same basic accoutrements used by most slug guns. Mr. Mitchell uses a chase patch for his 1785 grain two piece bullet. The precut paper is wrapped around form and inserted in a specially made die. The bullet is inserted into the die and the die fit into the false muzzle. A plunger type seating device is used to give the bullet a perfect start into the bore. A bench rod seats the bullet on 300 grains of fg Goex powder.
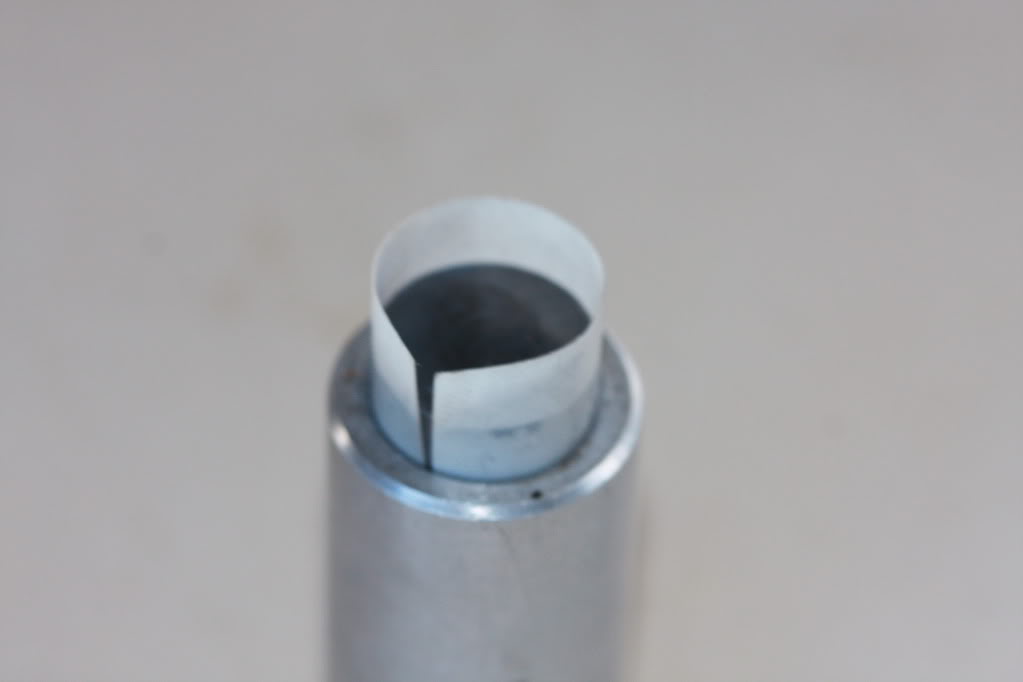
Caption: The paper patch is wrapped around a form.
Caption: The patch is inserted into a die up to a shoulder using the tool at right.
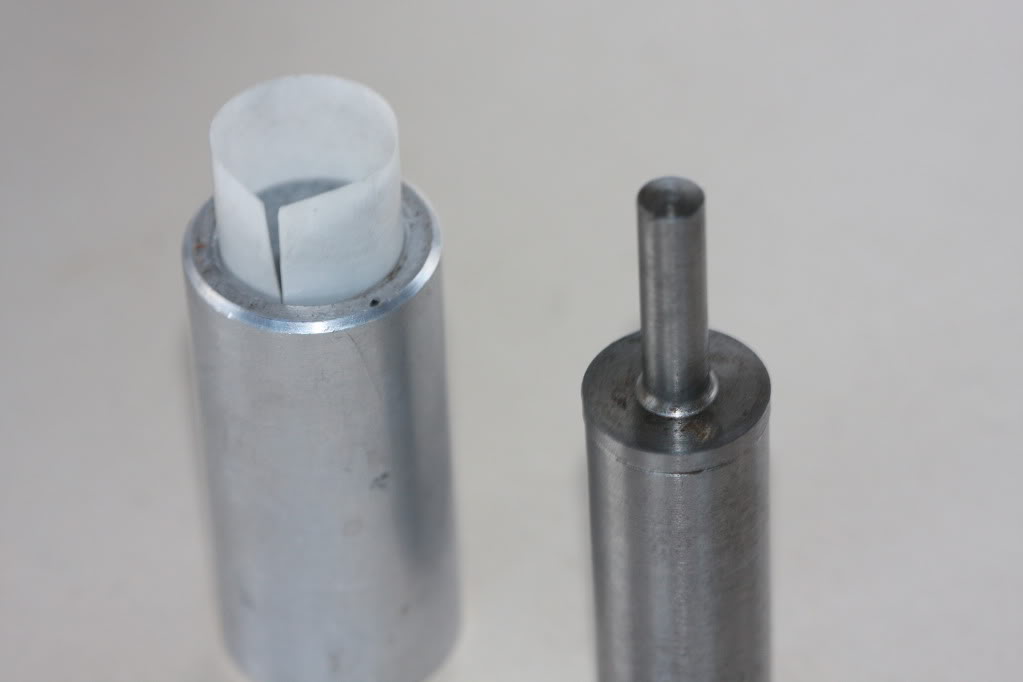
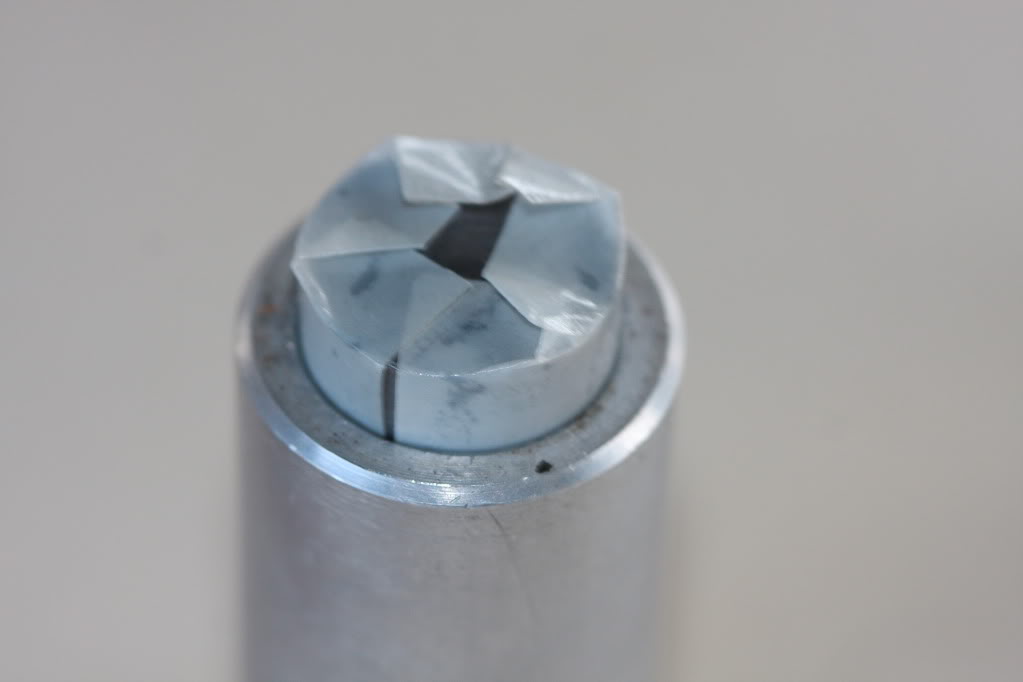
Caption: Here the bullet has been inserted up to the same shoulder.
Caption: The patch is folded over the bullet’s base. It is now ready for the false muzzle.
Caption: This plunger type seating tool is used to seat the bullet.
One subject that needs to be mentioned deals with the handling of the extra weight when going through loading, cleaning, and benching the gun prior to shooting. Mr Mitchell uses a swivel mounted on the top of his shooting bench. With the gun on the swivel the gun rests on the muzzle and on the swivel; the stock is a few inches off the bench. To ready the gun for firing, a pin is removed from the swivel and the gun is lowered so that the stock rests on the bench.
After firing, the stock of the gun is raised and the gun placed on the swivel. The gun is then rotated on the swivel until the stock can be lowered to the ground. After cleaning and loading, the gun is swung back unto the bench where the swivel can be disconnected and the stock again lowered unto the bench. It seemed that this process was well thought out, and the only time the full weight of the gun was lifted was when it was taken to the bench at the beginning of the shooting session. Moving to and from the range was done with a two-wheeled cart adapted for that purpose.
Caption: Please note the swivel in the center of the bench. This holds the weight until the pin is pulled and the stock lowered to the bench. The gun can be rotated and the stock lowered to the ground. (You may have noticed the false muzzle remaining on the gun while on the bench. Mr. Mitchell had just placed the gun on the bench for taking photos. The false muzzle is left in place when the gun travels and moved to the bench to protect the muzzle.)
Caption: George is making adjustments to his scope.
Caption: You saw this photo at the beginning, but it’s worthy of a second look!
I’d like to thank George Mitchell, his wife, and all those slug gun shooters on the line for their cooperation. Their willingness to help with information and helping to set up photography shots was invaluable.

October 2010 – vol.4, Larry Pletcher, editor
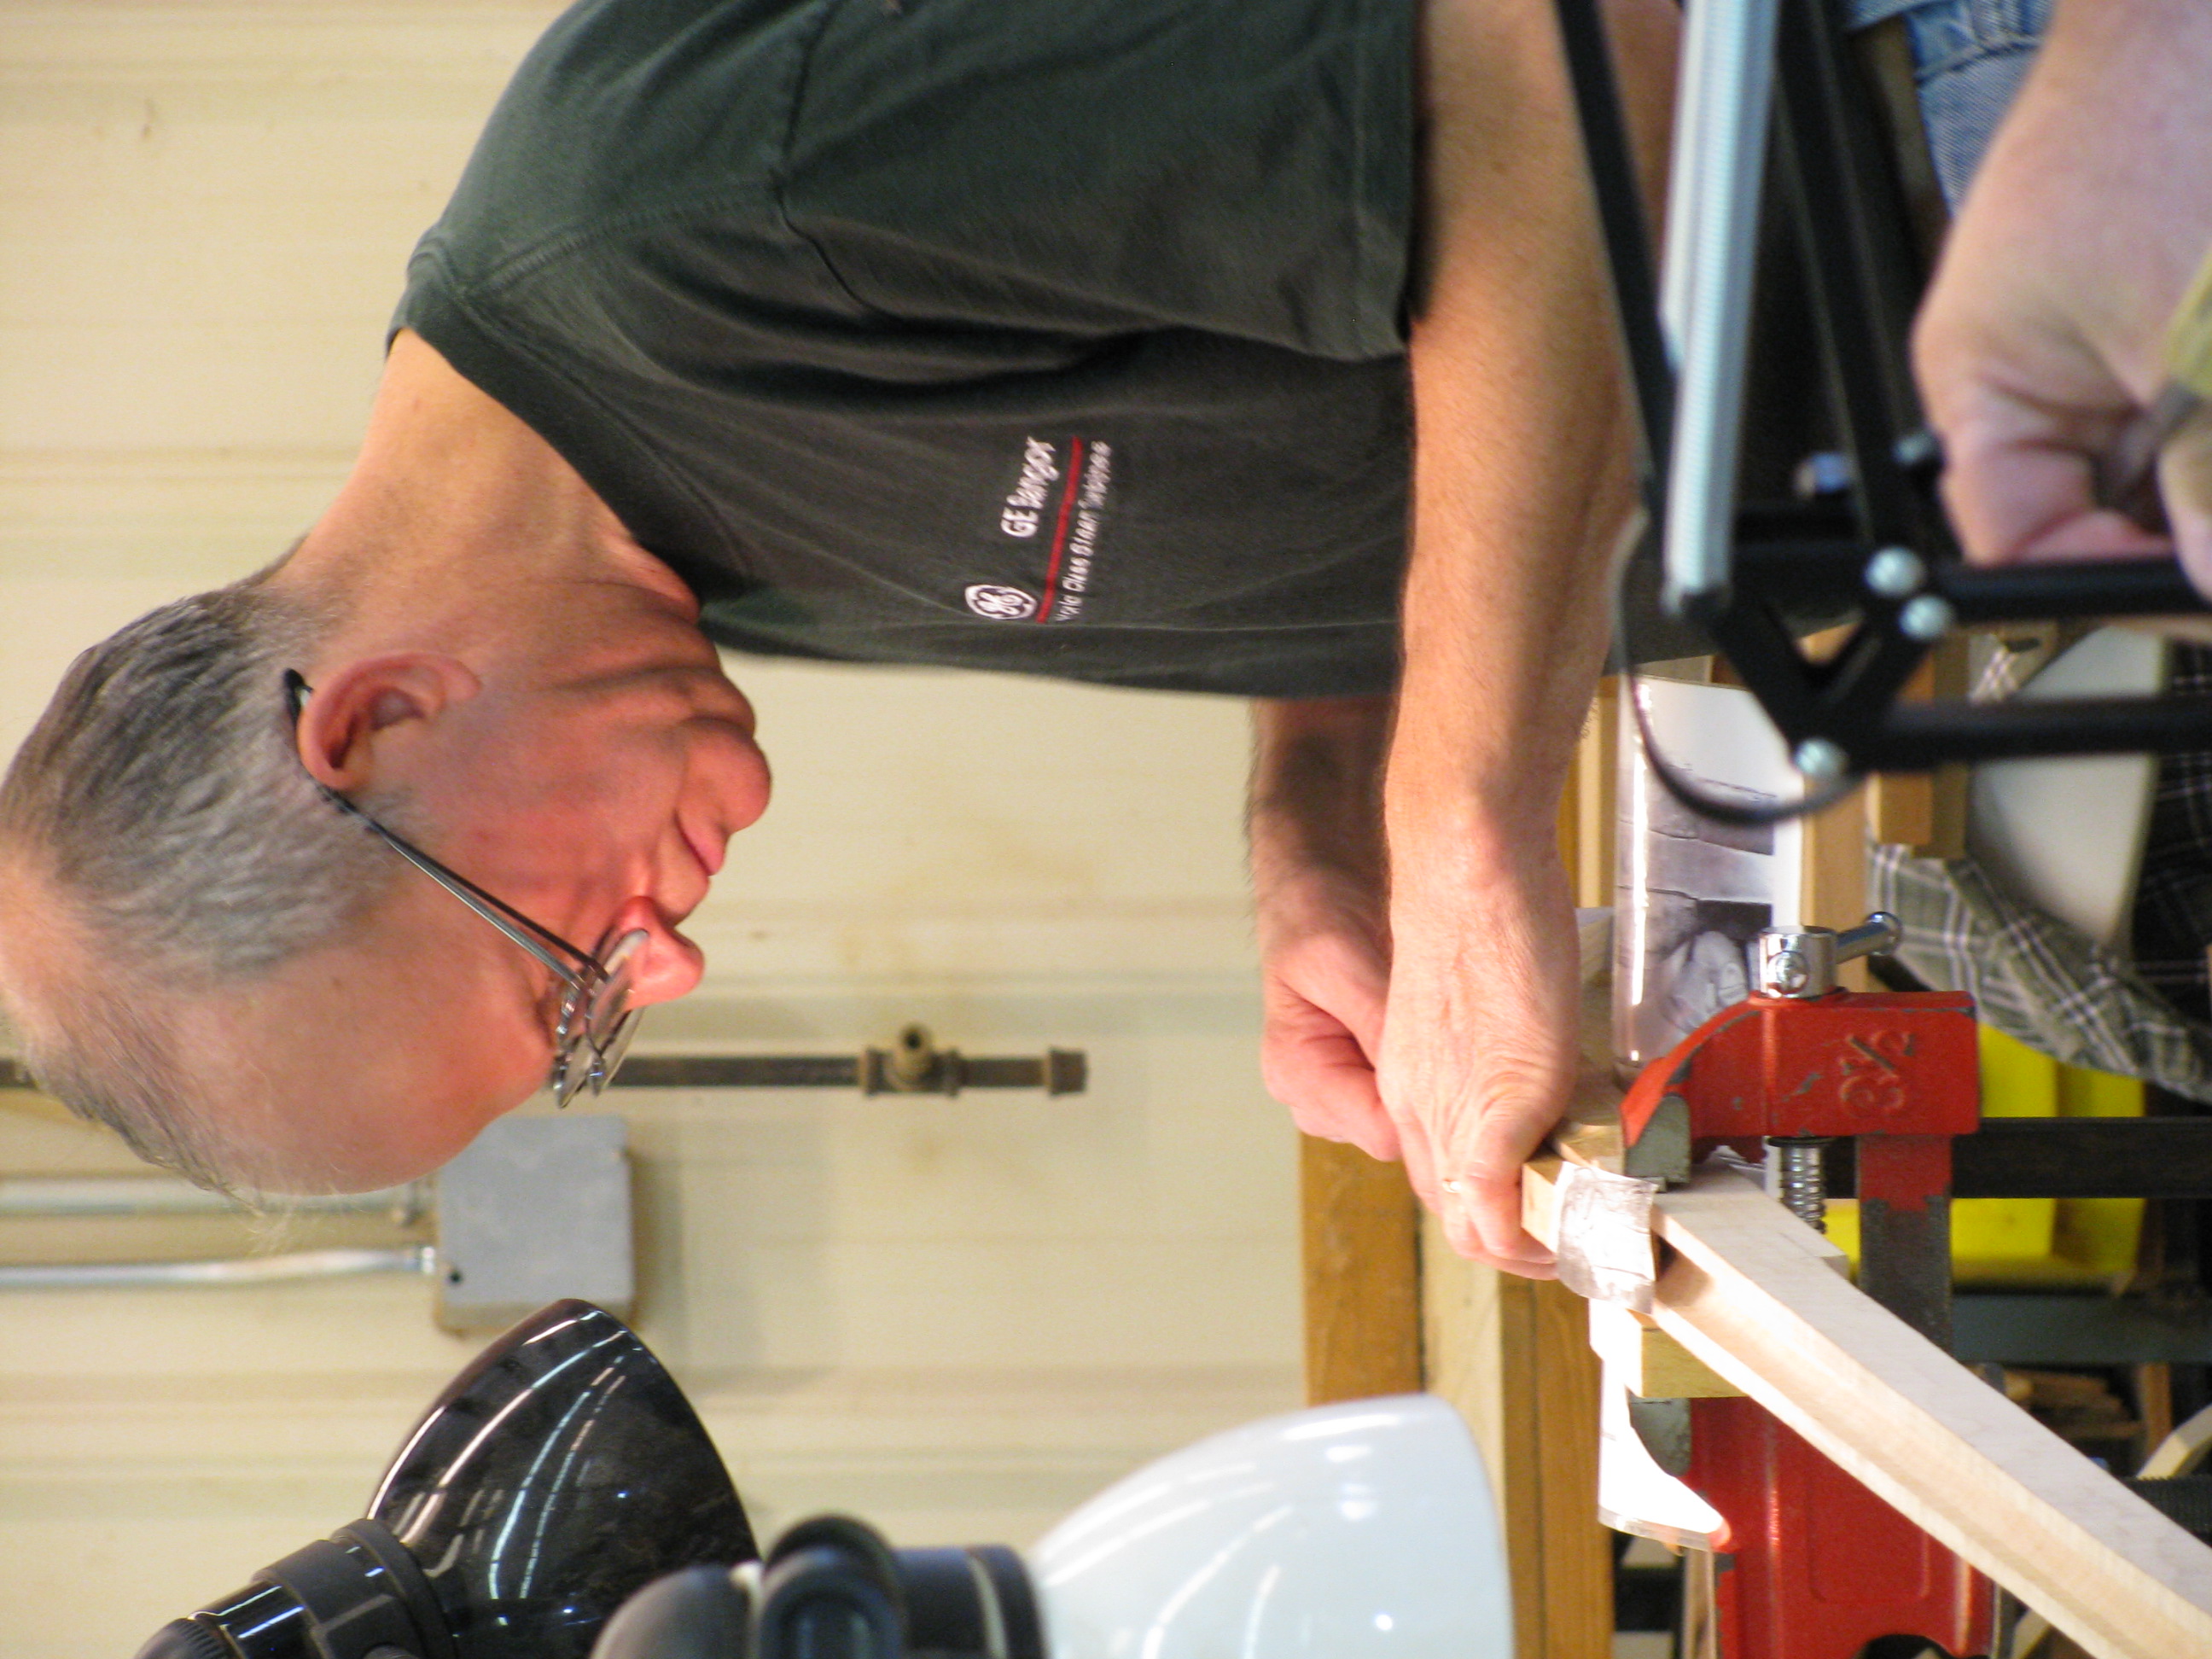
I think I first met Mark at Dixon’s a few years ago and was impressed with his work. Since then I have admired his rifles at the CLA shows in Lexington. Mark’s gun making started as a hobby, but now is a full time occupation. He won a “Best of Show” at Dixons in 2005.
I remember a conversation with Mark a few years ago at CLA when I mentioned that I had a nice stock and was worried that I would not stop carving before I exposed my inabilities. His reply was, ” I remember getting over that.”
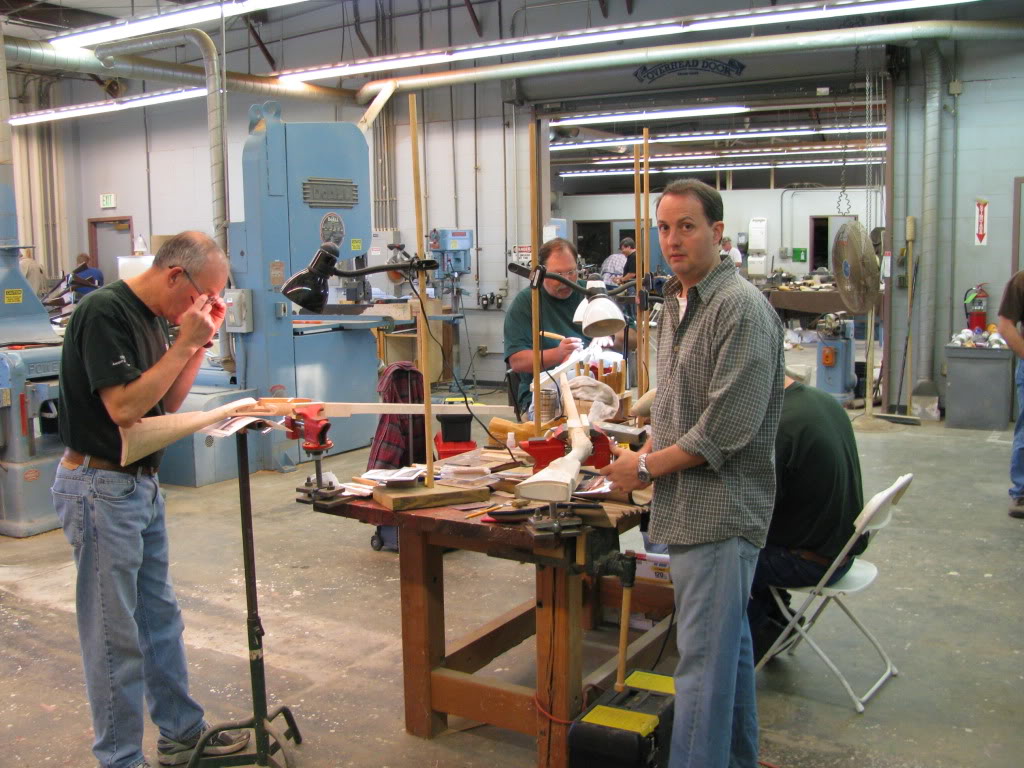
In a field with so many aging builders, it is great to see the prominence of a younger generation of gun makers. I look forward to seeing Mark’s work for many years. In fact I will get to see his work this week at his carving class at Conner Prairie. These photos came from that class:


Mark’s web site and contact information is found below:

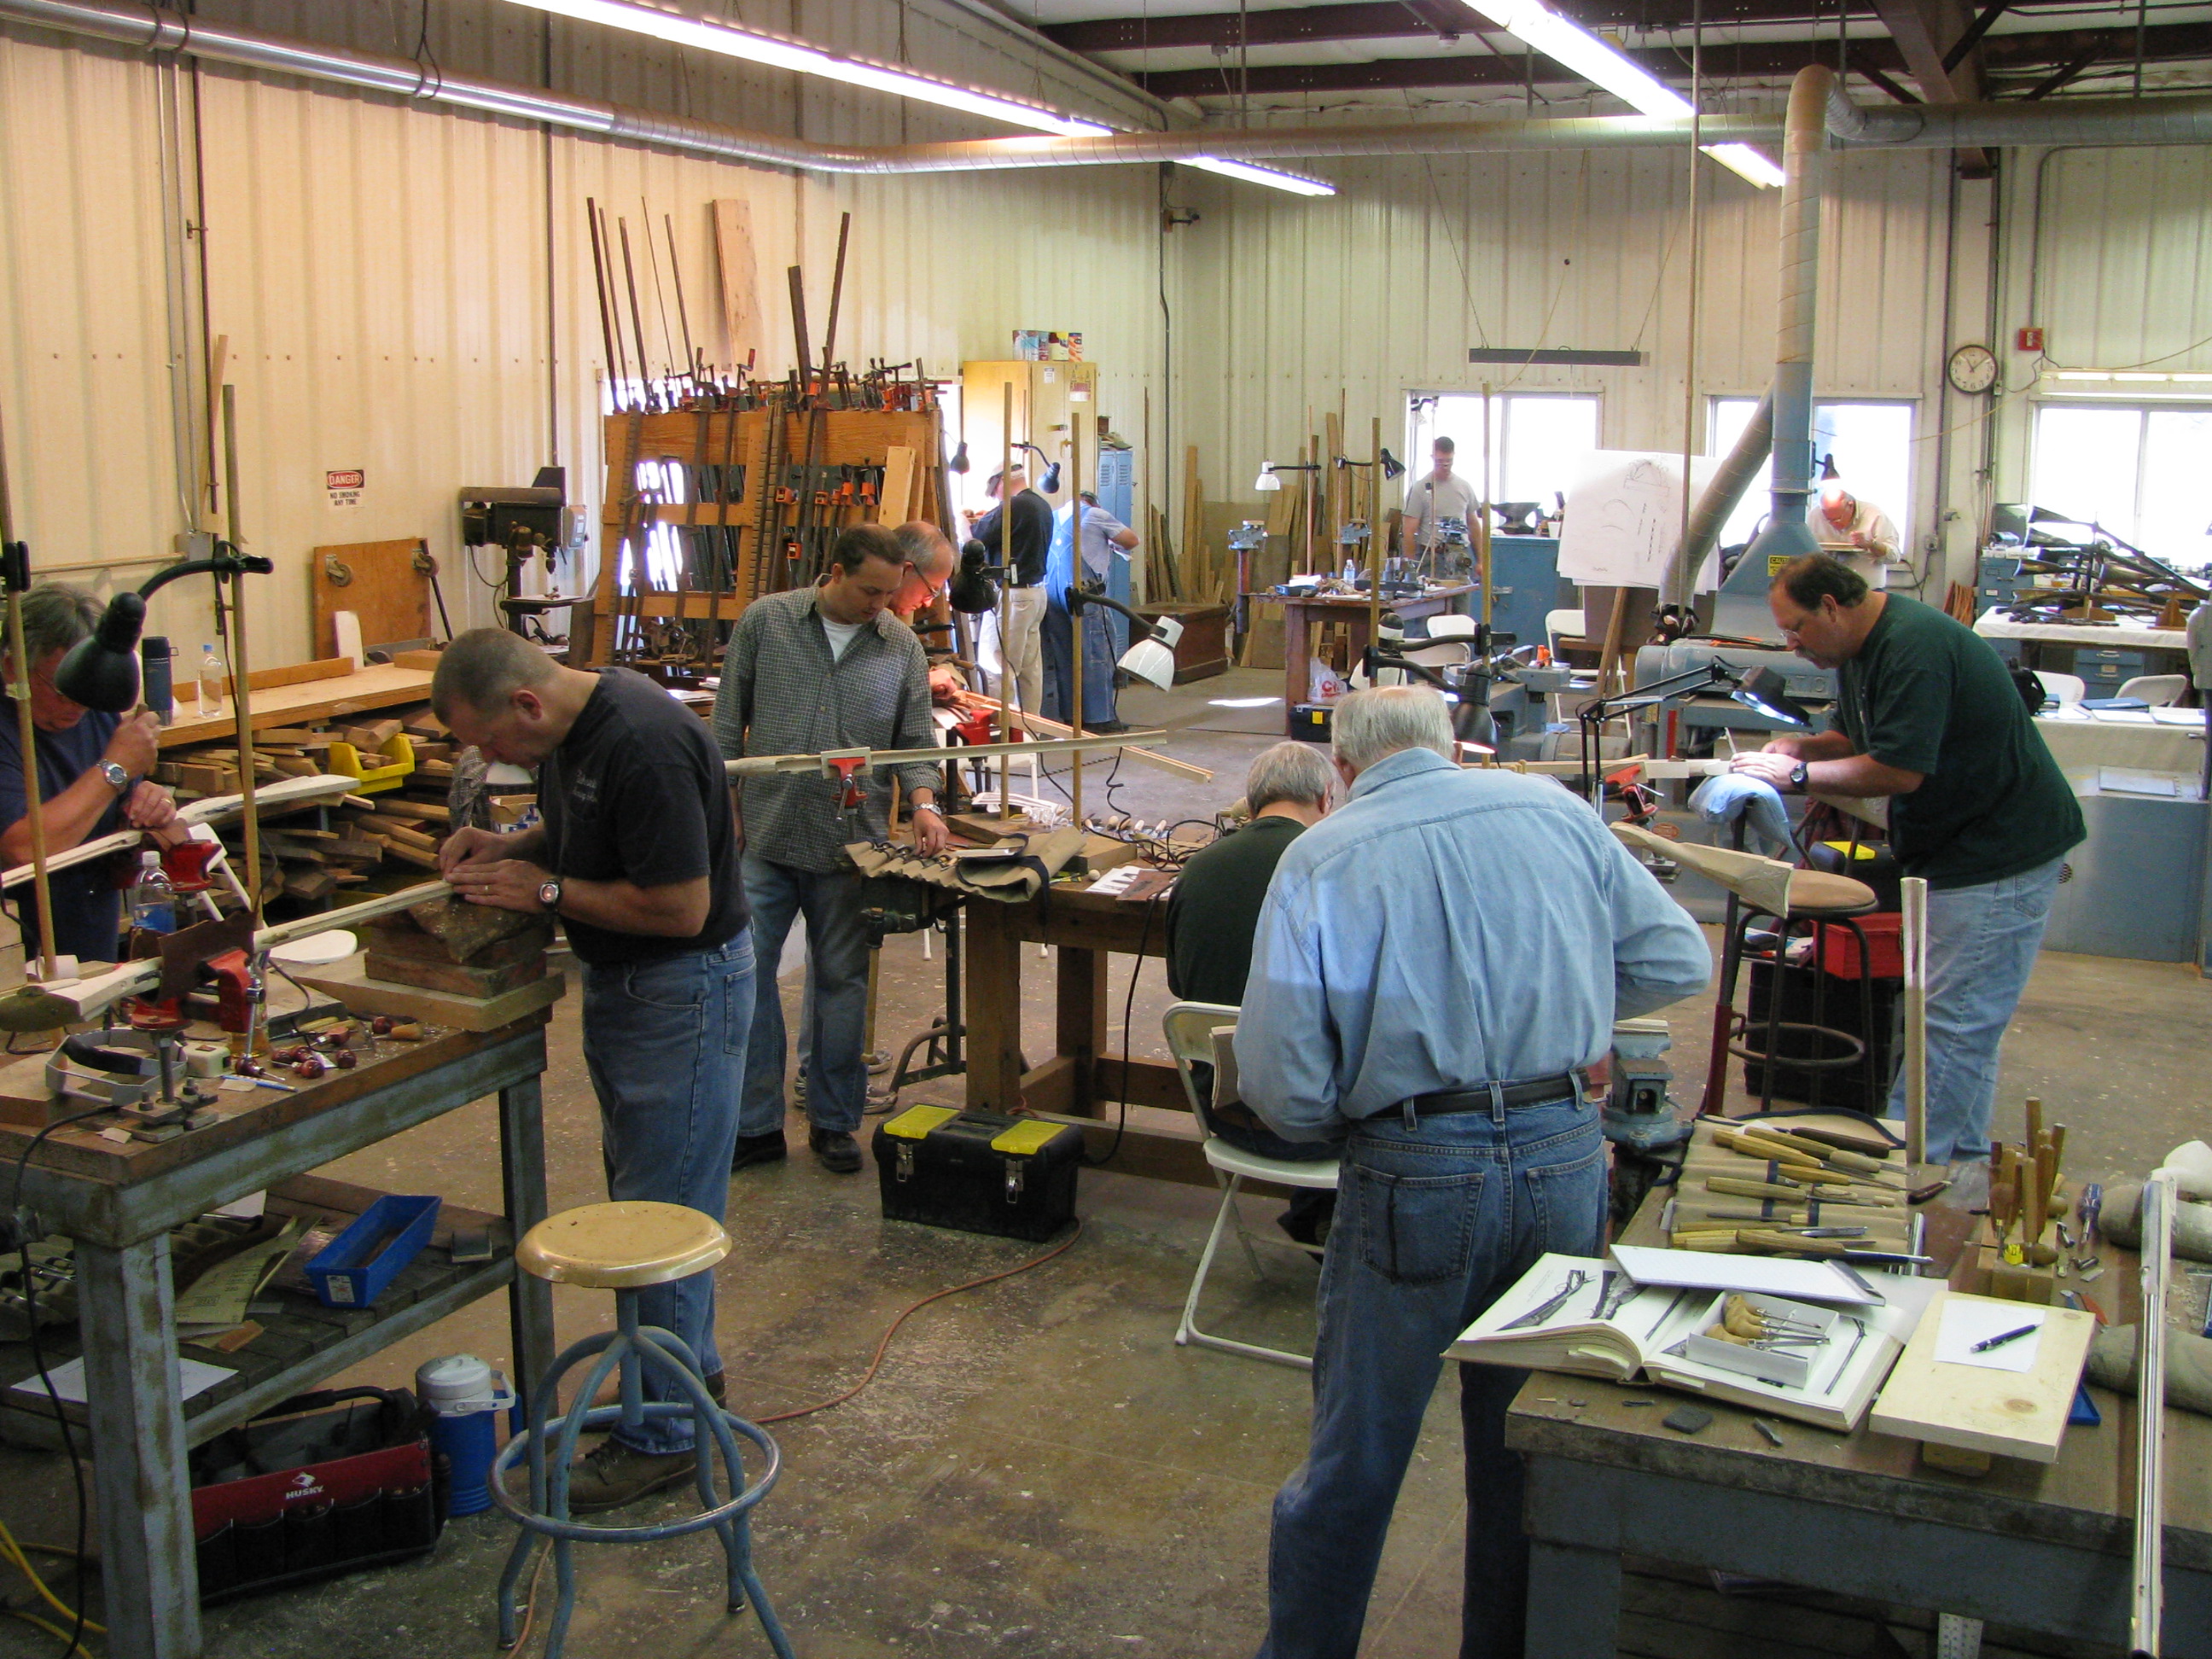
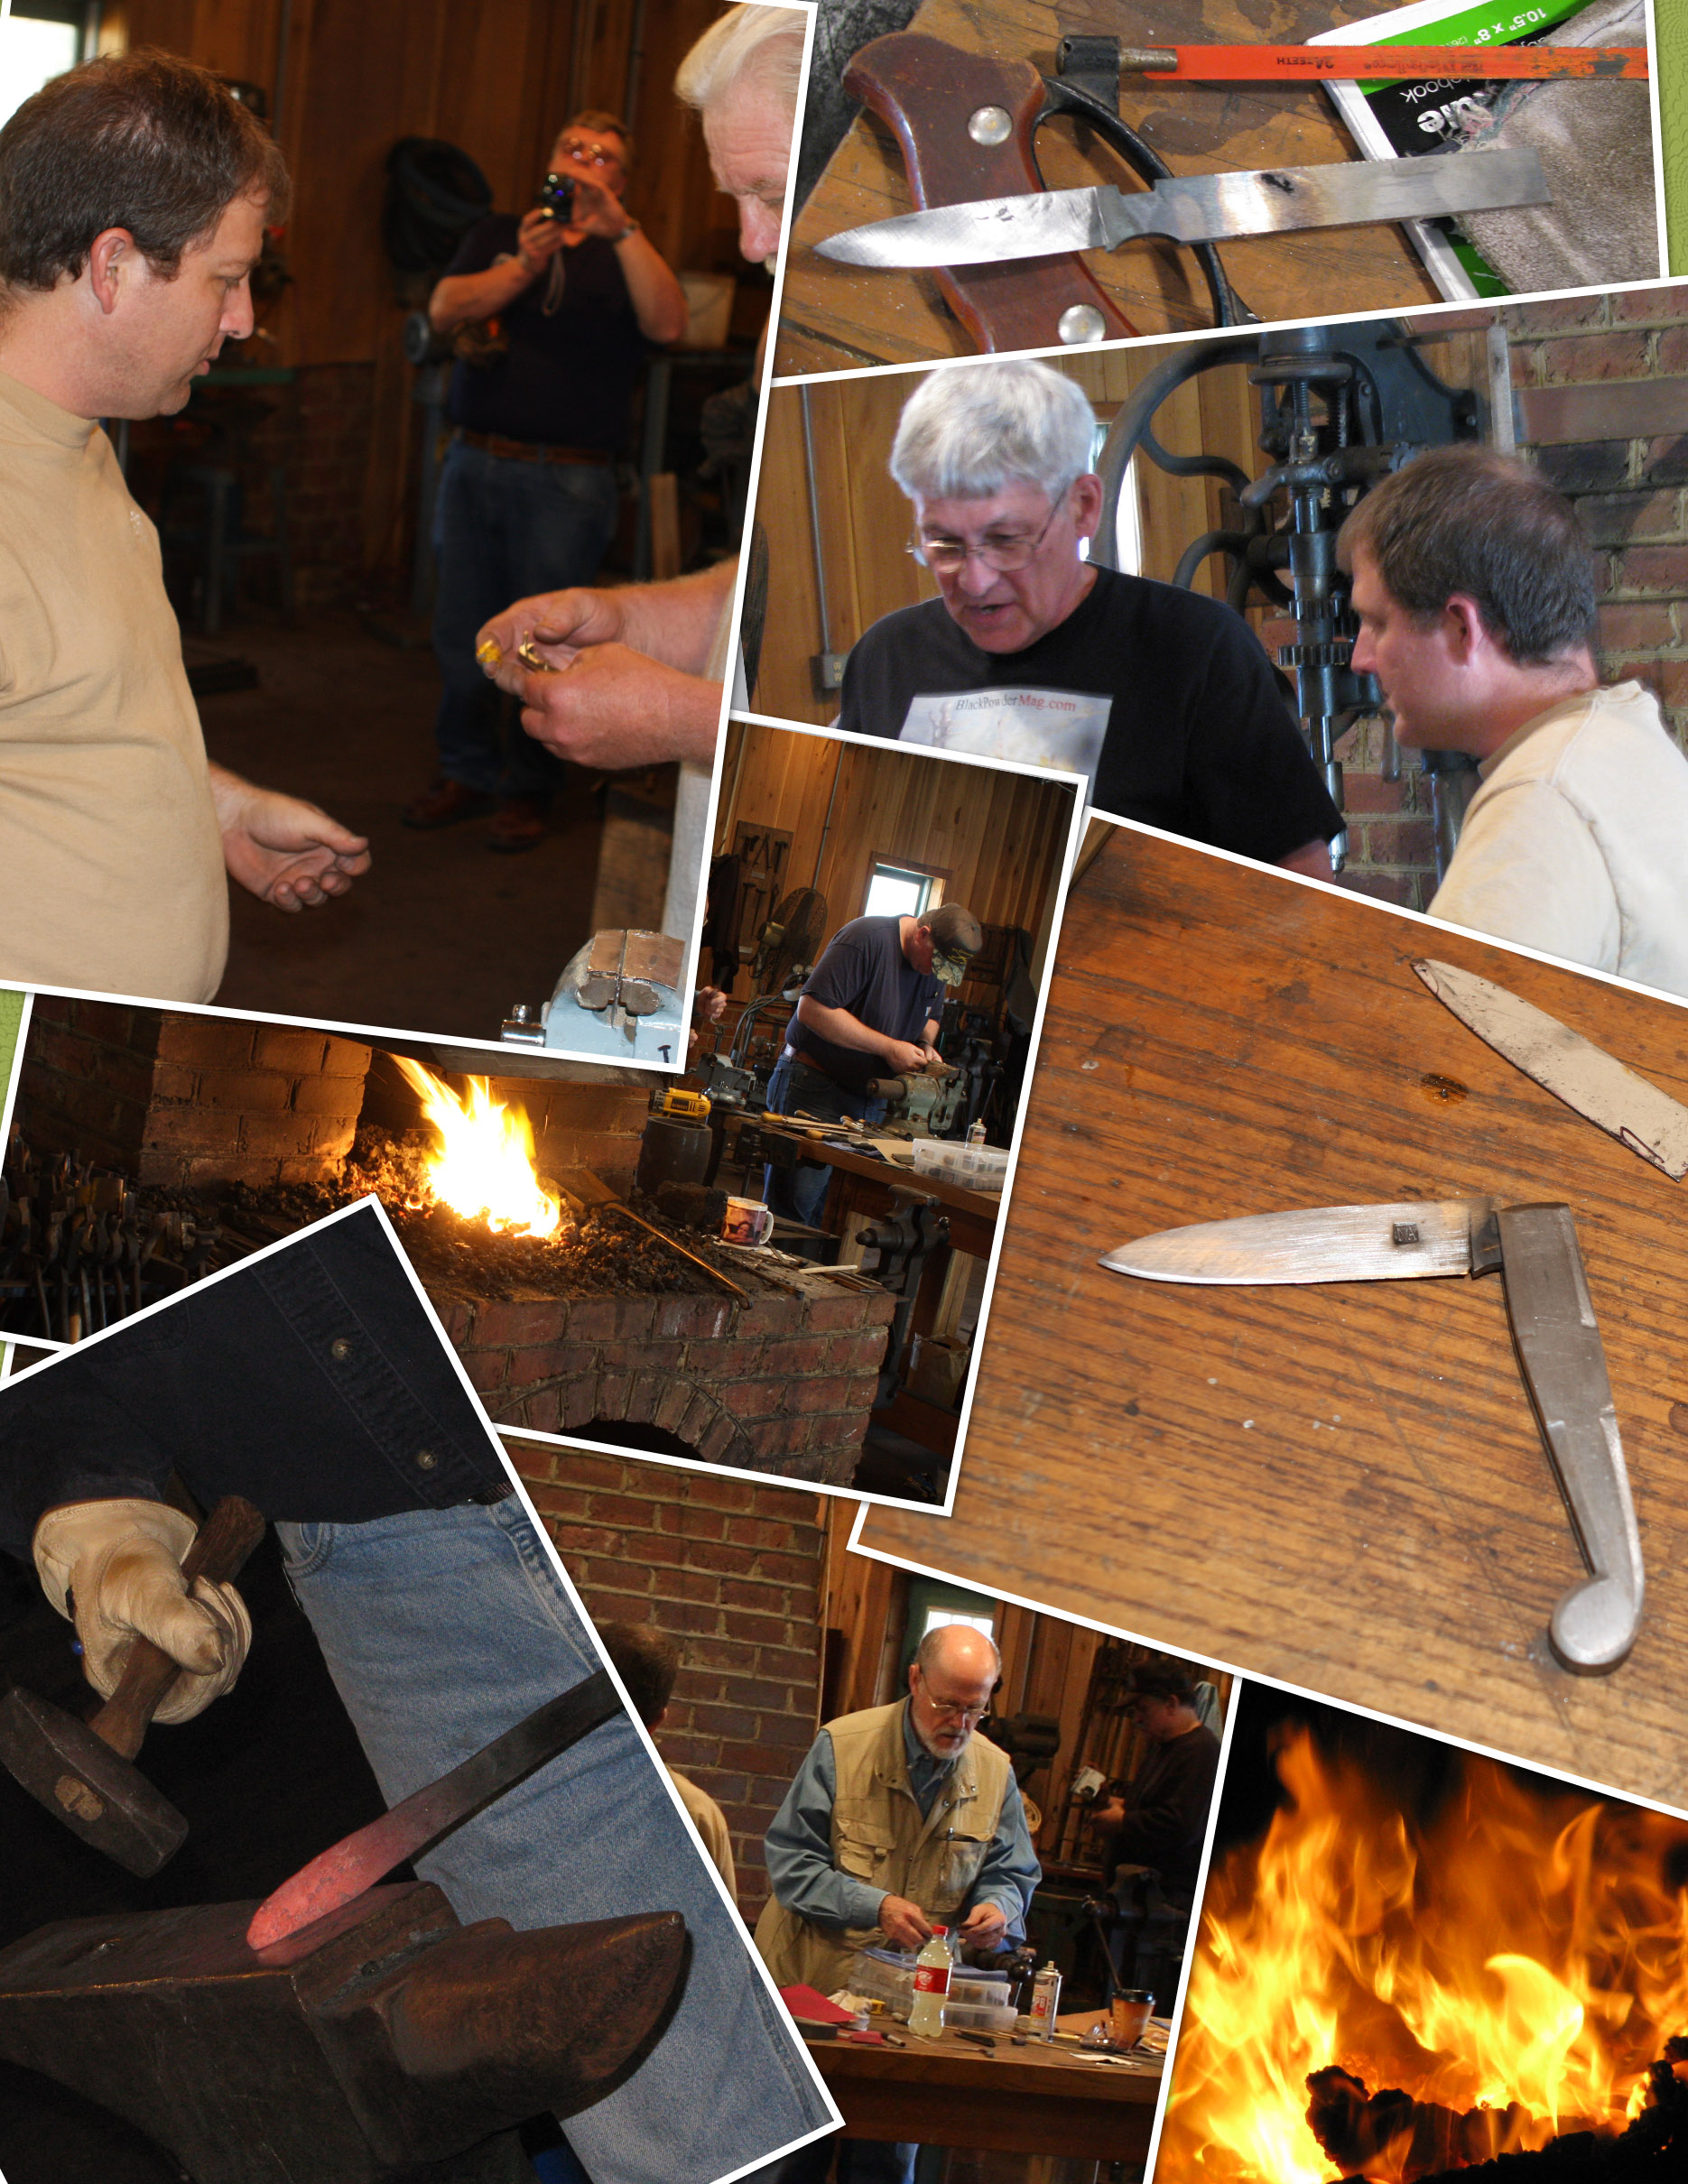
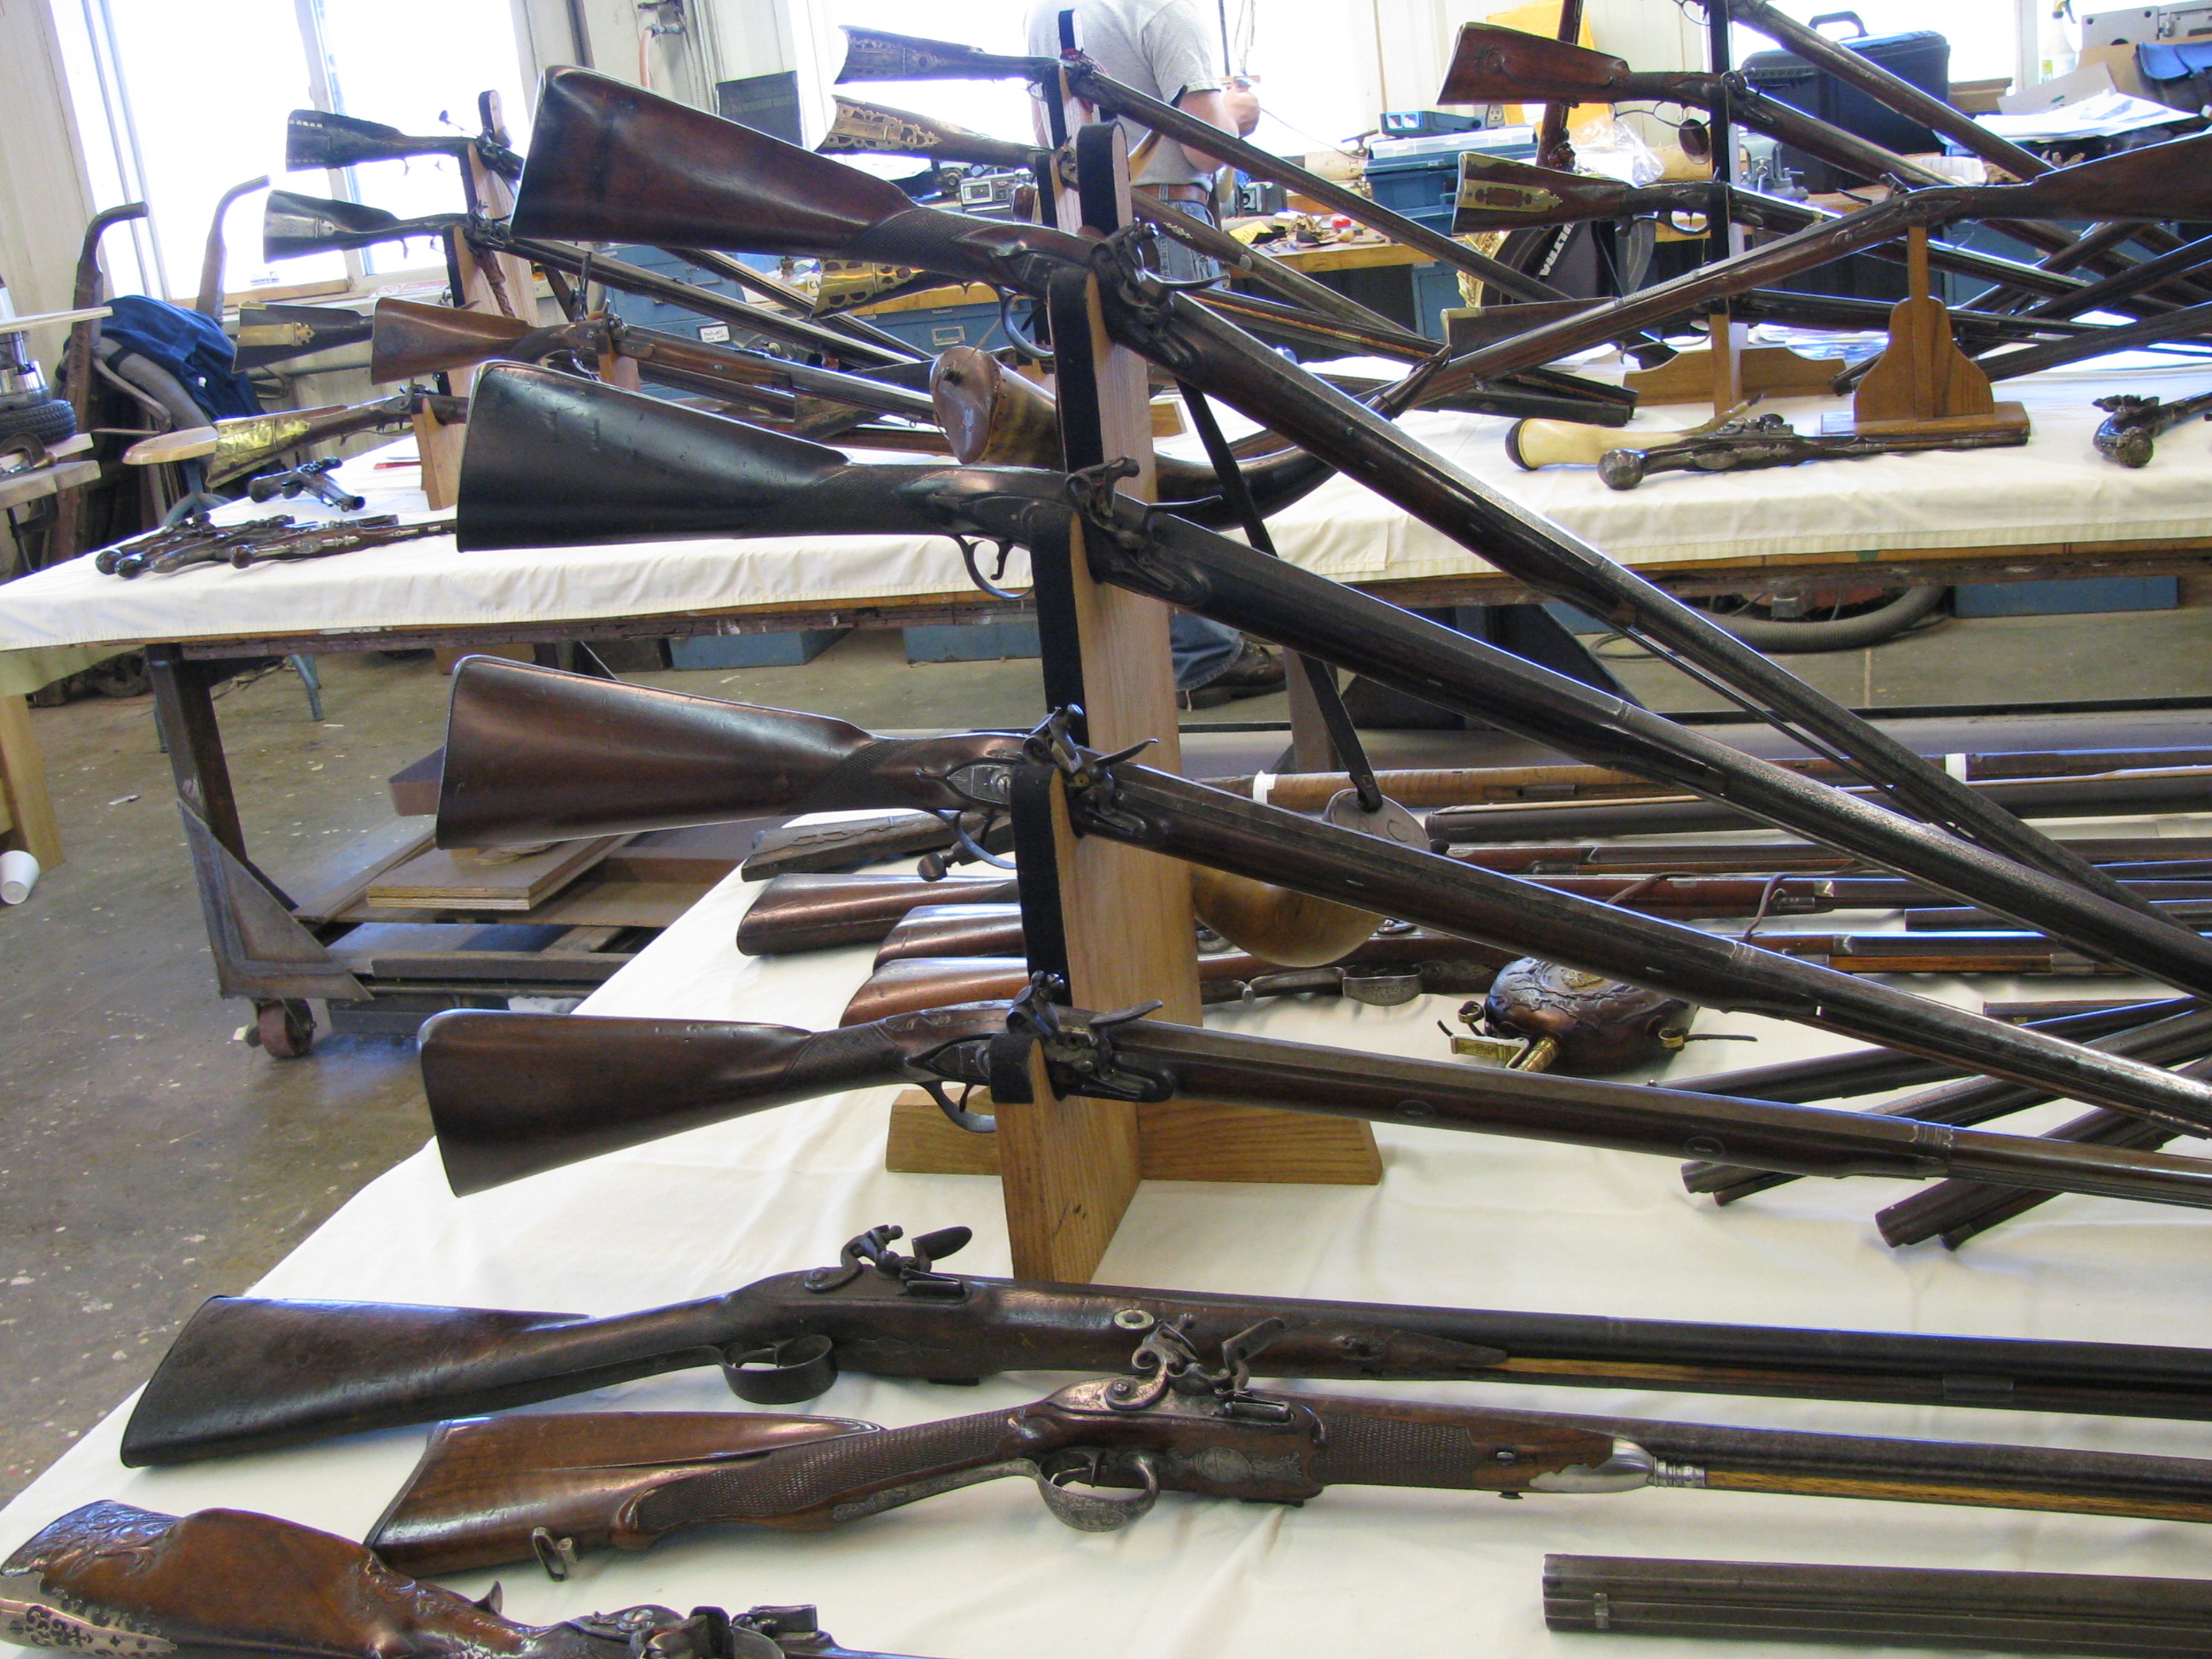
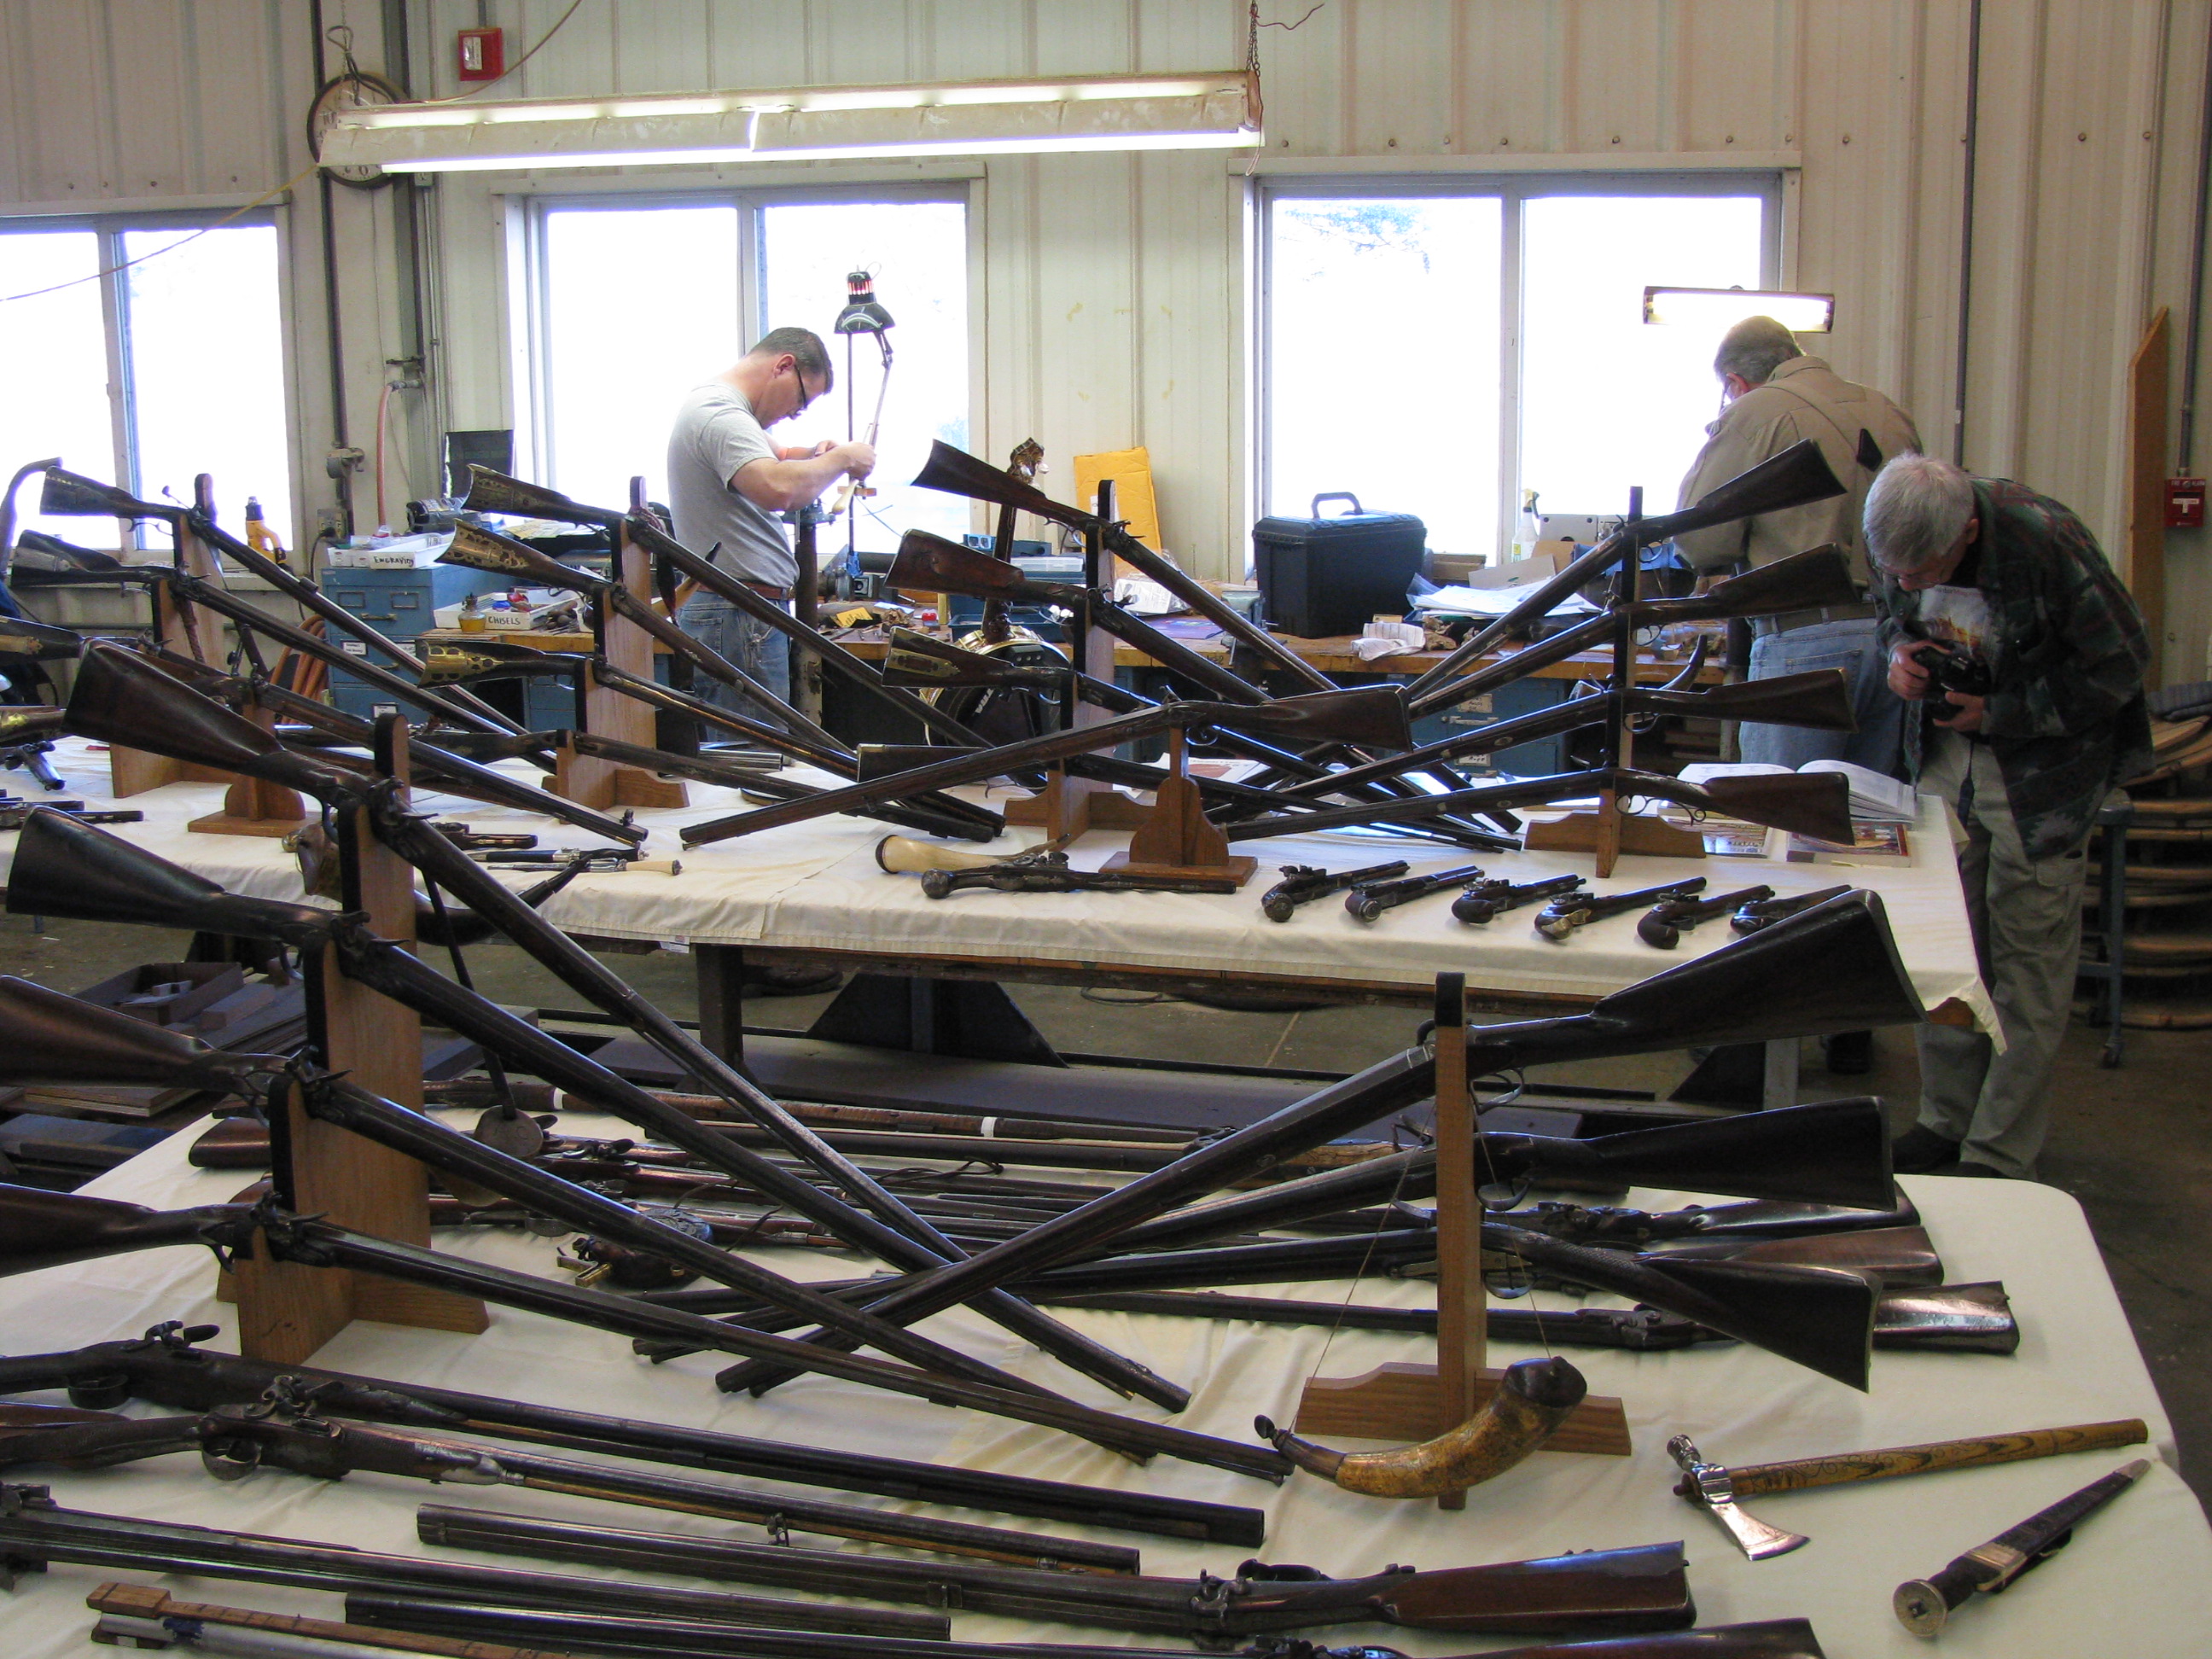
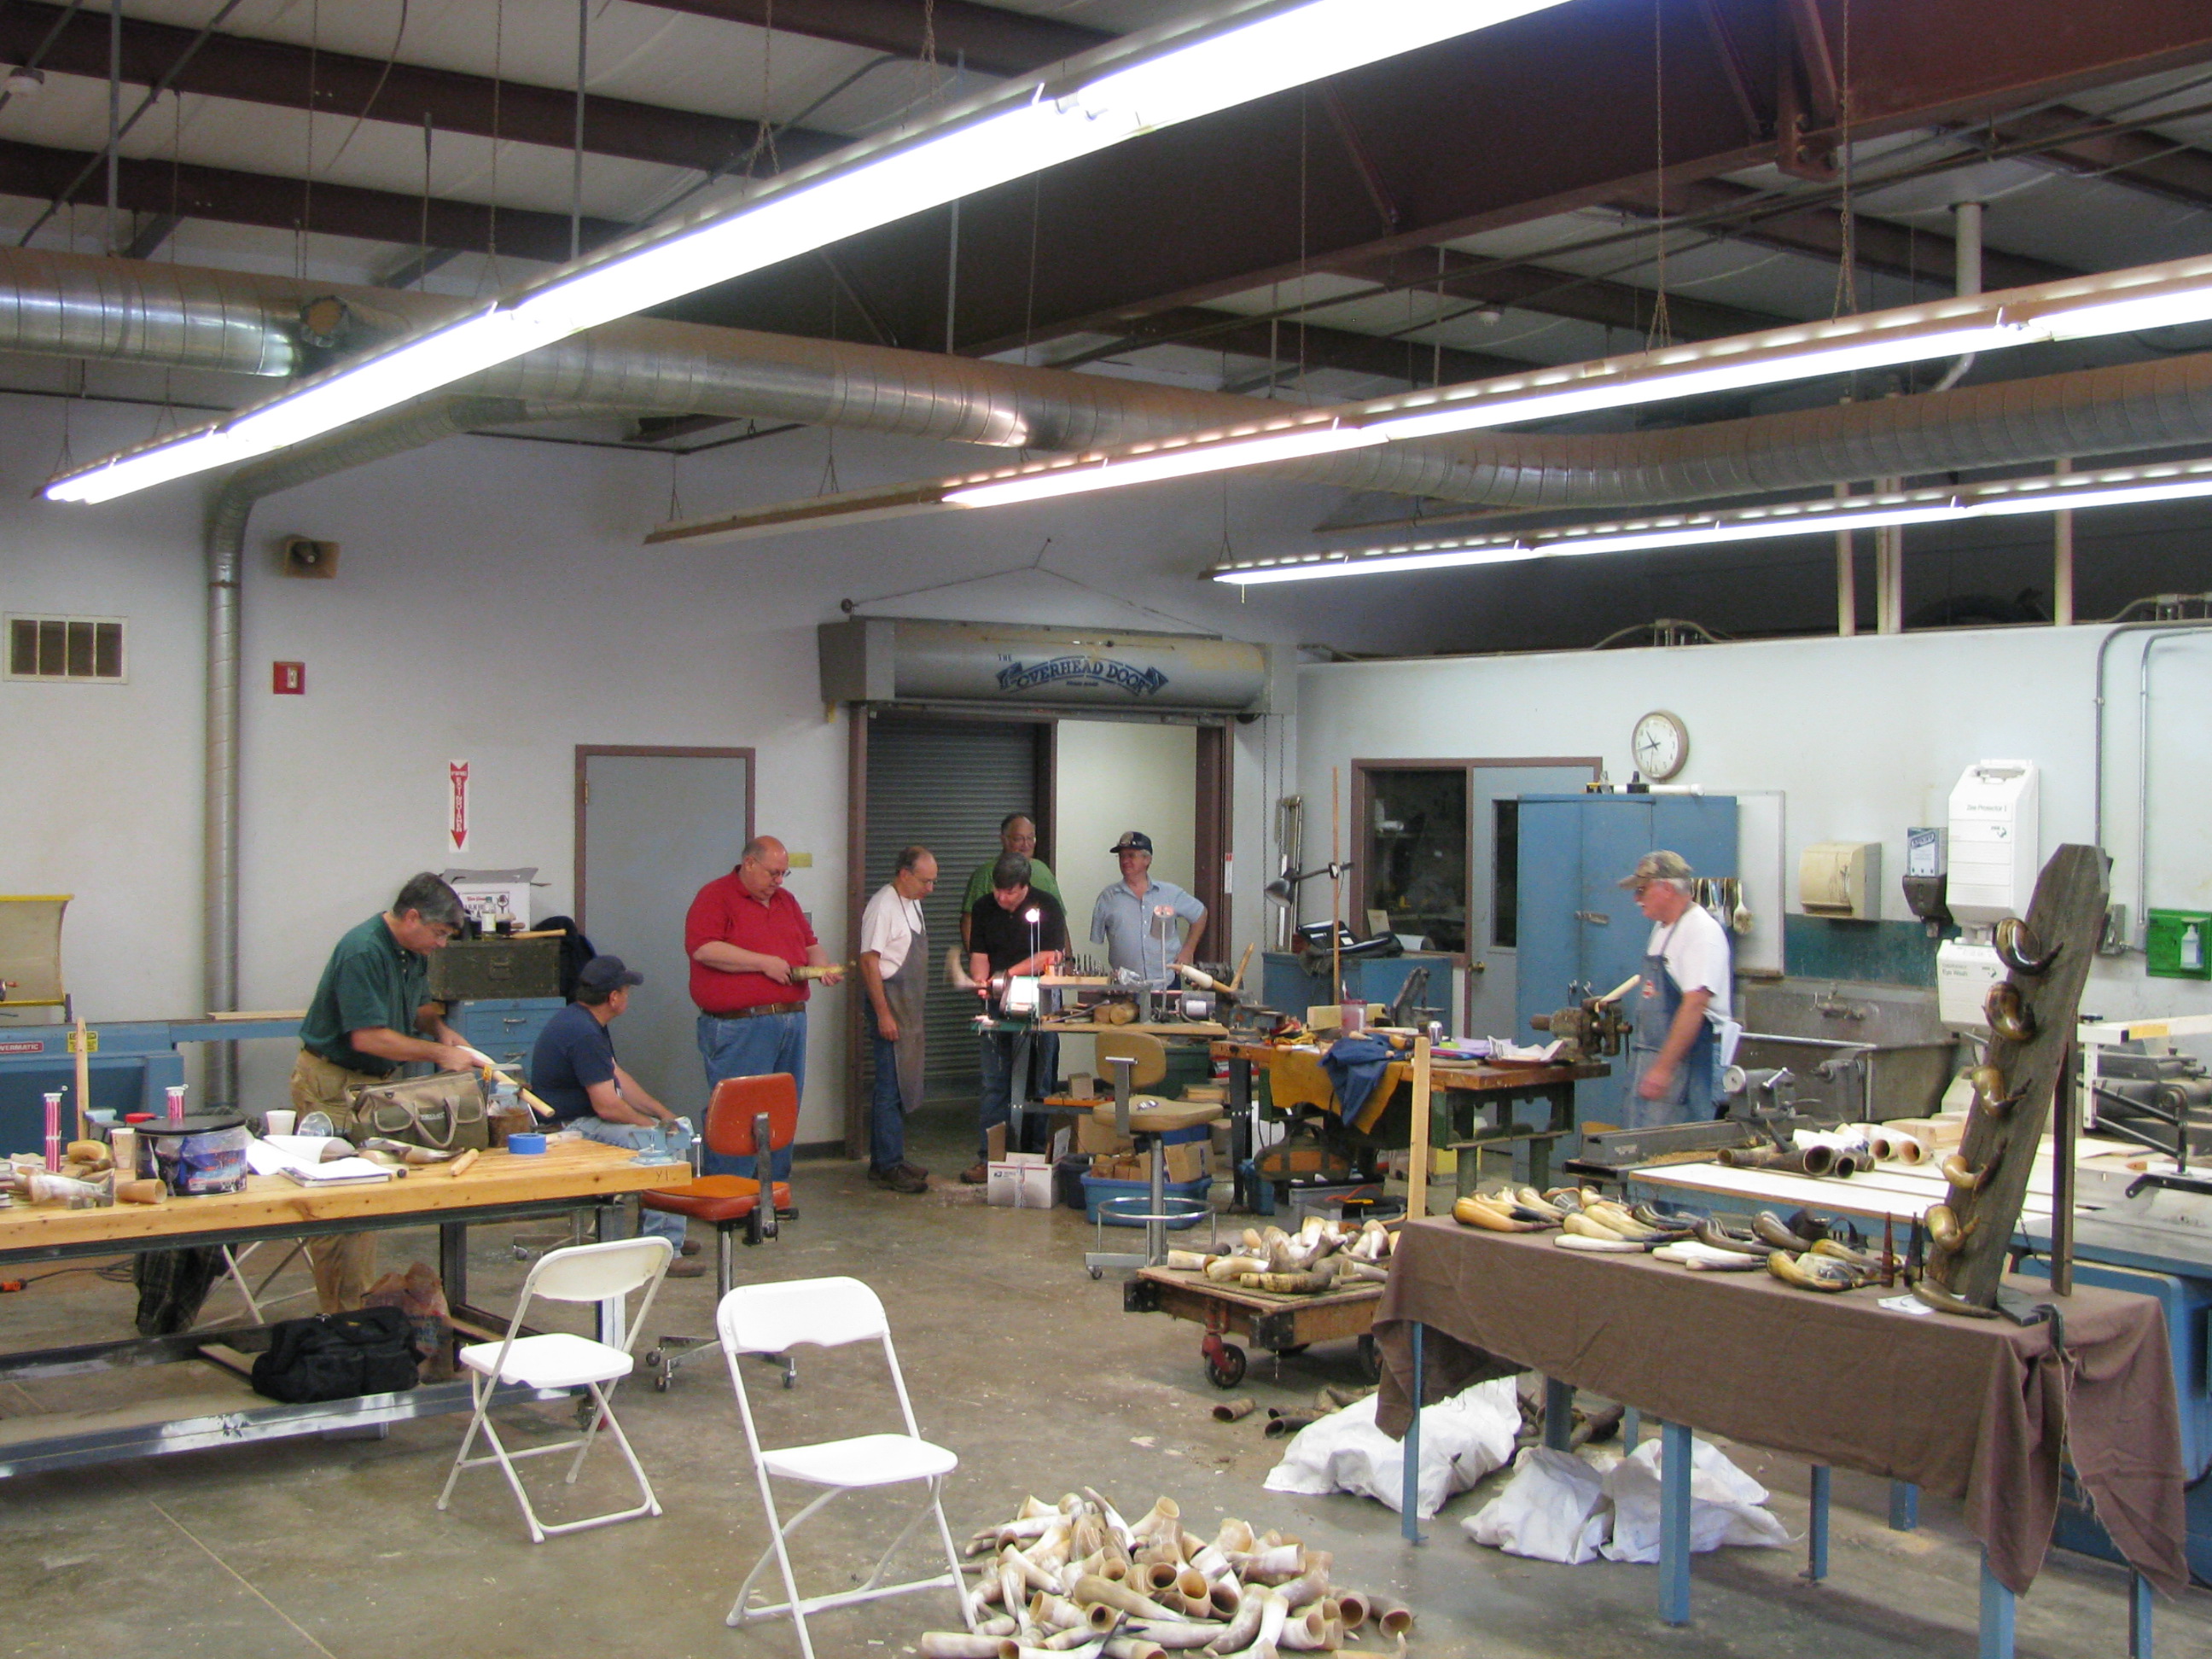
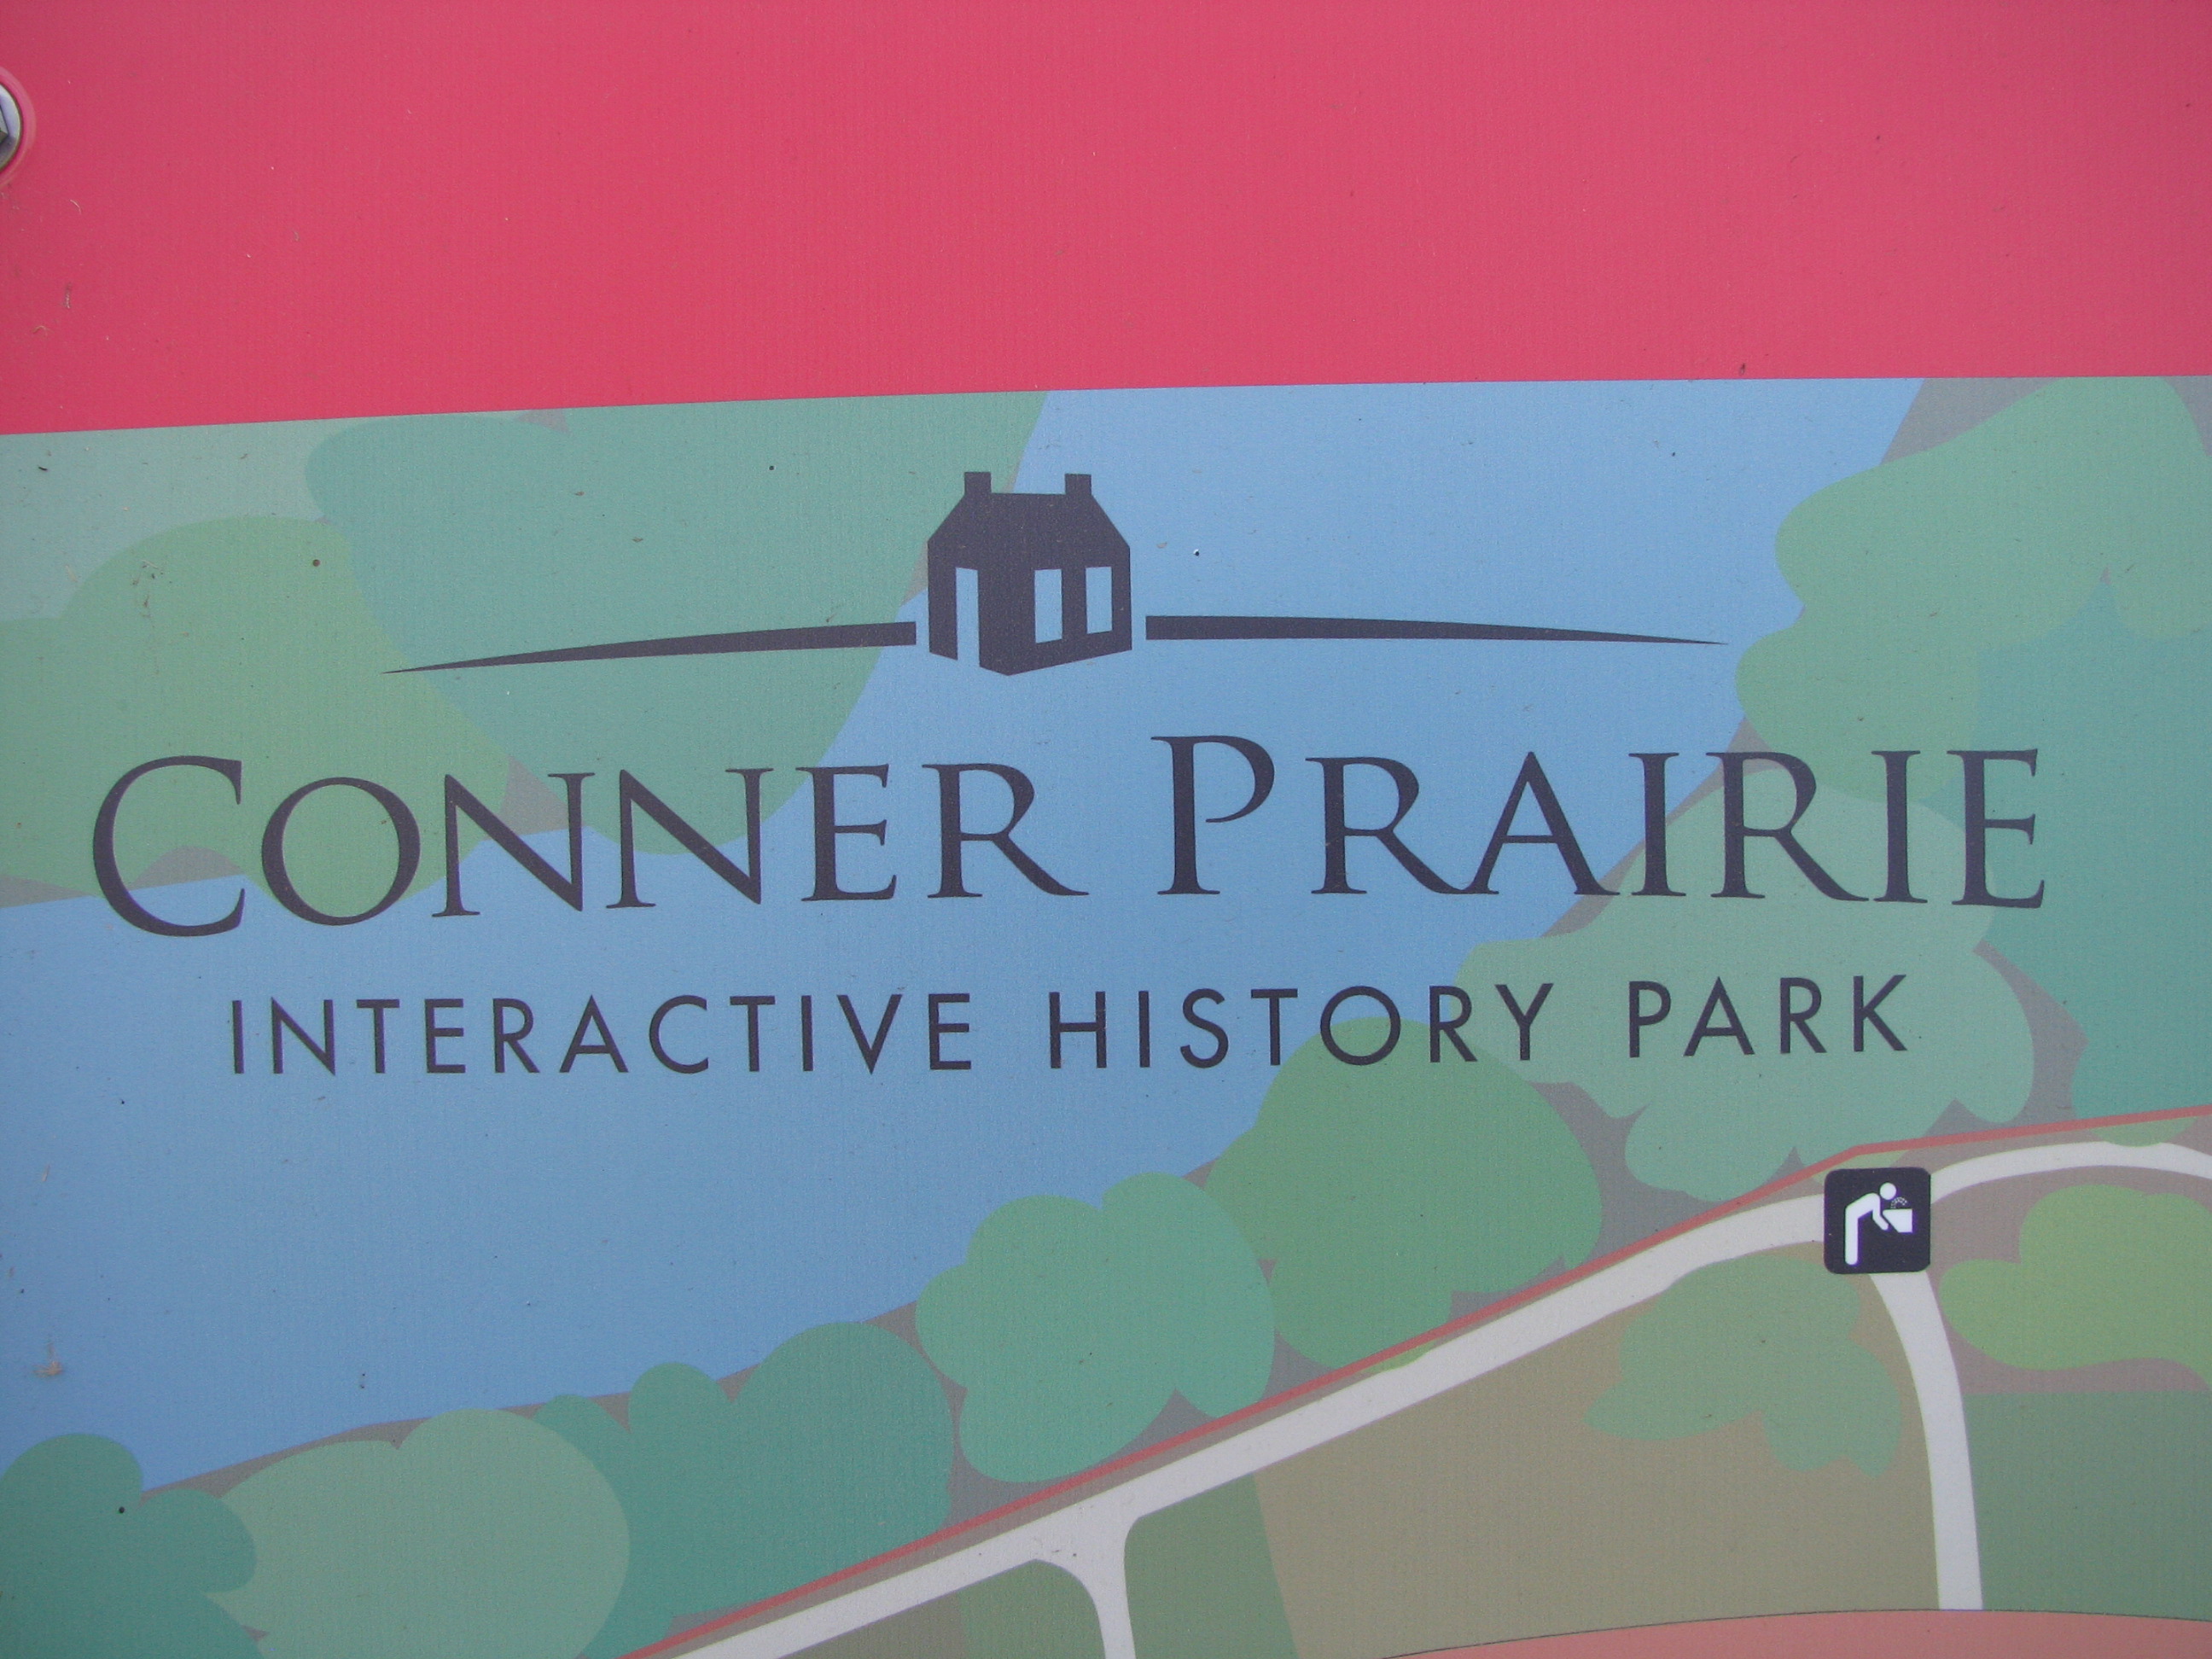
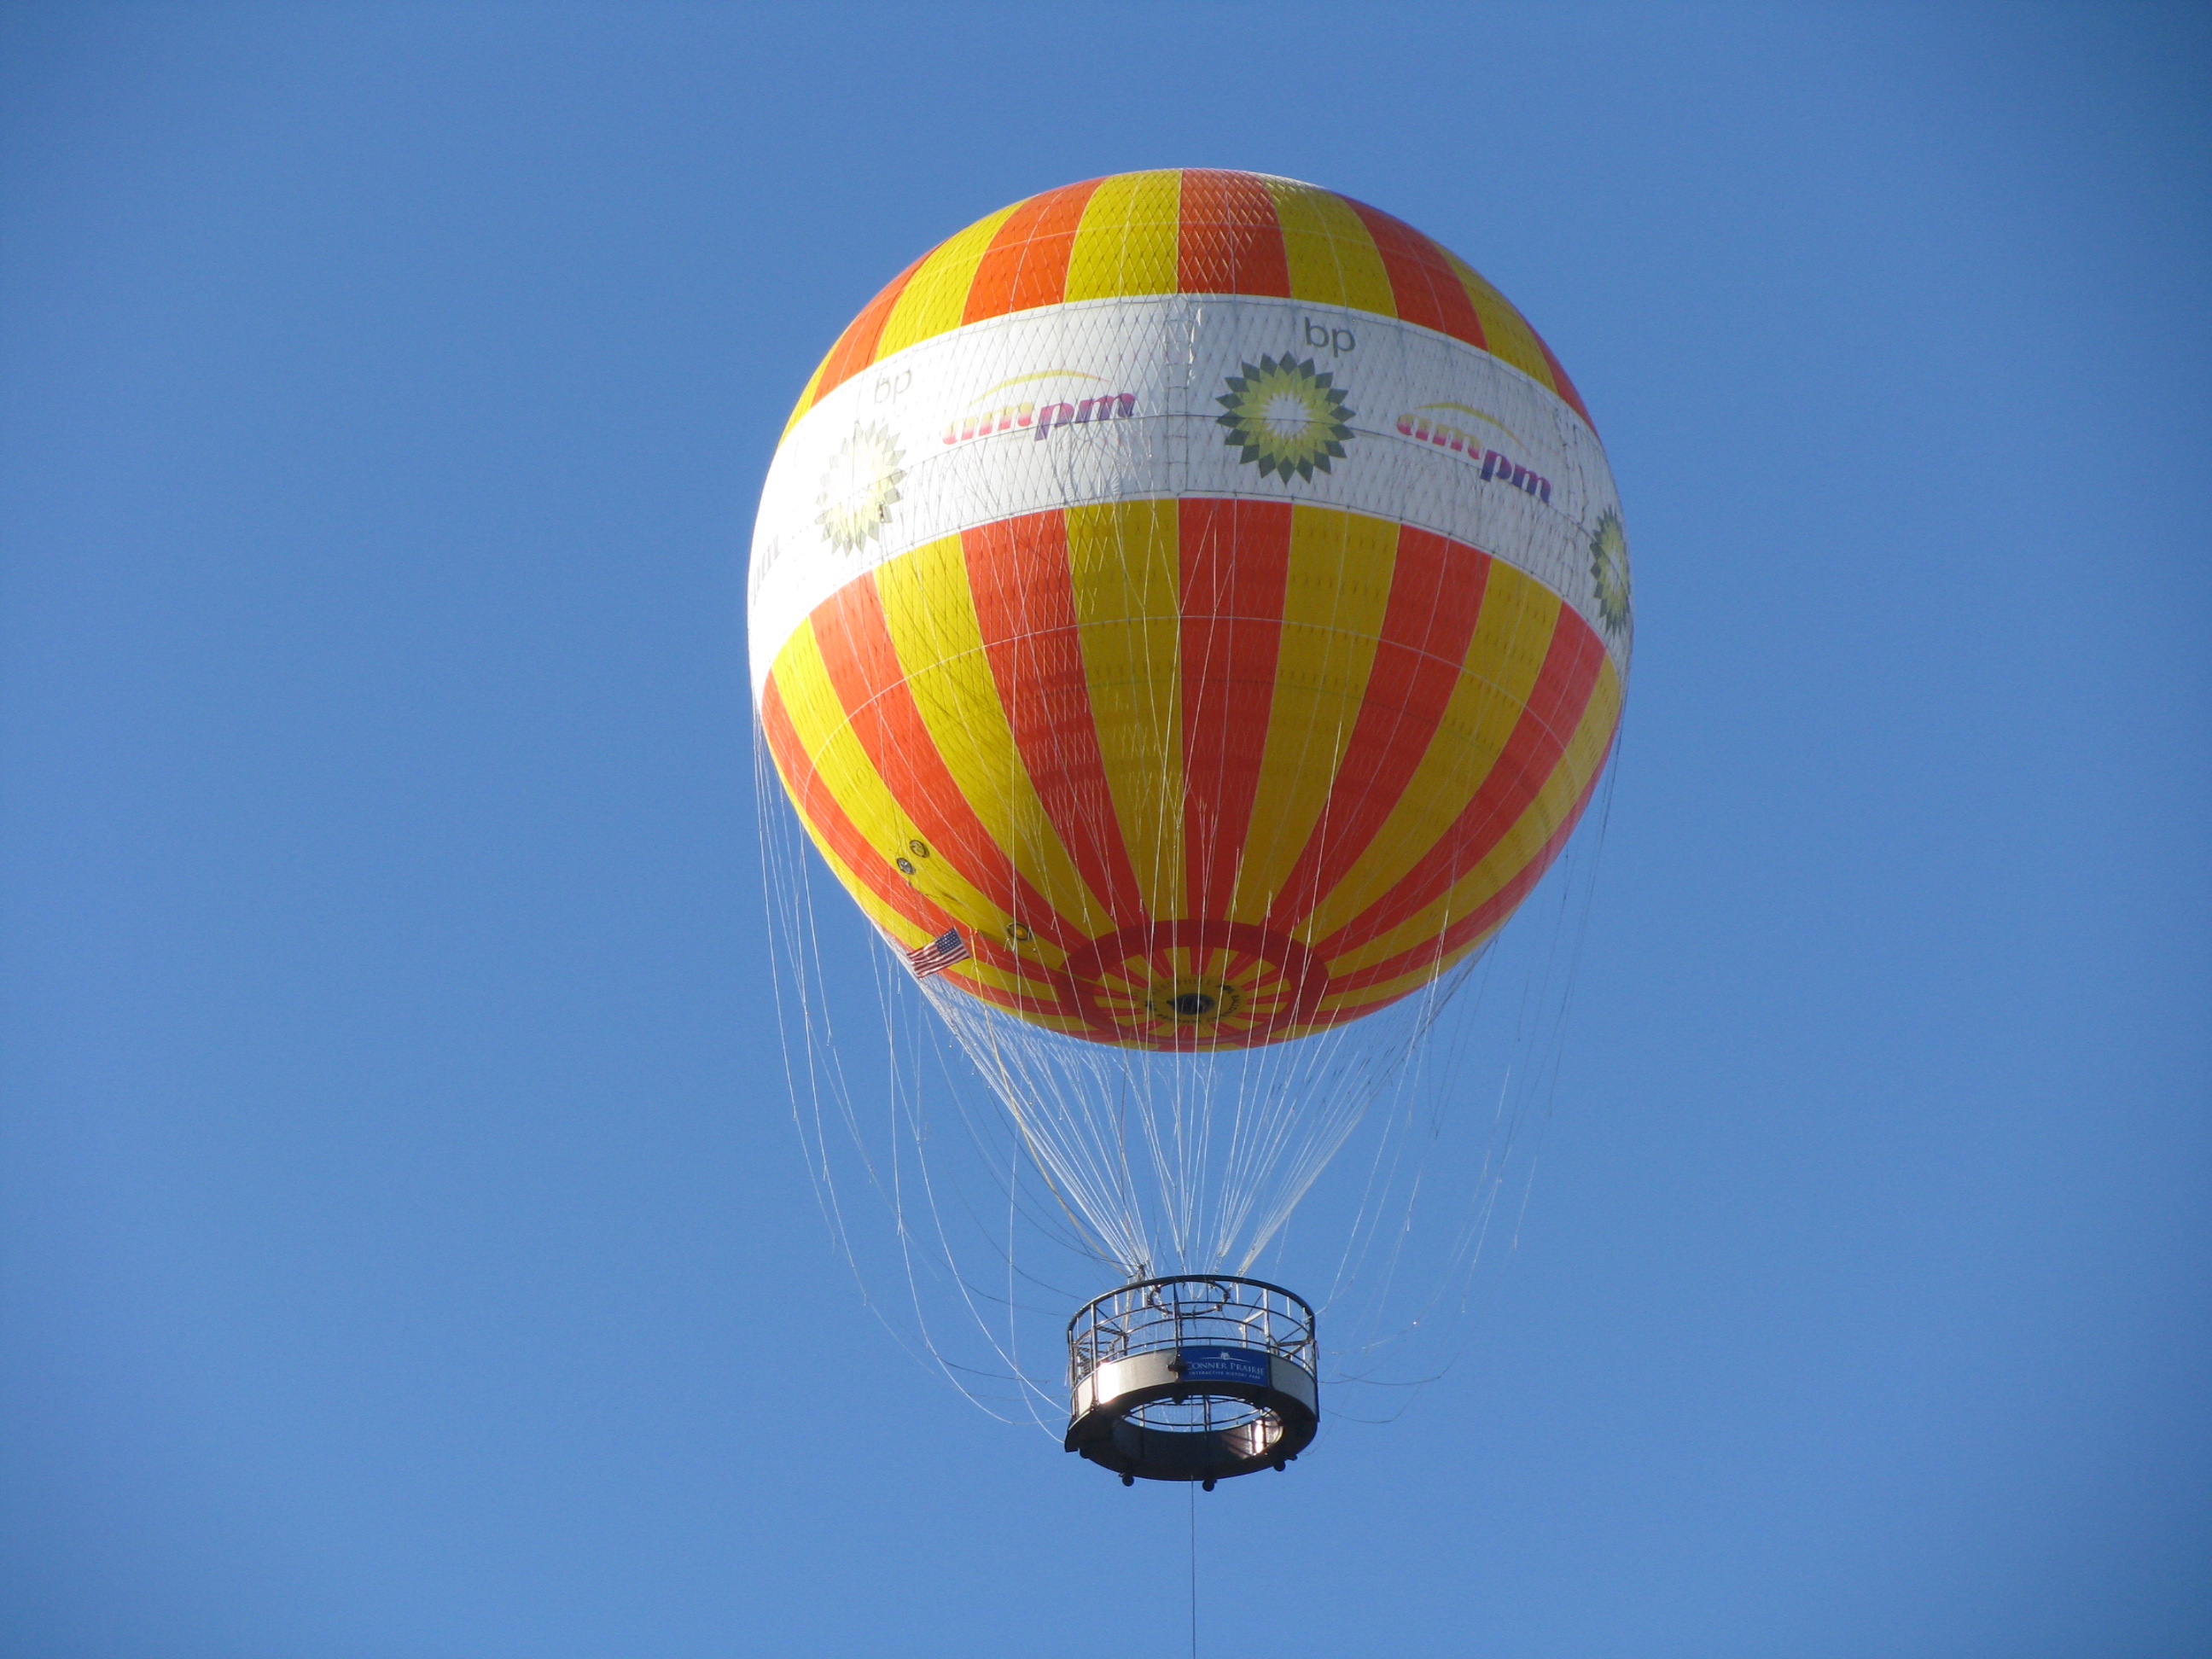
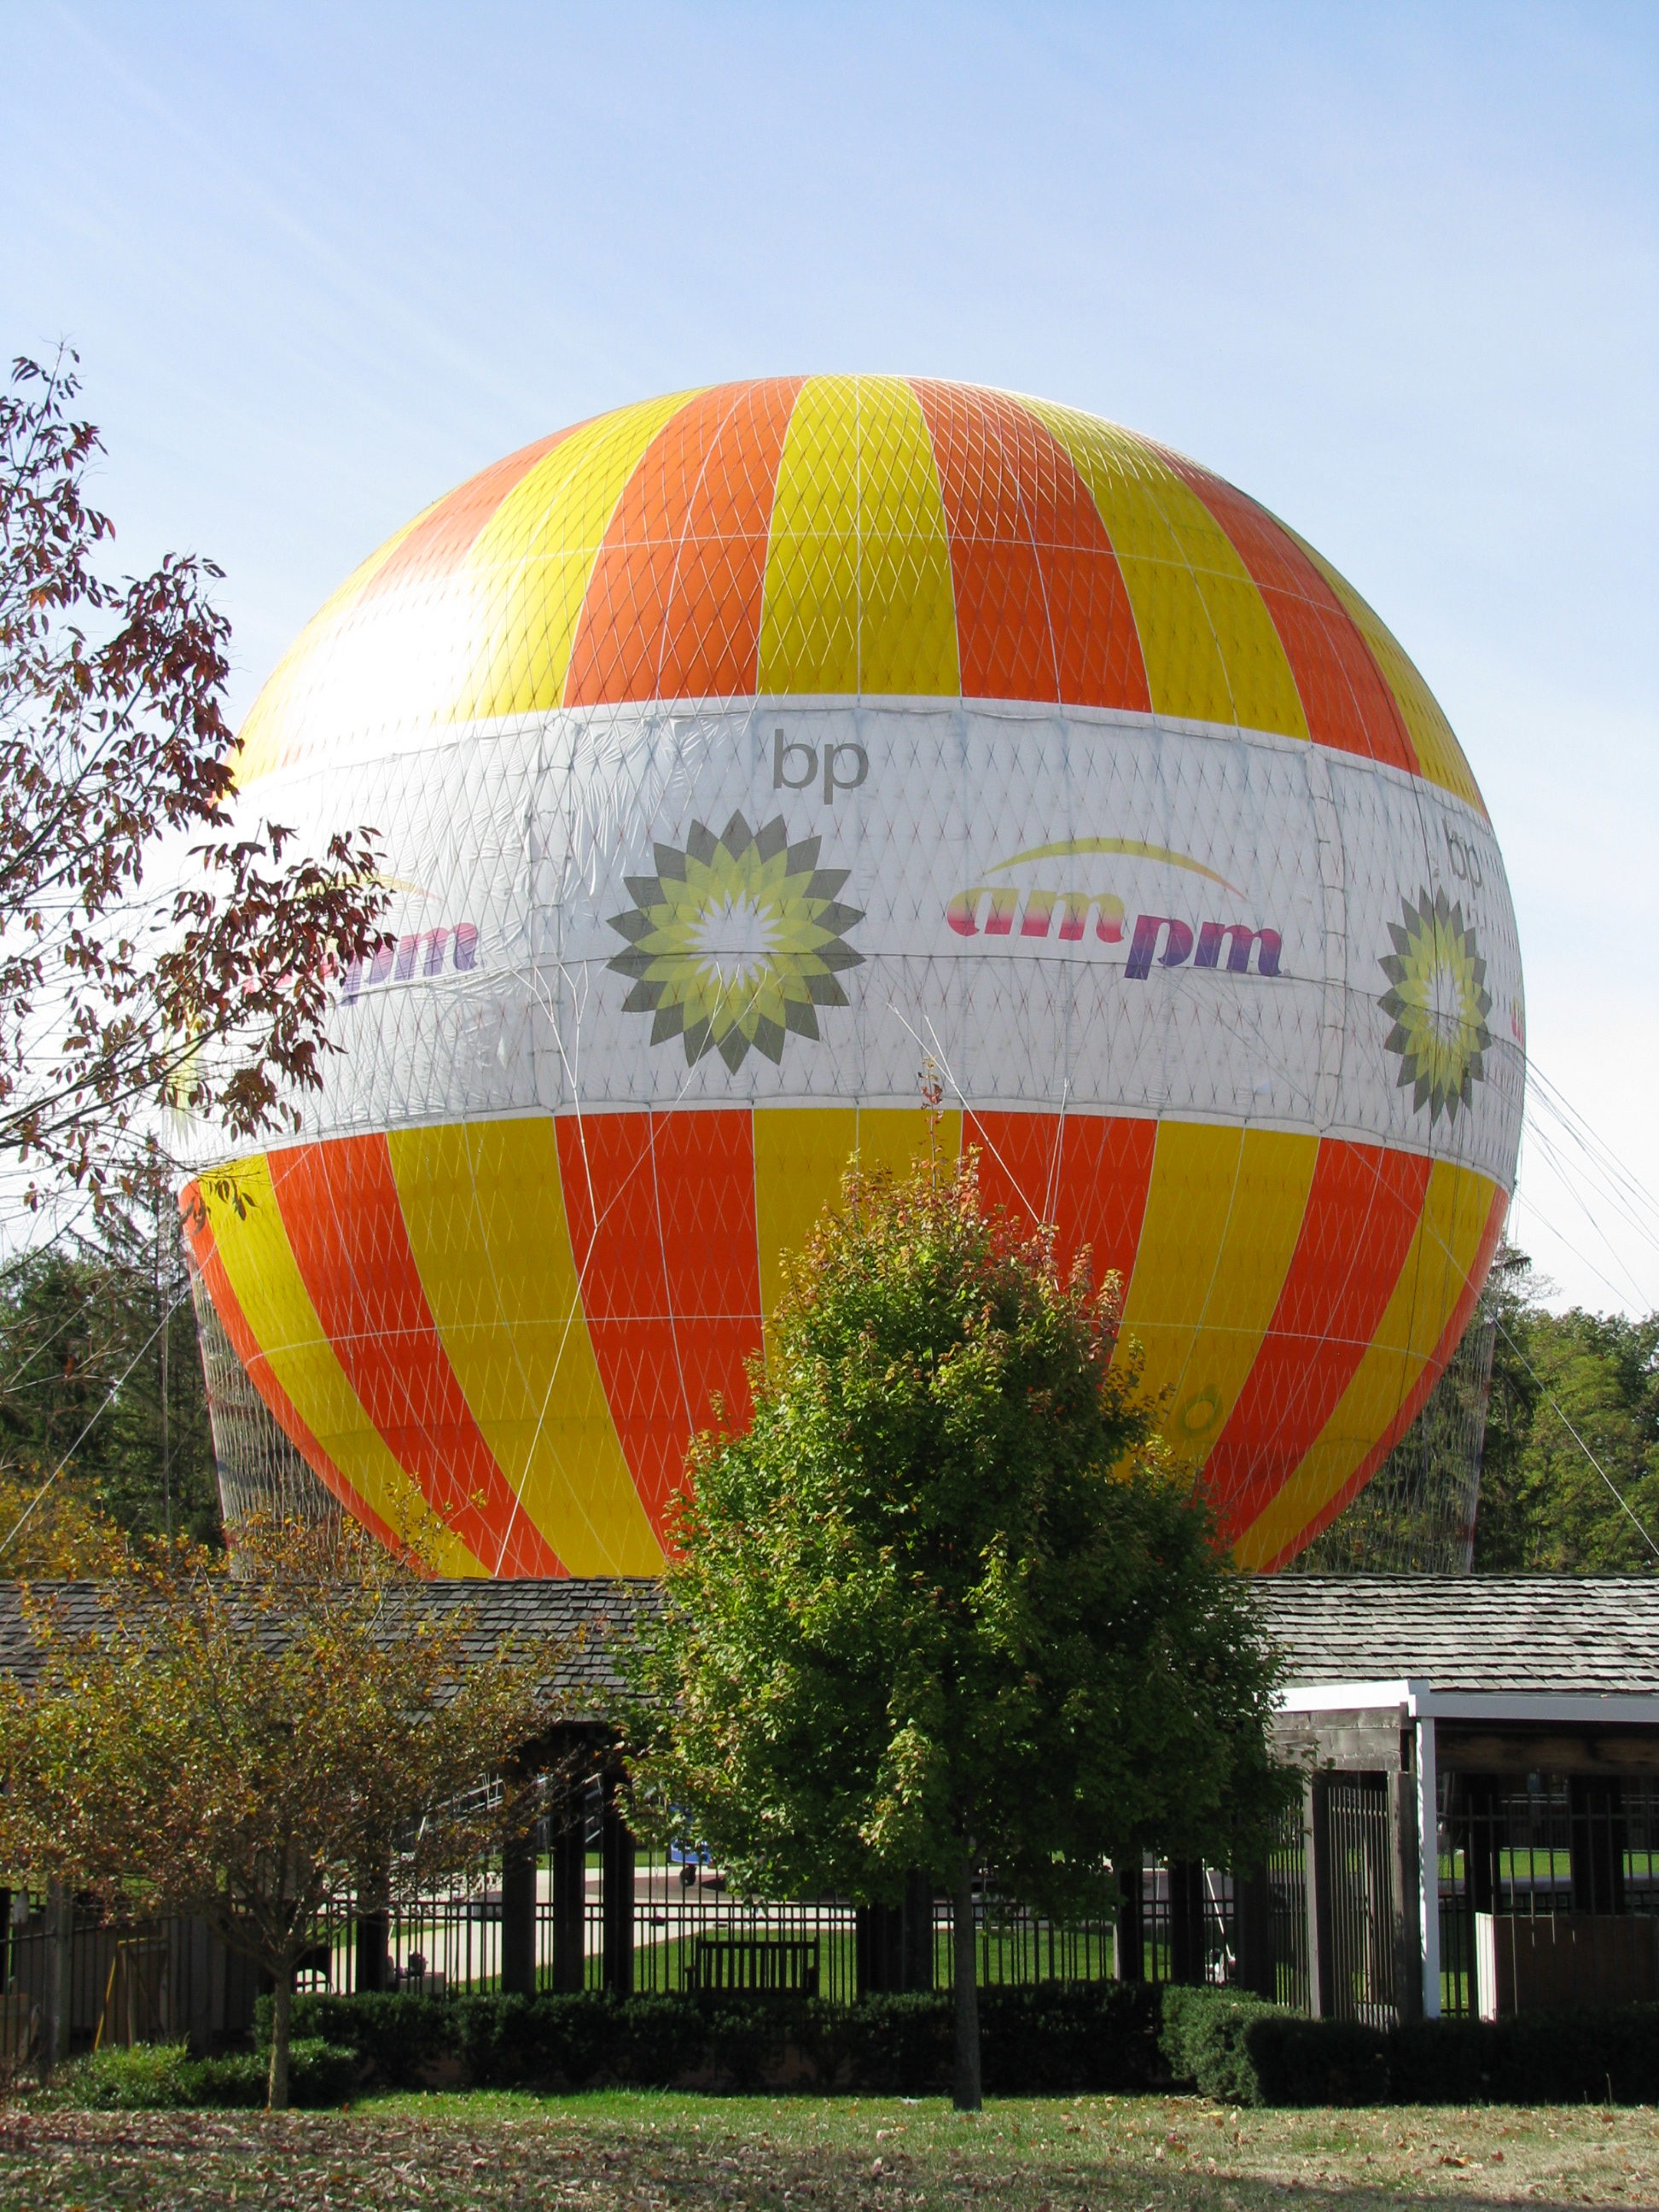
The Conner Prairie 21st Annual Traditional Arts and Arms Making Workshop has just concluded. As you enter Conner Prairie to attend class you see CP’s new addition: a tethered balloon in memory of the aeronauts and the beginning of balloon flight in the 1800’s. There is more to Conner Prairie than the classes for black powder folks. photo credits: Steve Chapman, Larry Pletcher editor: Larry Pletcher
The classes at Conner Prairie are becoming a habit for me. I came to the fall classes in 2006 to take pictures for my web site. In 2008 and 2009 I took Art DeCamp’s horn making classes. This fall I came back for more photos for a web article. The classes offered are never a disappointment. I generally take pictures of a class thinking that I need to come back next year and attend the class. This year was no exception.
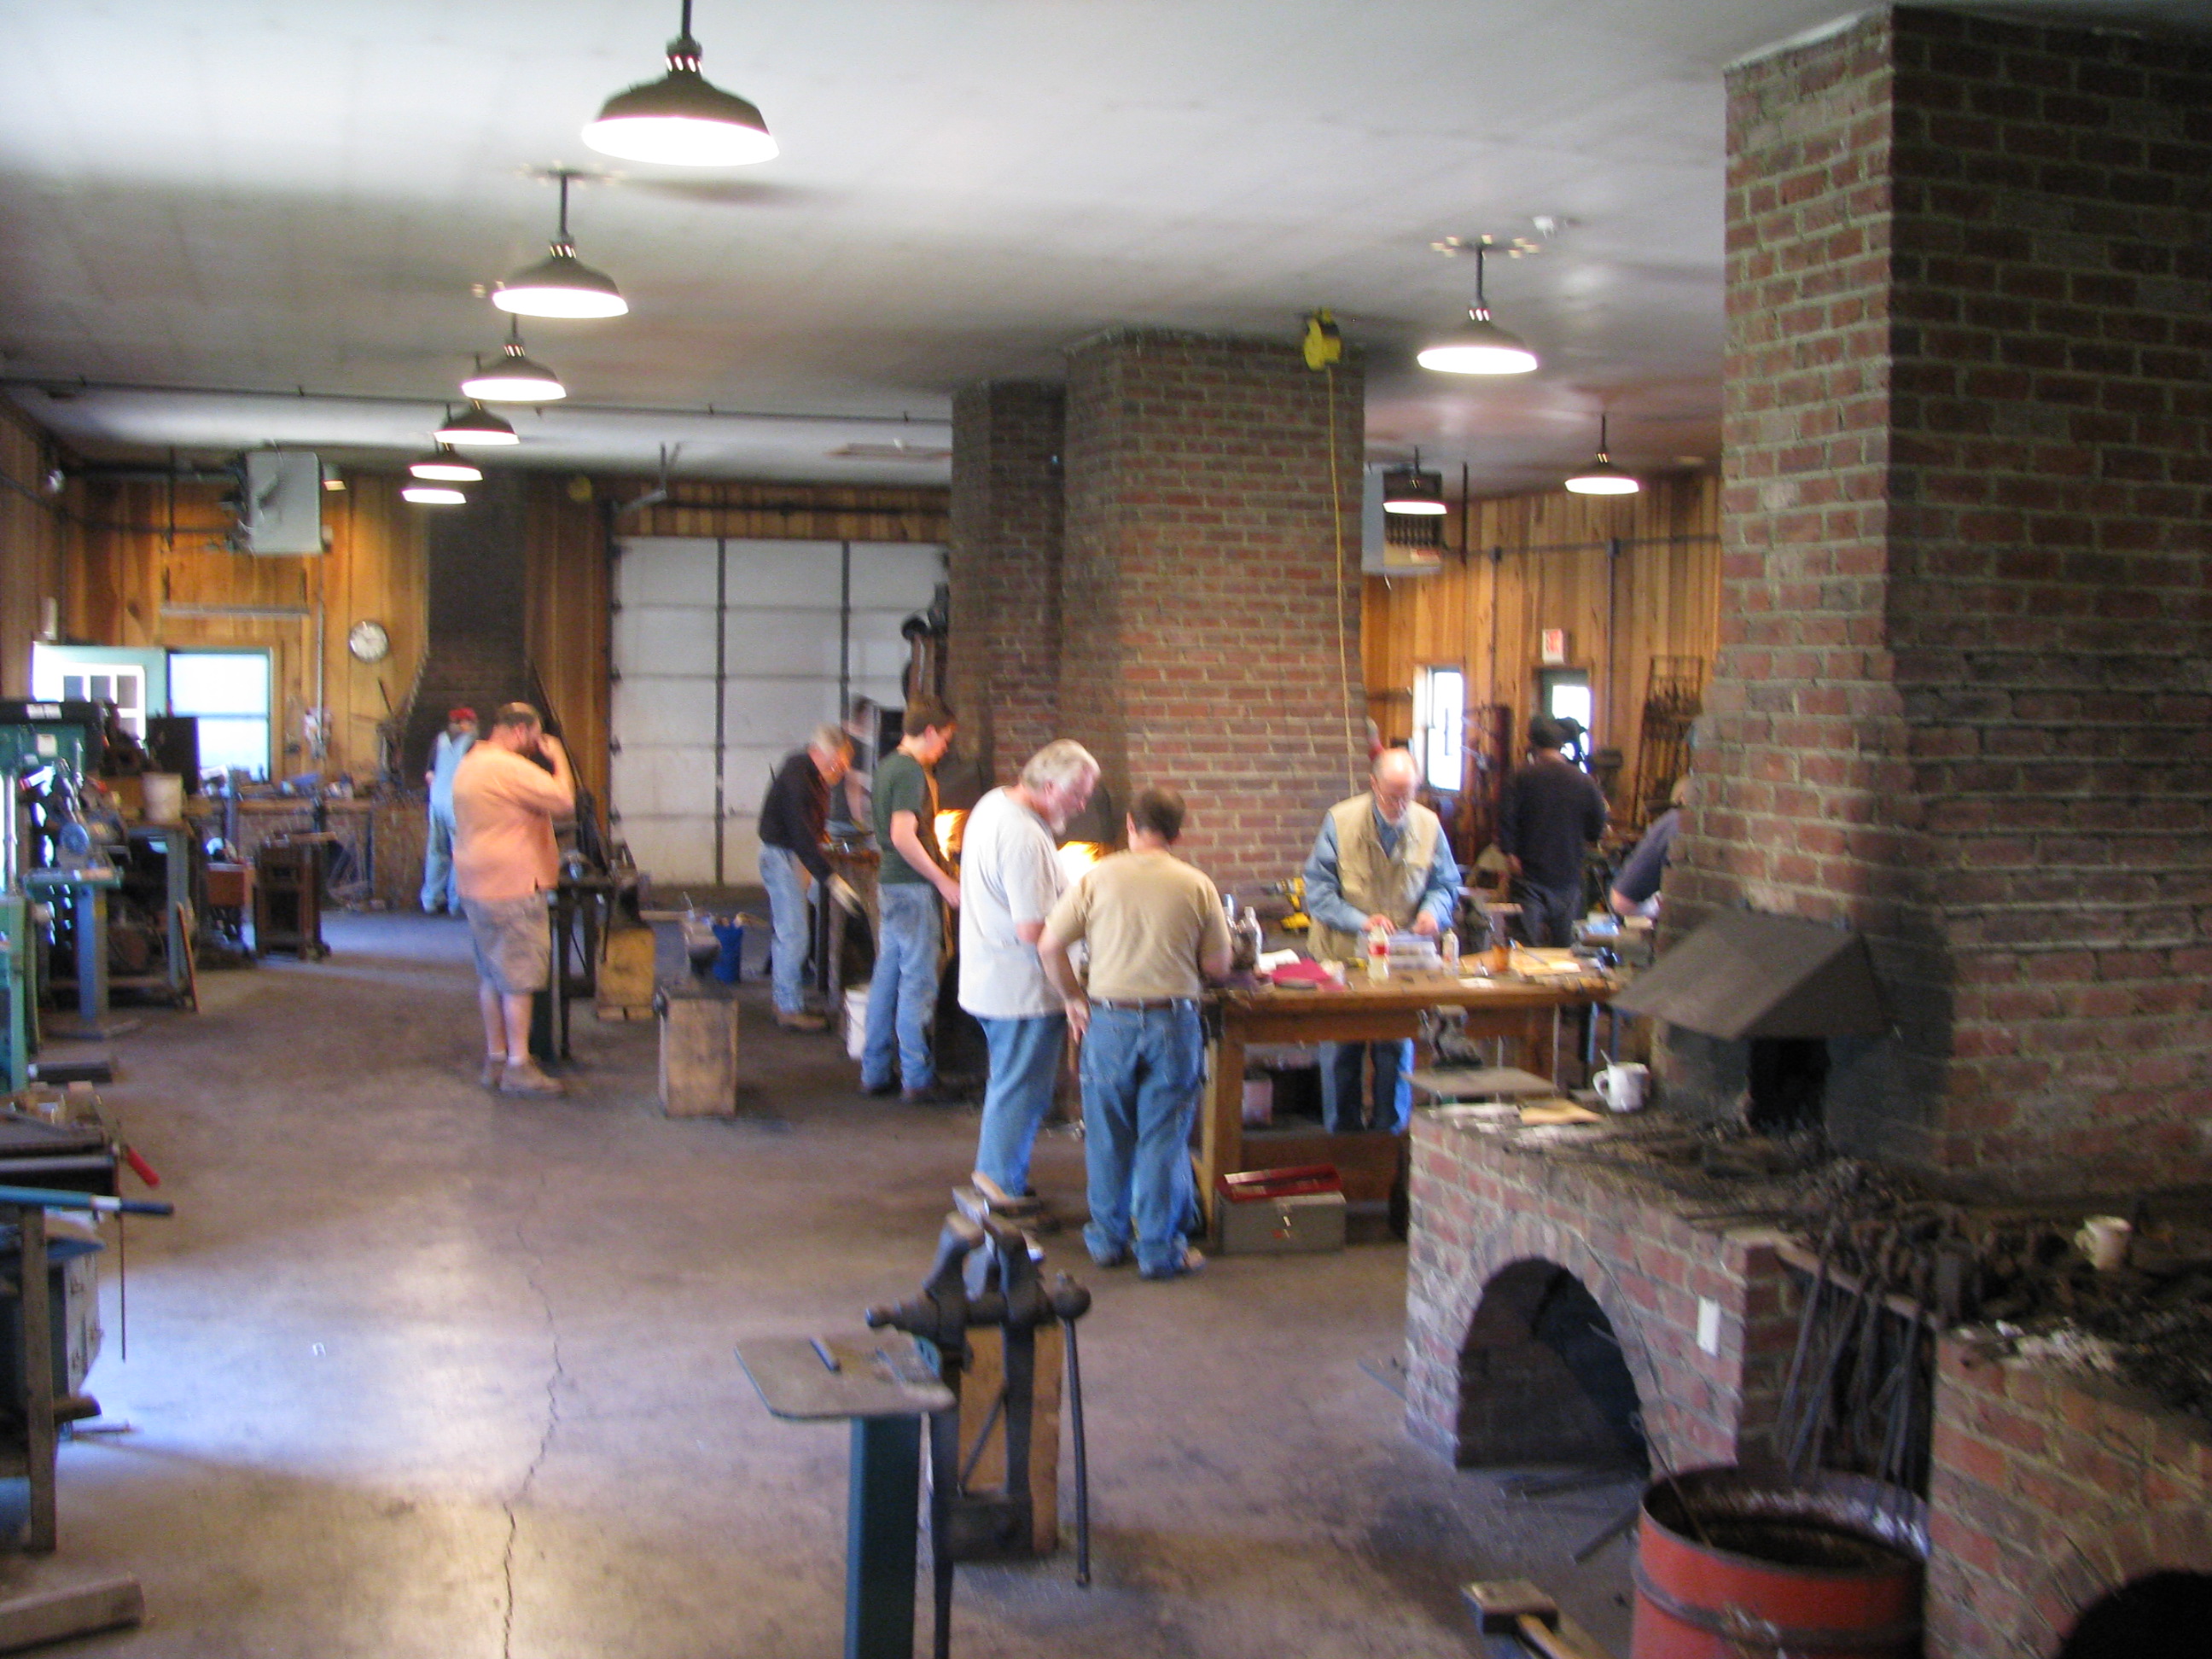
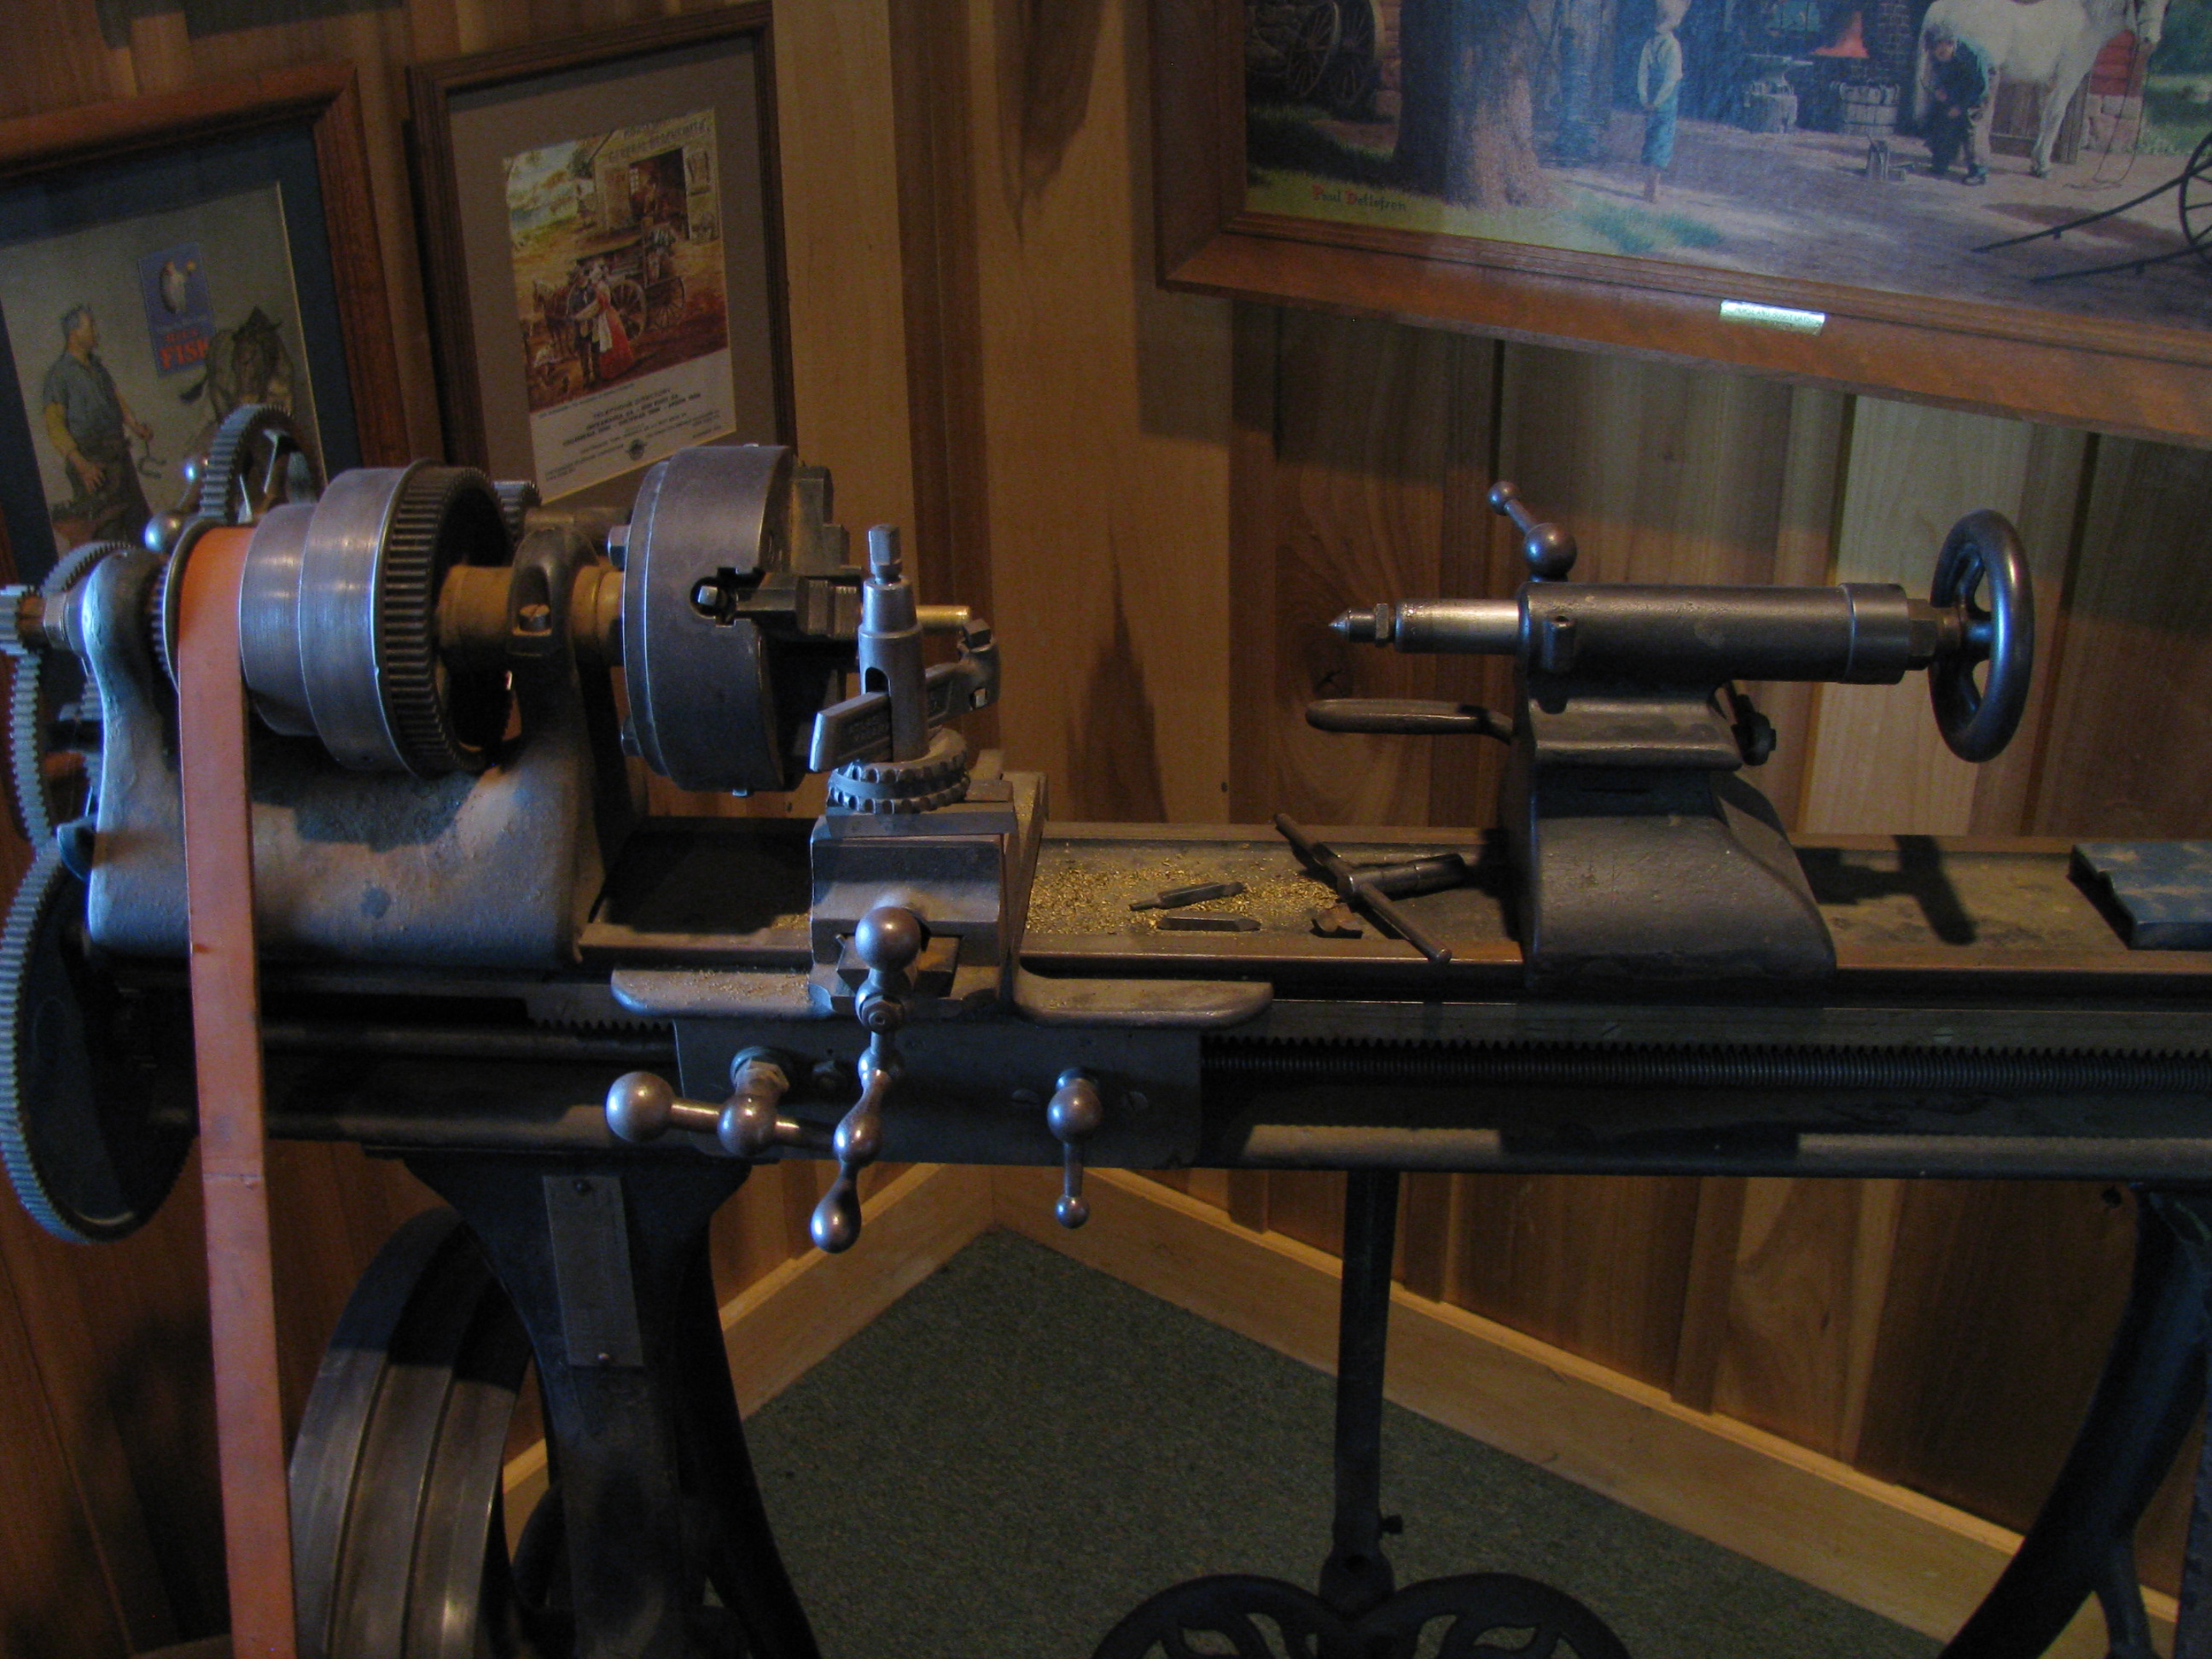
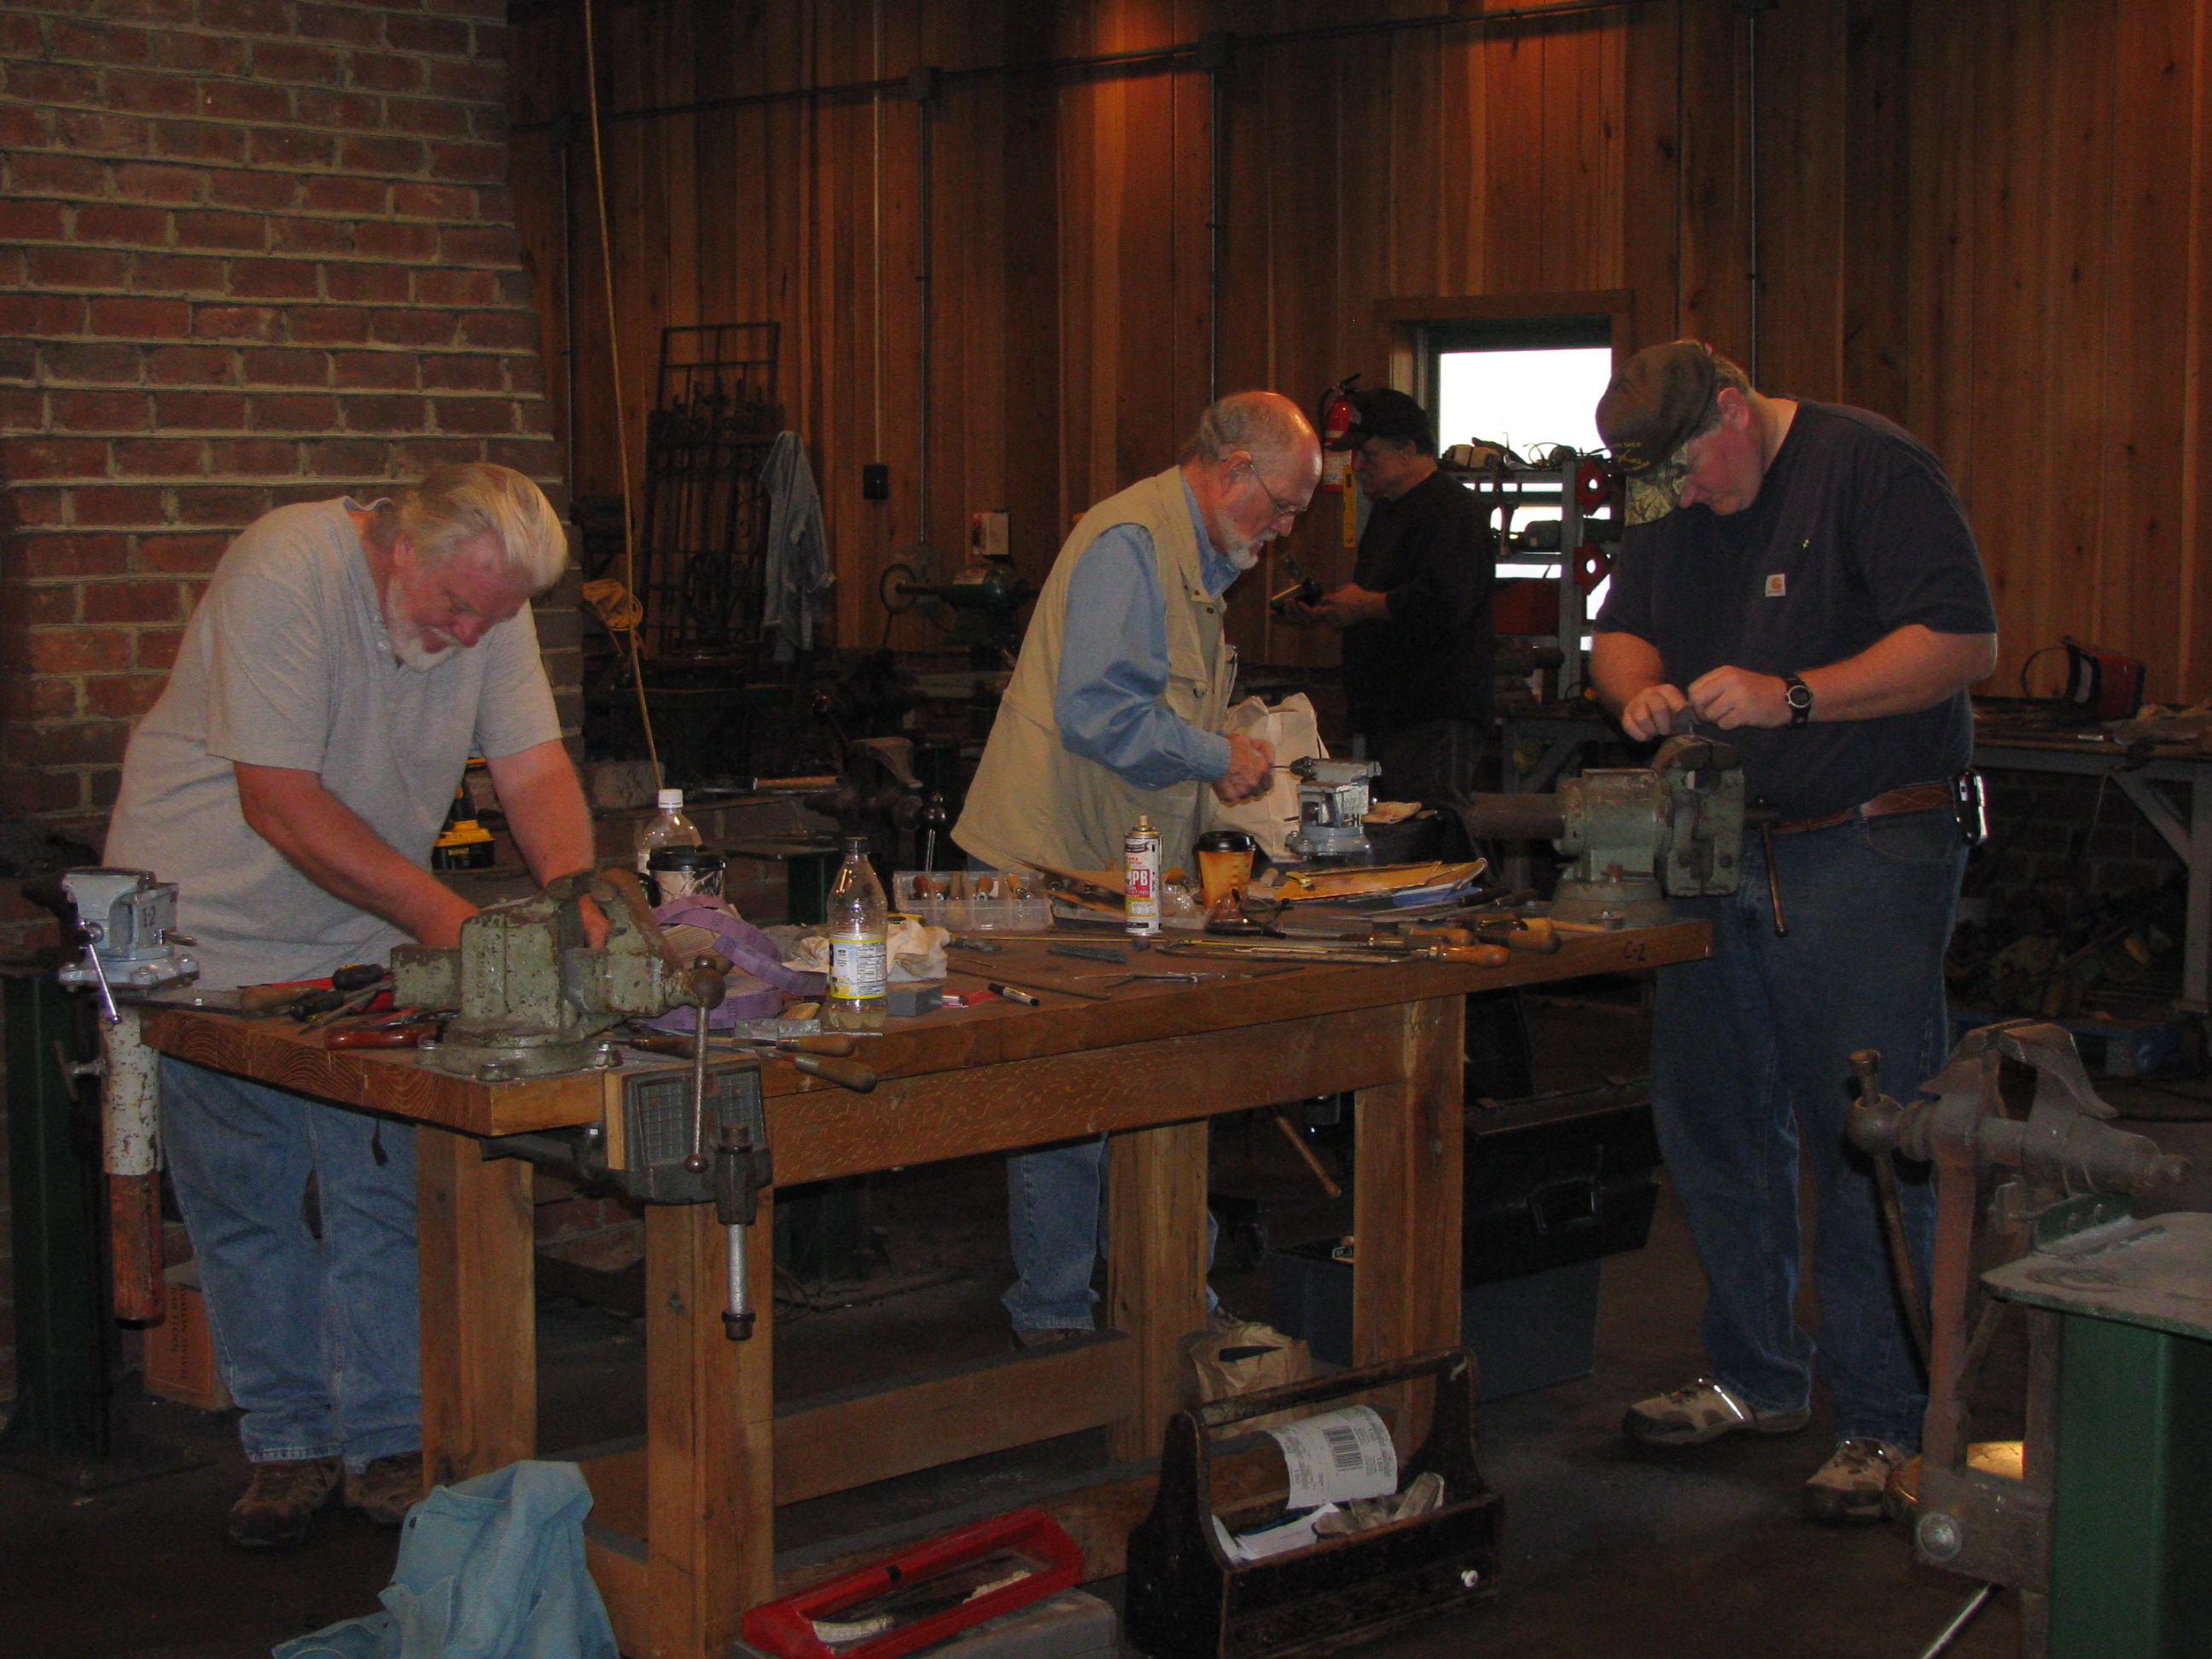
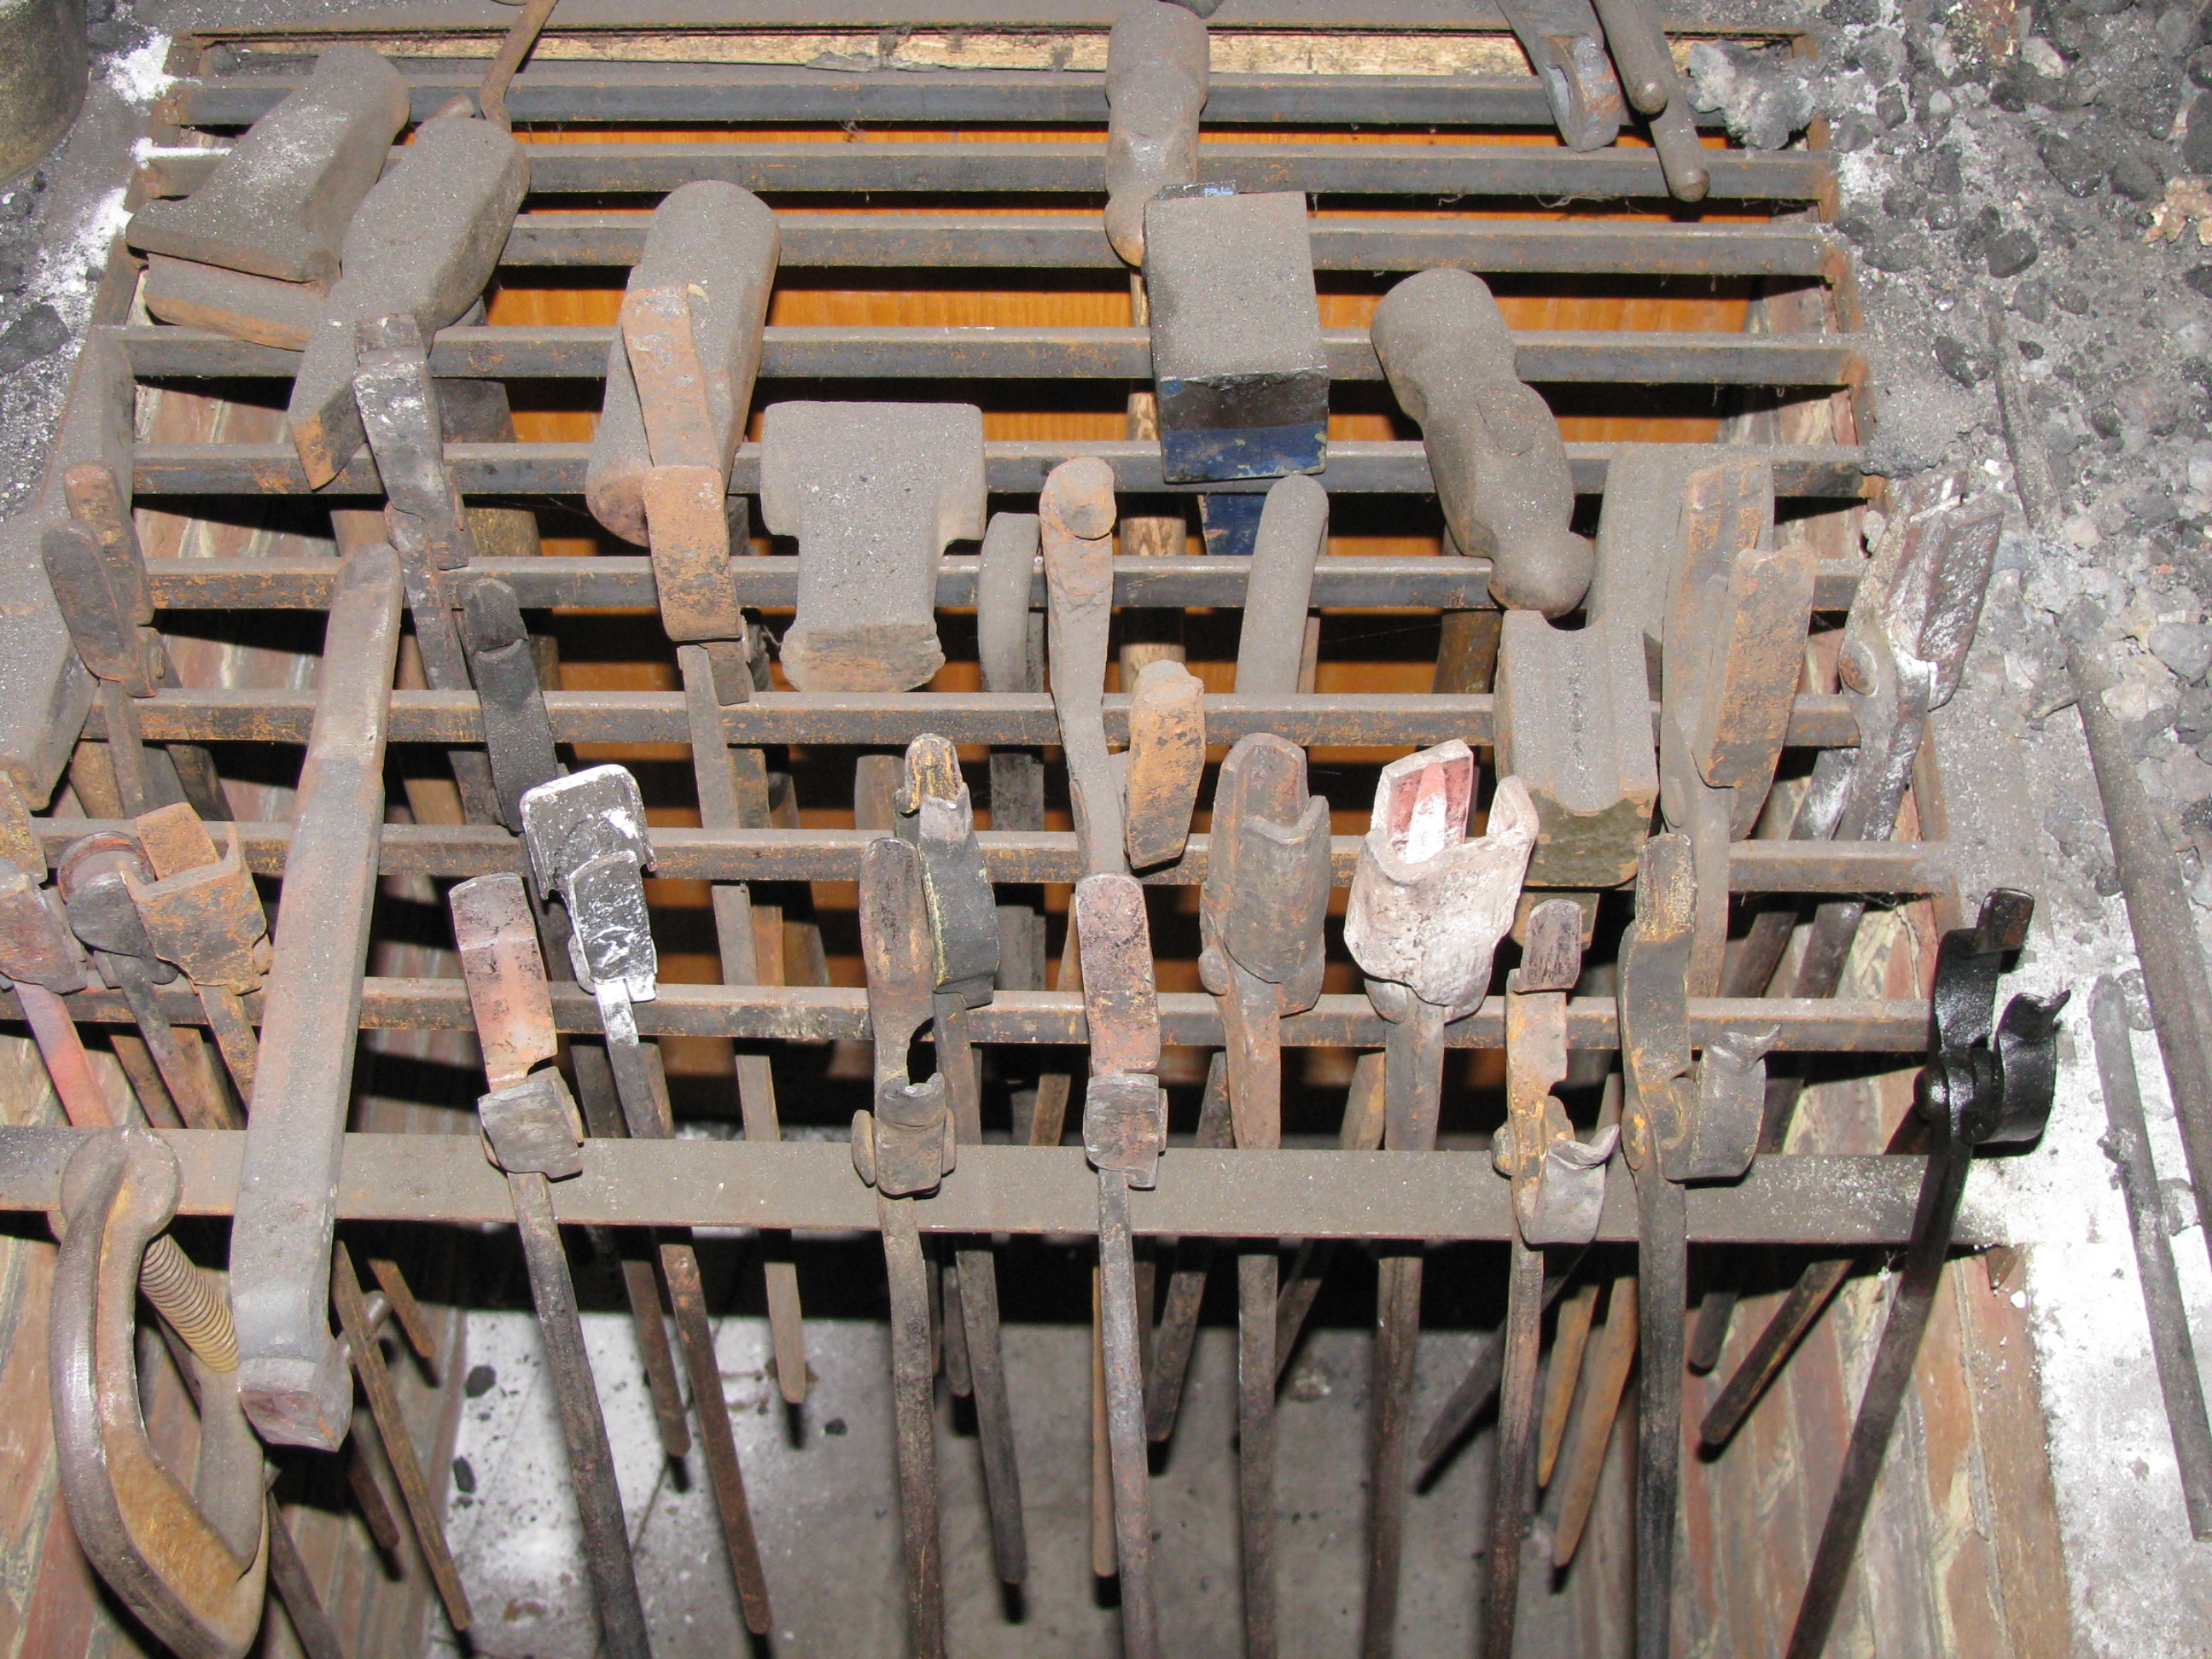
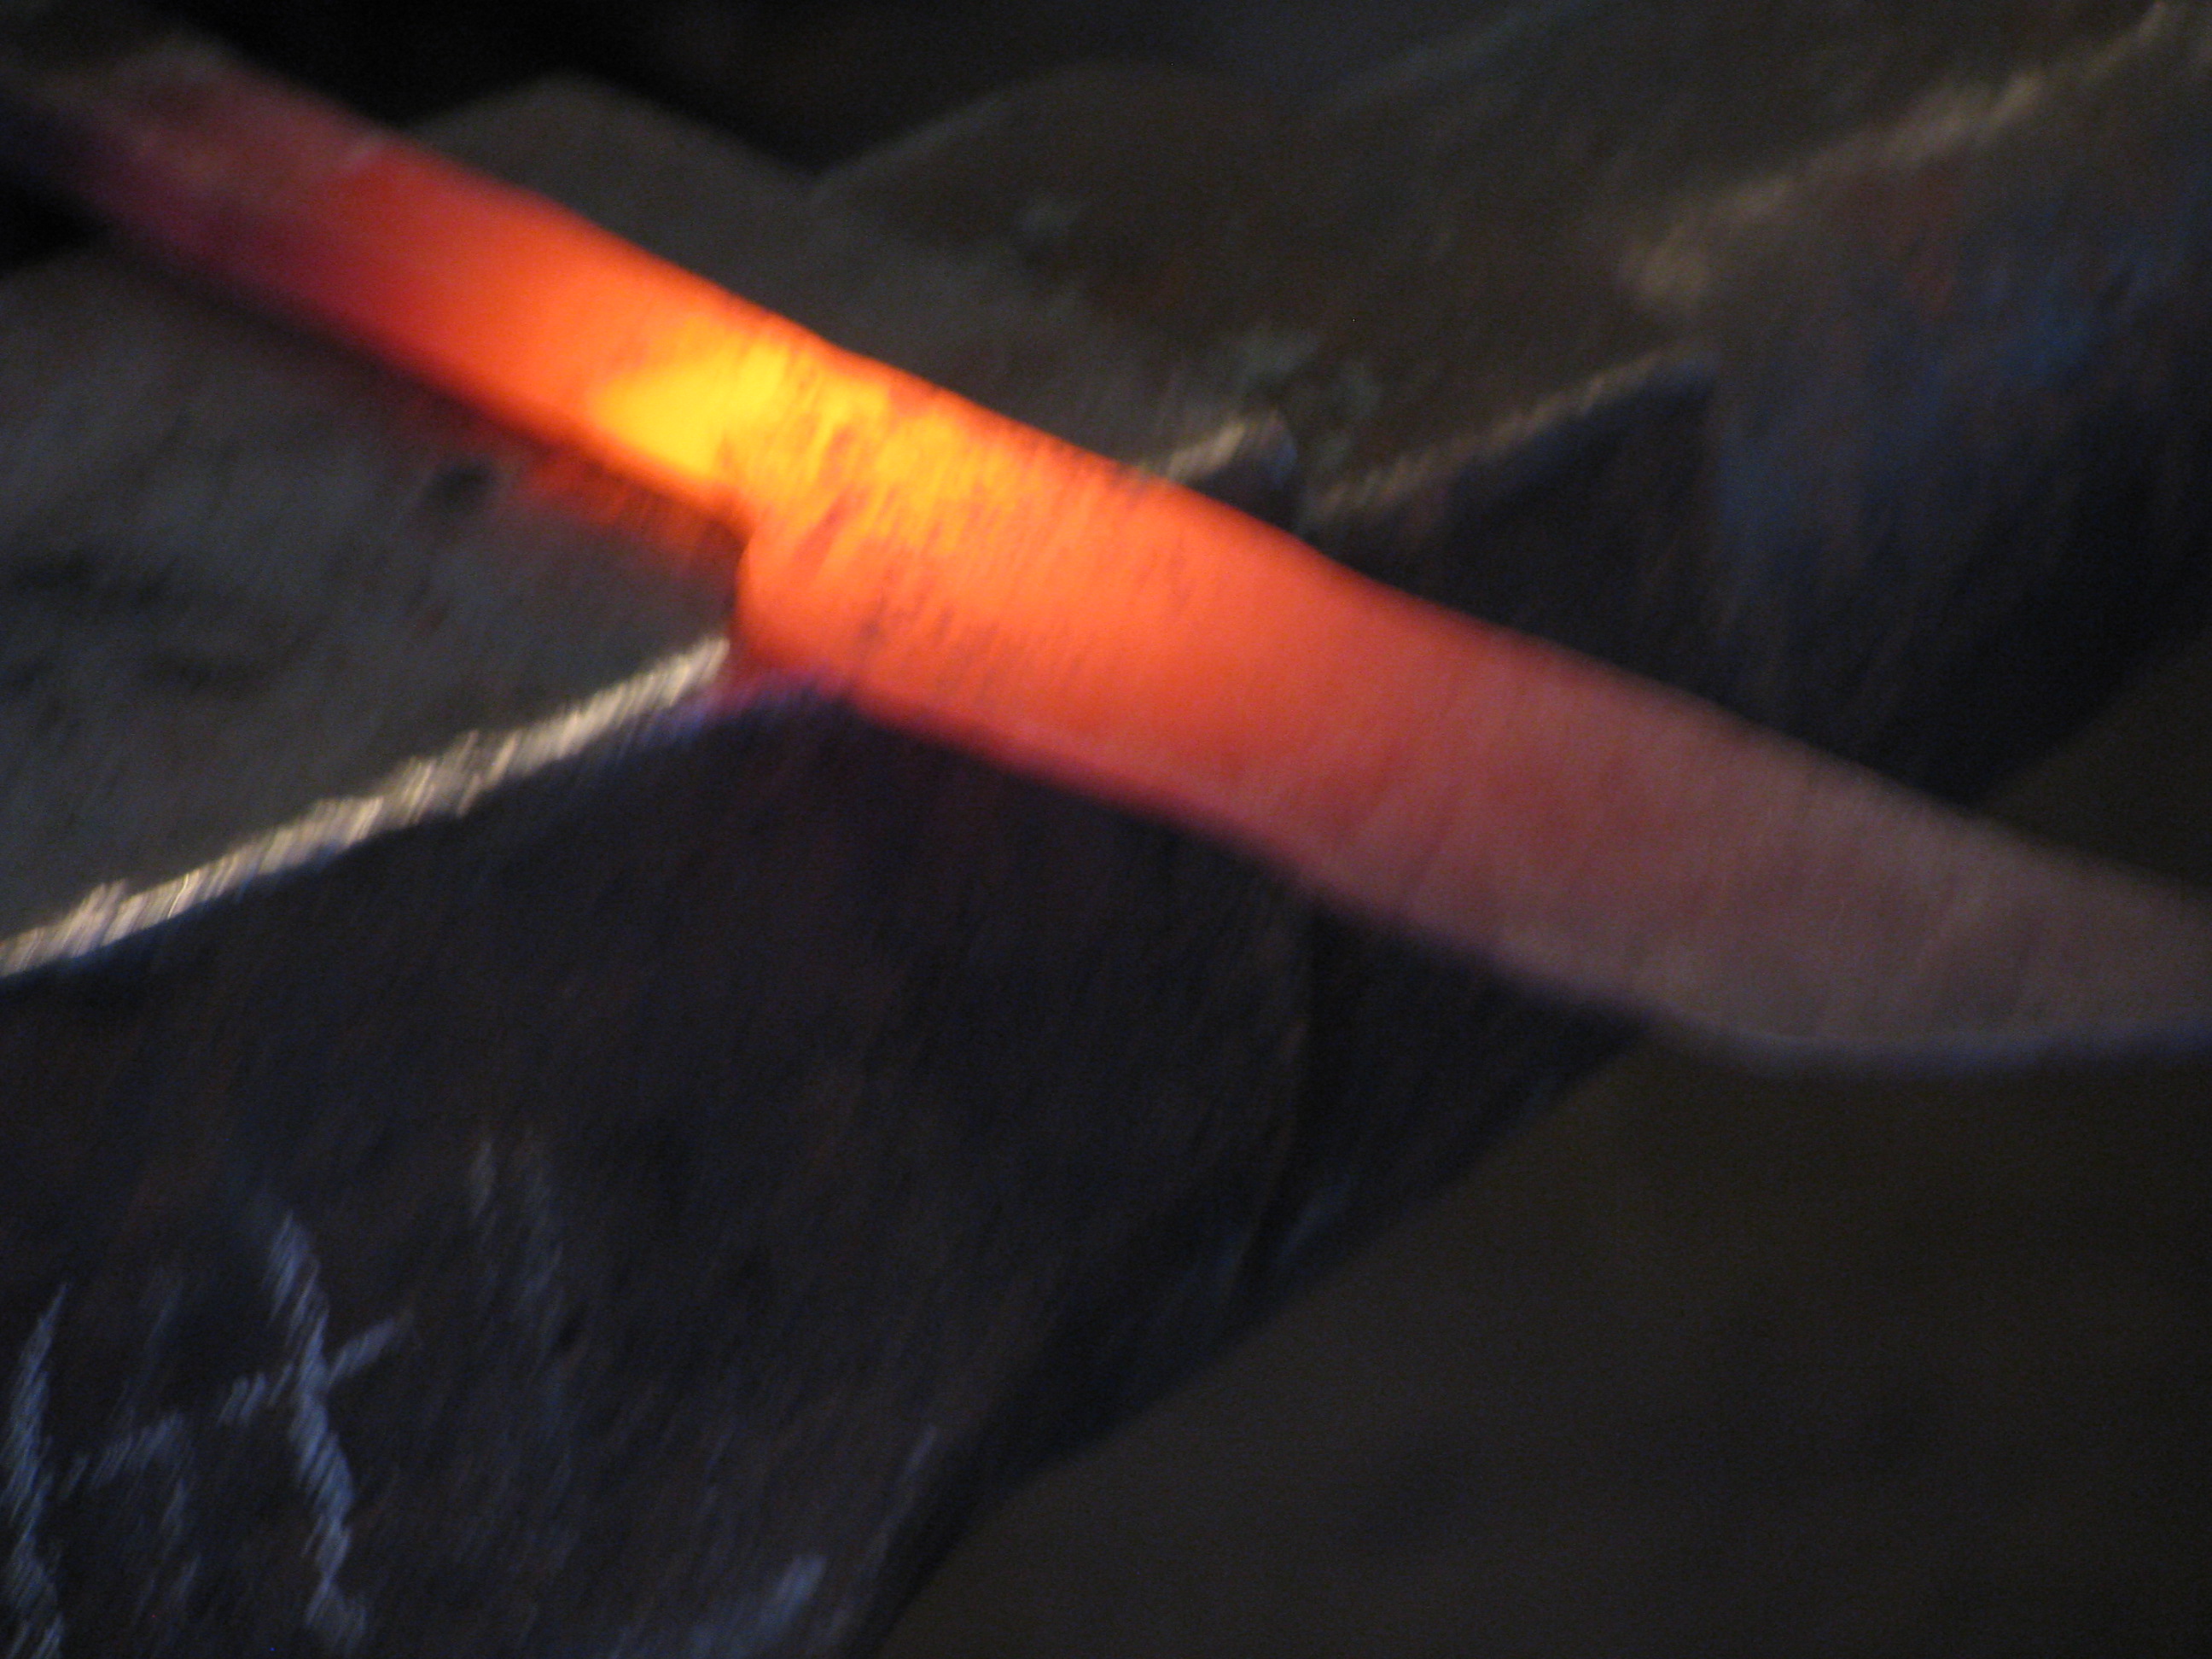
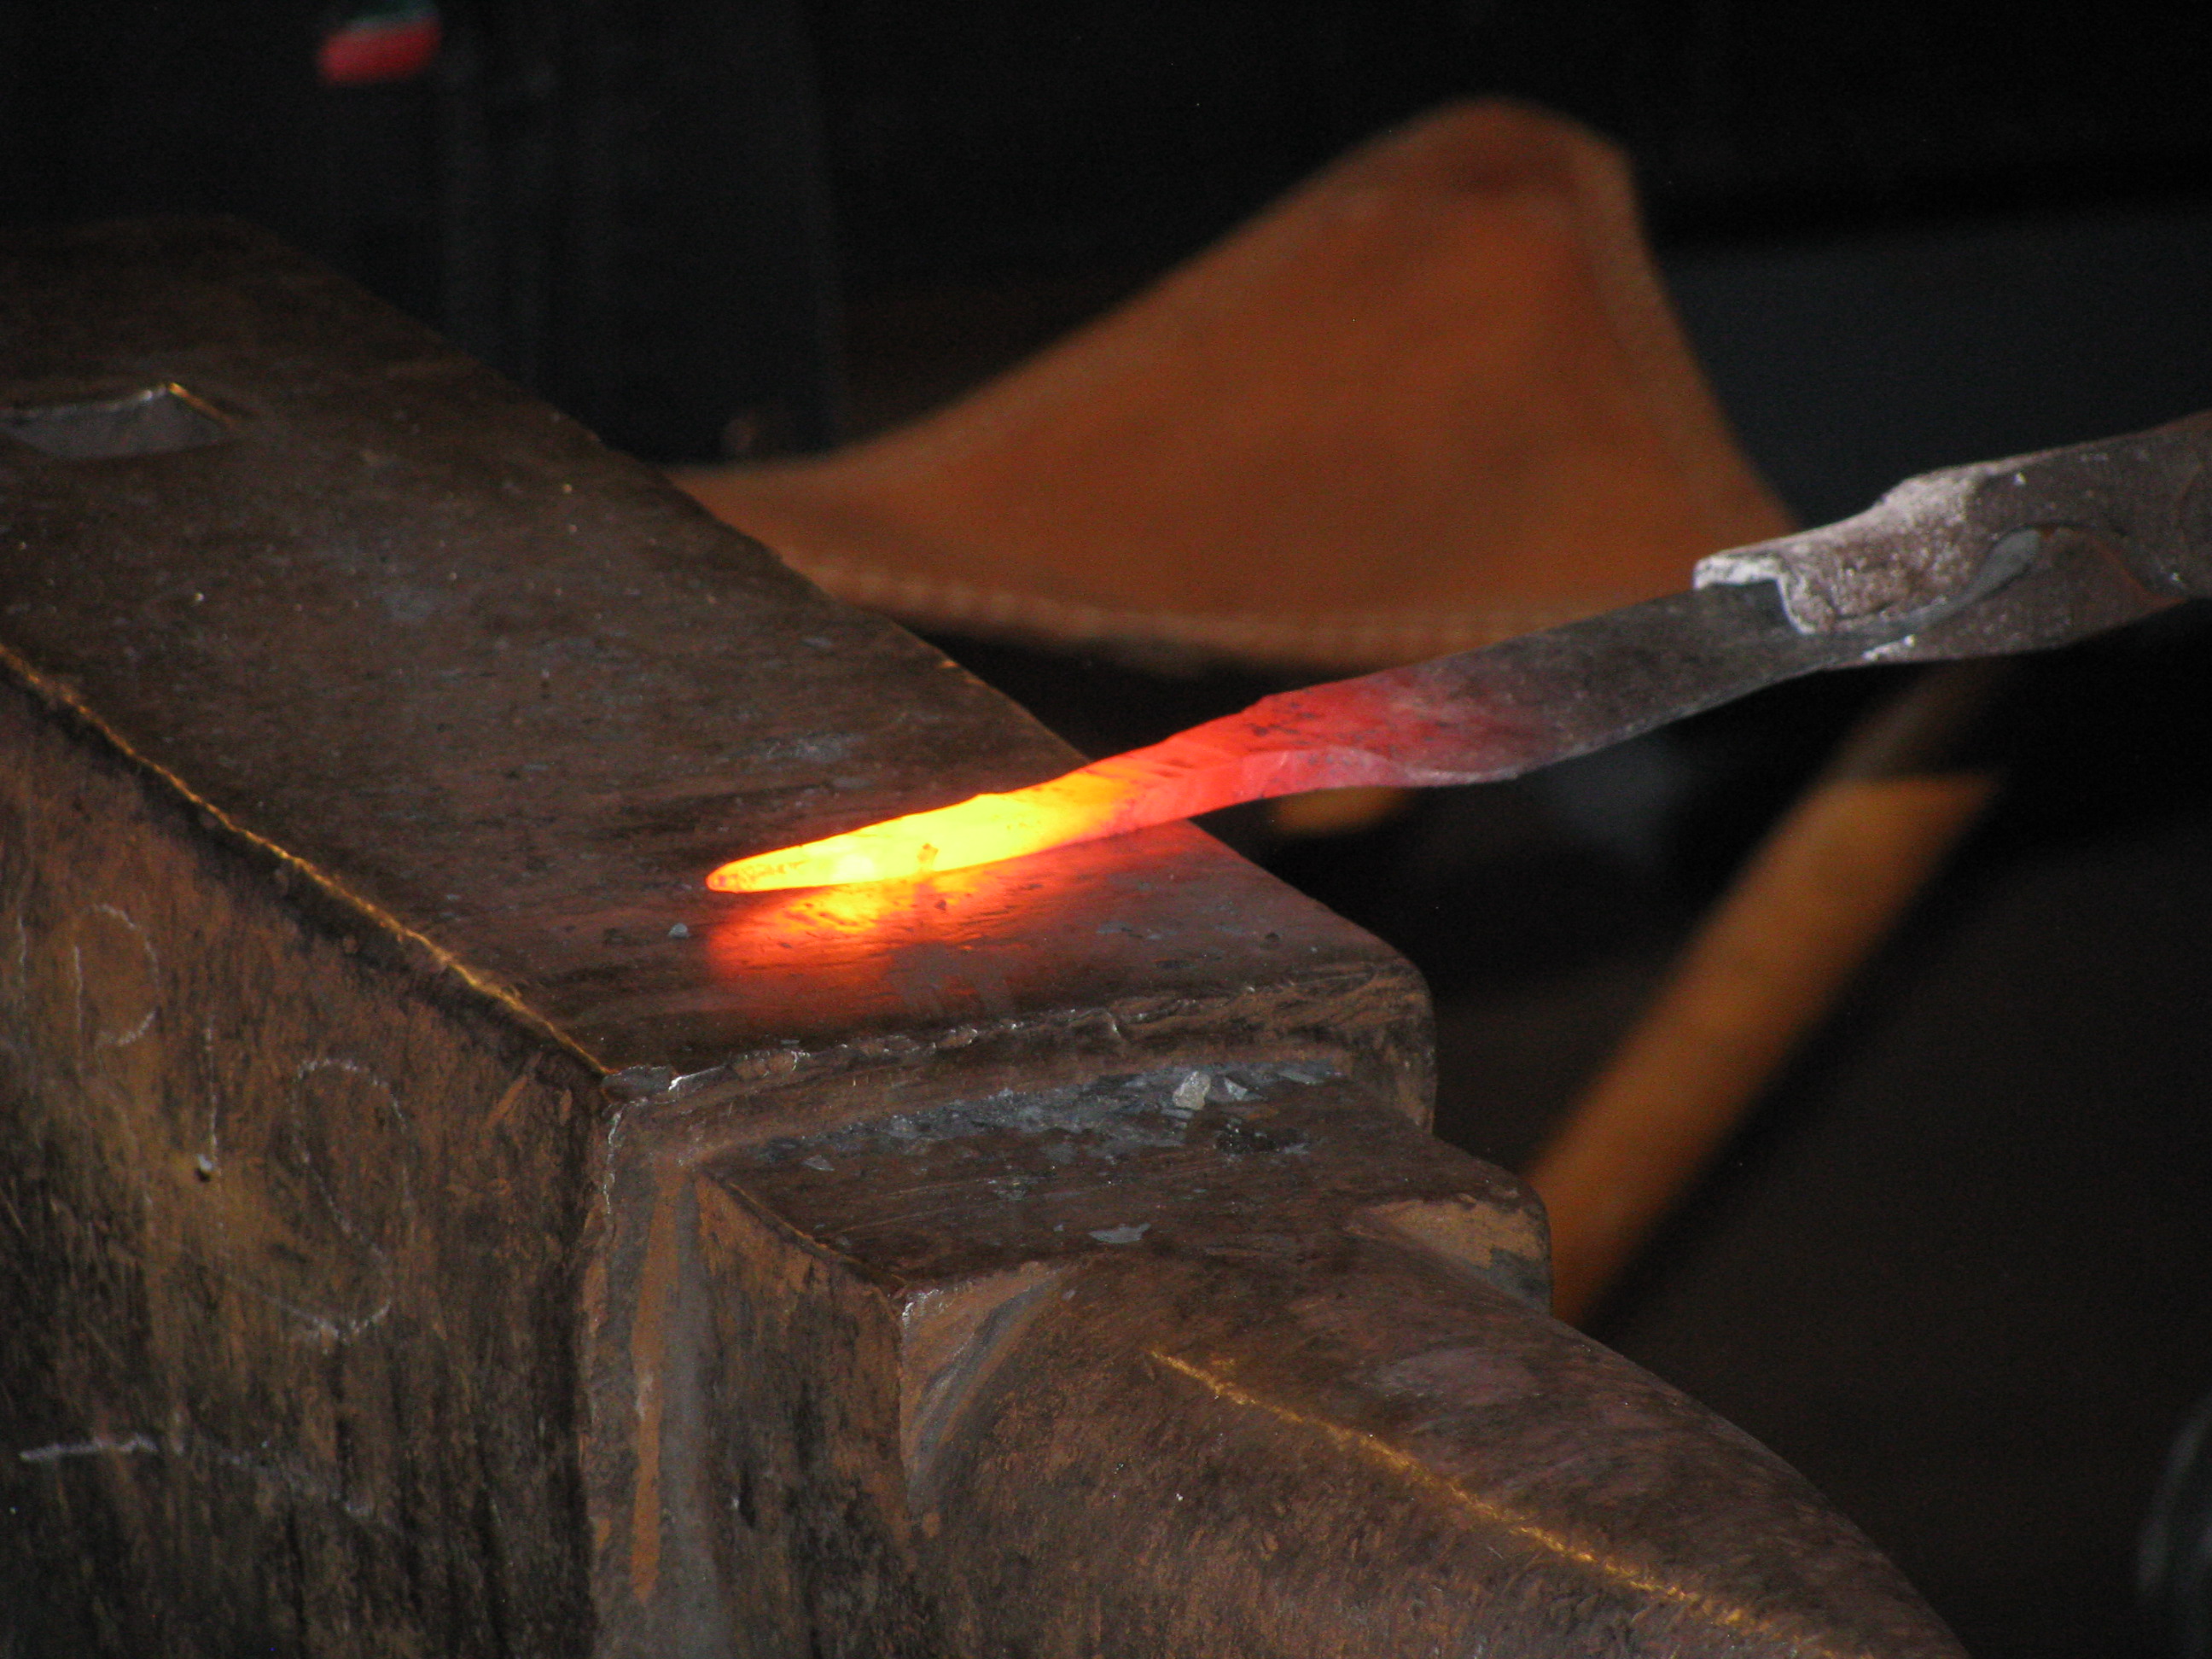
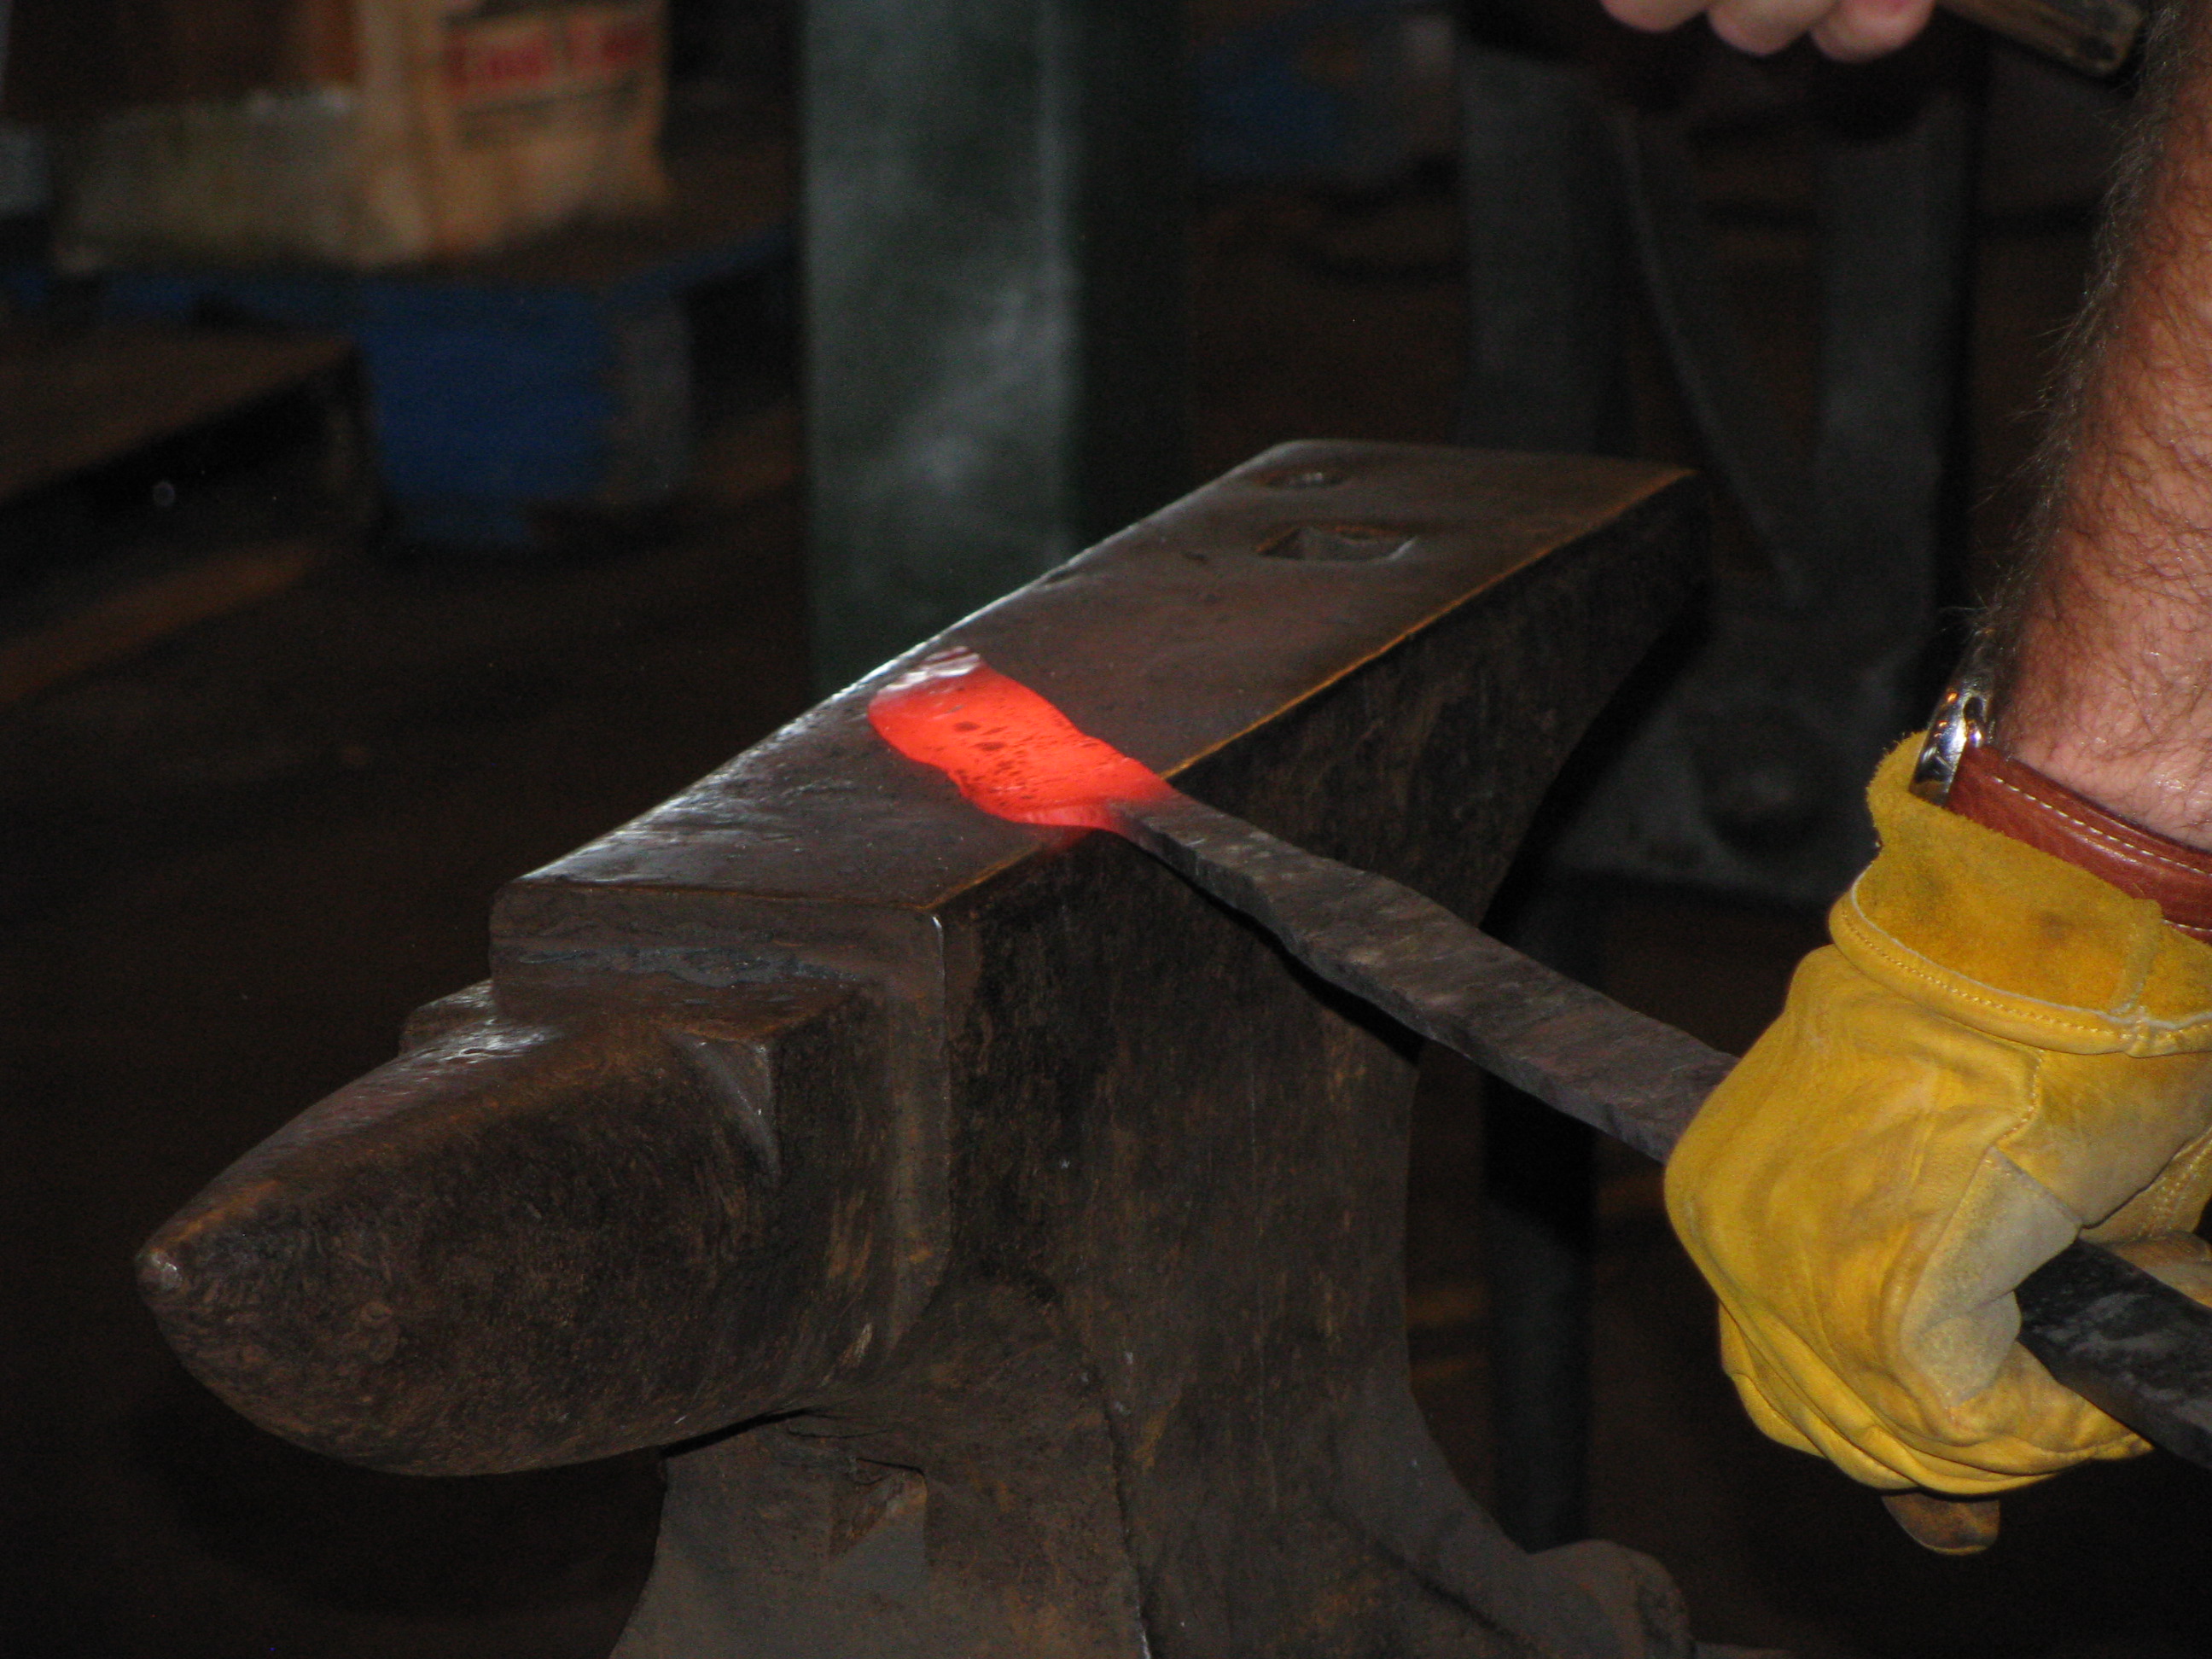
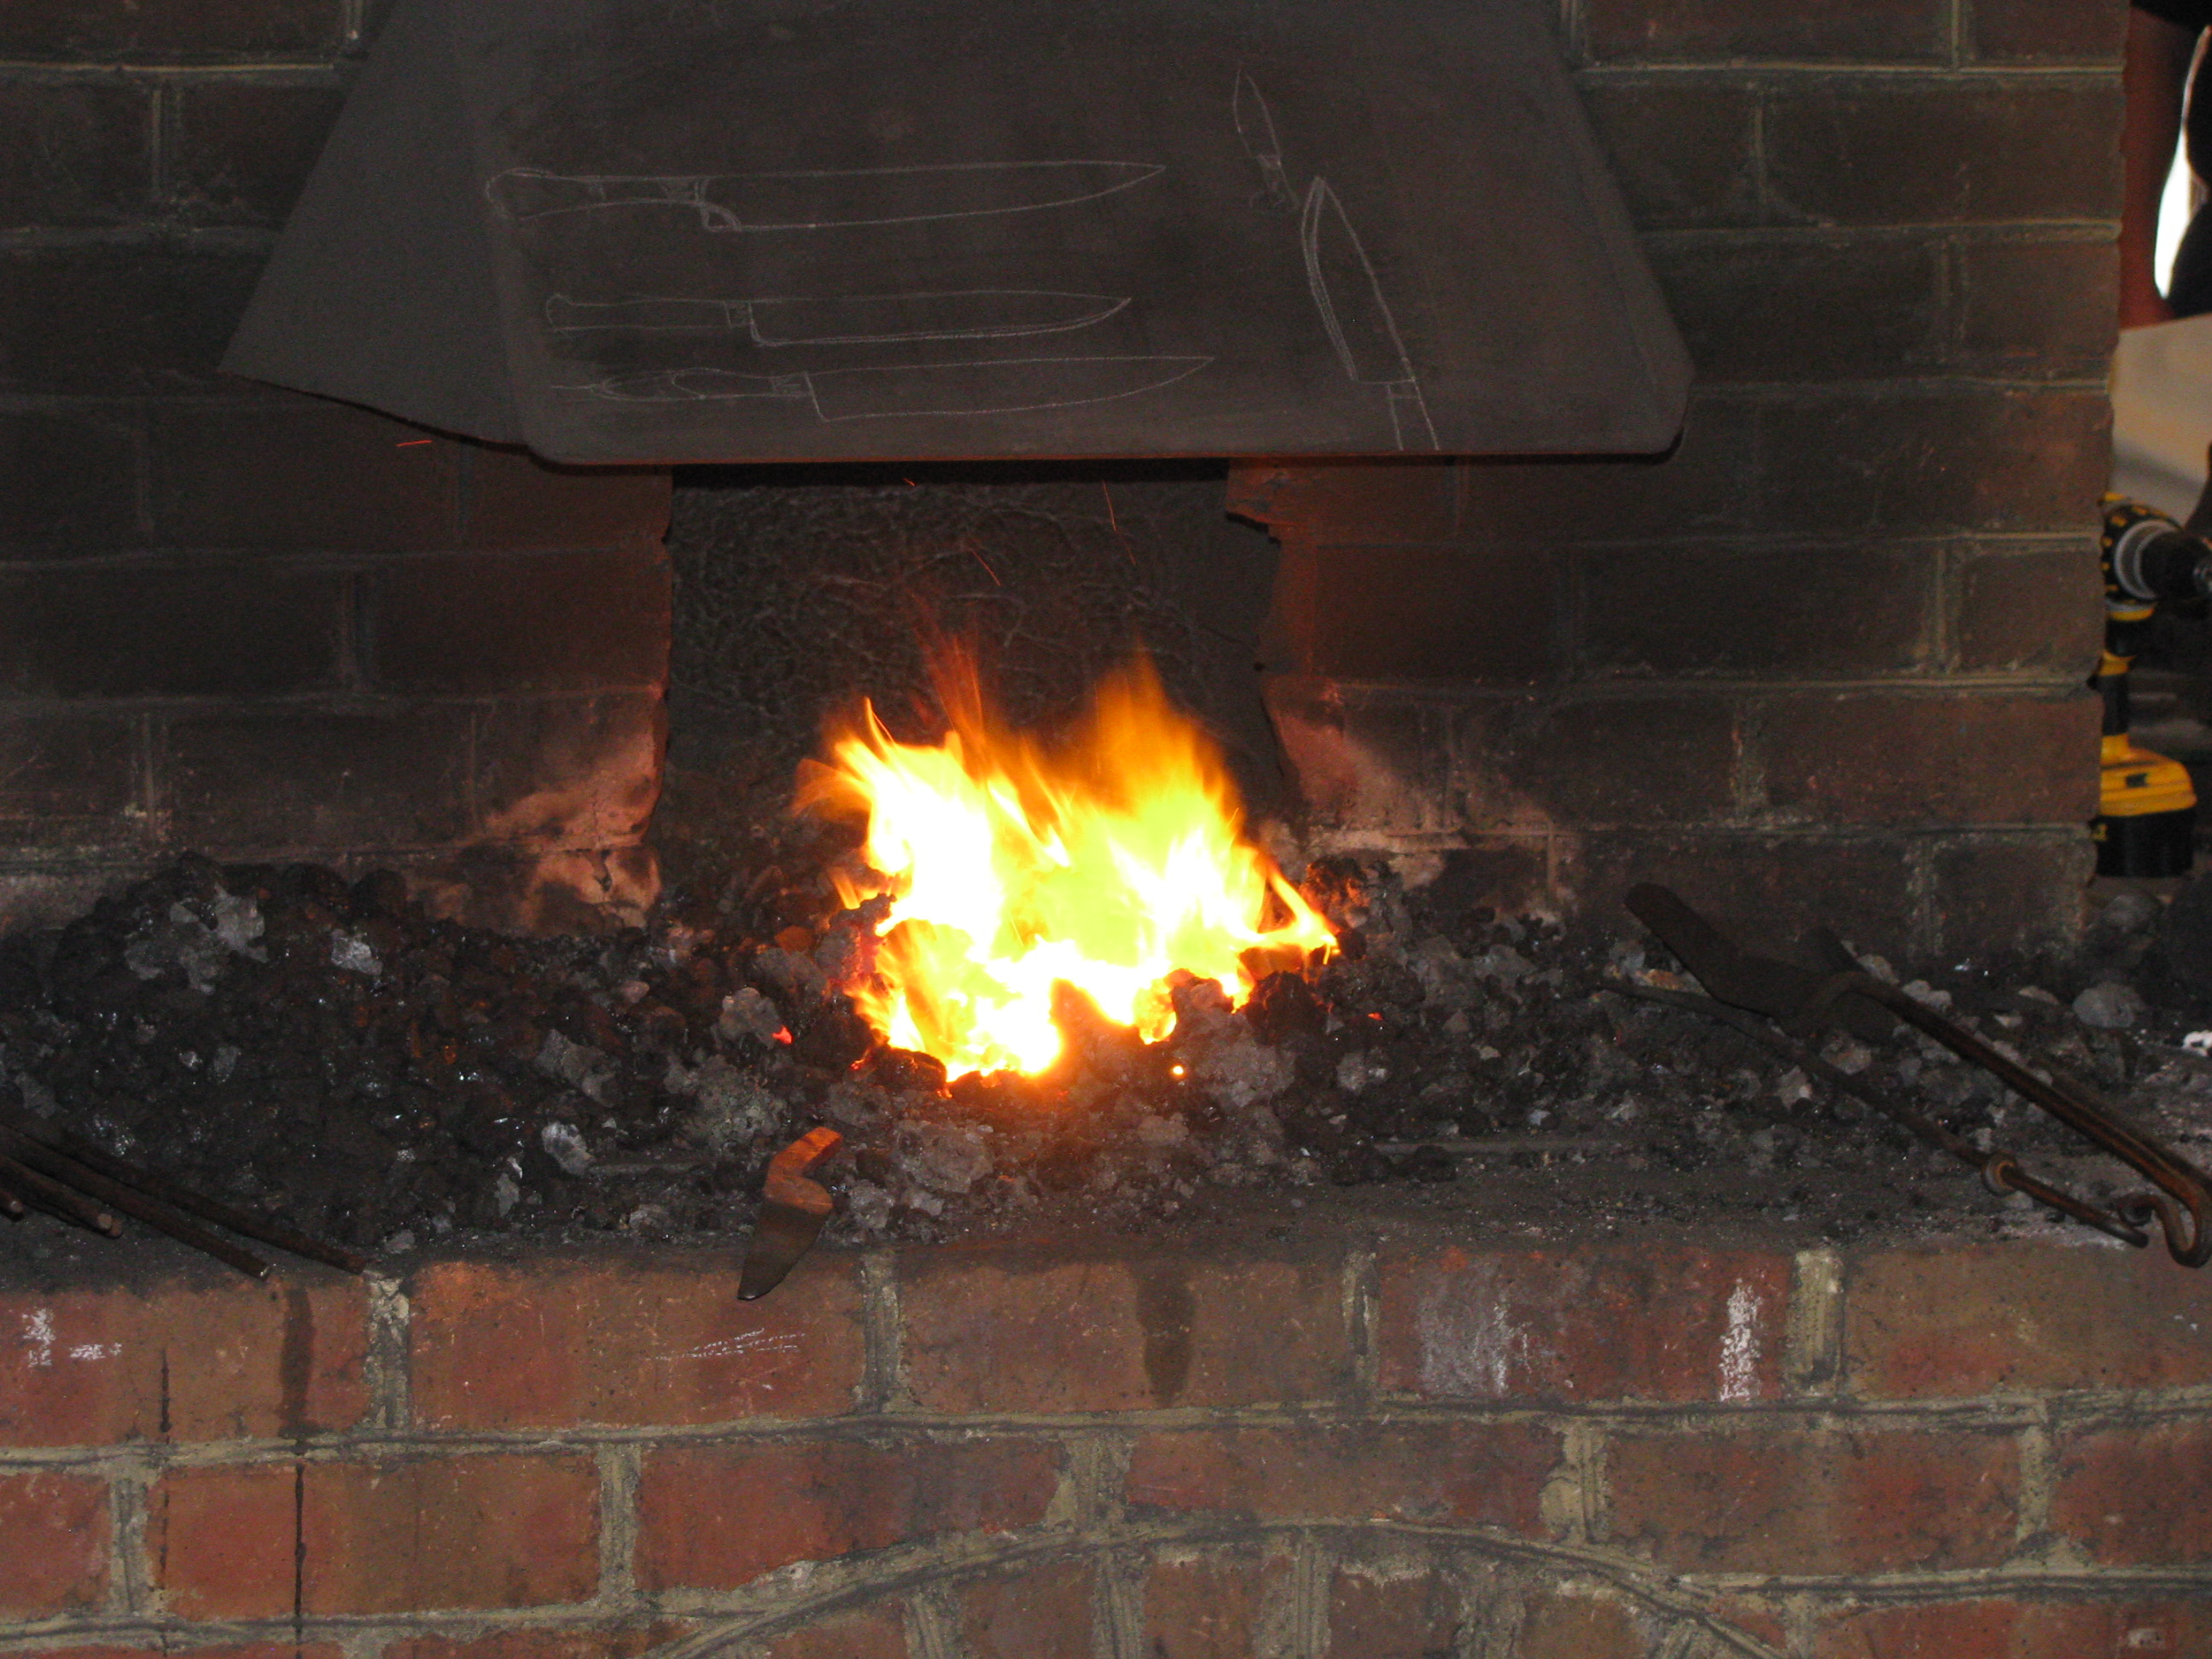
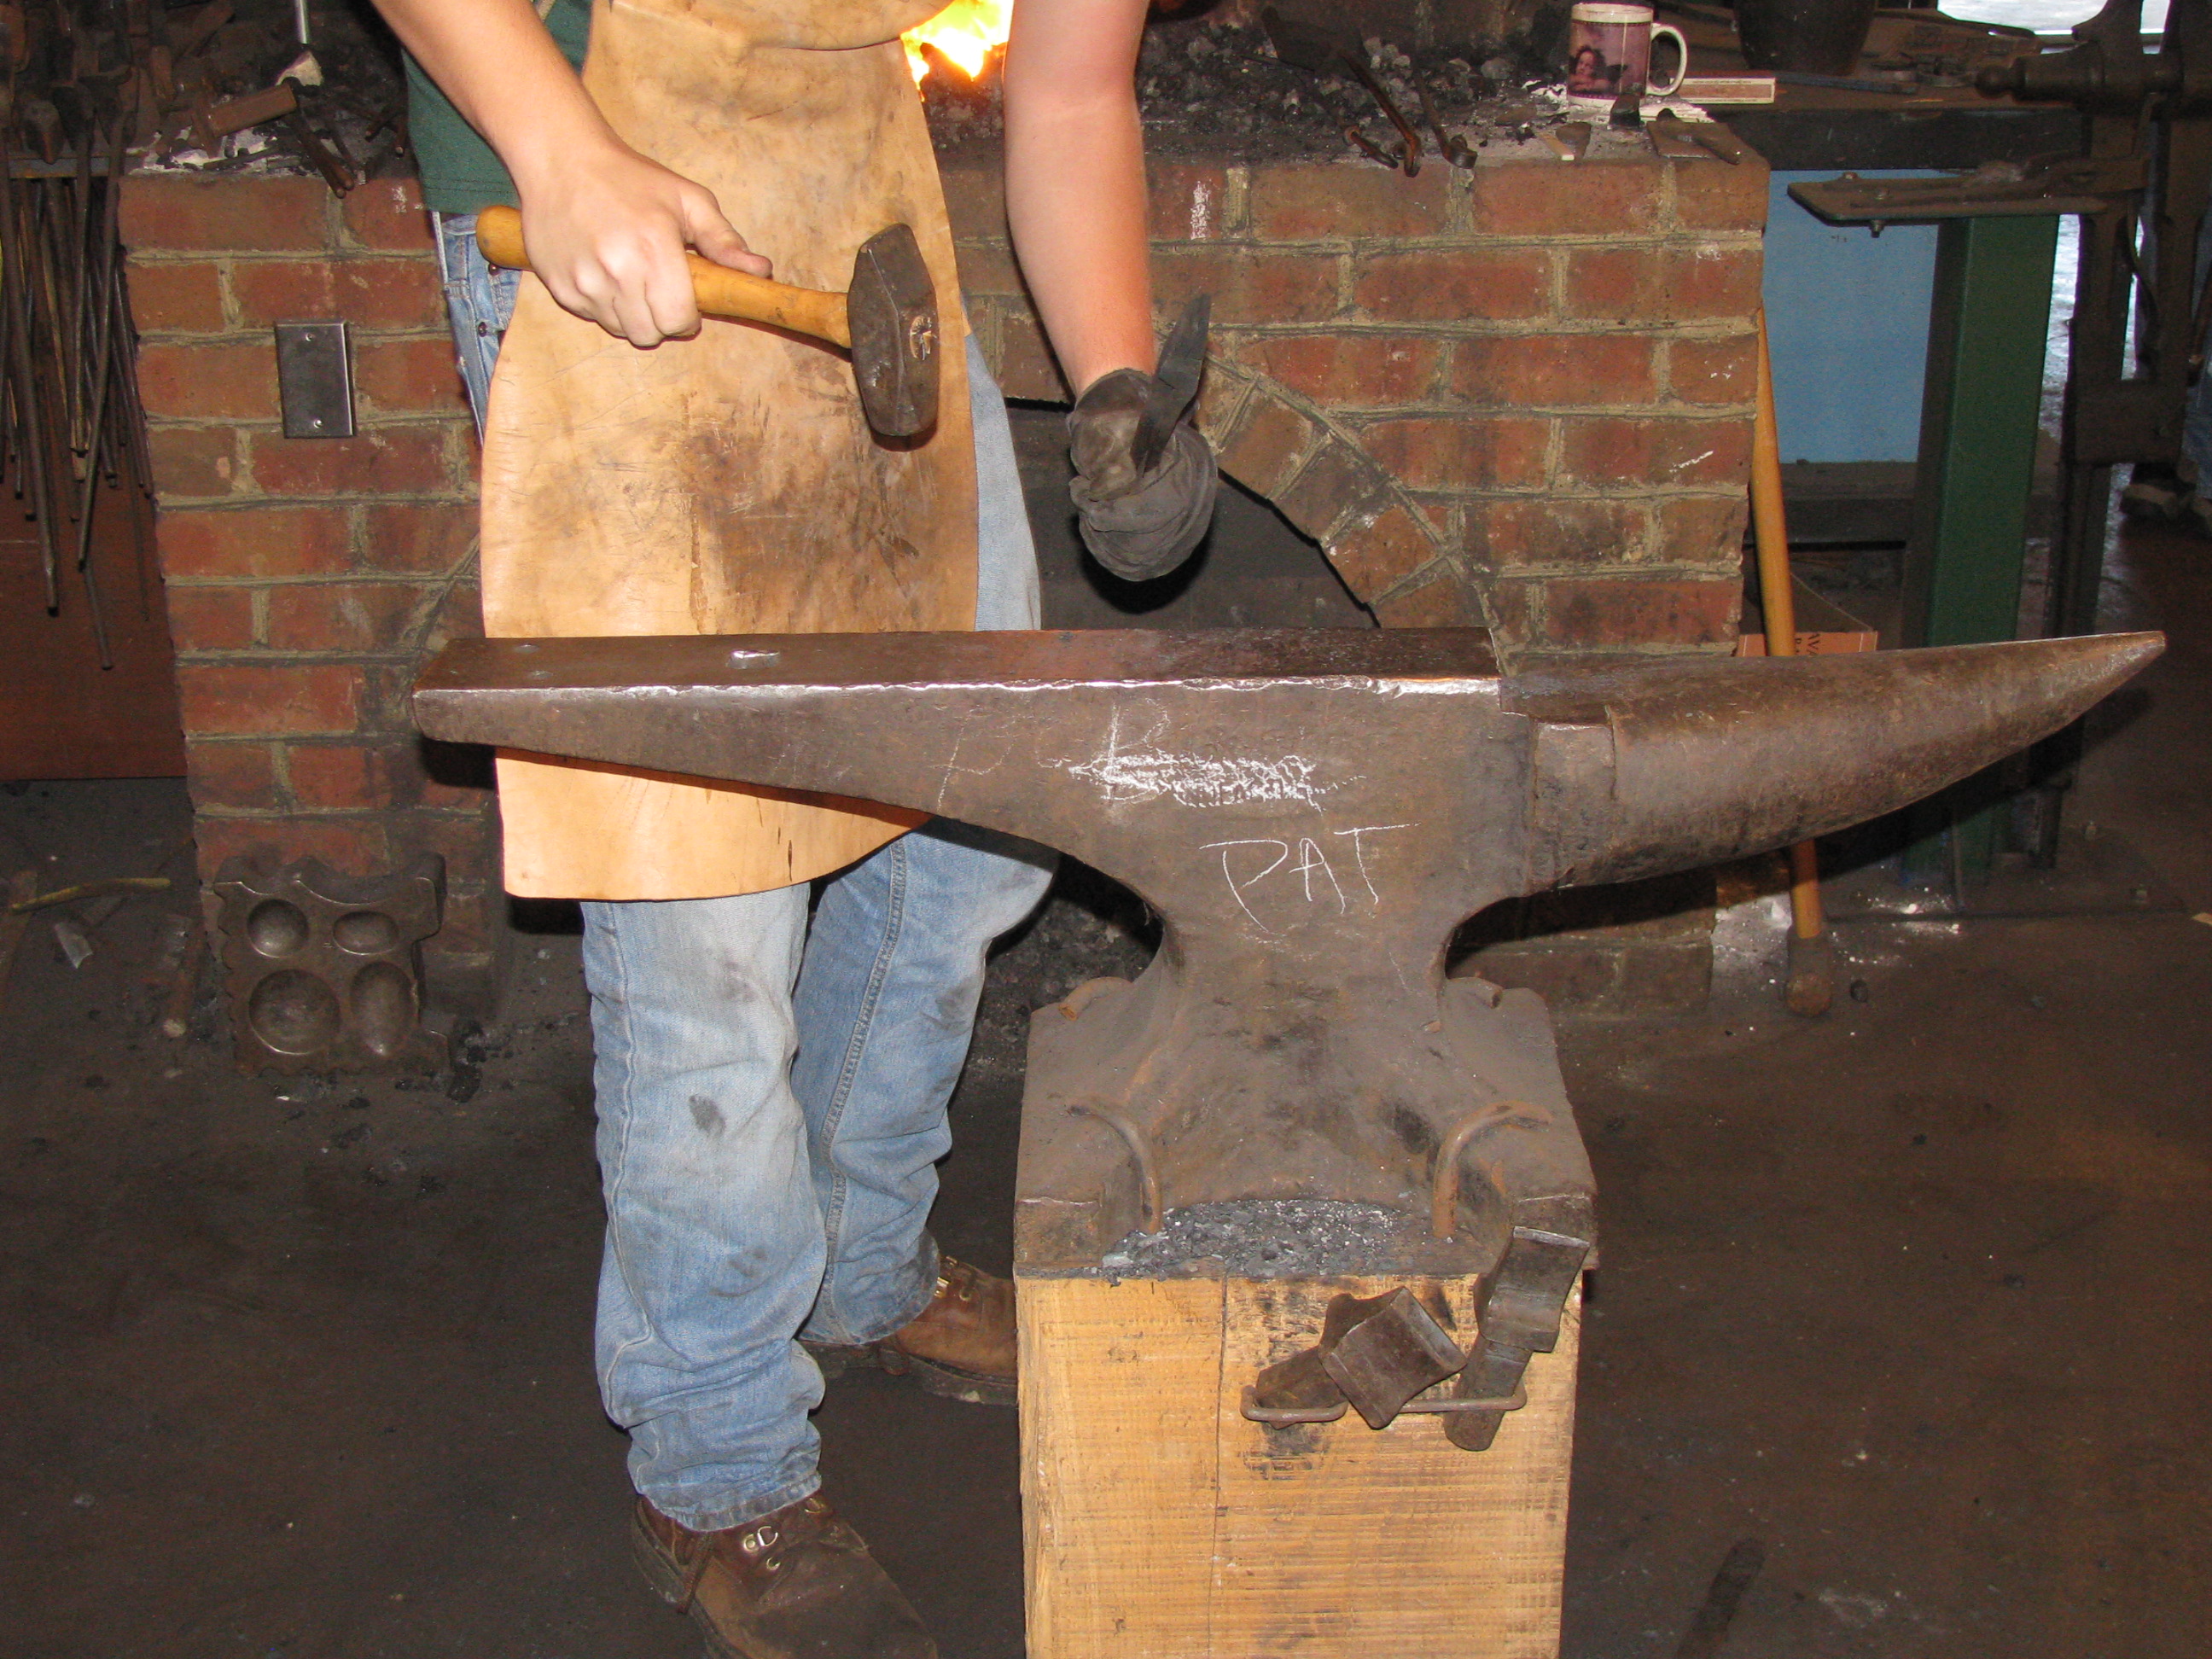
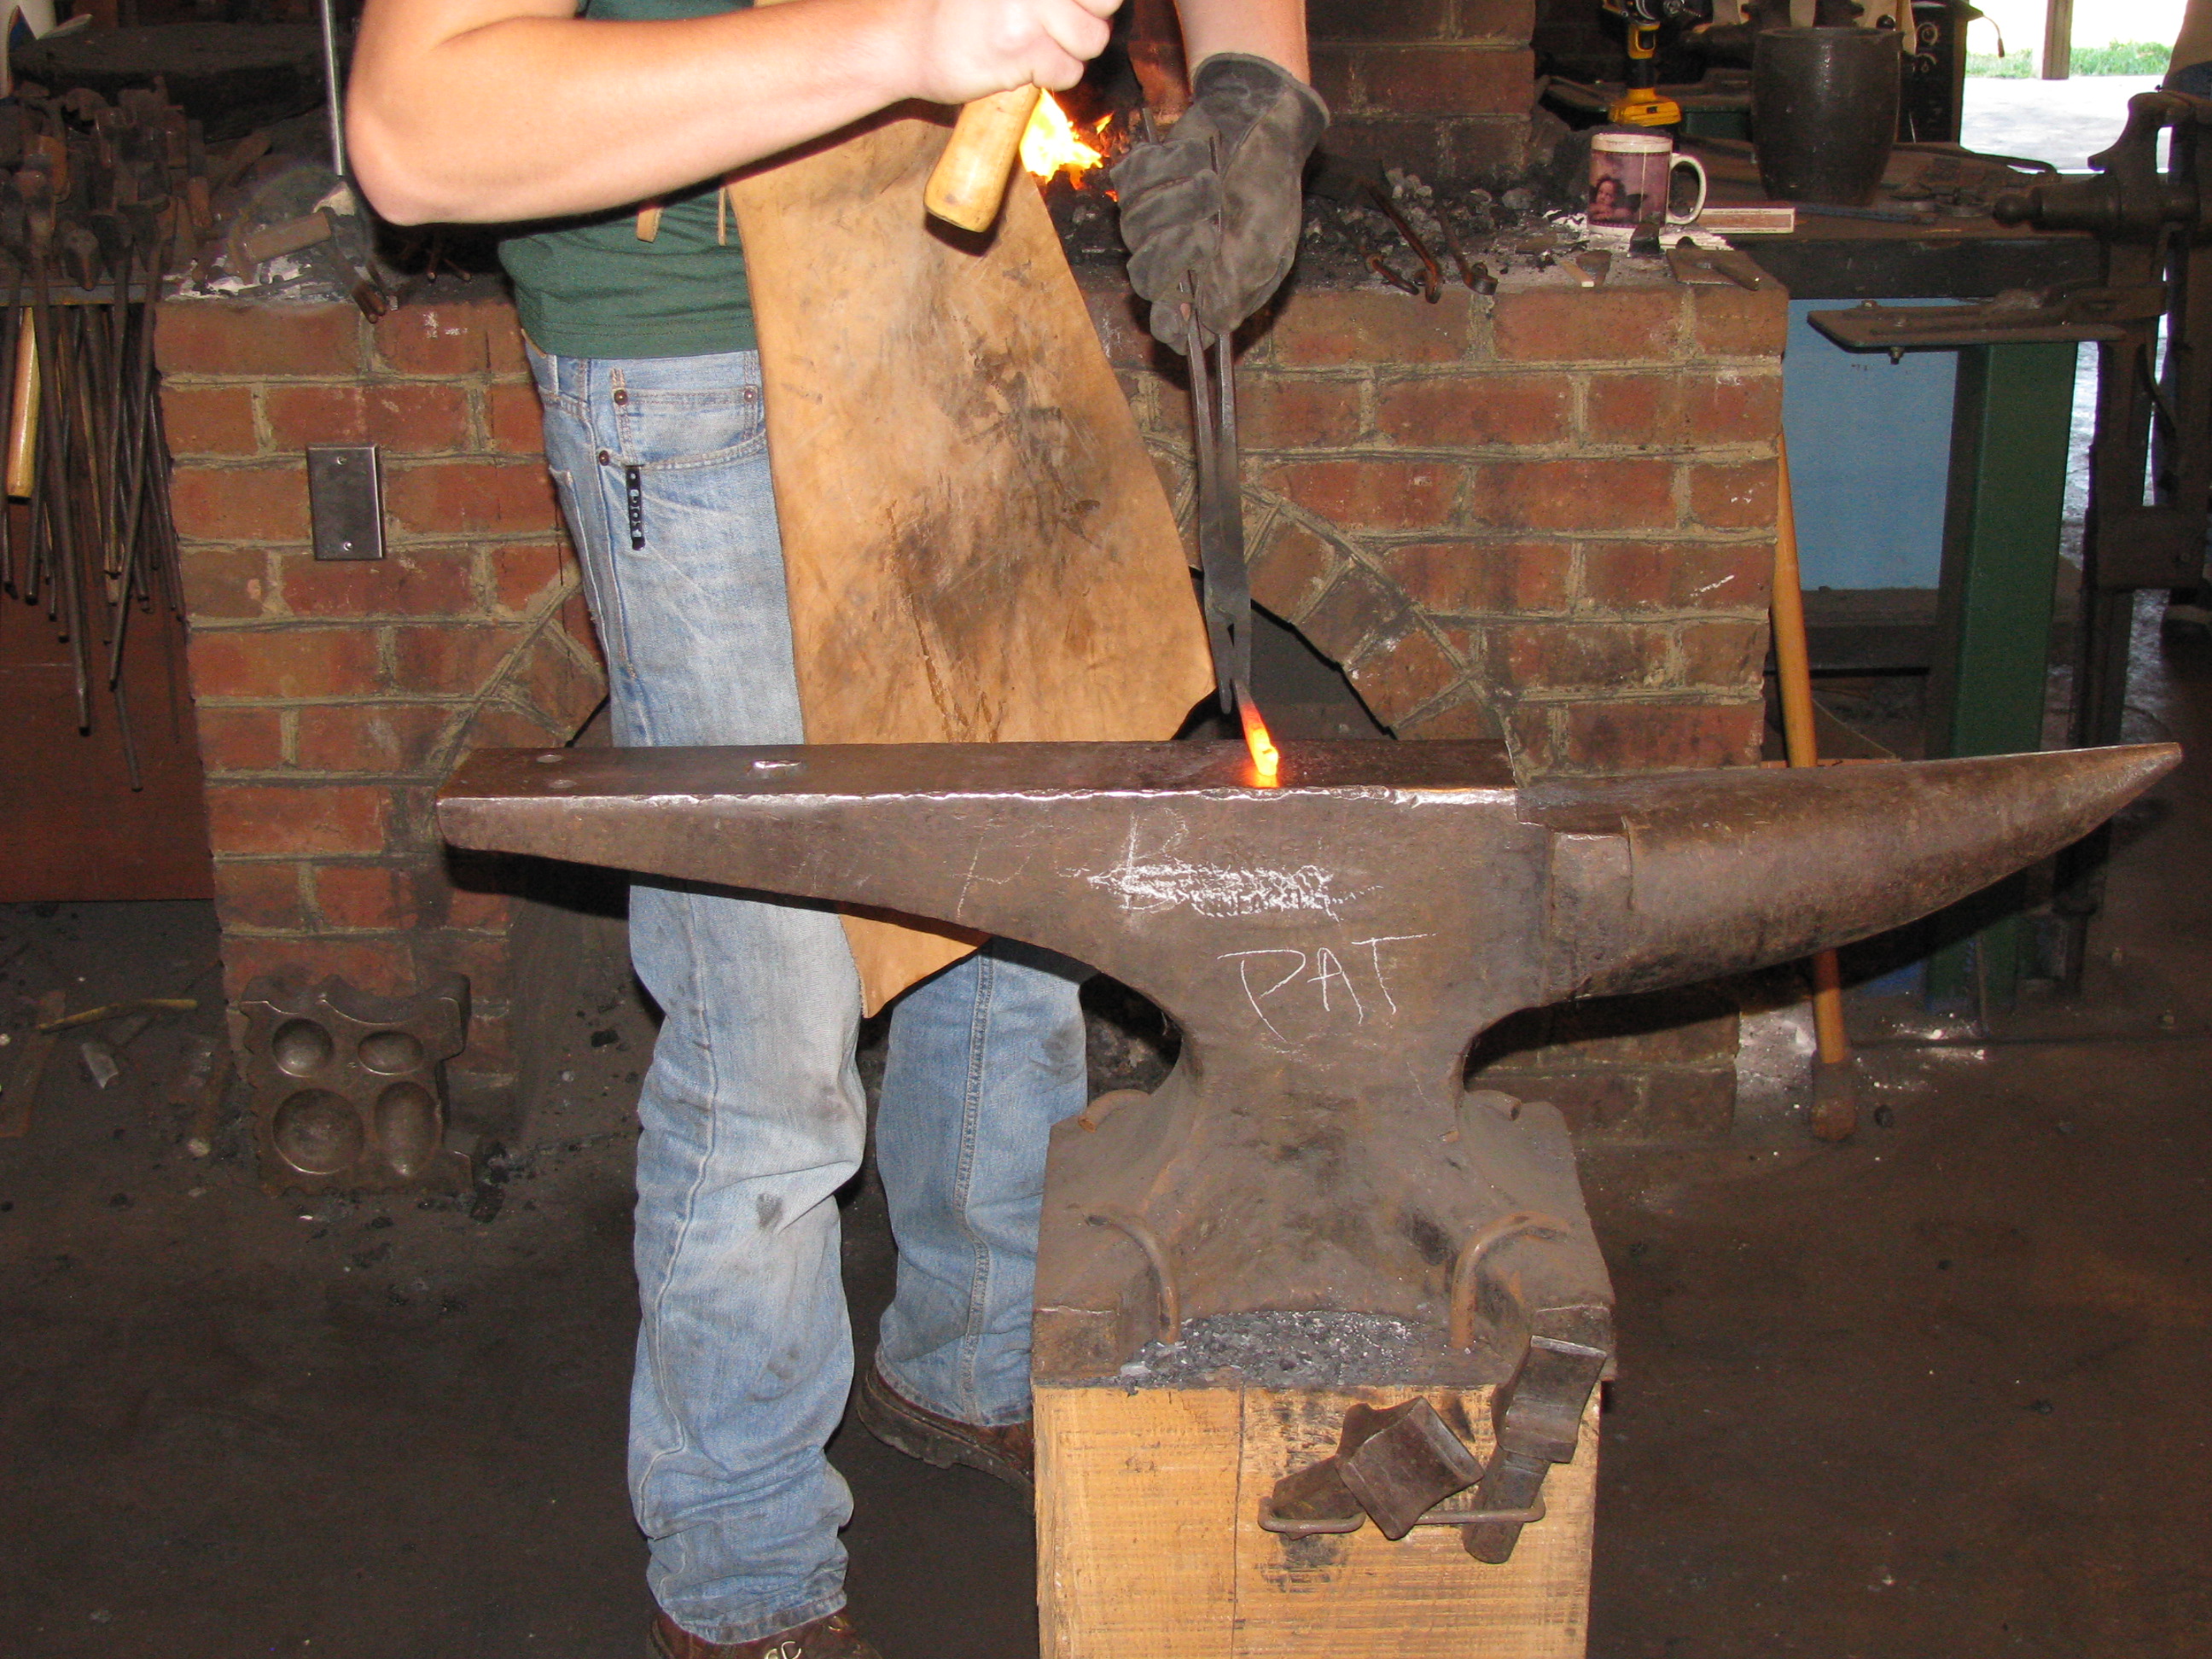
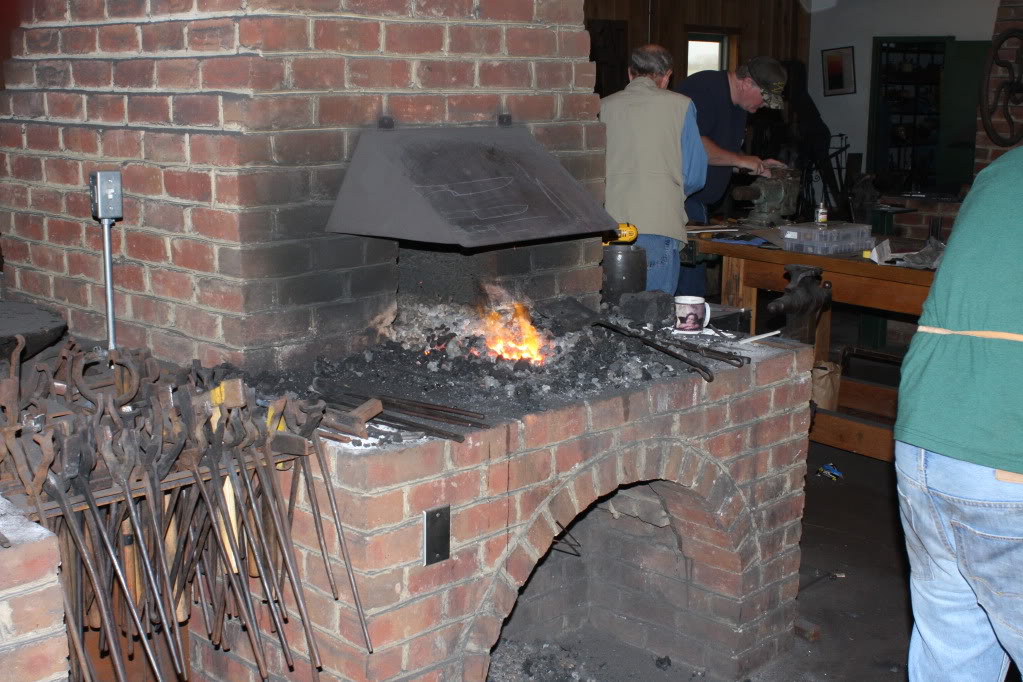
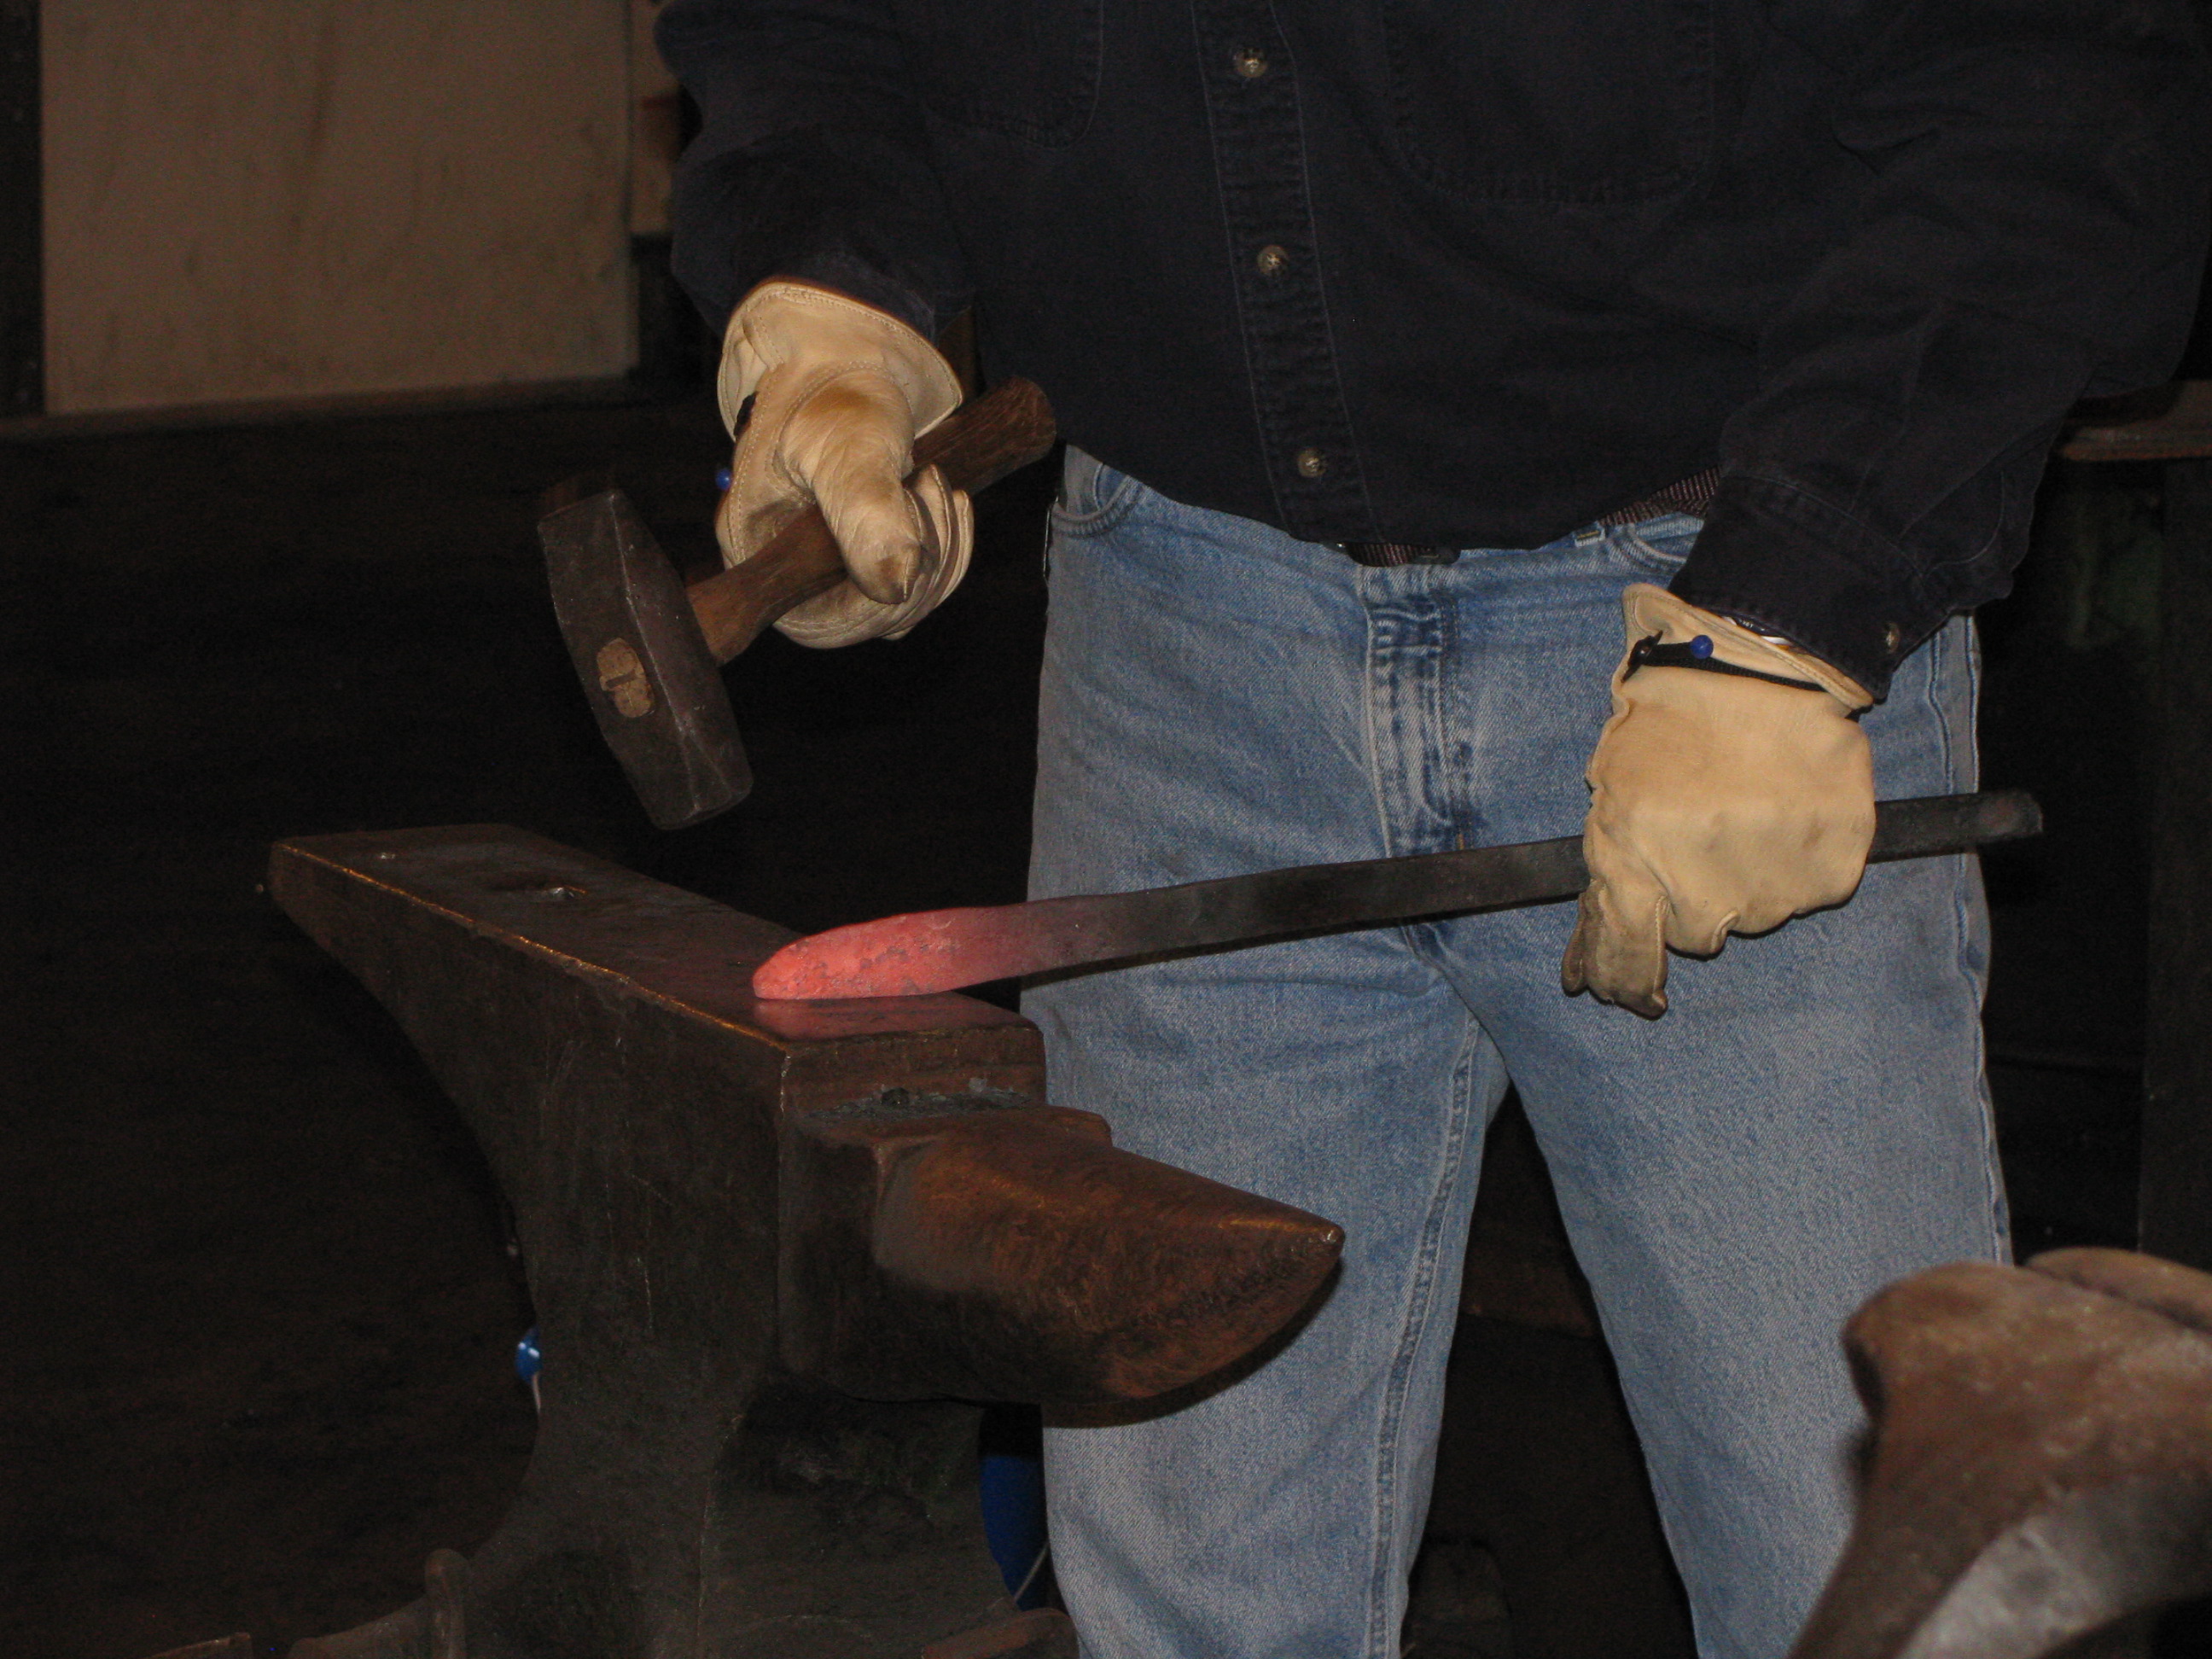
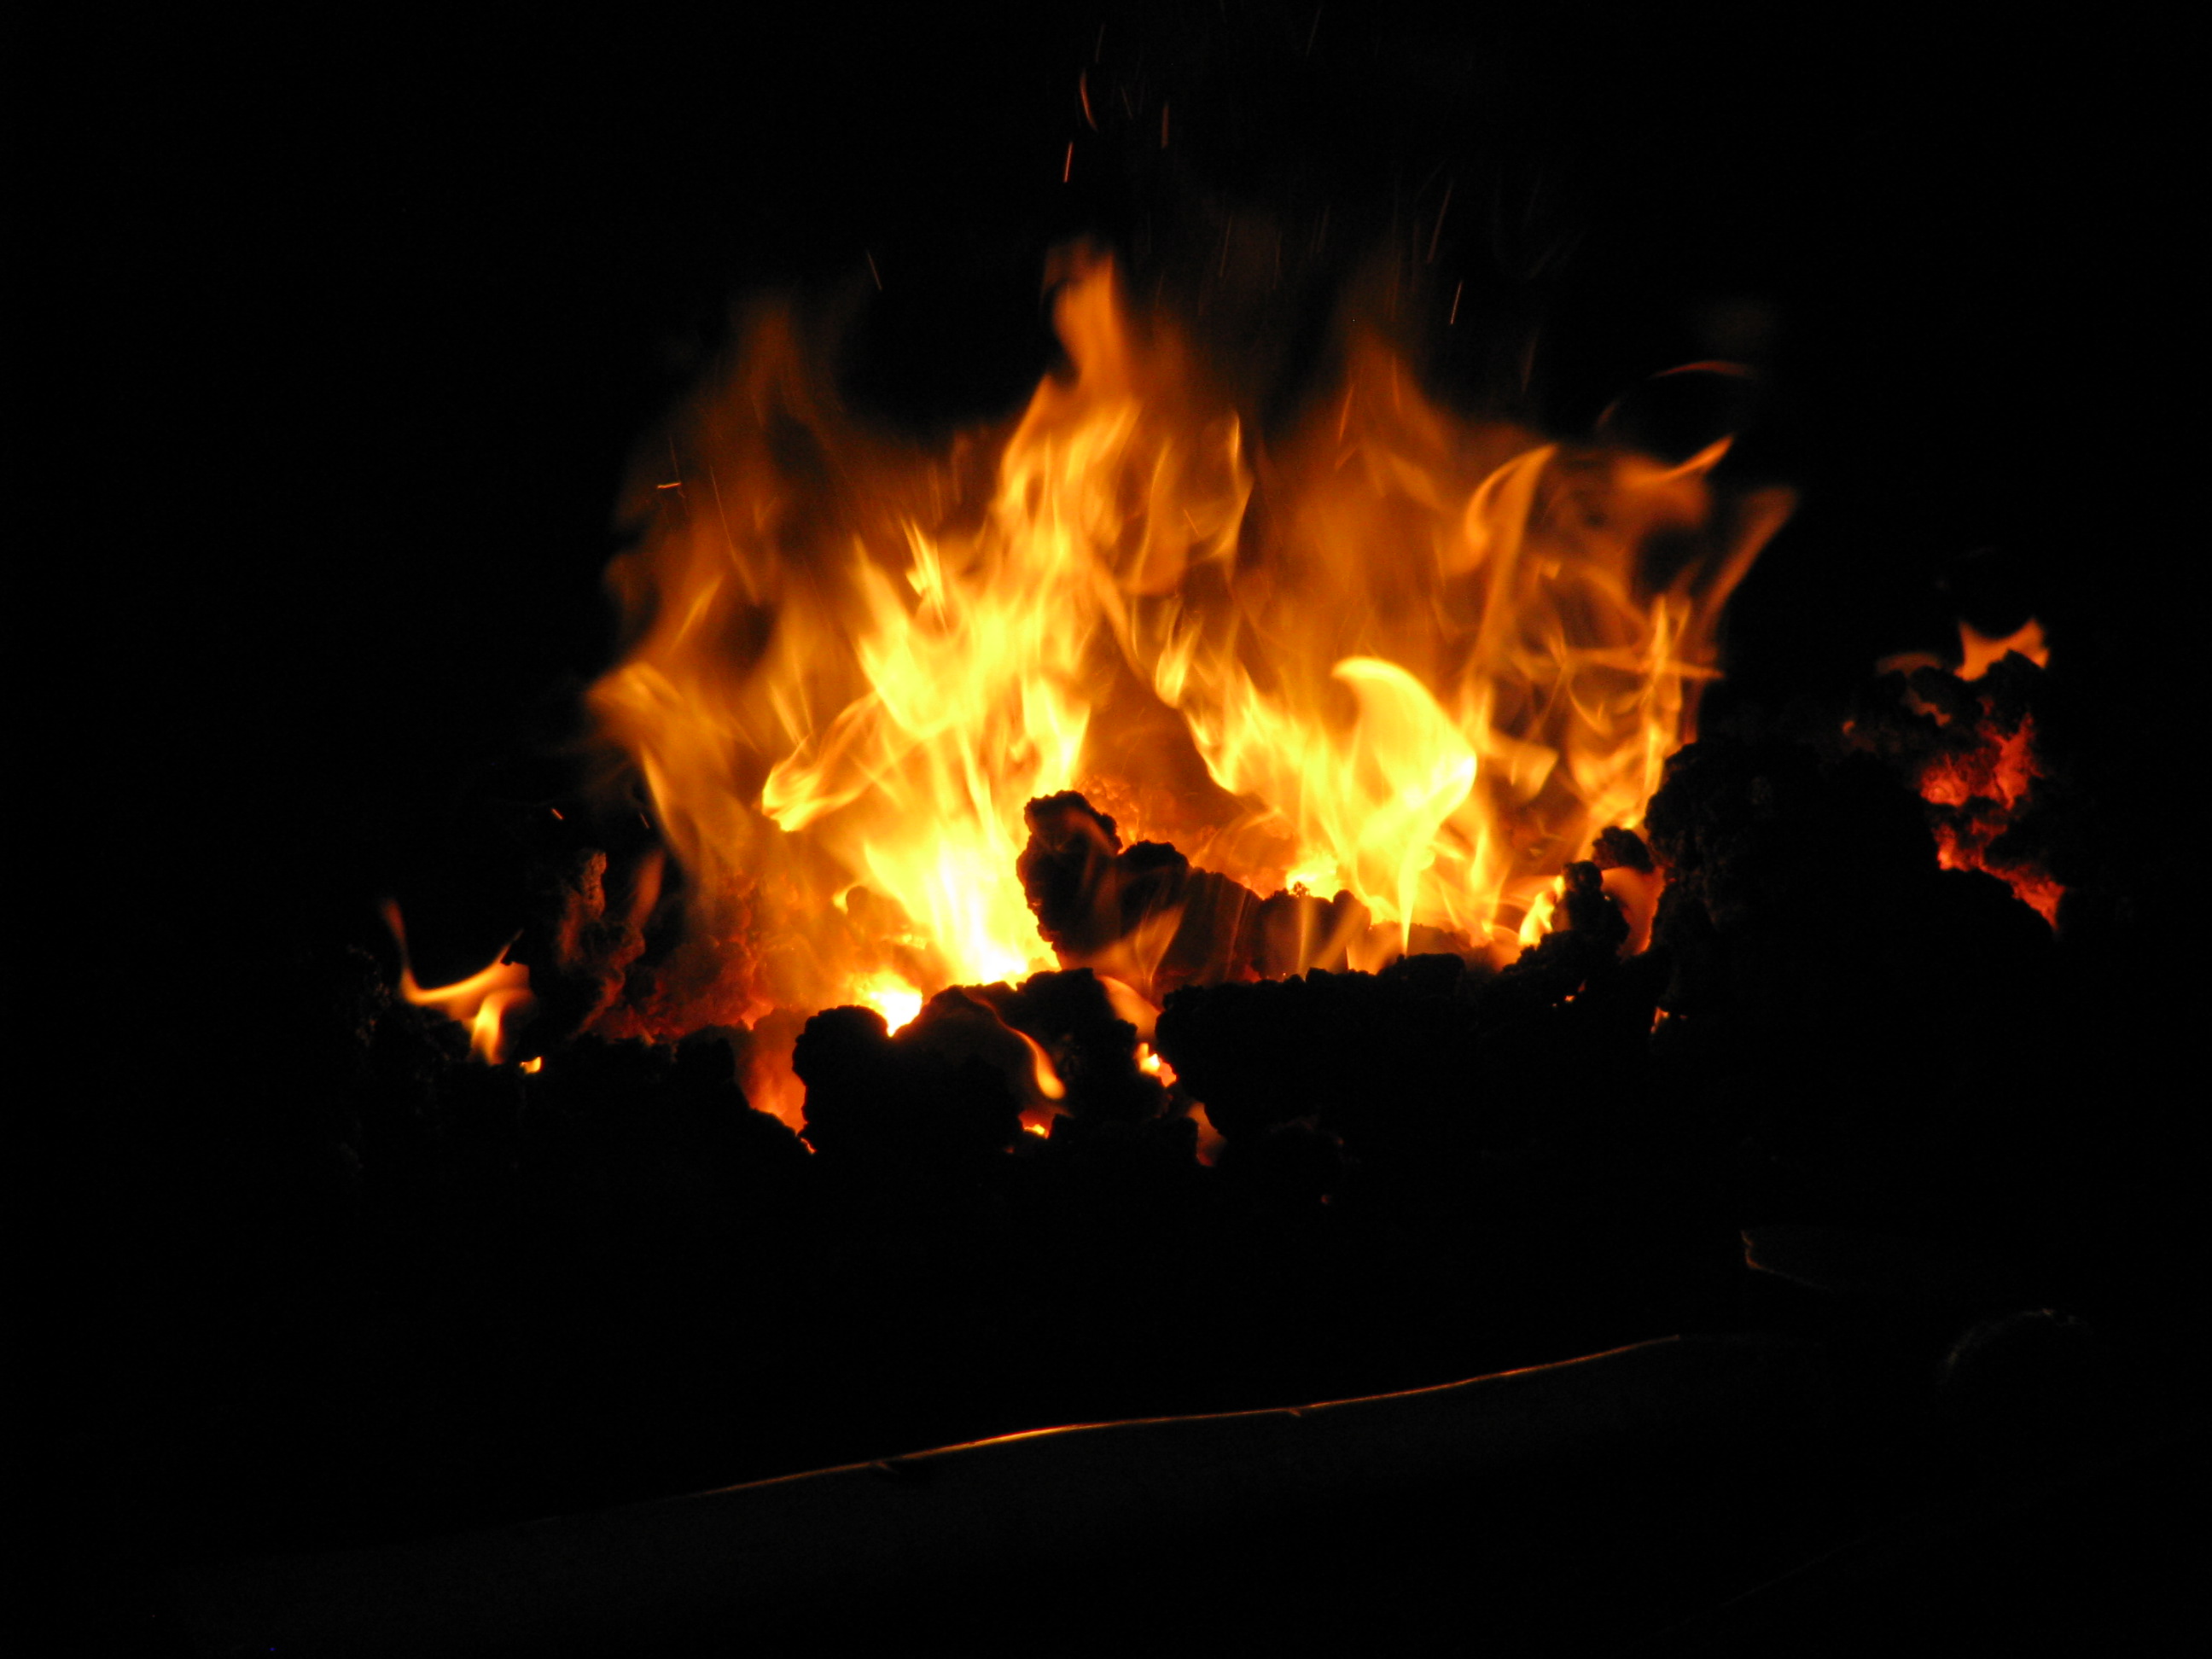
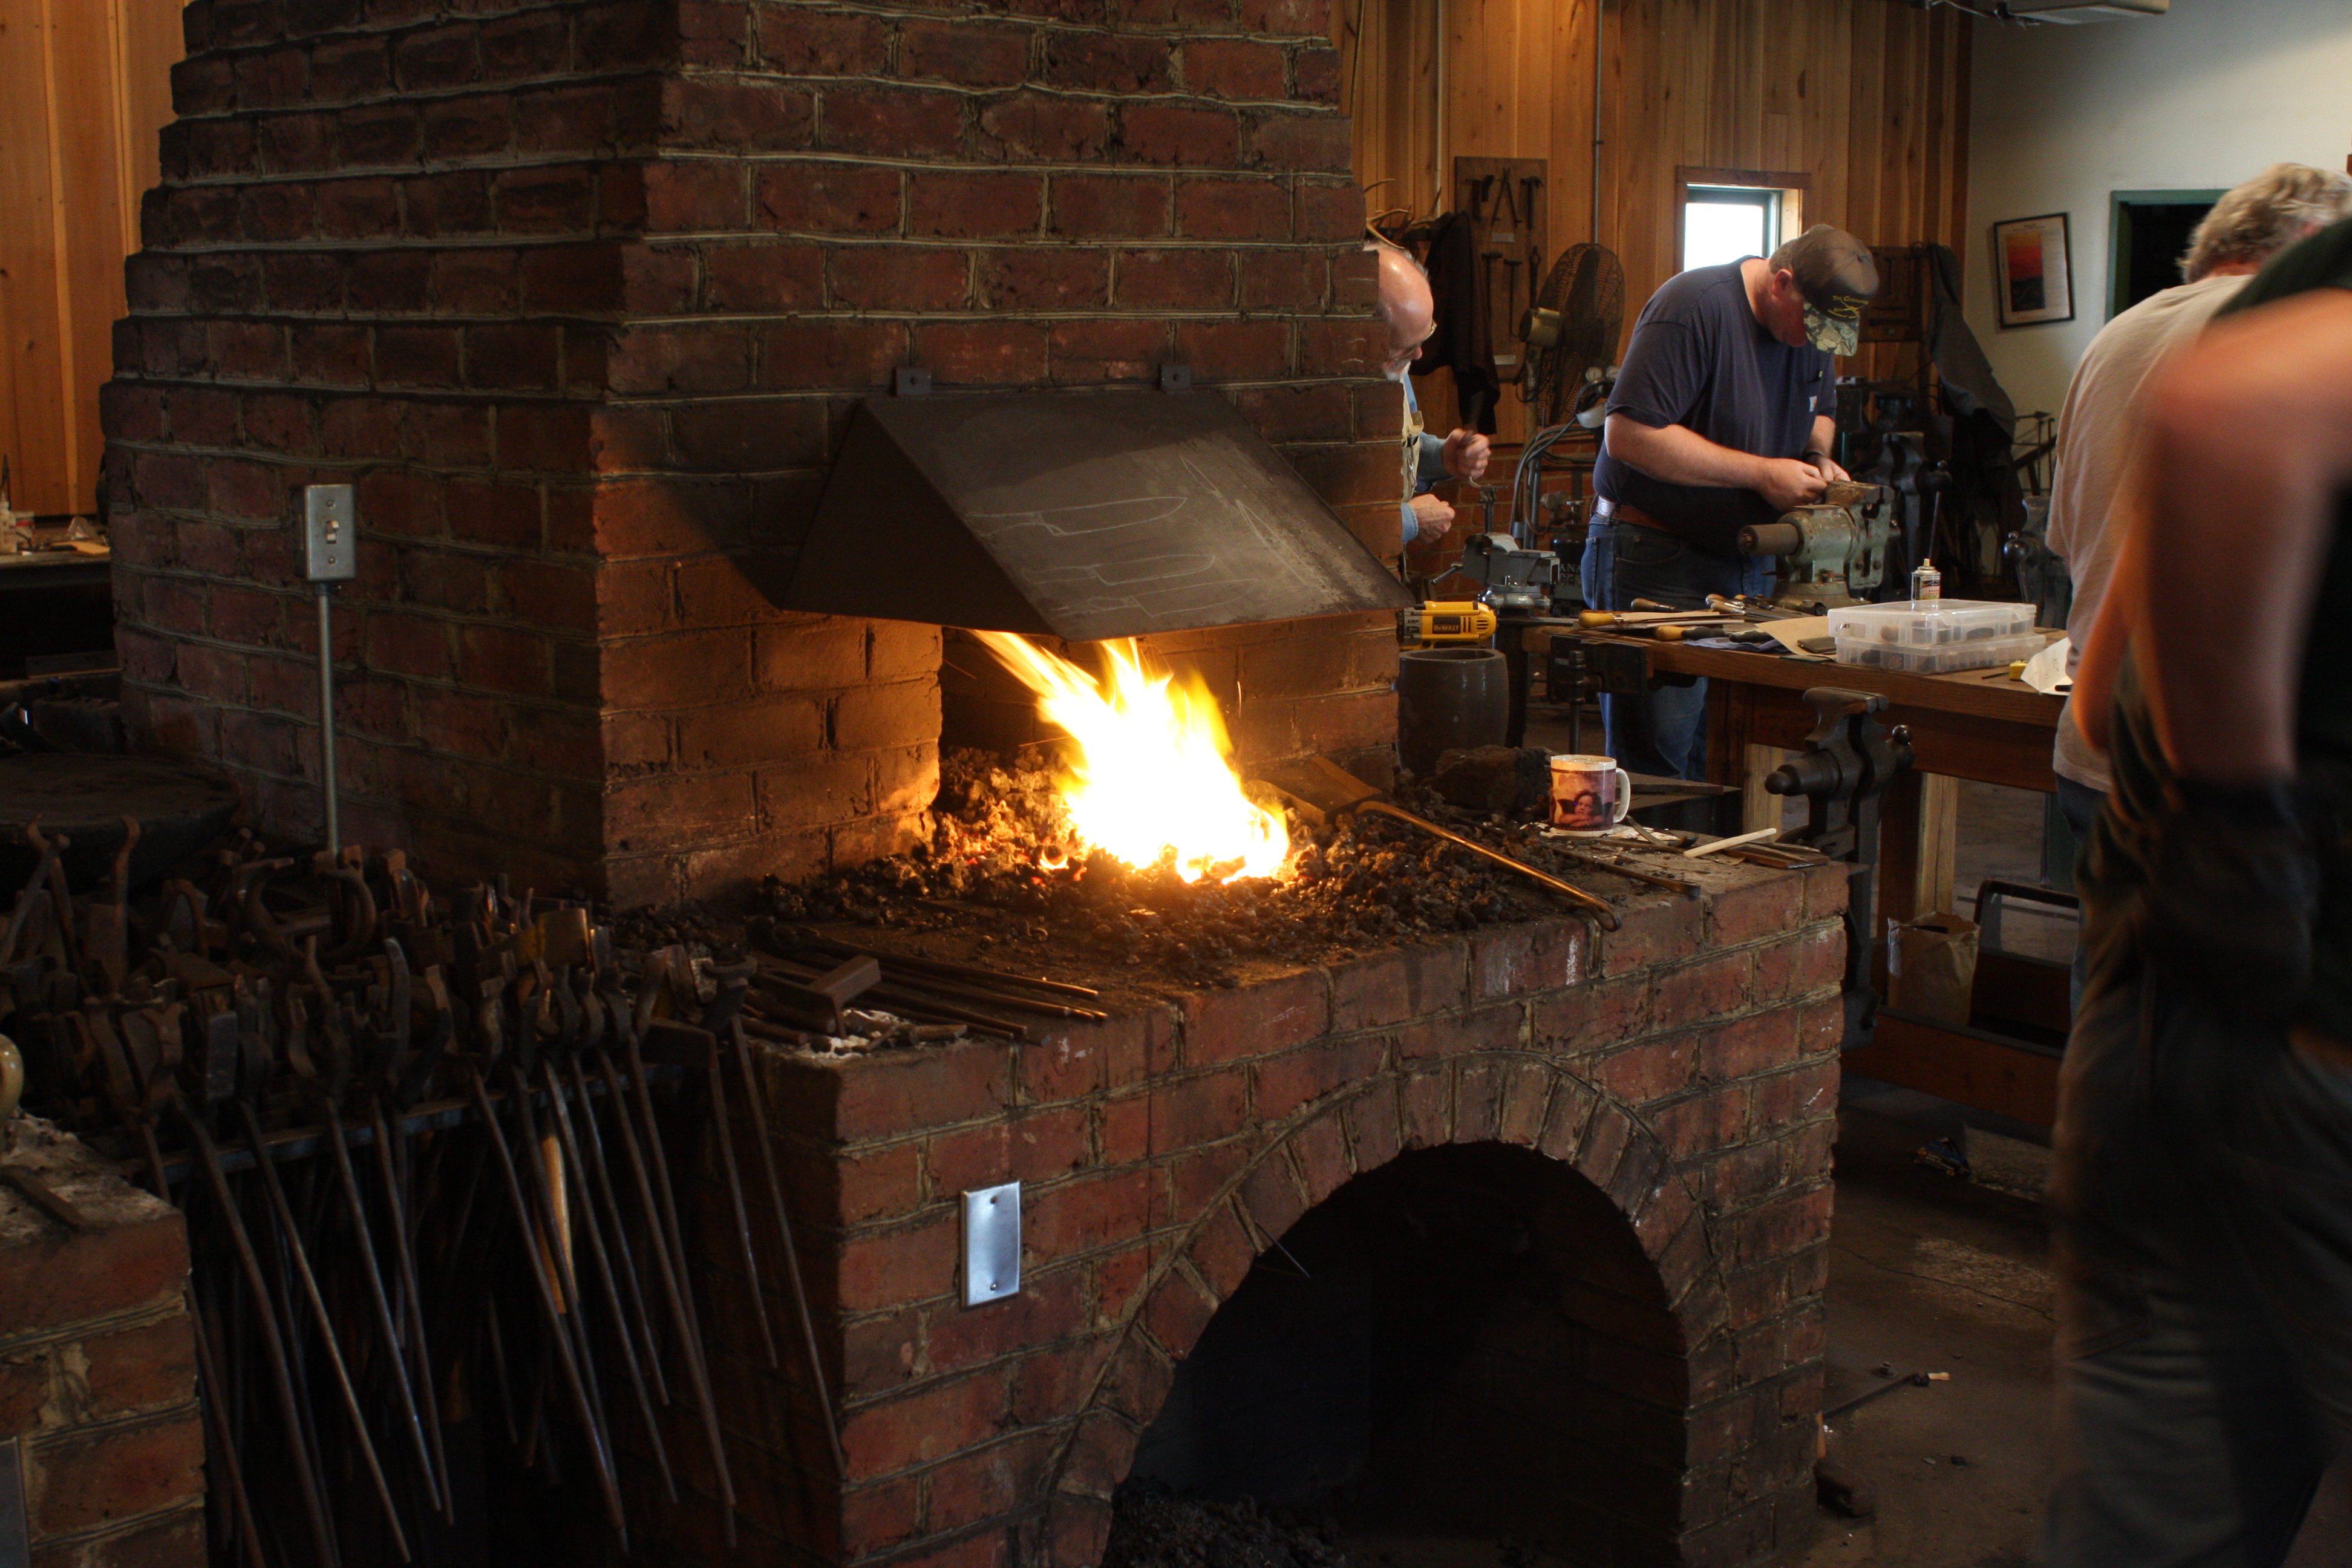
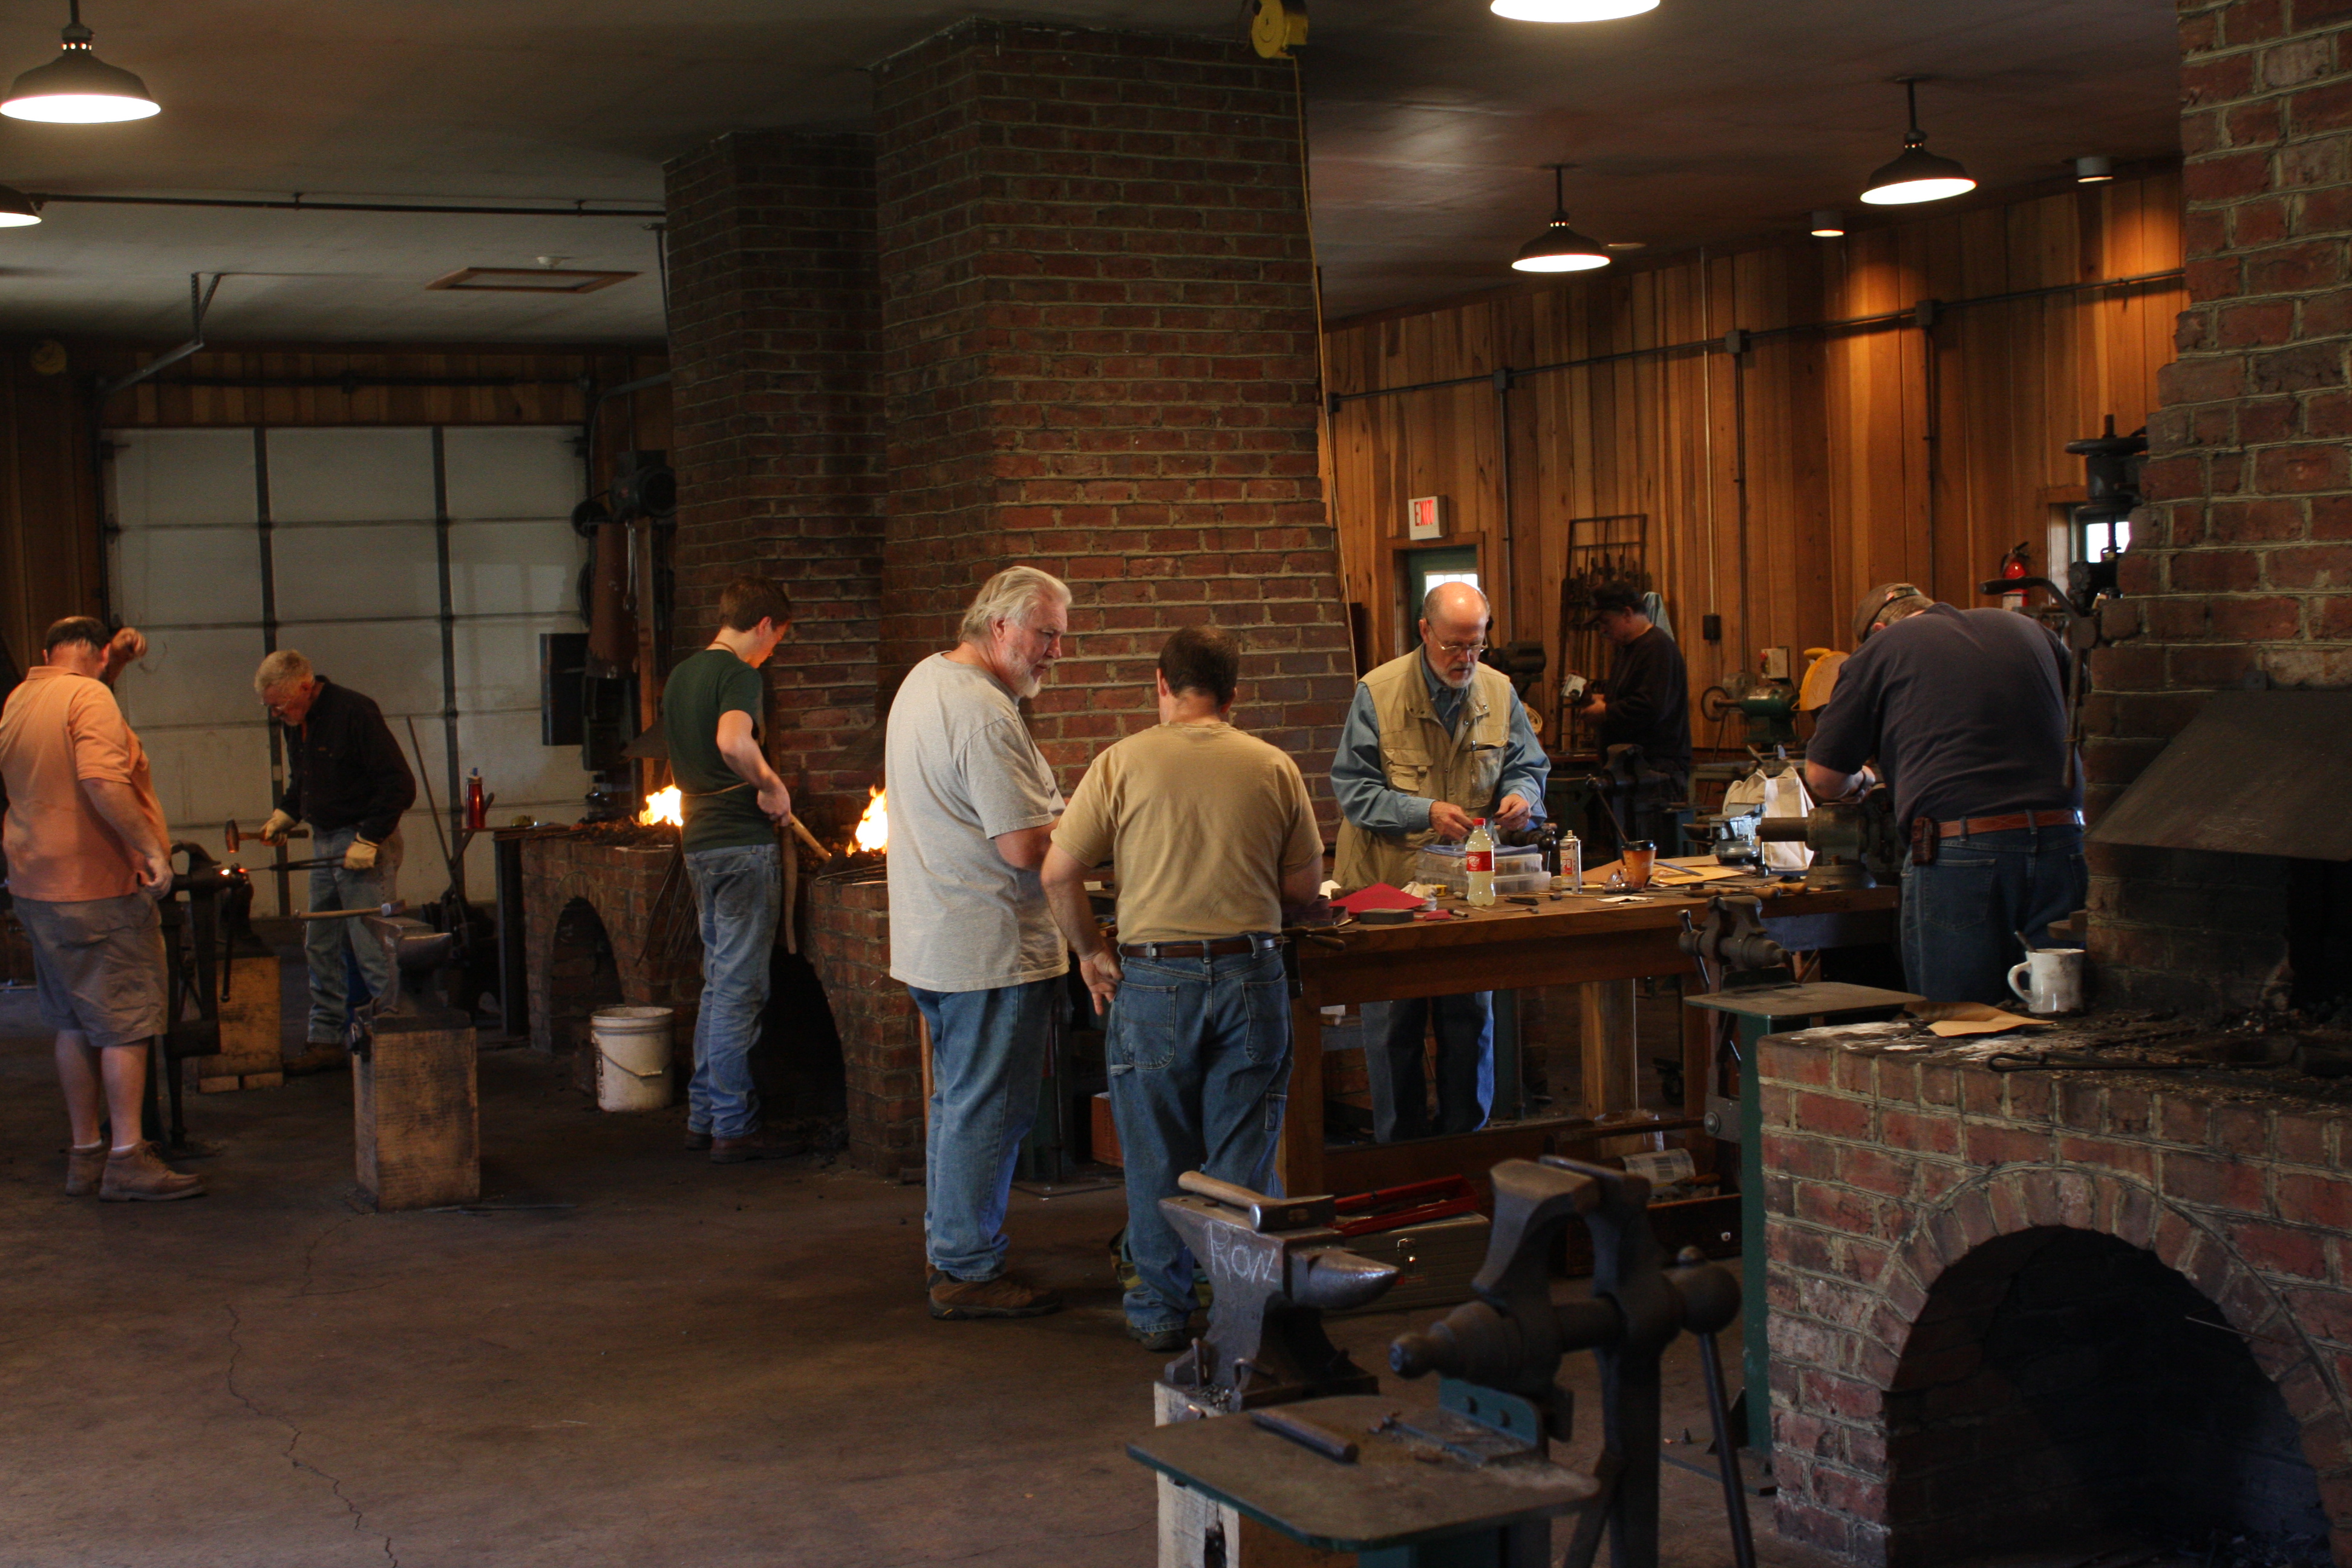
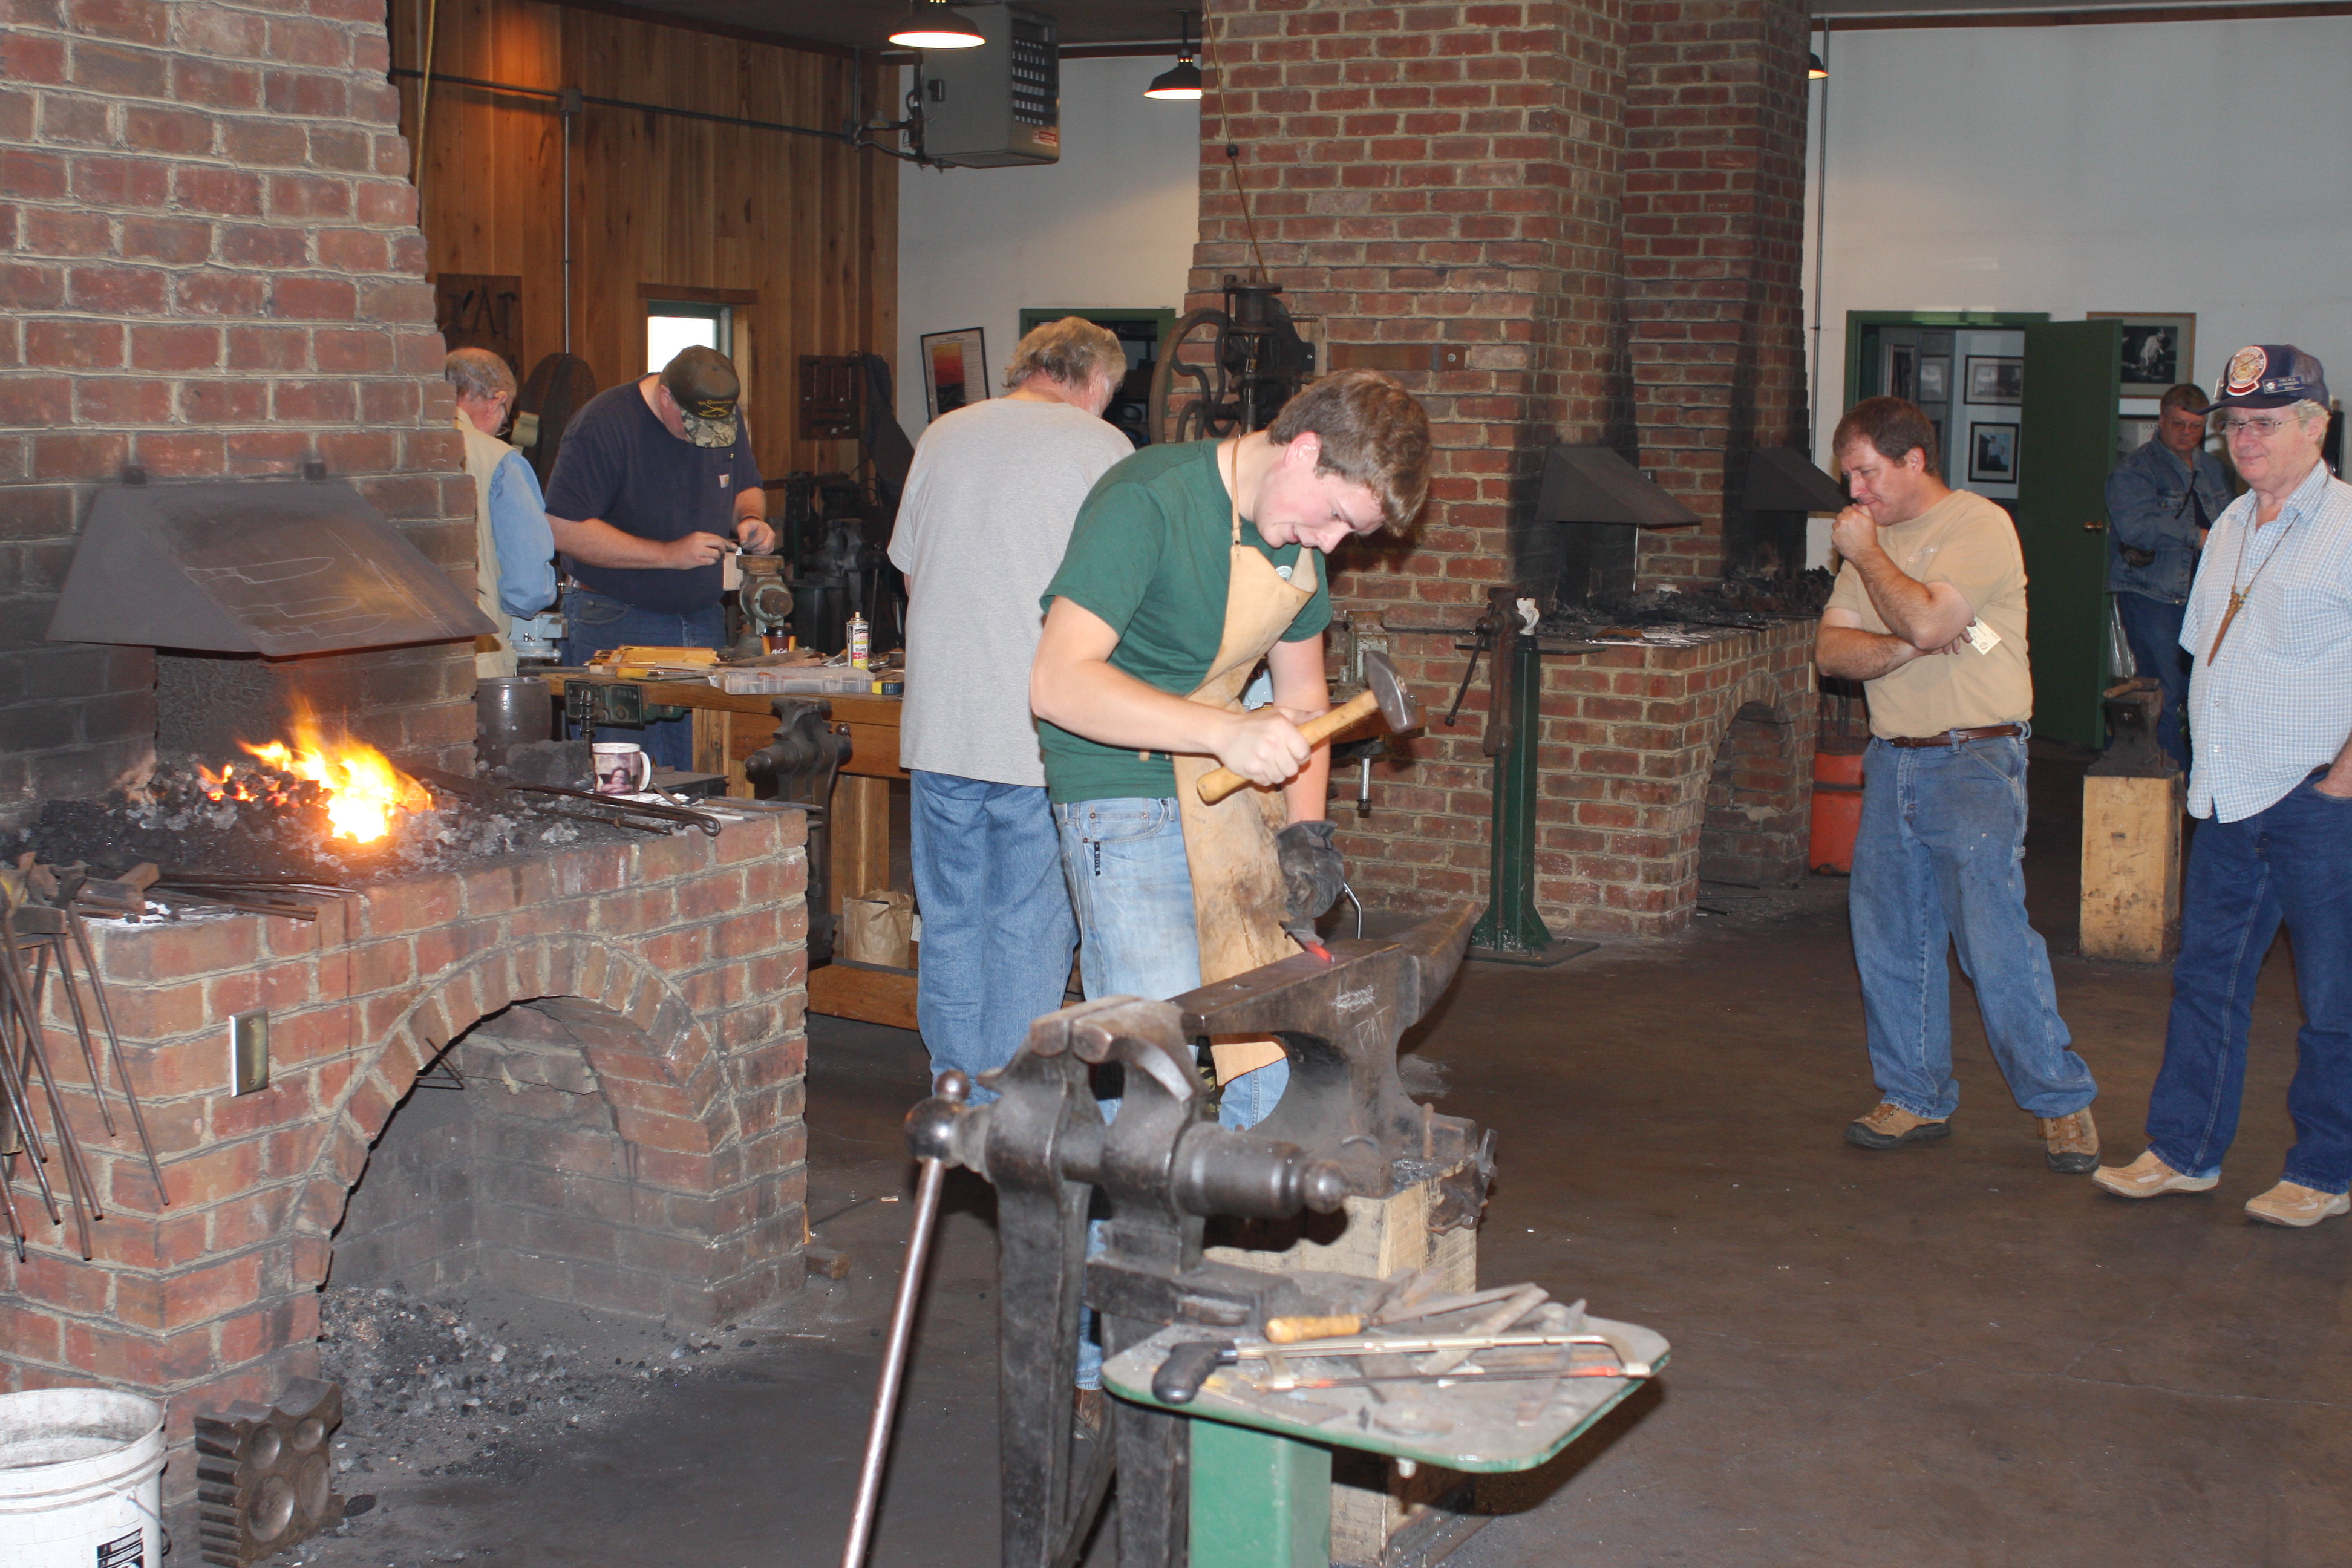
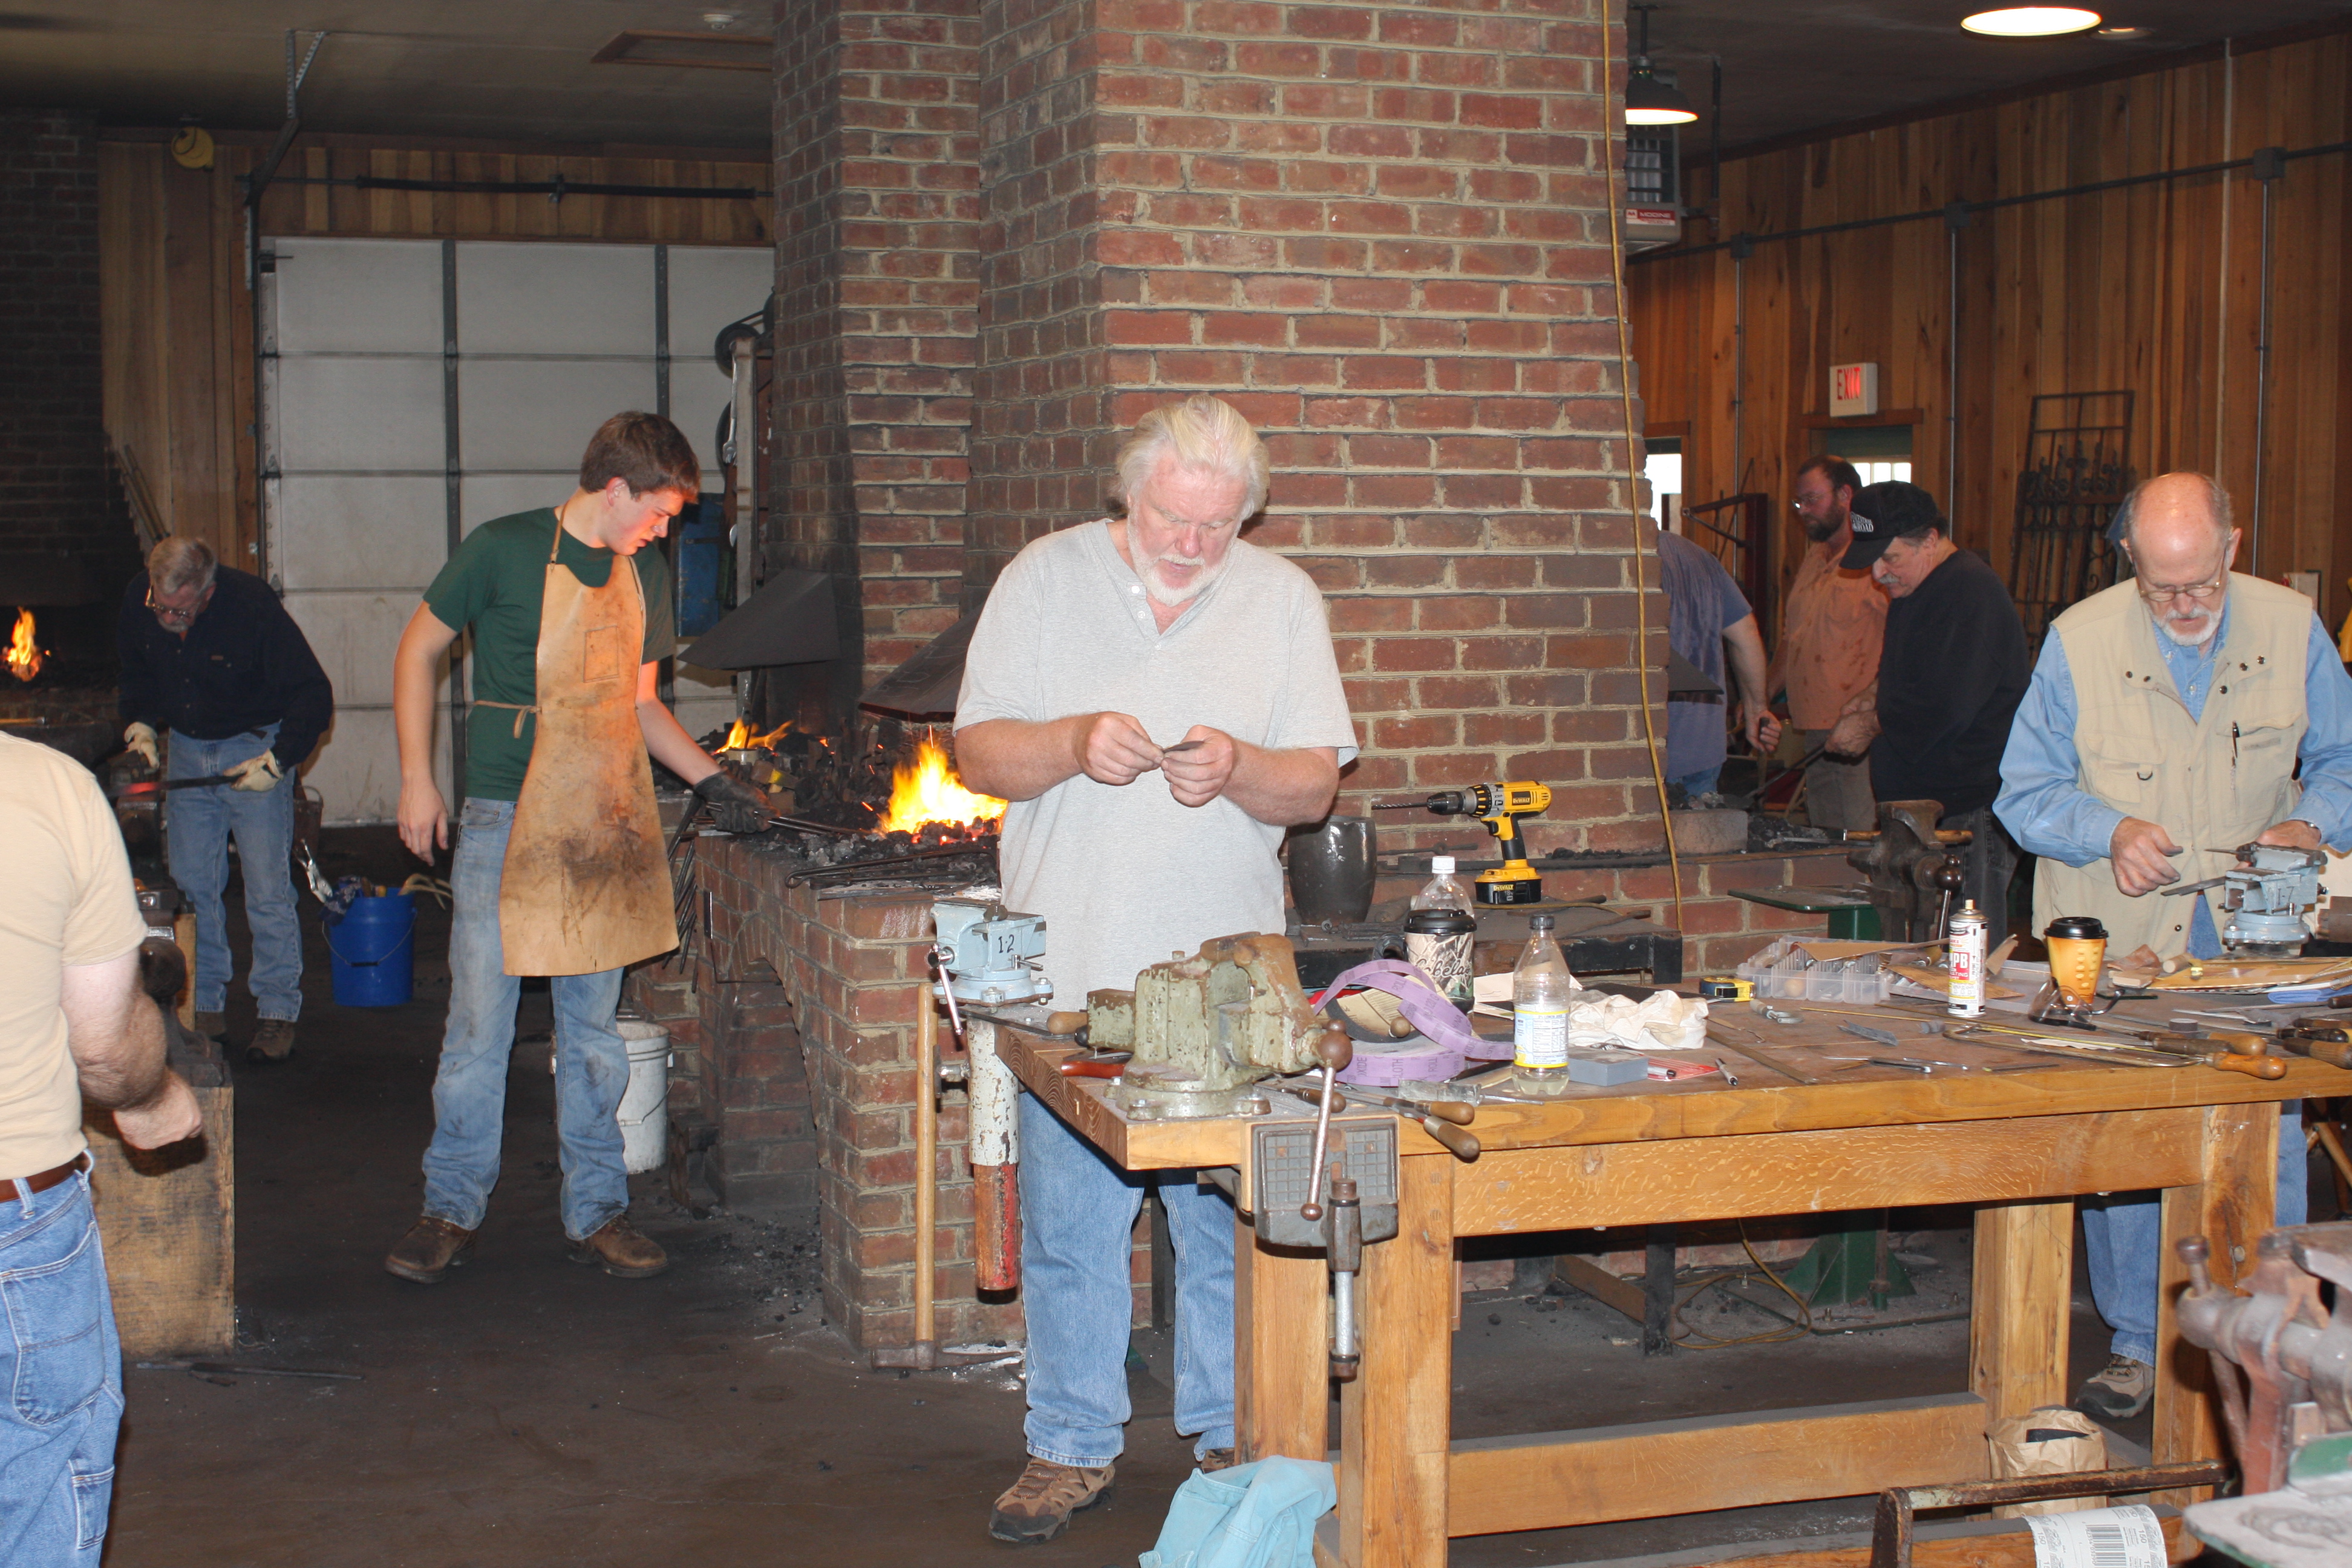
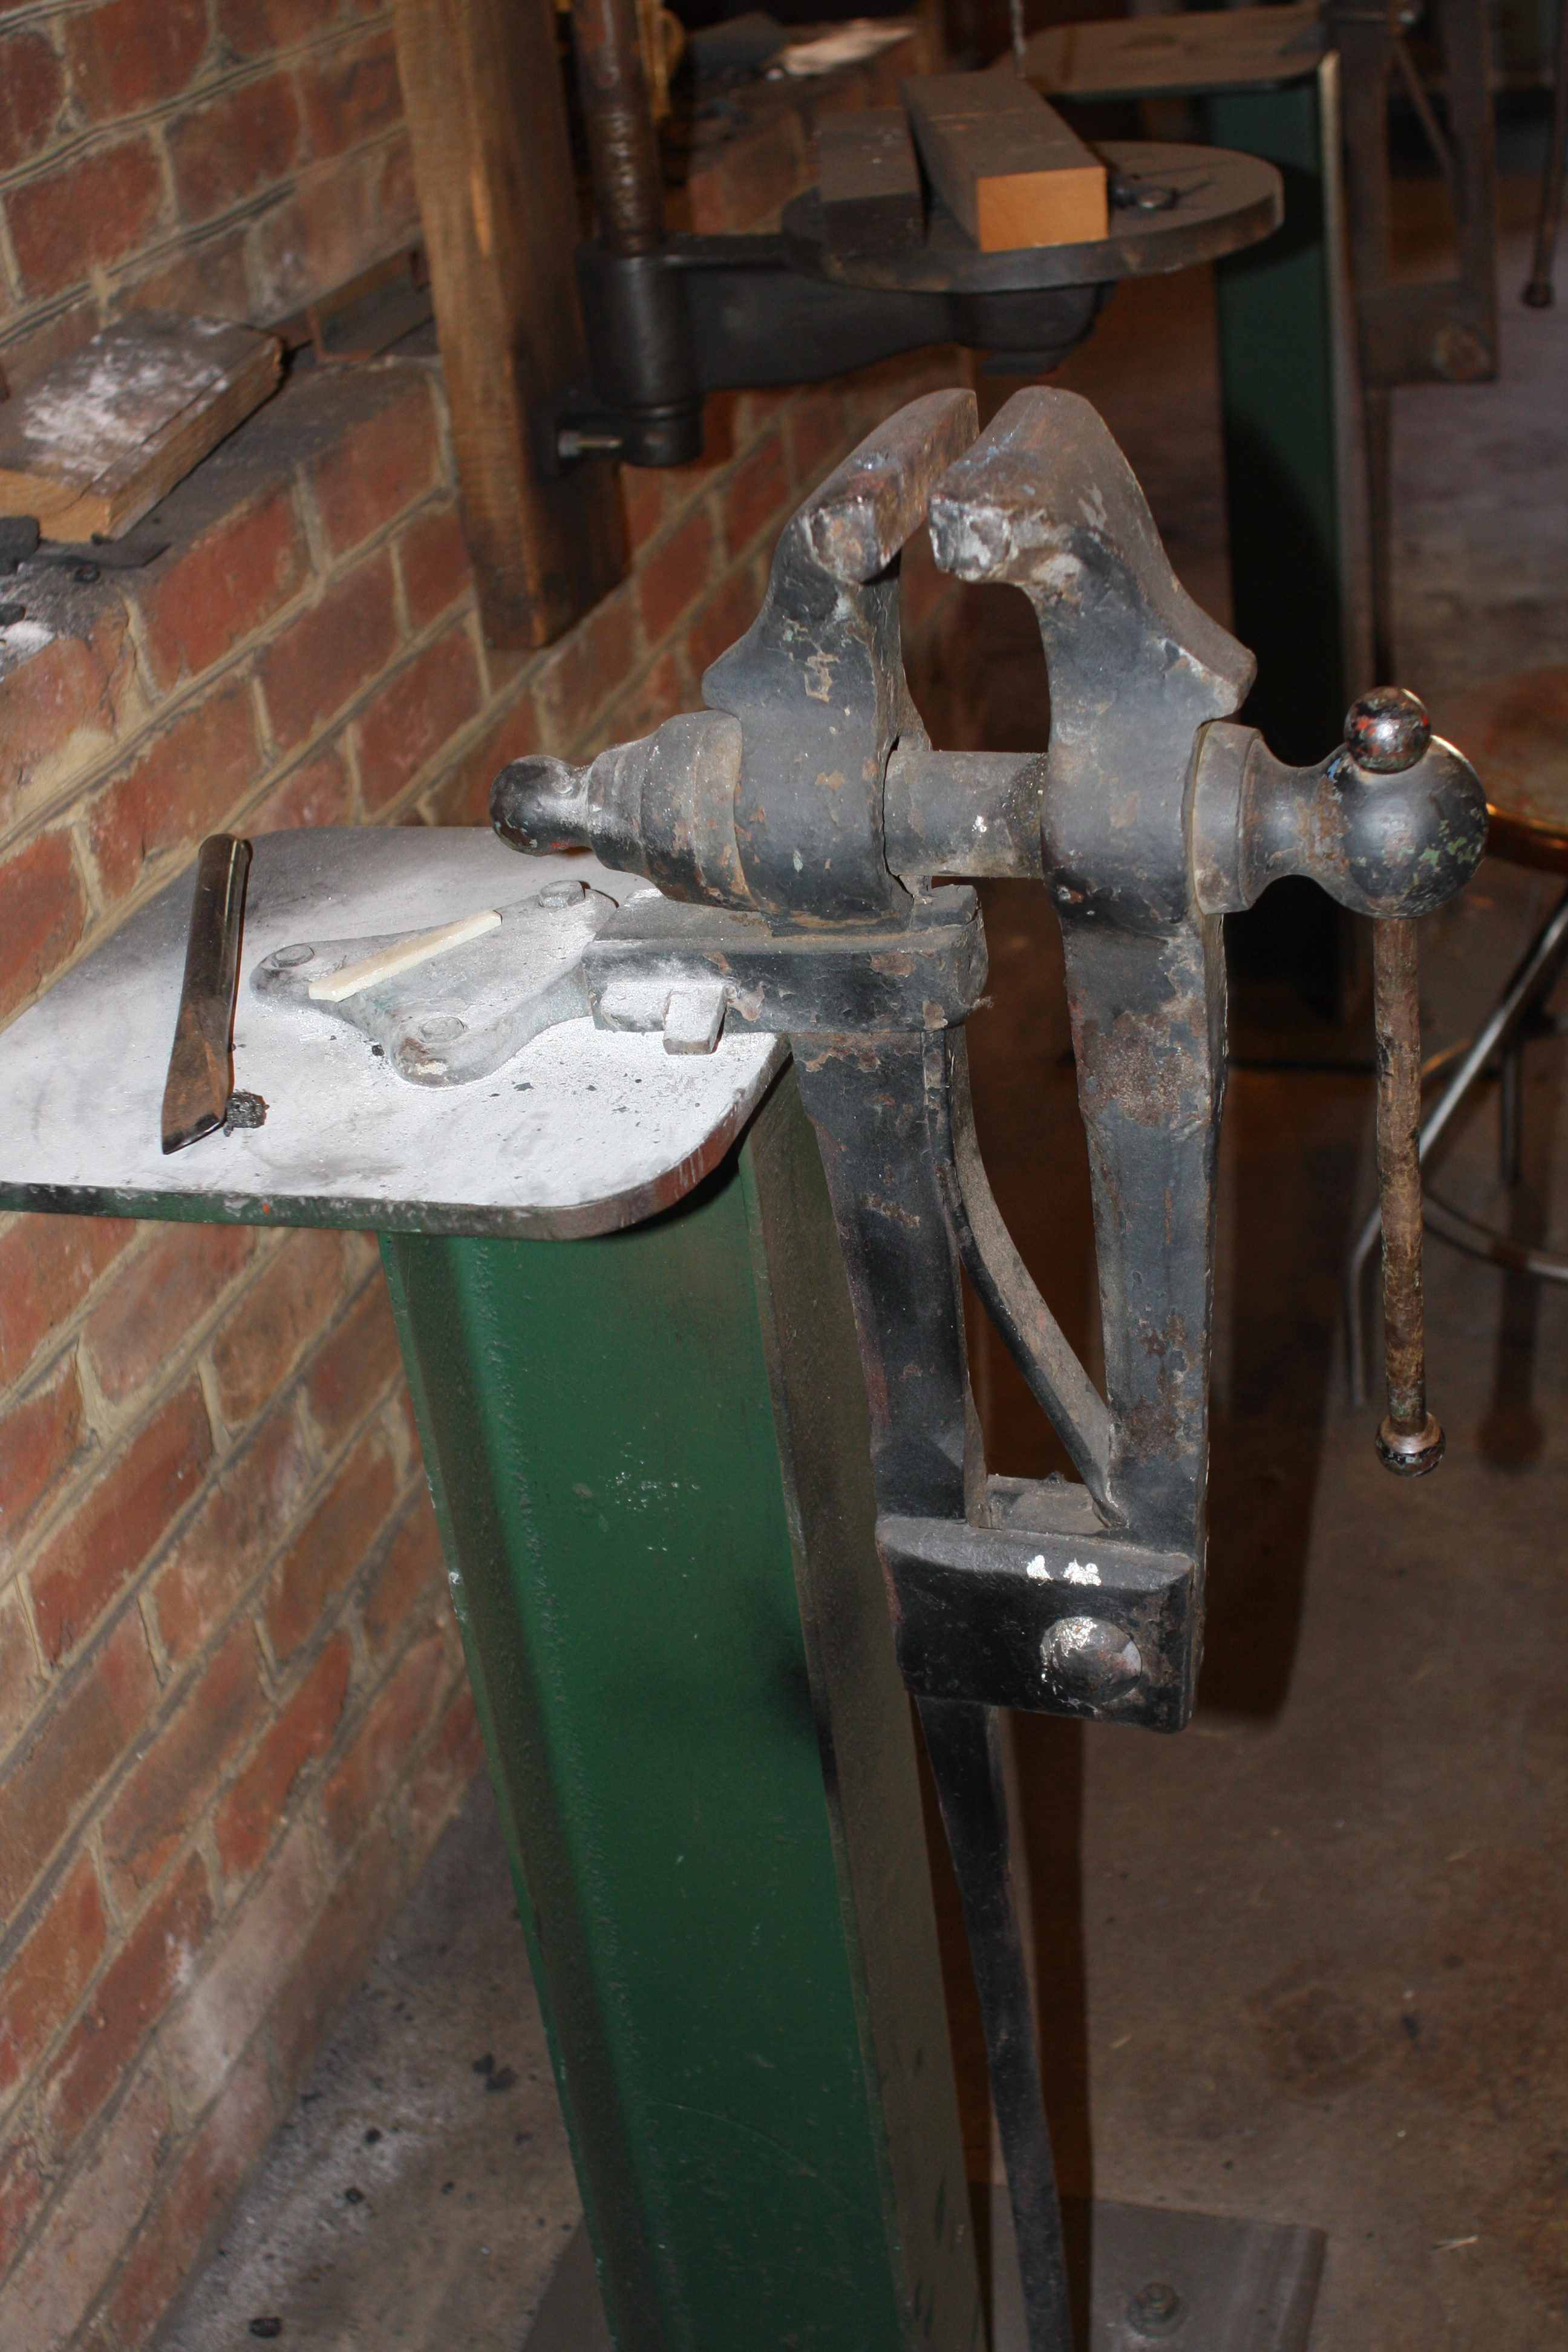
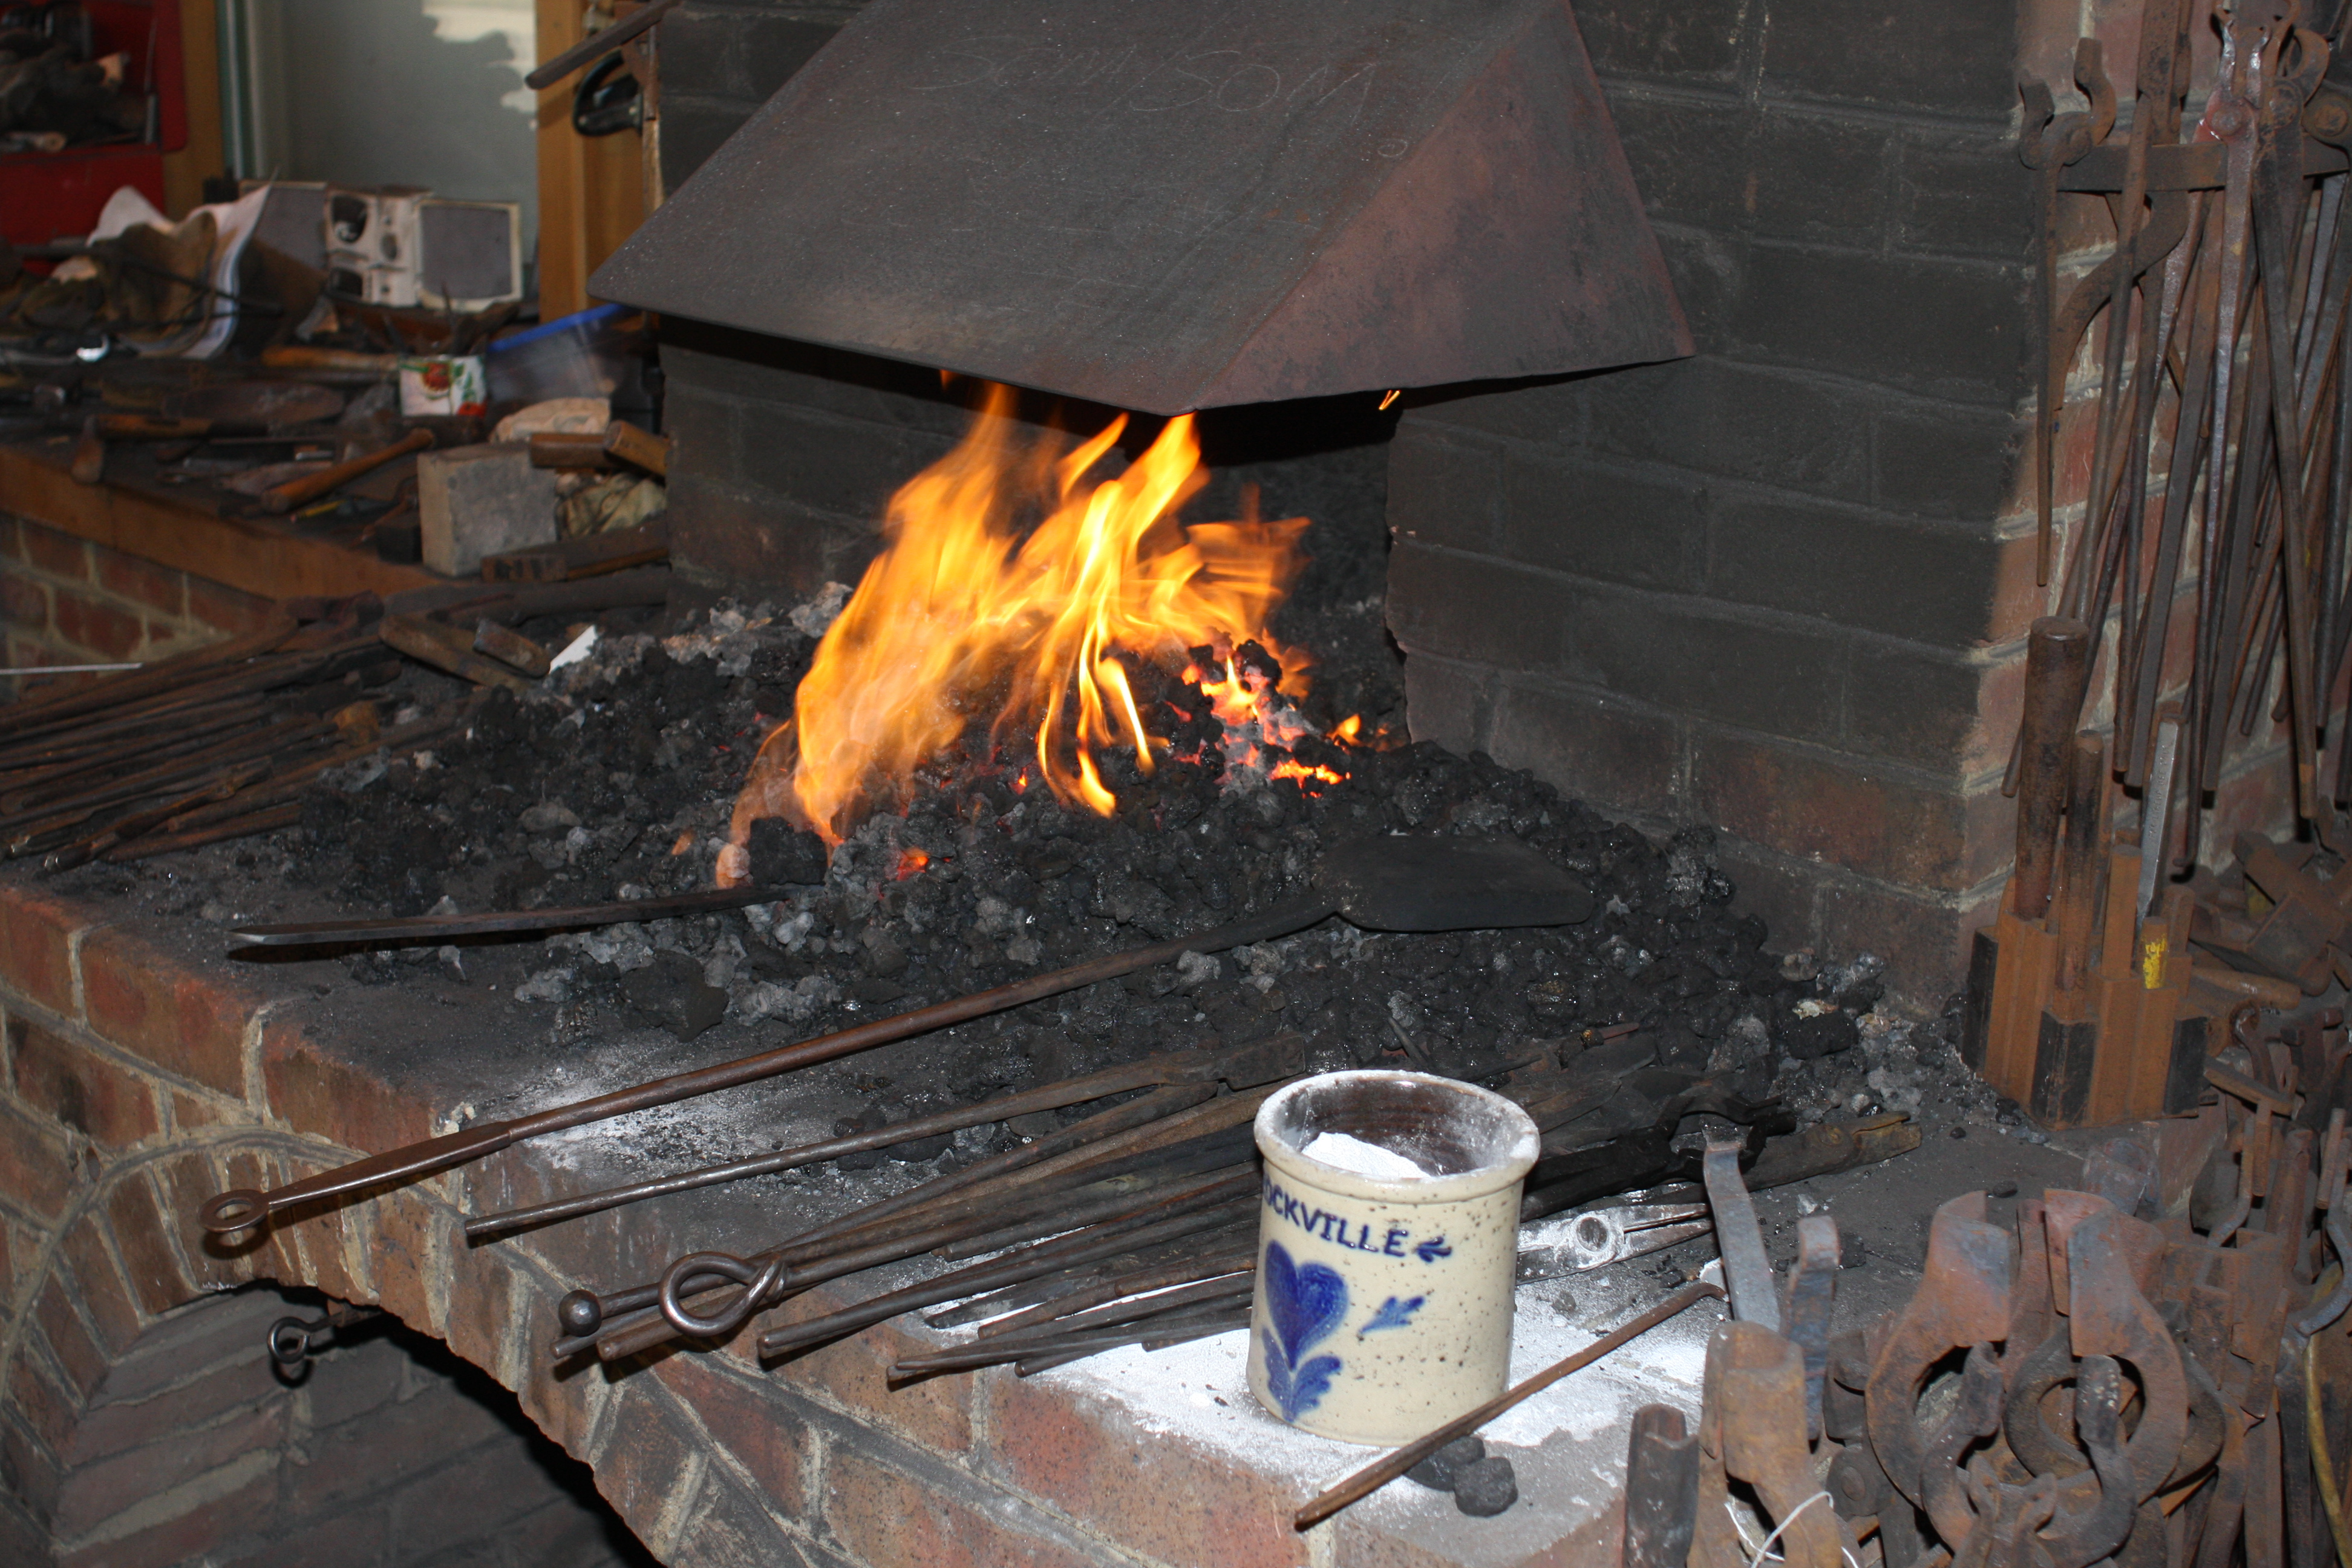
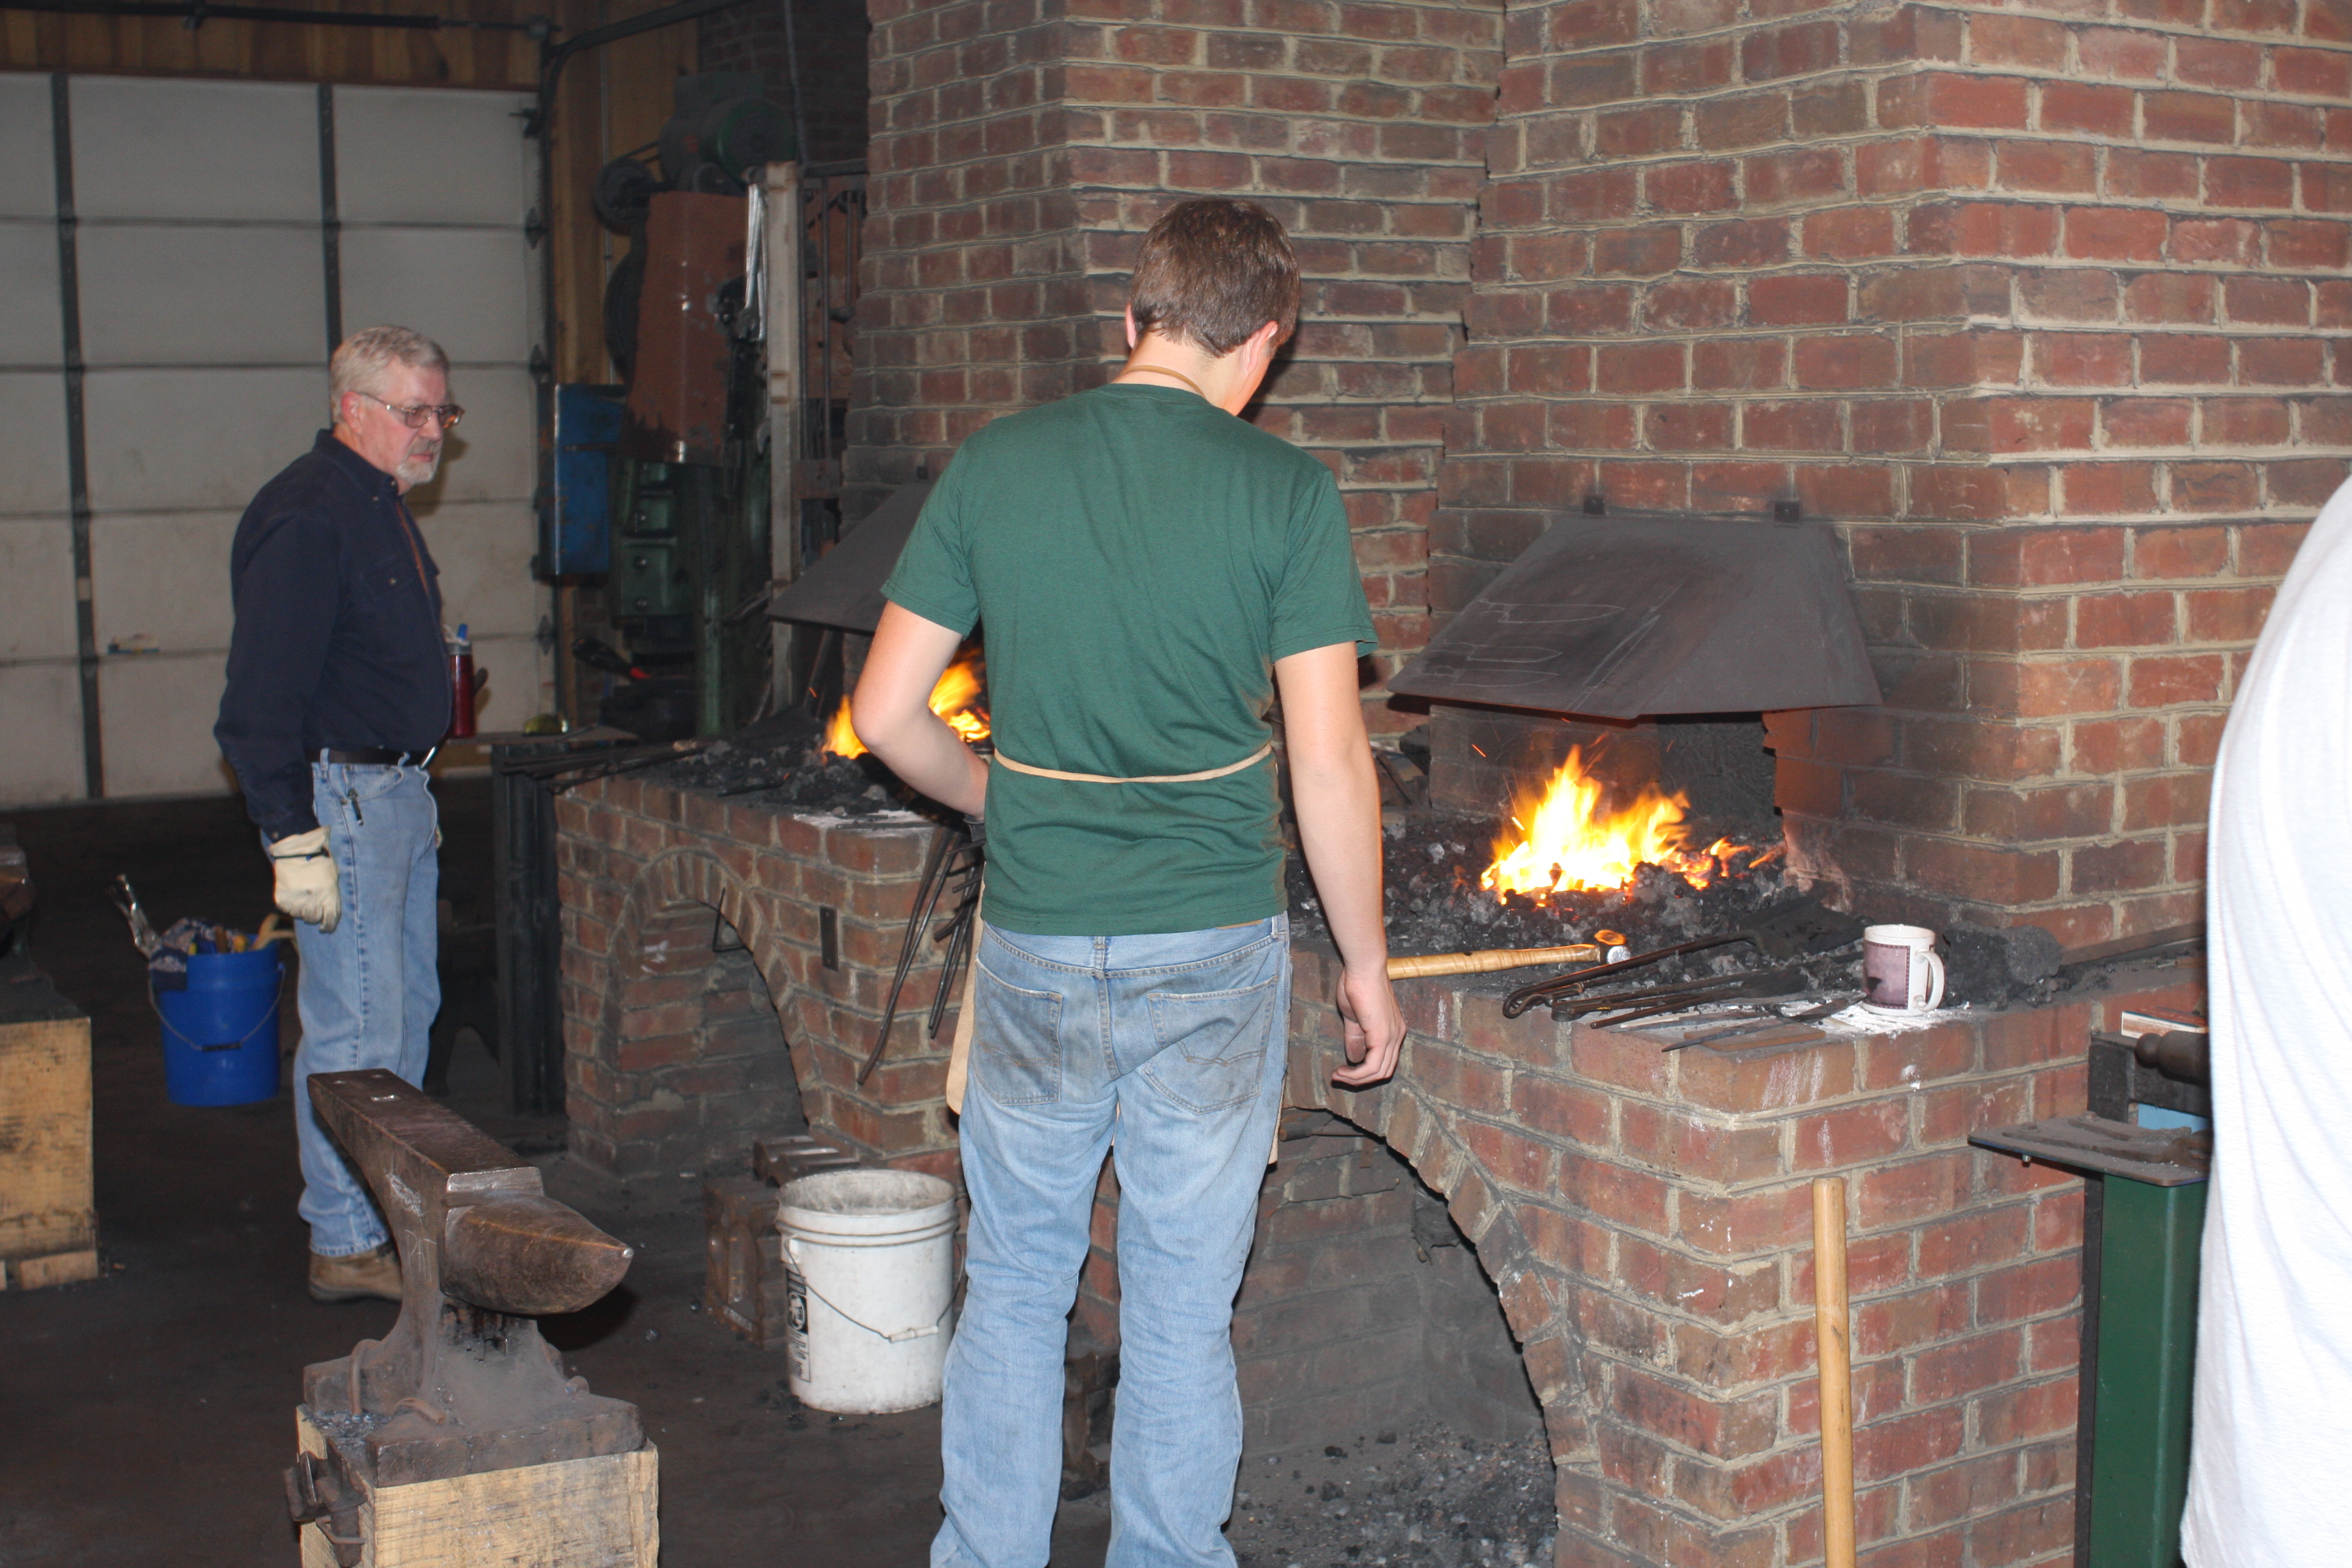
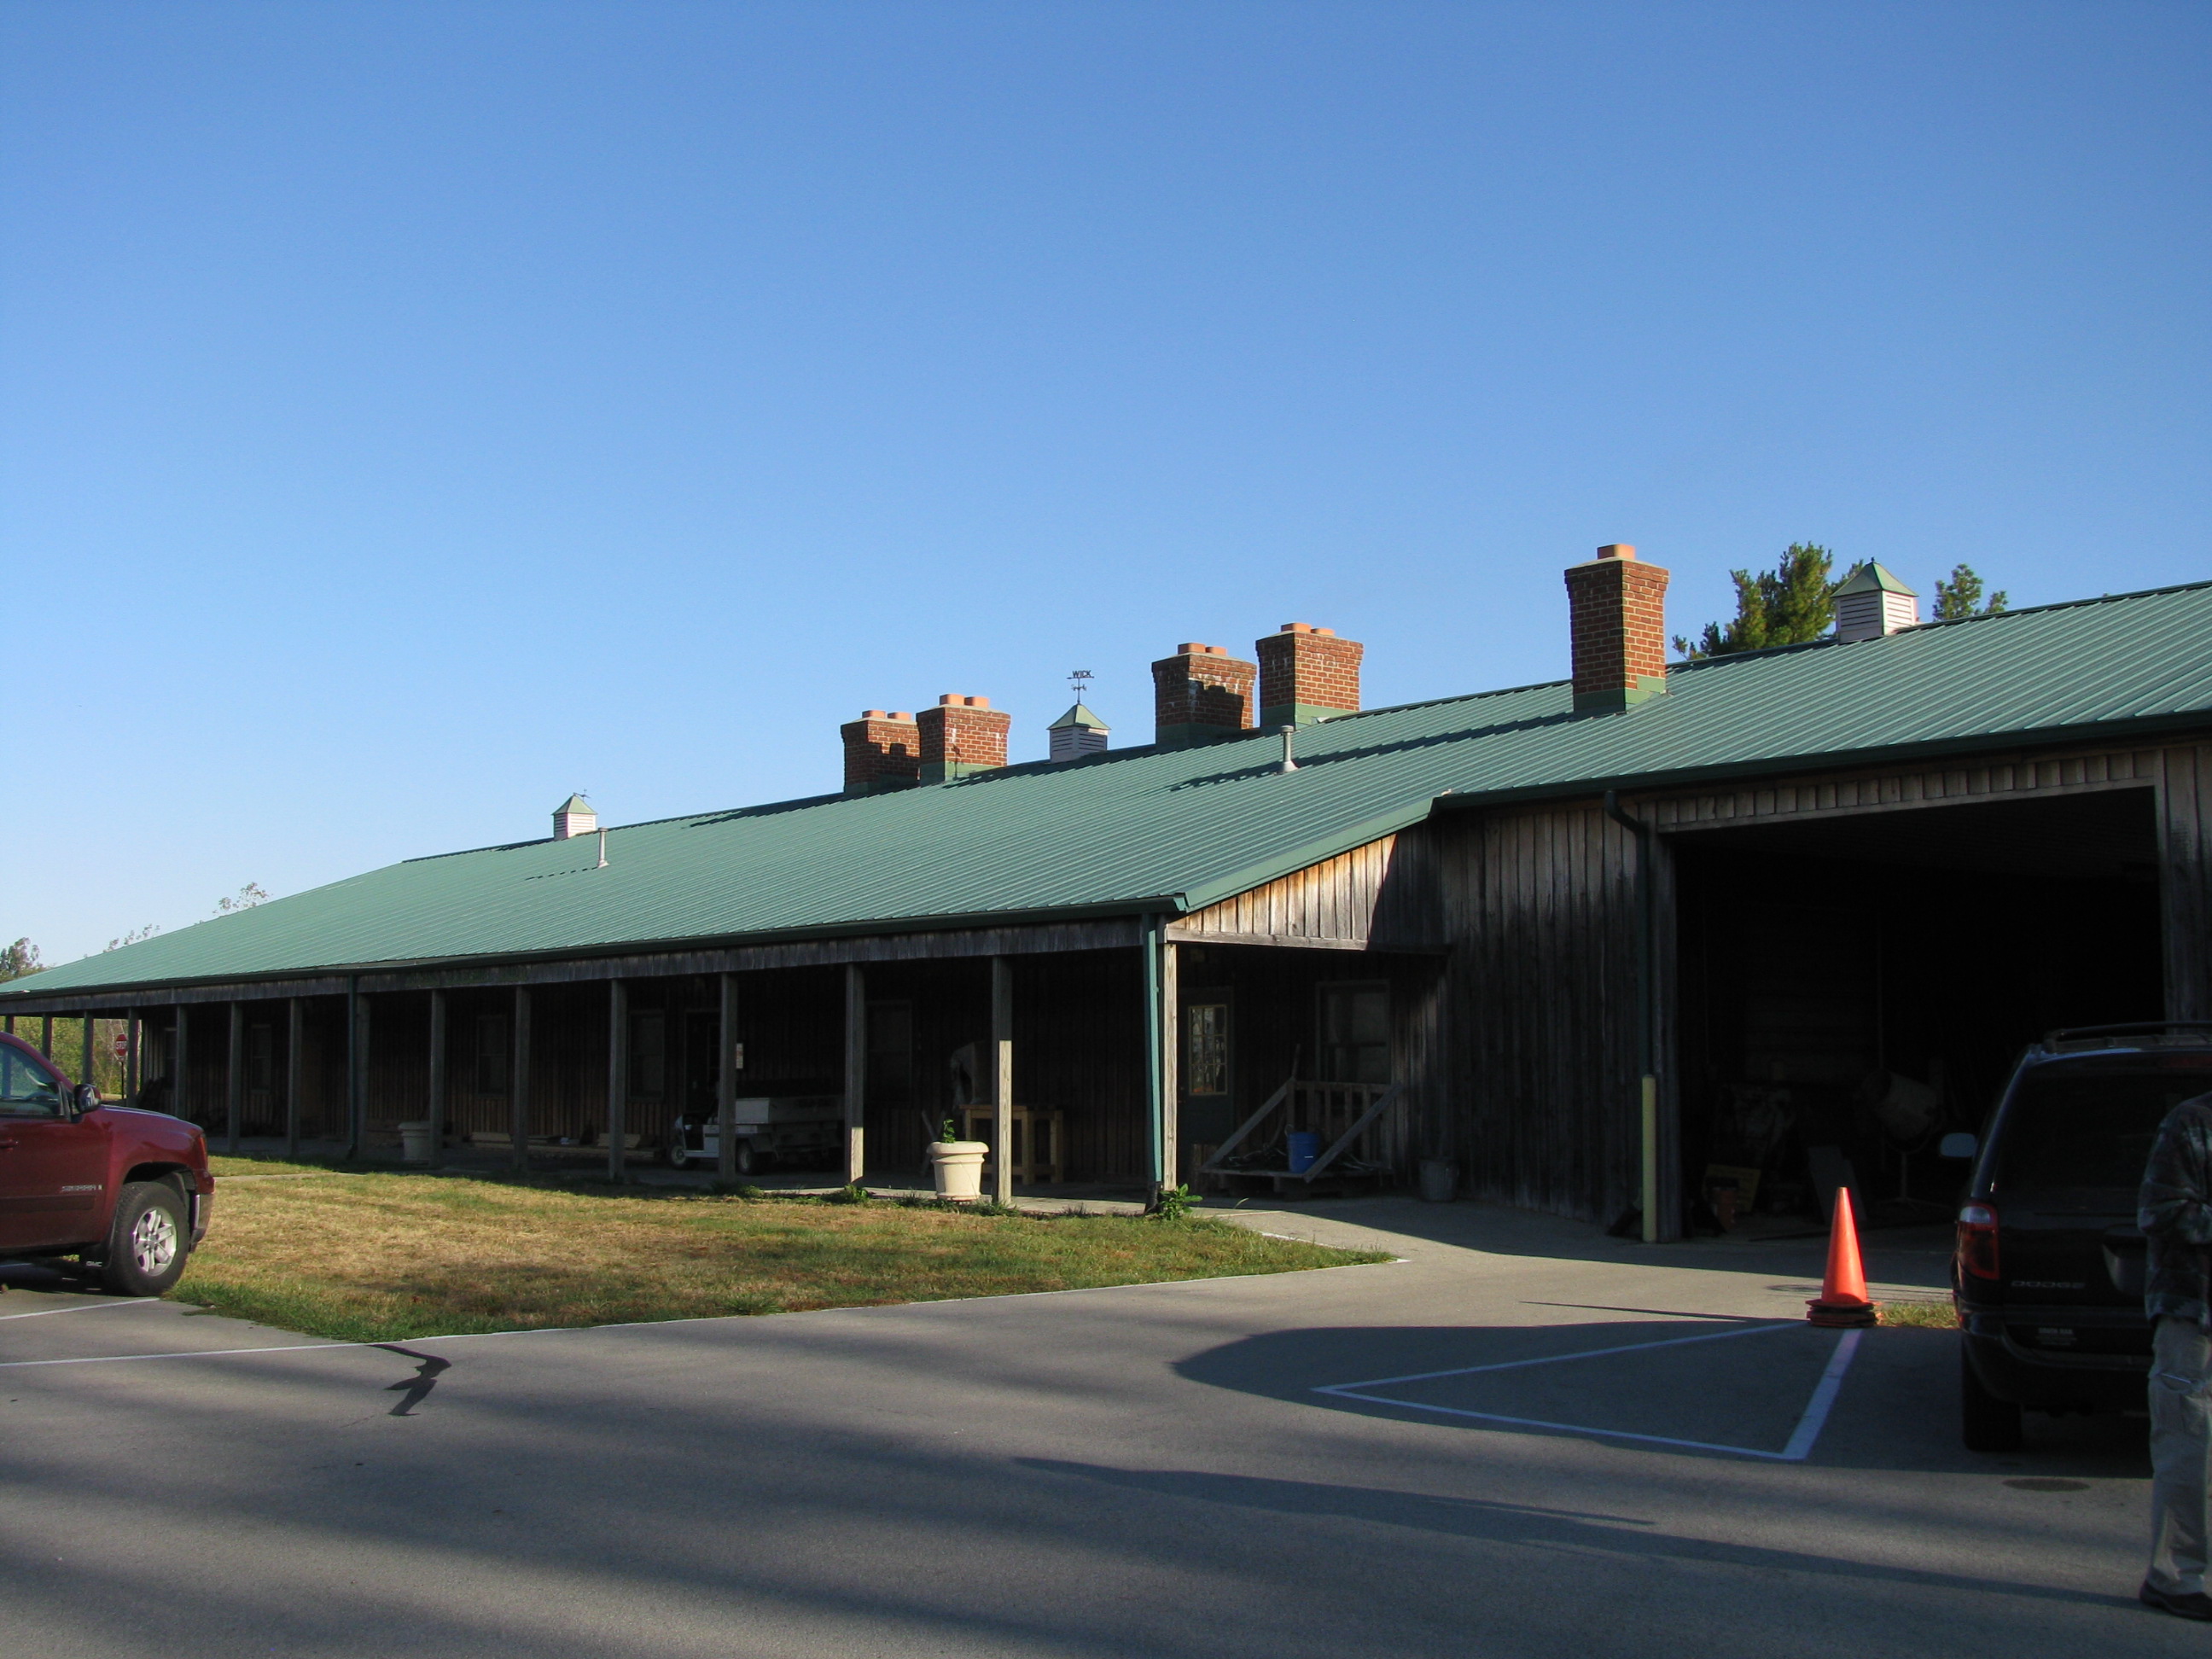
For each visit, the many chimmneys on top of the forge building are the first clue to the type of instruction found inside. The room houses 10 forges, and most were being used. If there is a better place to teach forging, I’m not aware of it.
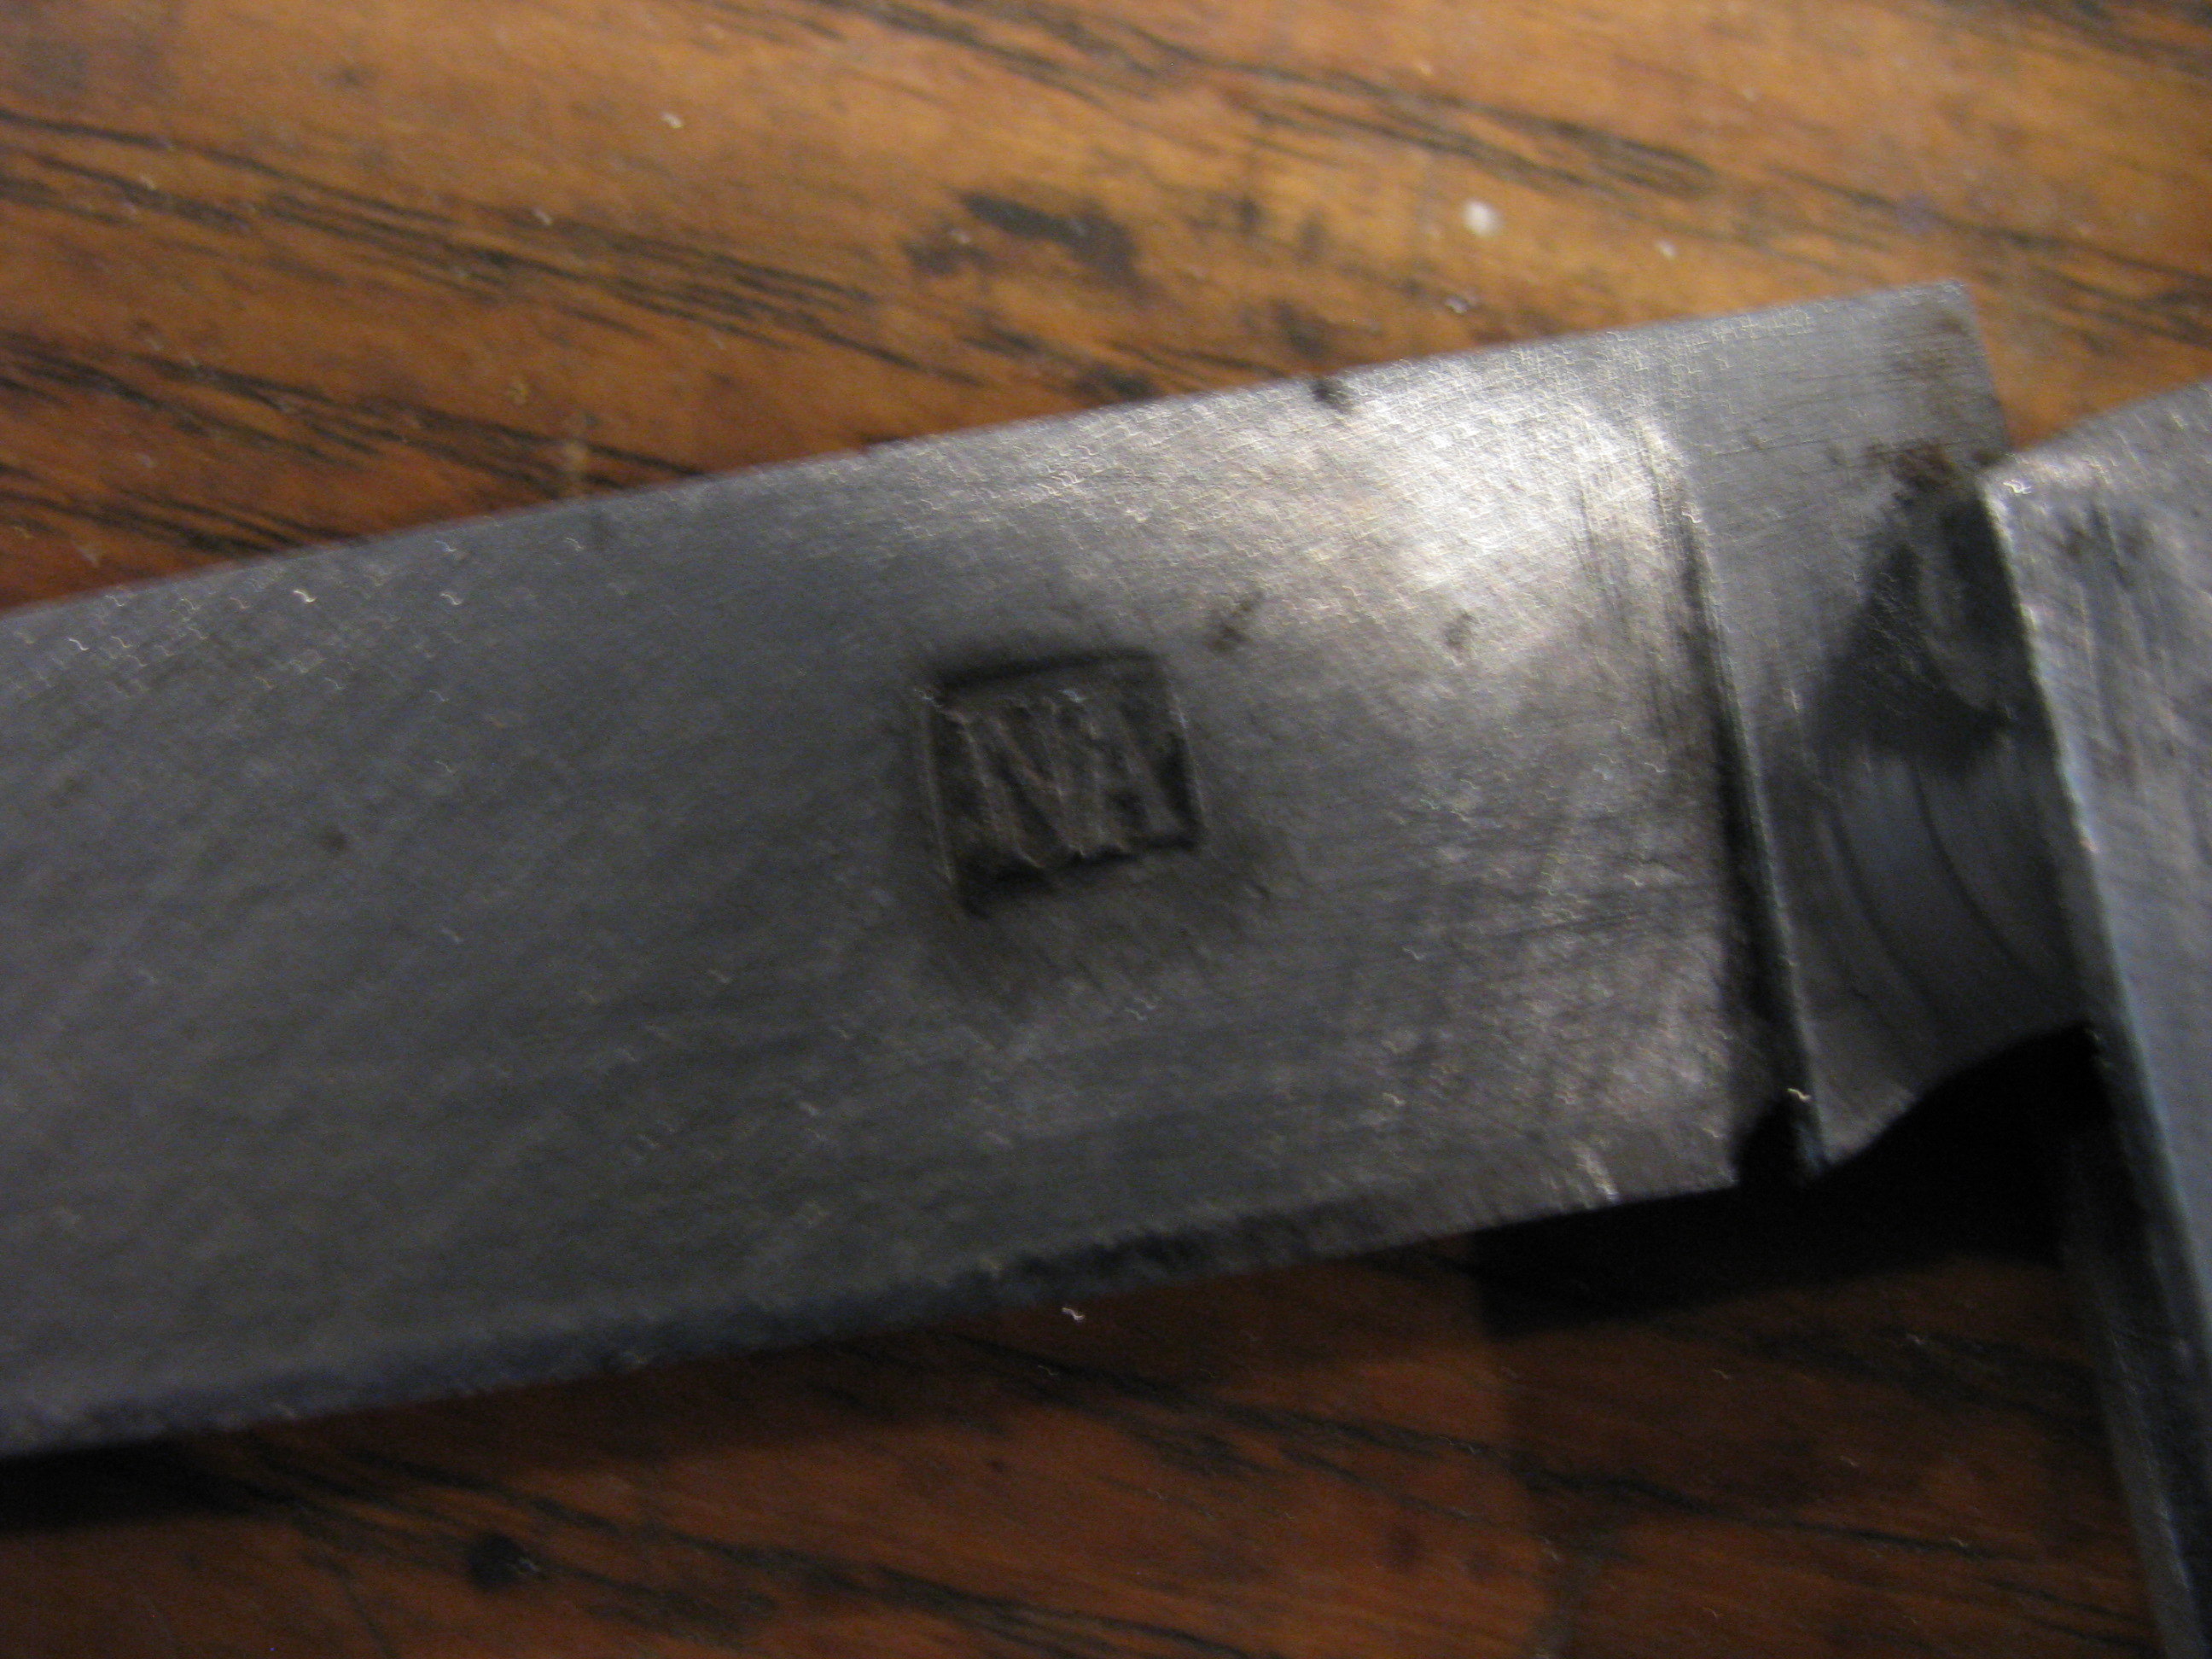
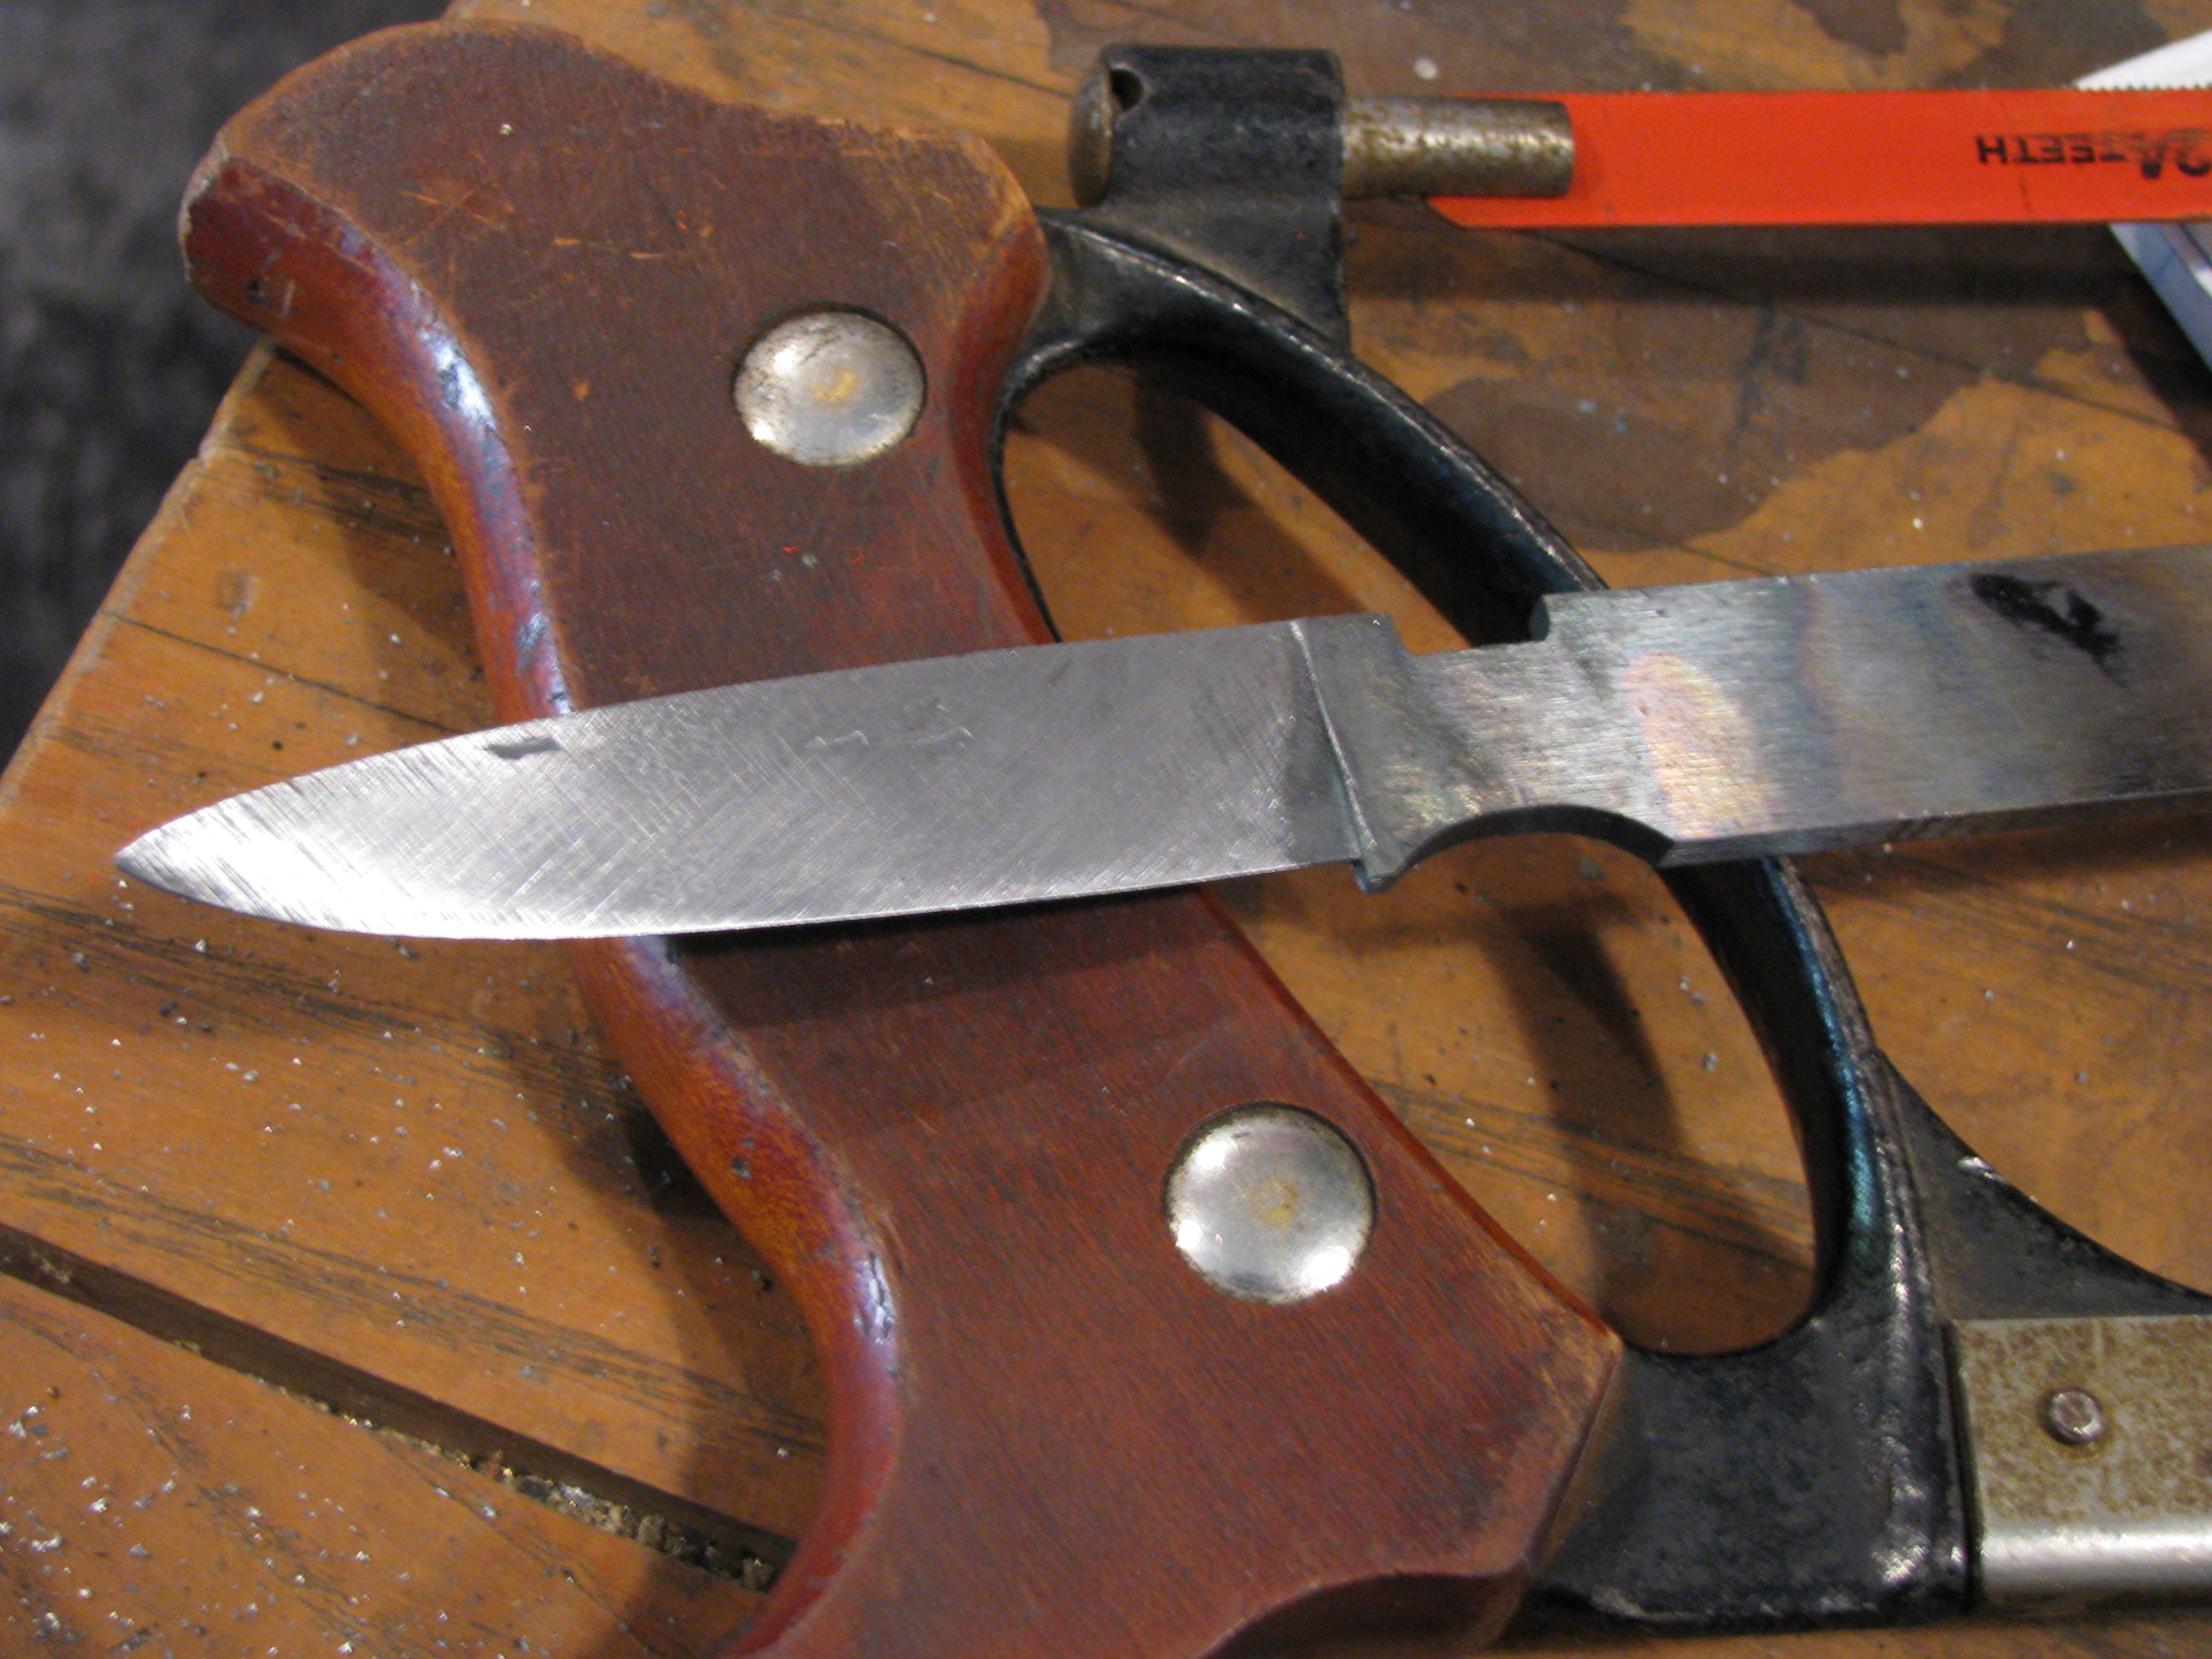
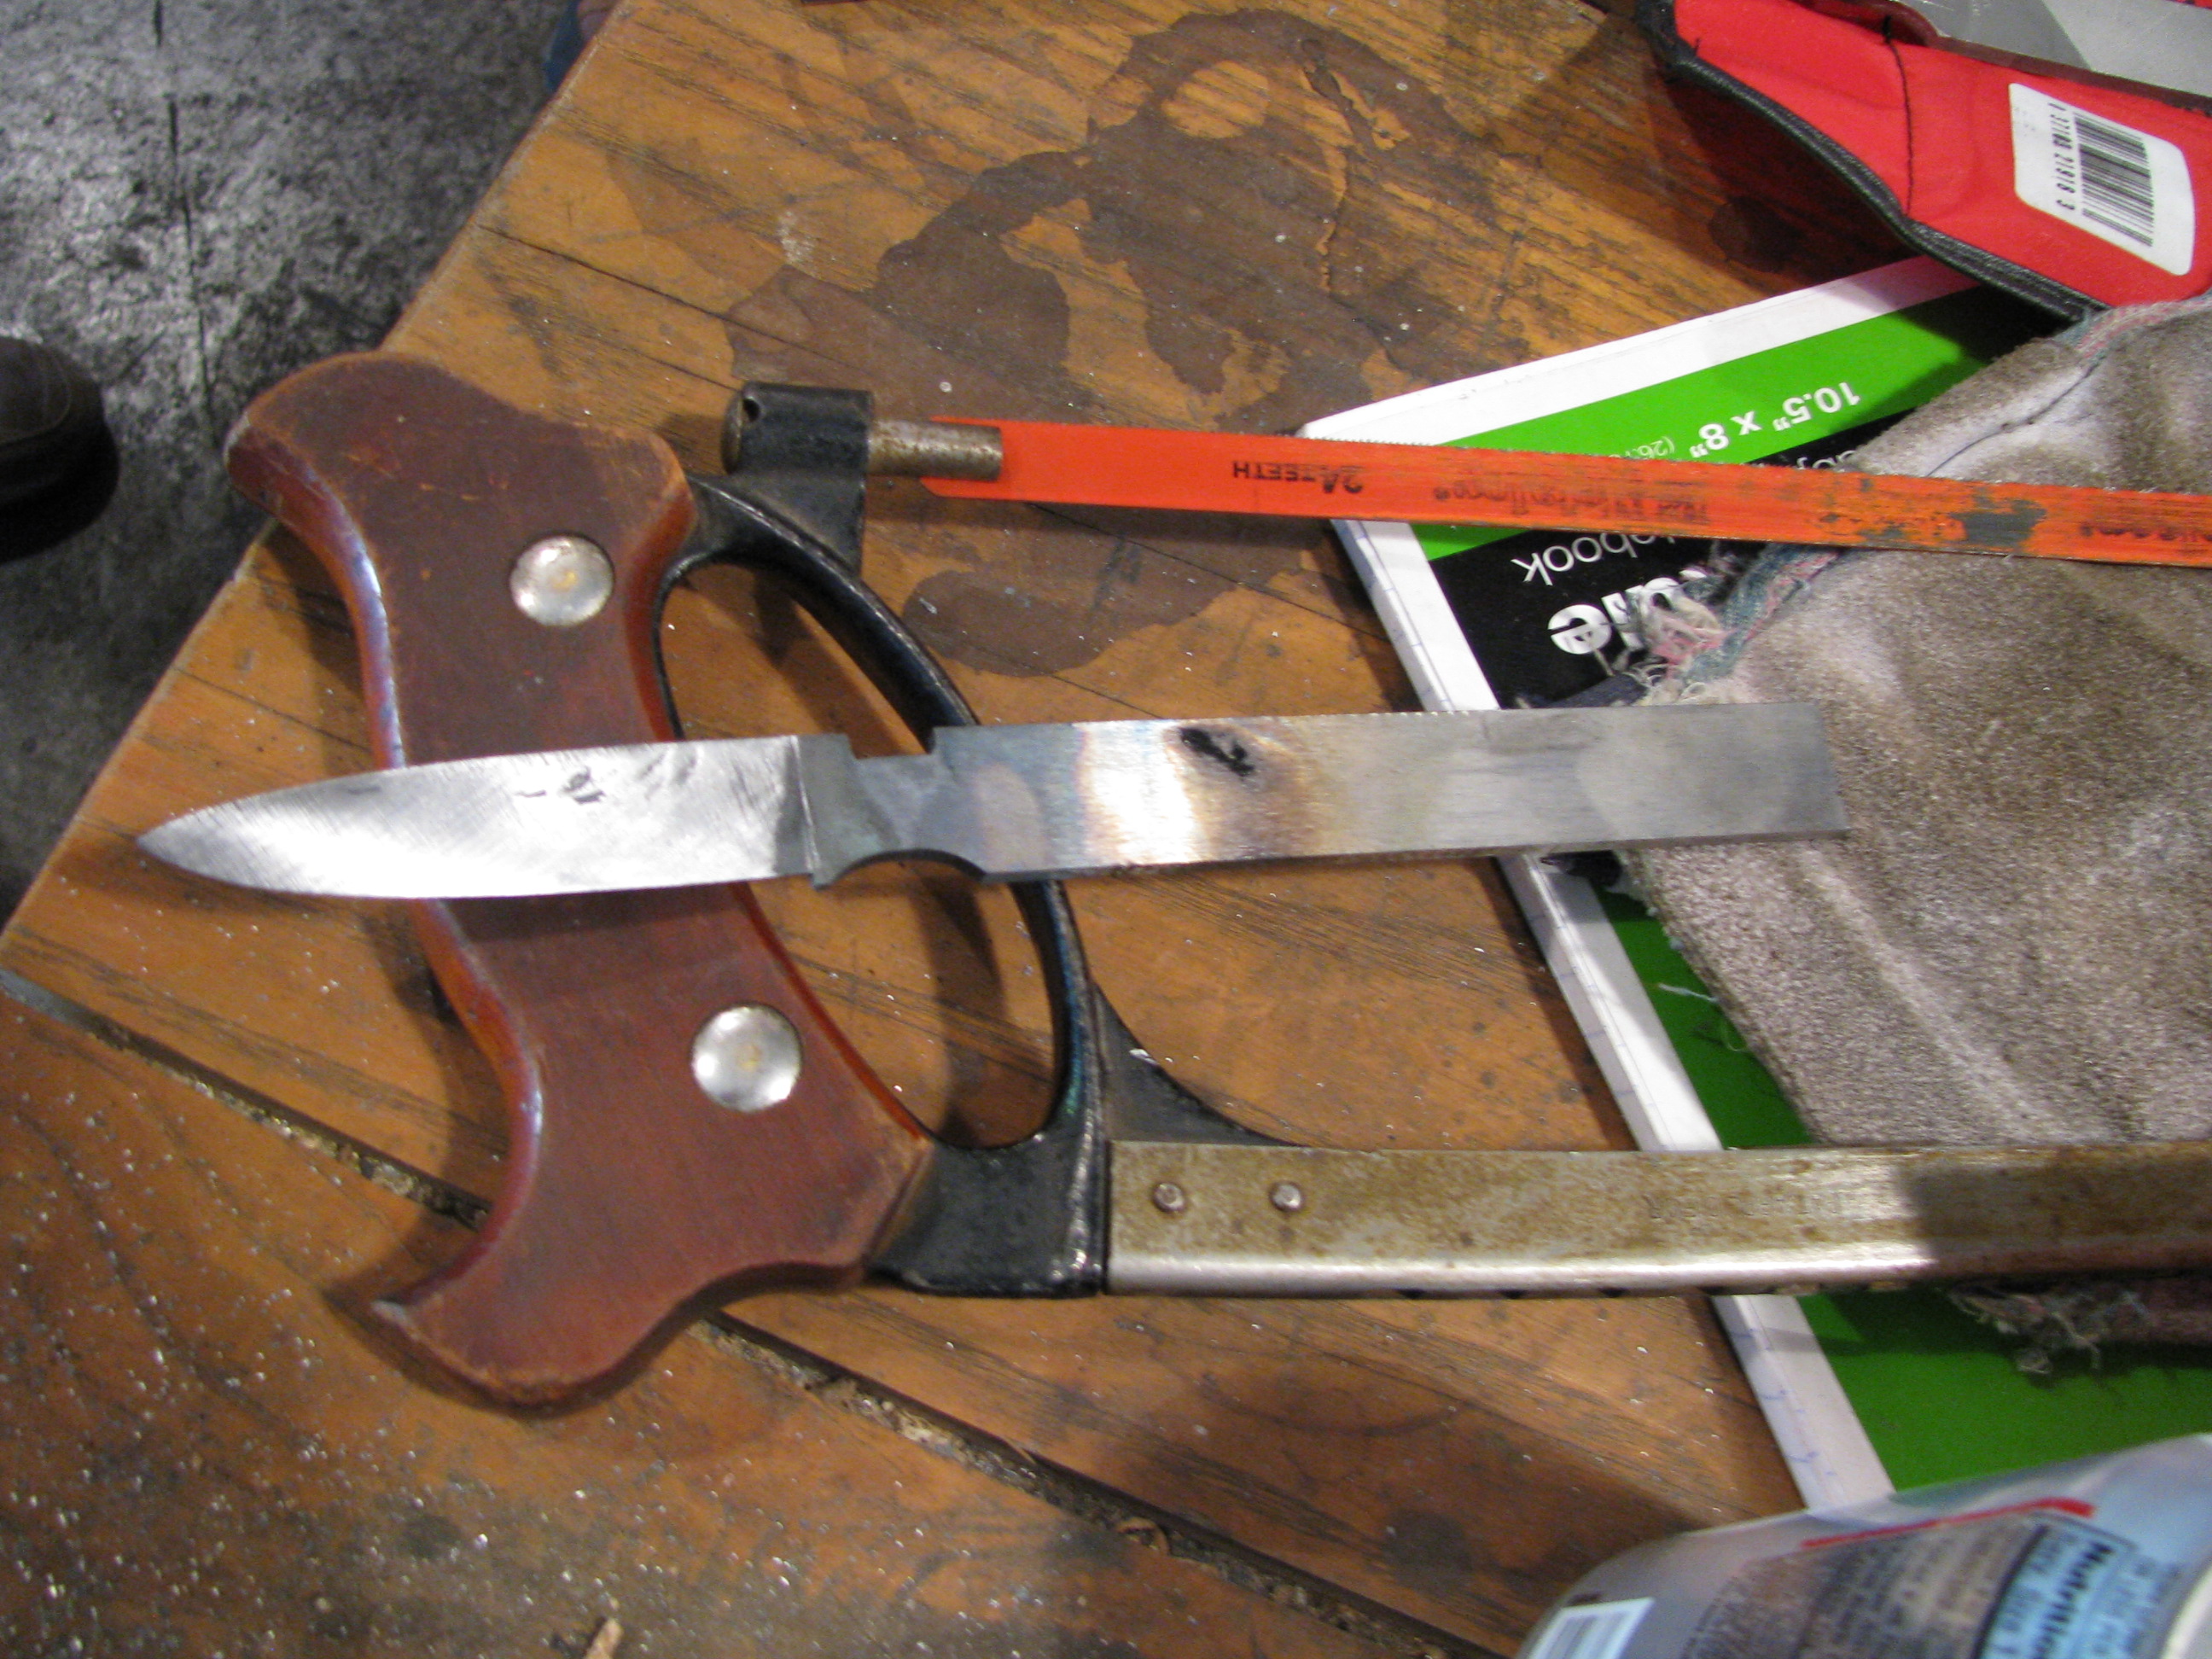
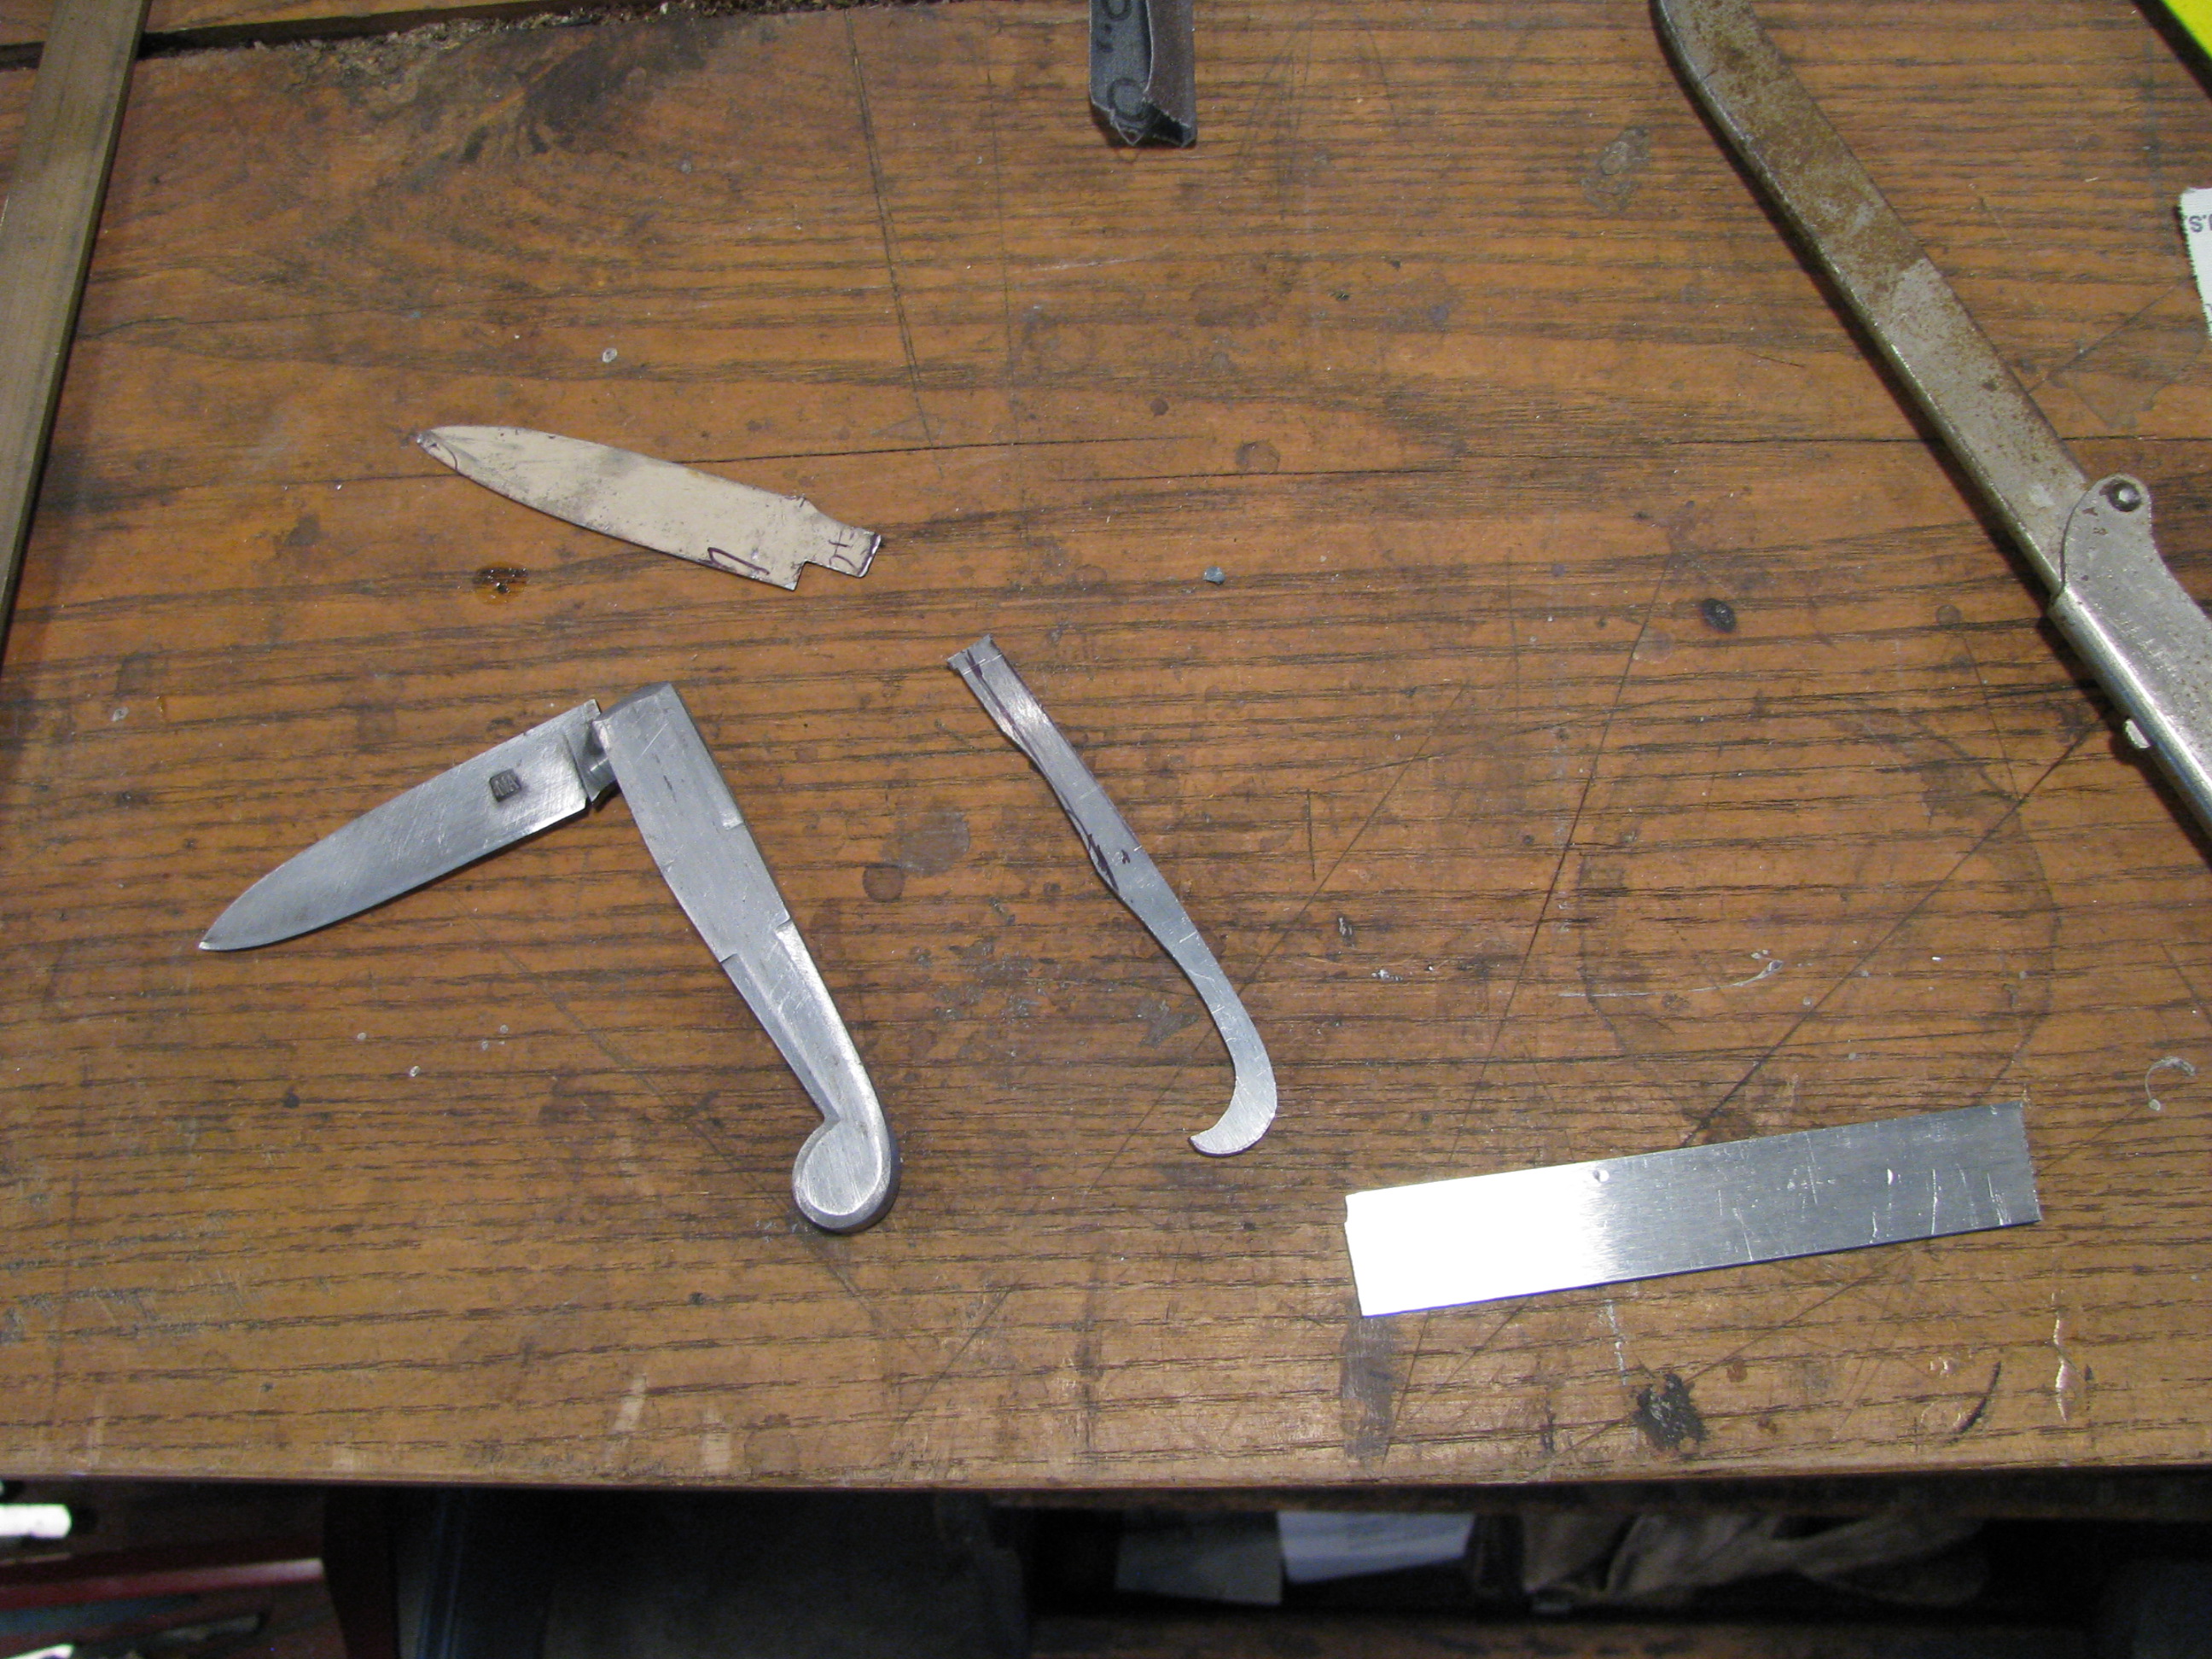
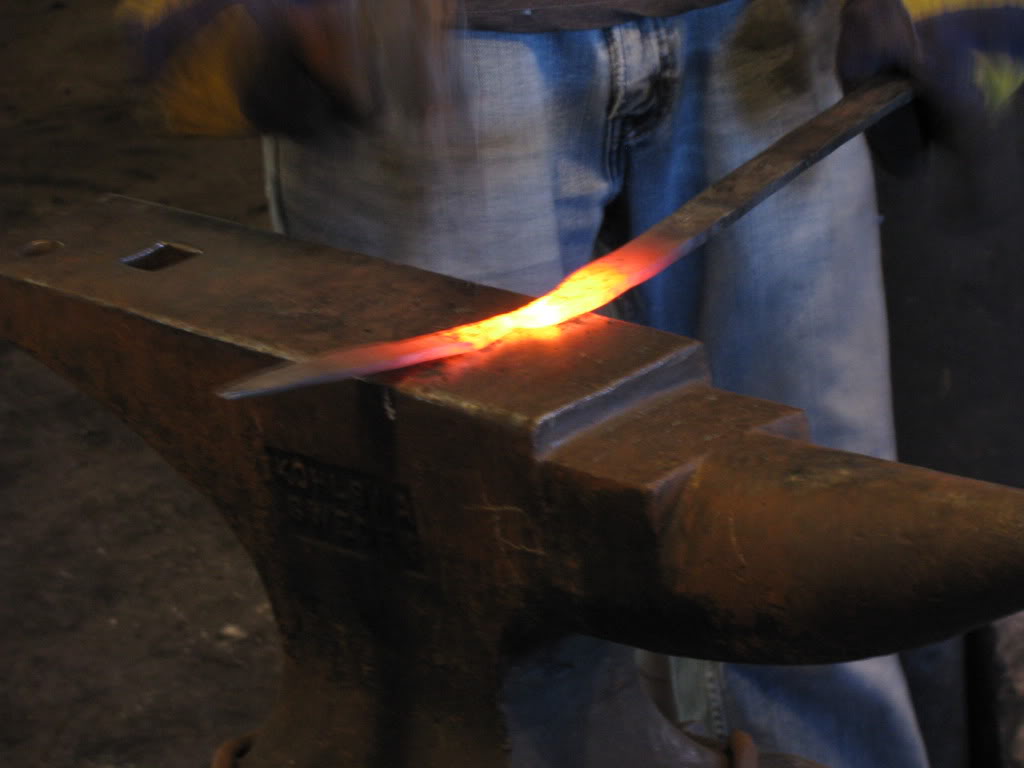
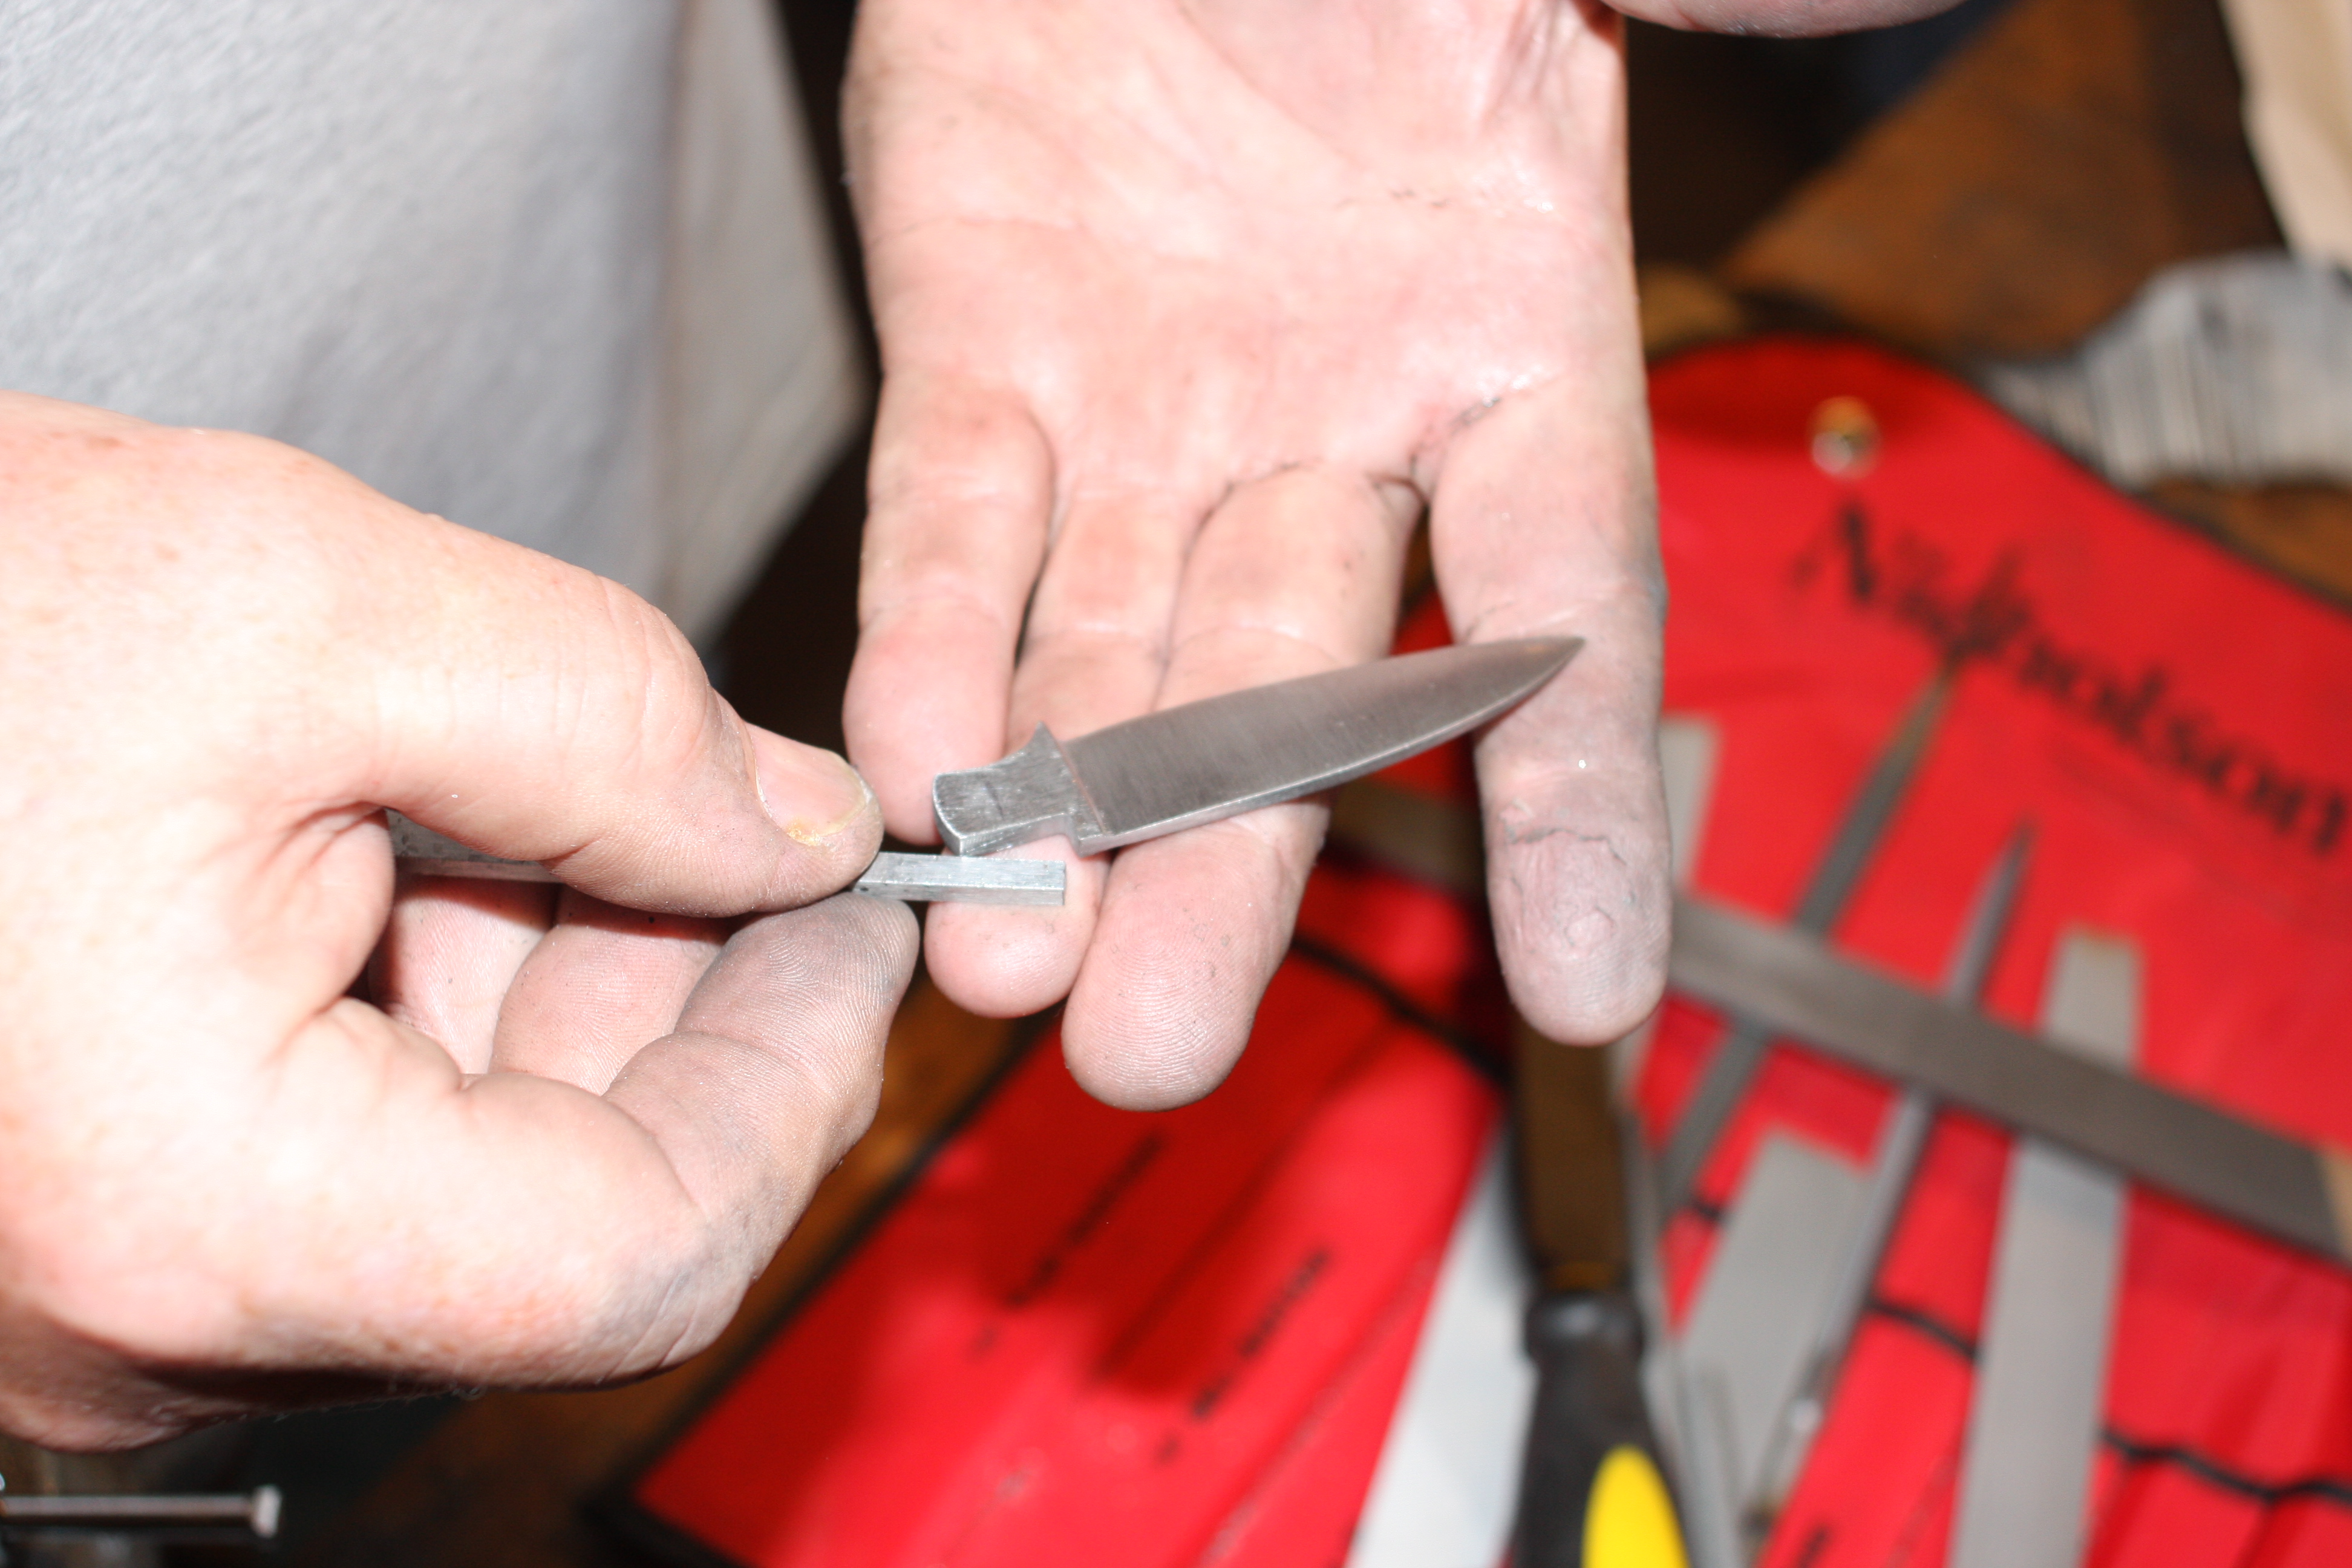
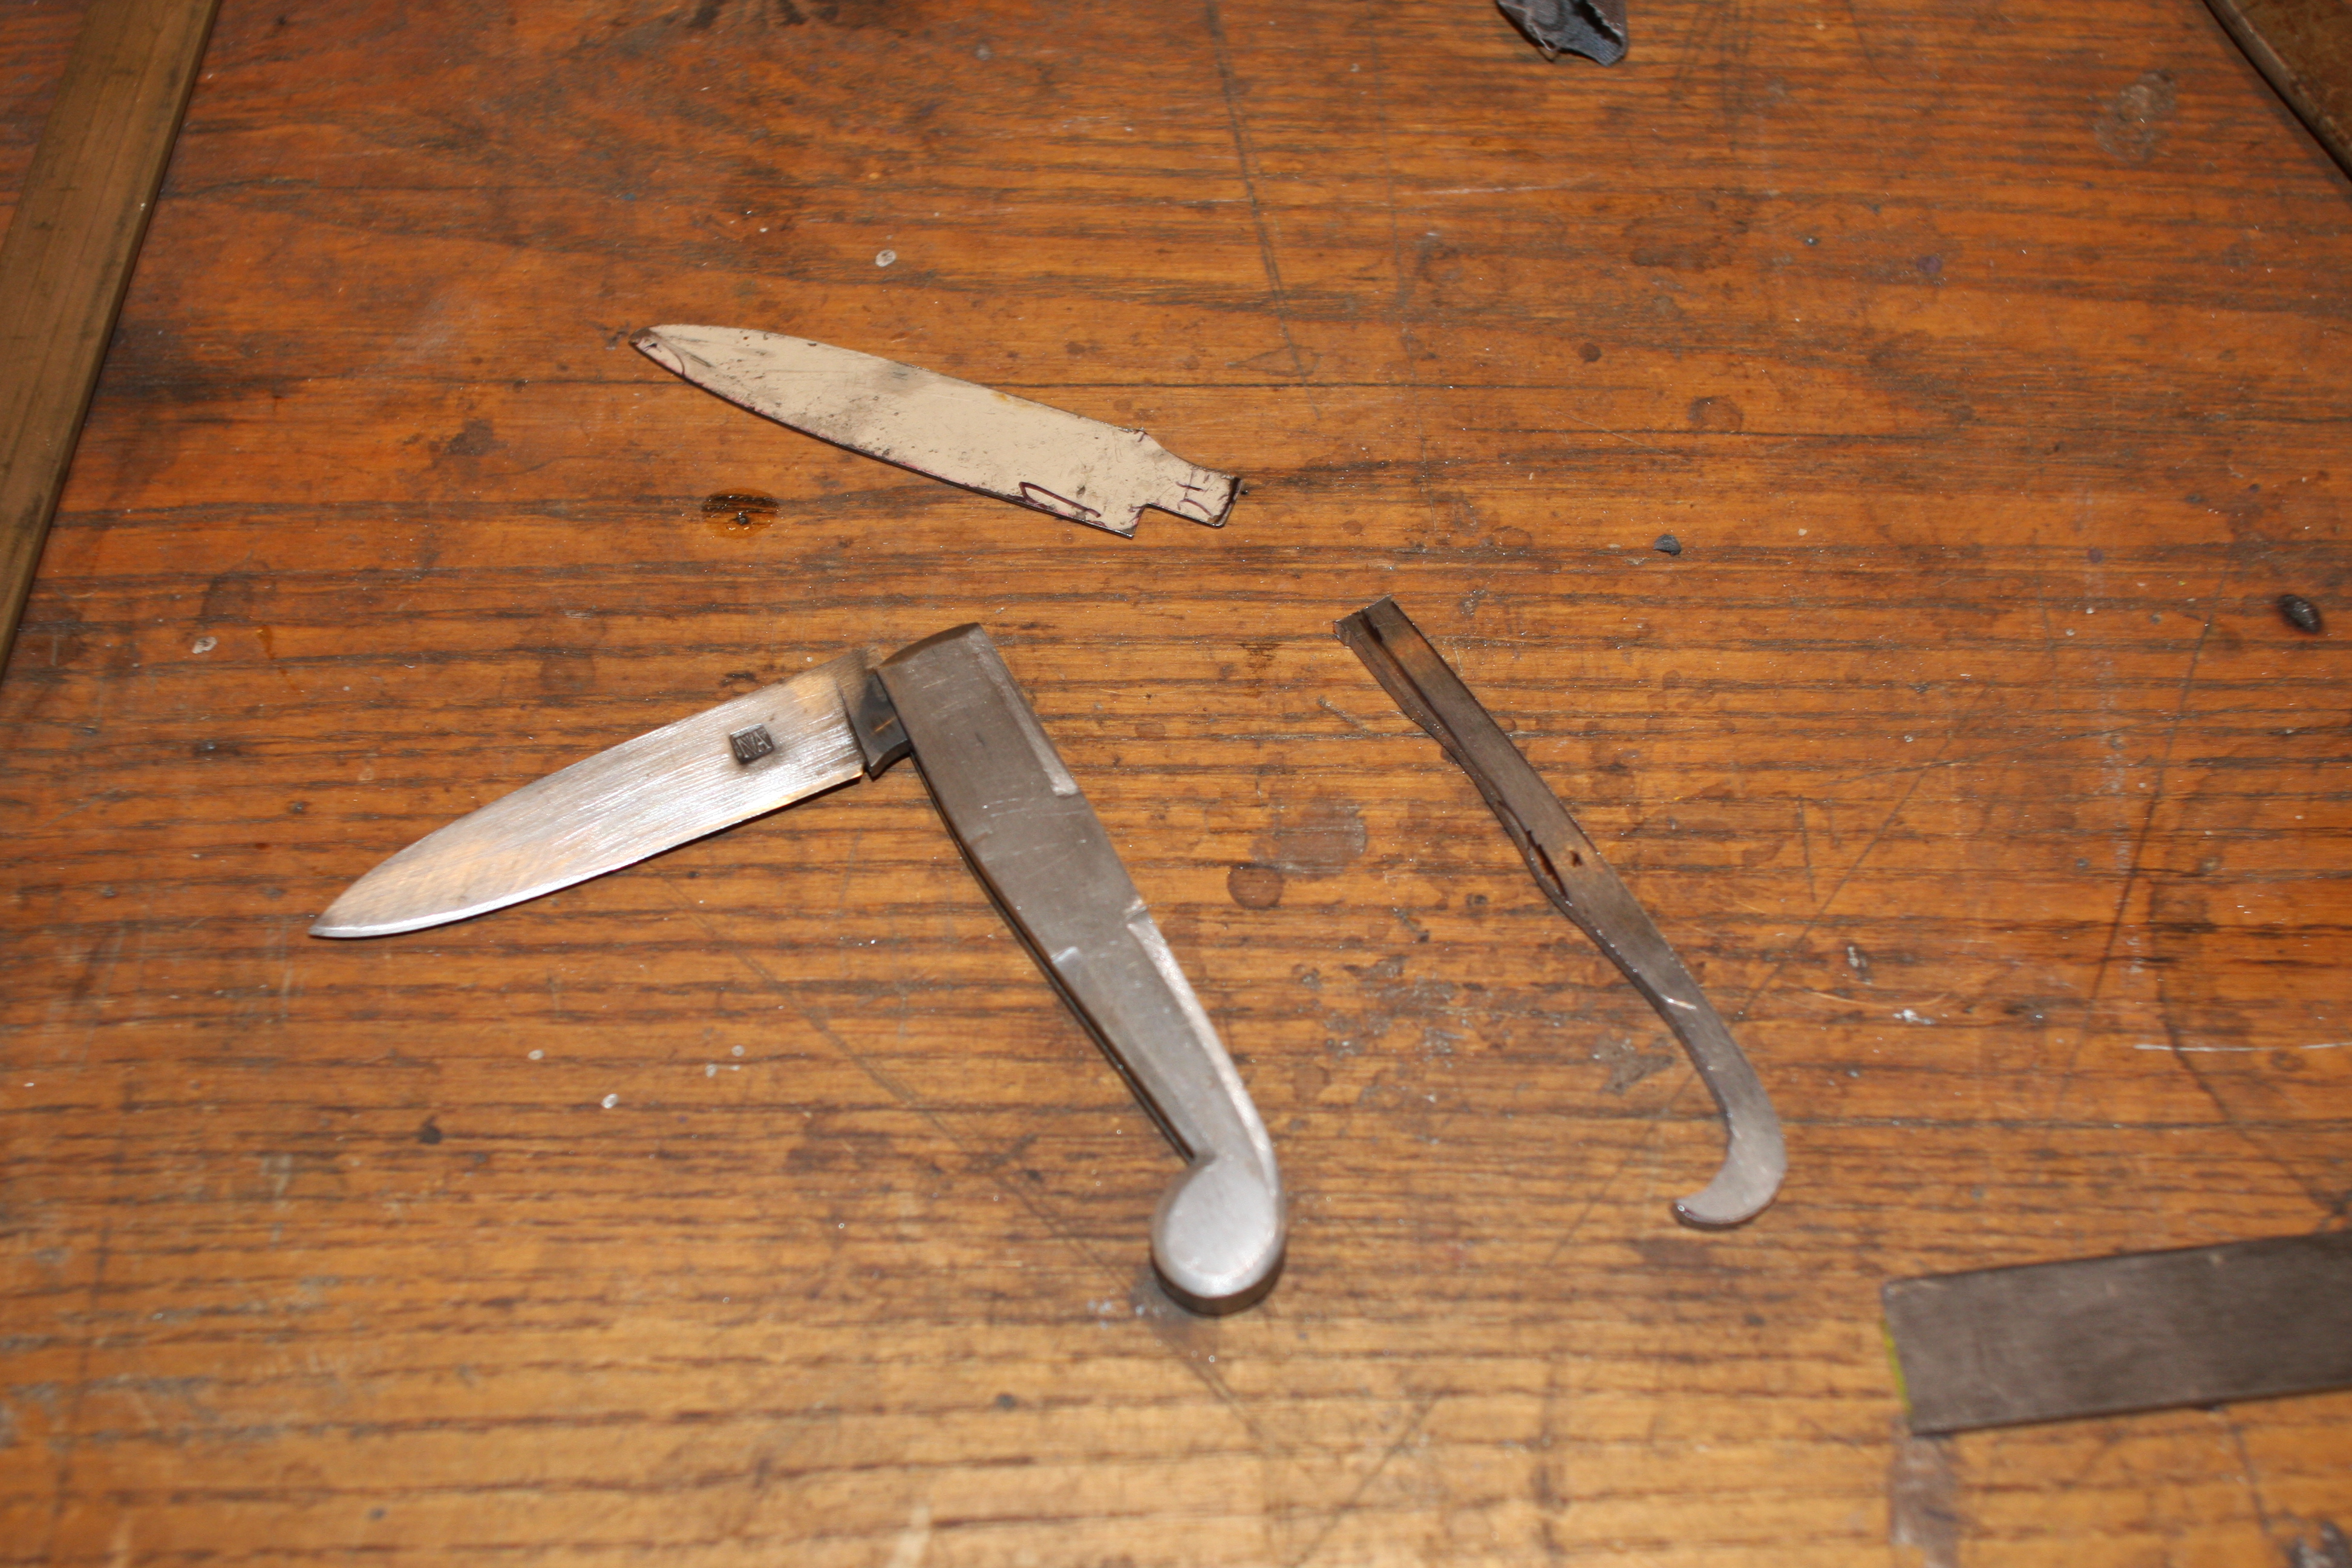
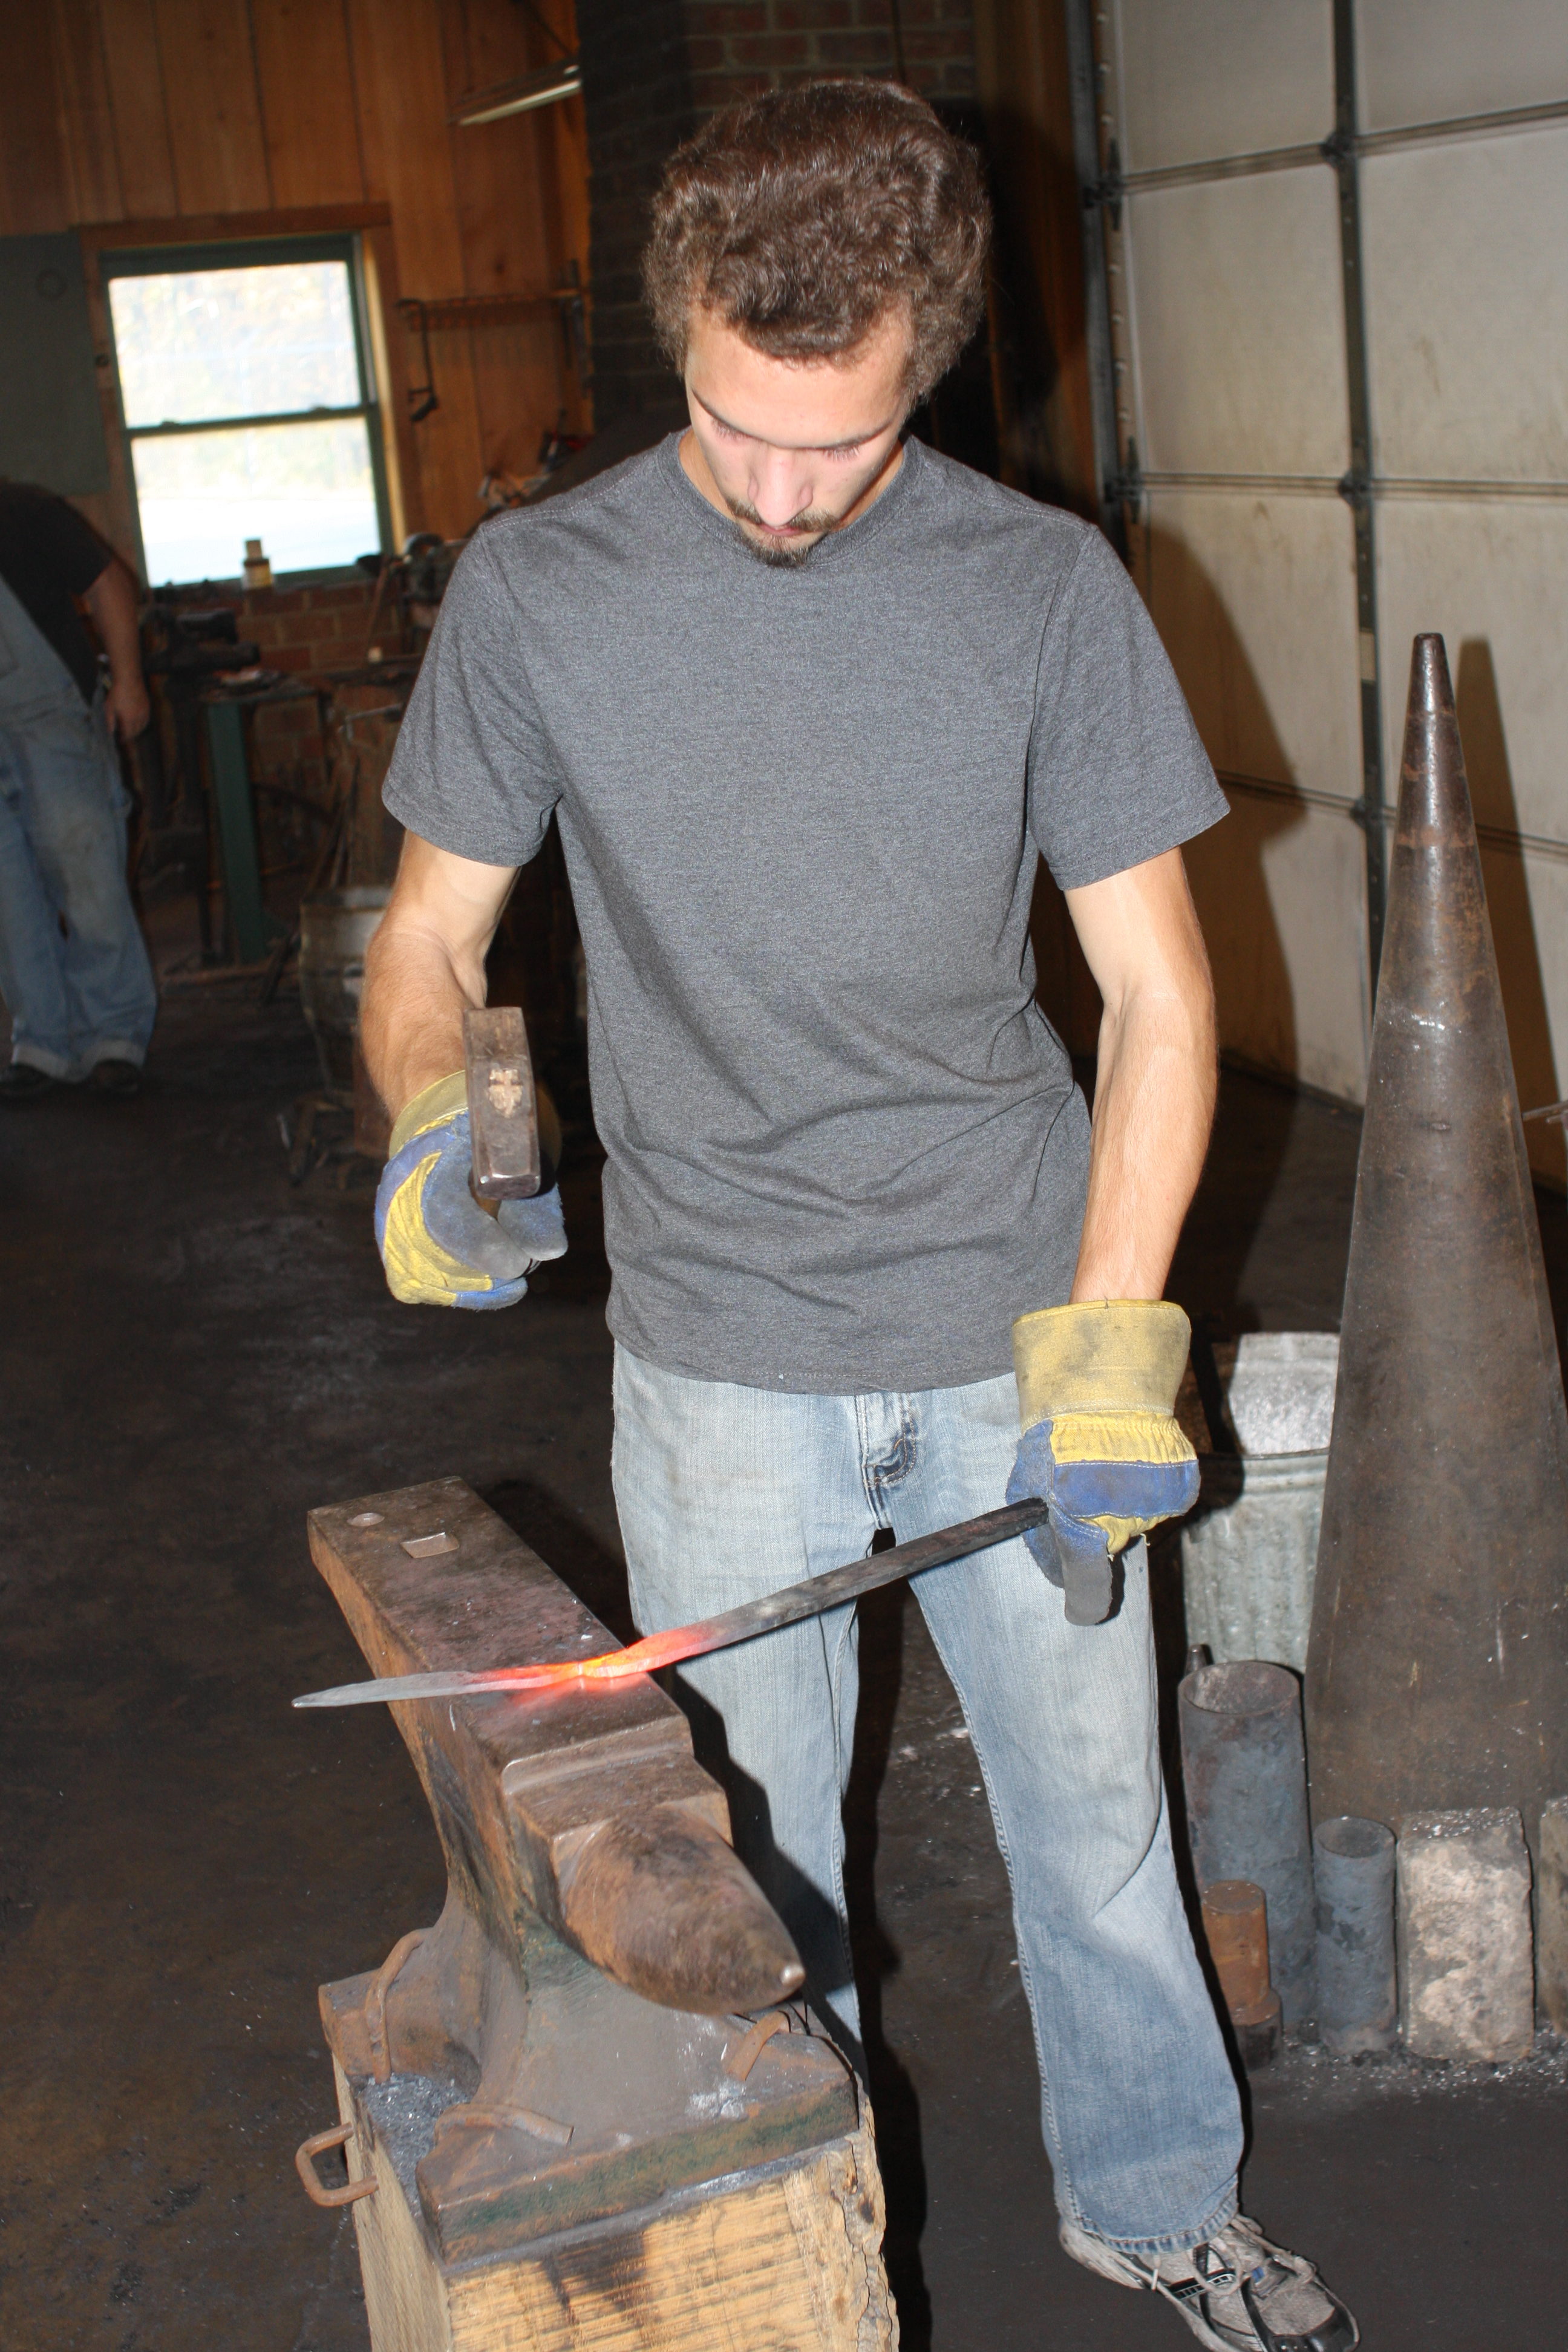
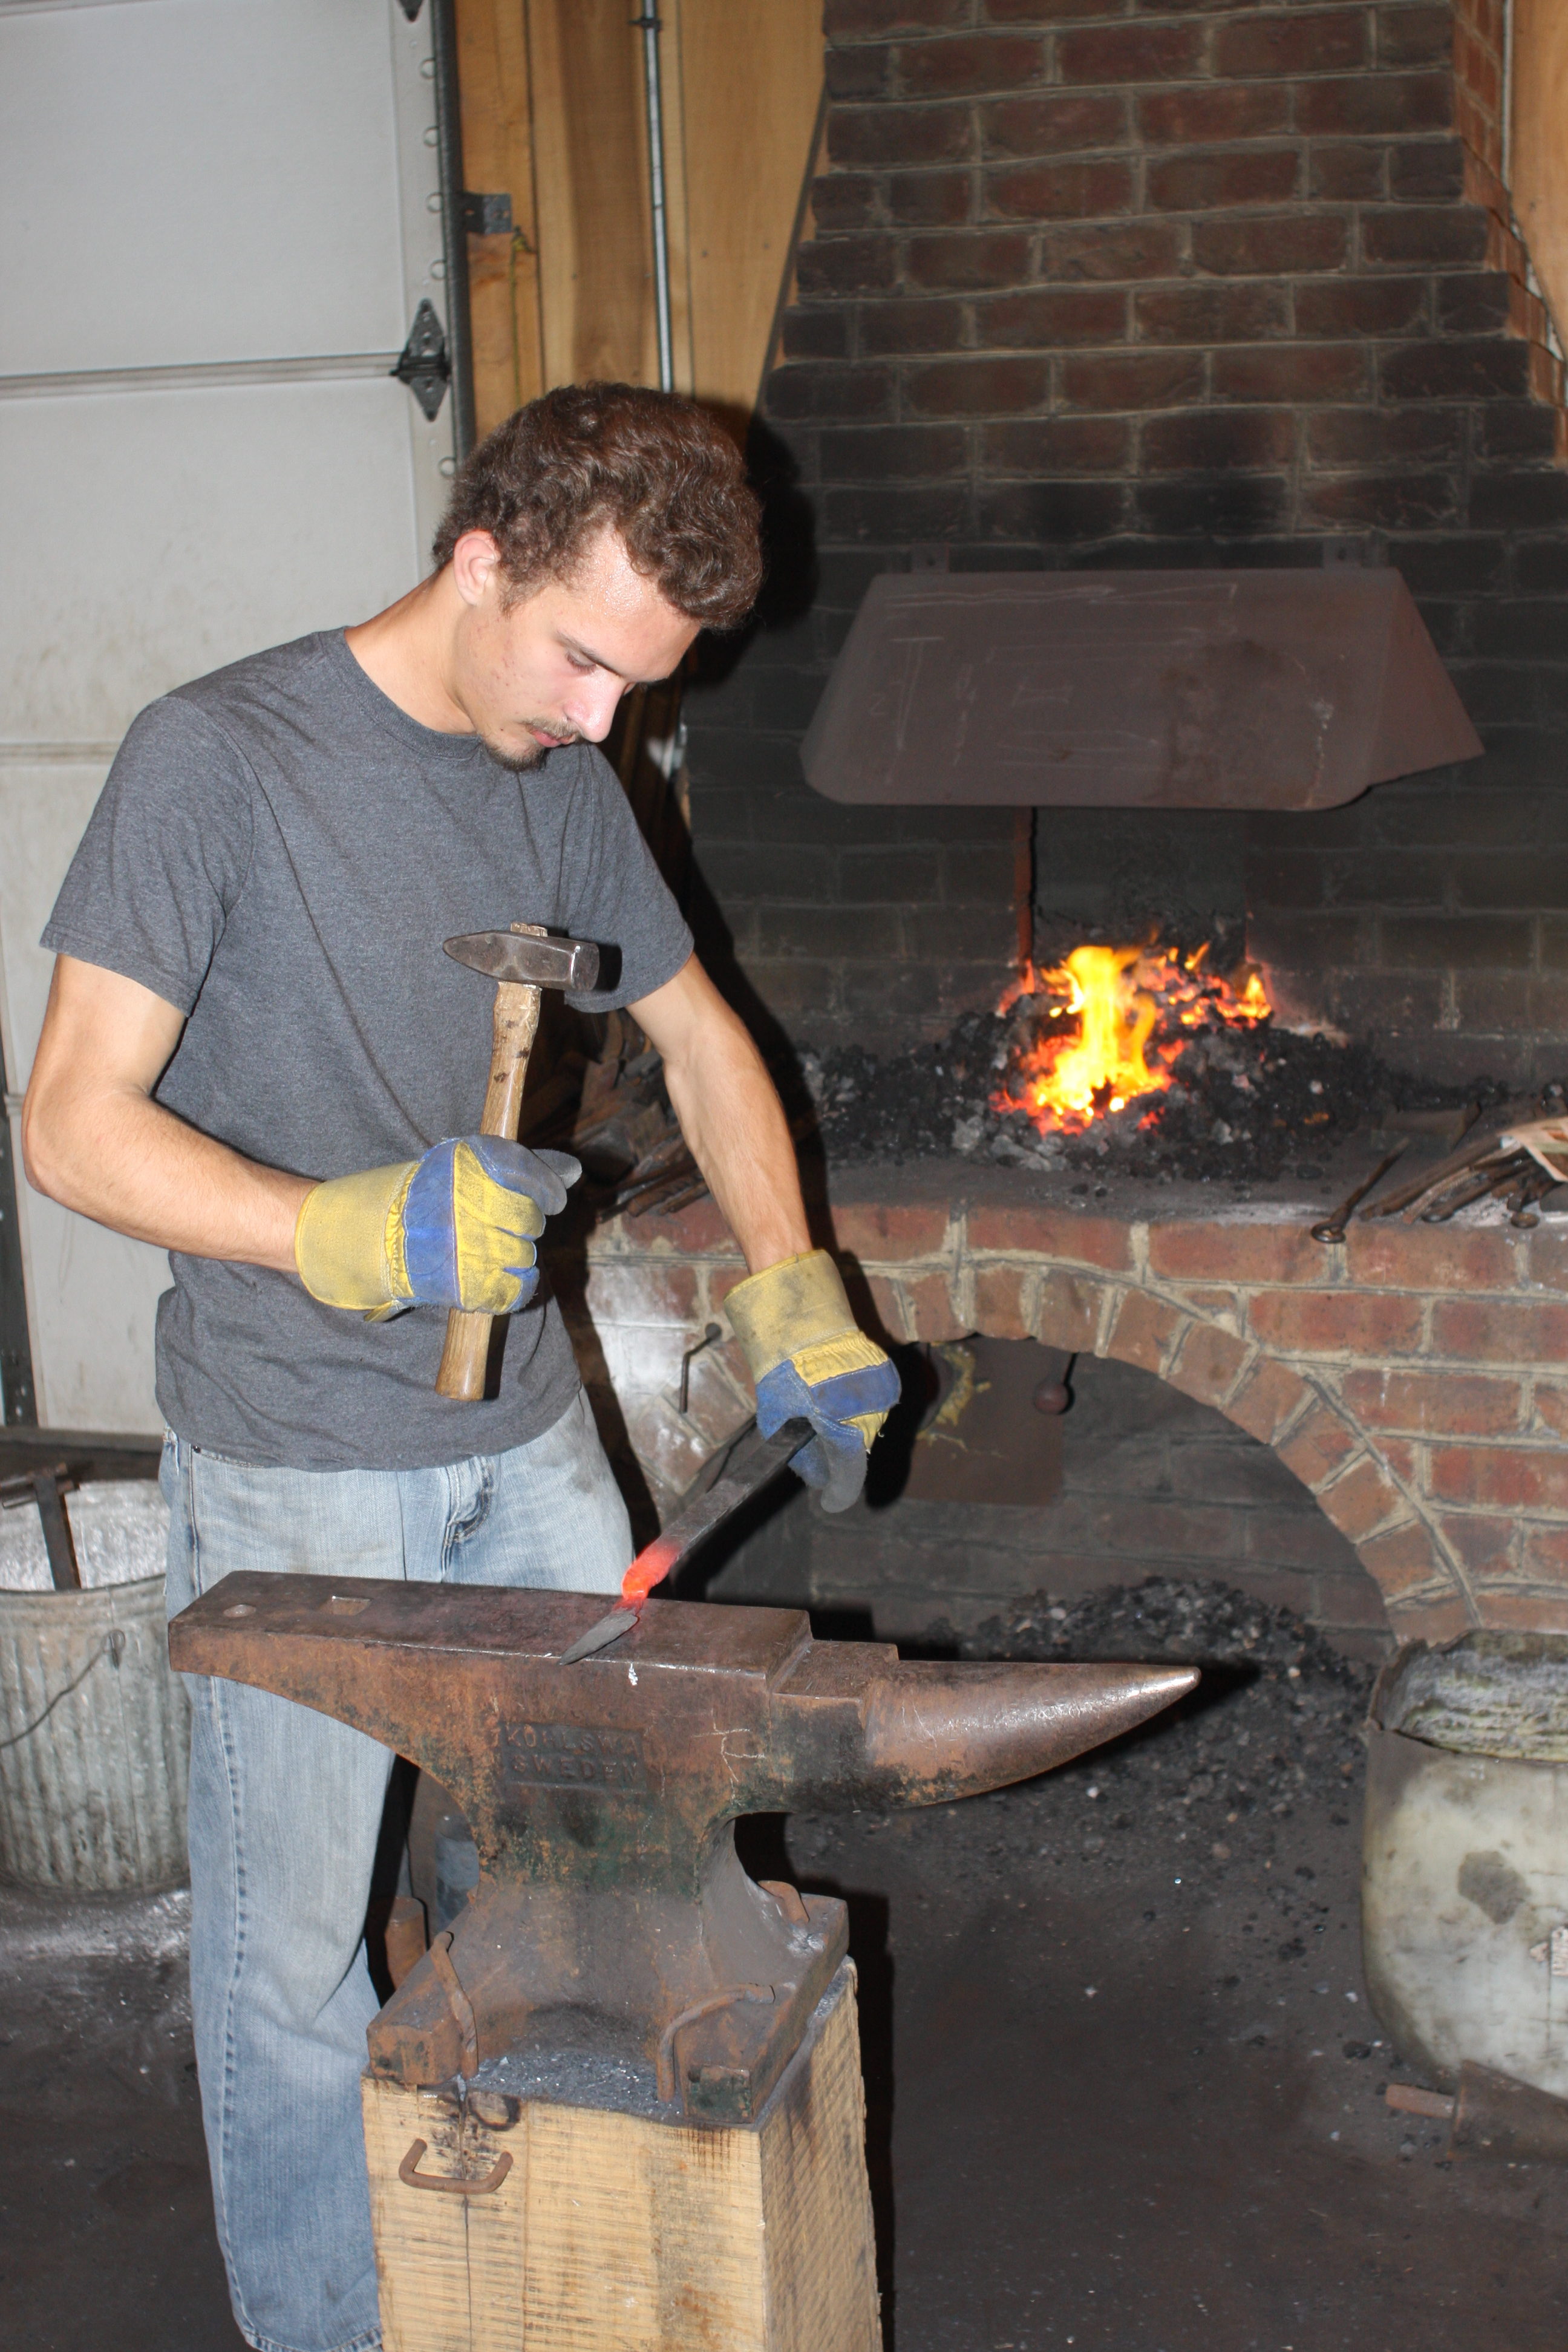
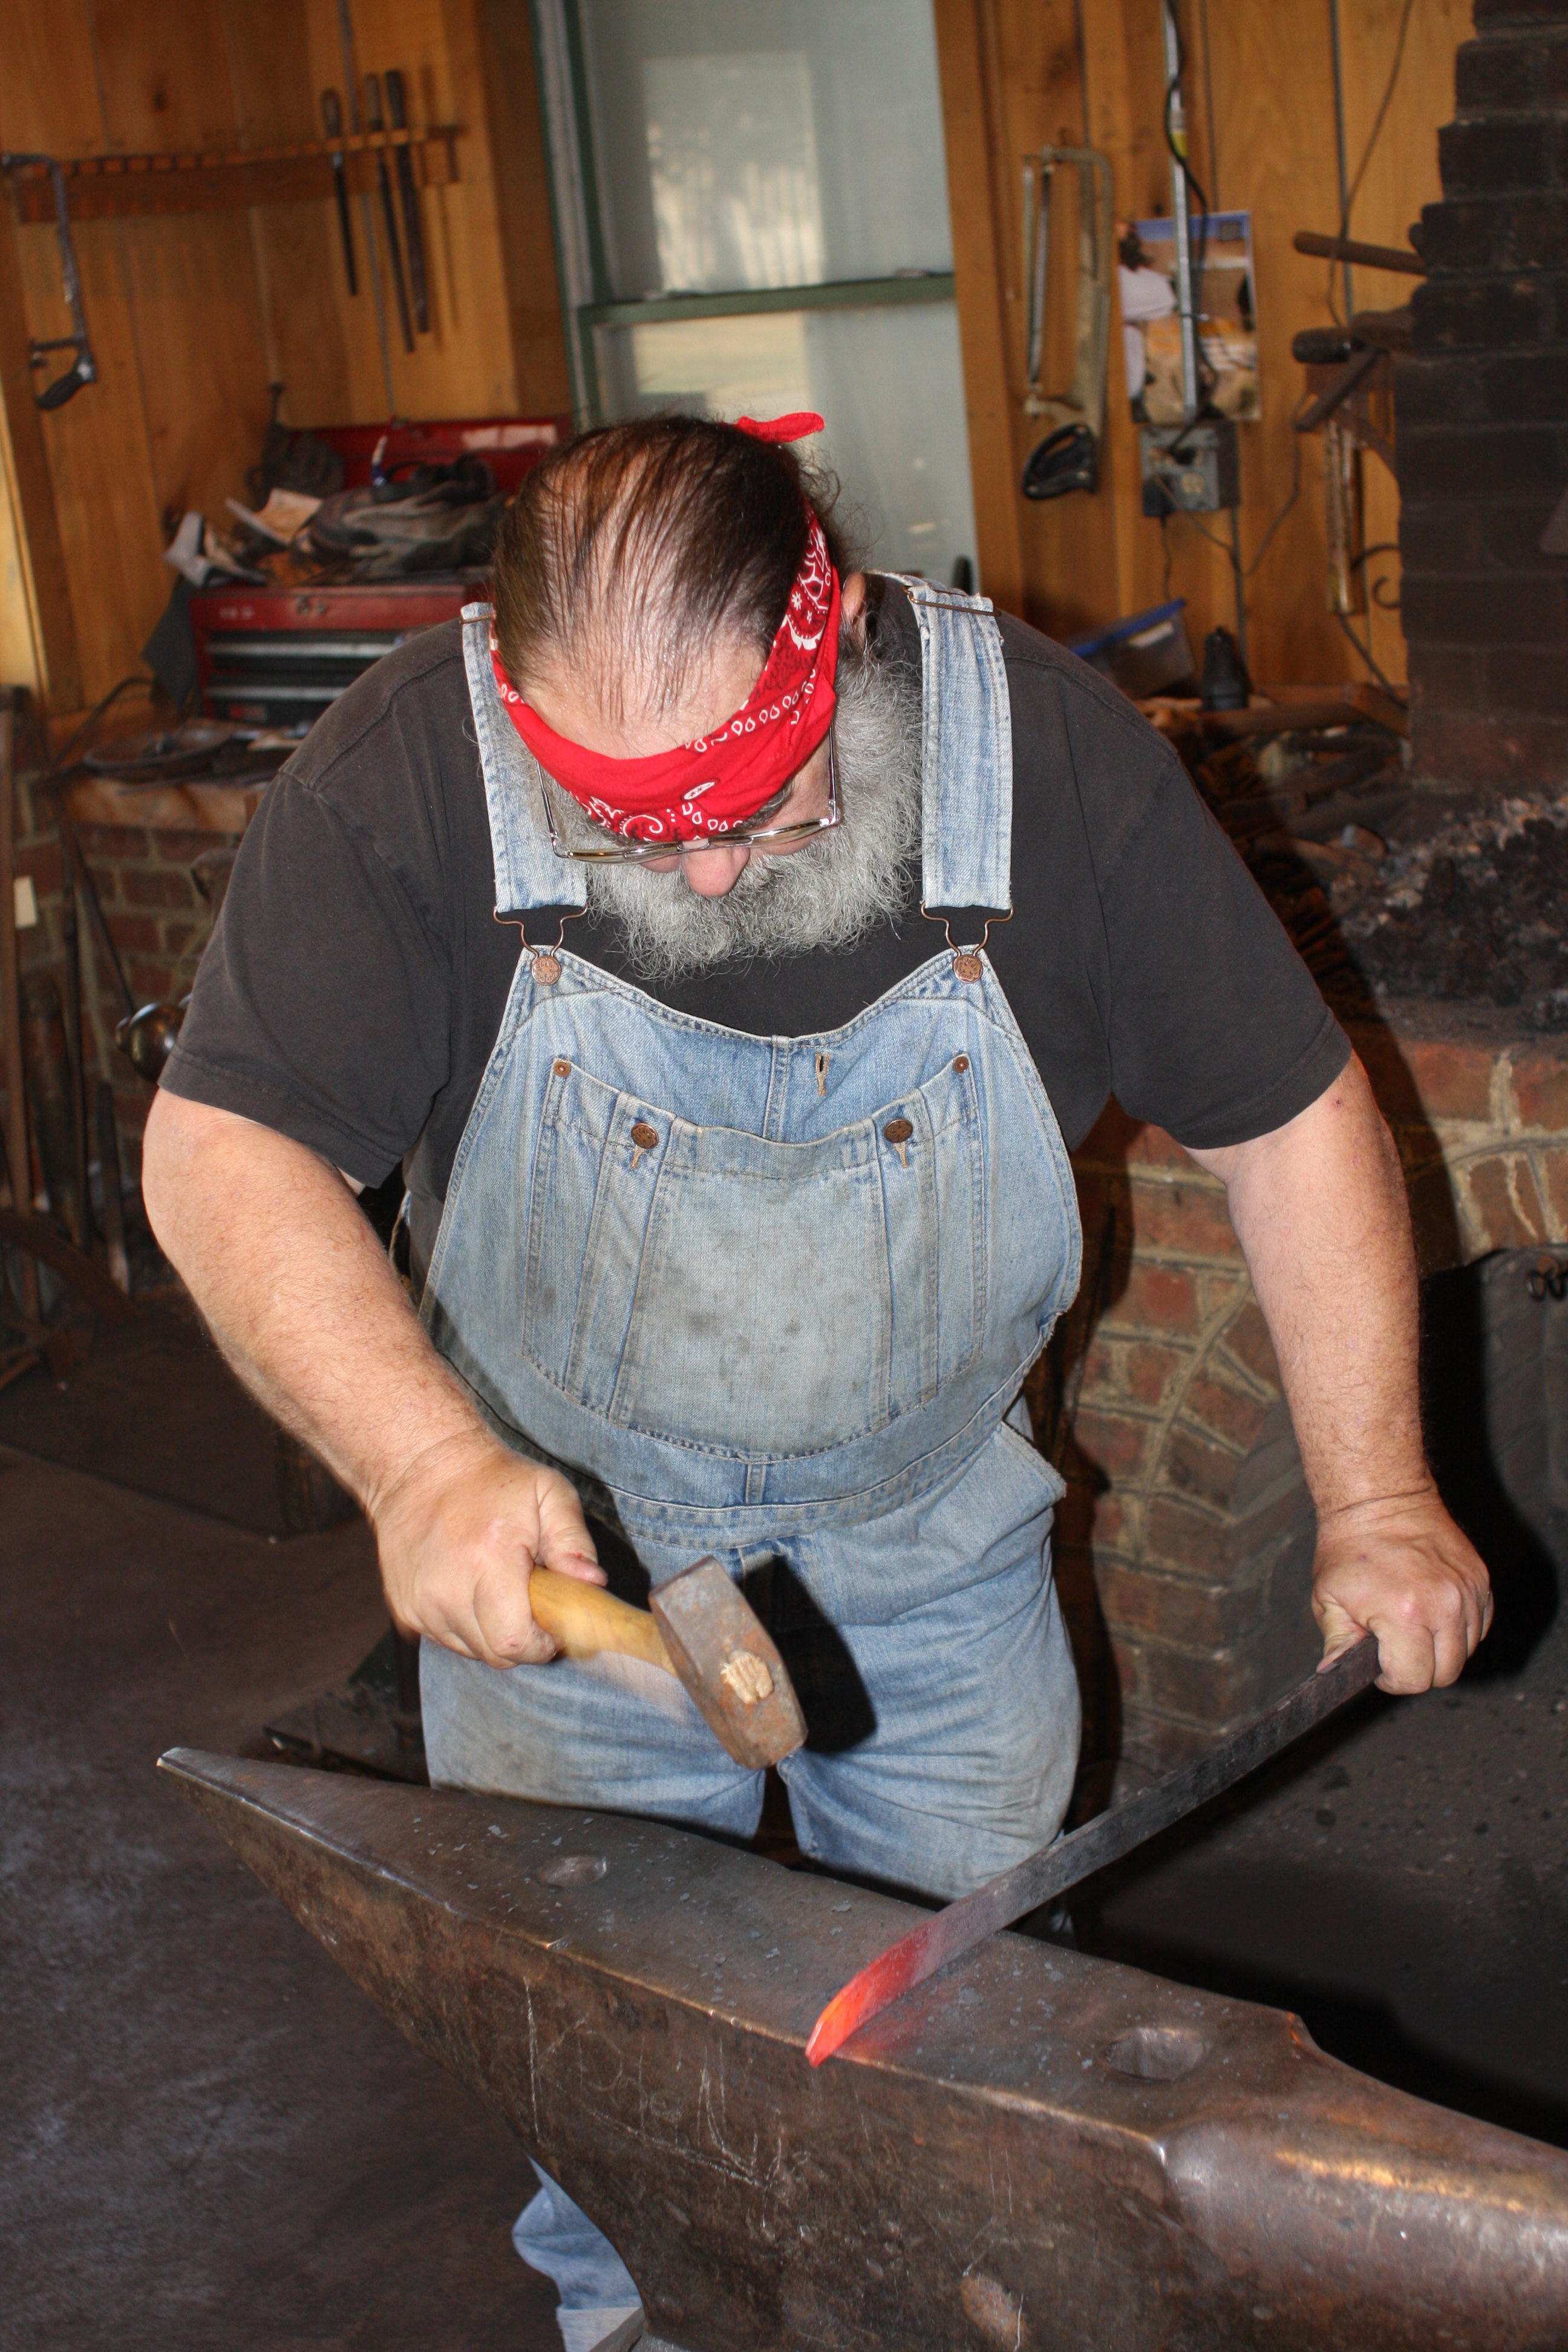
Nathan Allen’s knife making class lasted the whole week. This year both folding and fixed blade knives were being made. Students forged the basic blade shape and used files to finish fitting the parts. By walking around you could see students in various stages of knife making. Folding knives used patterns to help in getting the fit just right. Fixed blade knife makers had more freedom to forge the style of their choice.
The forge room is large enough to run multiple classes. A class that built double set triggers had just finished the day before we arrived. For more photos from the forge room click on Forge Room #1 or Forge room #2. (Use your “back” button to return to the article.)
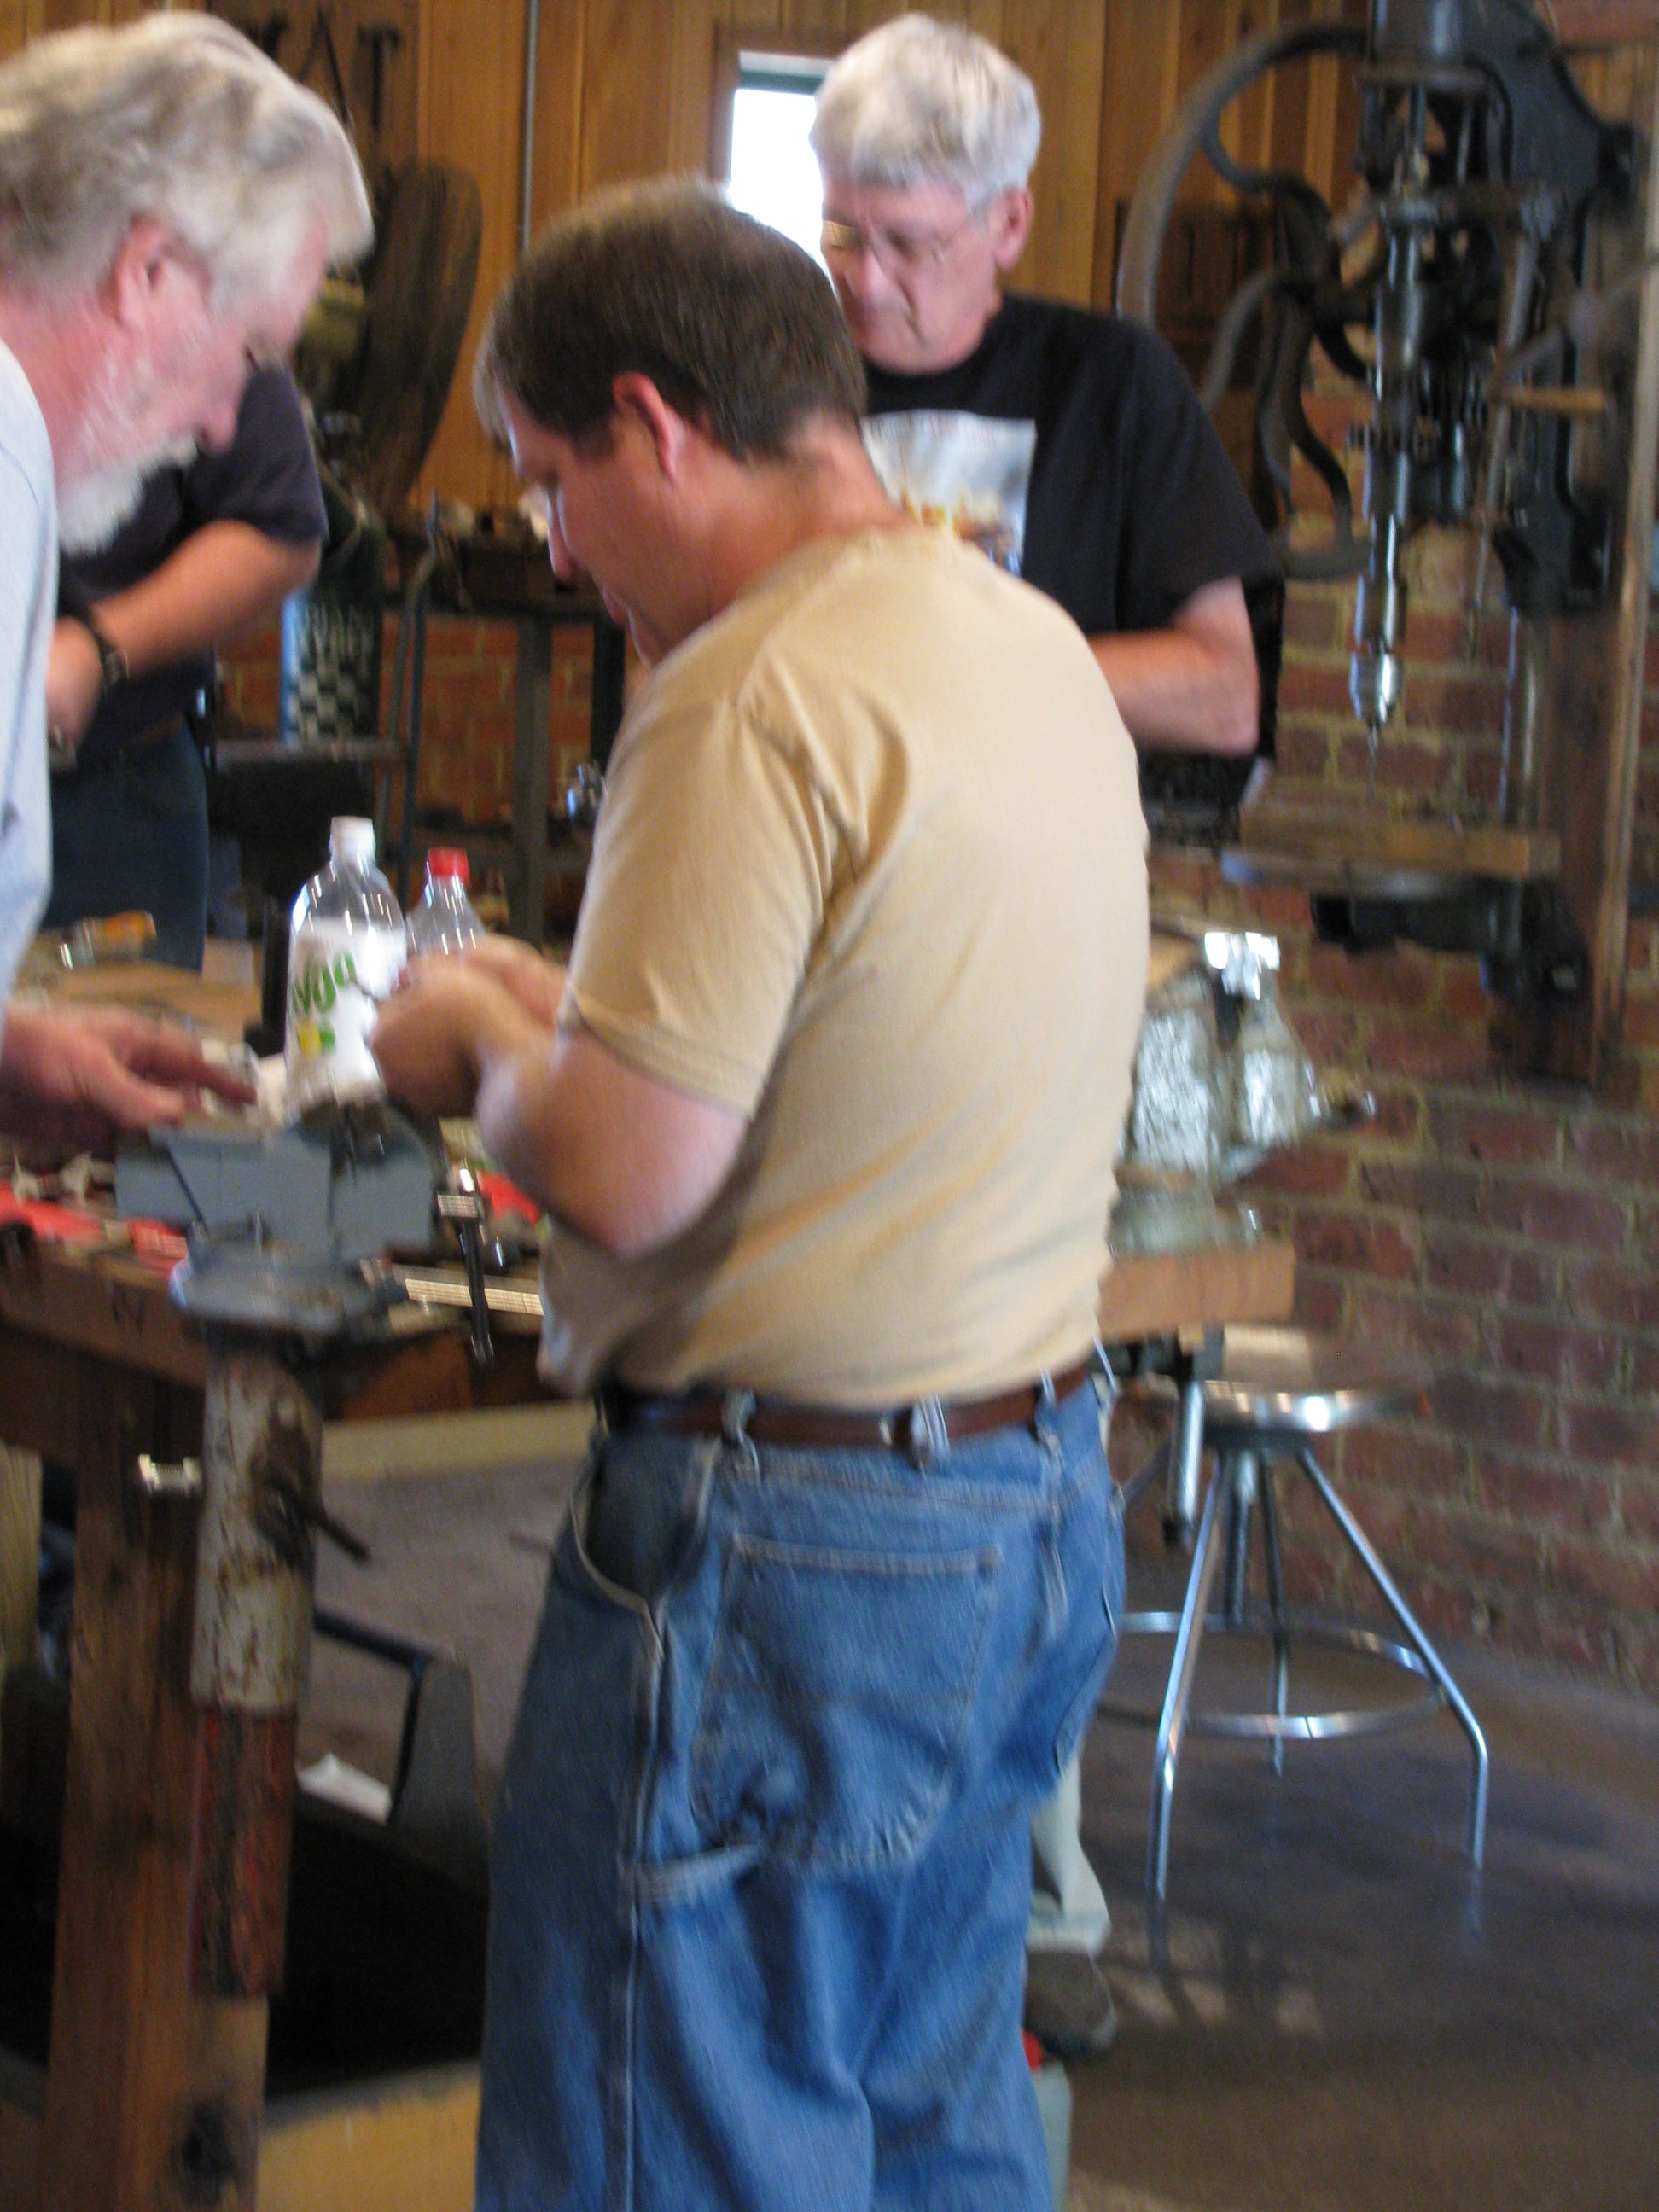
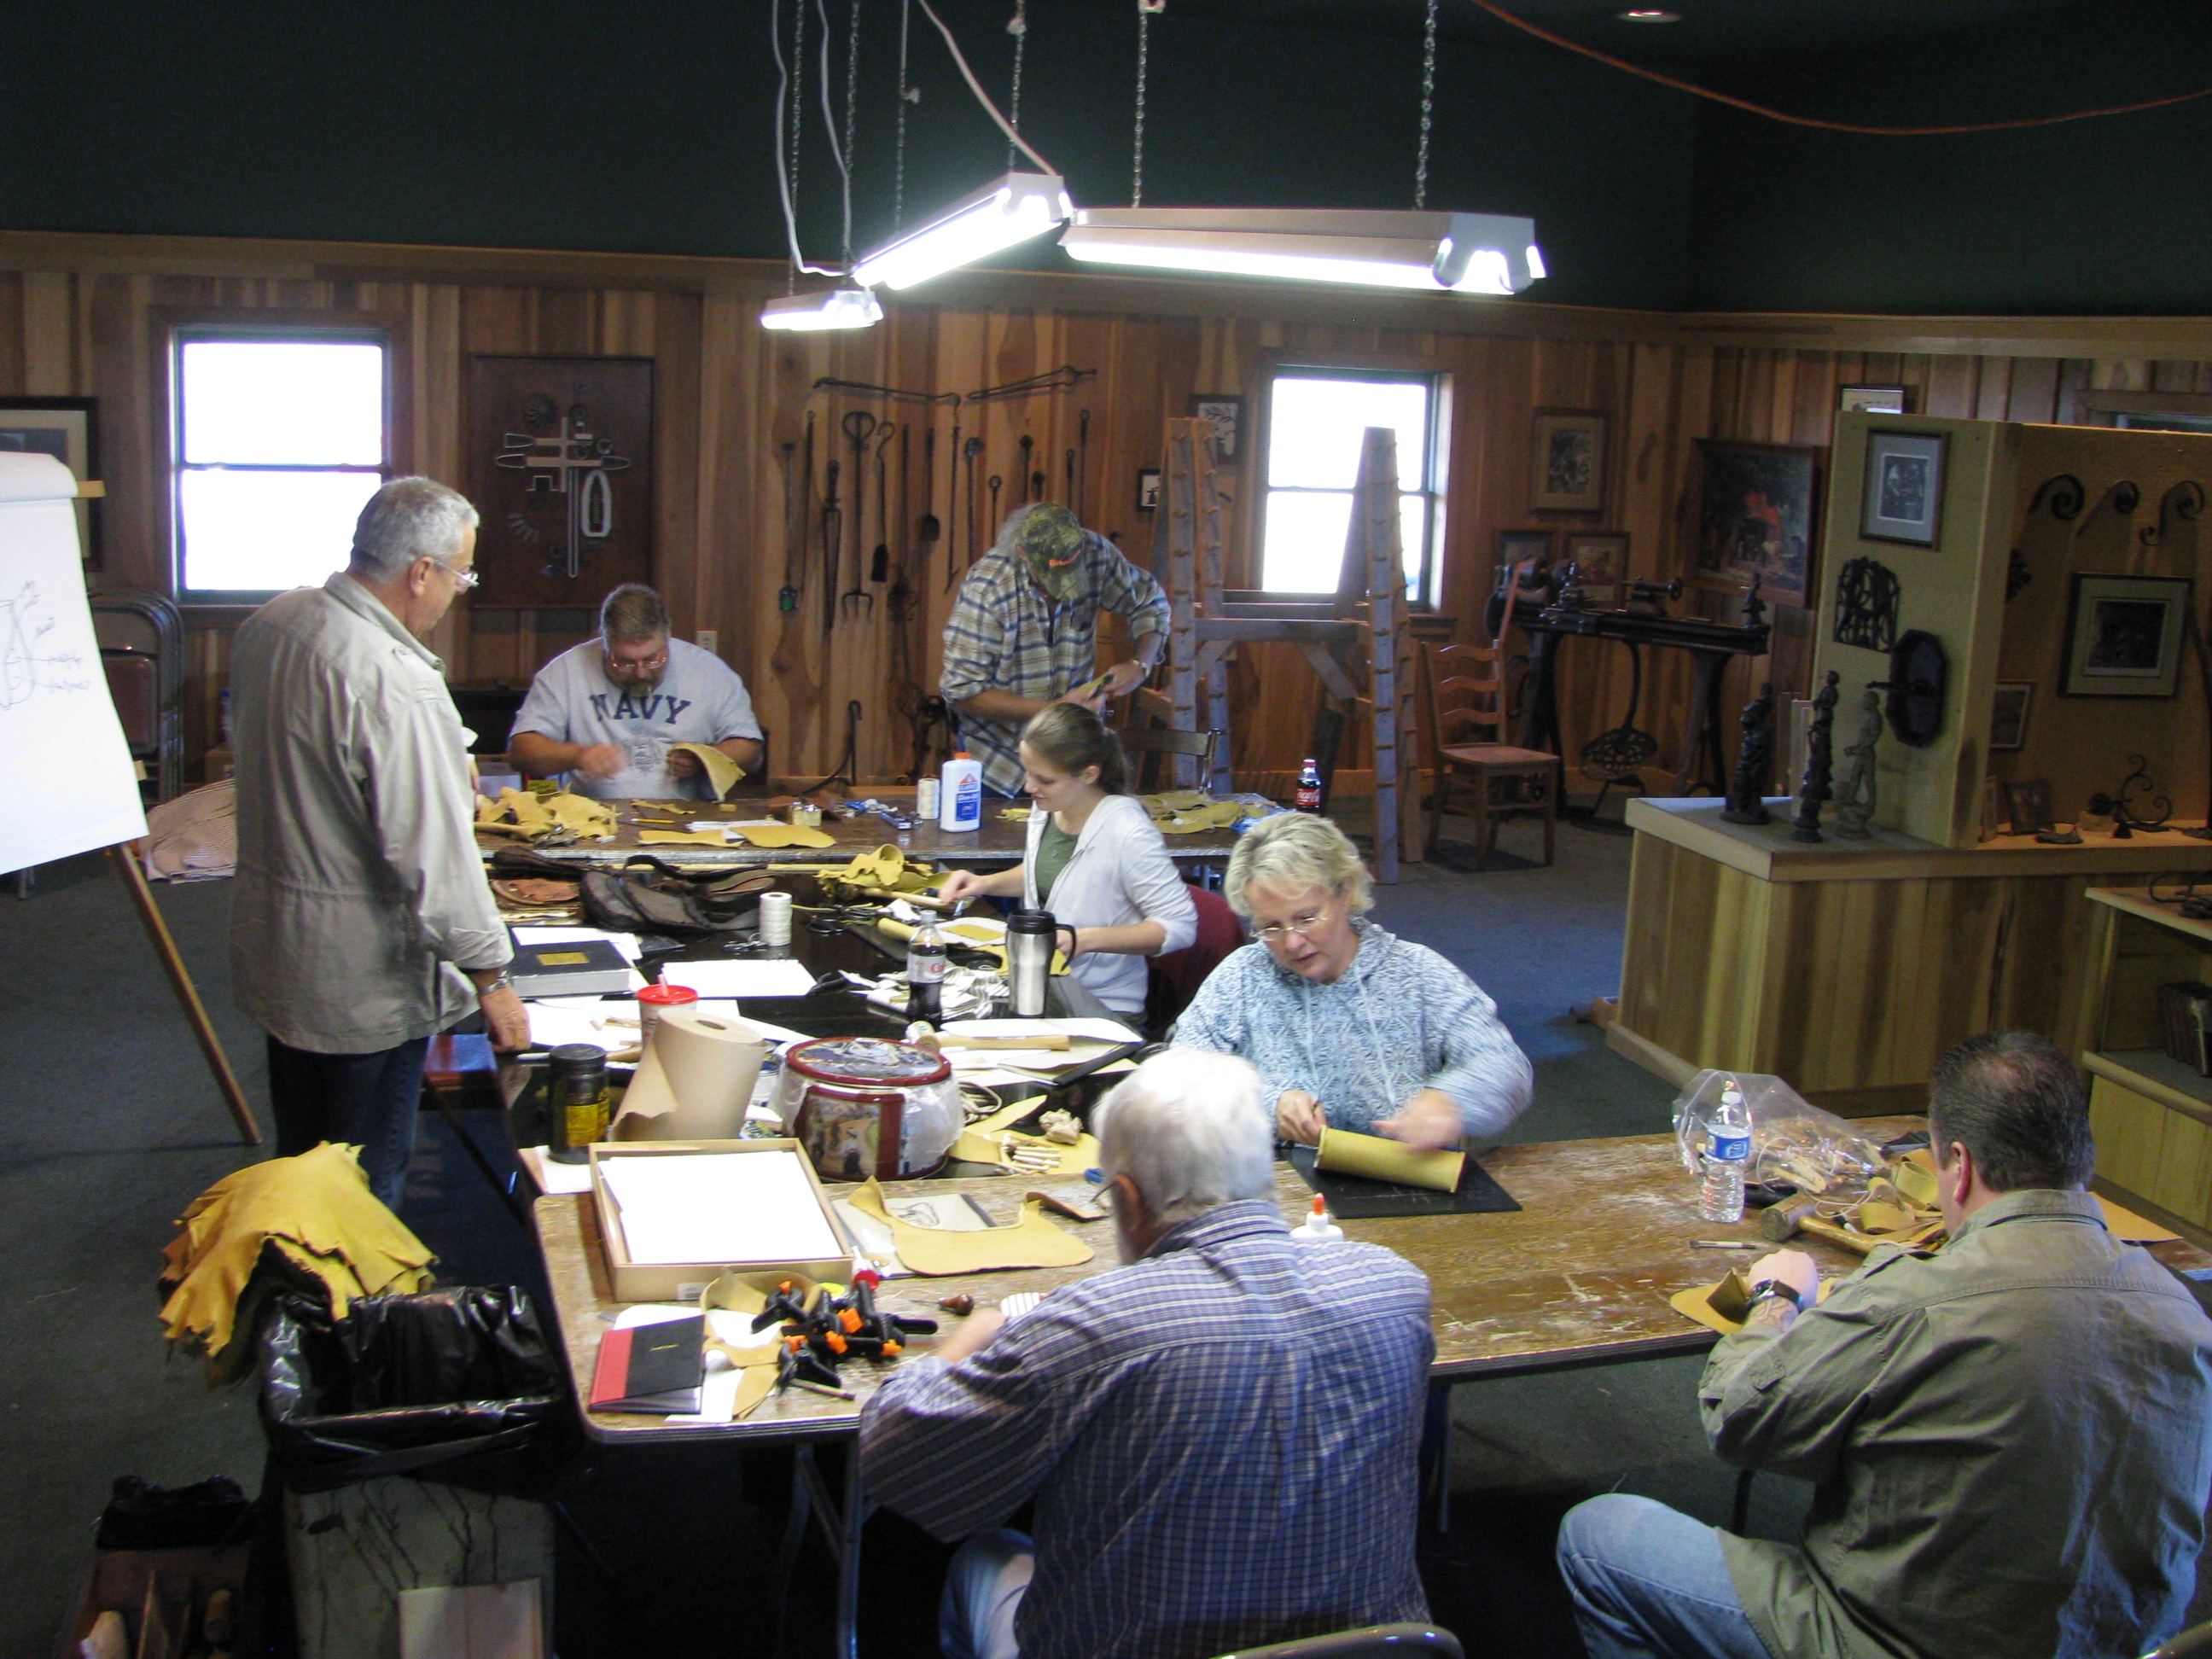
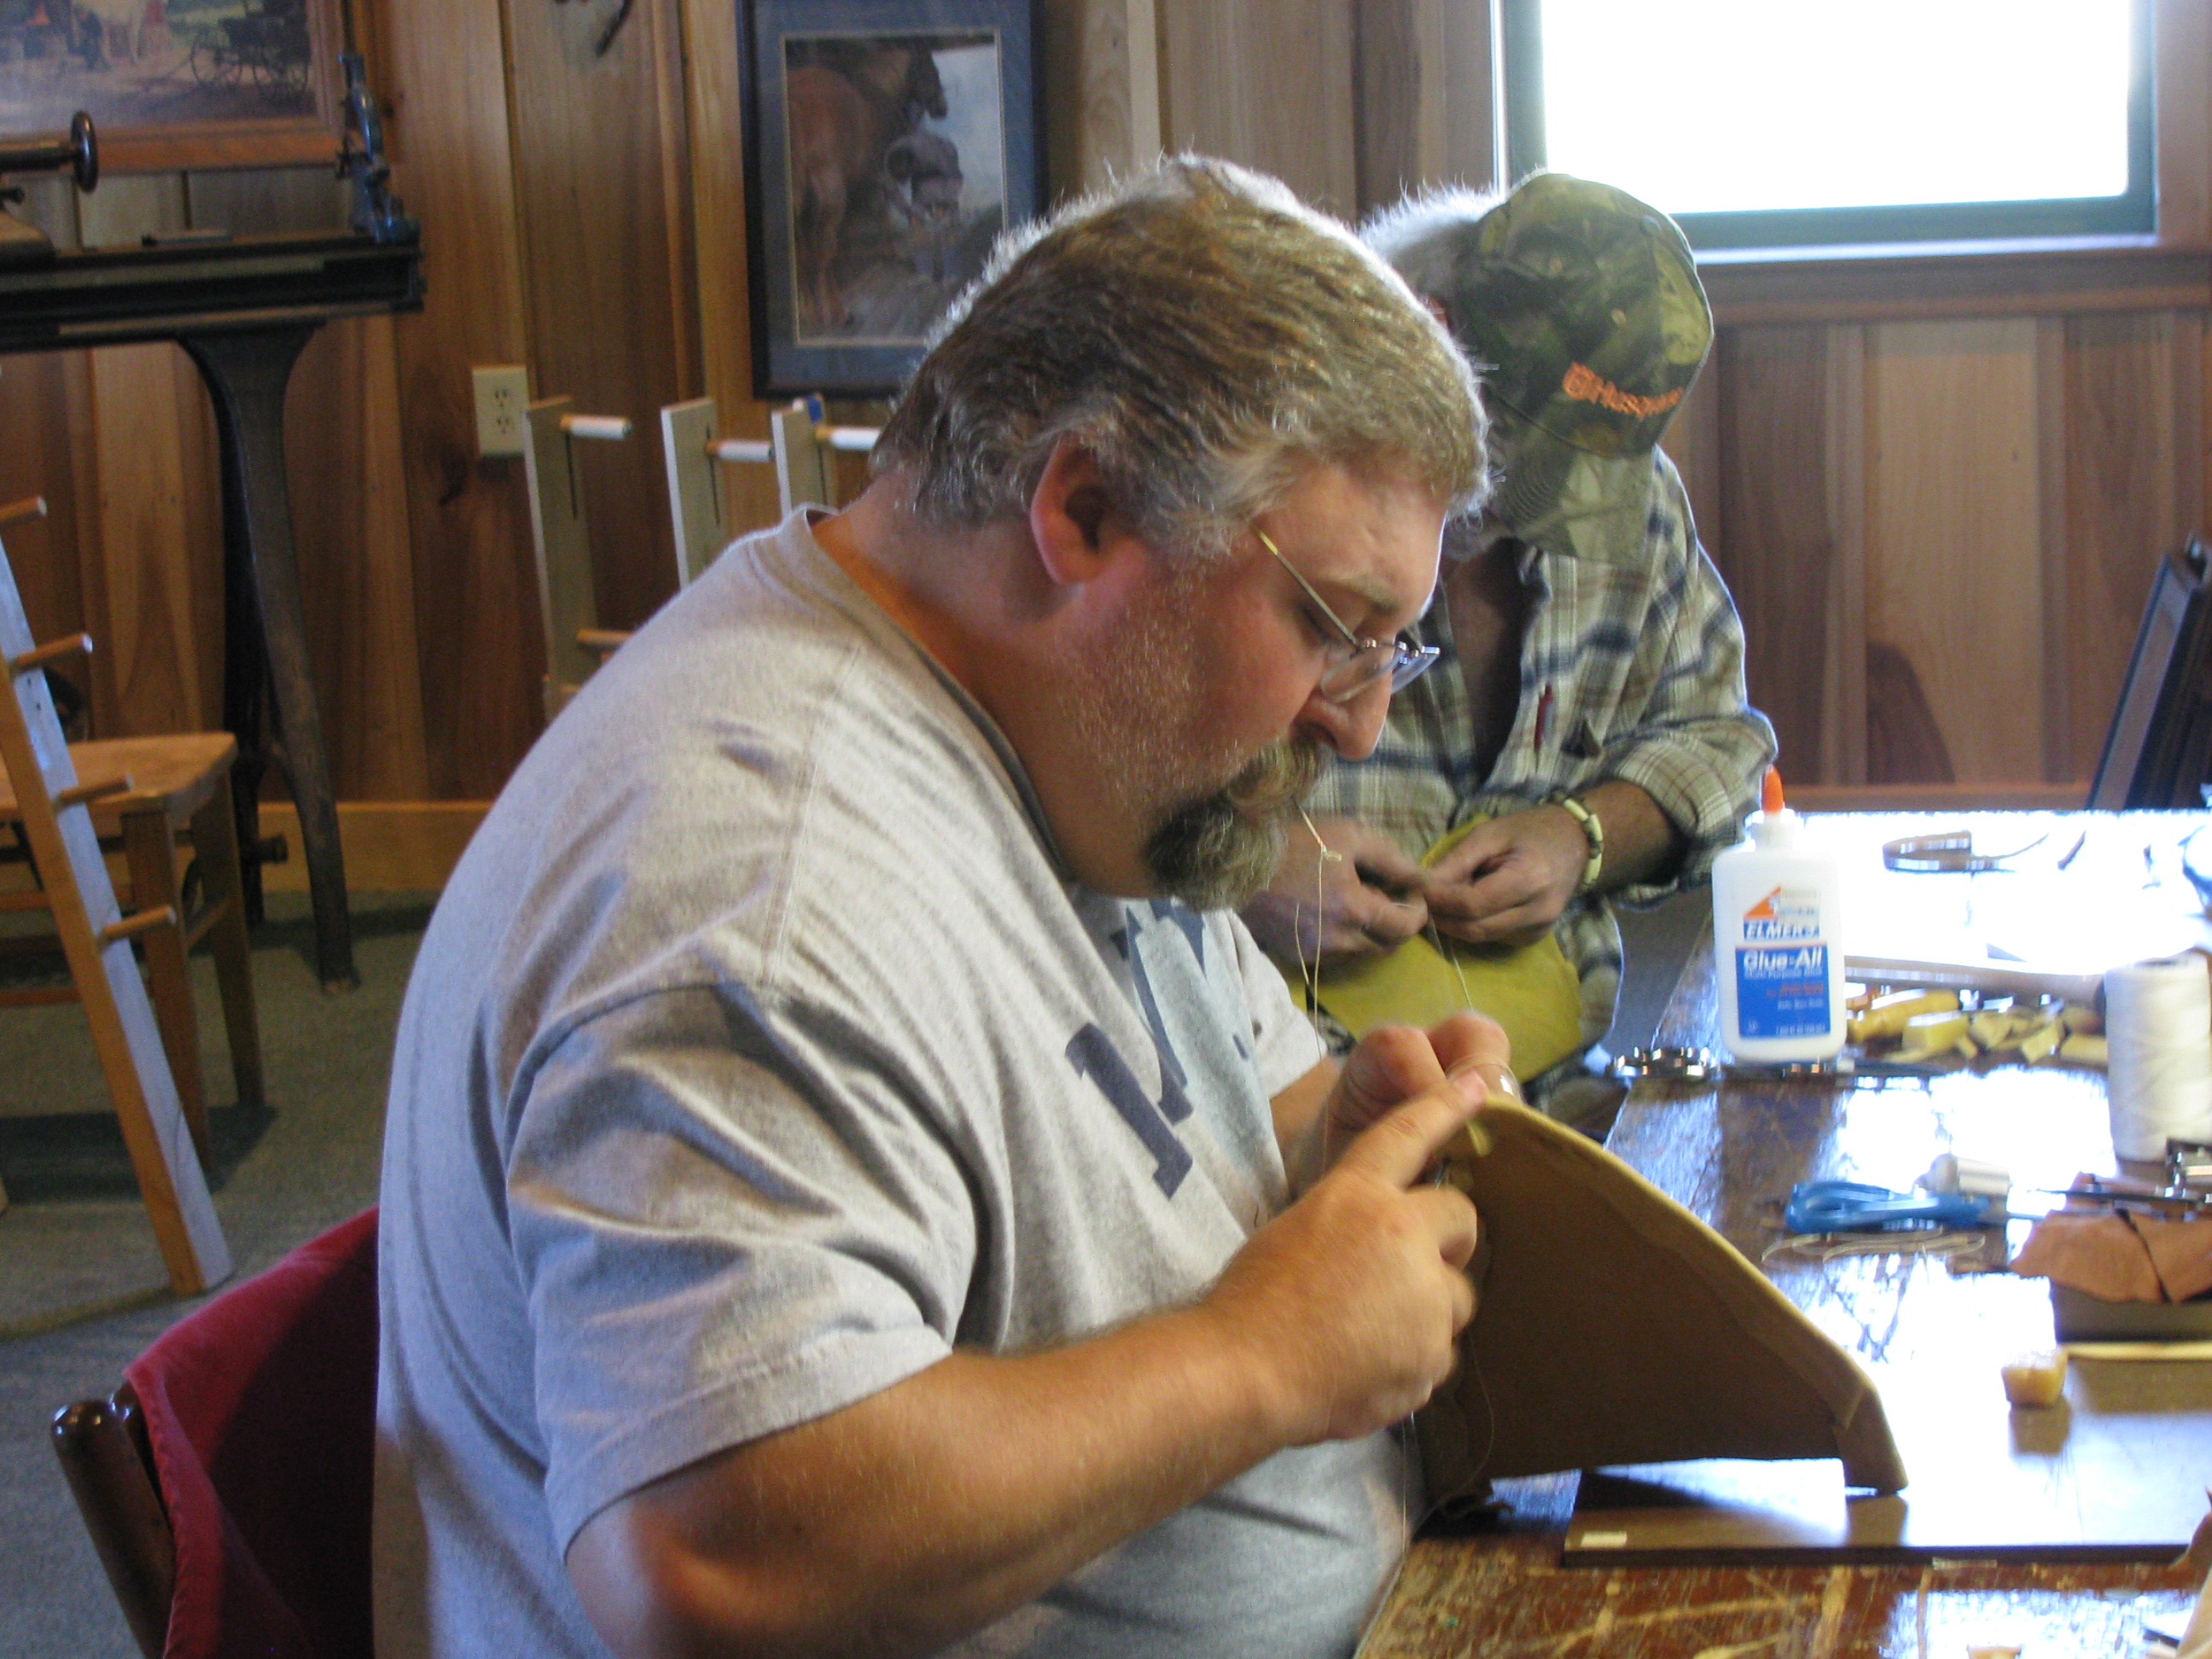
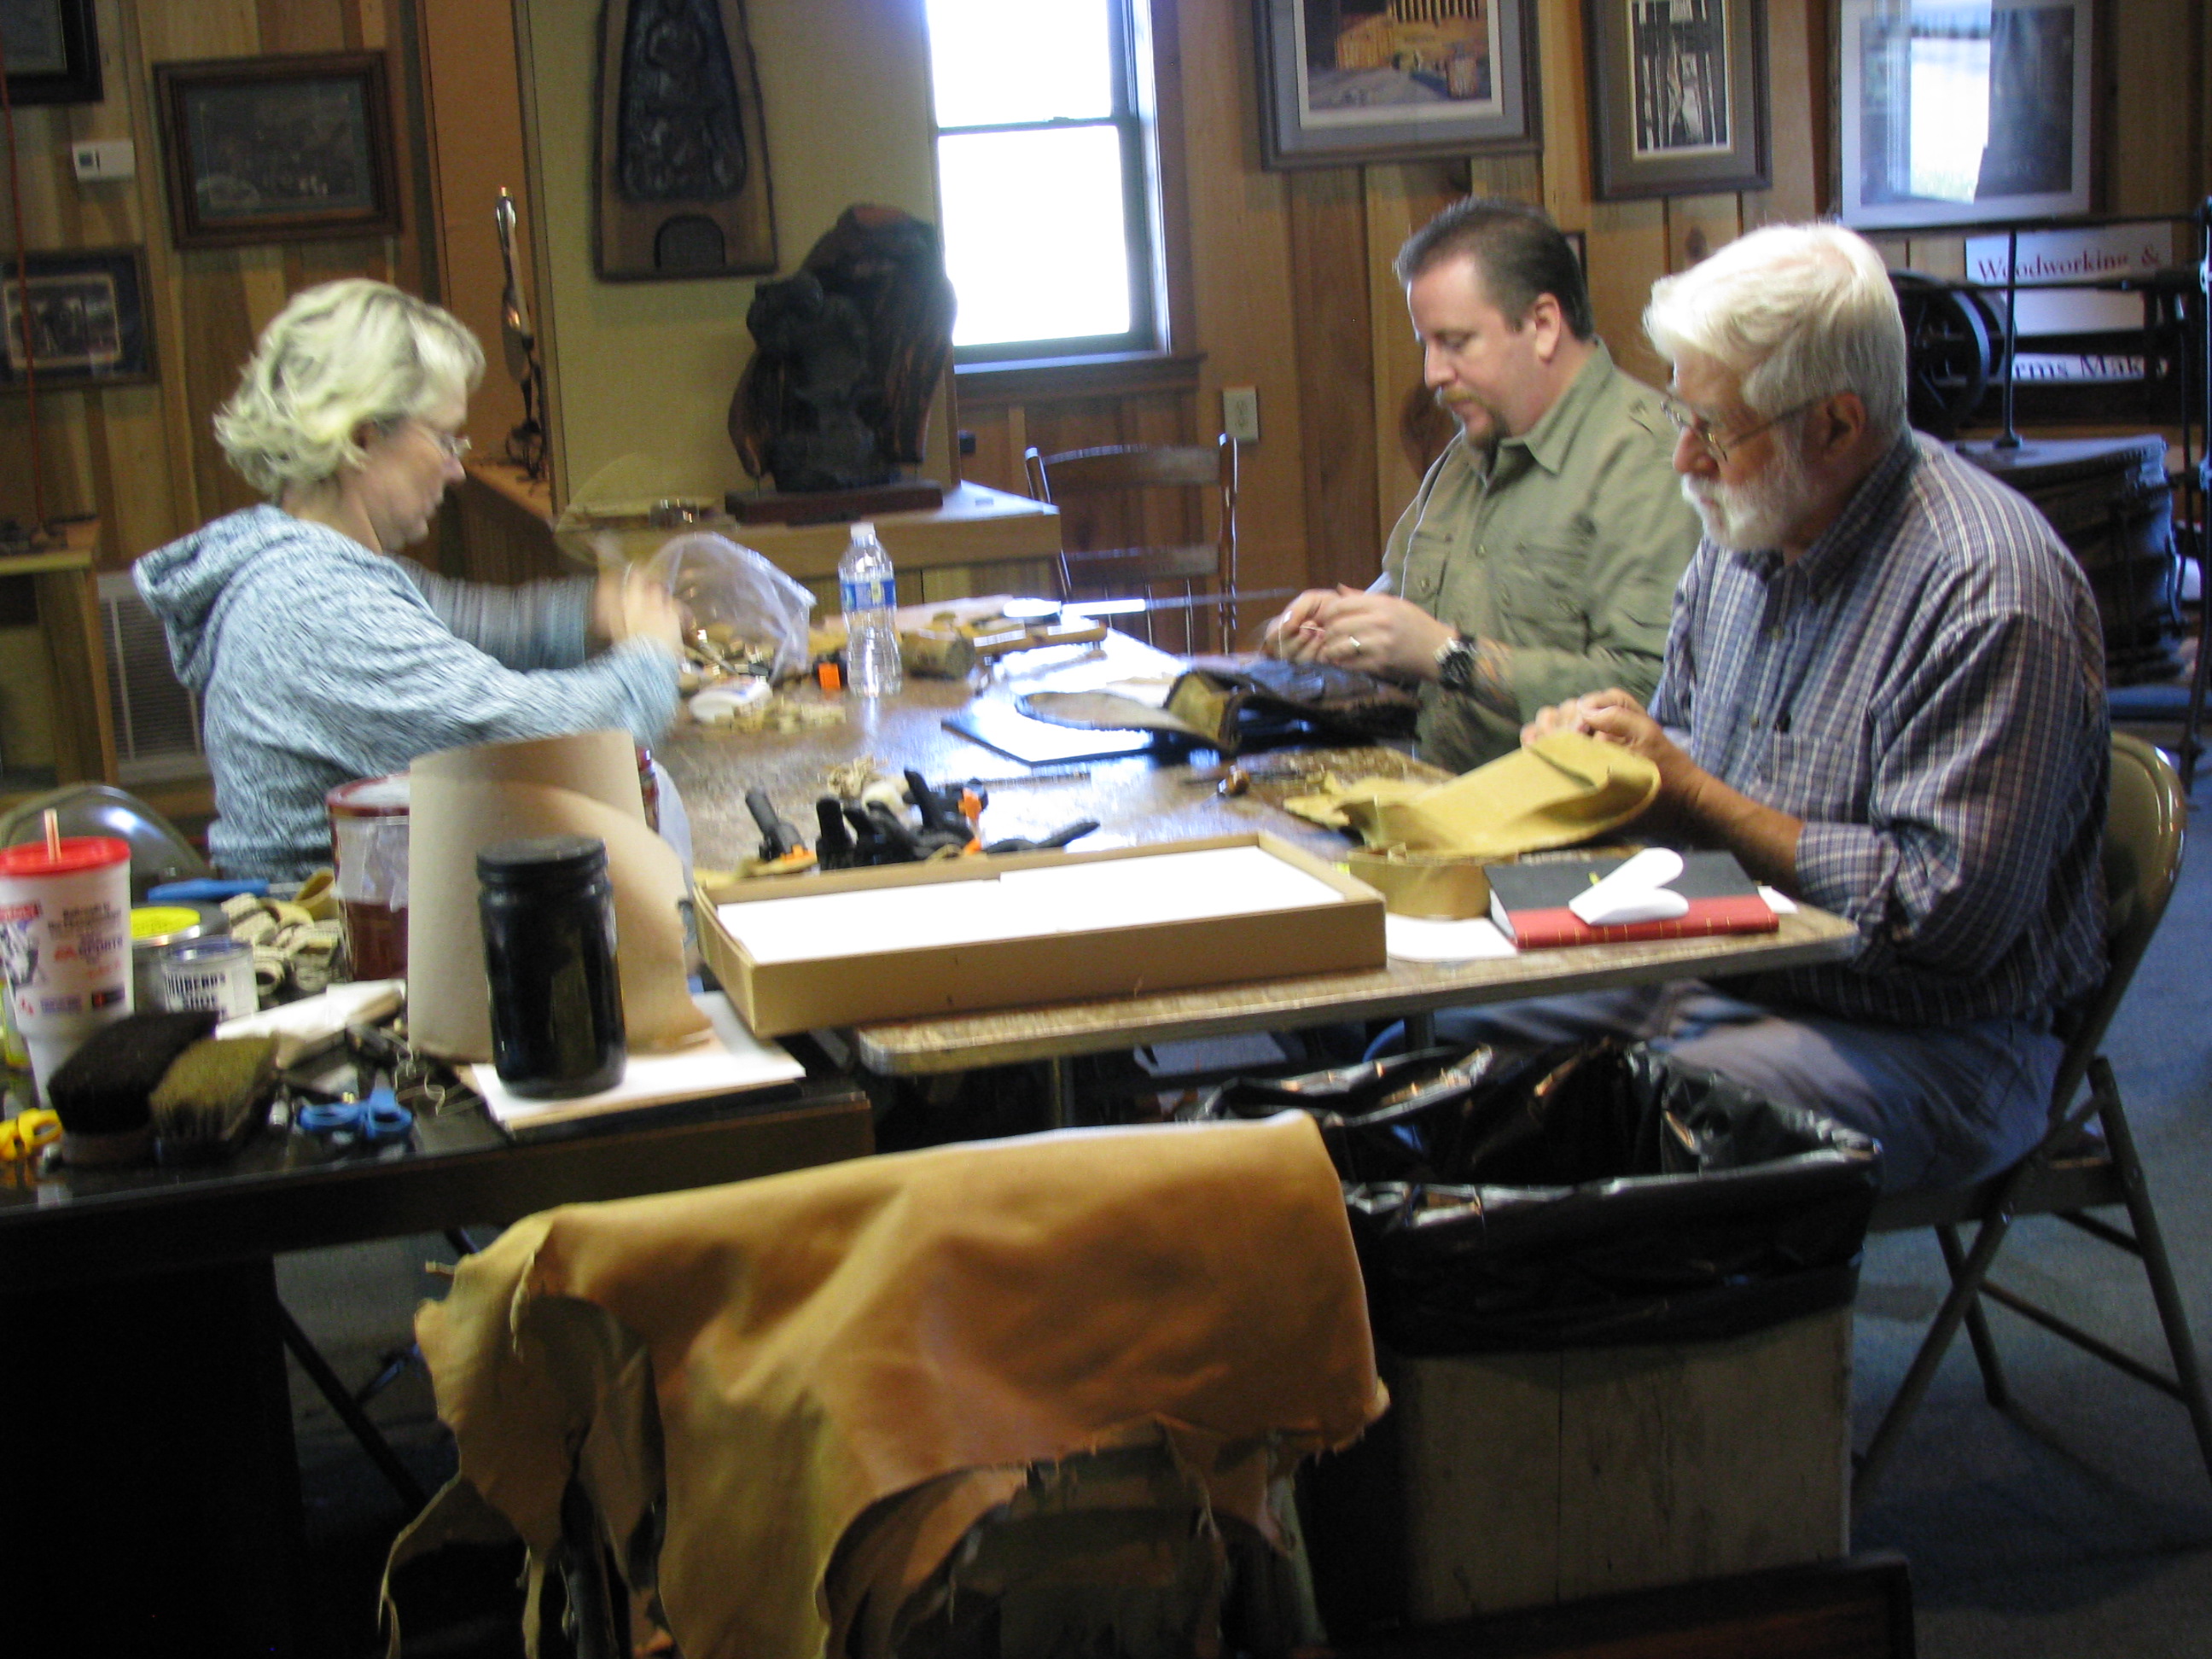
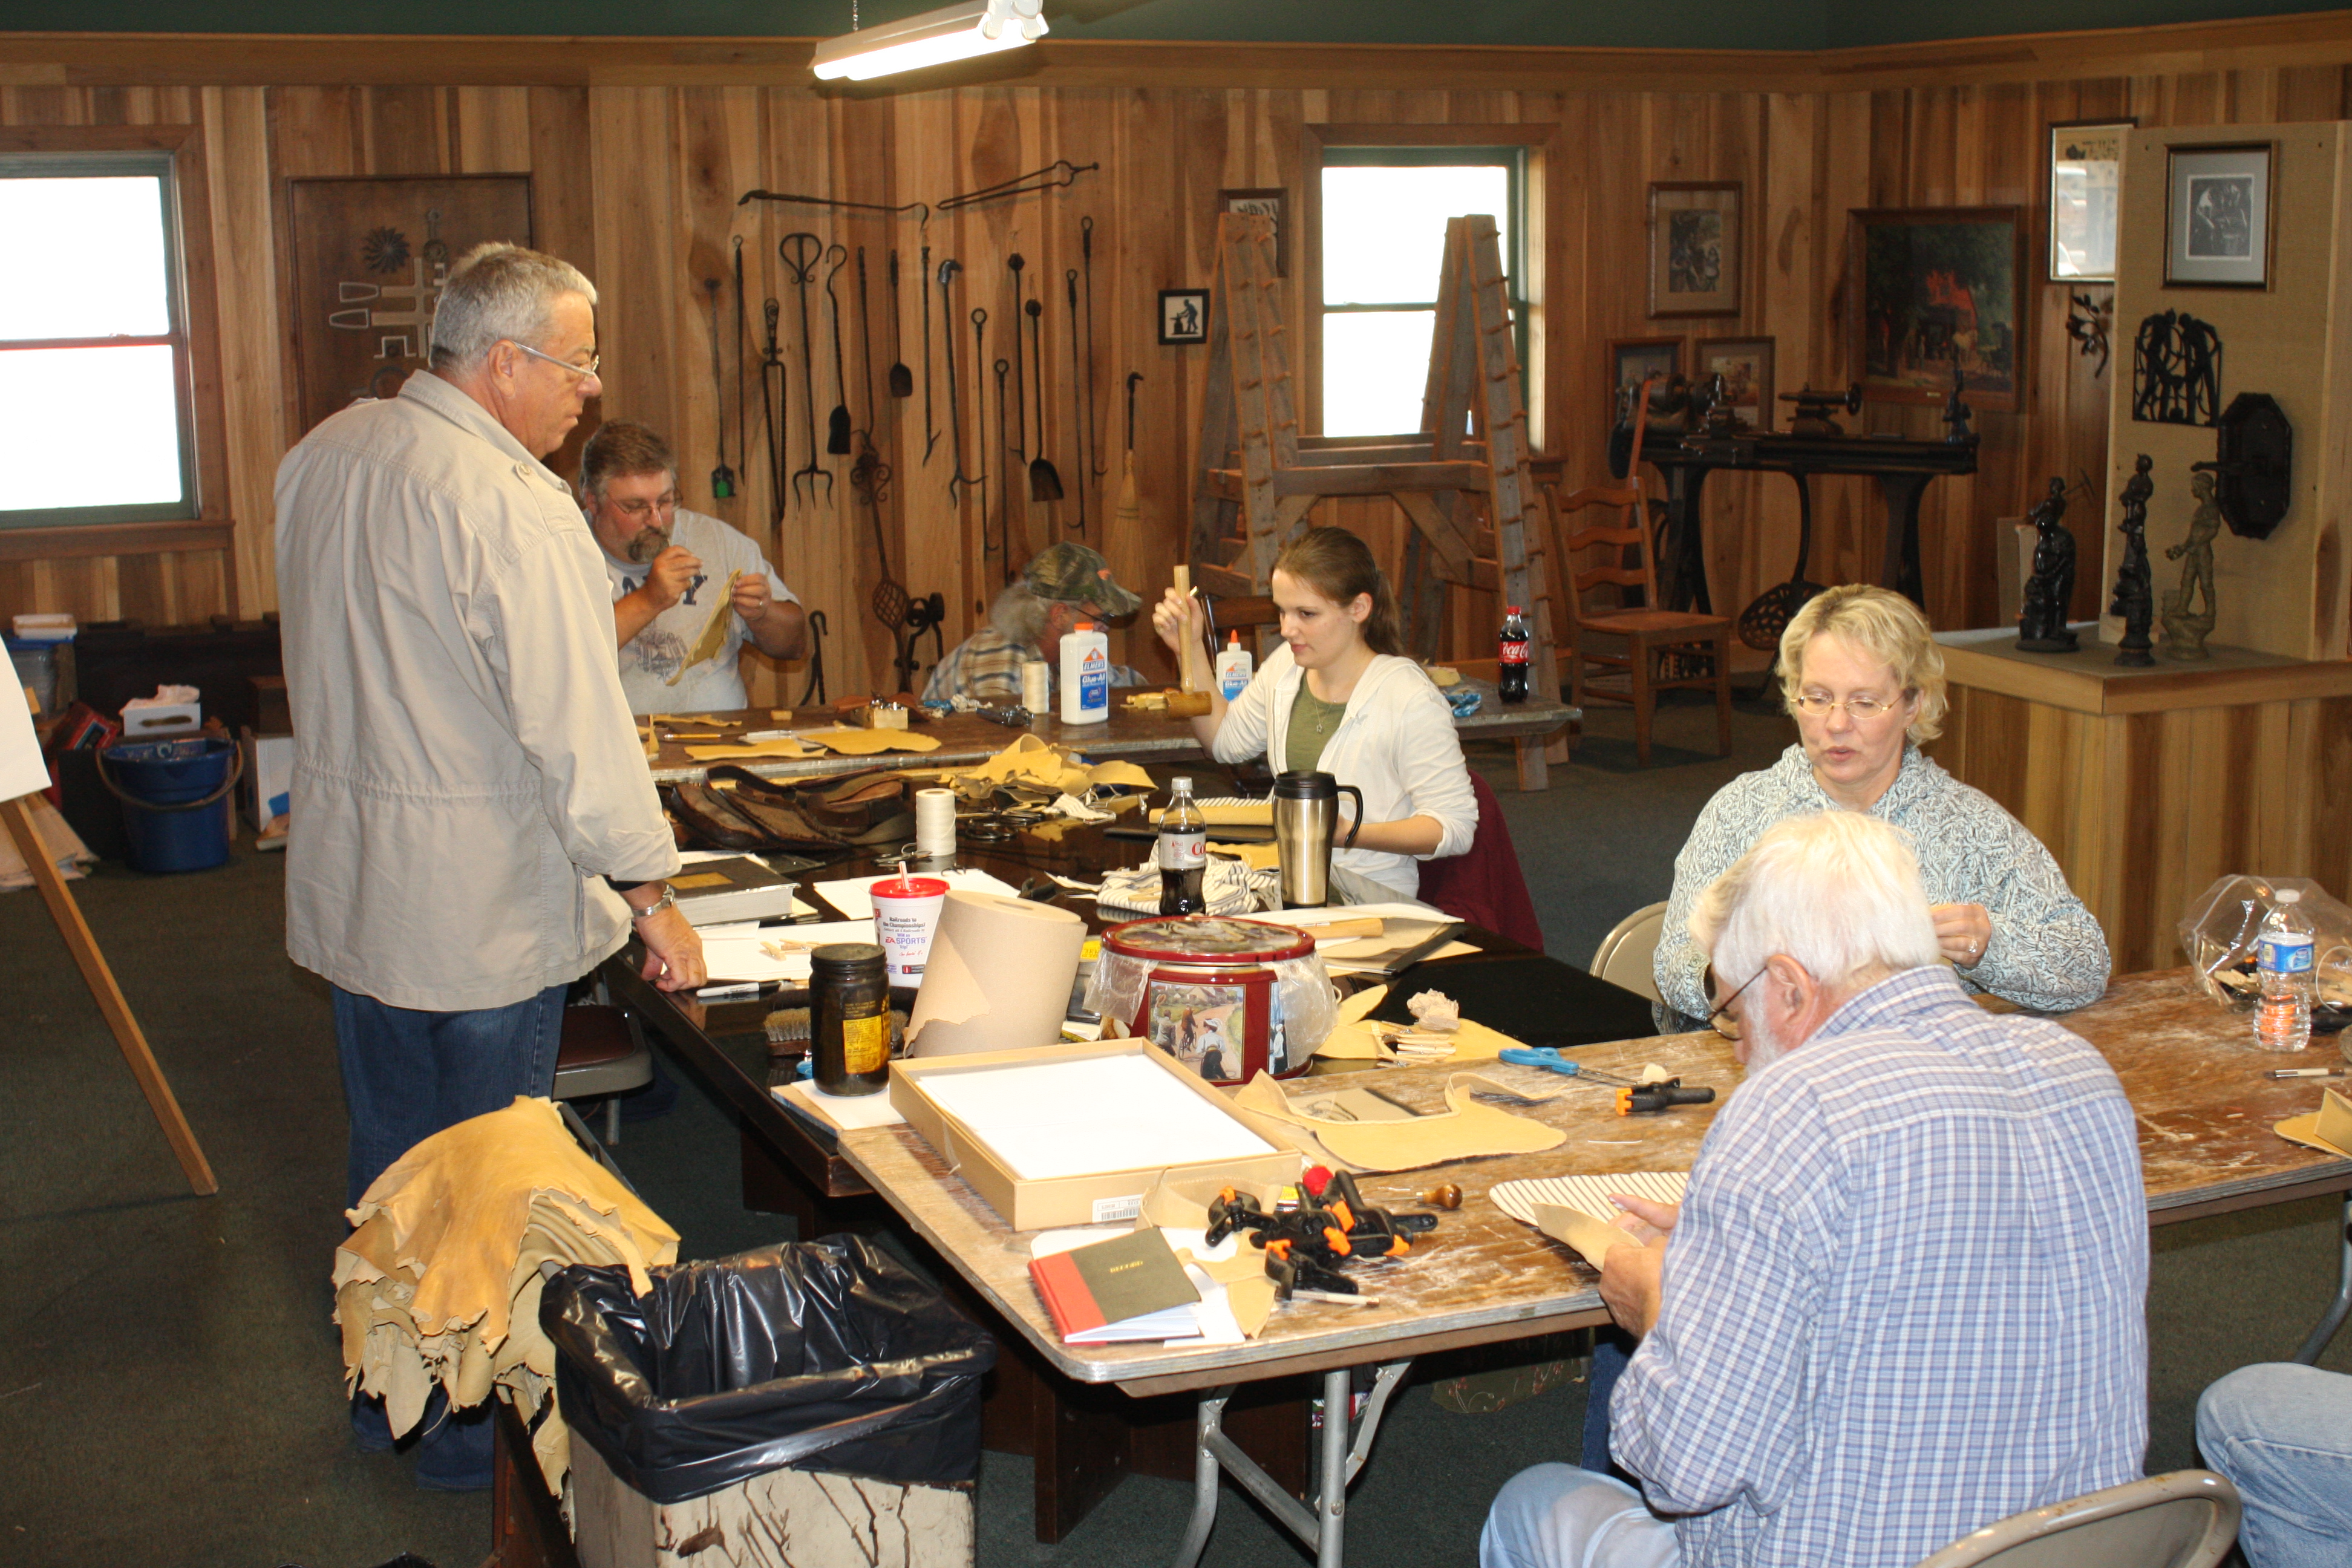
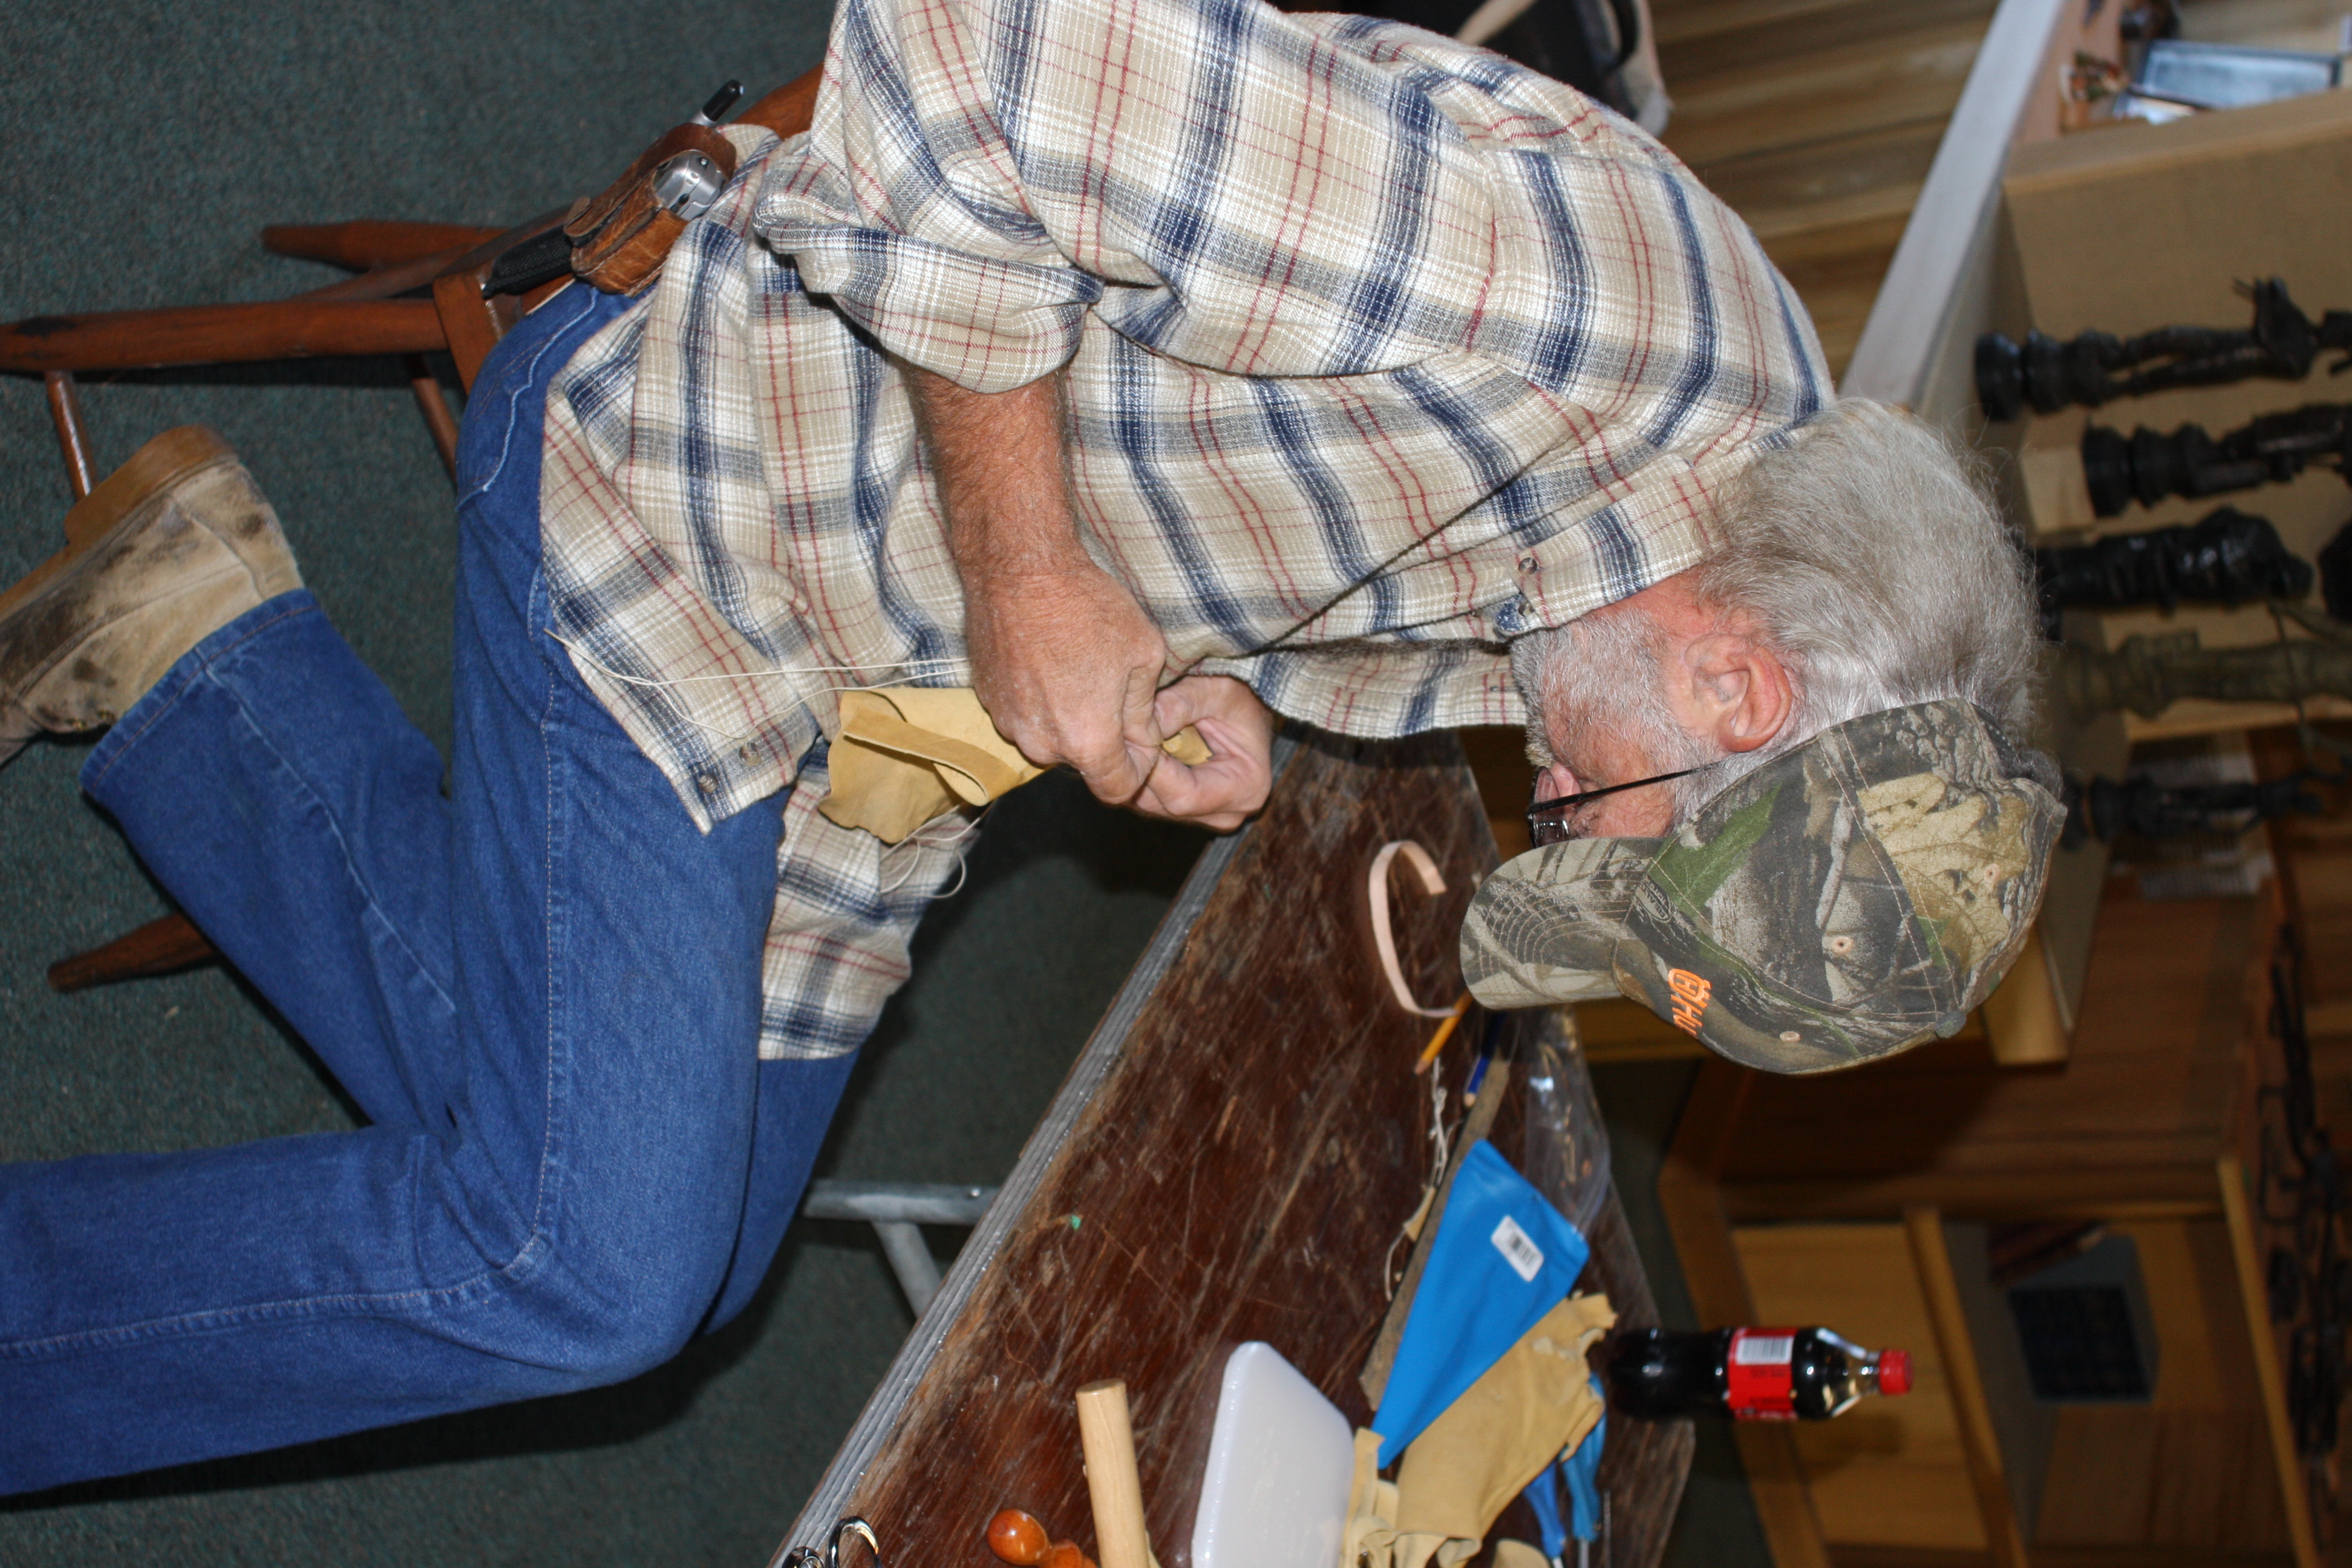
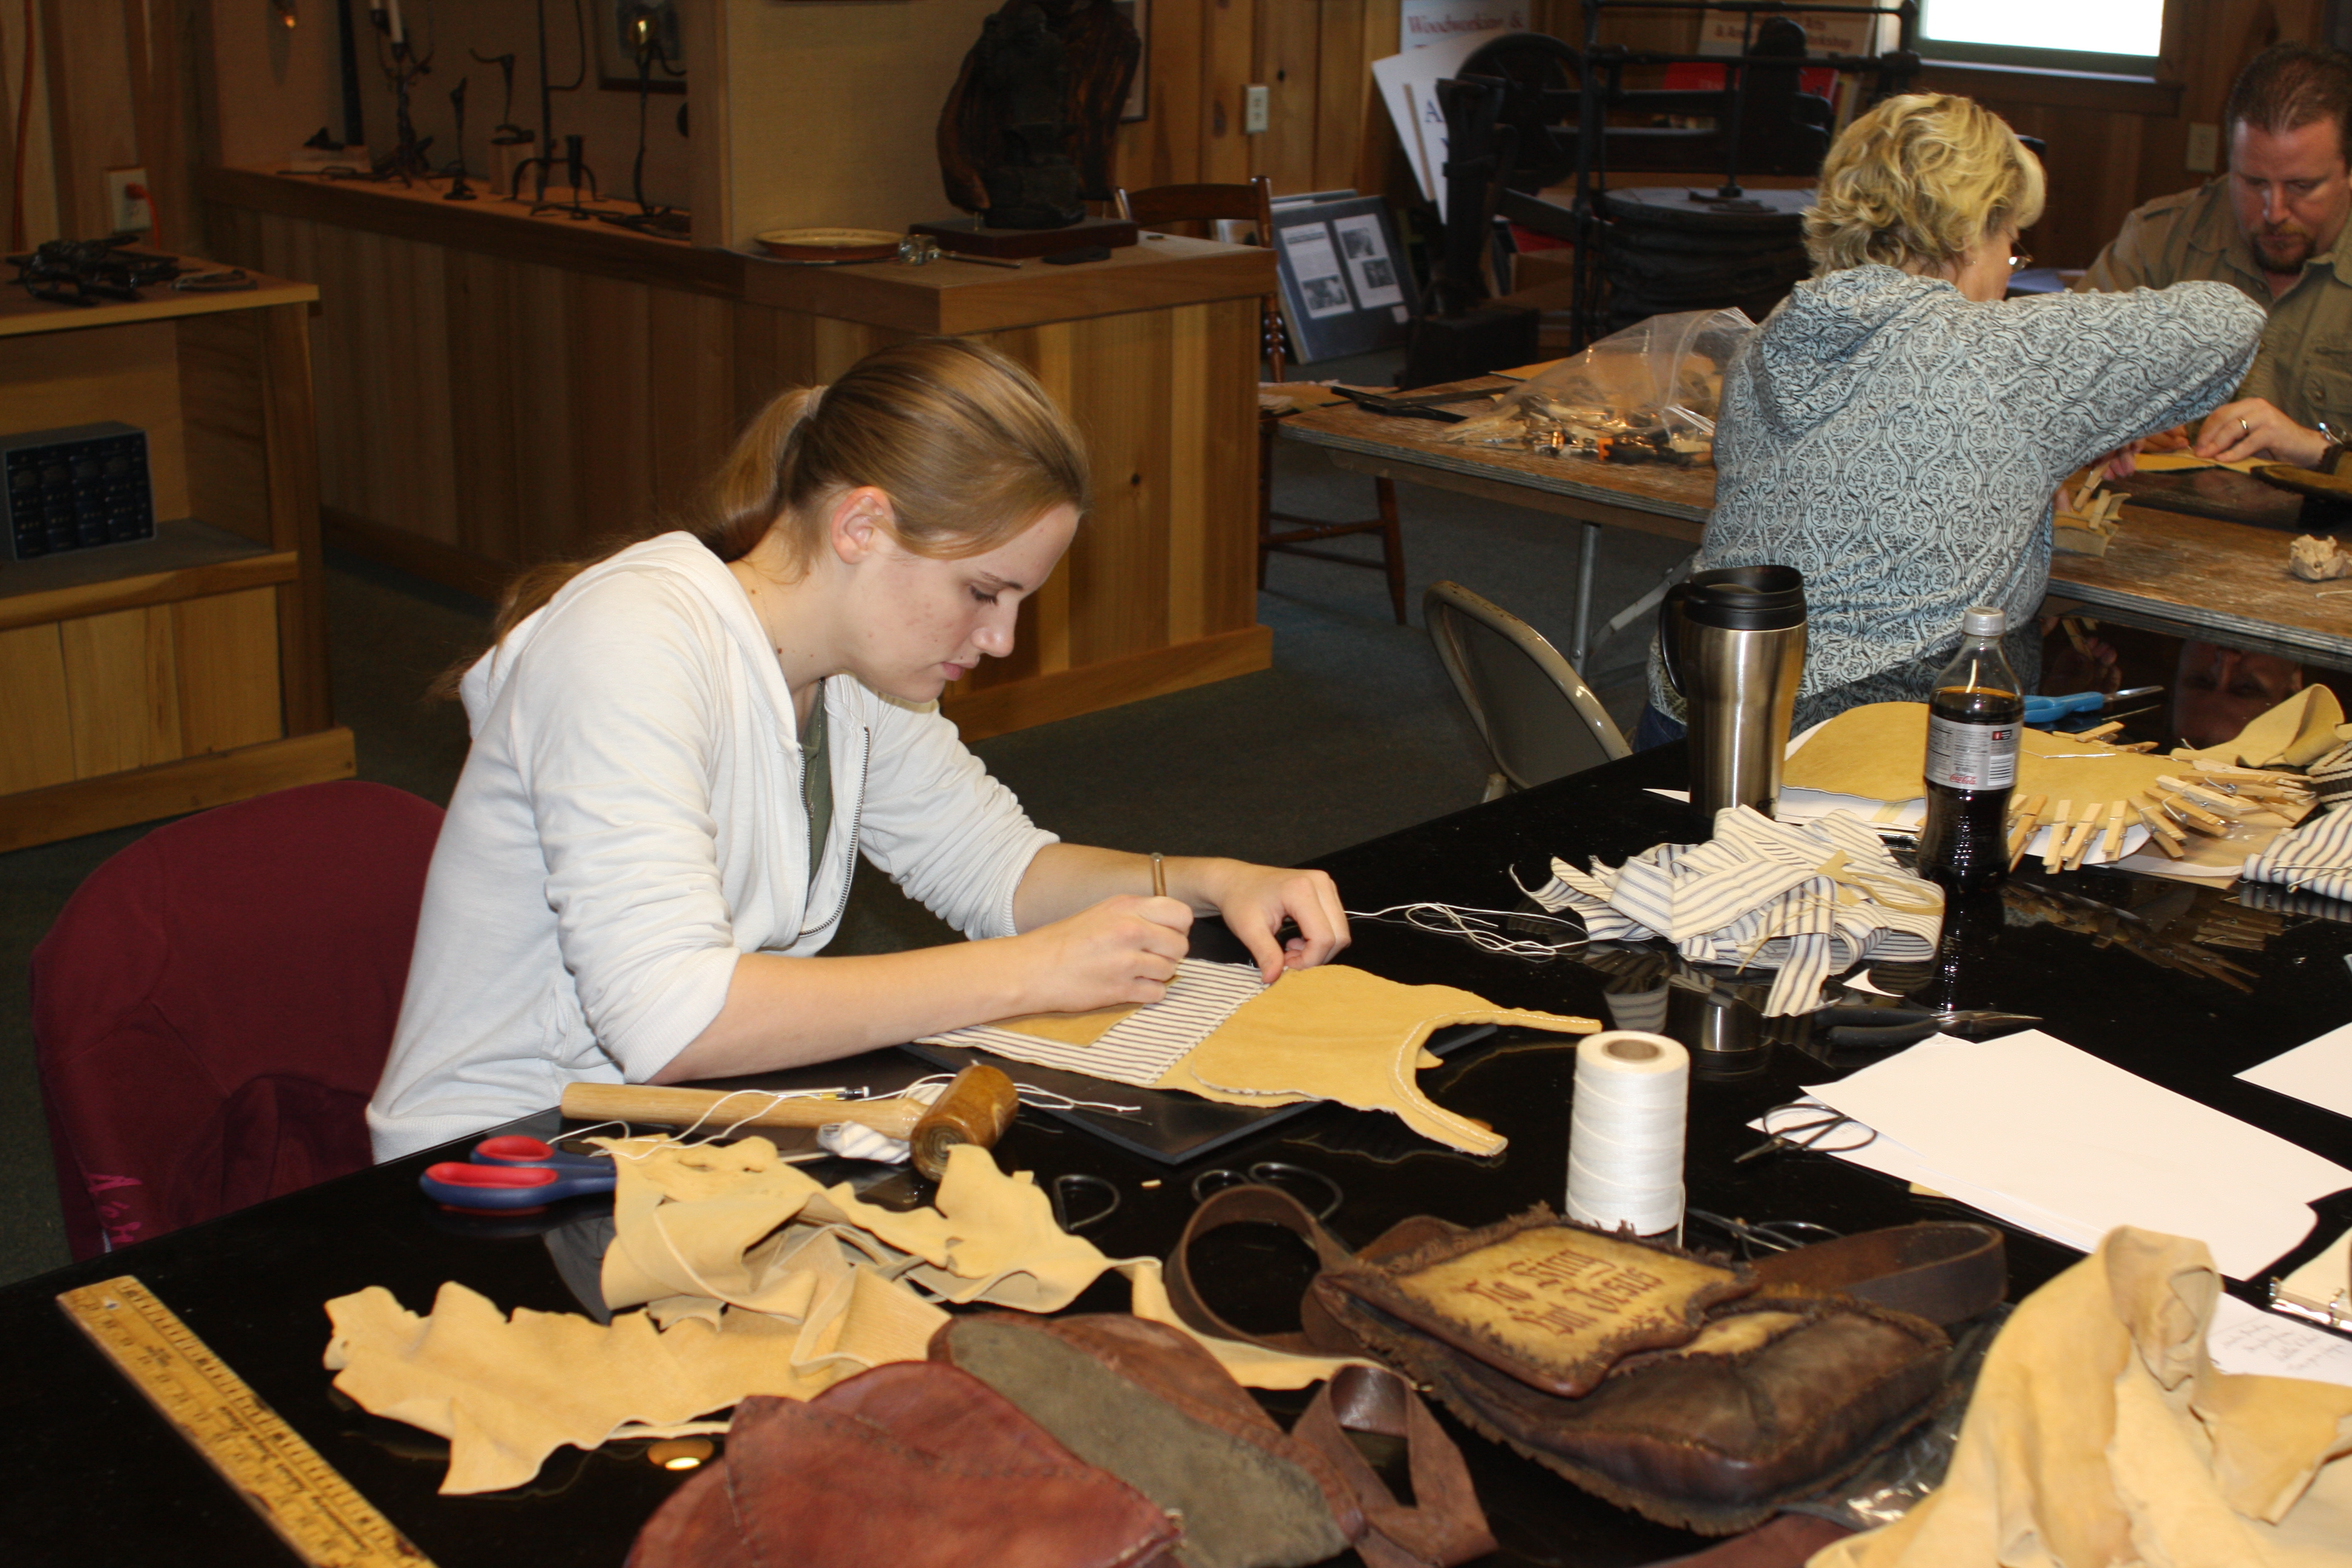
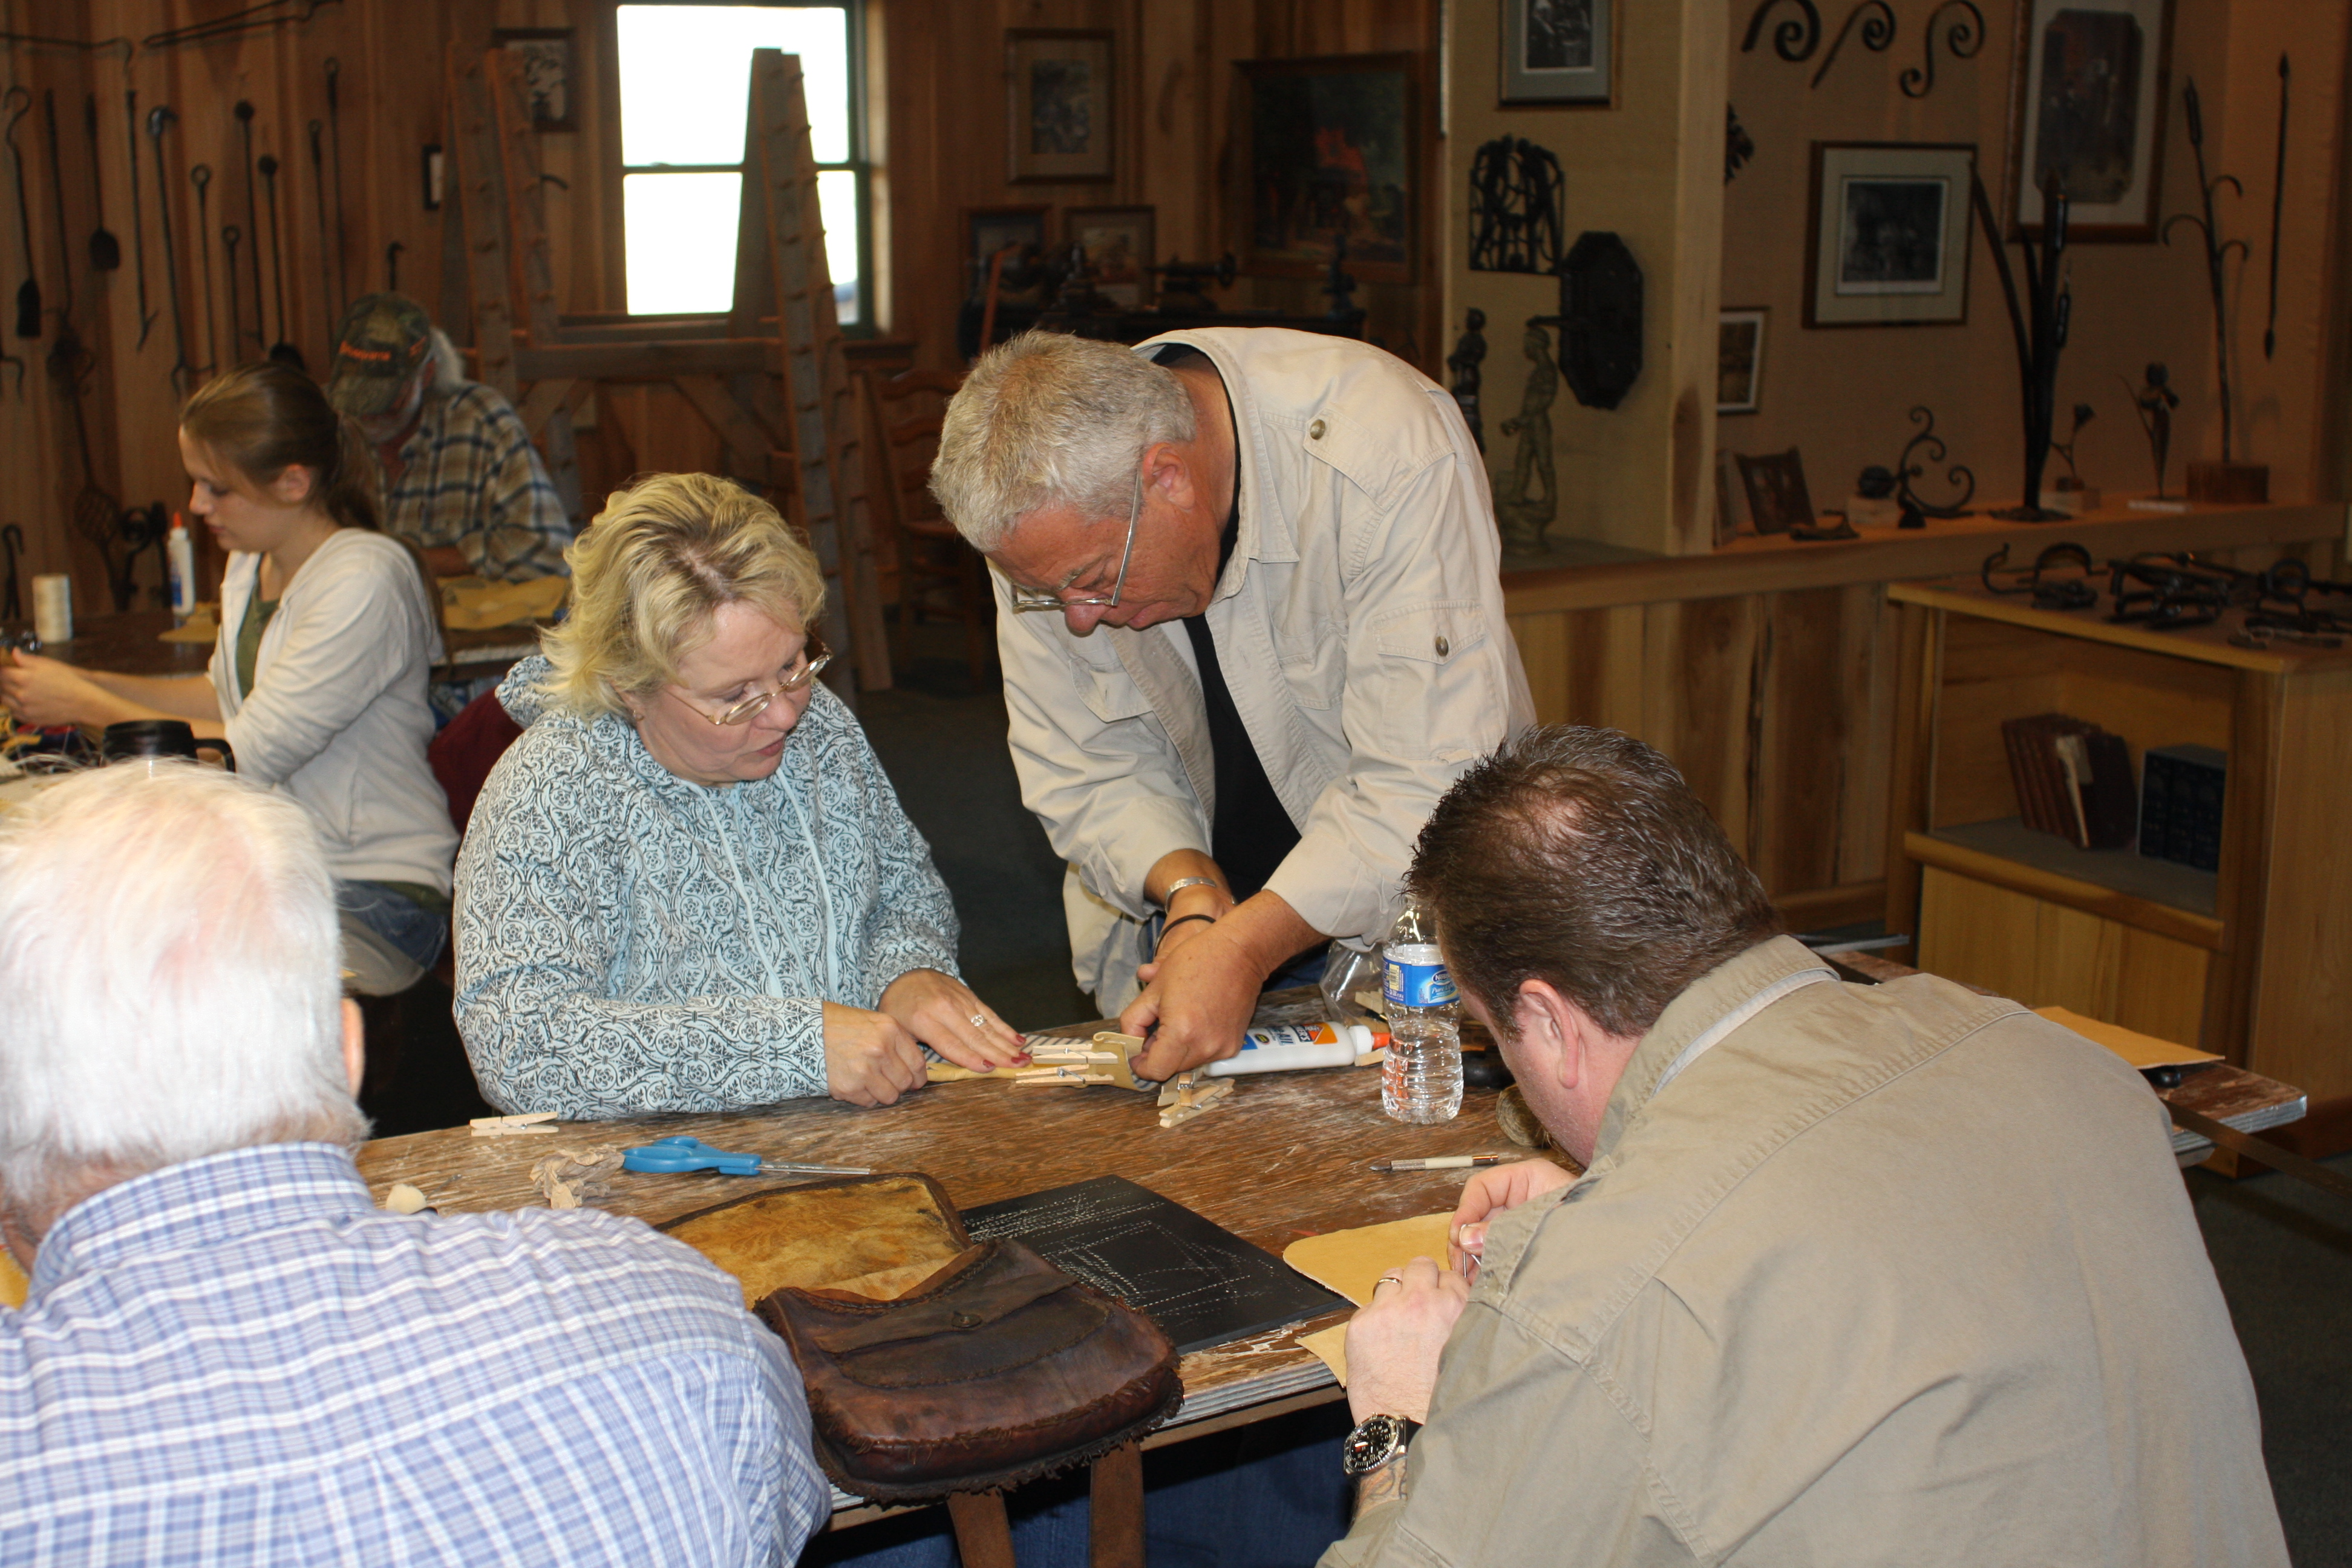
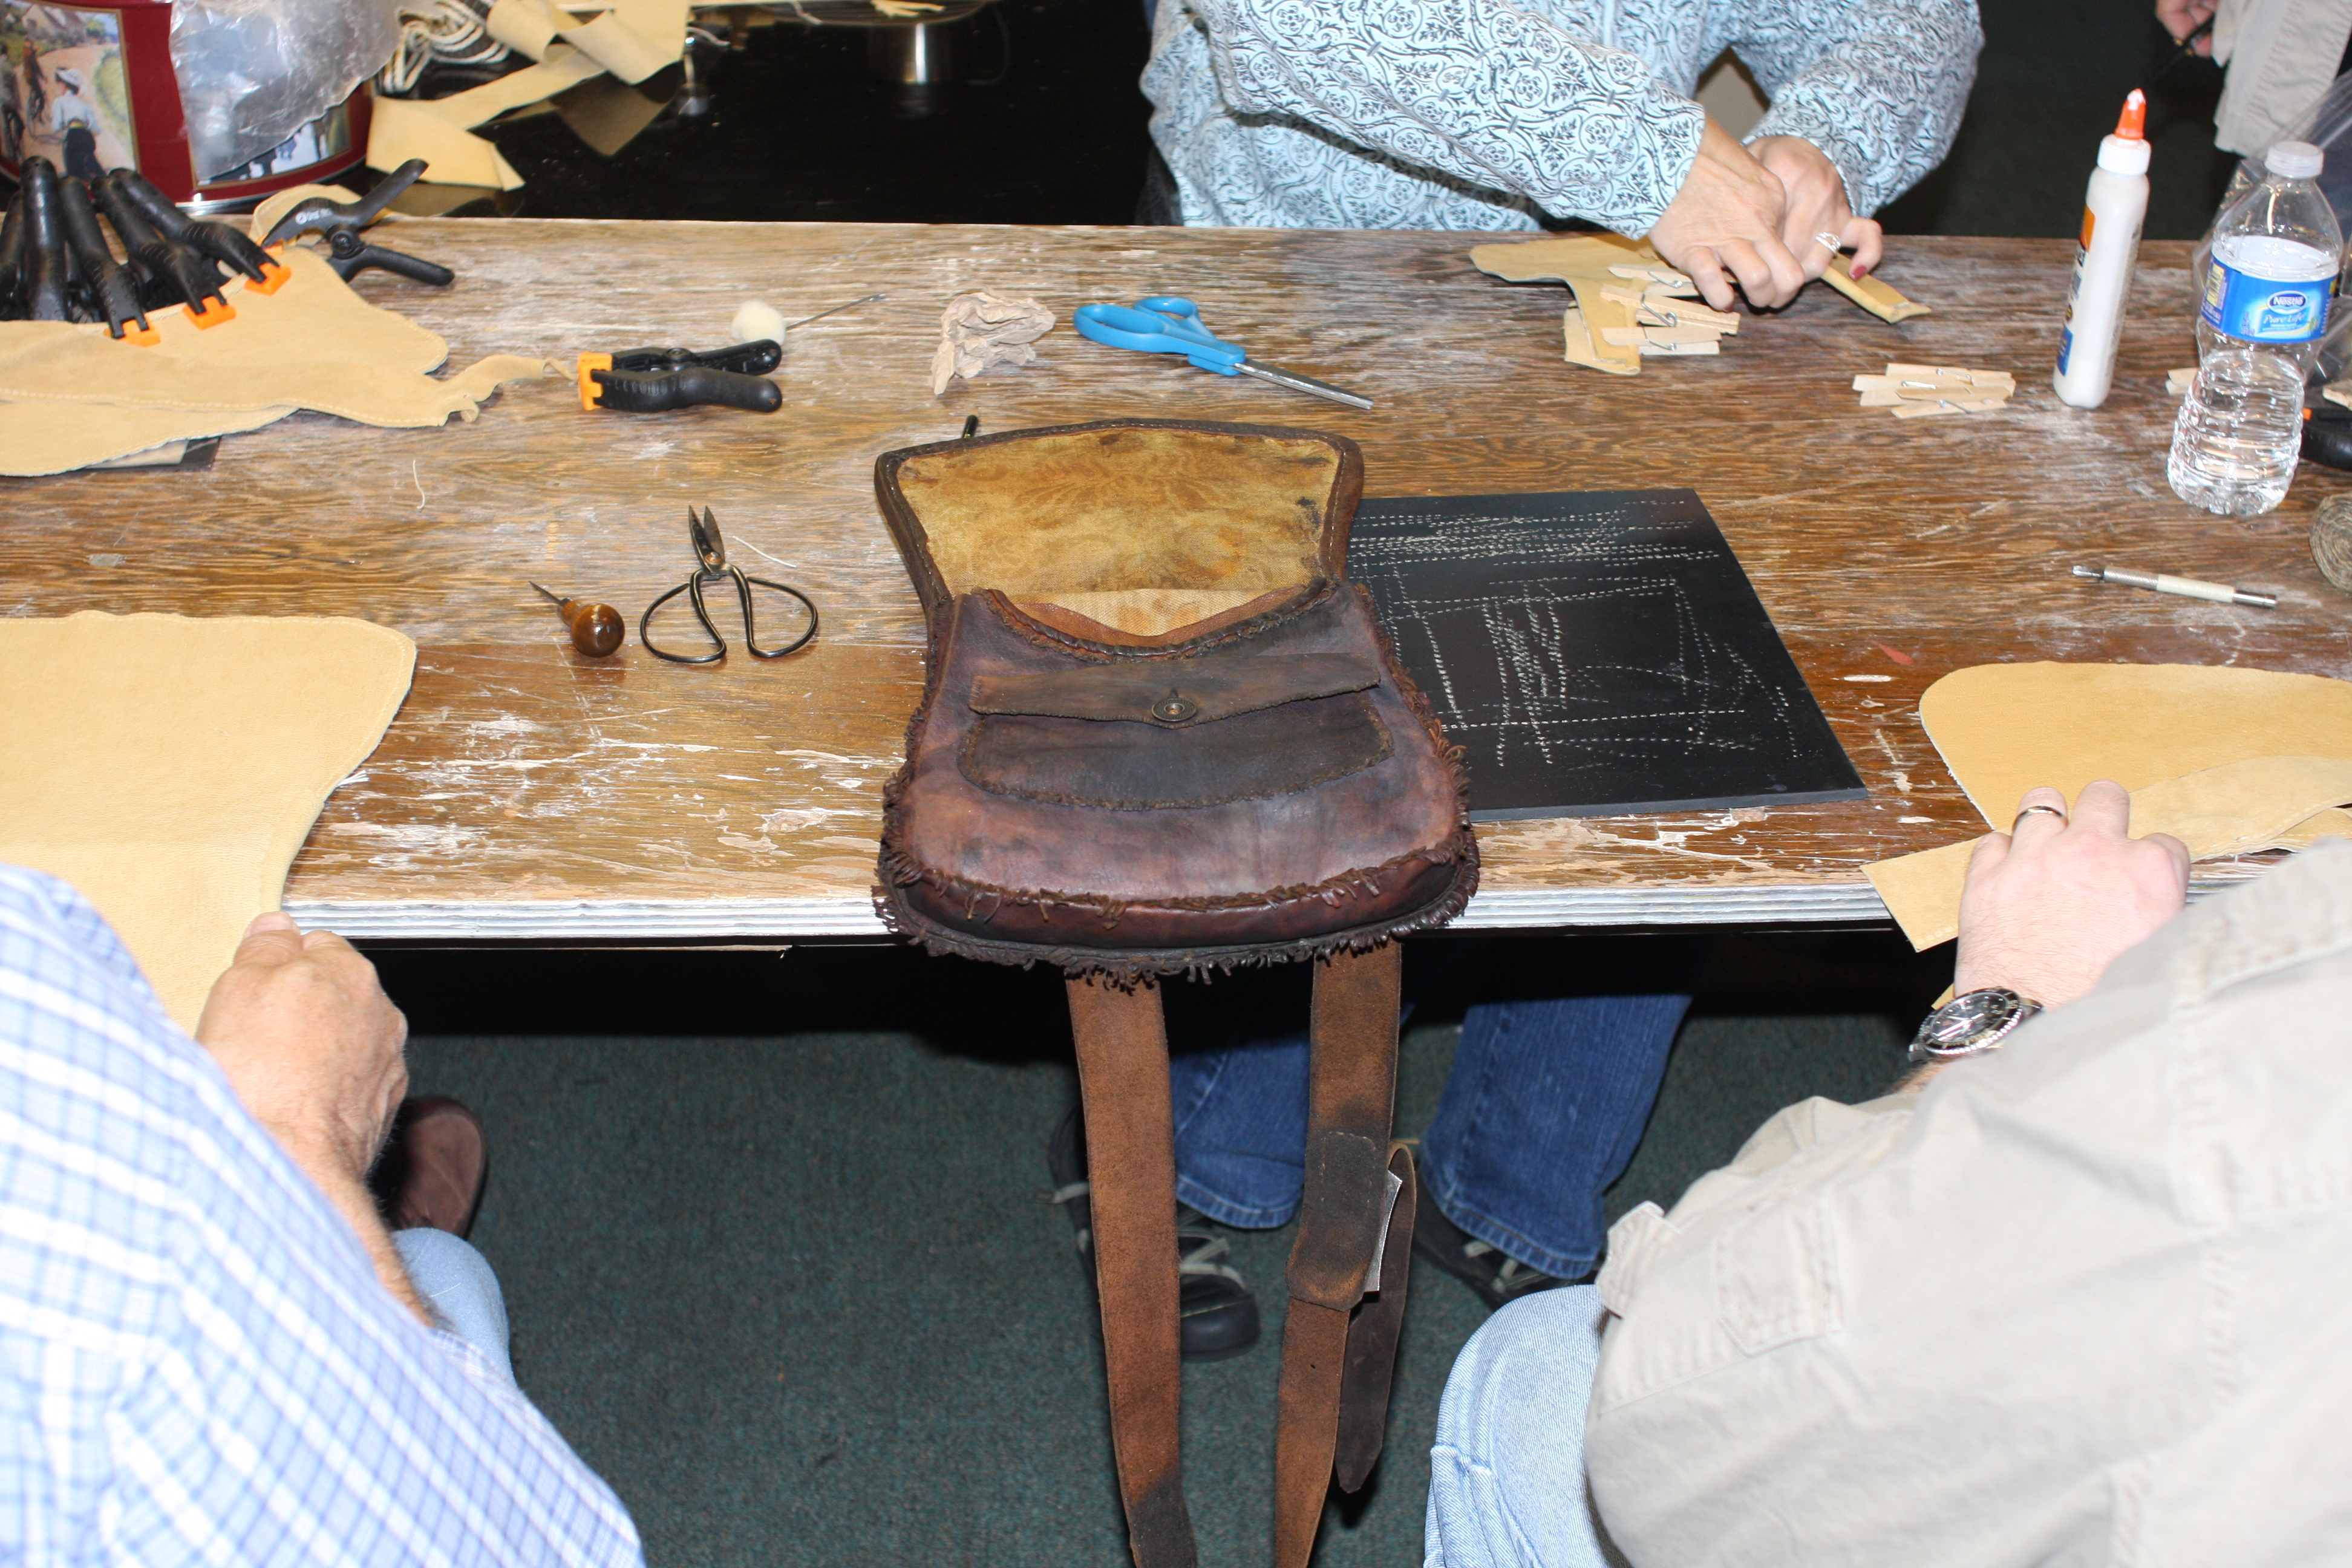
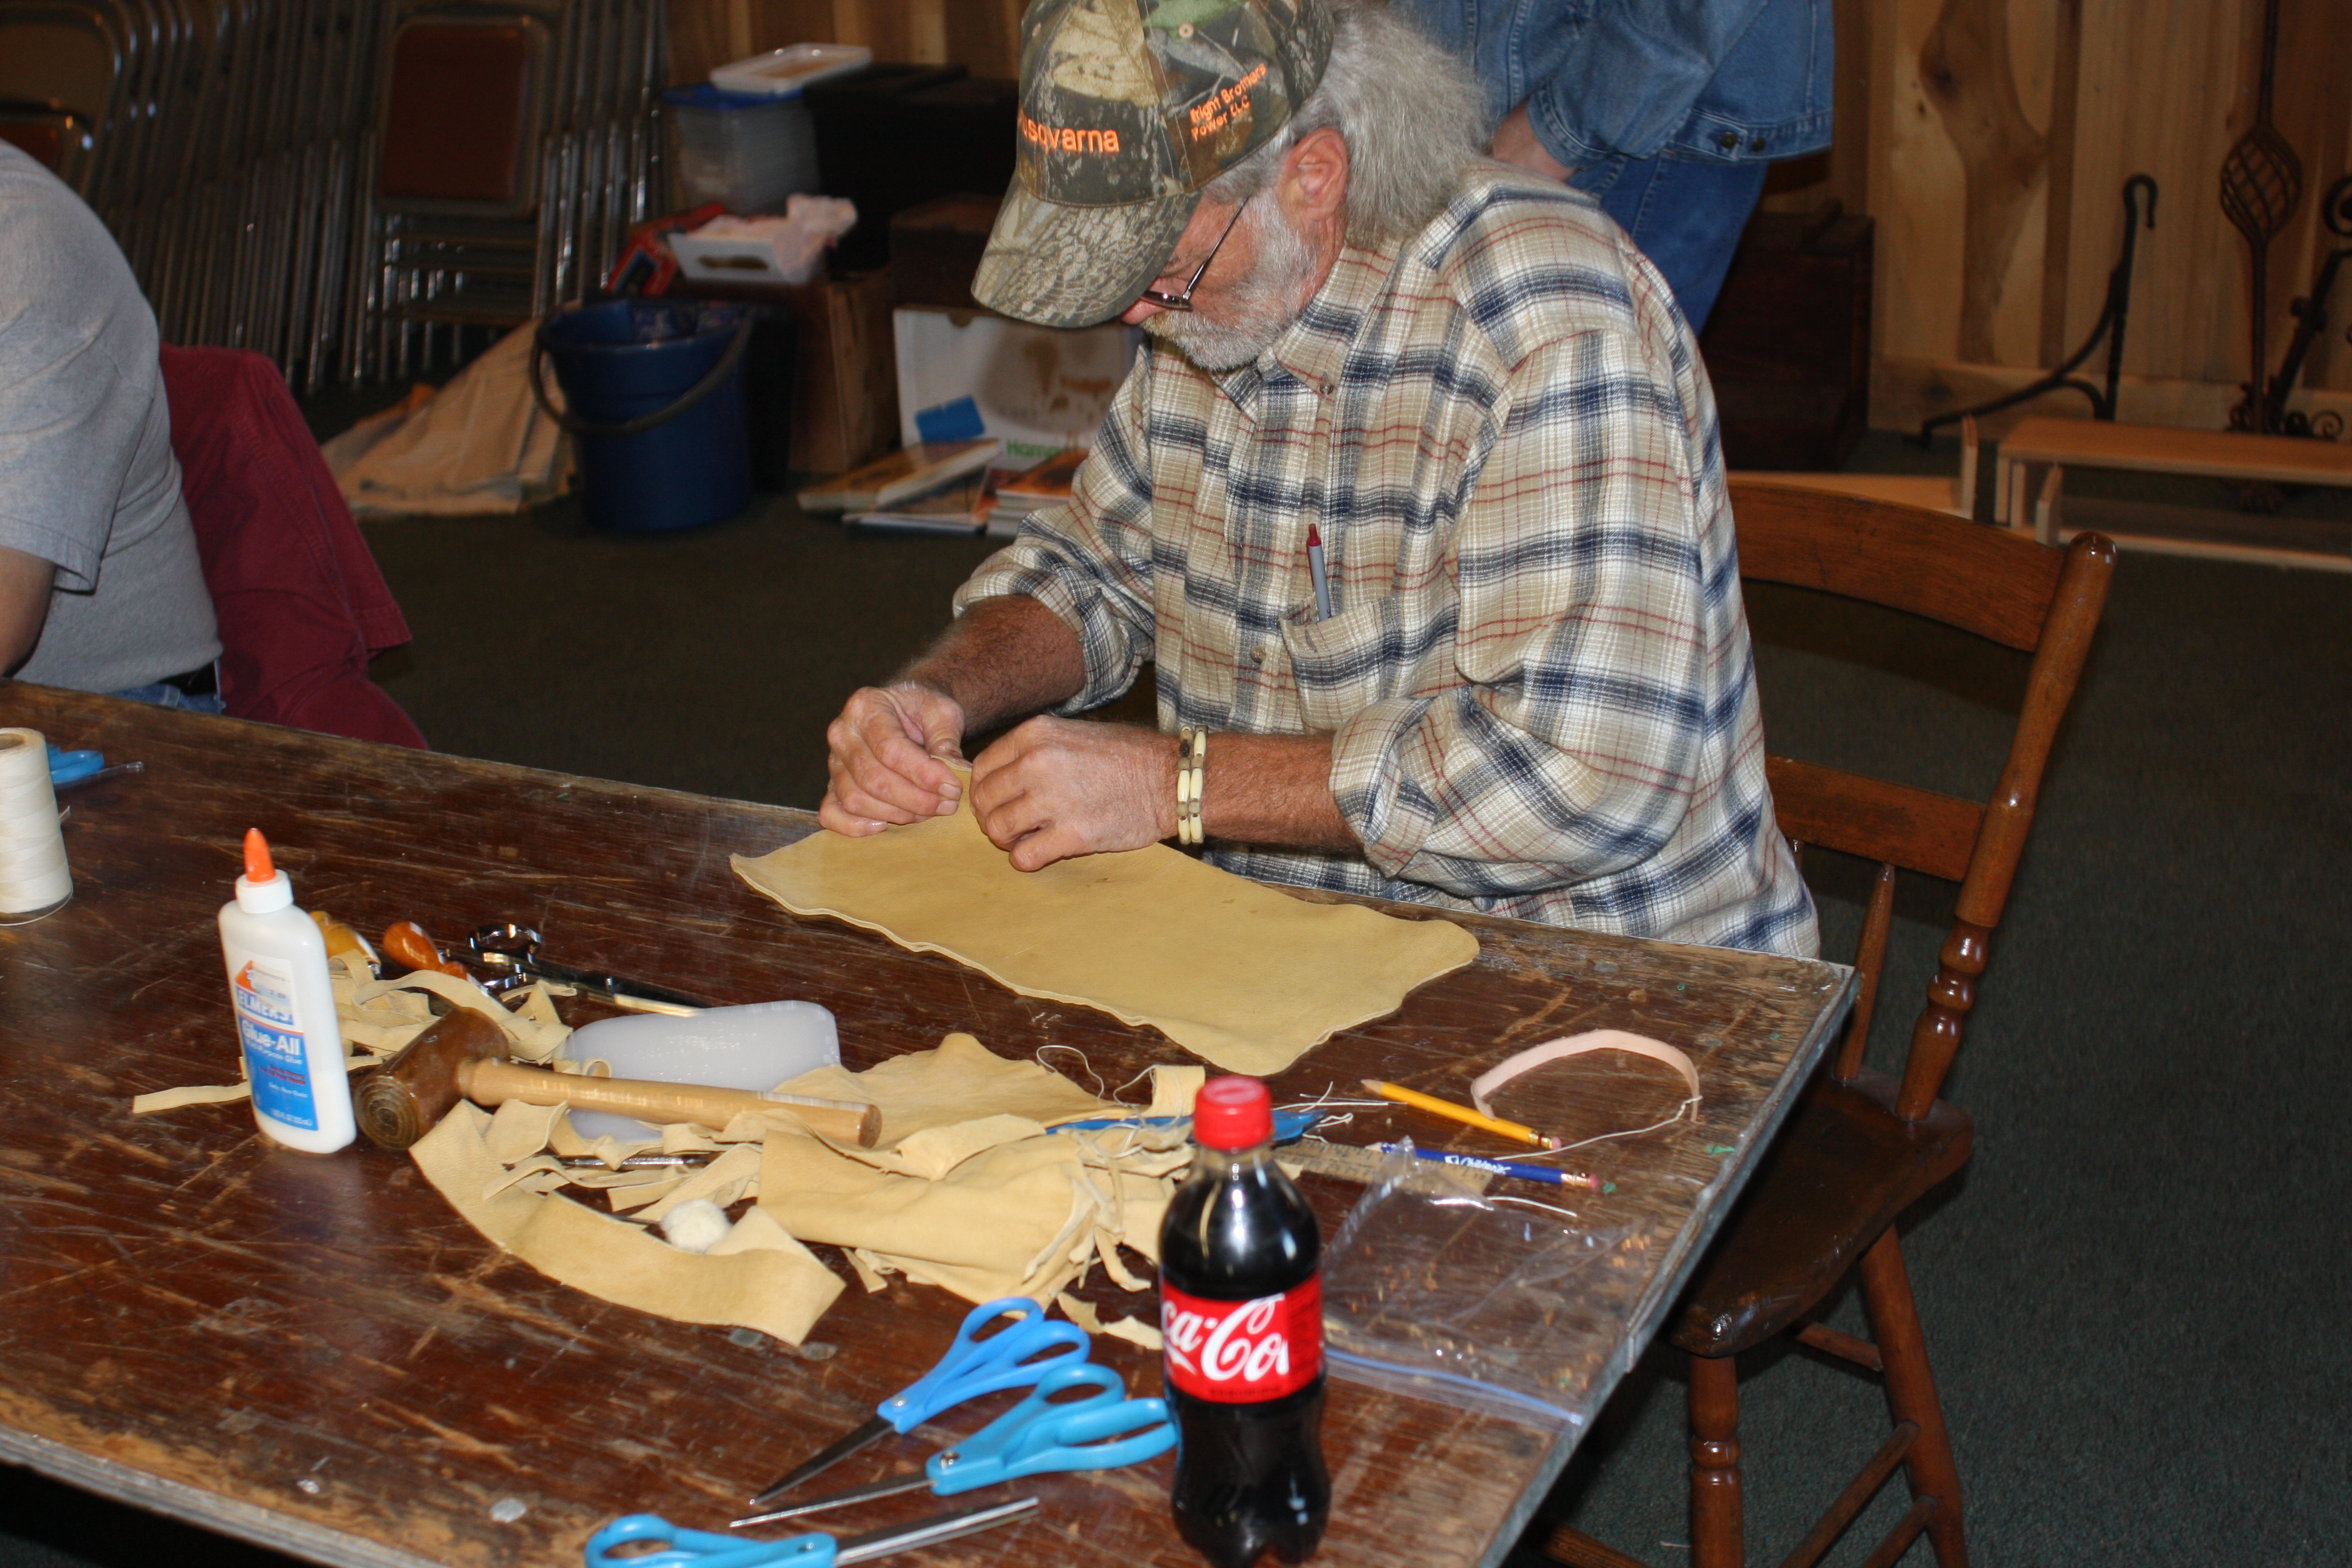
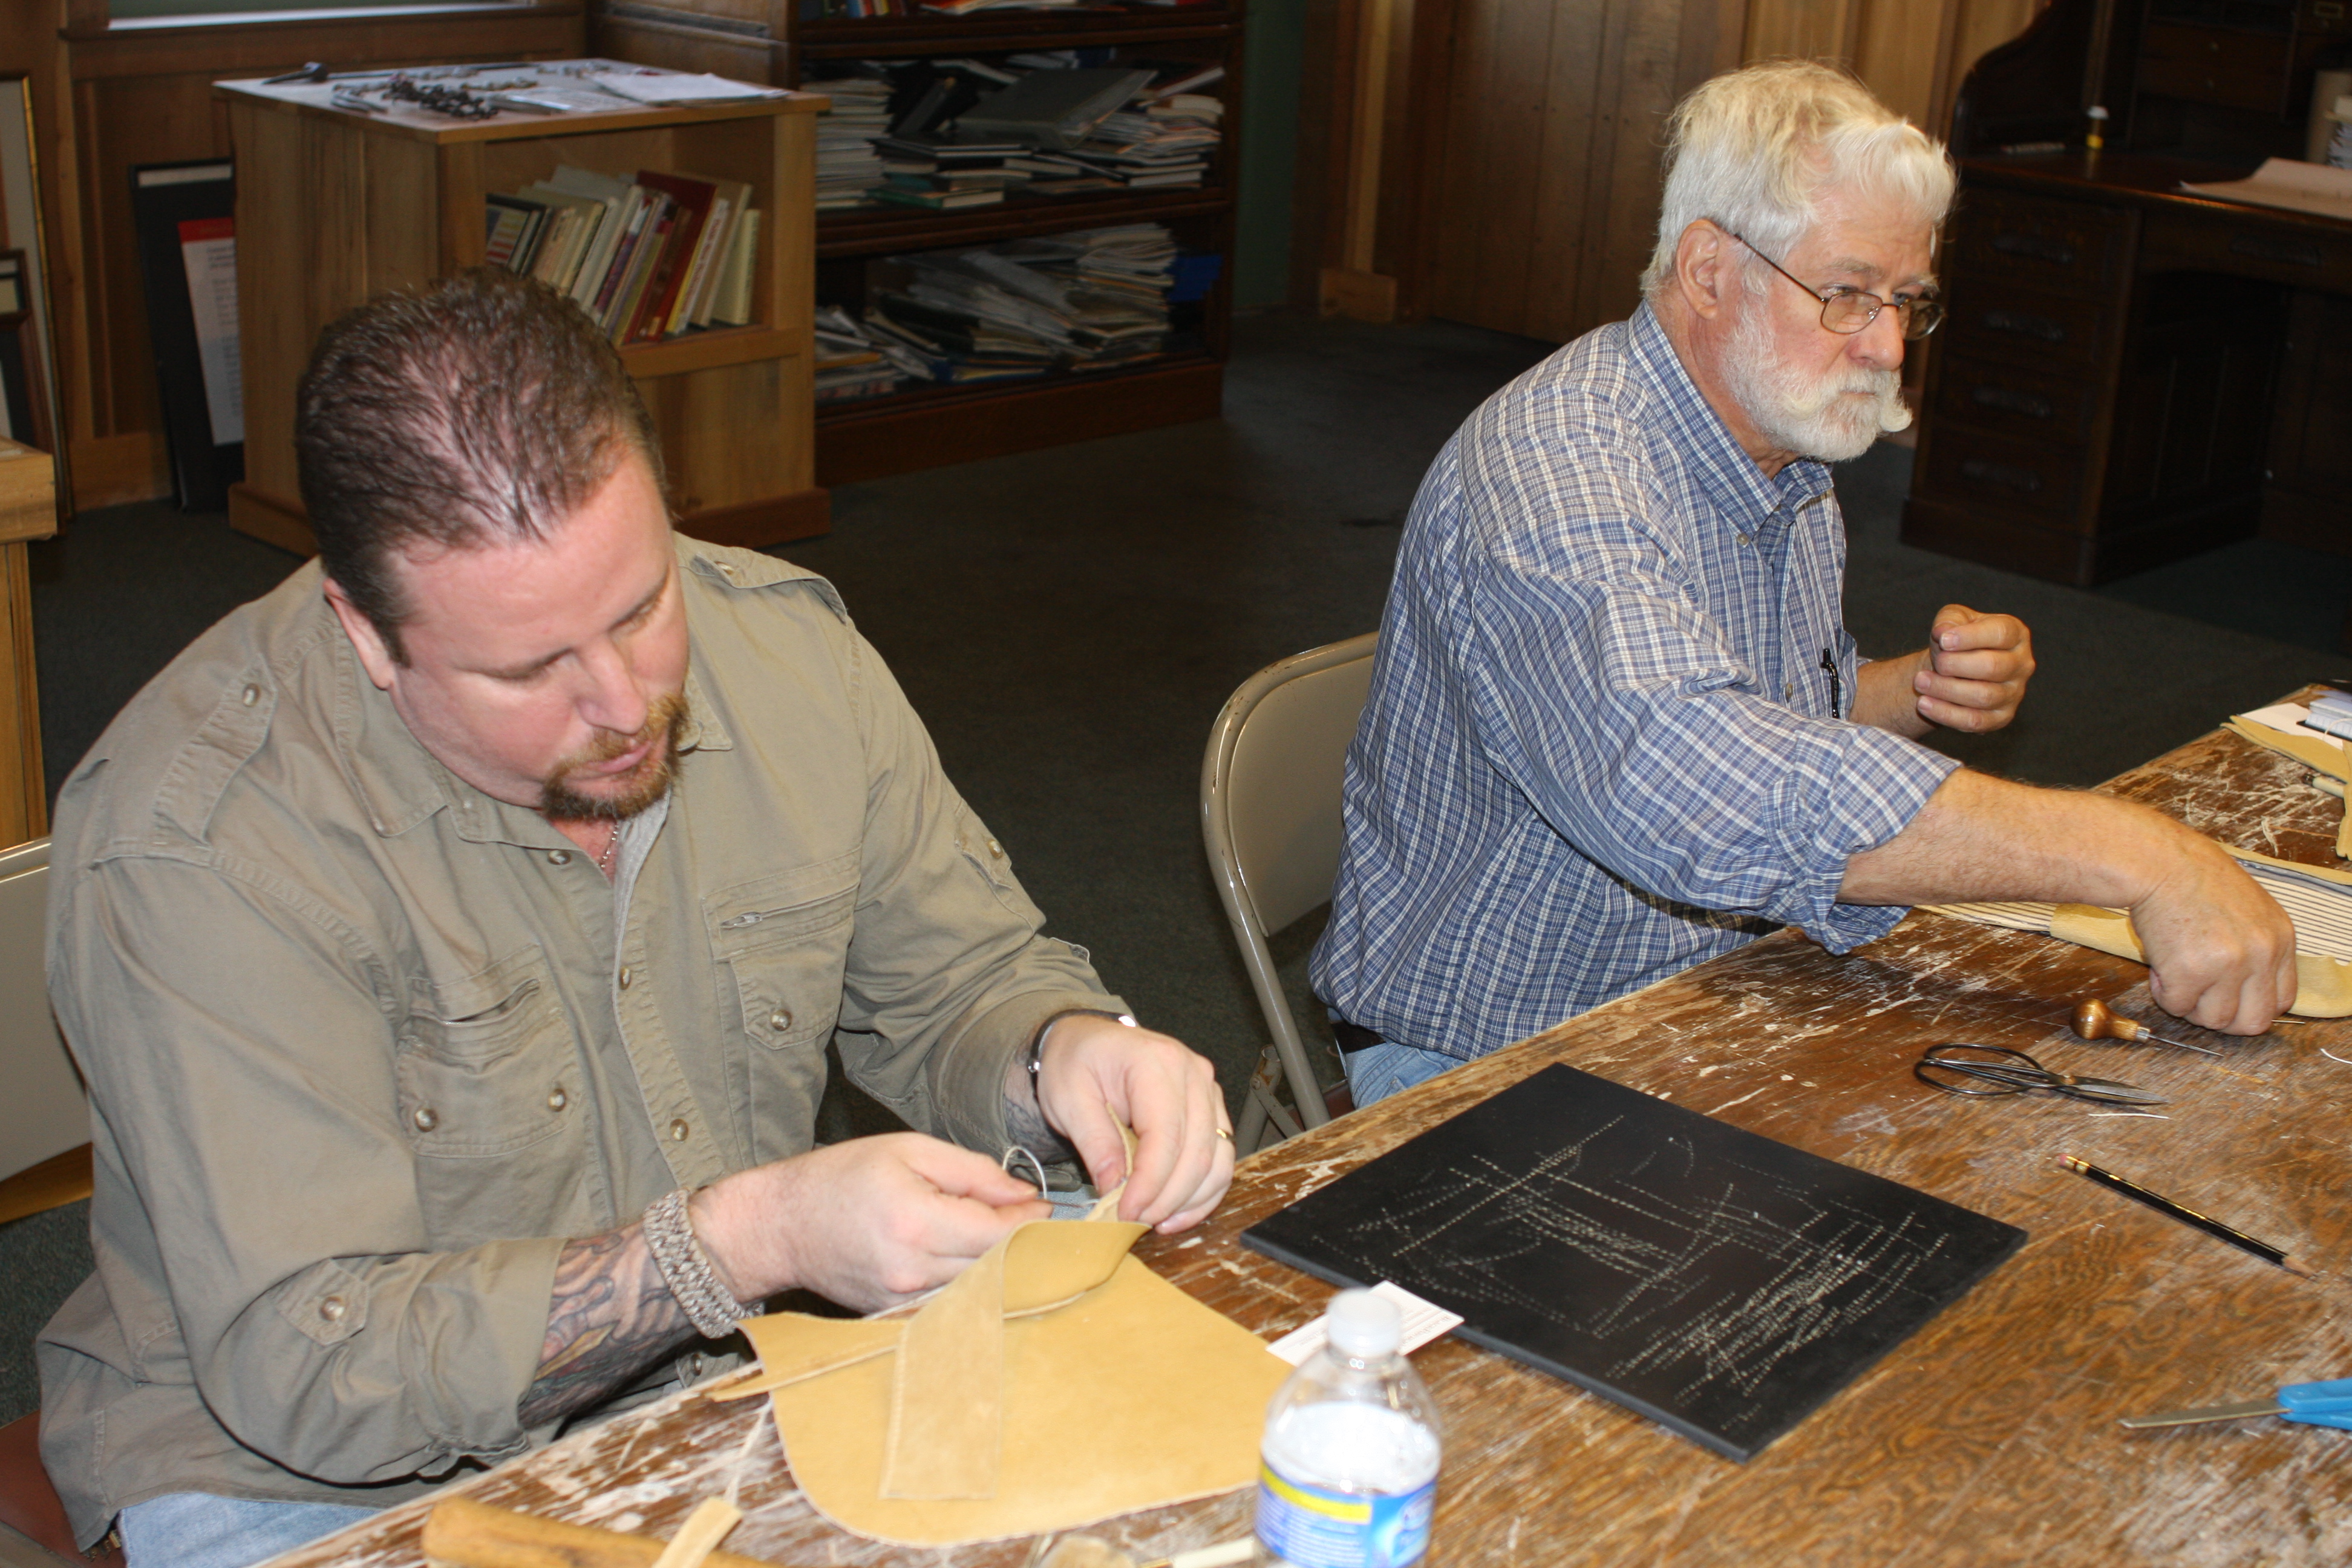
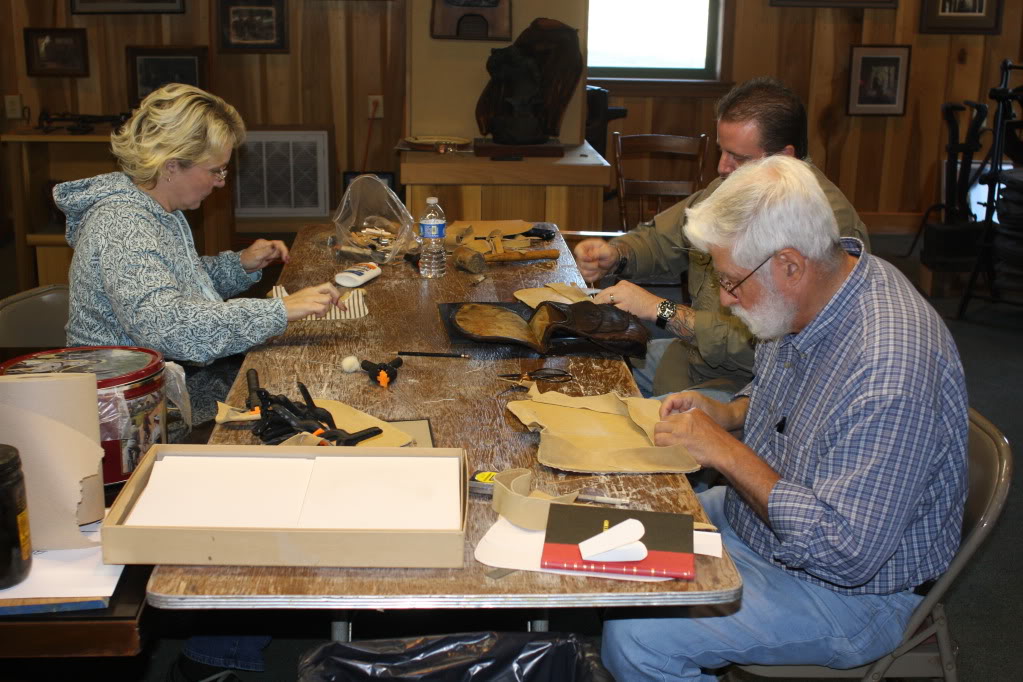
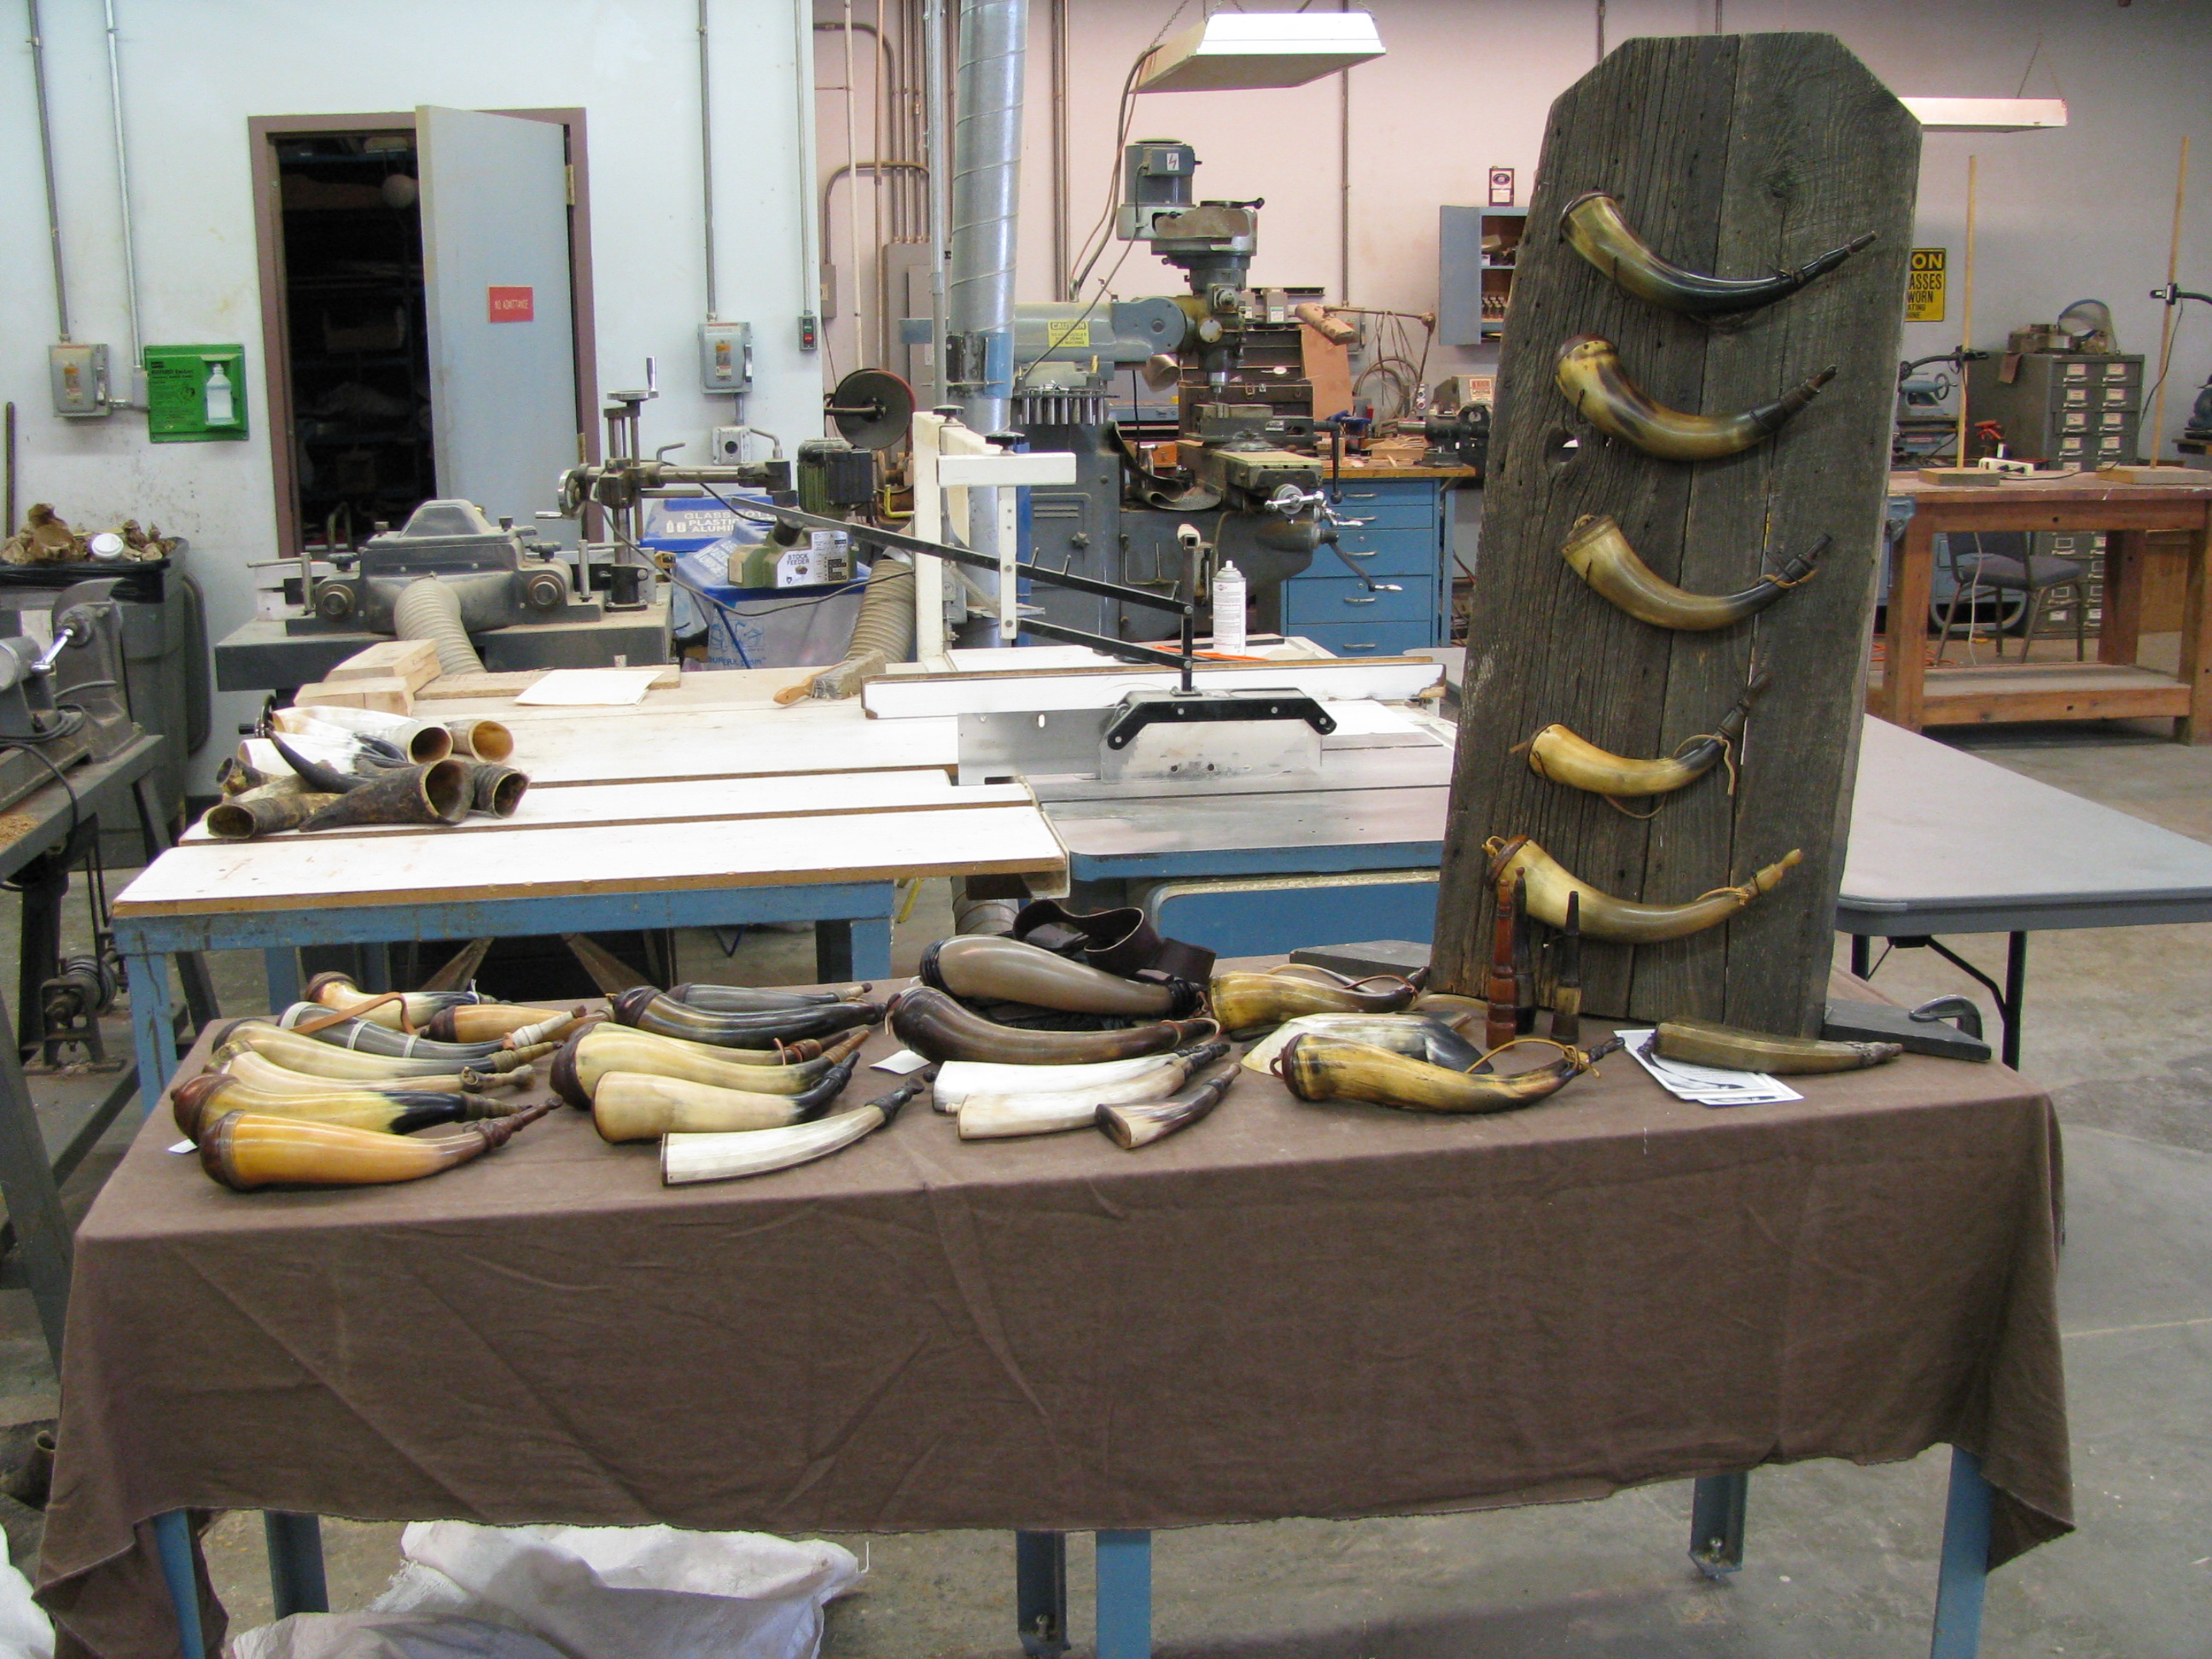
Ken Scott’s bag-making class was next door. Ken’s class includes instruction about bag styles, including region, purpose, and time period. When we arrived the students had their bags cut out and were busy sewing.
Below is one of Ken’s bags that I saw at the CLA show in Lexington. This is one of my favorites. Click on Shooting Bags for more photos. (Use your “back” button to return to the article.)
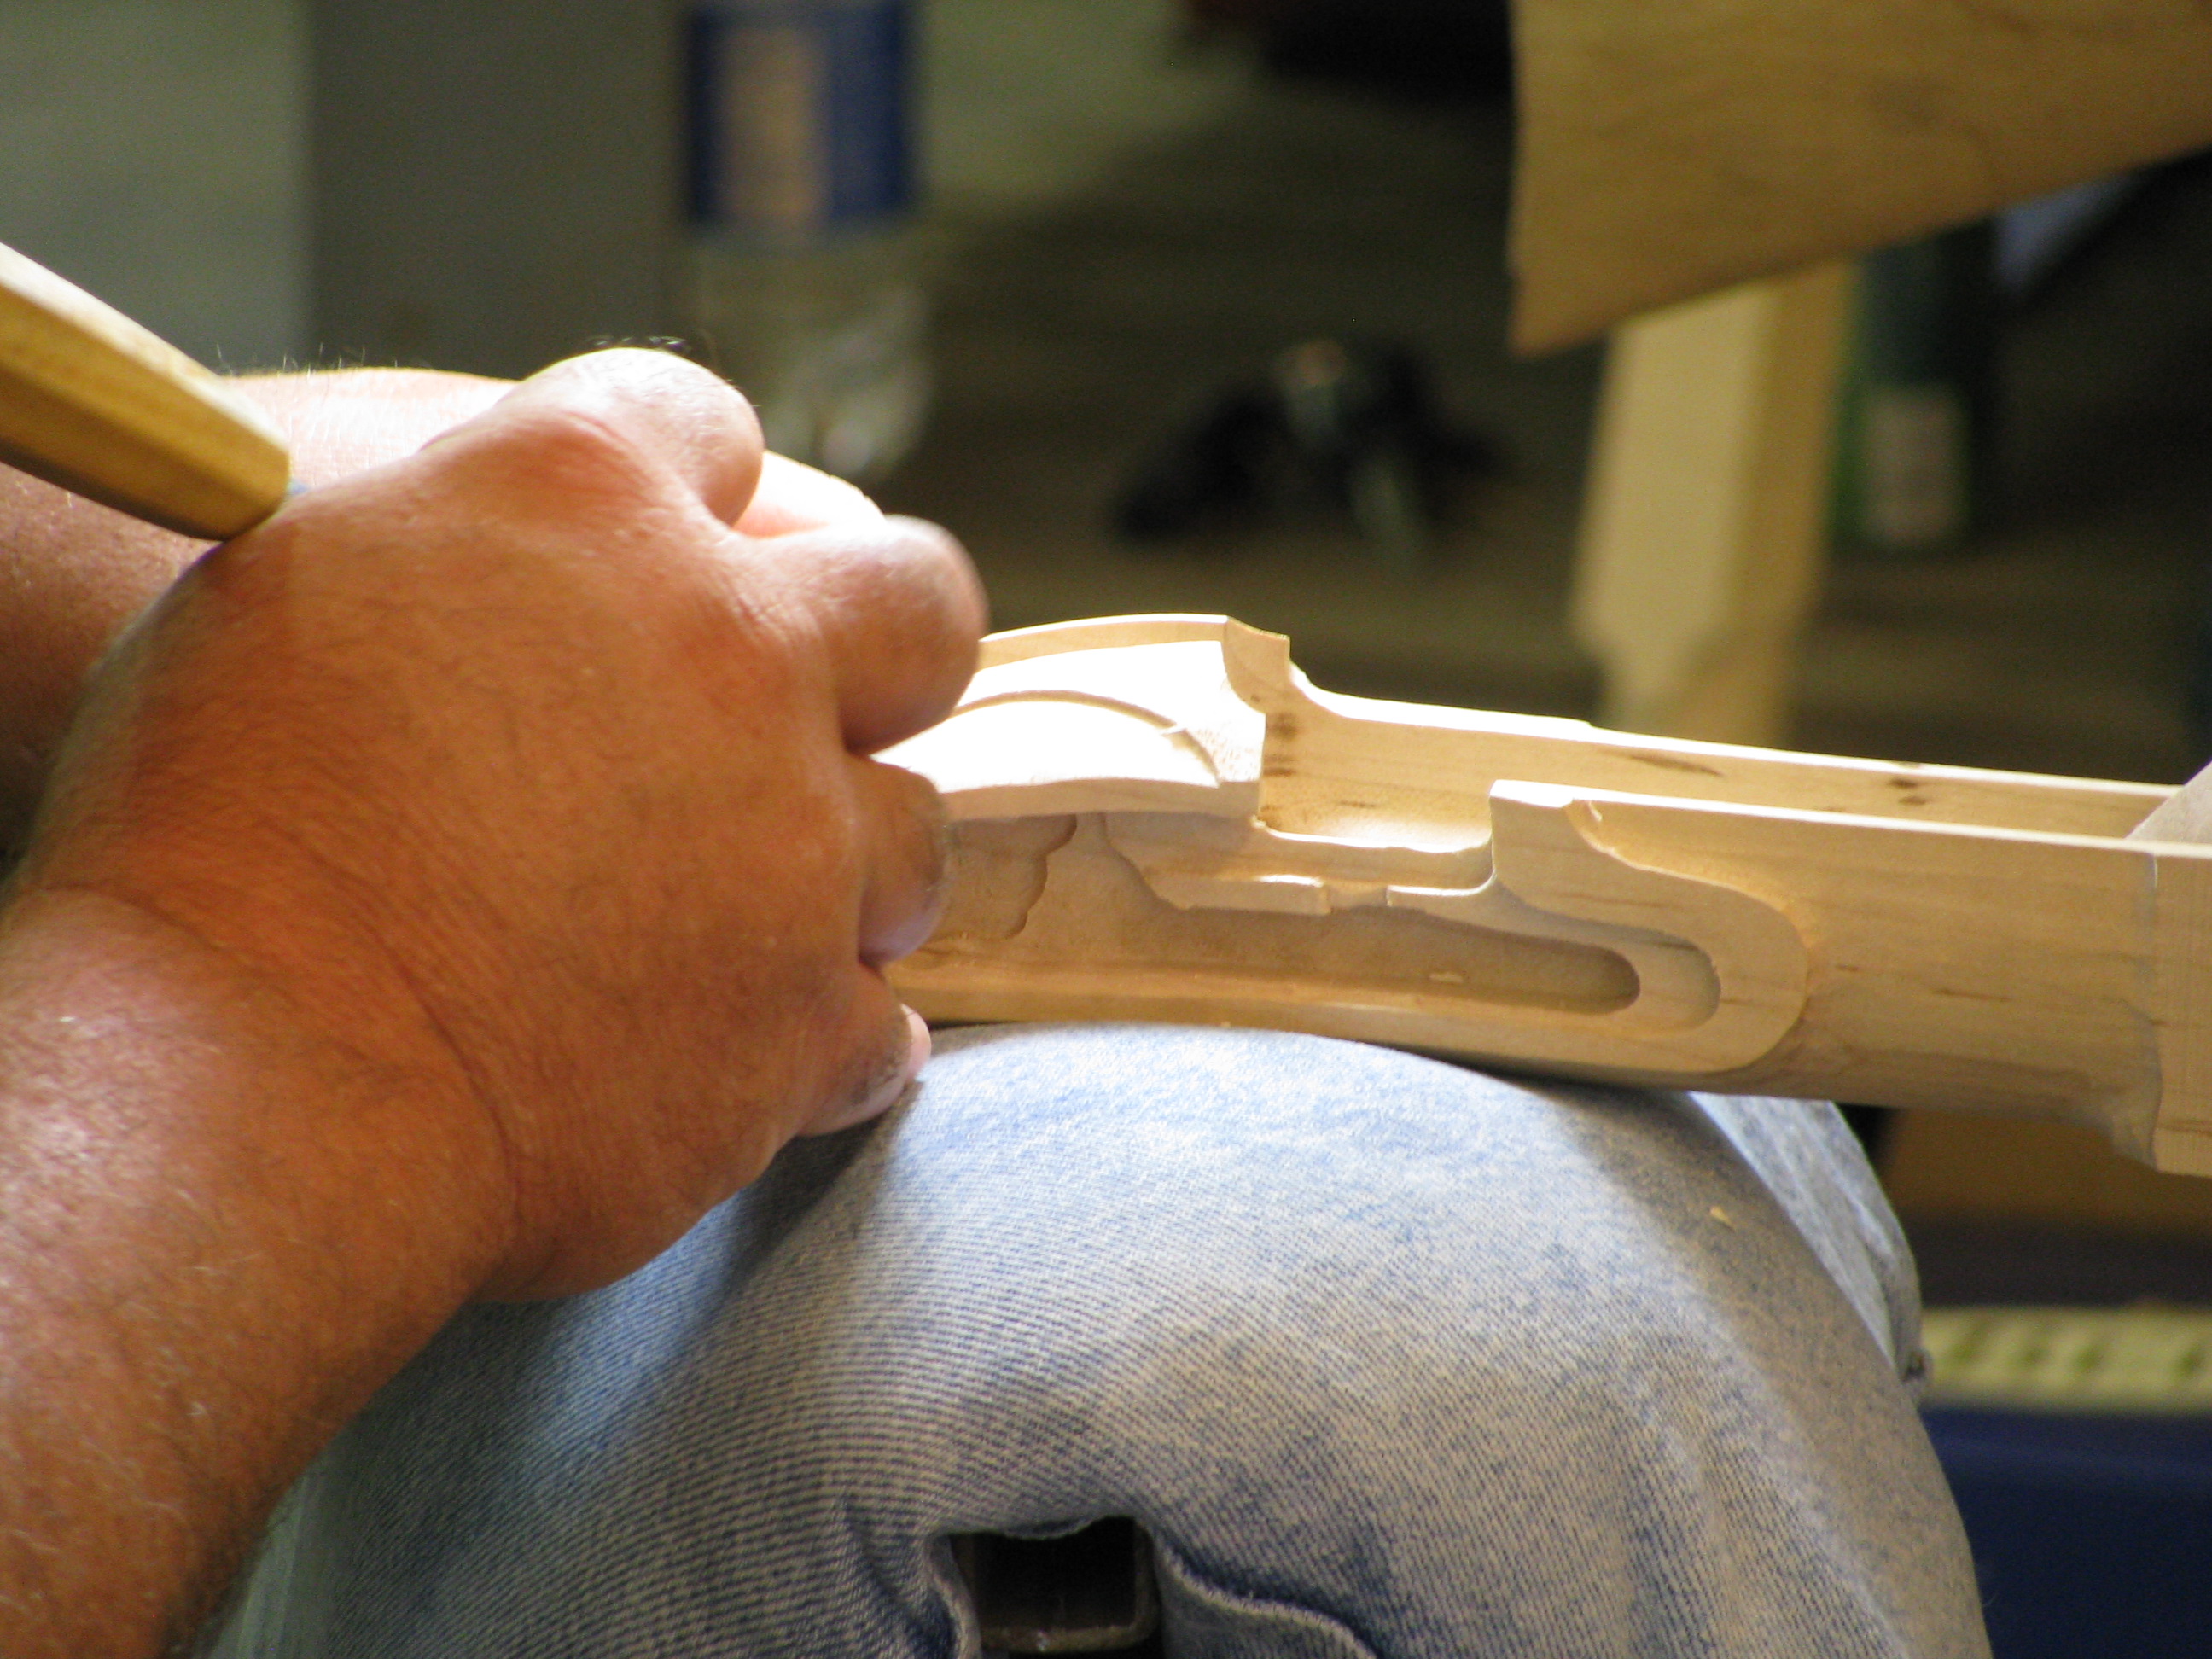
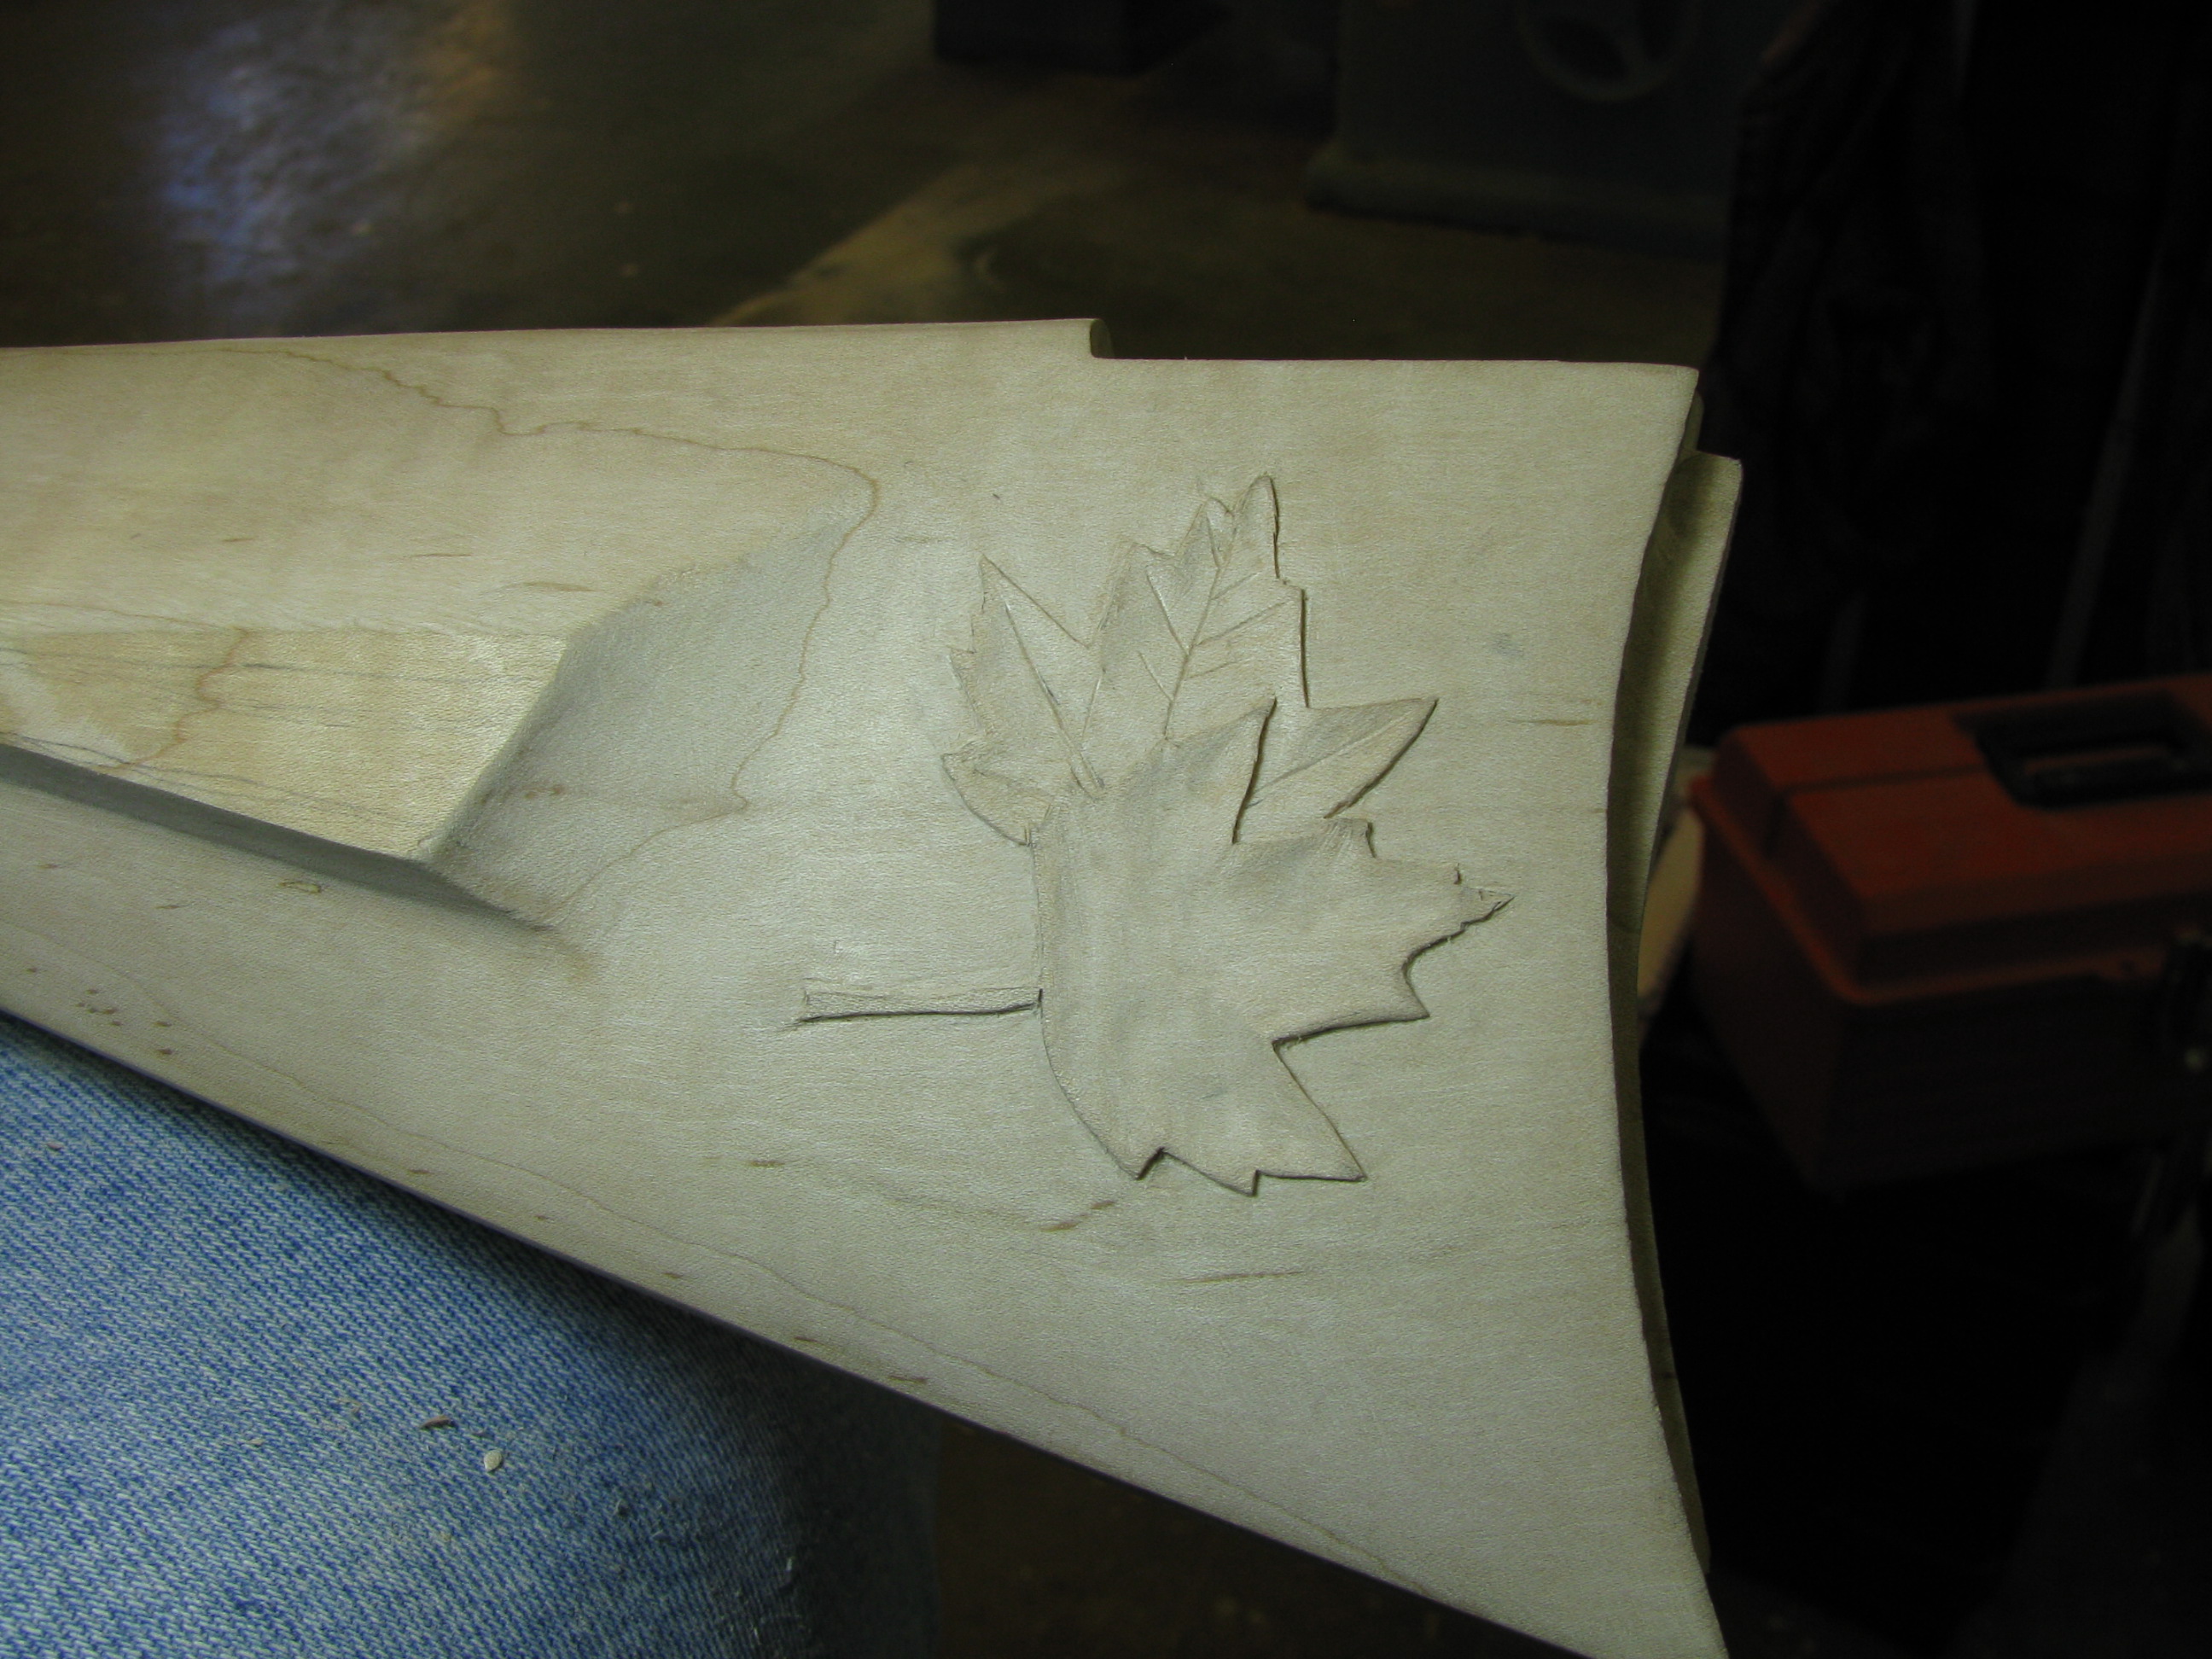
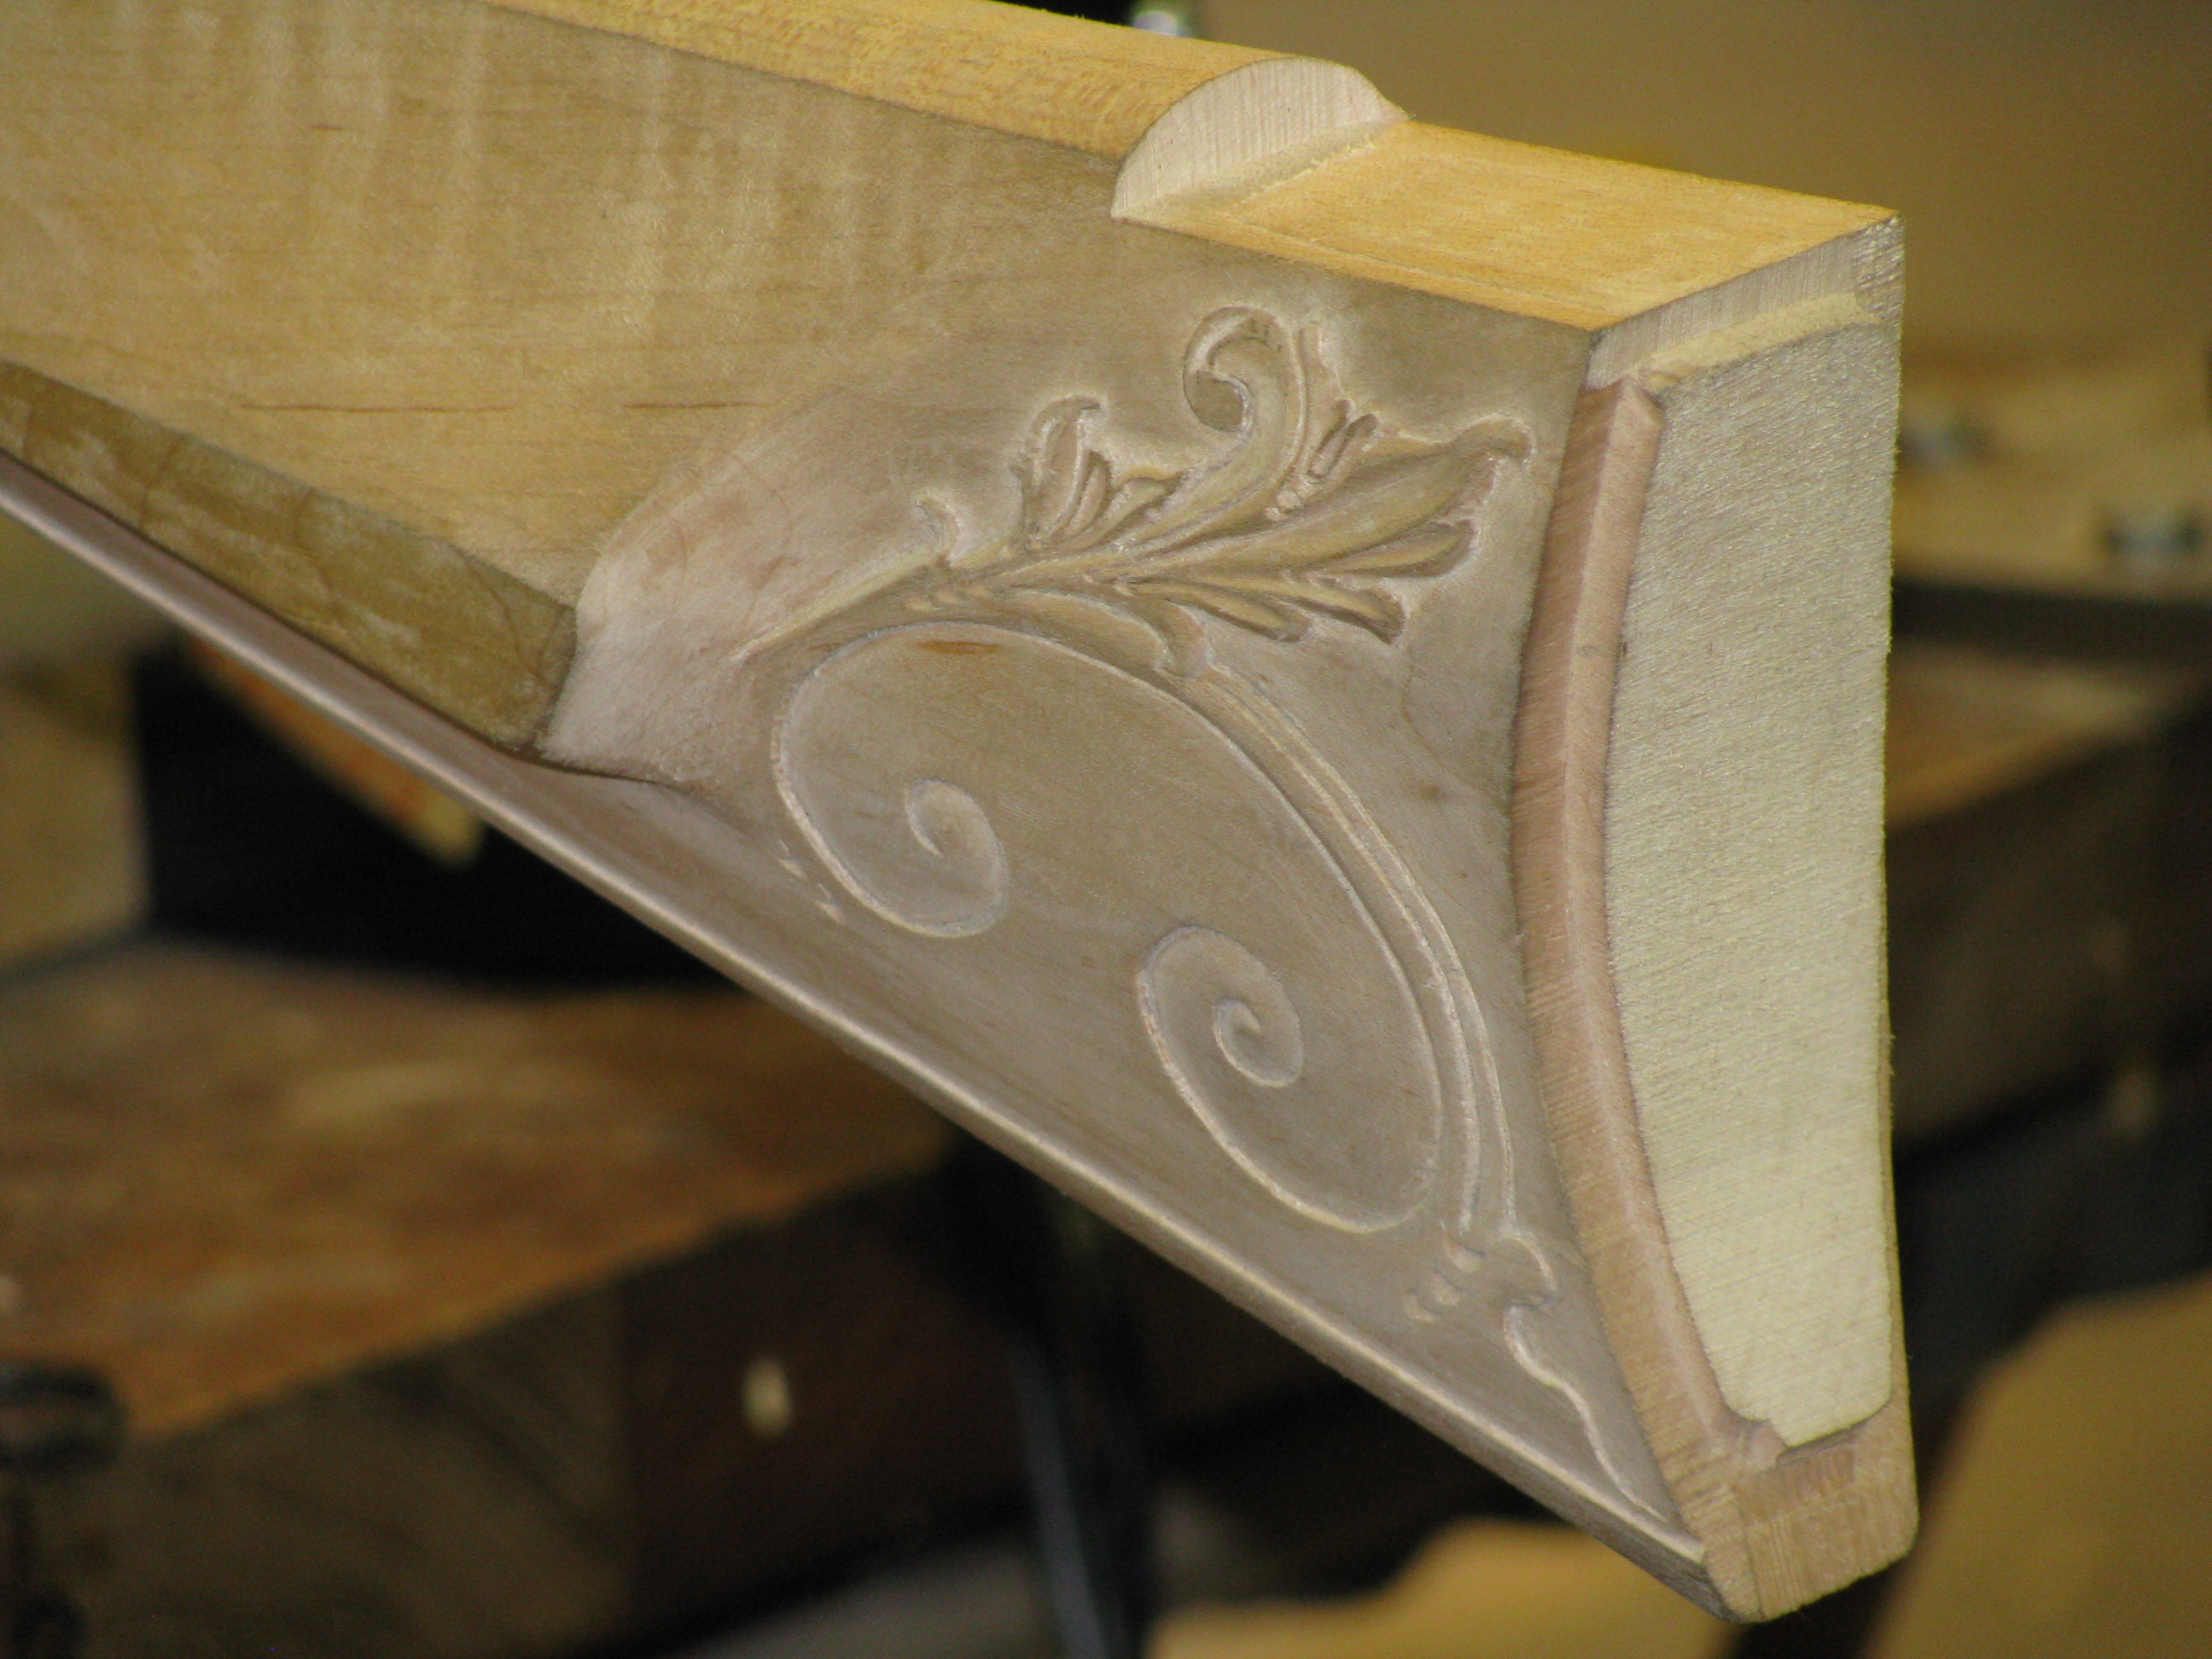
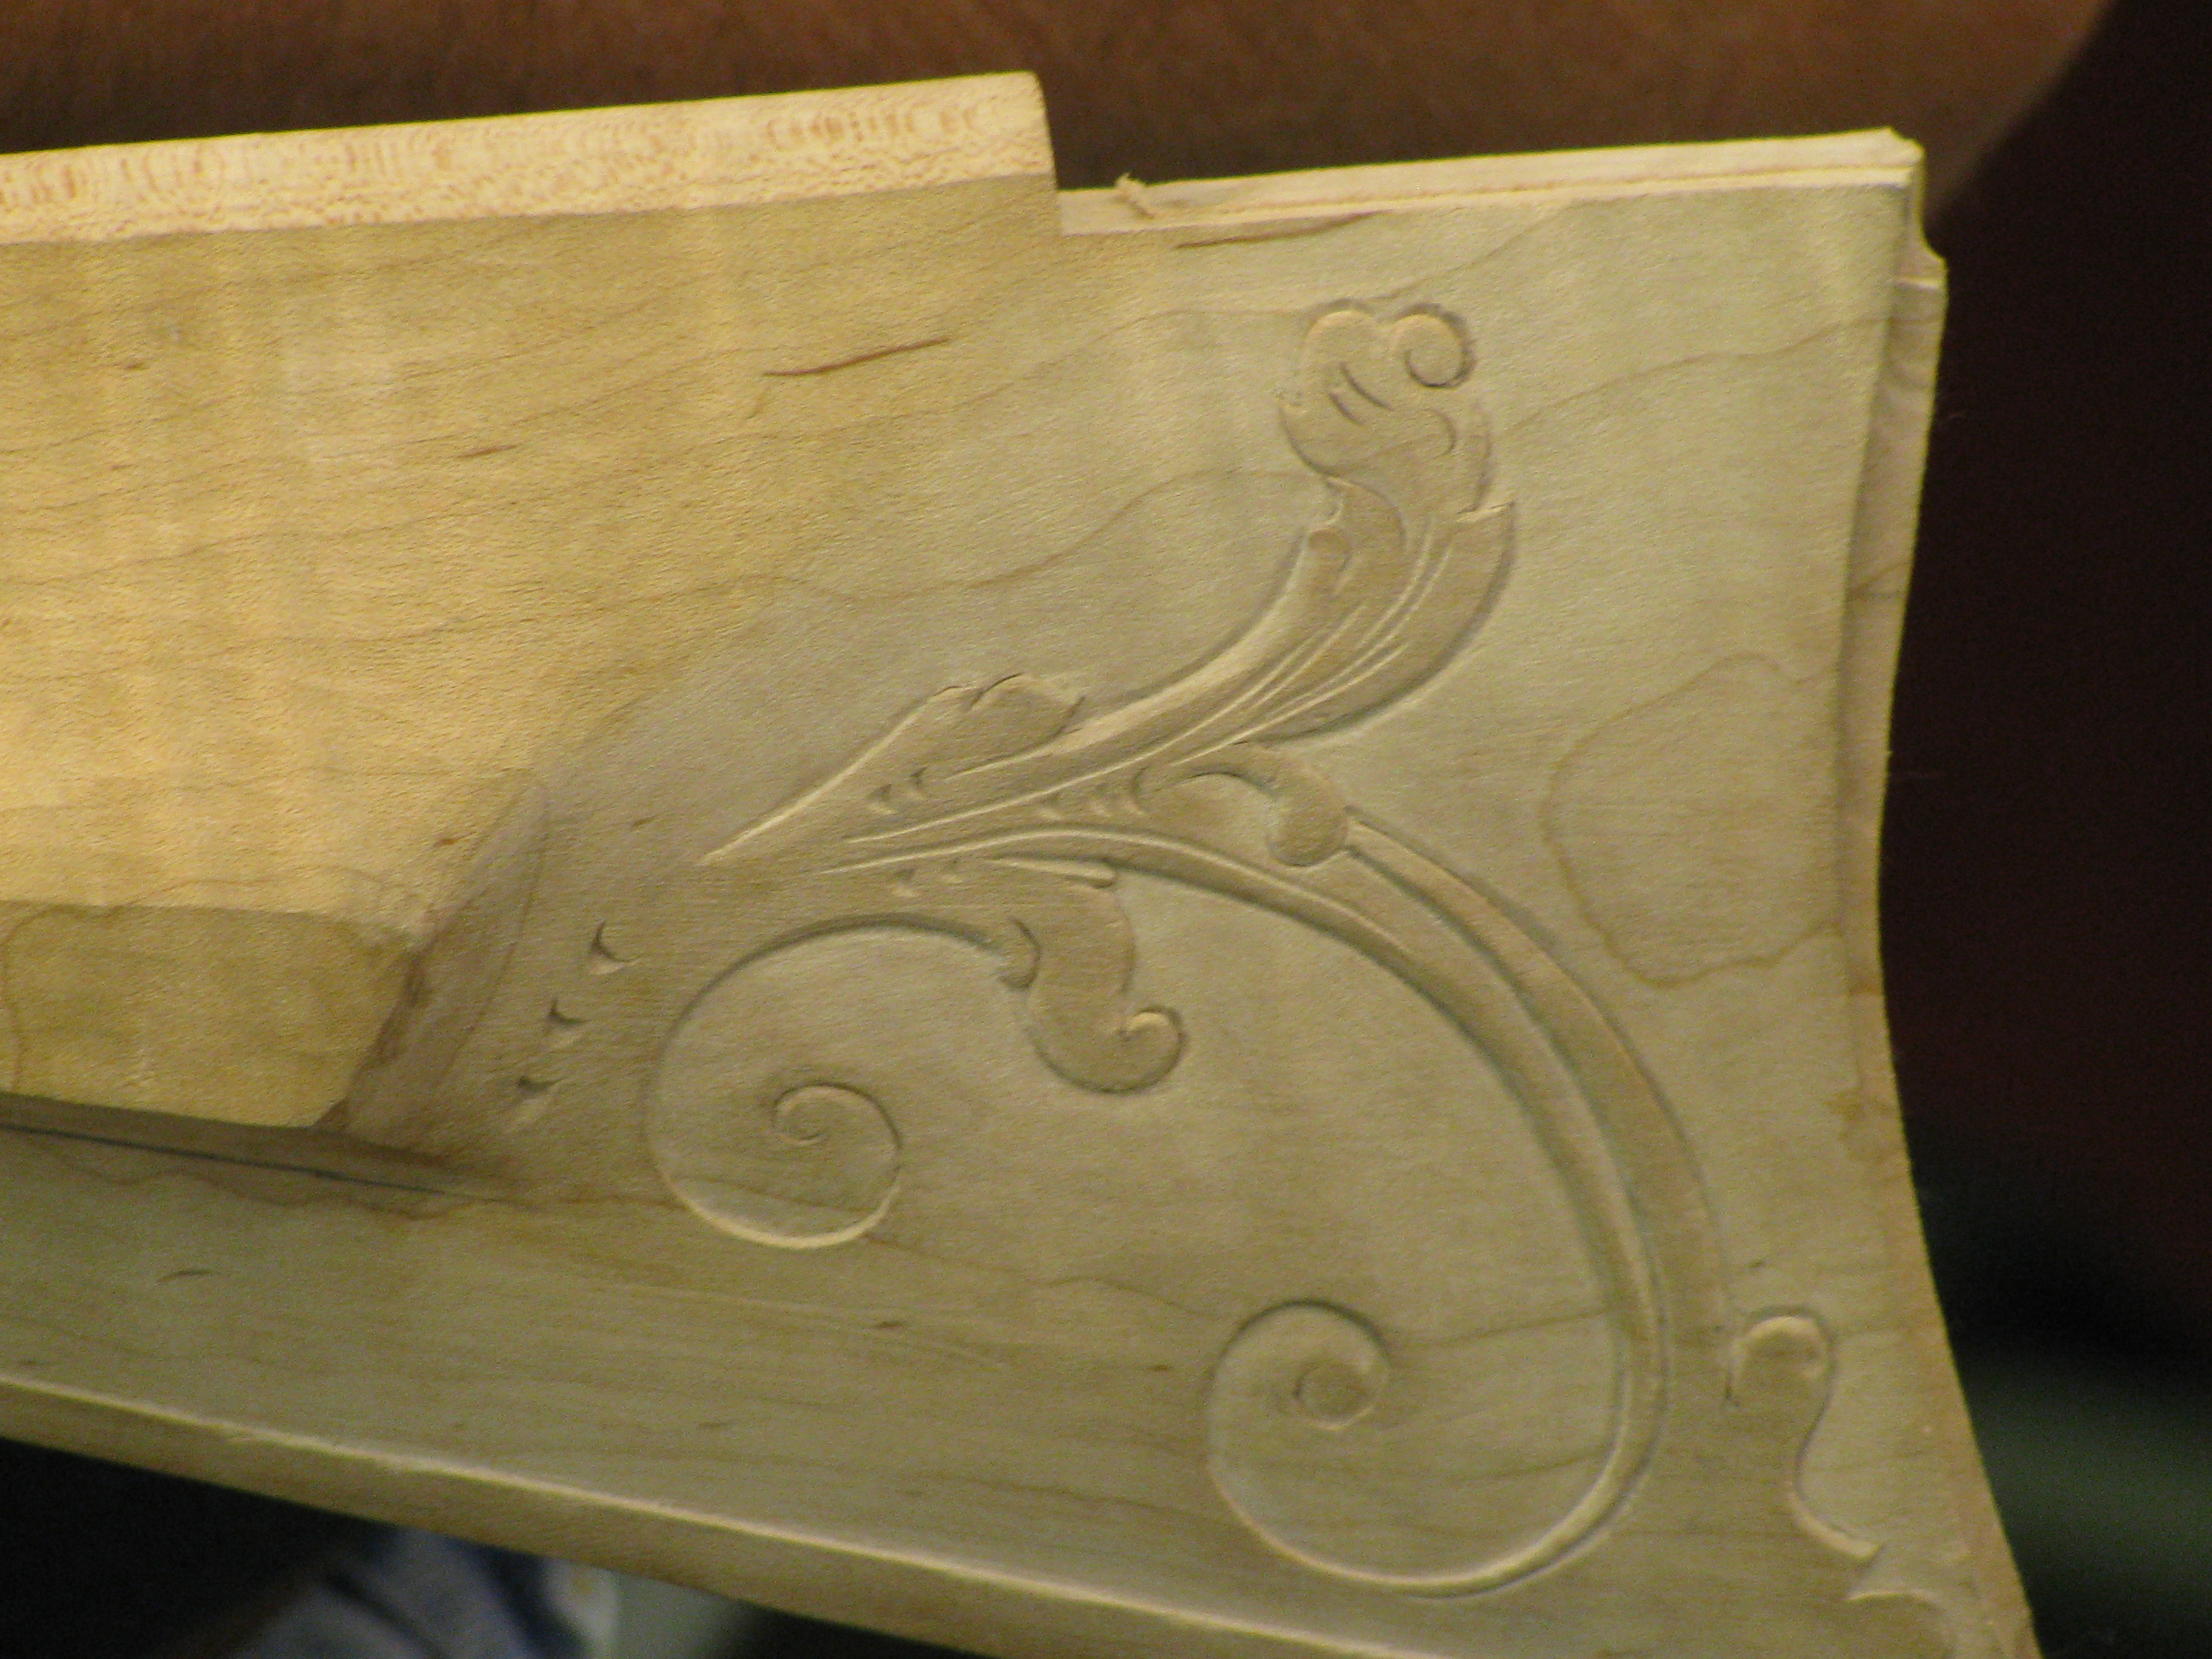
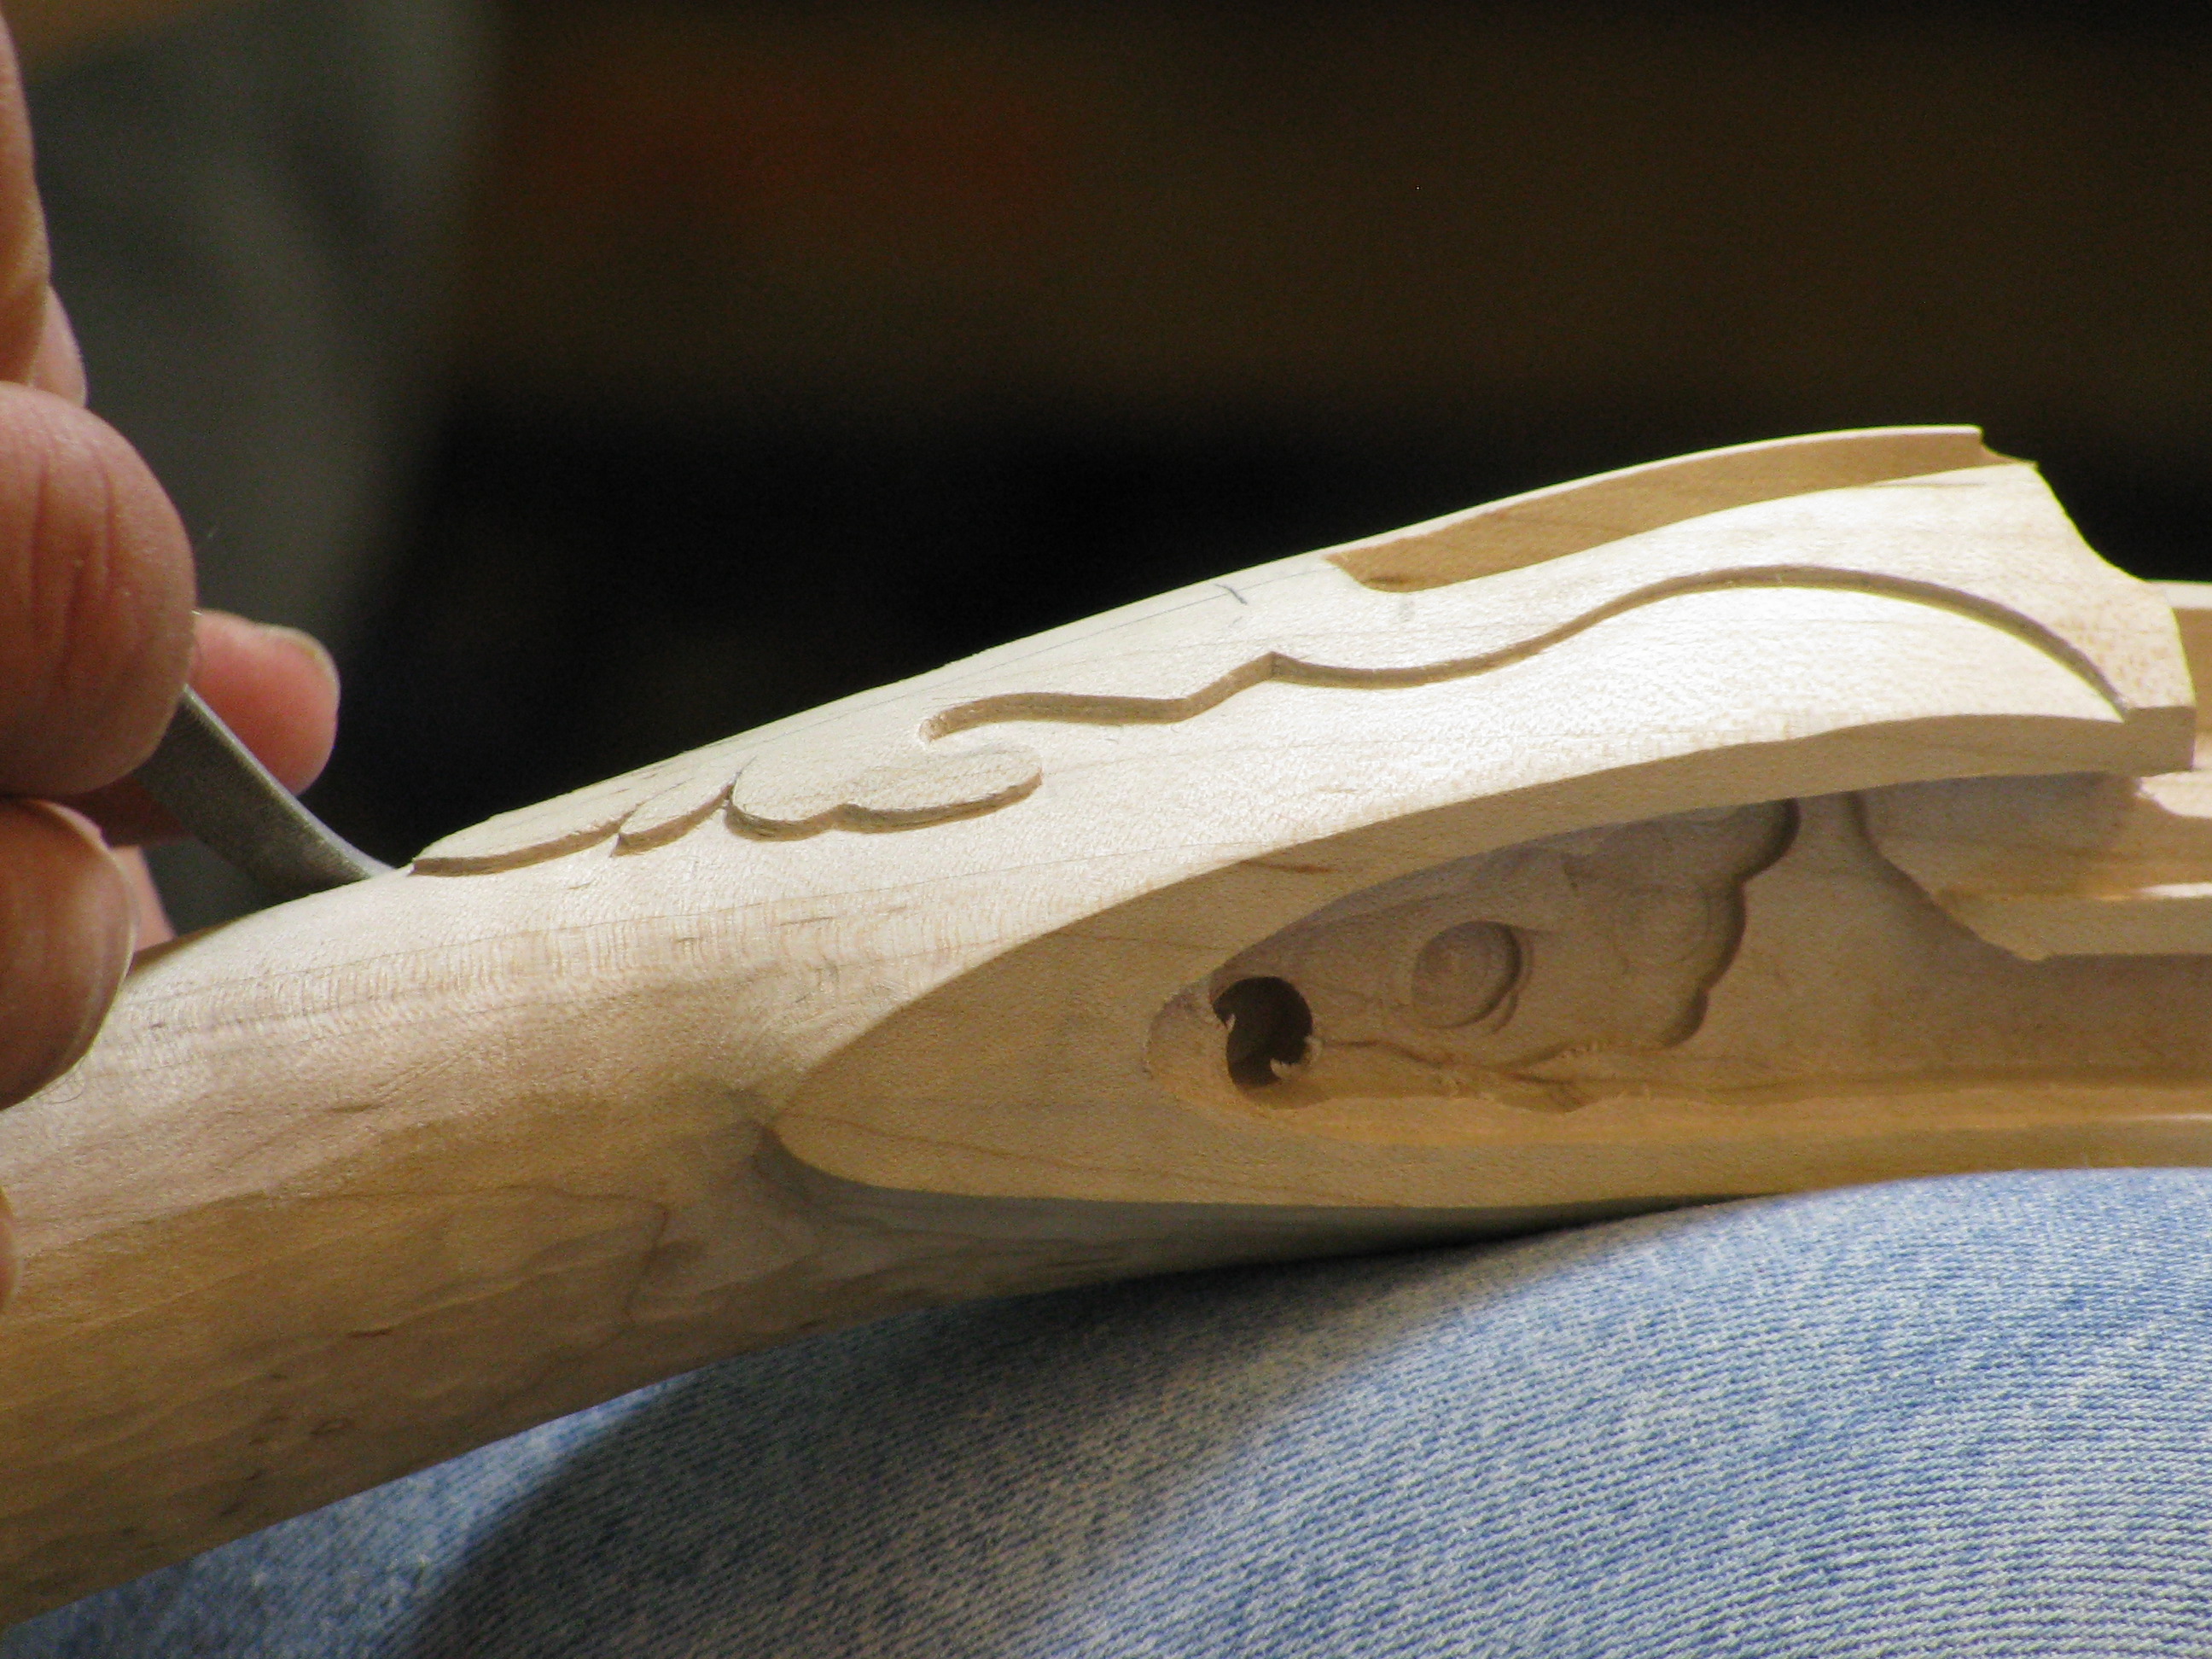
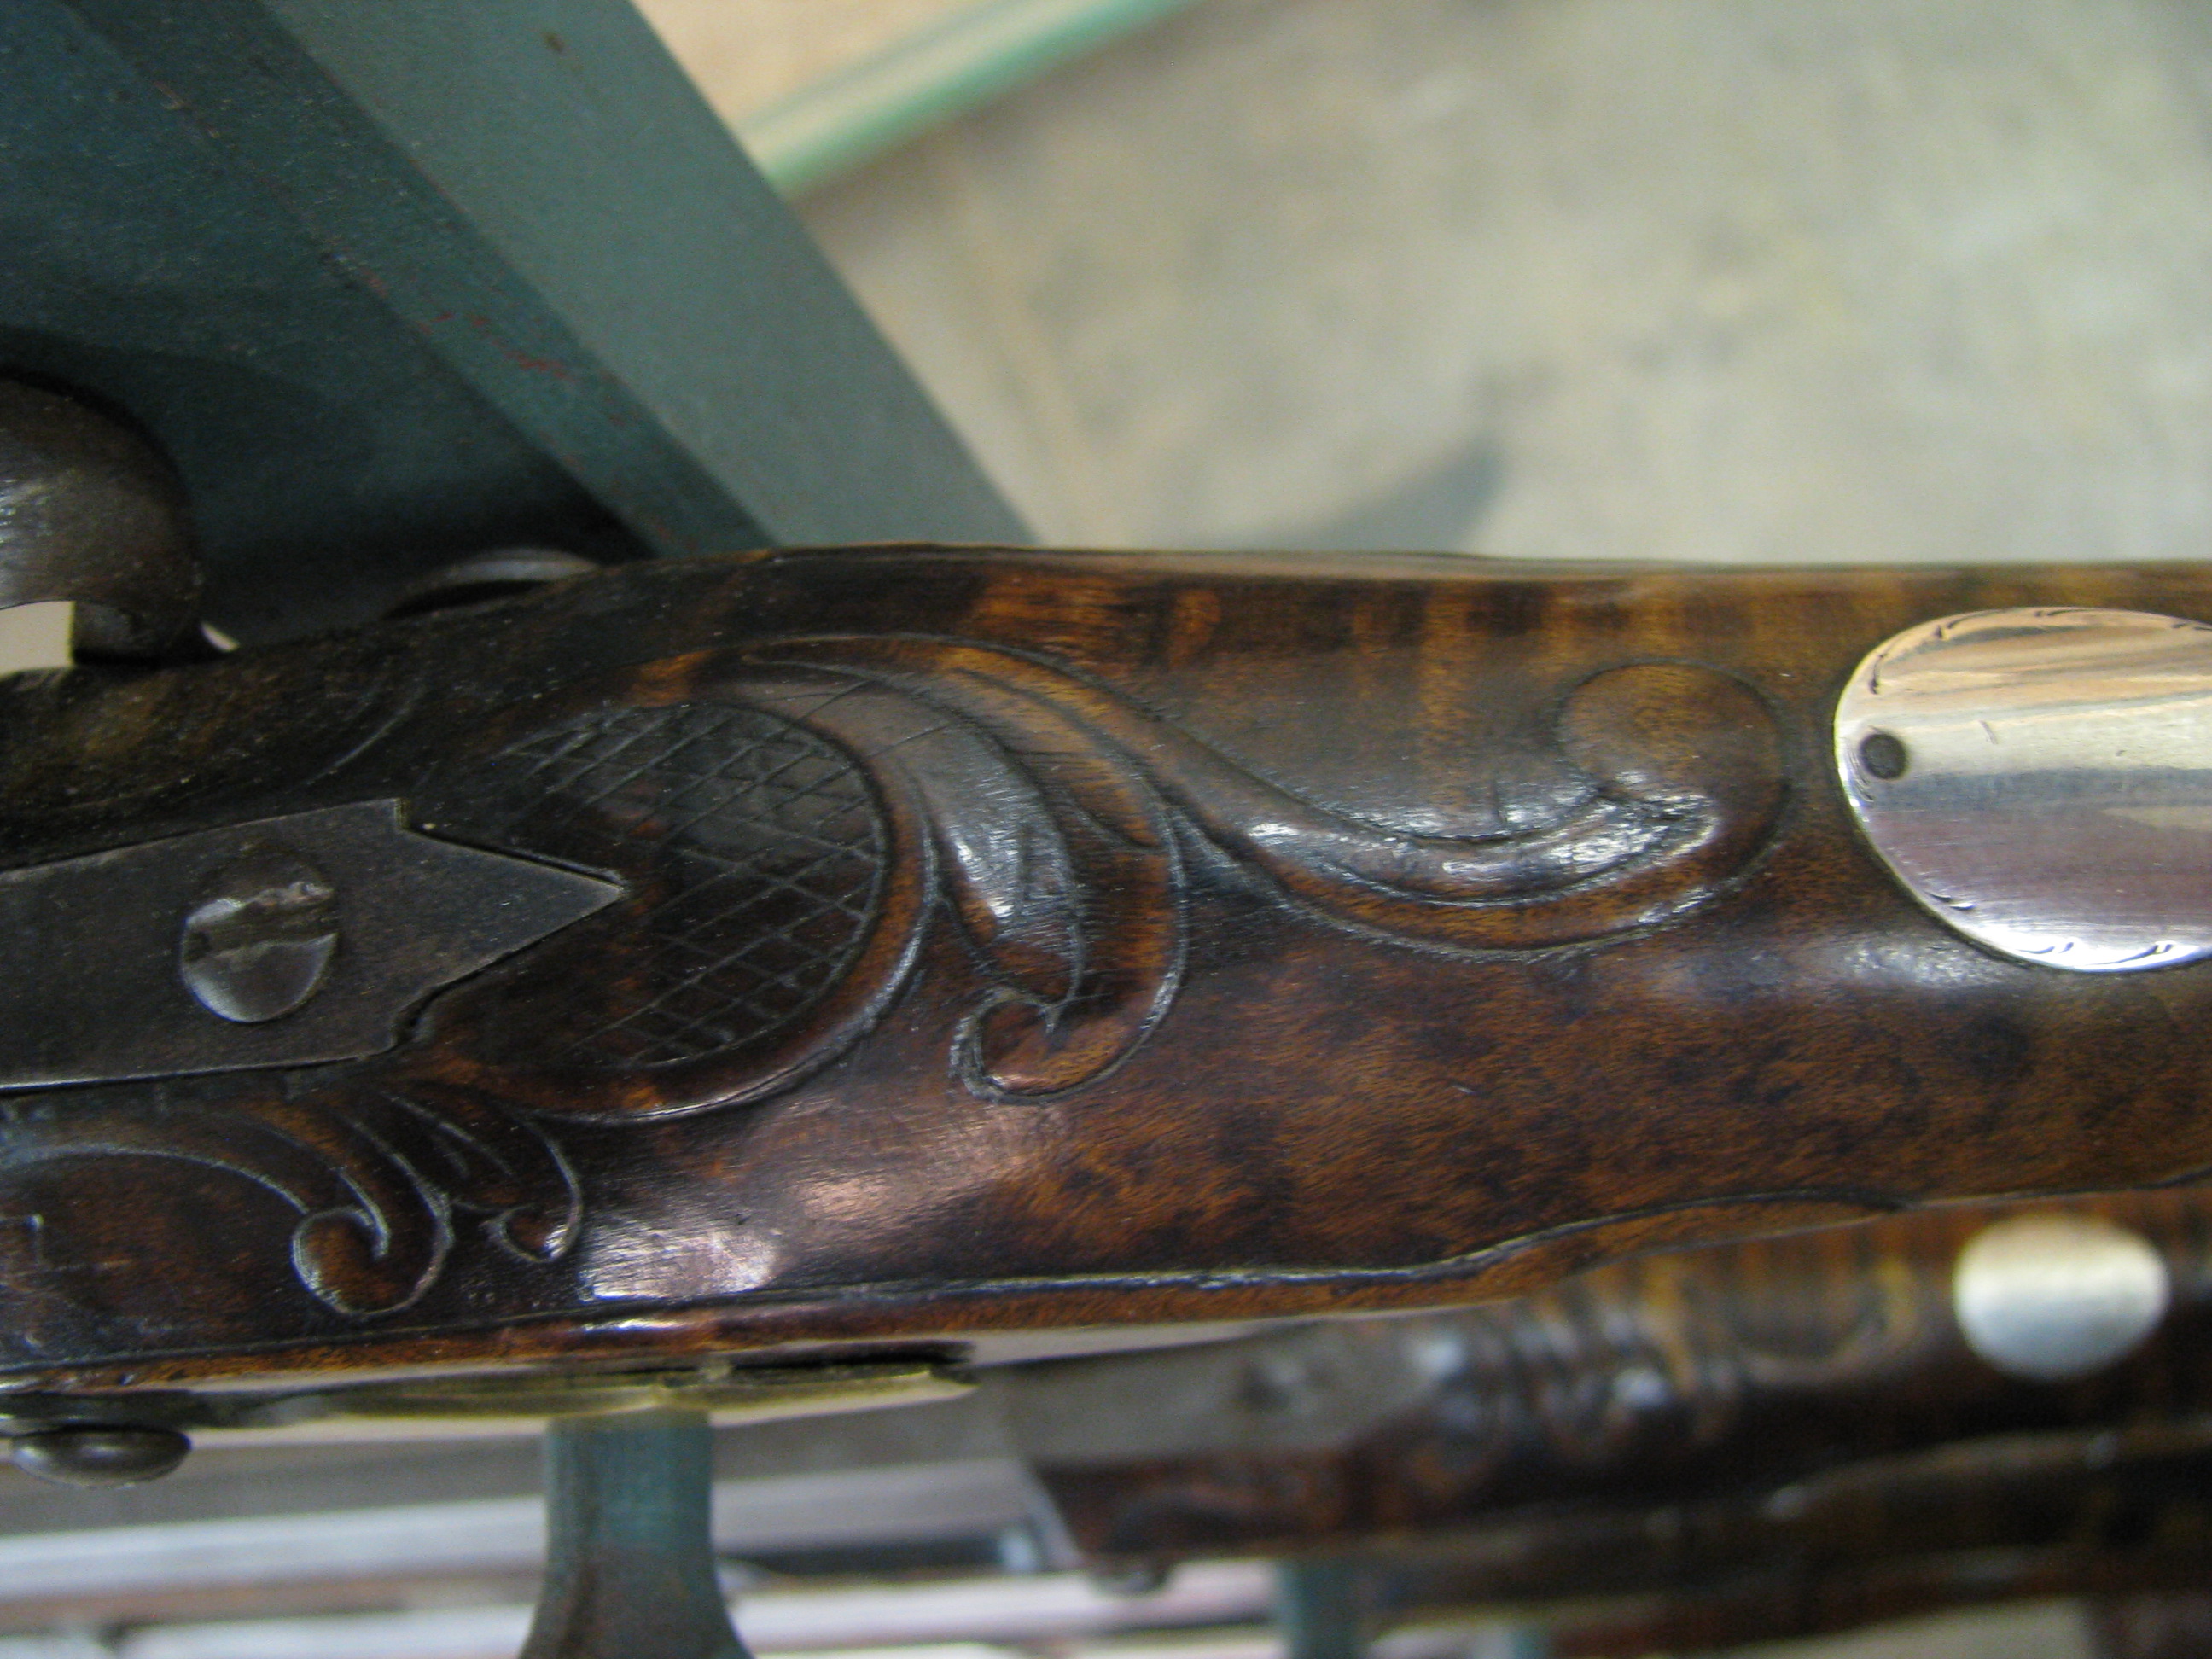
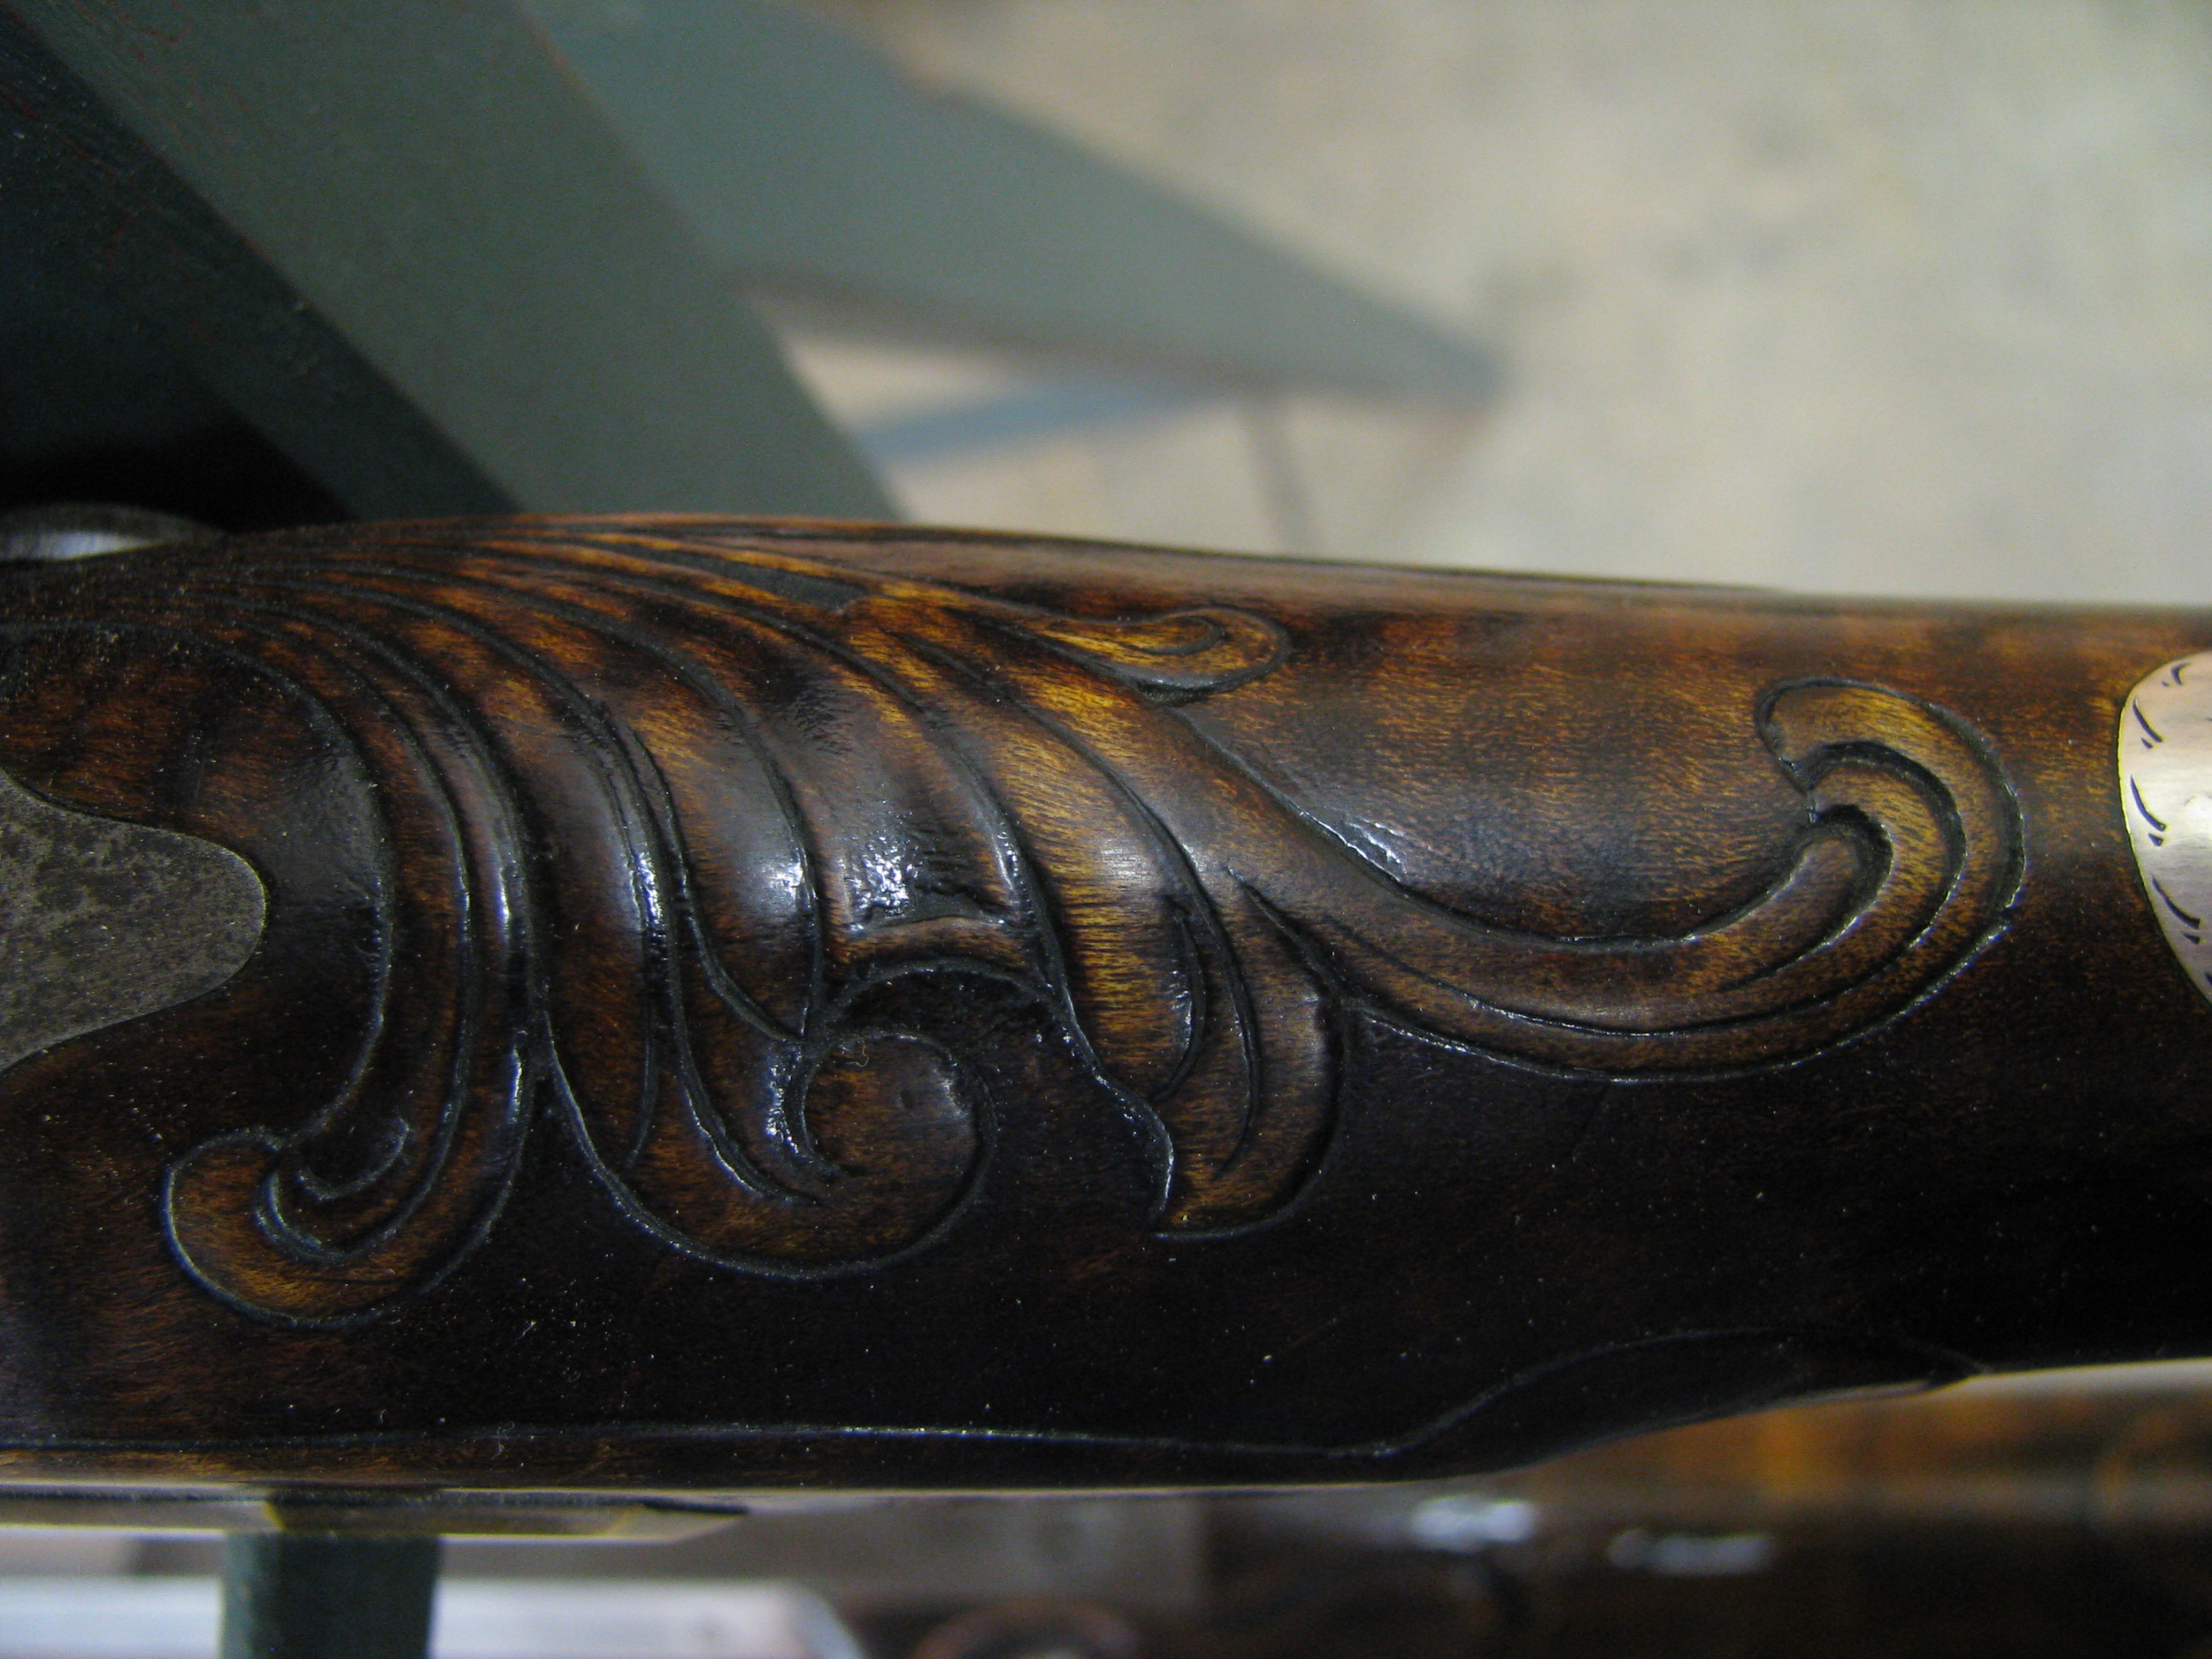
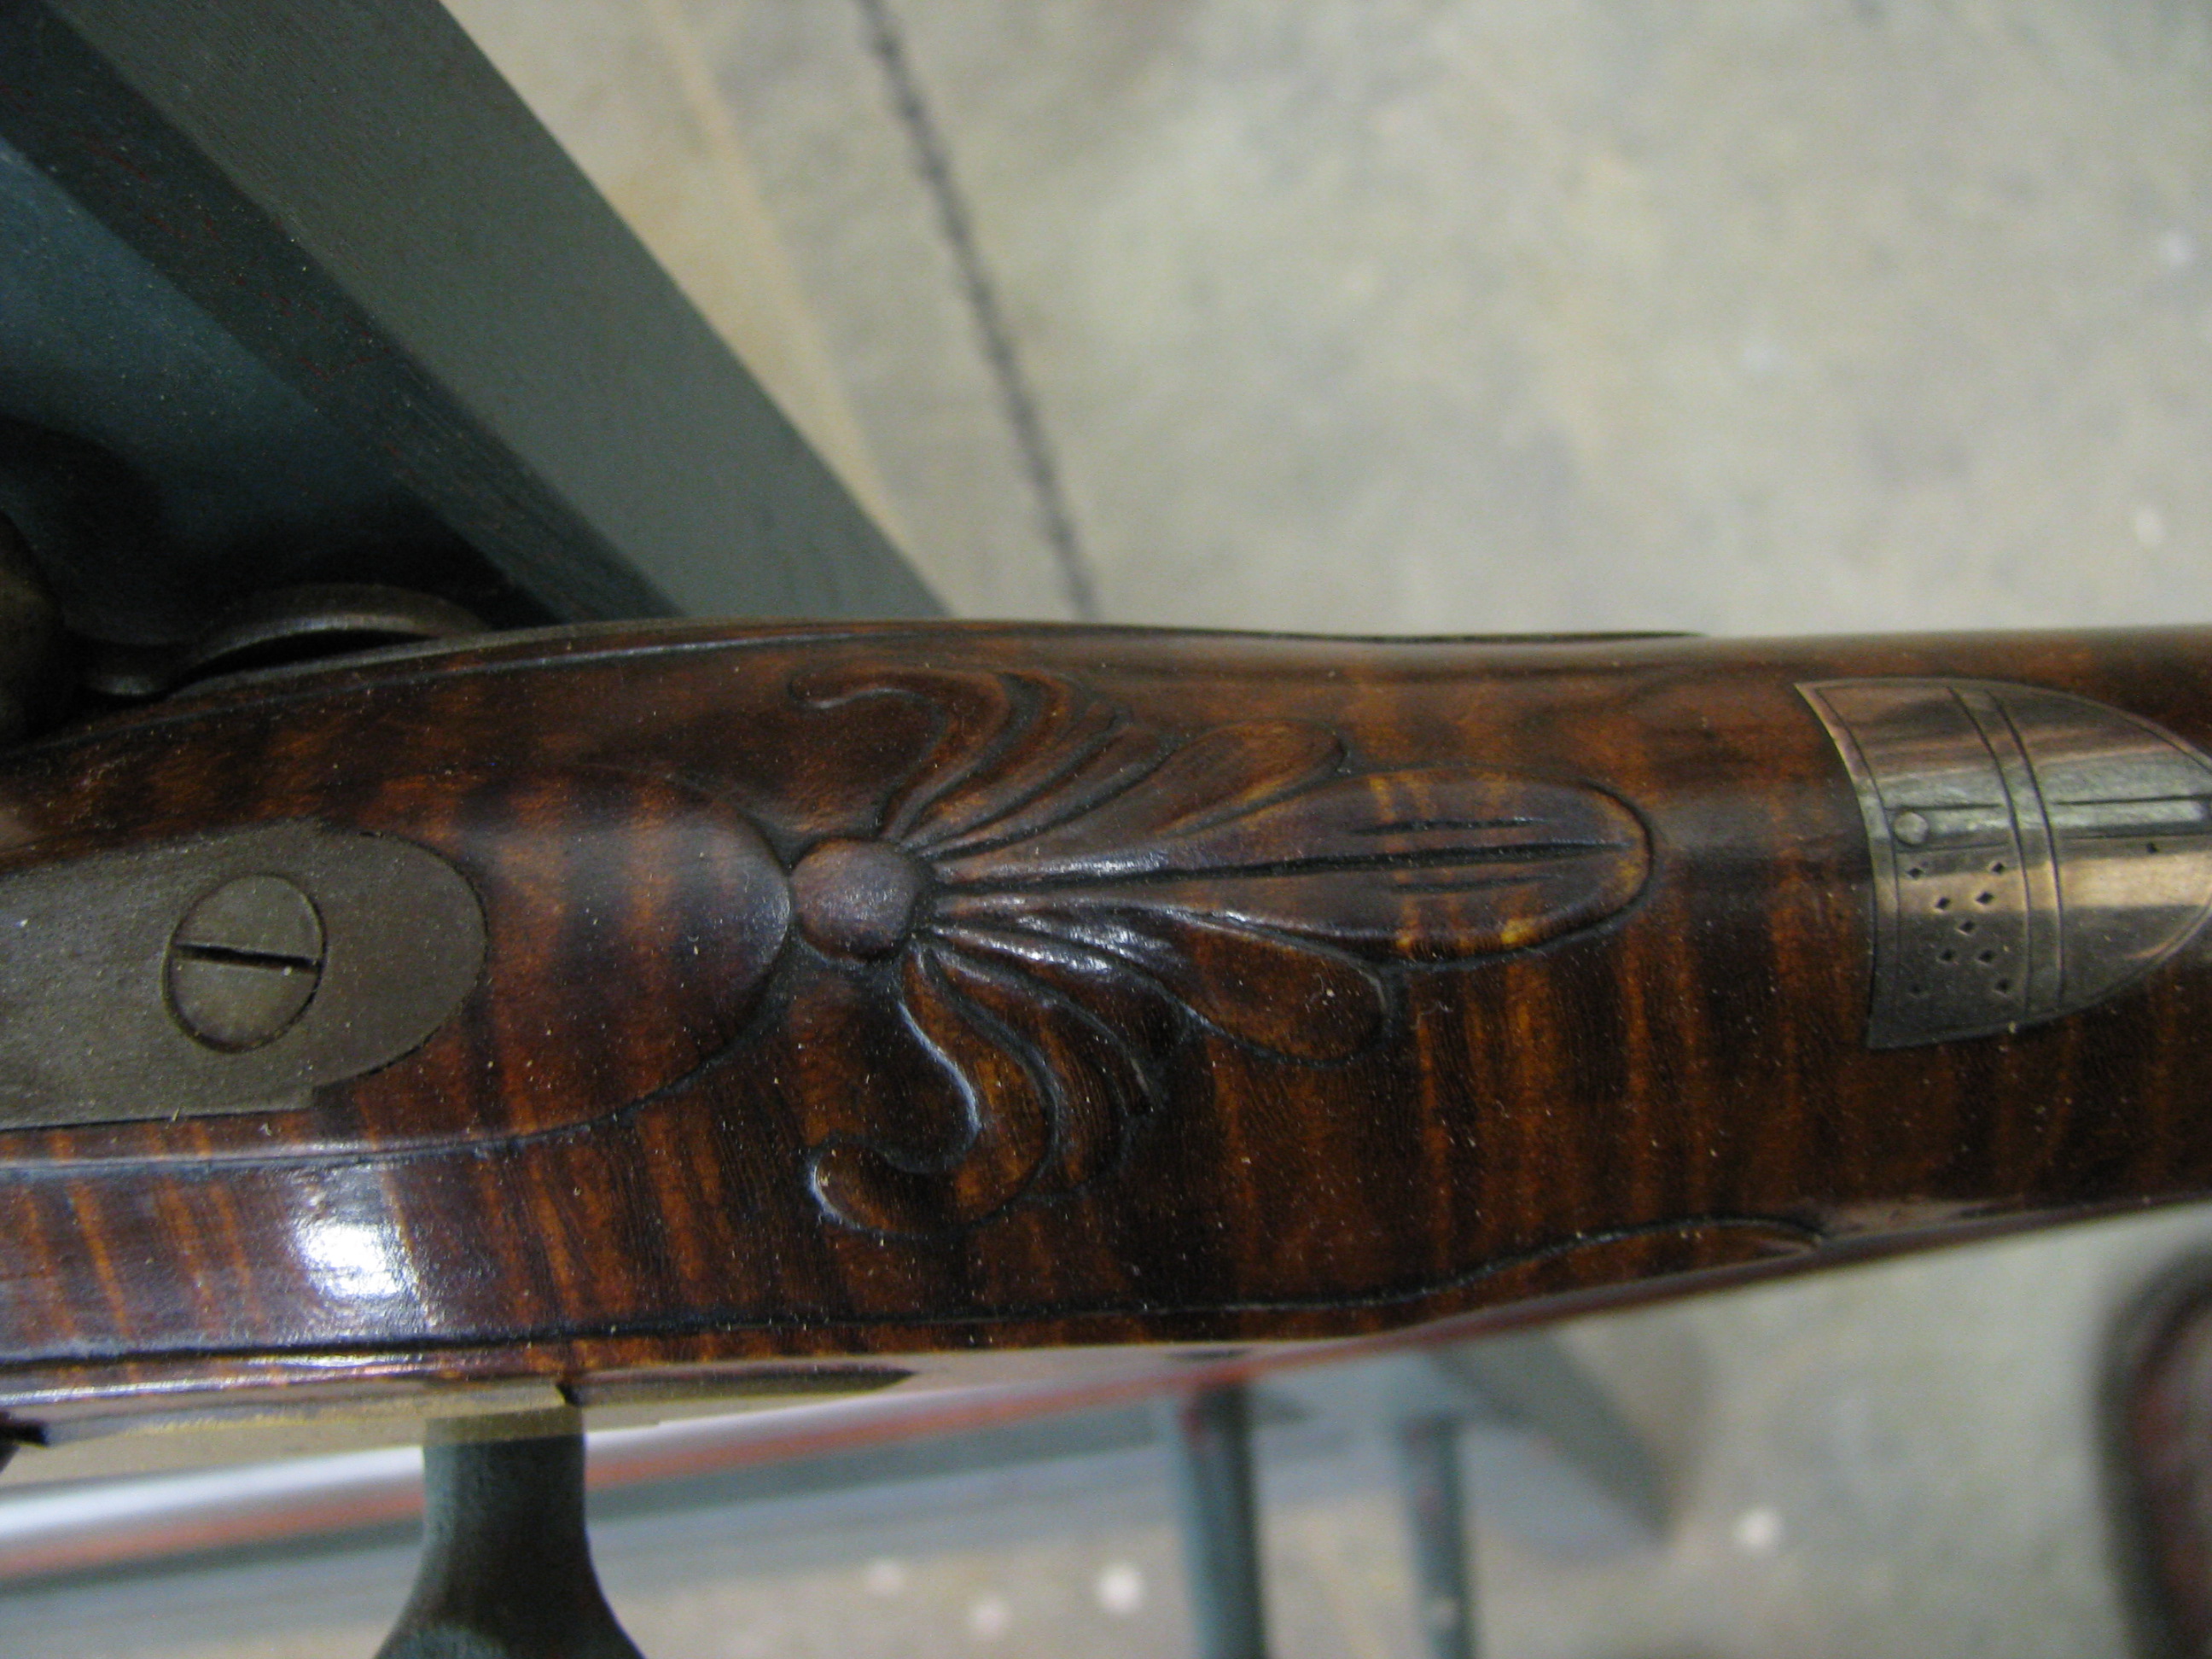
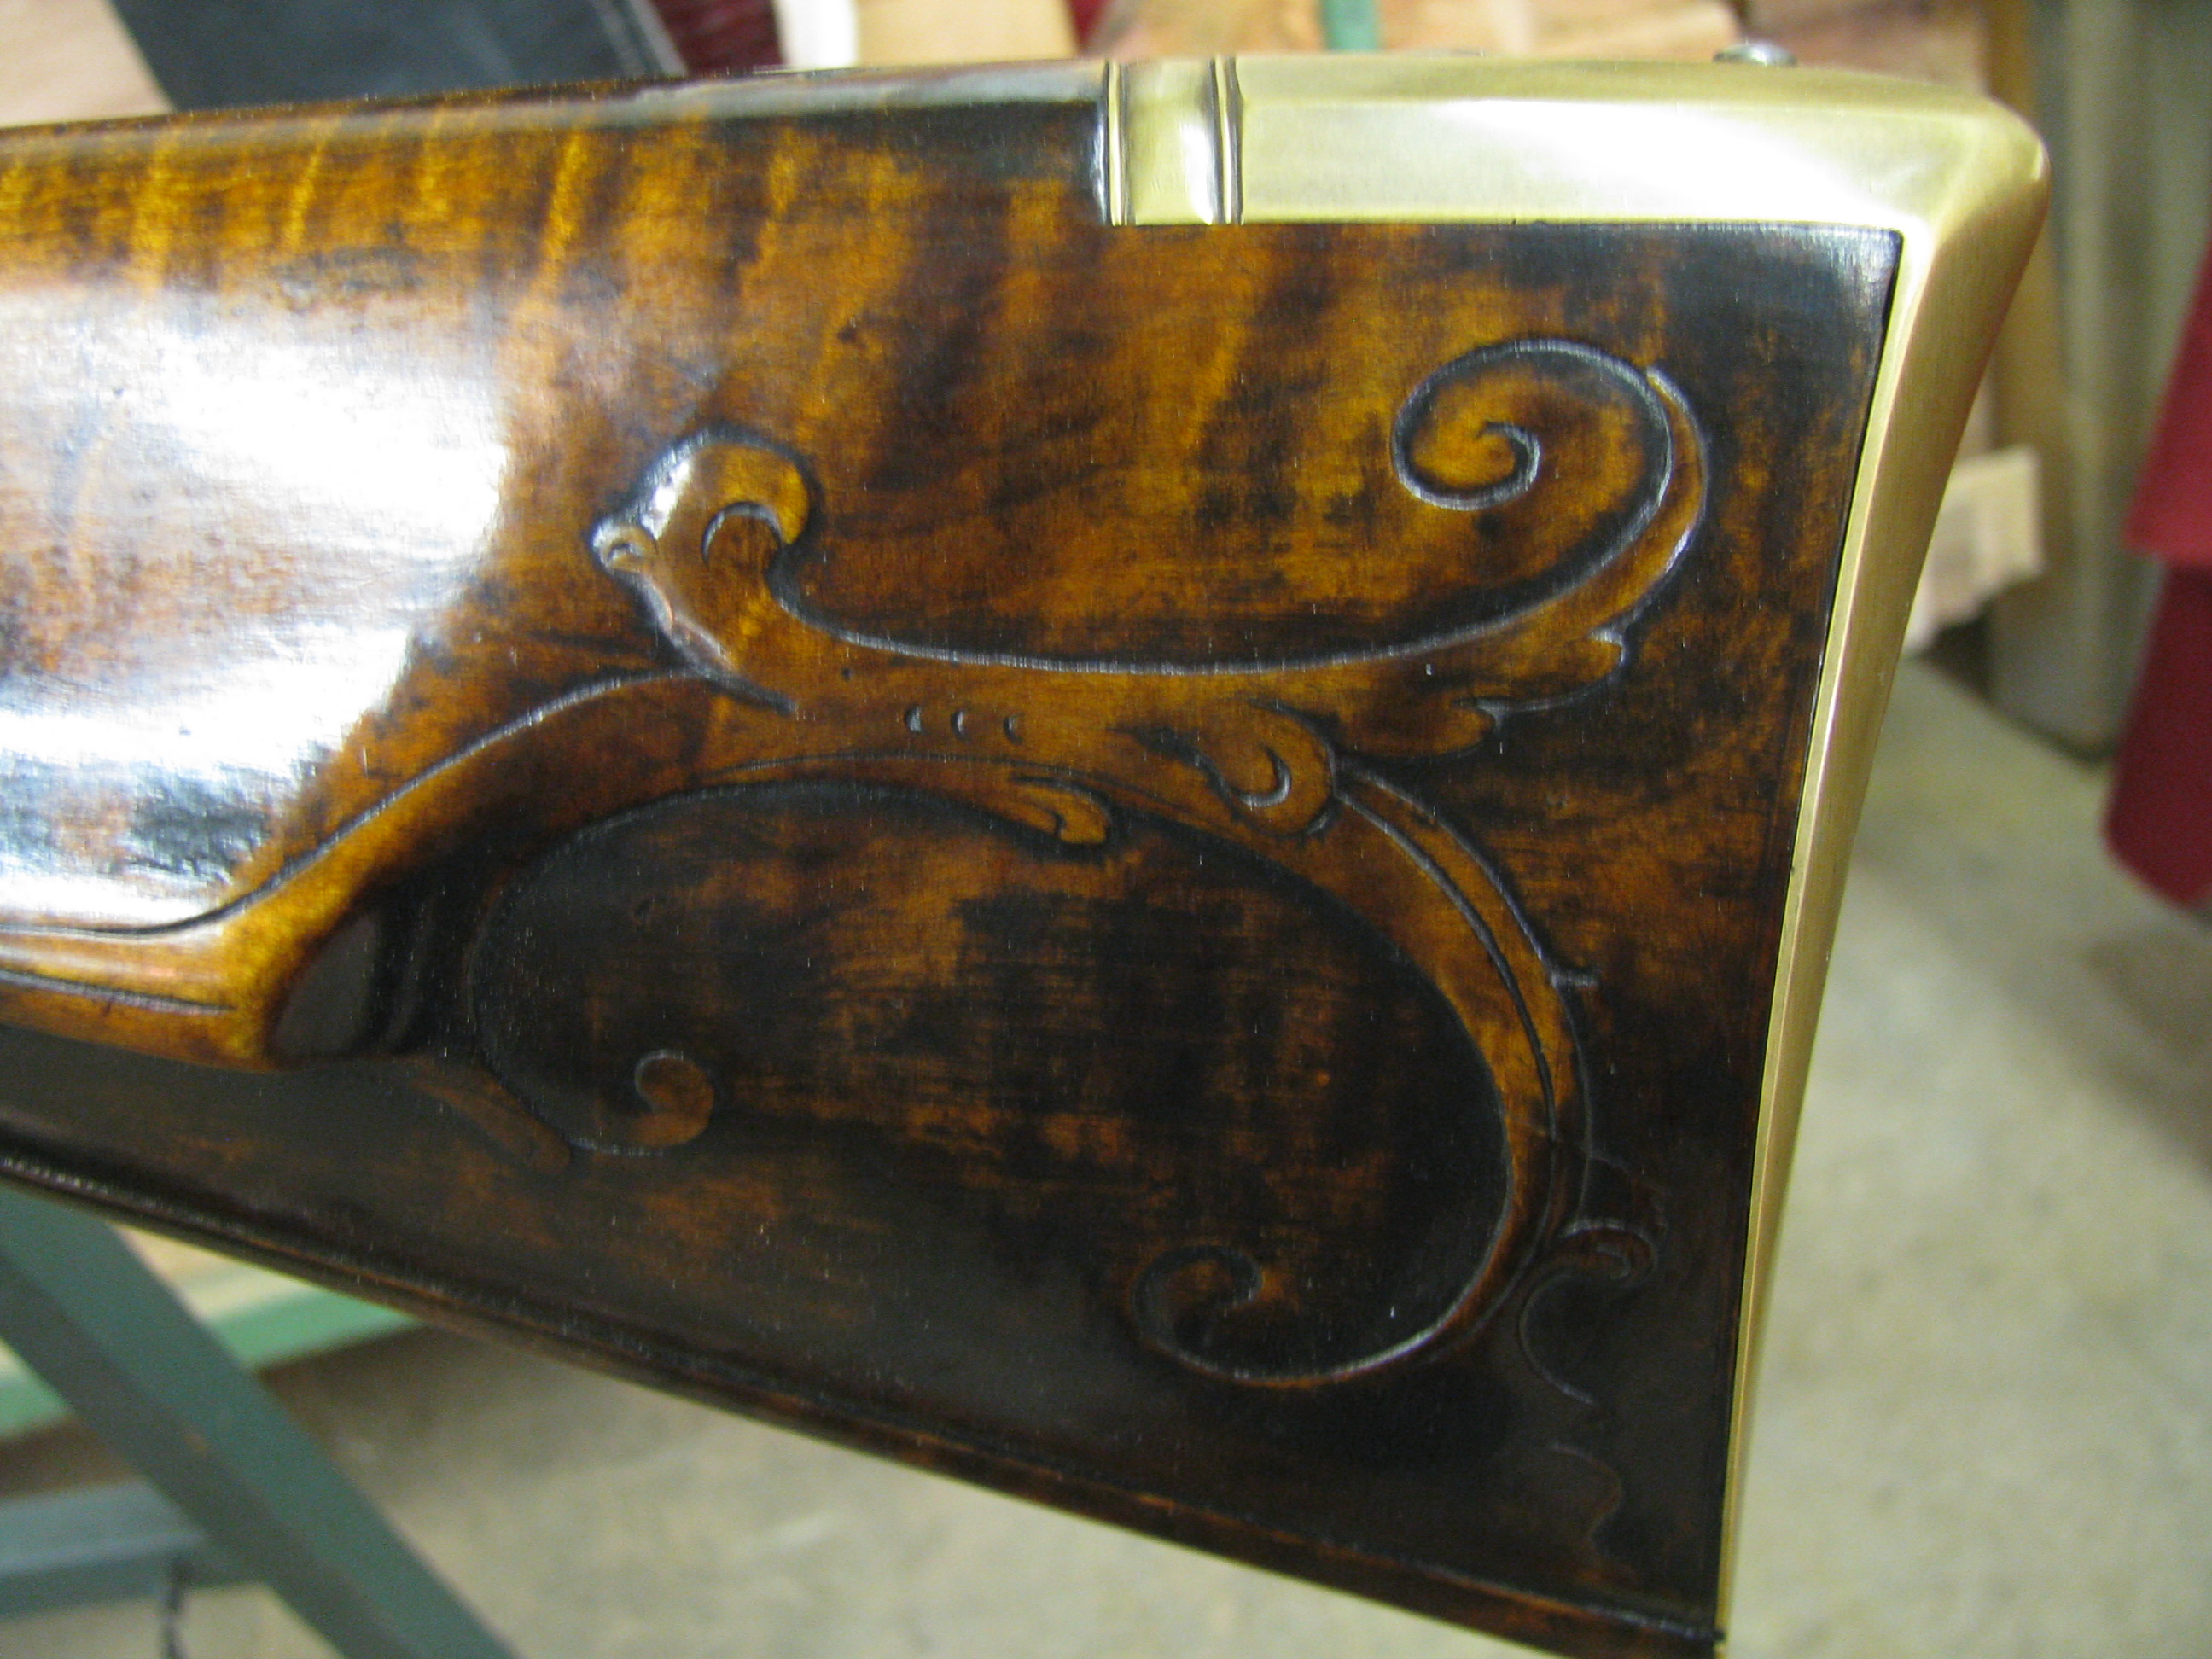
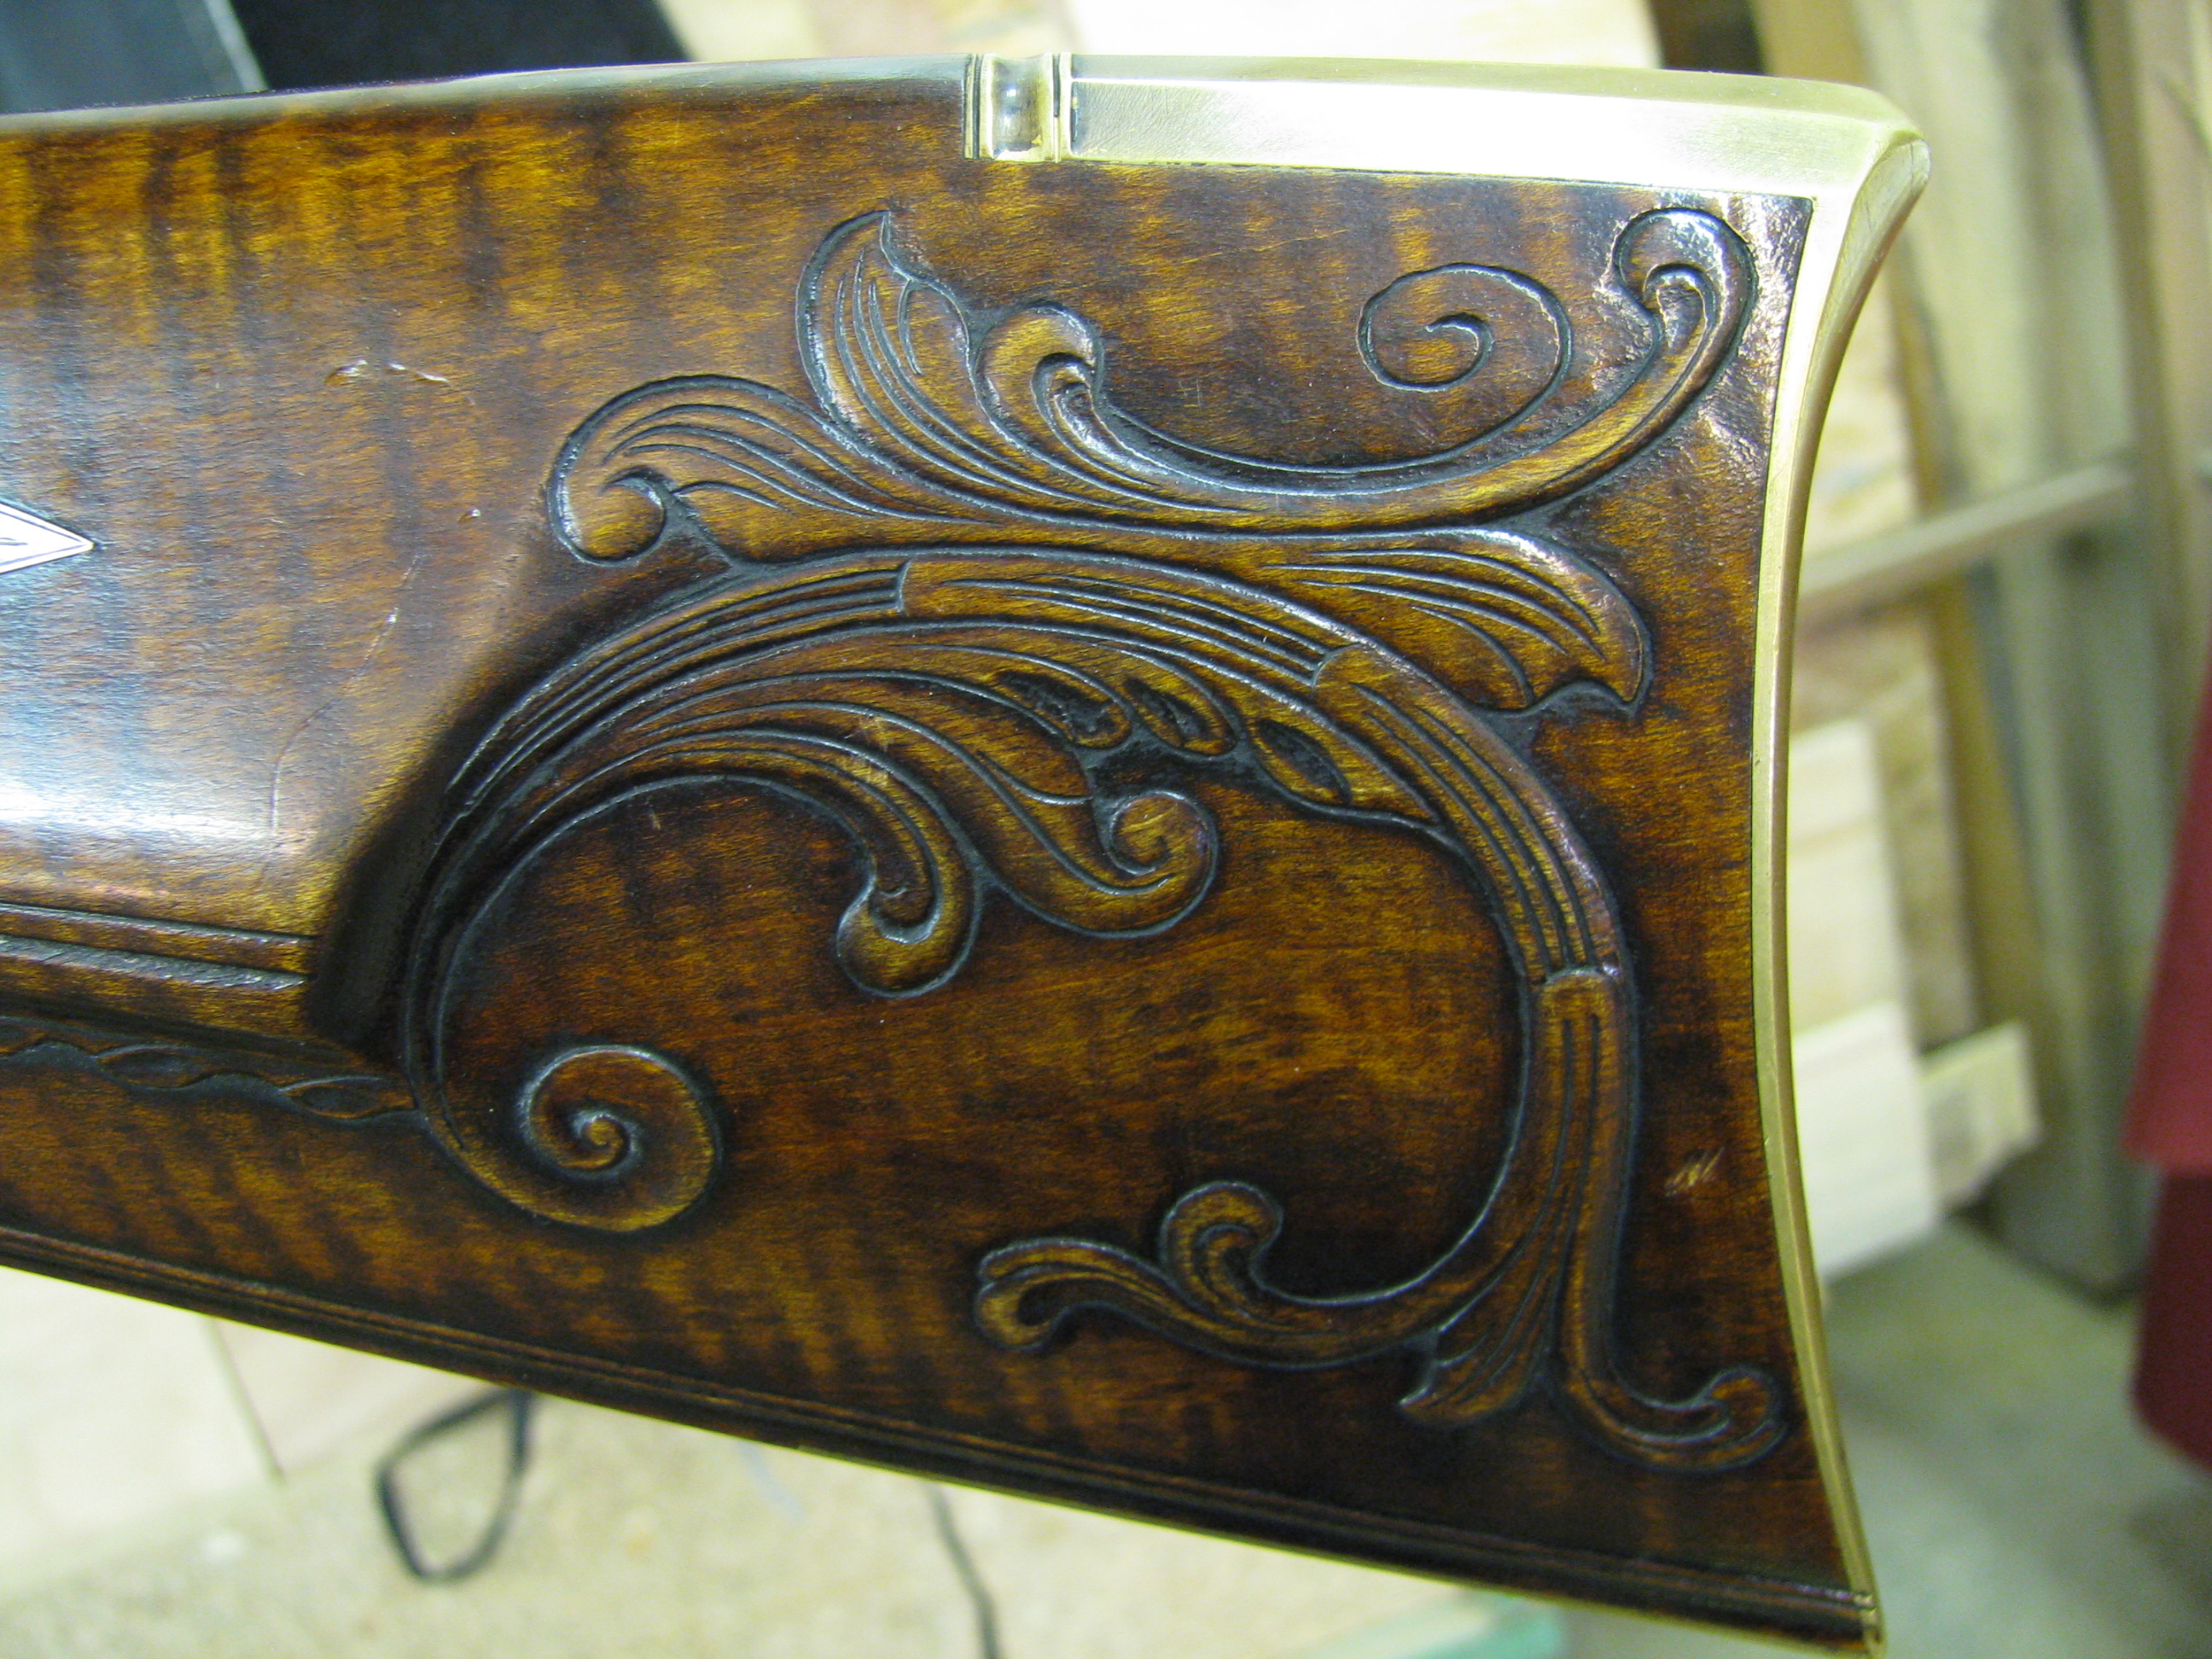
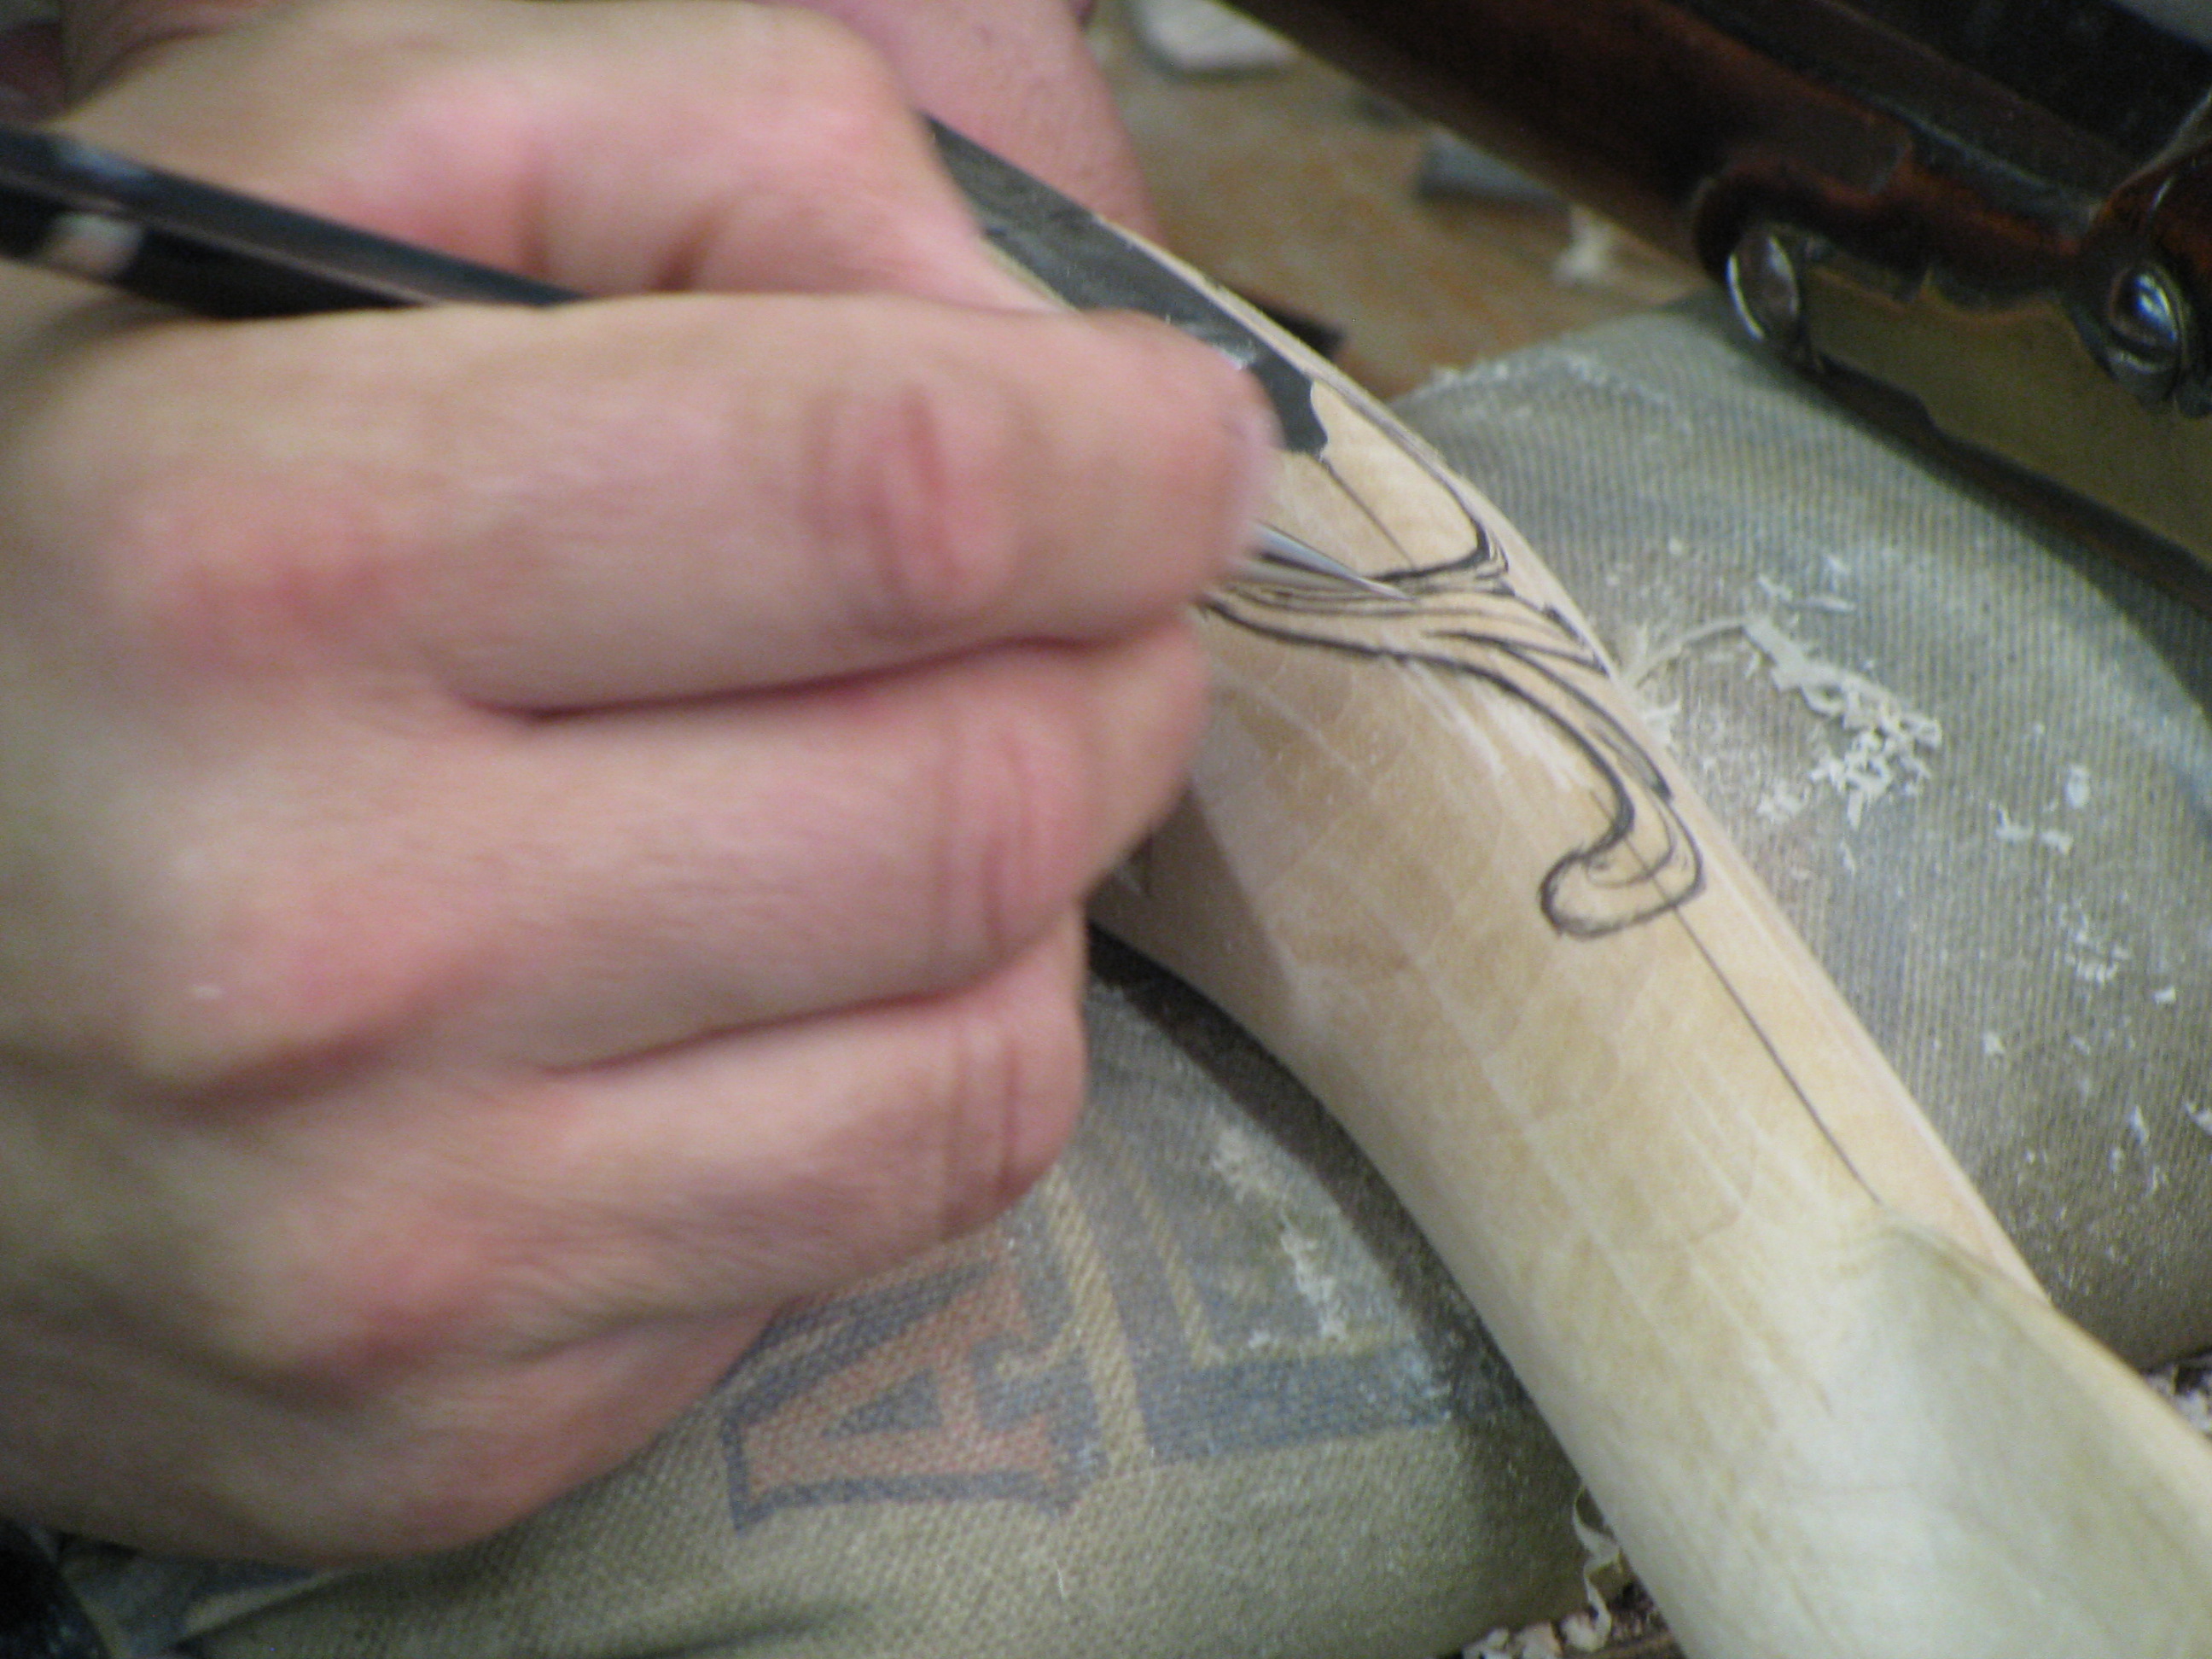
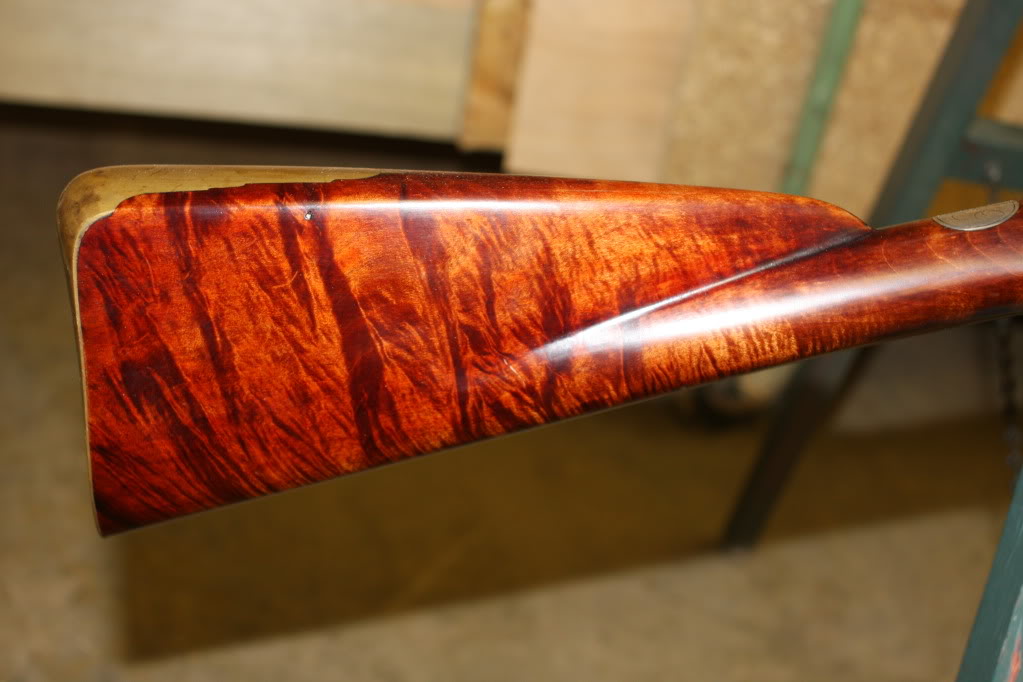
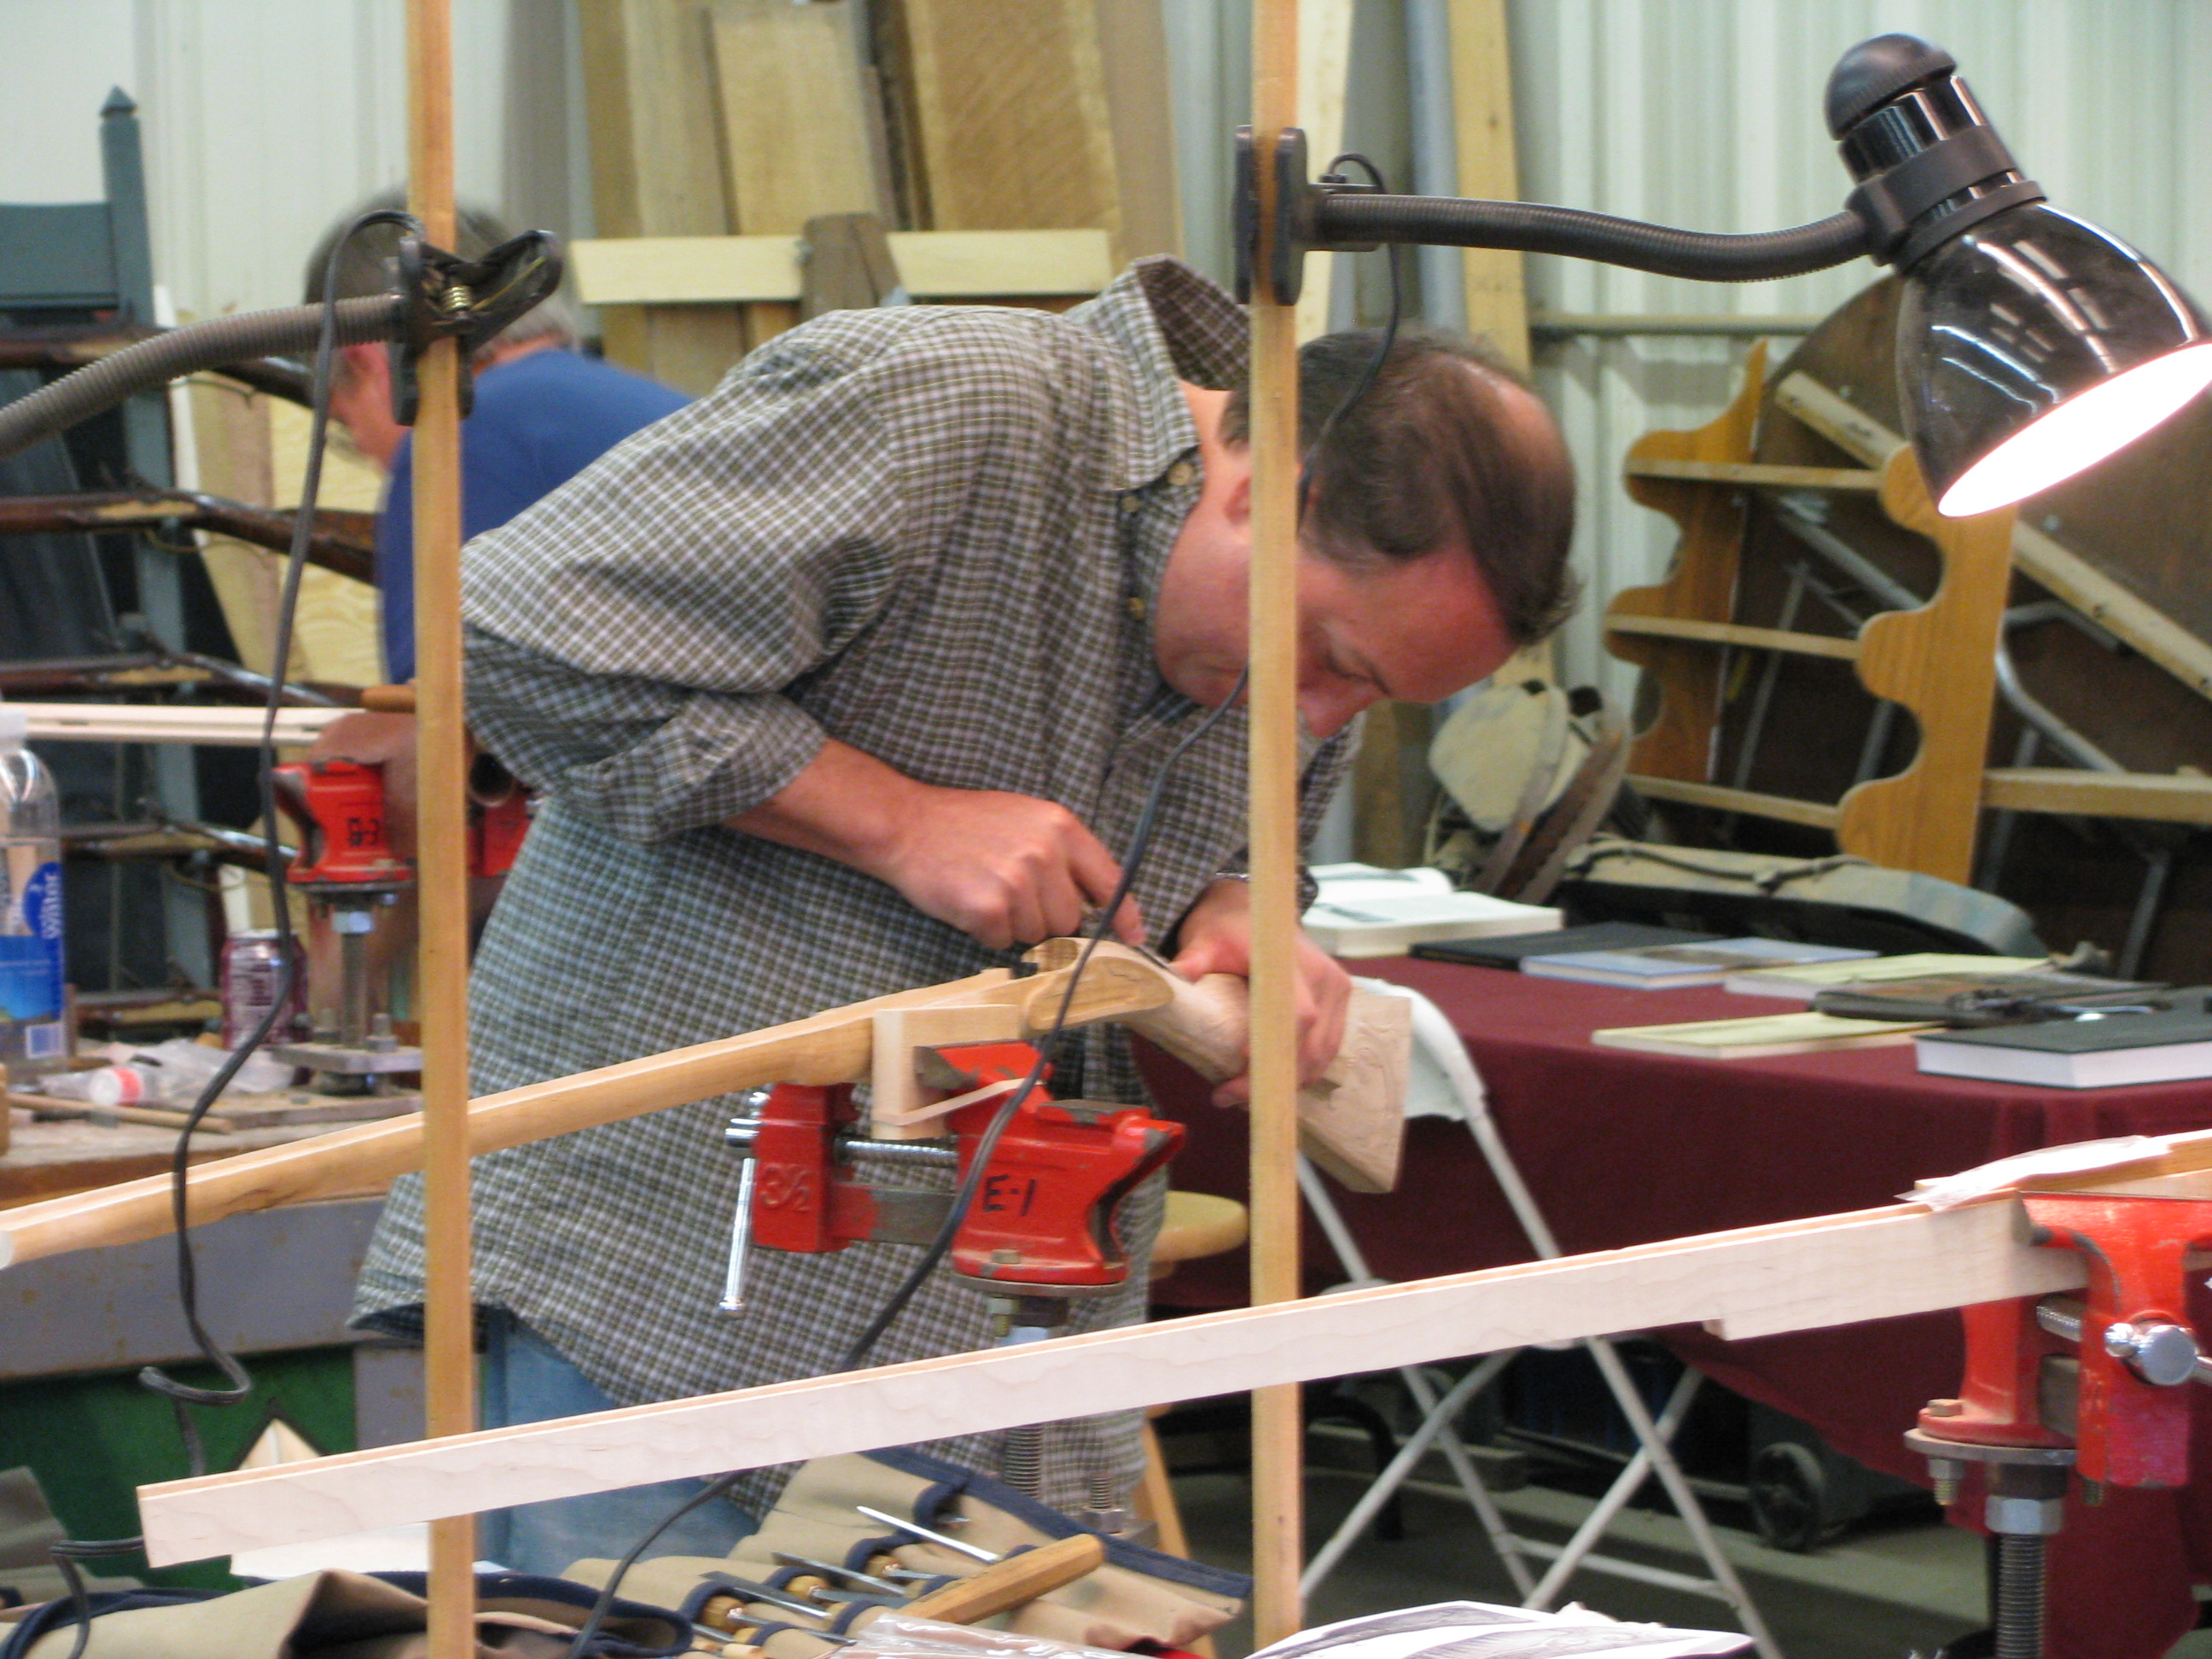
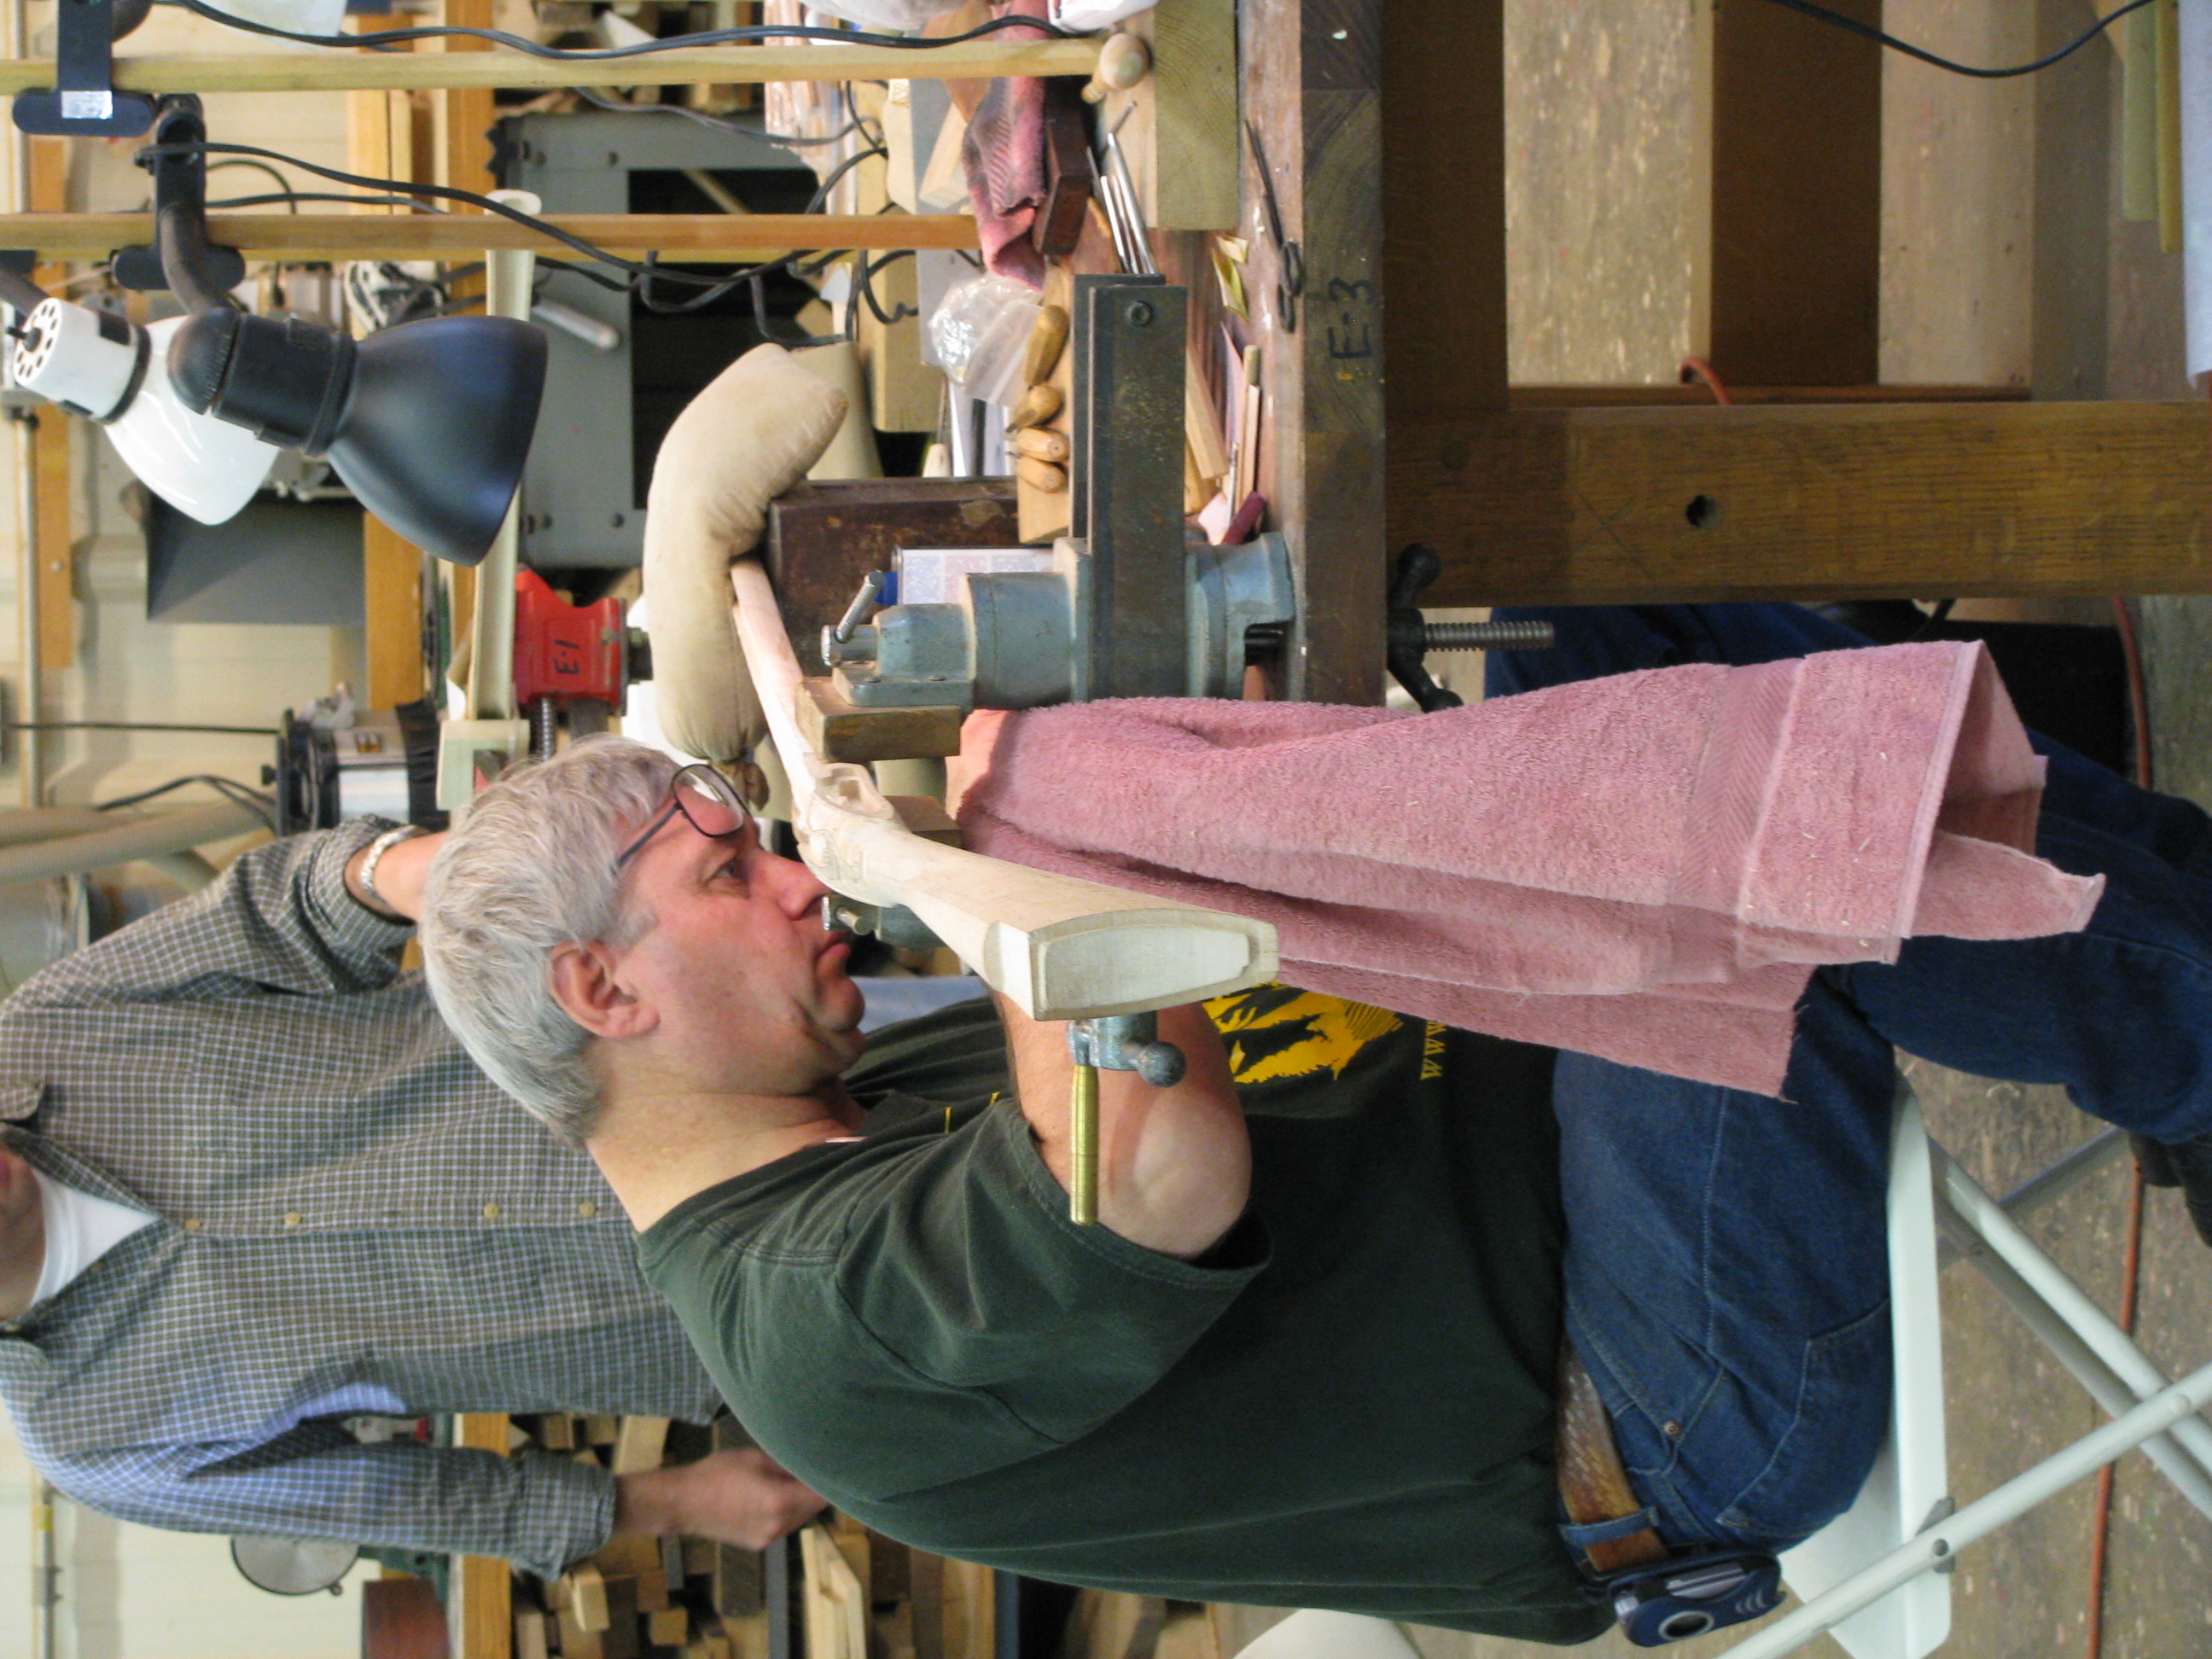
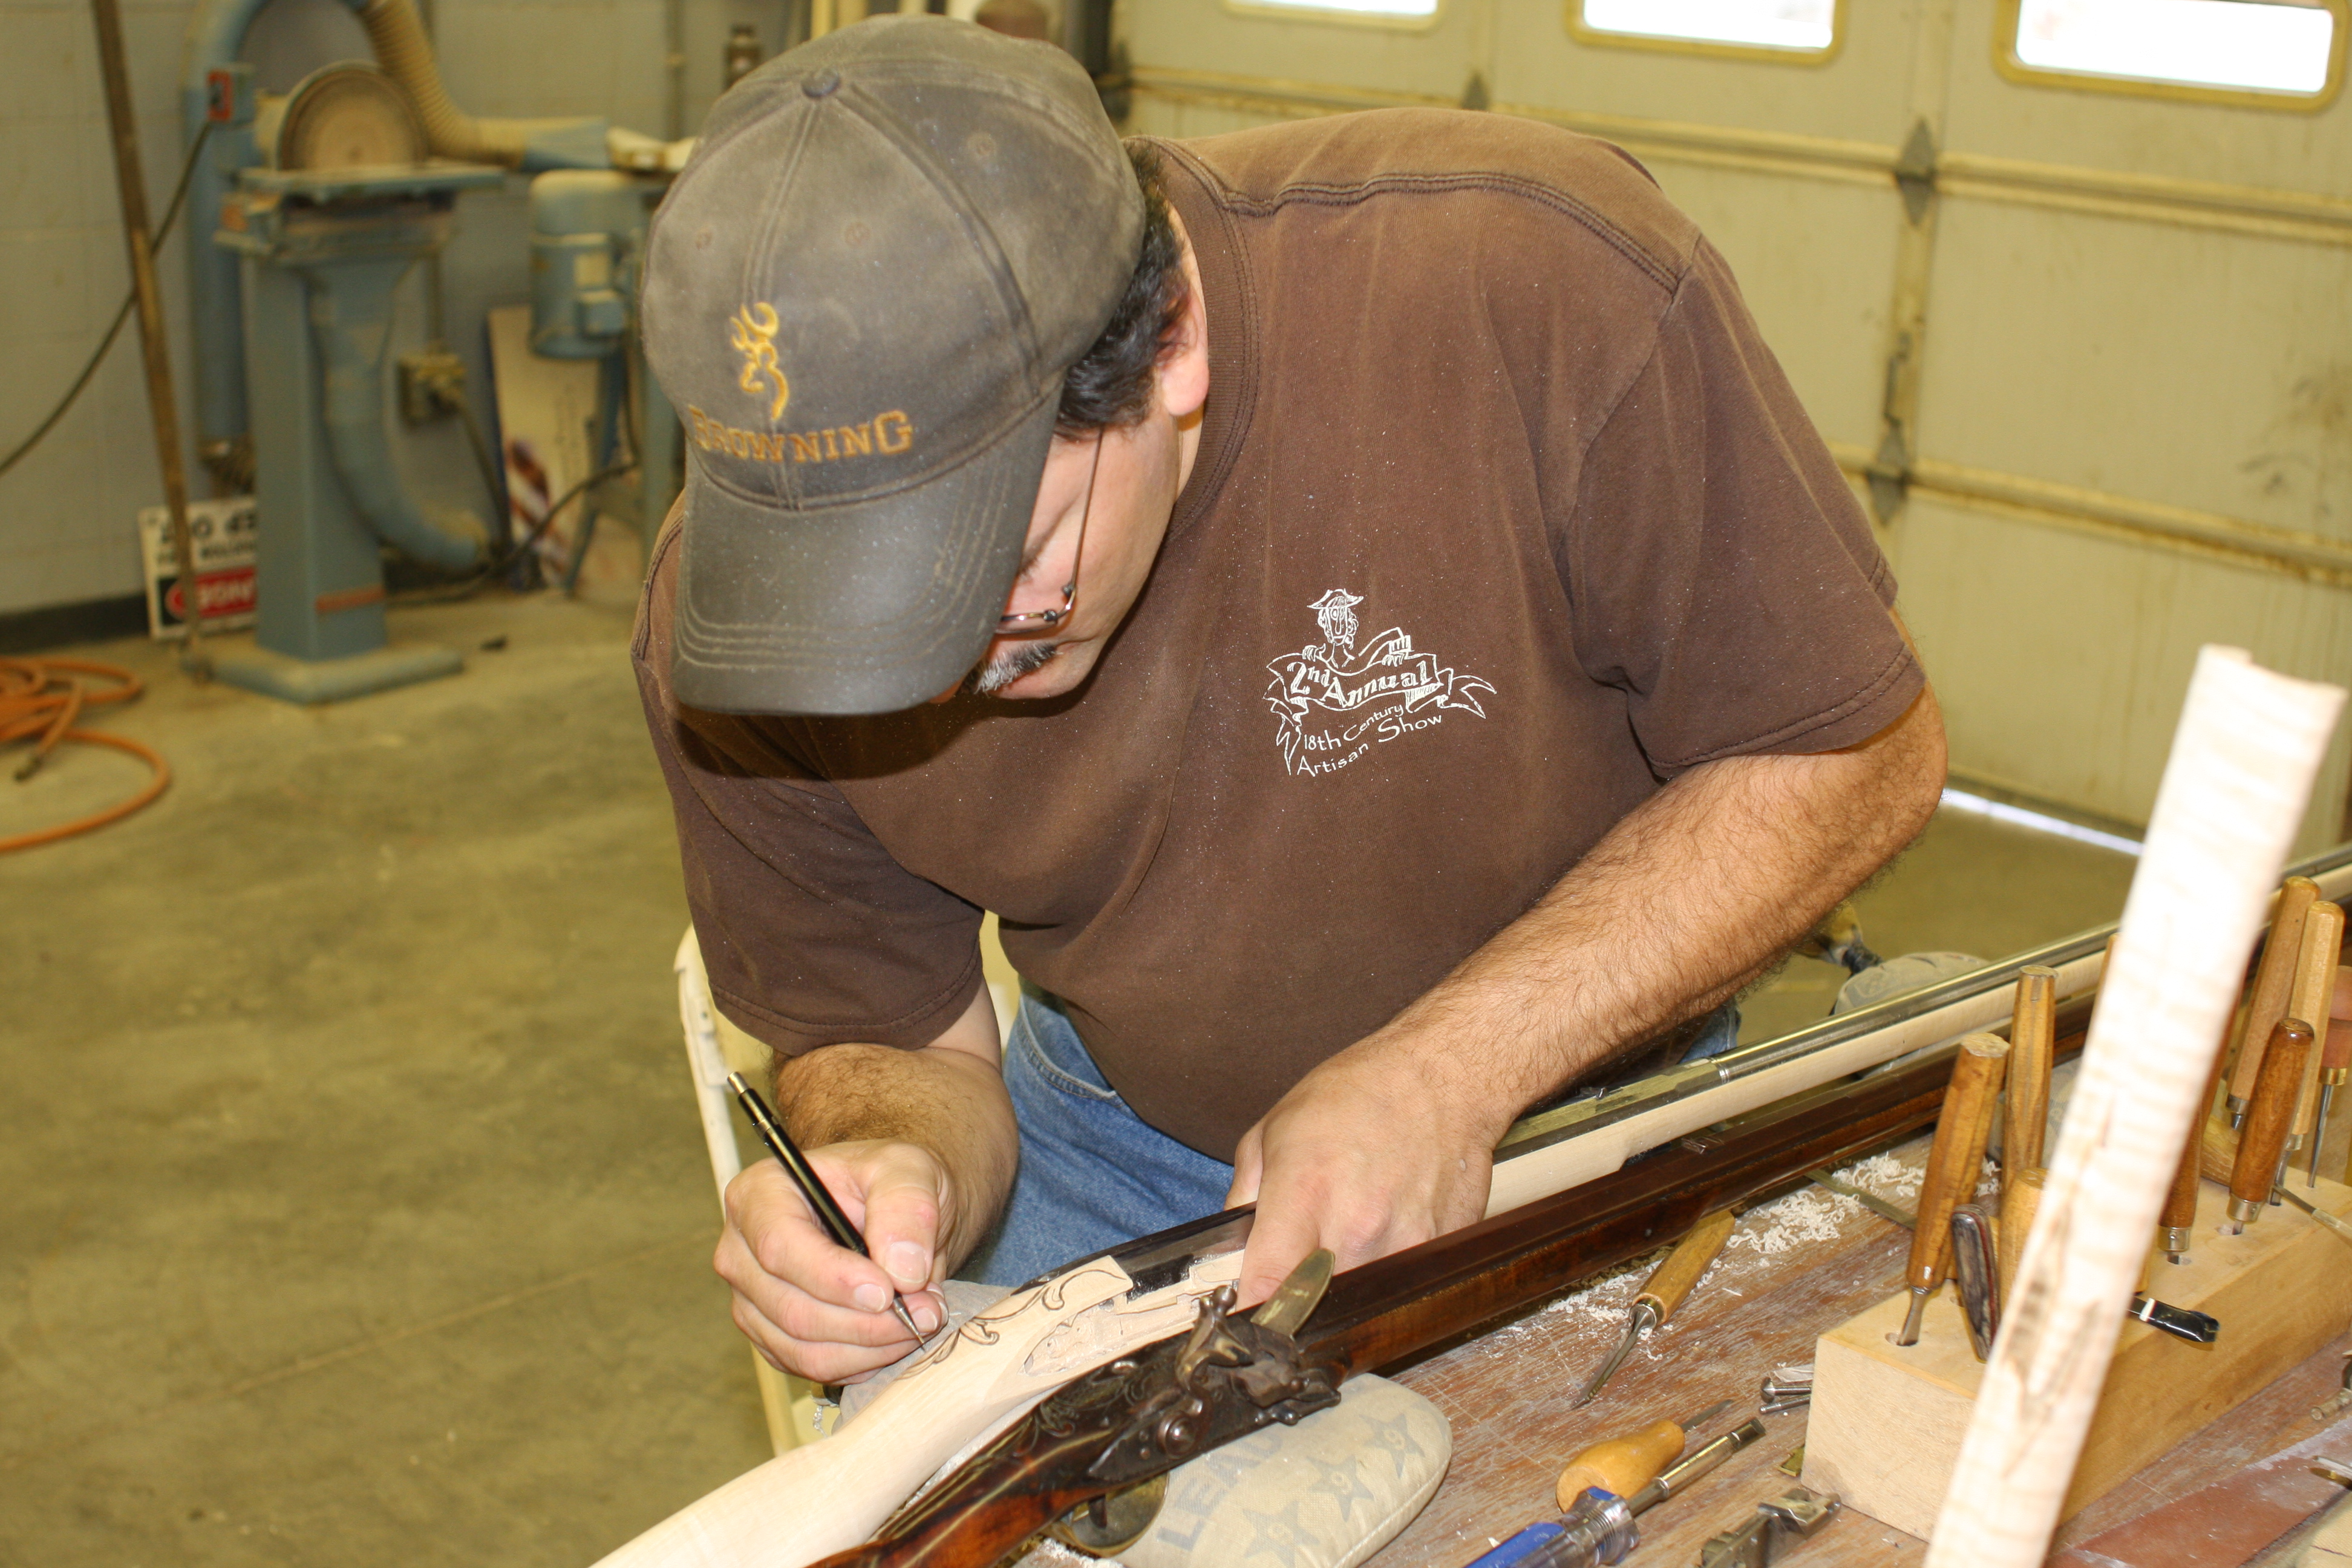
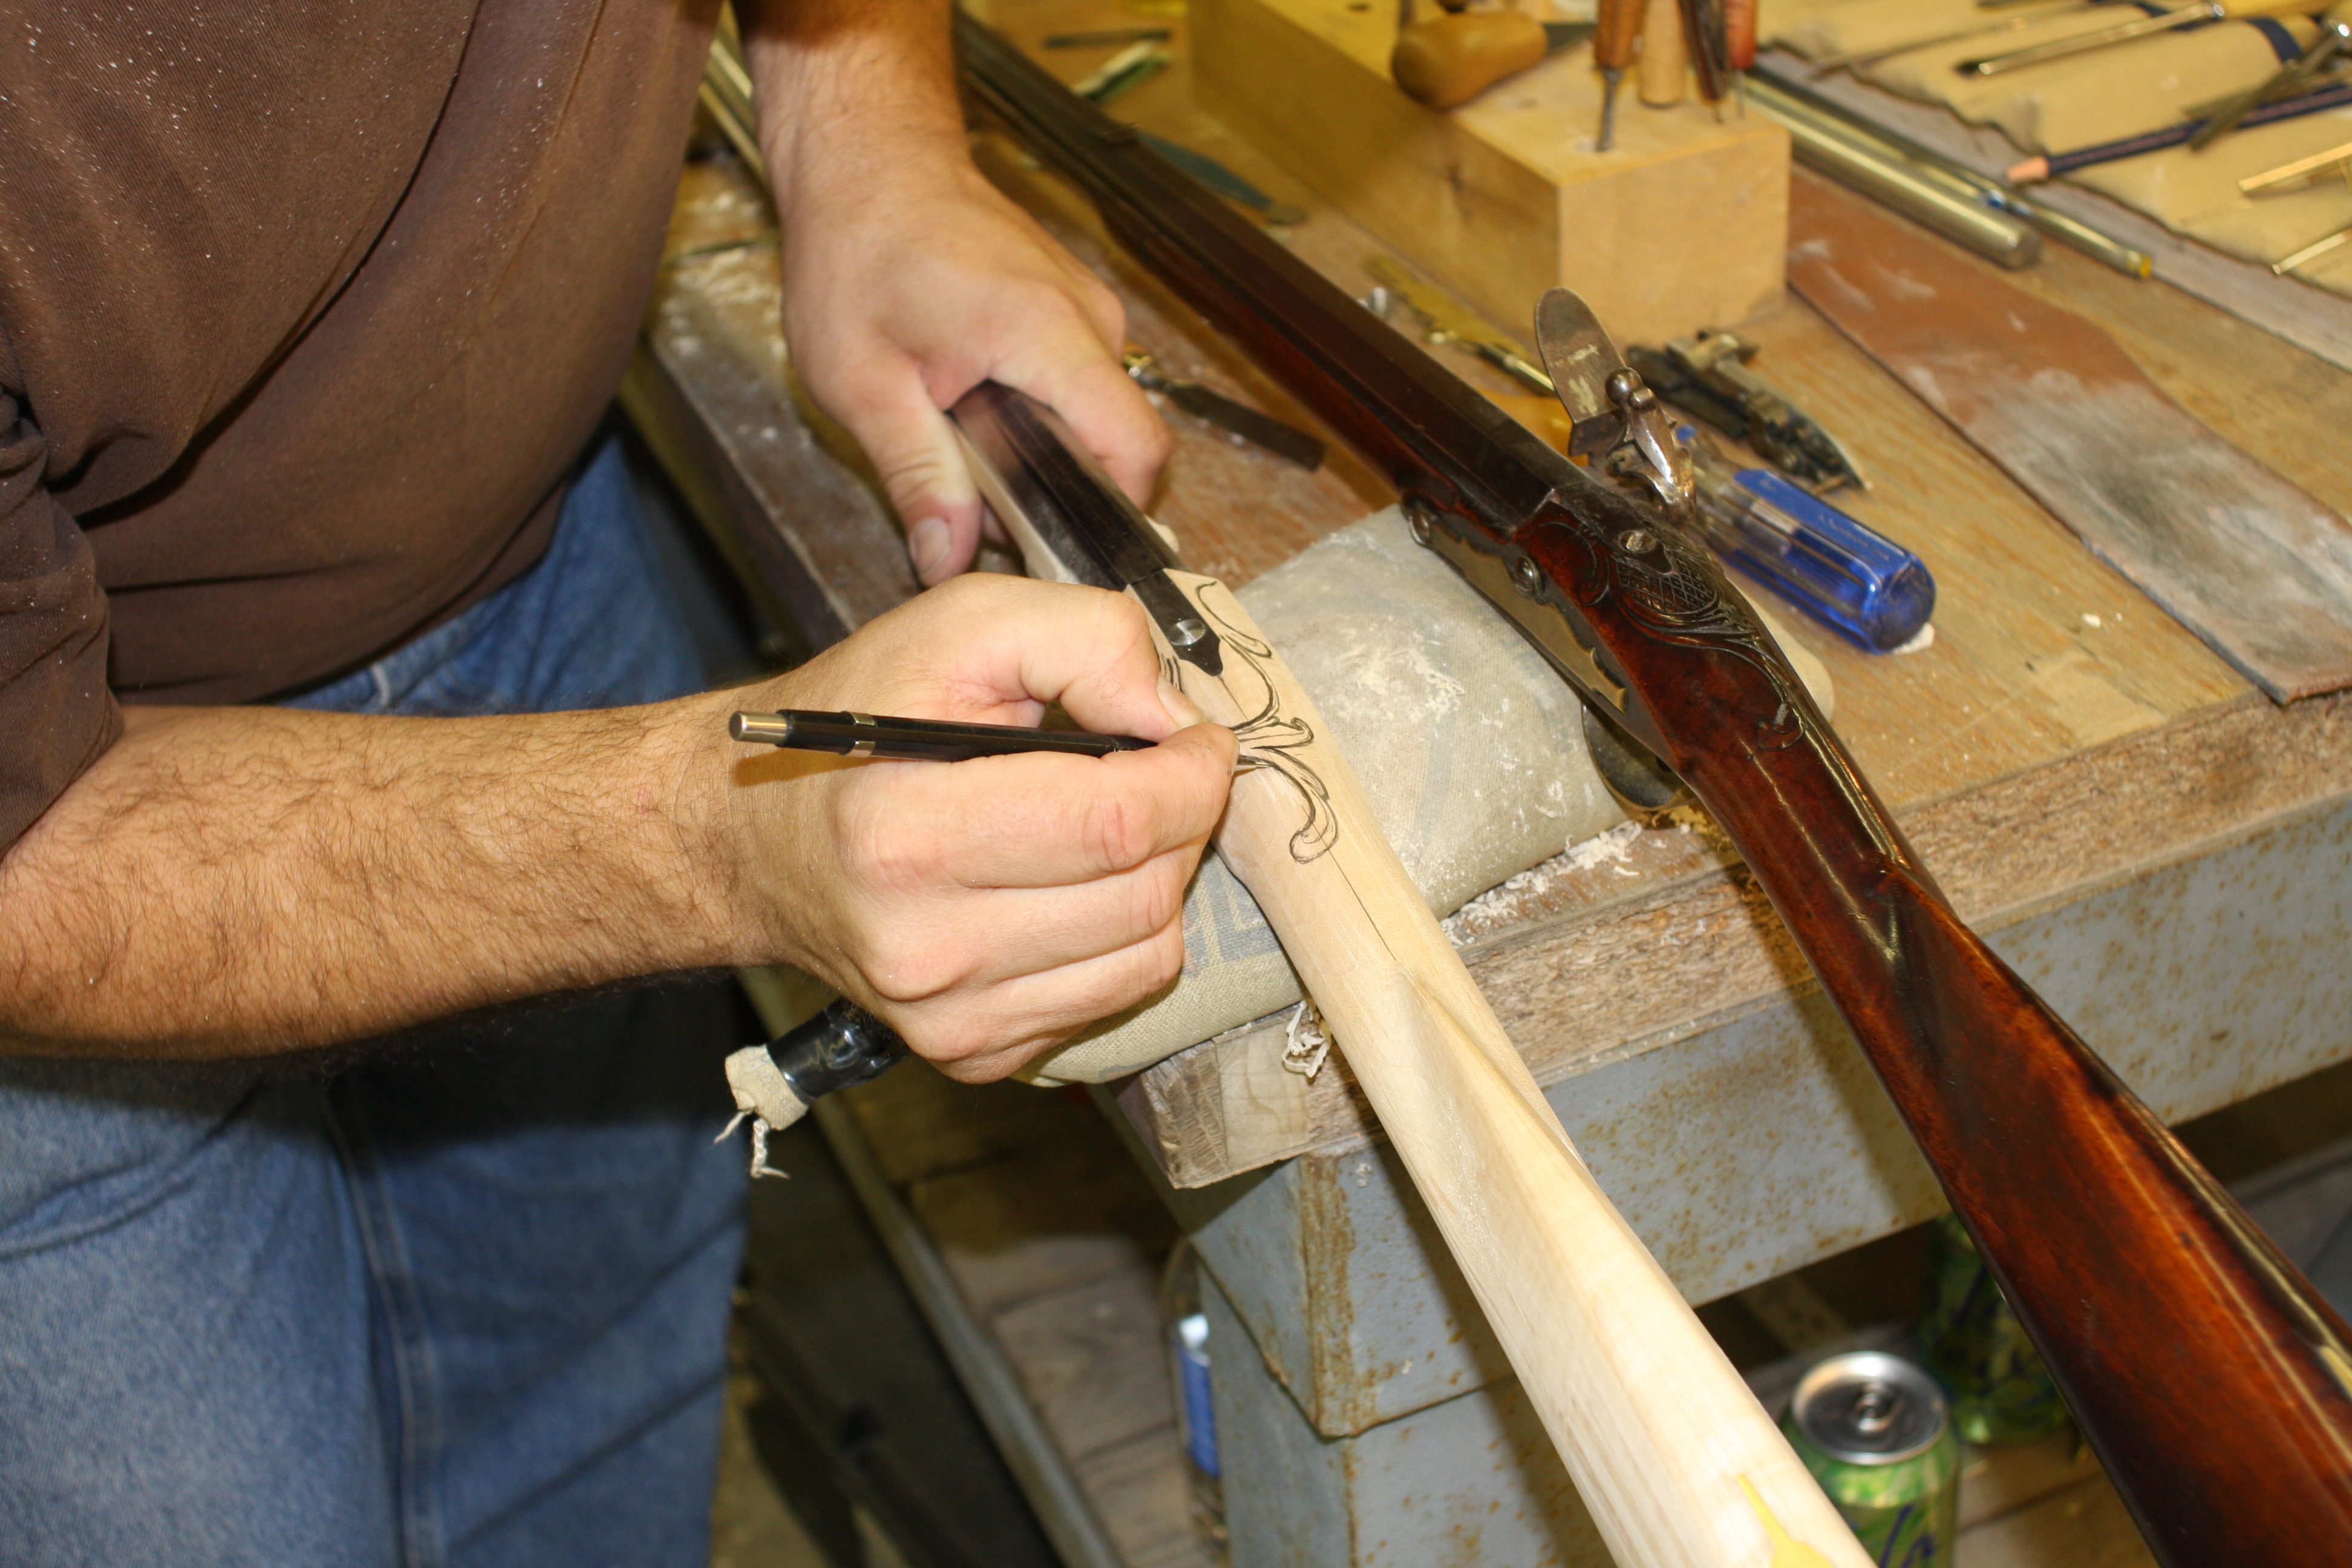
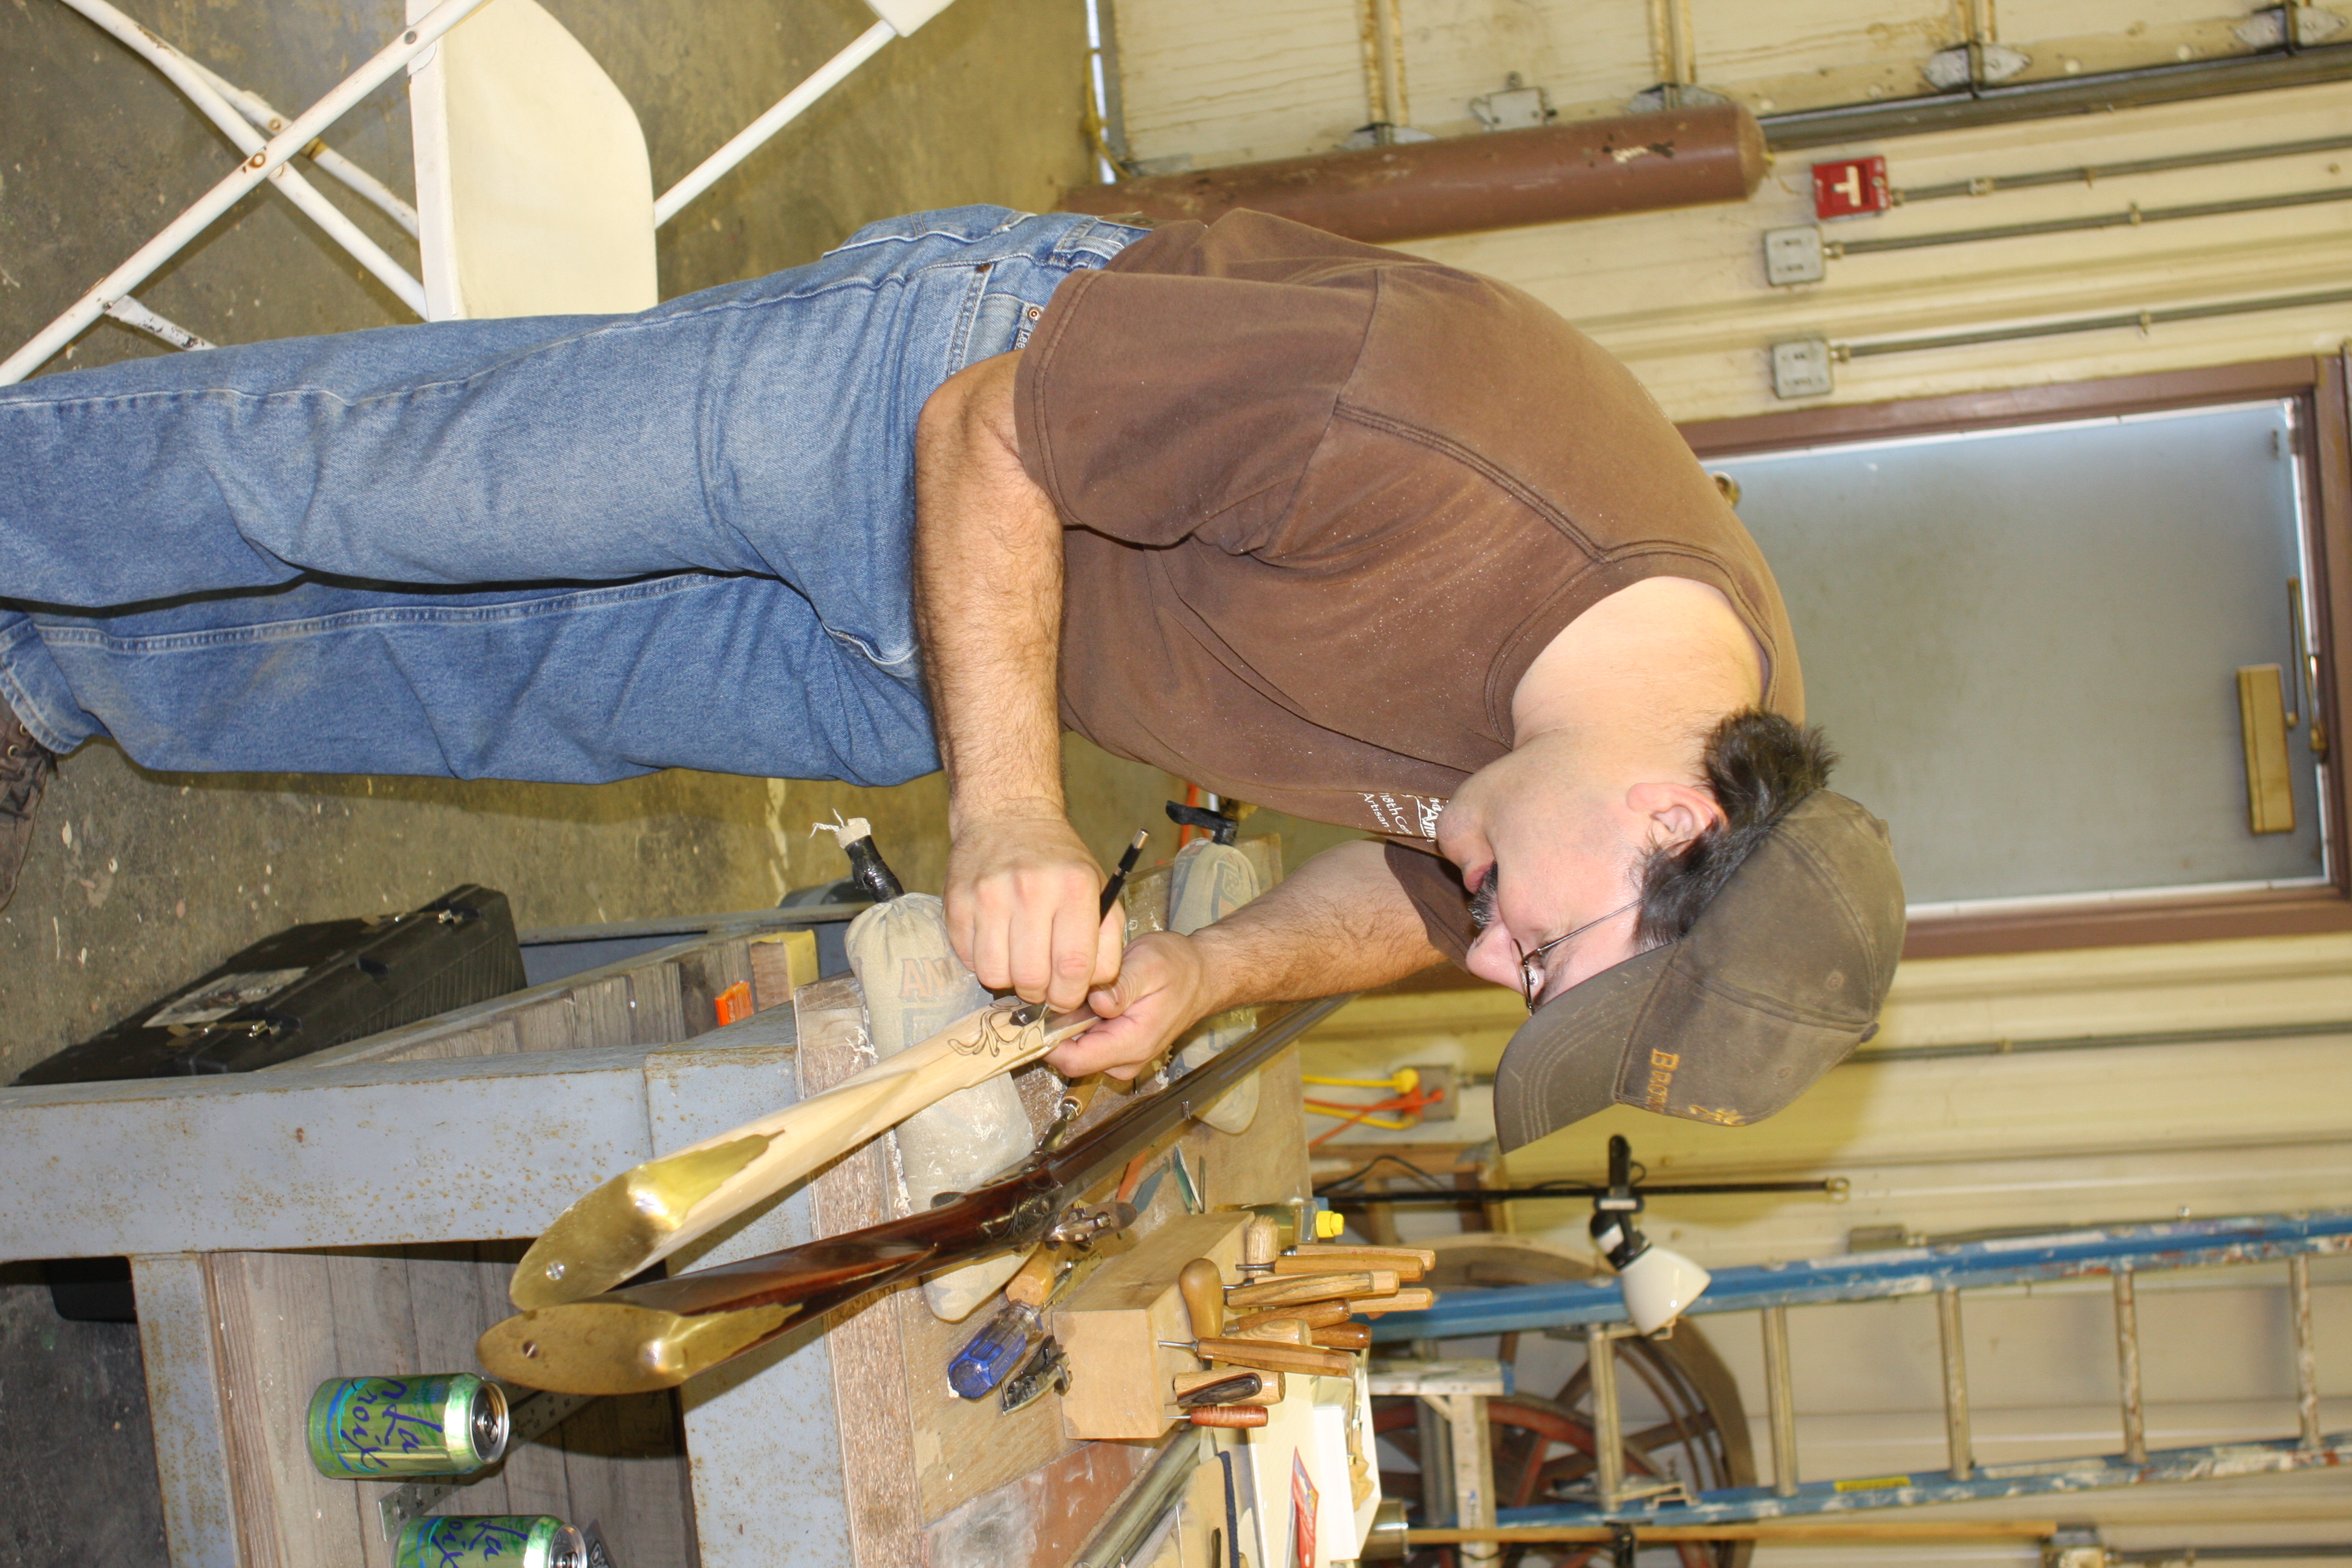
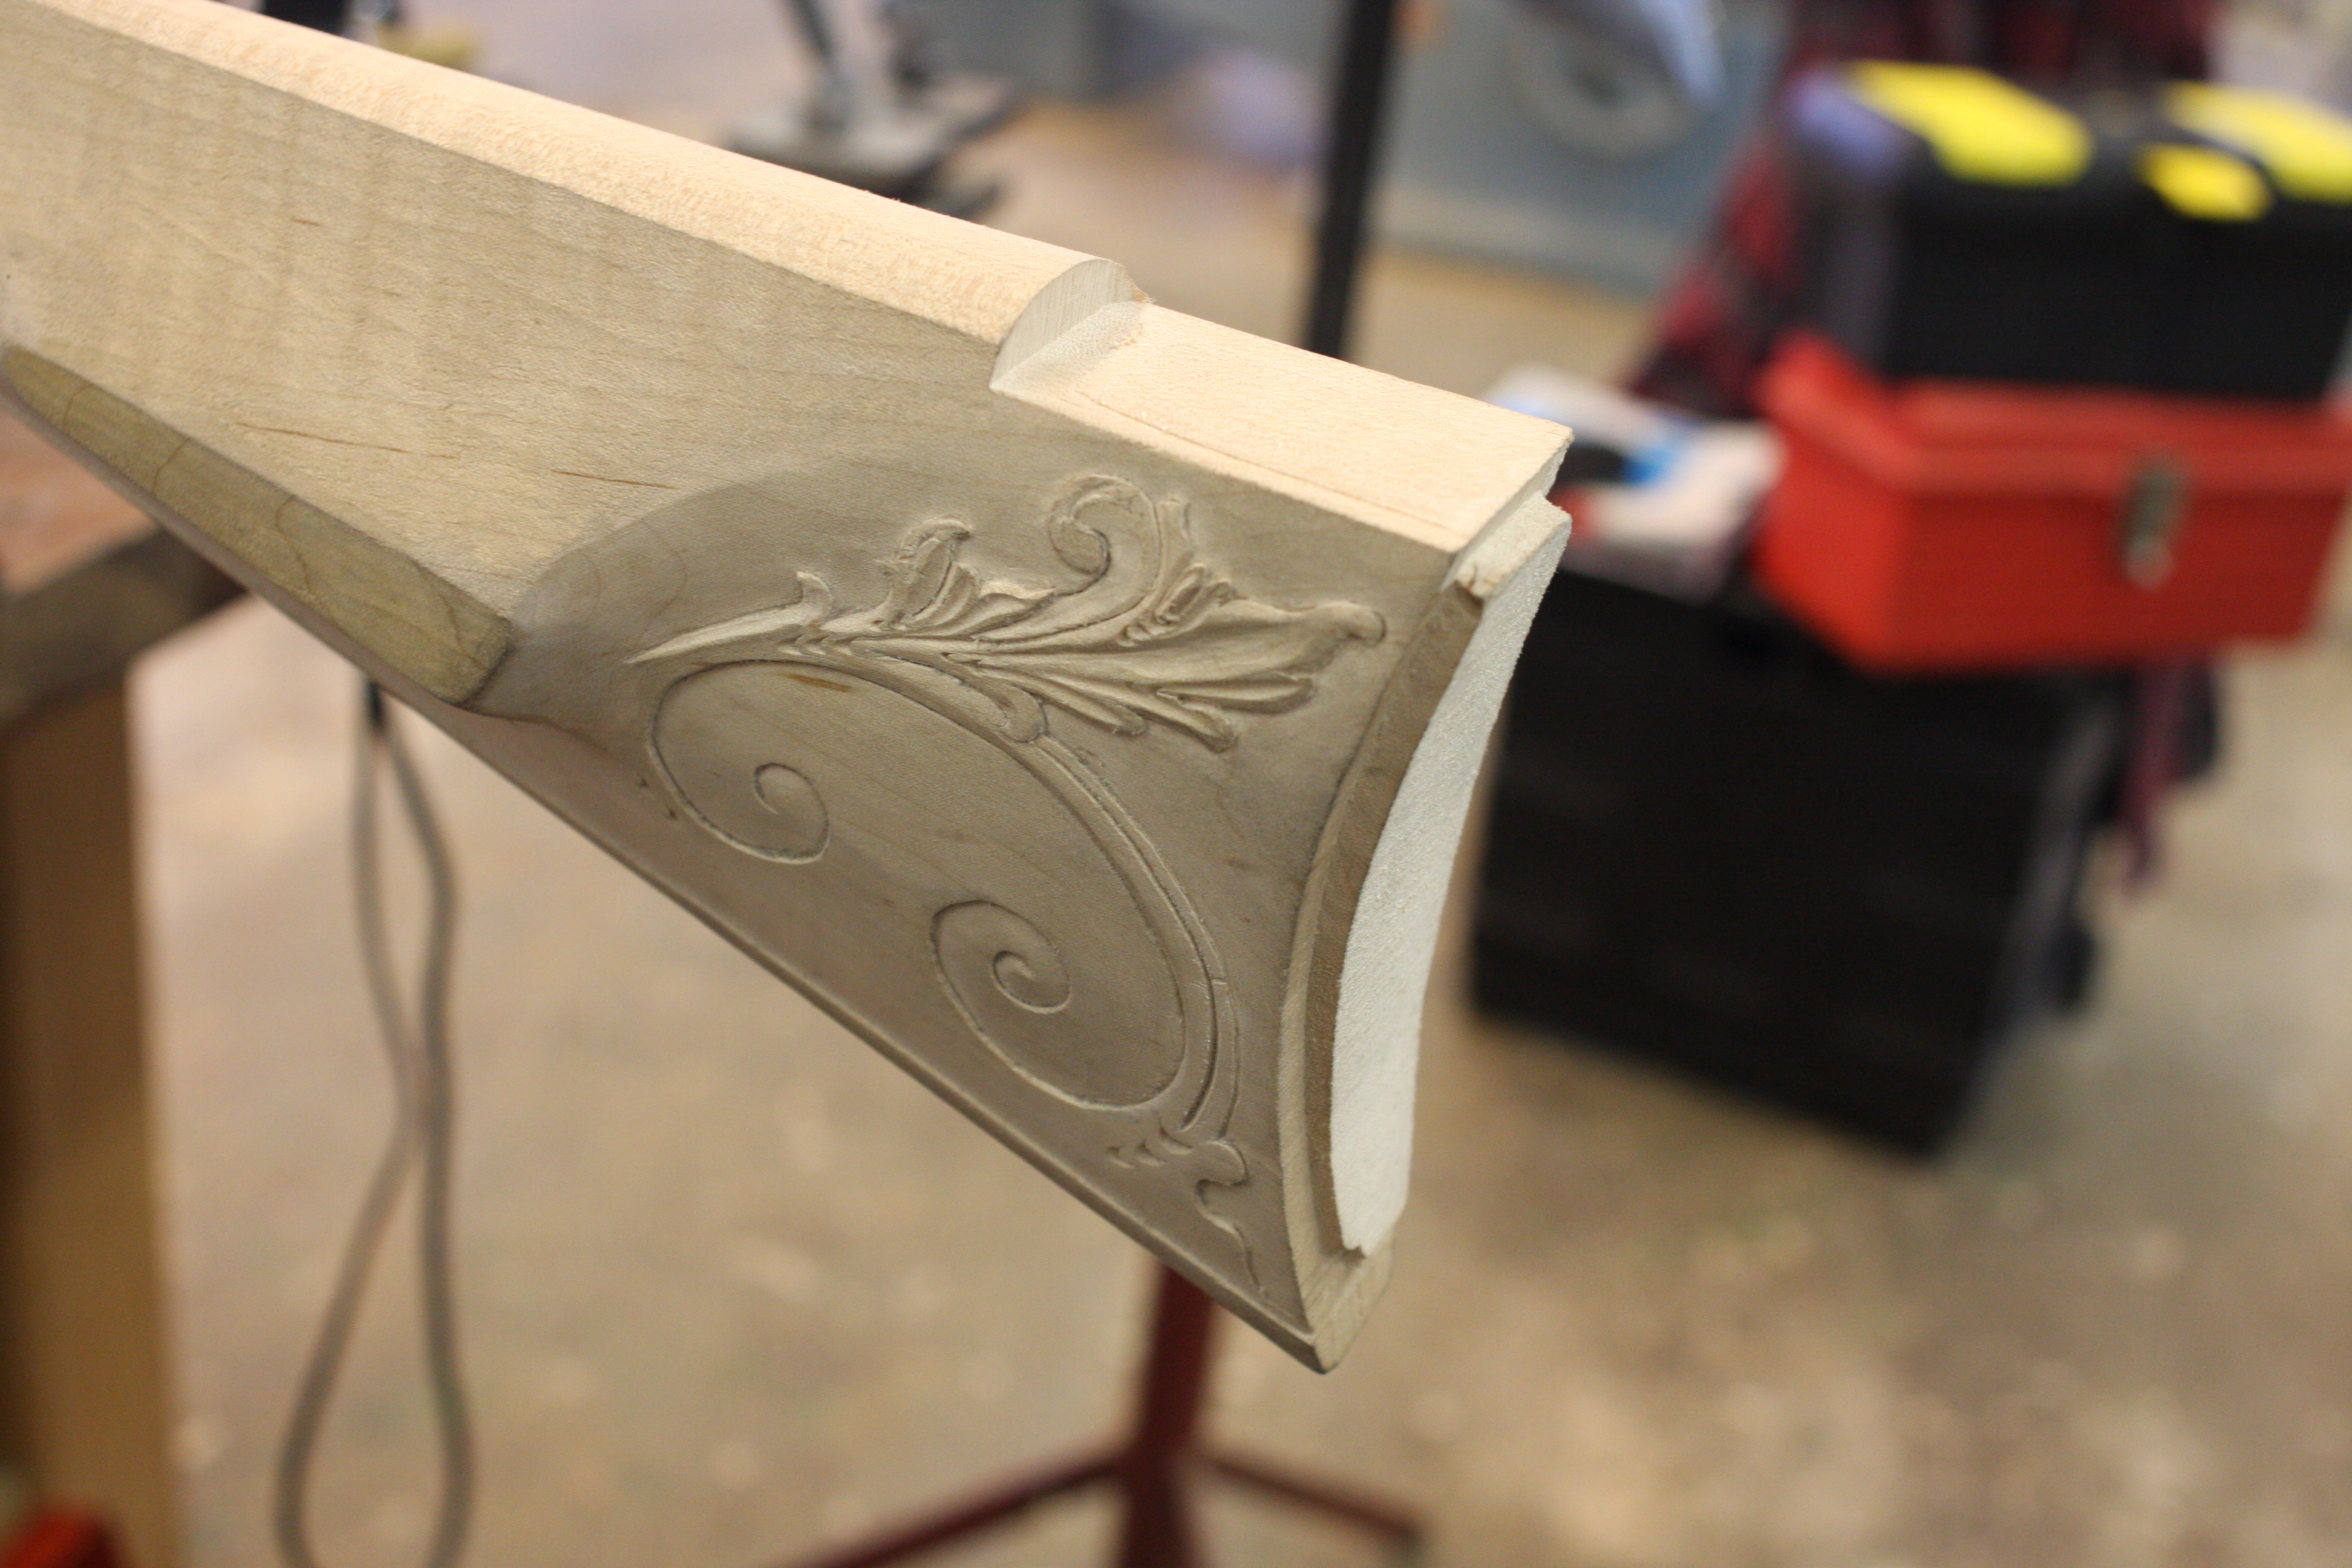
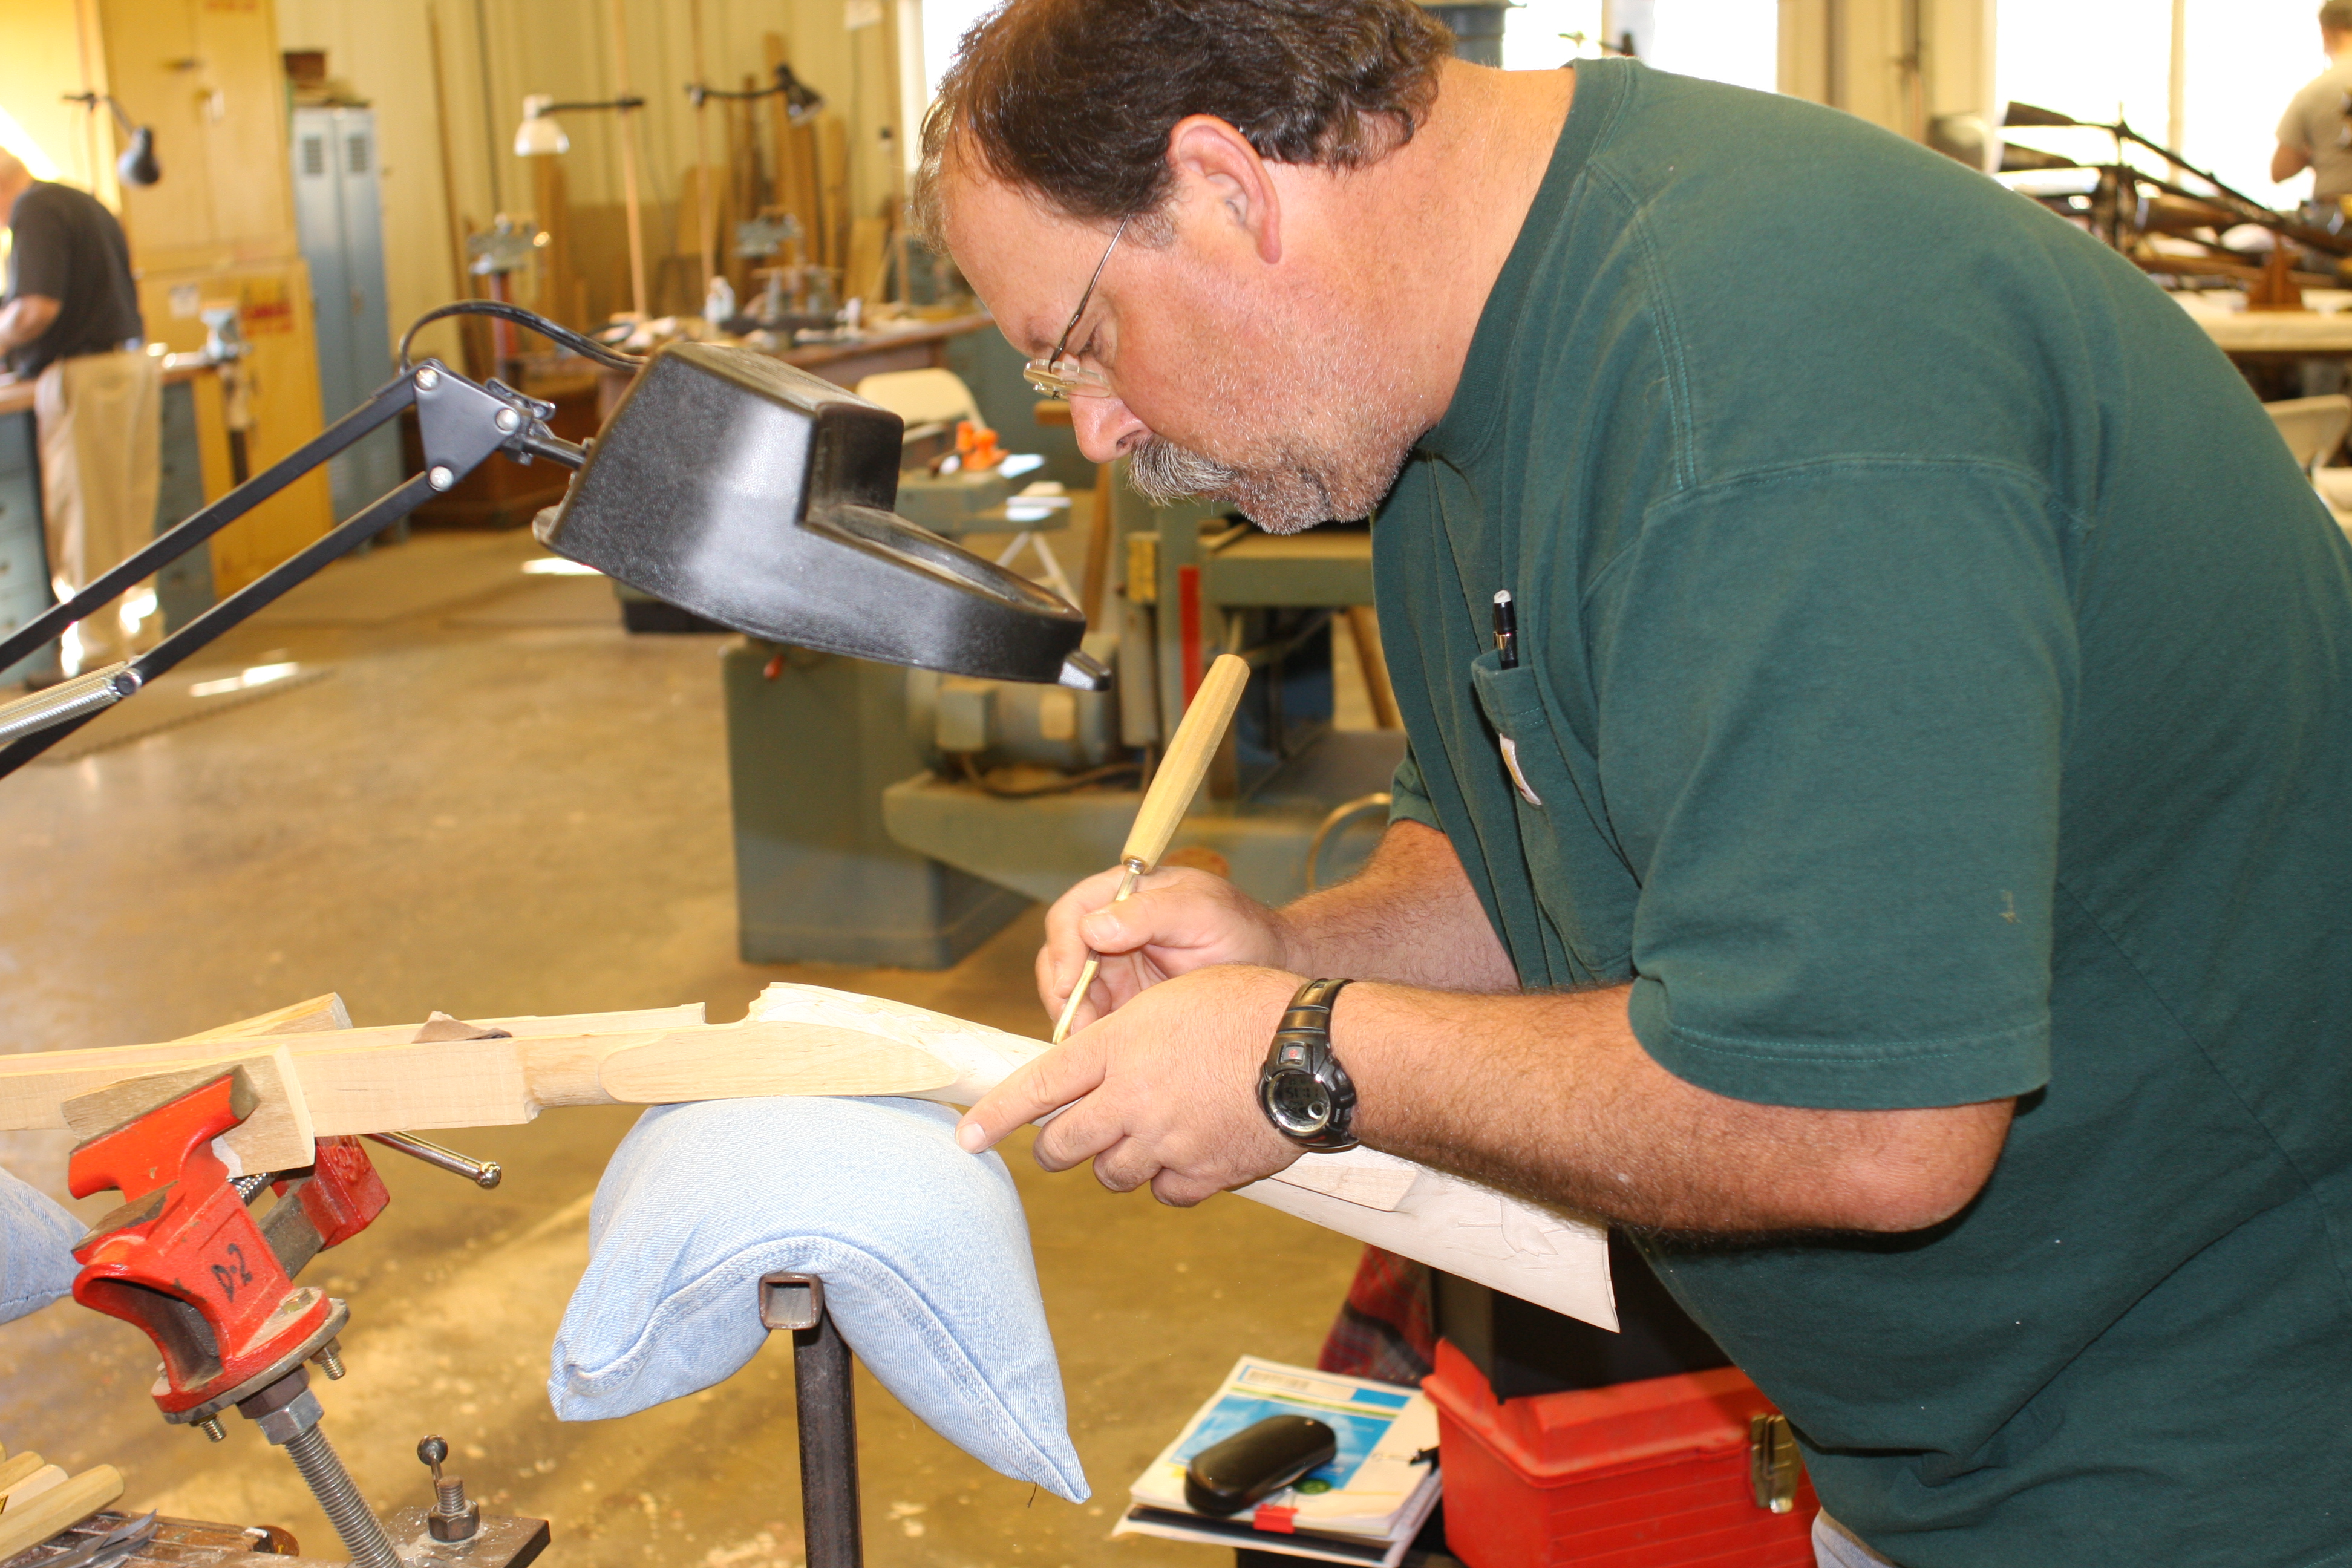
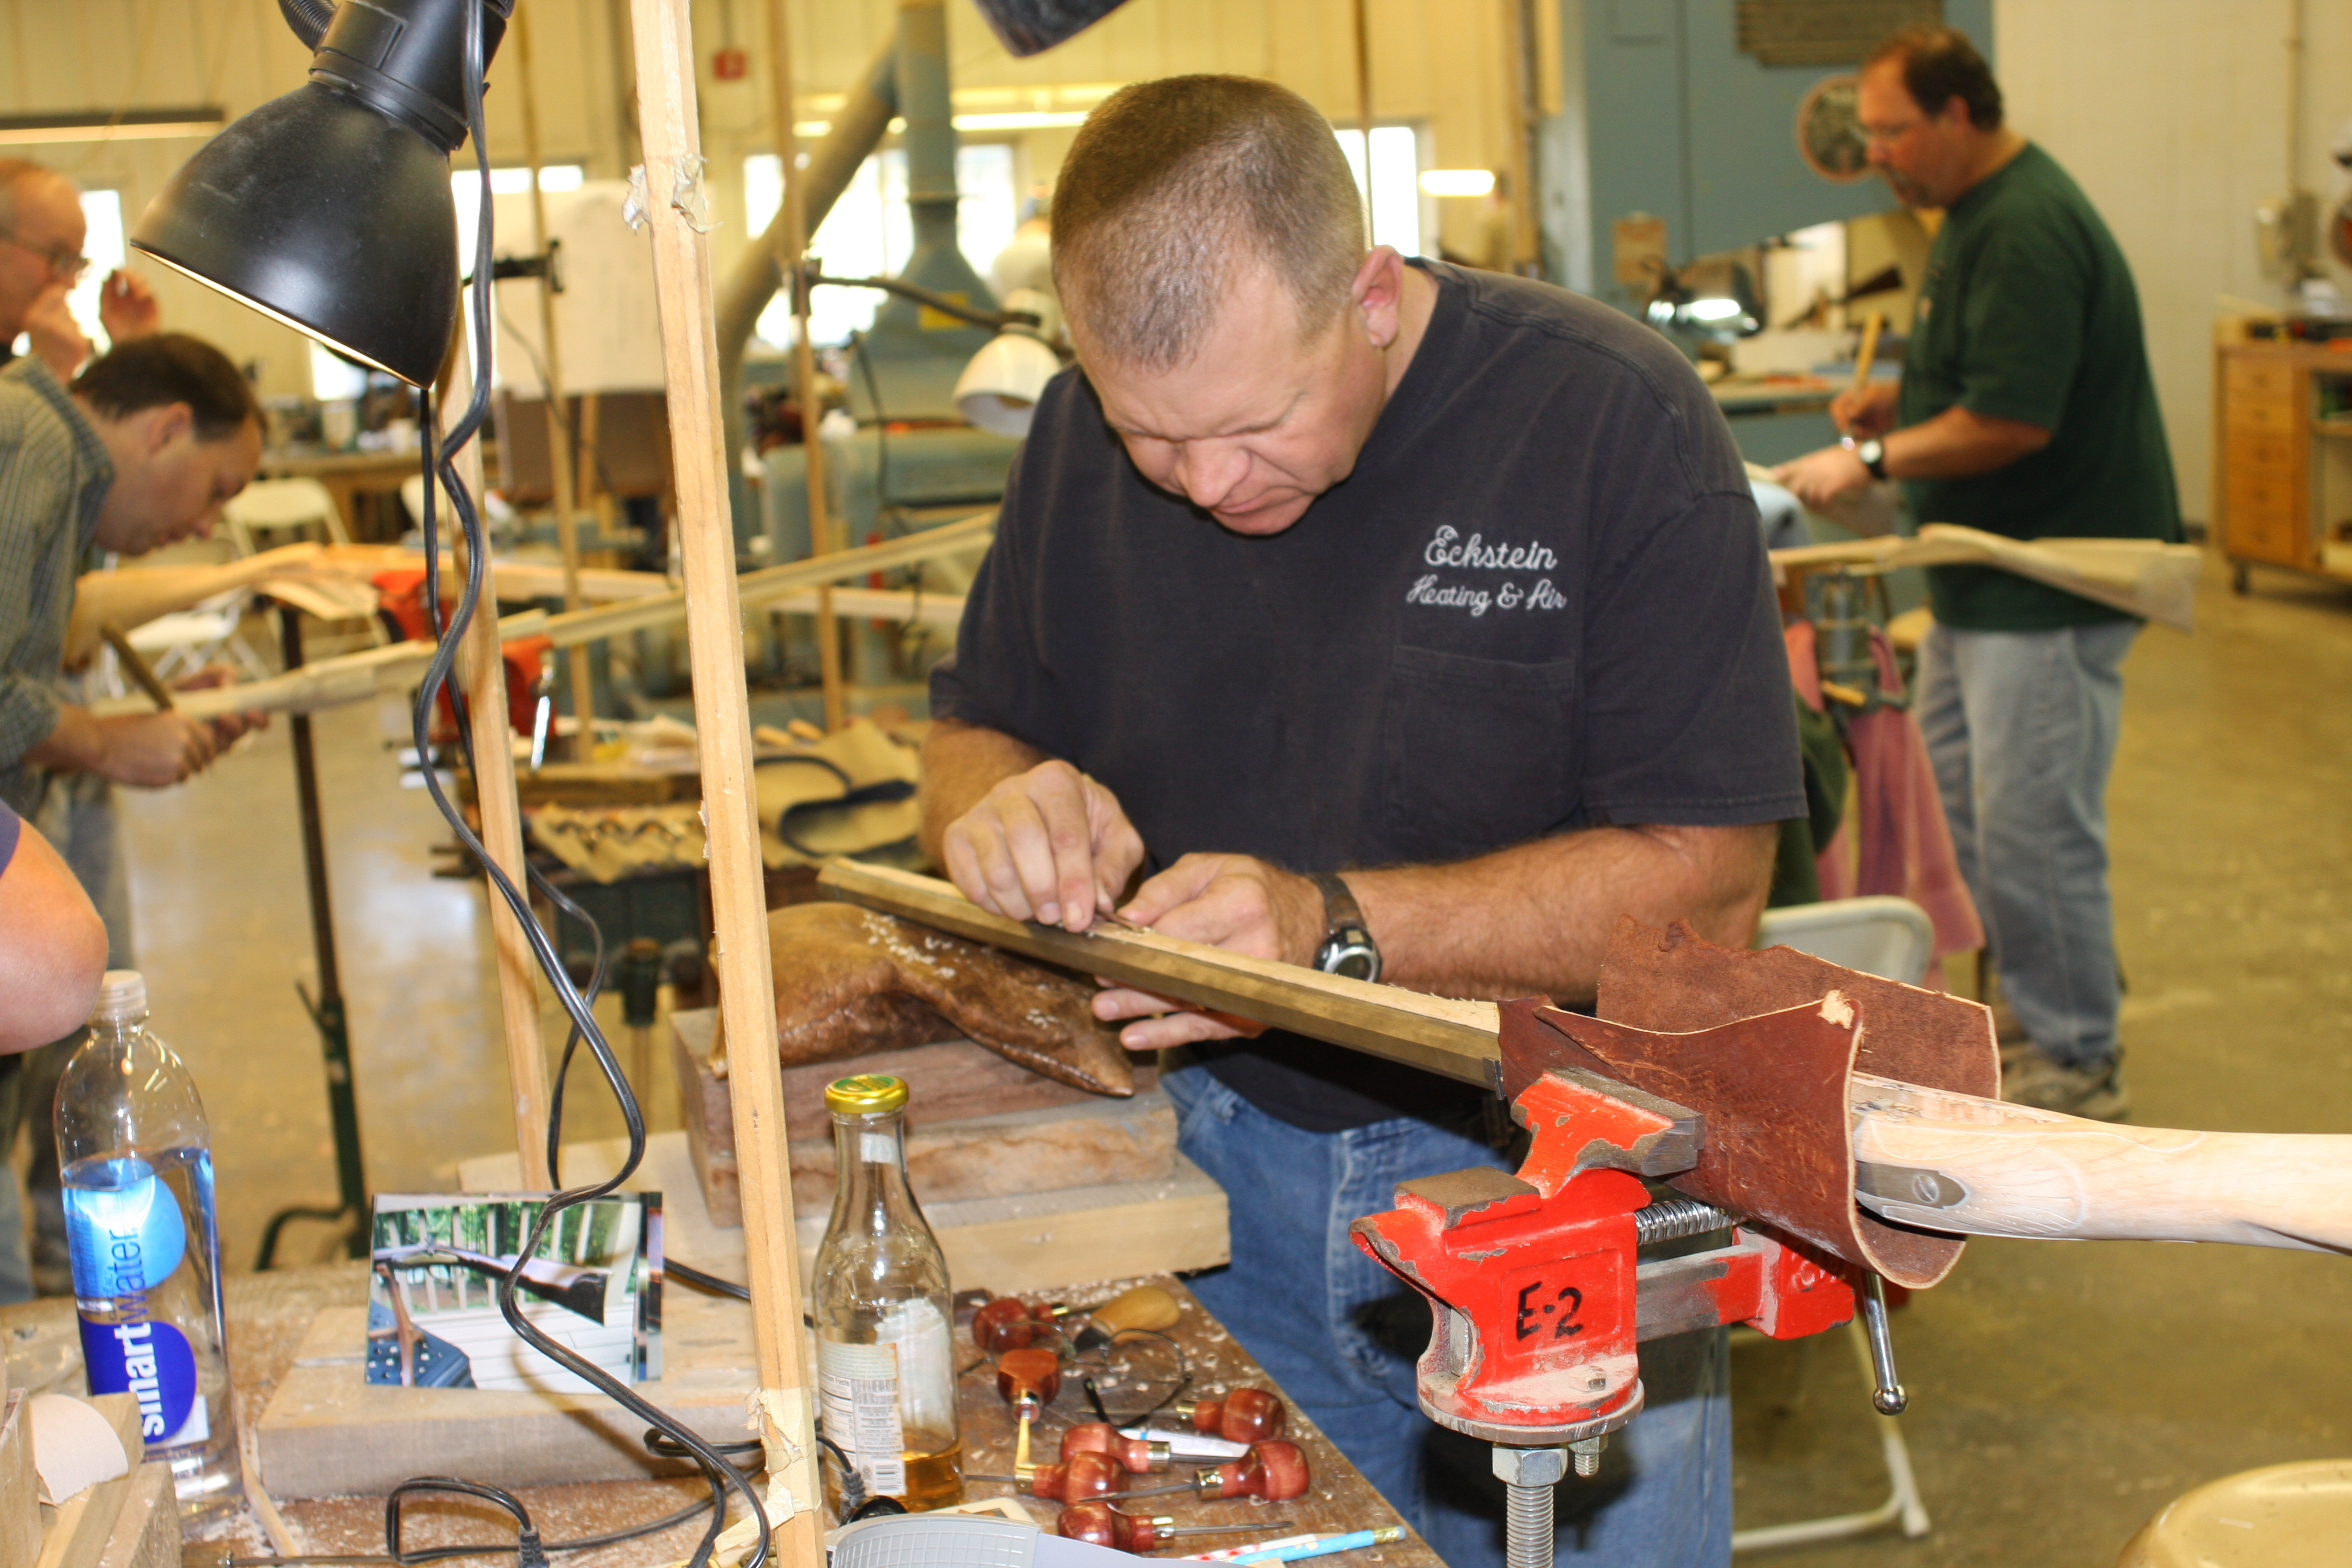
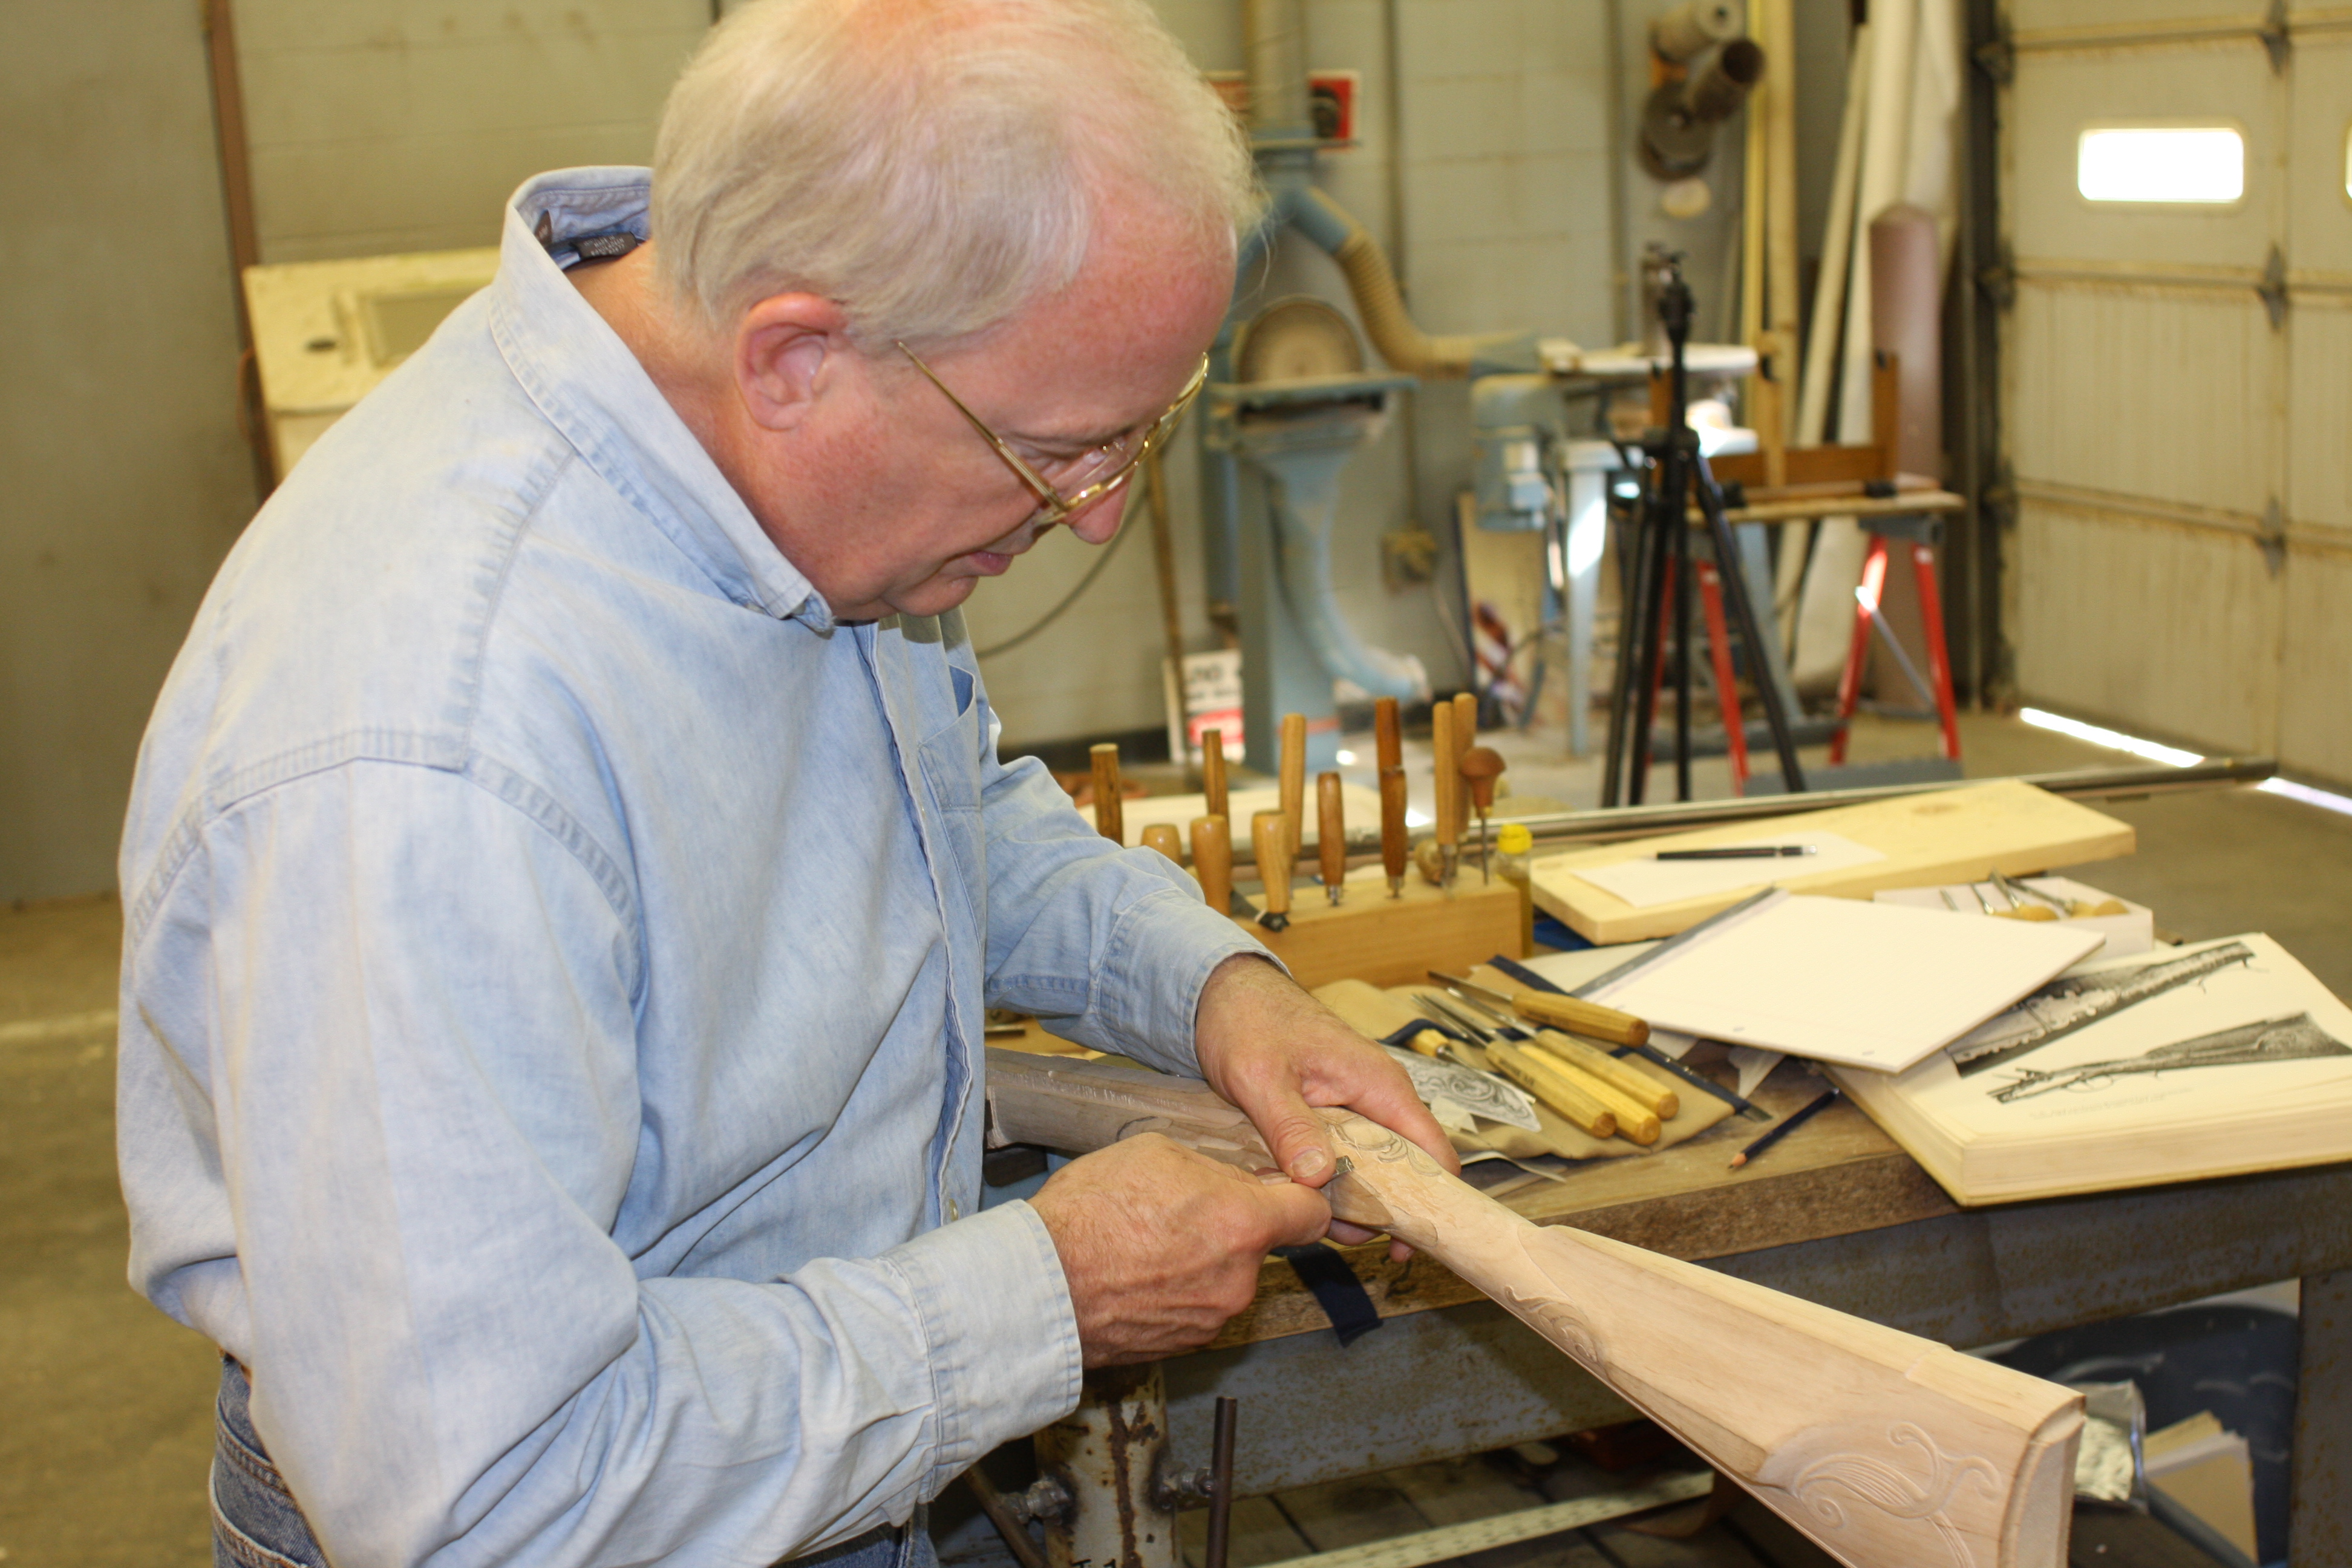
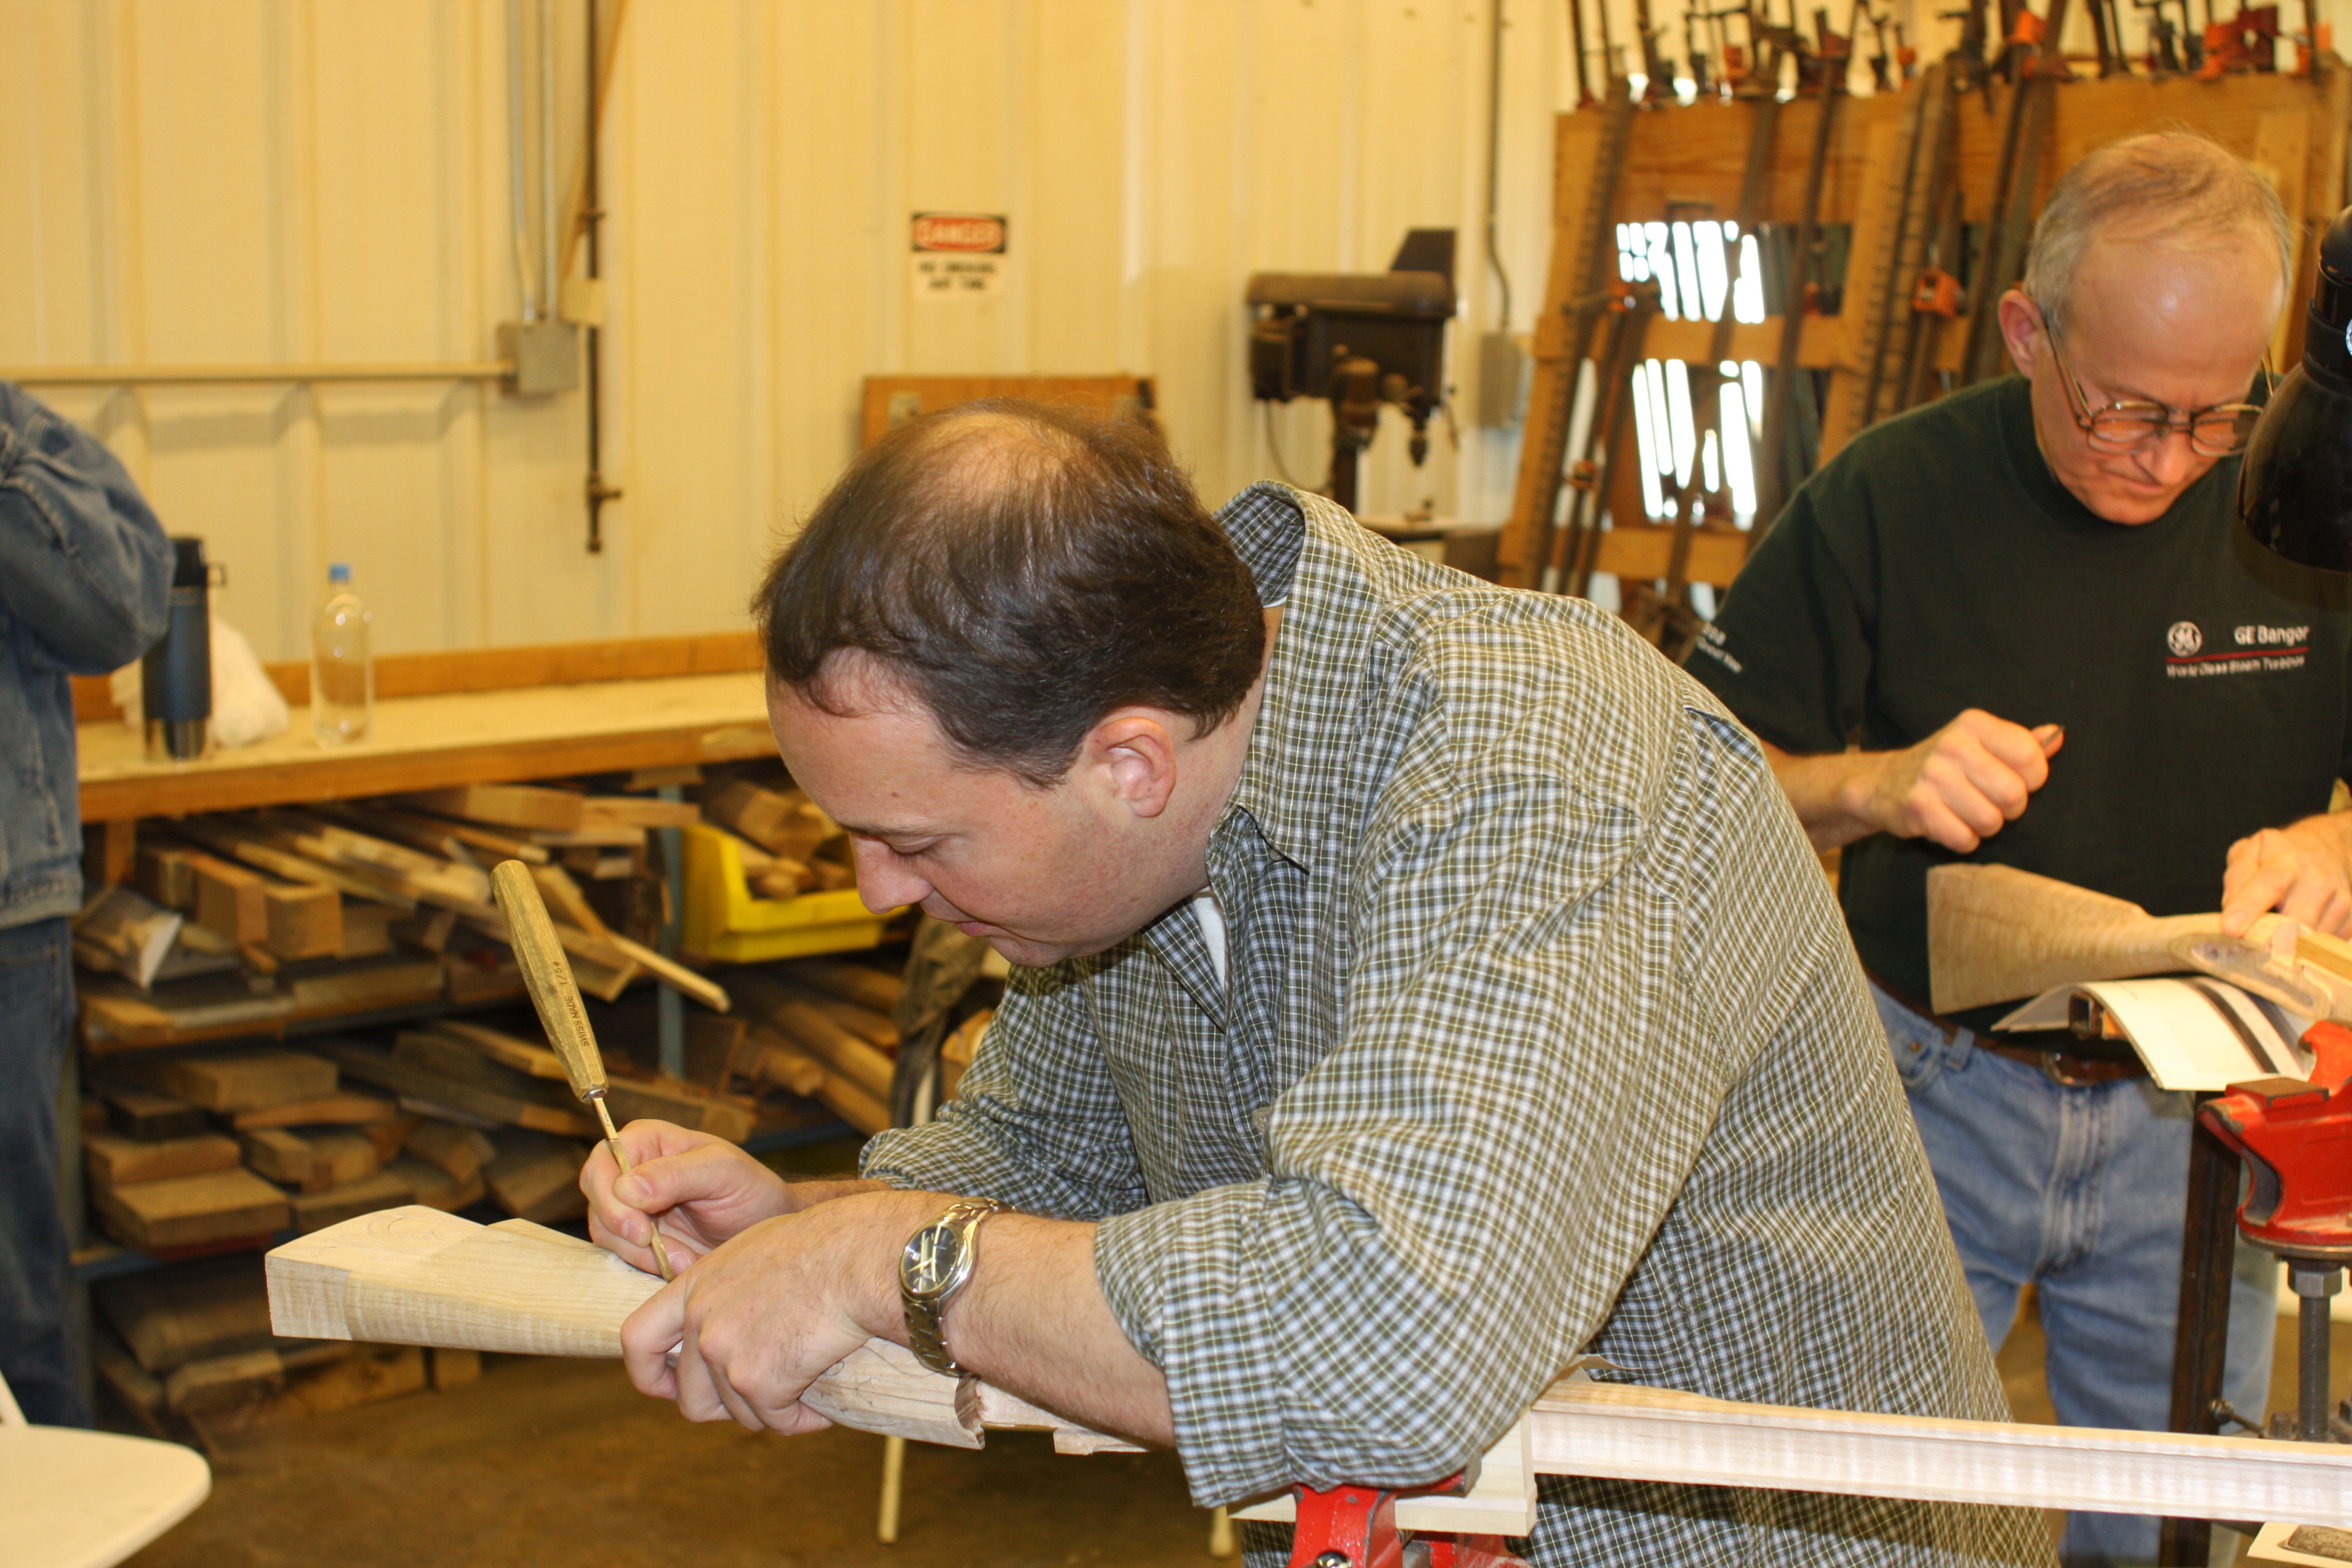
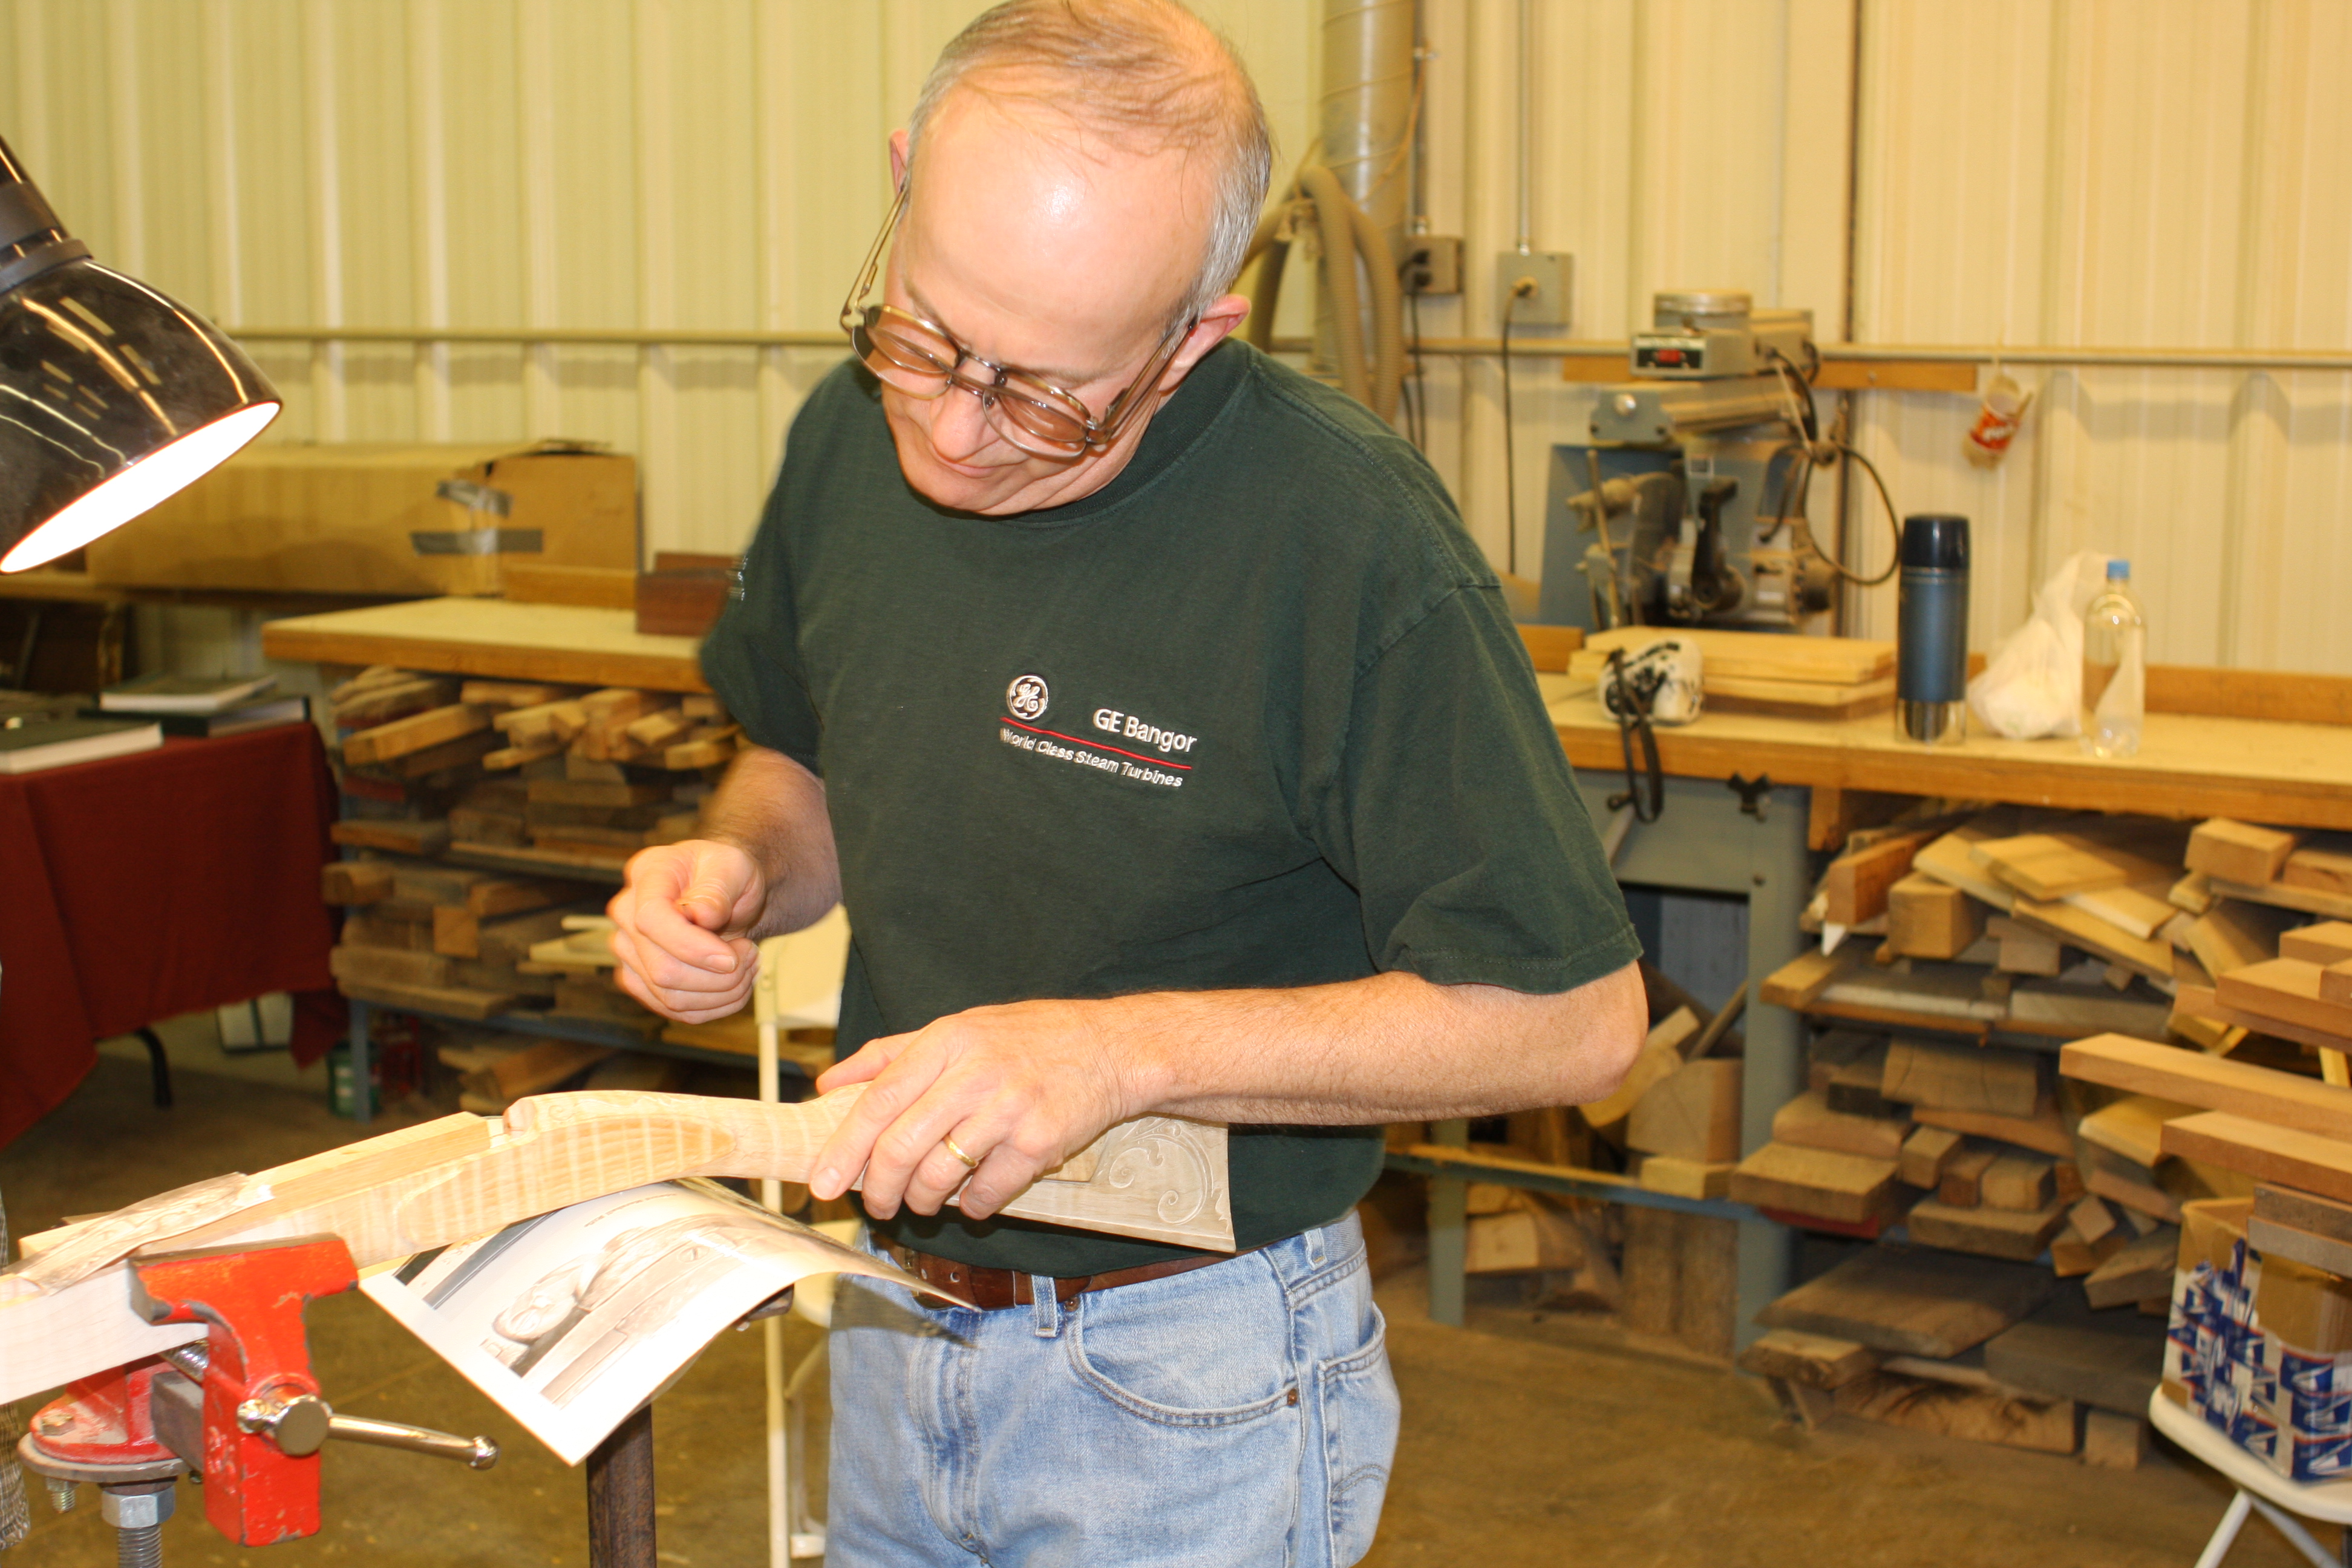
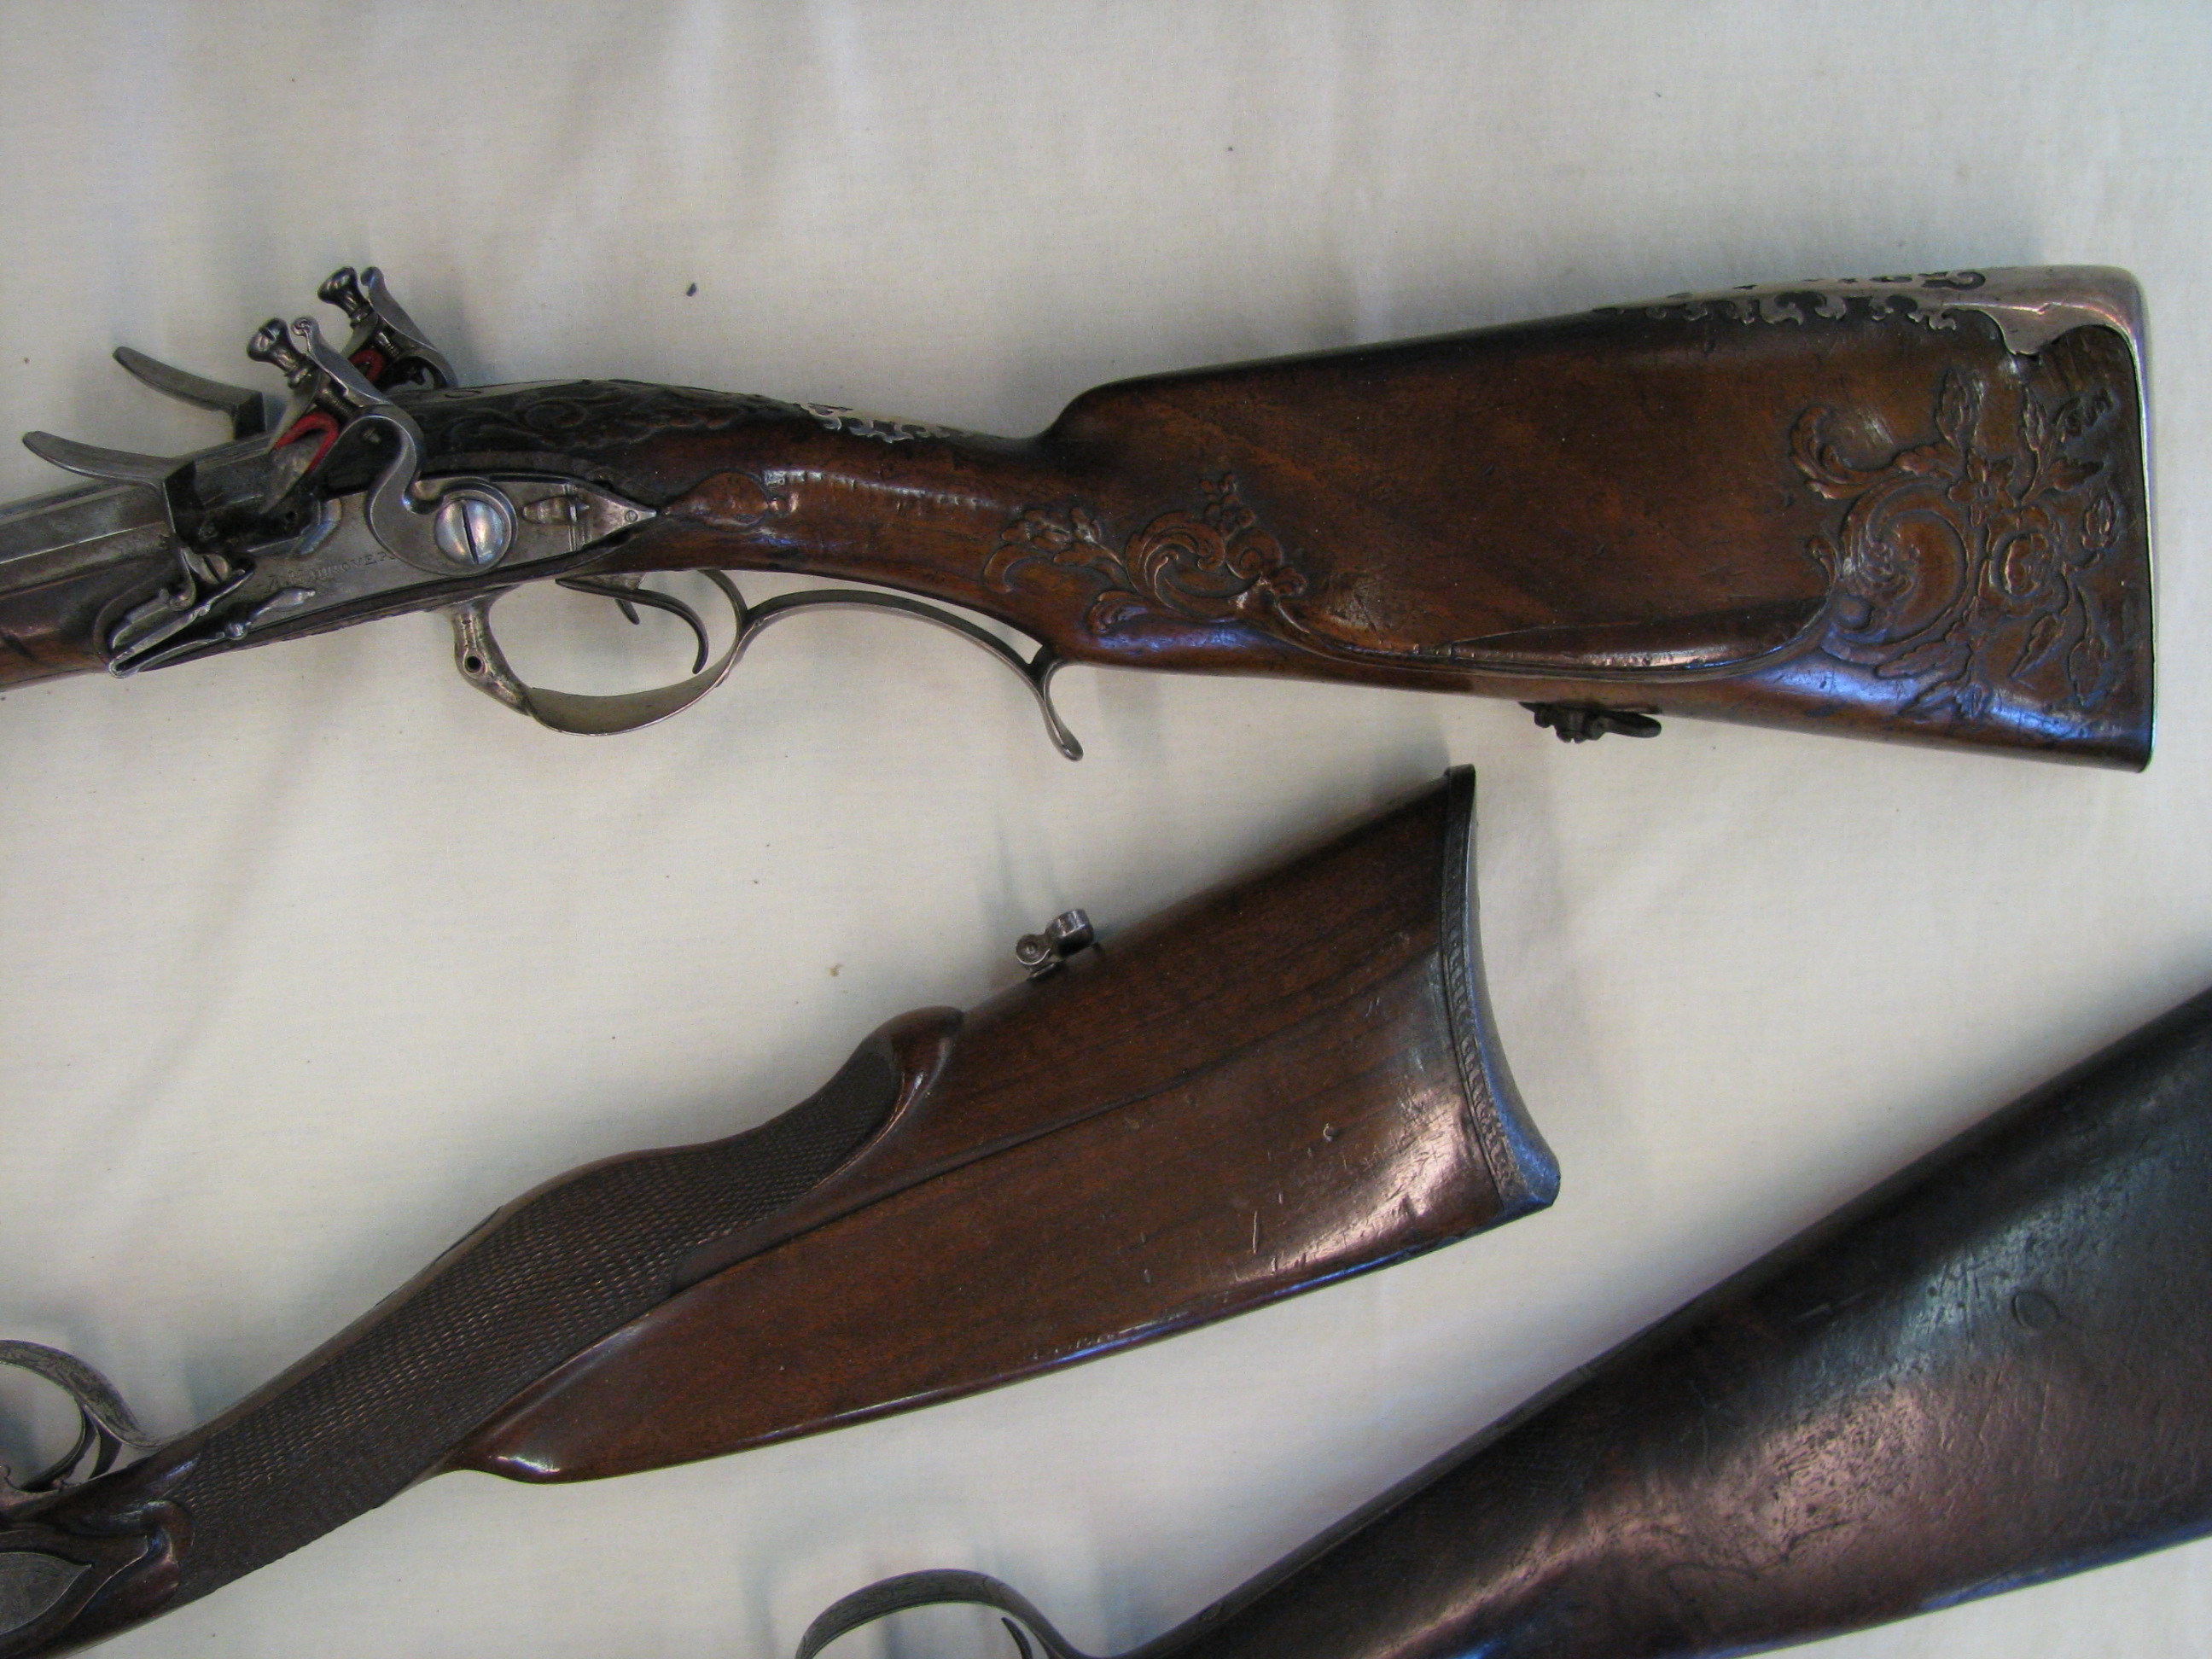
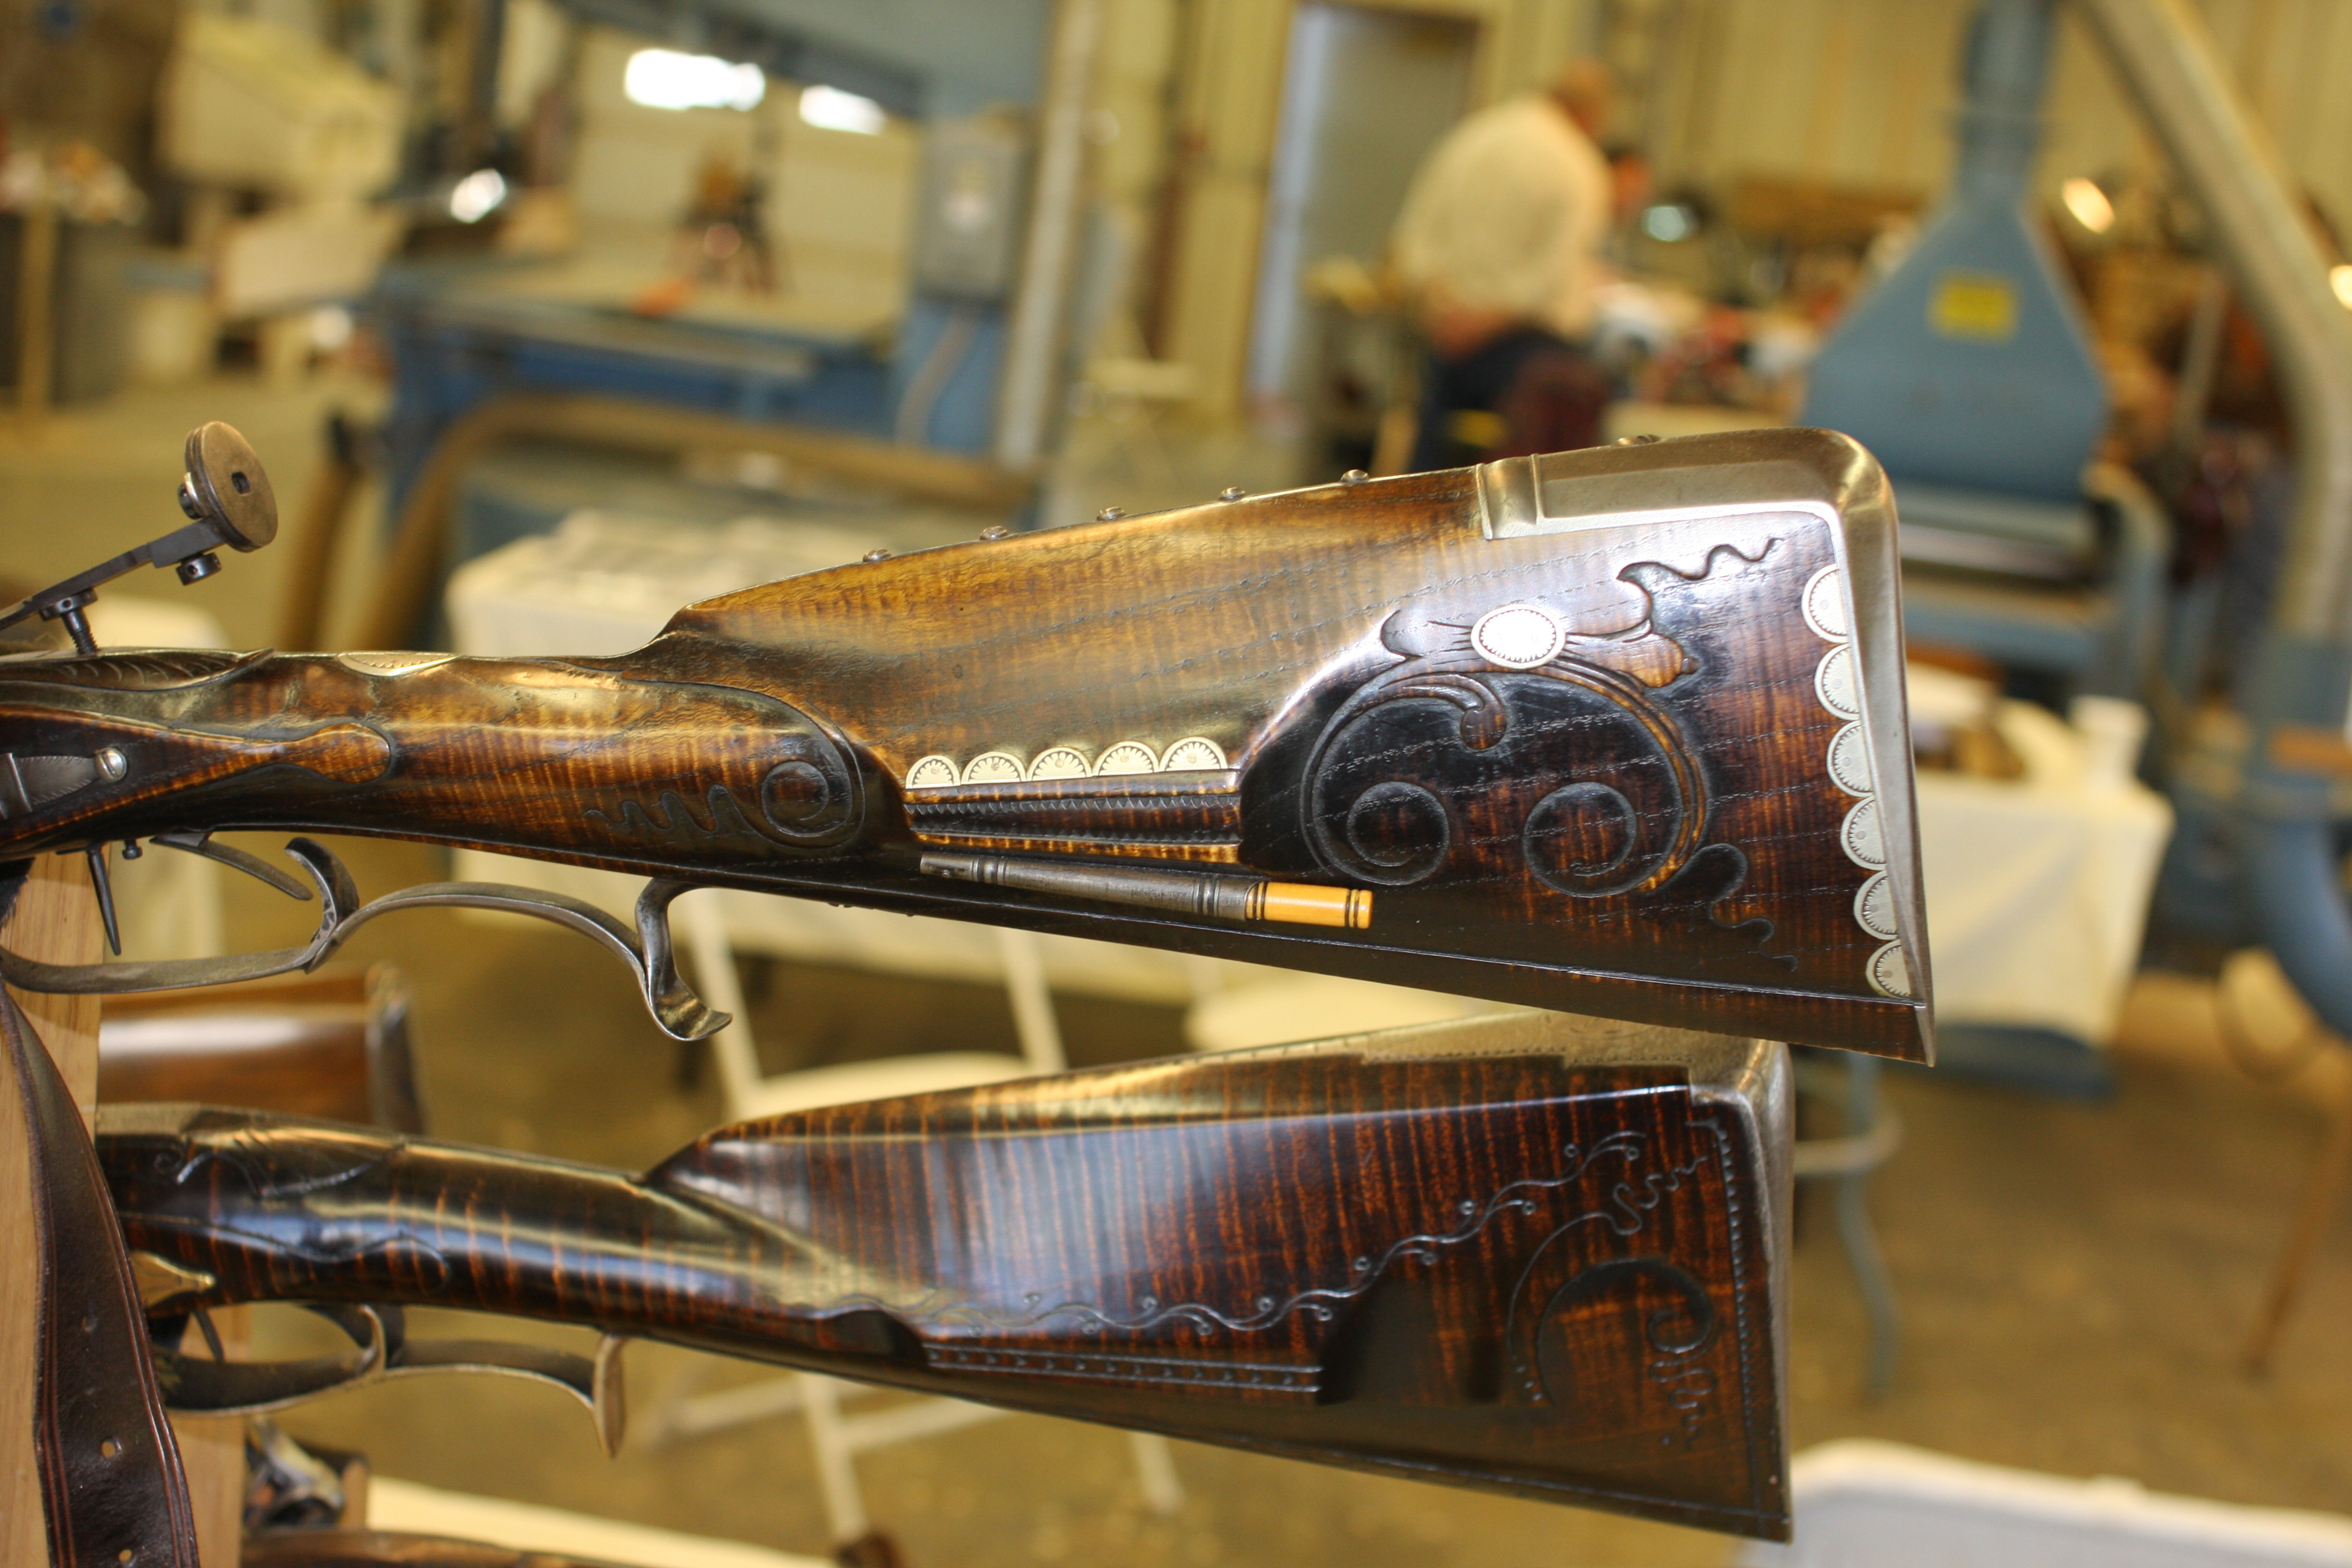
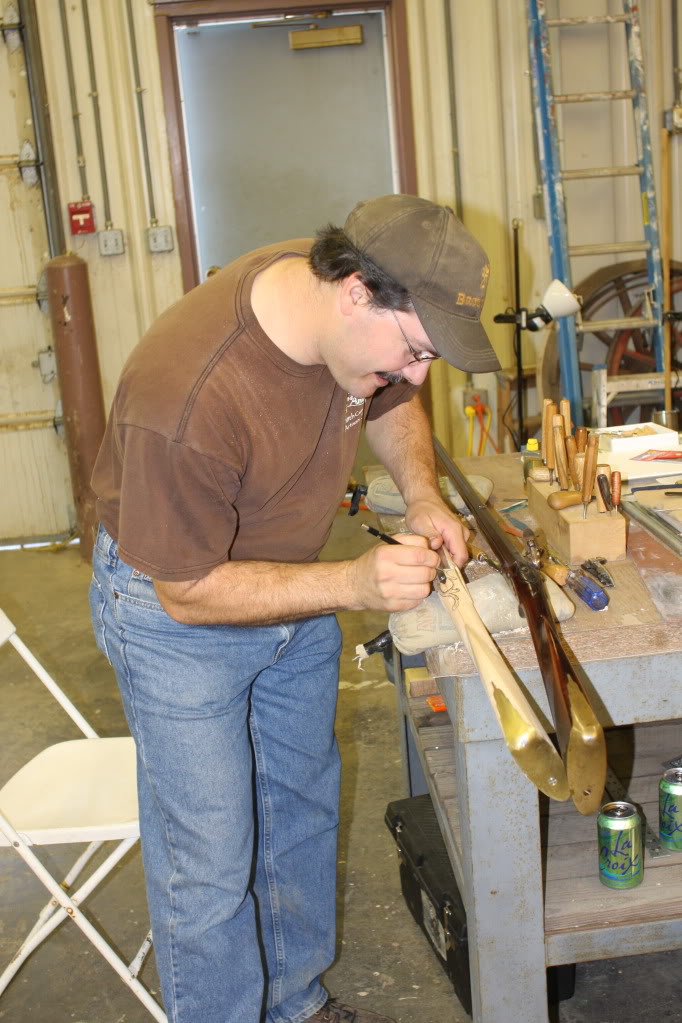
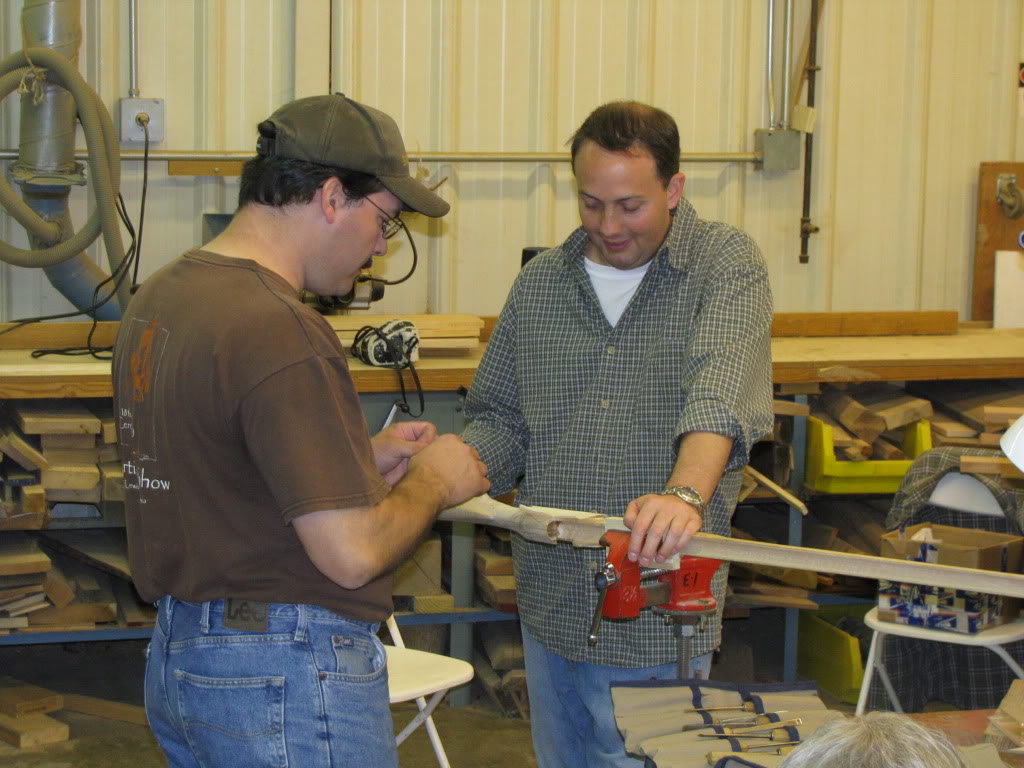
Mark Wheland taught the gun stock carving class this year. Mark is a Pennsylvannia native and lives in an area rich in gun-making talent. He is a full time gun maker and won “best of show” at Dixons in 2005. Click on Gun Stock Carving #1 or Gun Stock Carving #2 for more photos. (Use your “back” button to return to the article.)
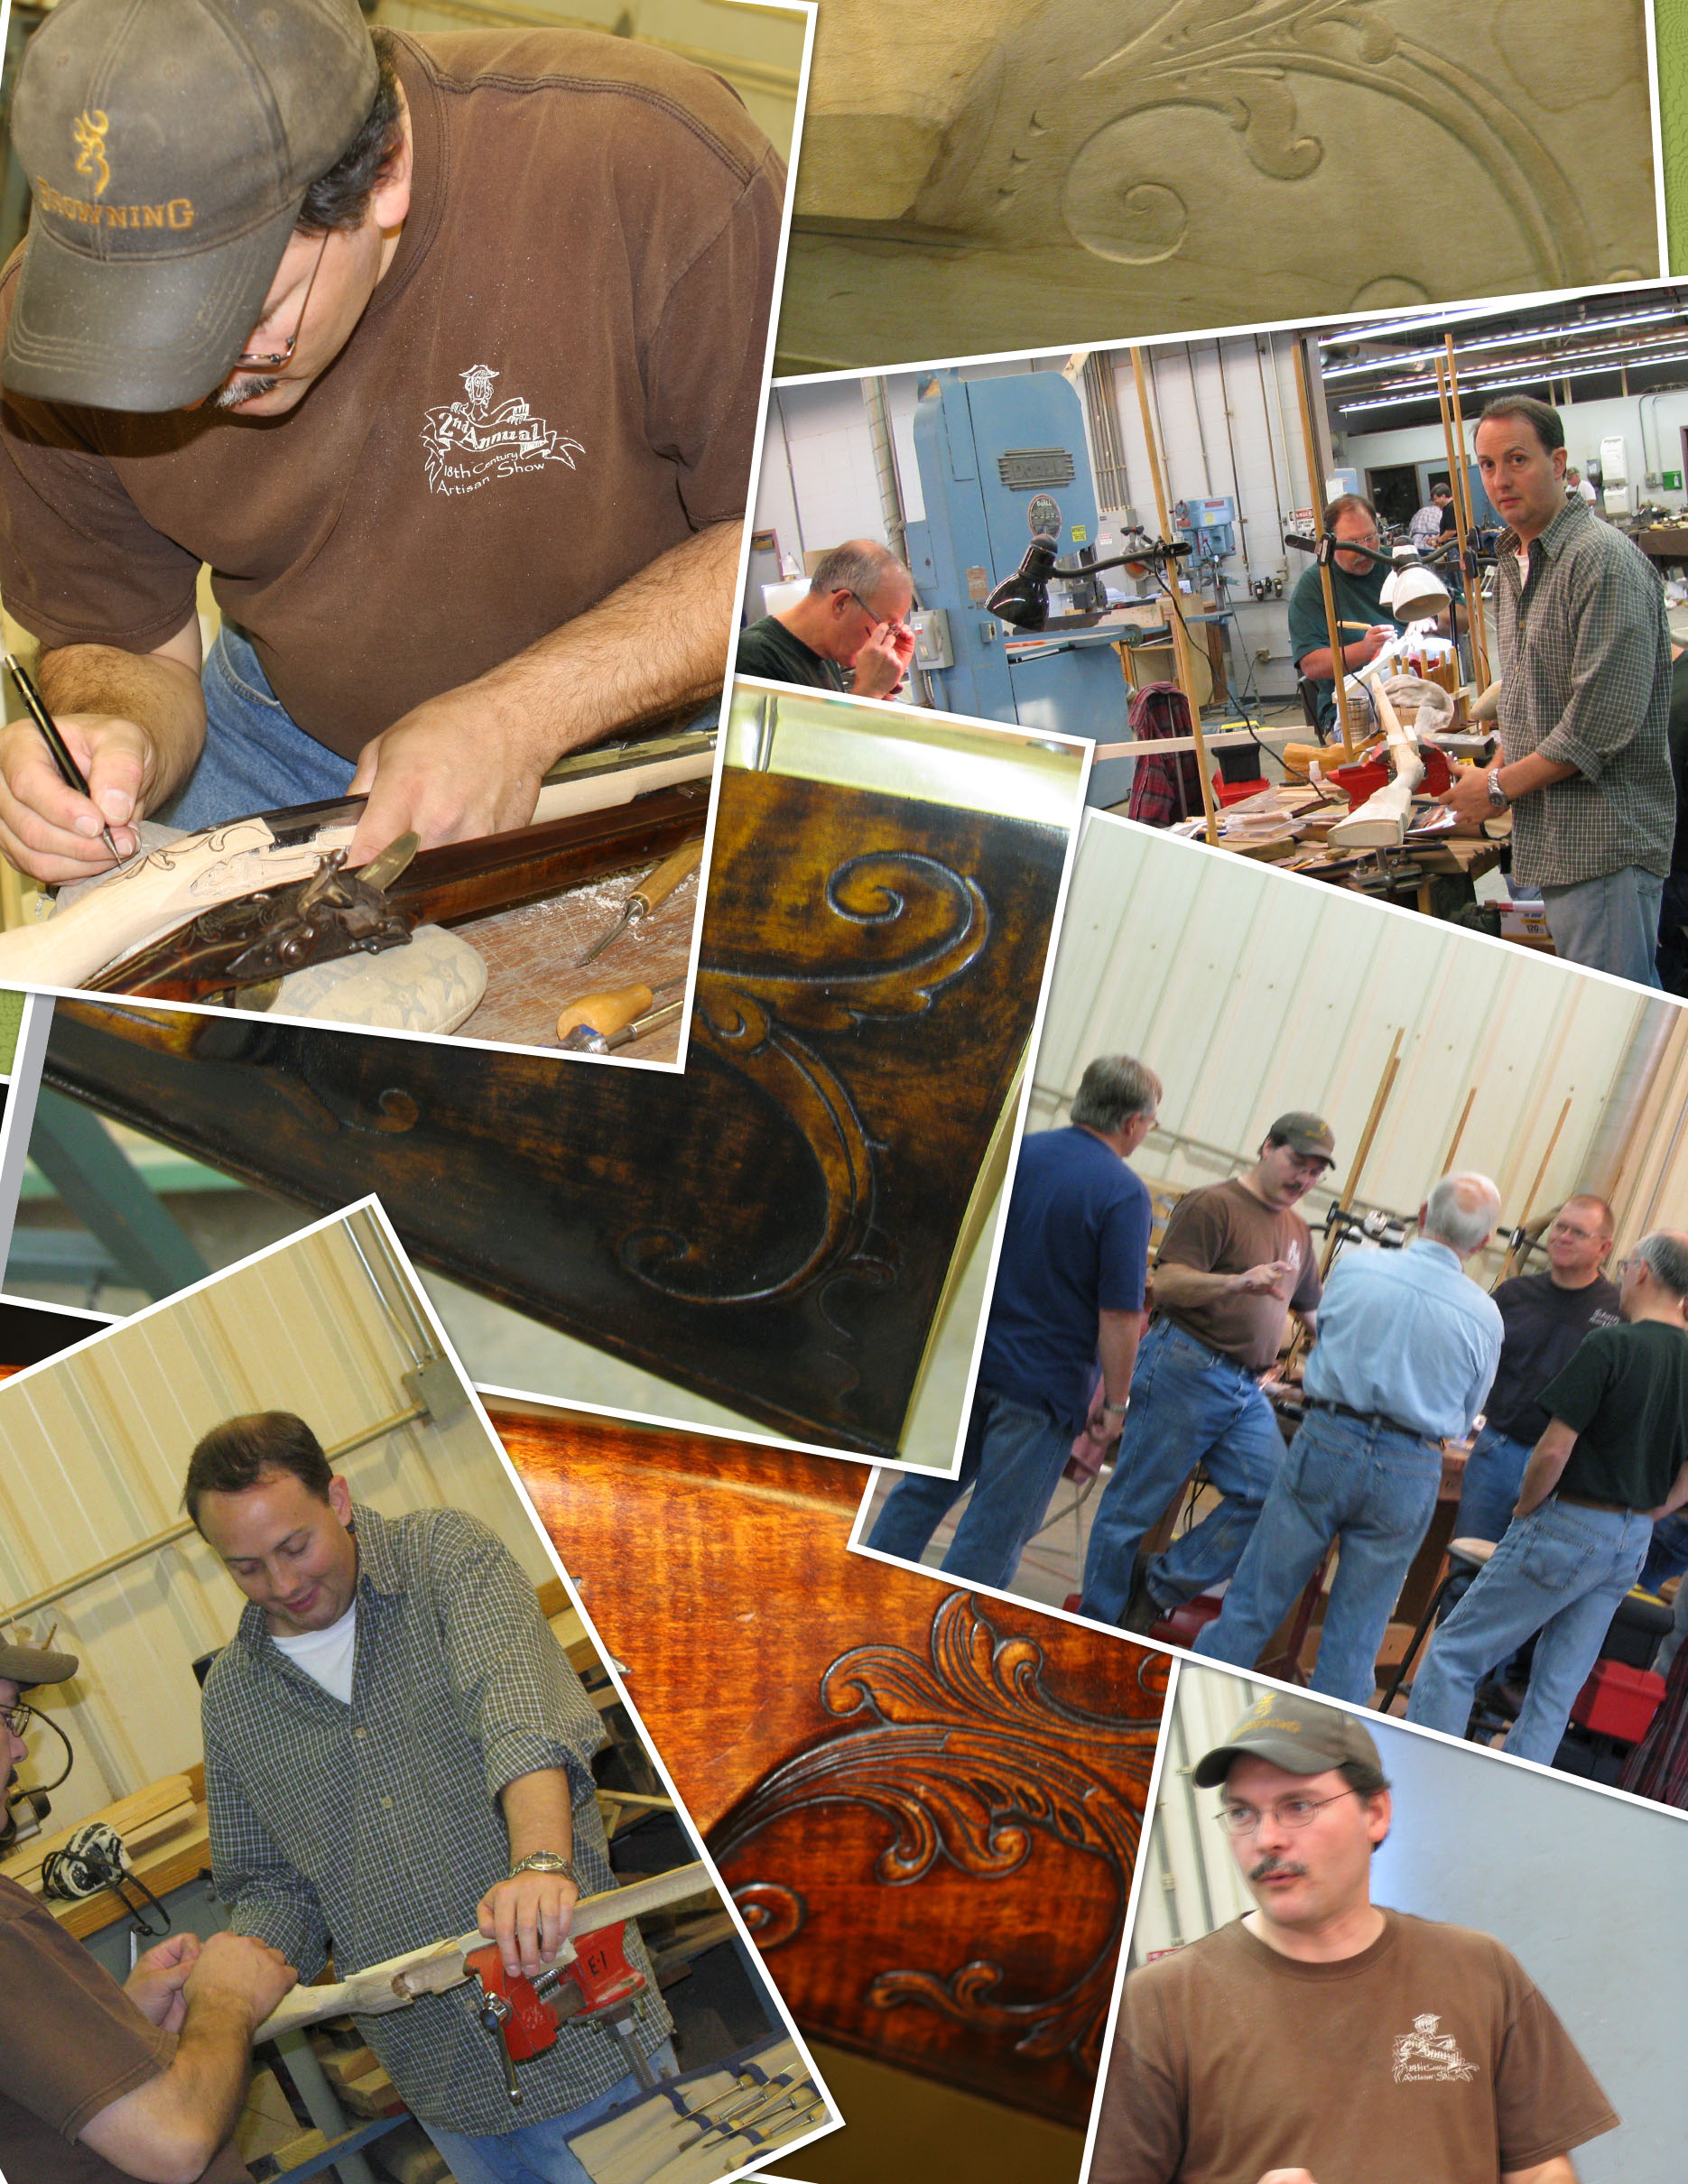
A number of Mark’s students brought guns they had started at home. There is nothing like having the master look over your progress and advise you on methods and techniques. Styles chosen by the students varied, but all benefited from Mark’s expertise.

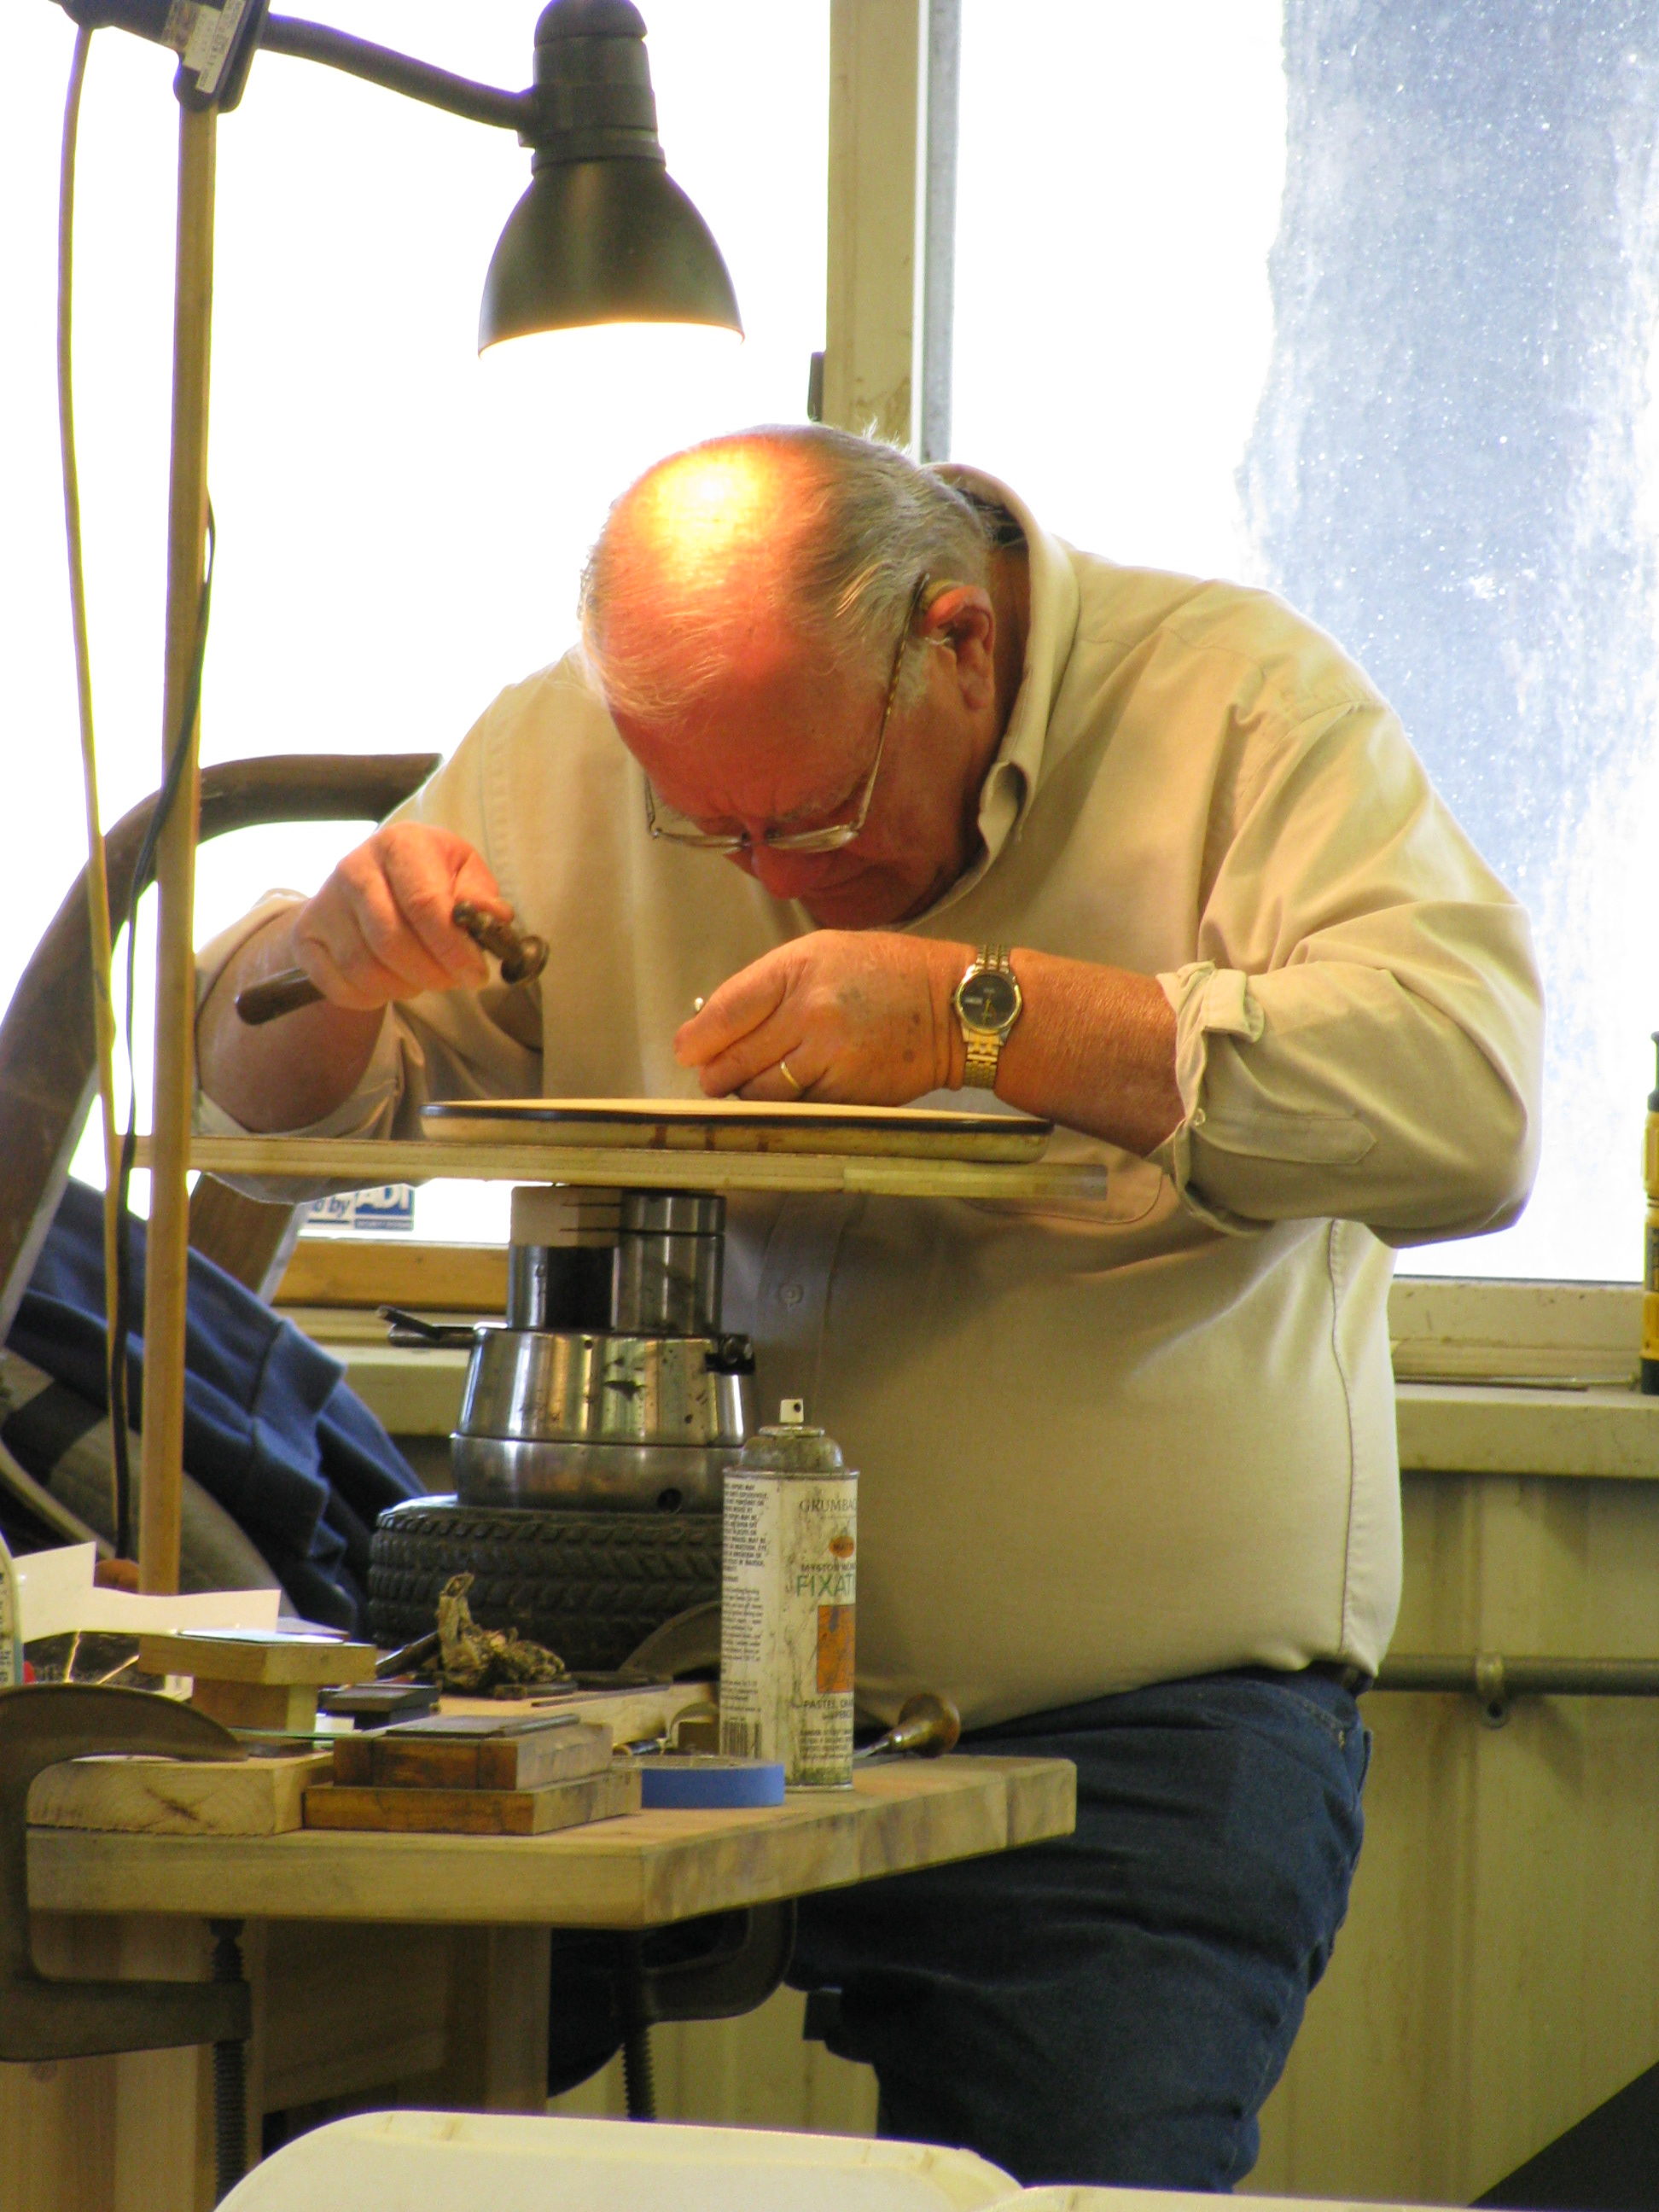
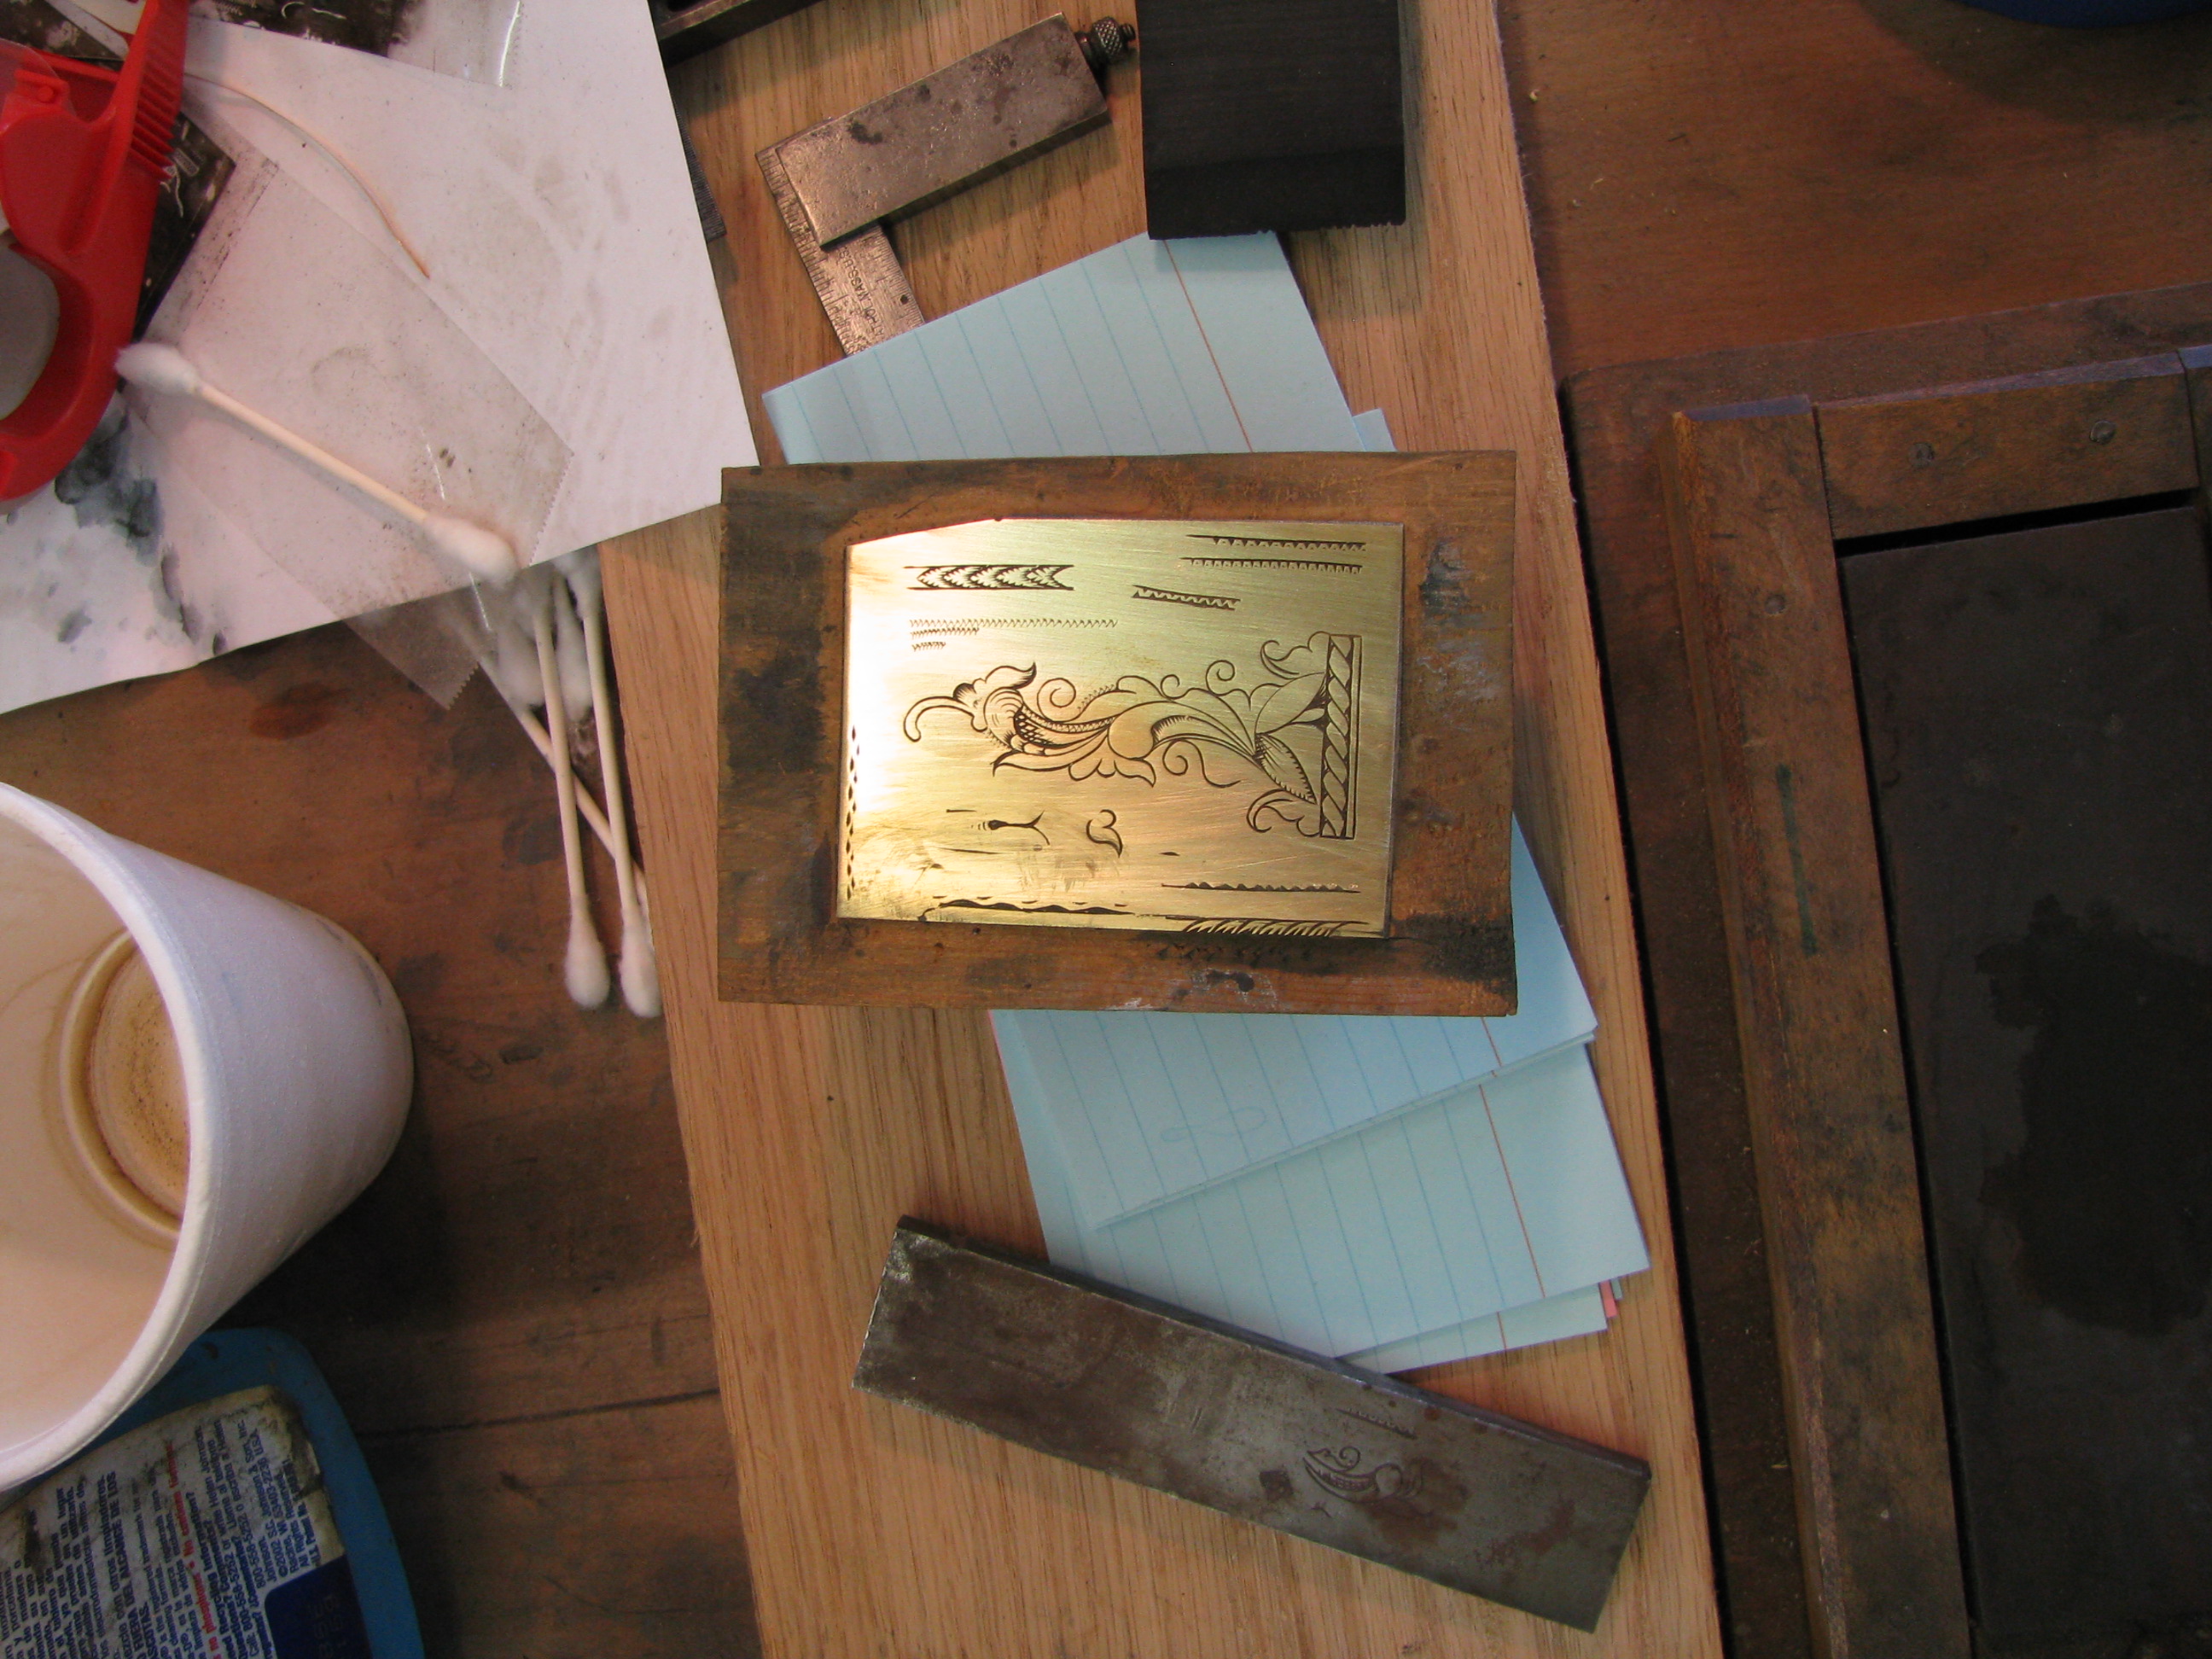
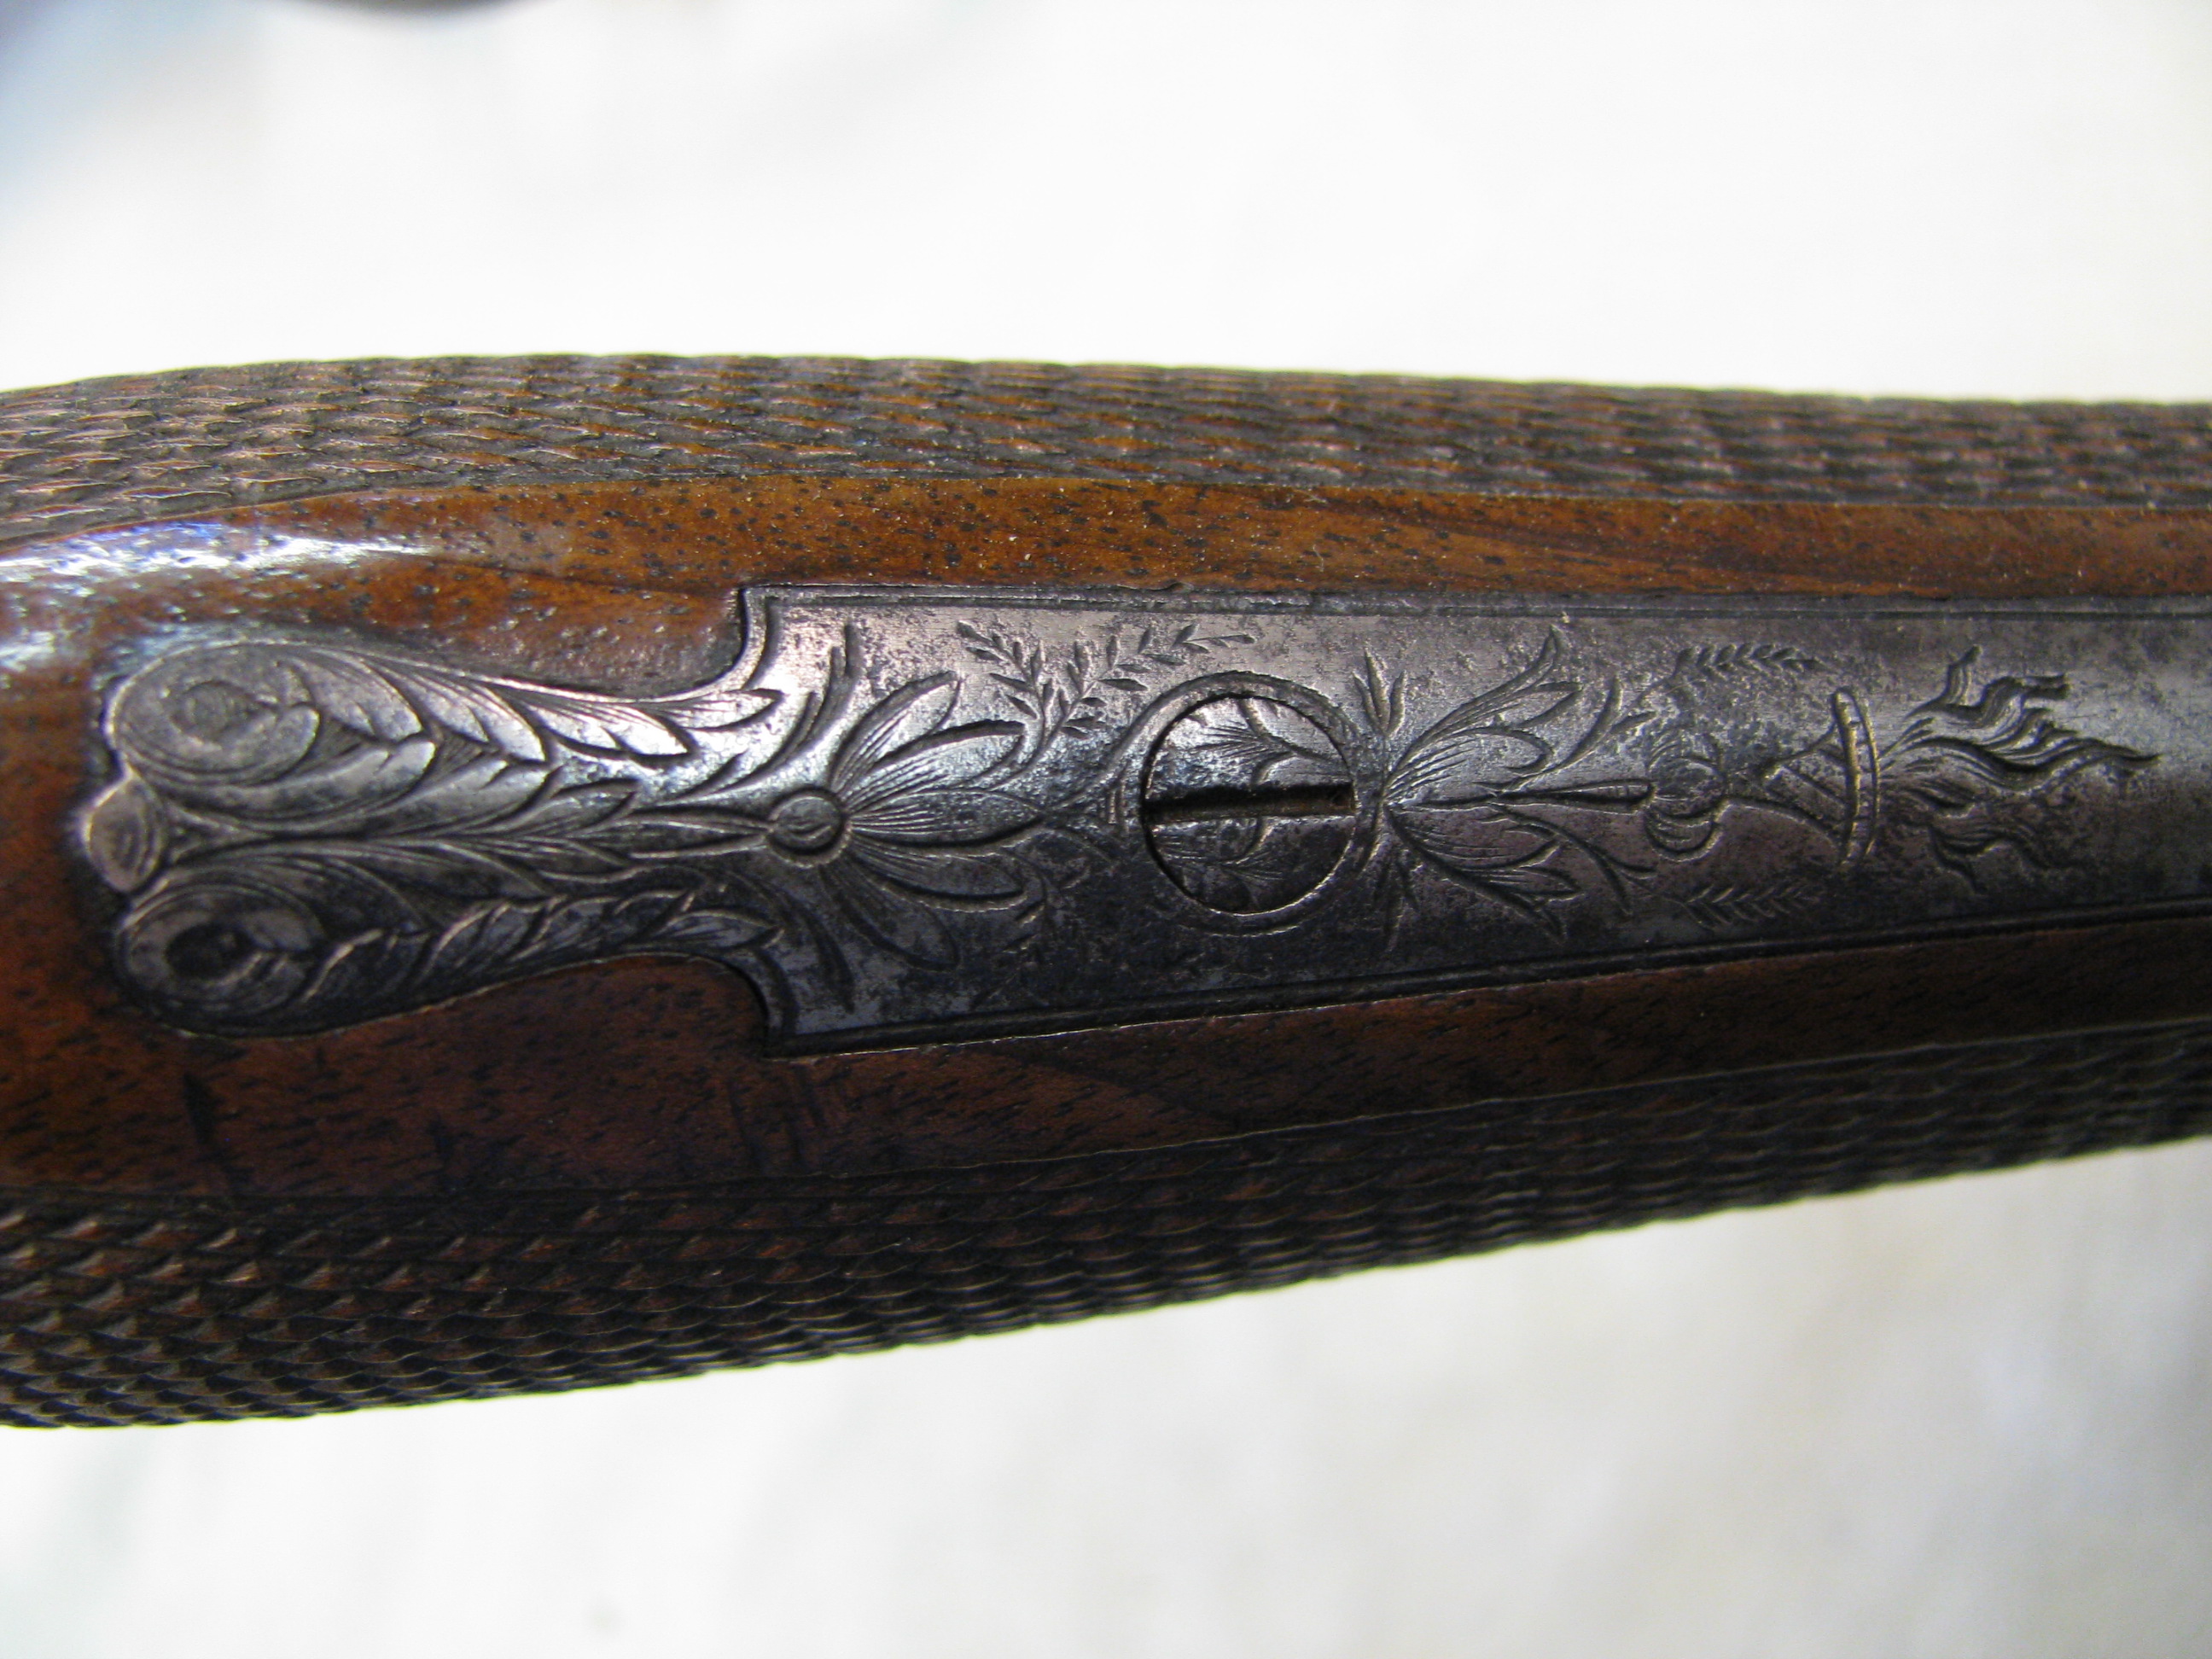
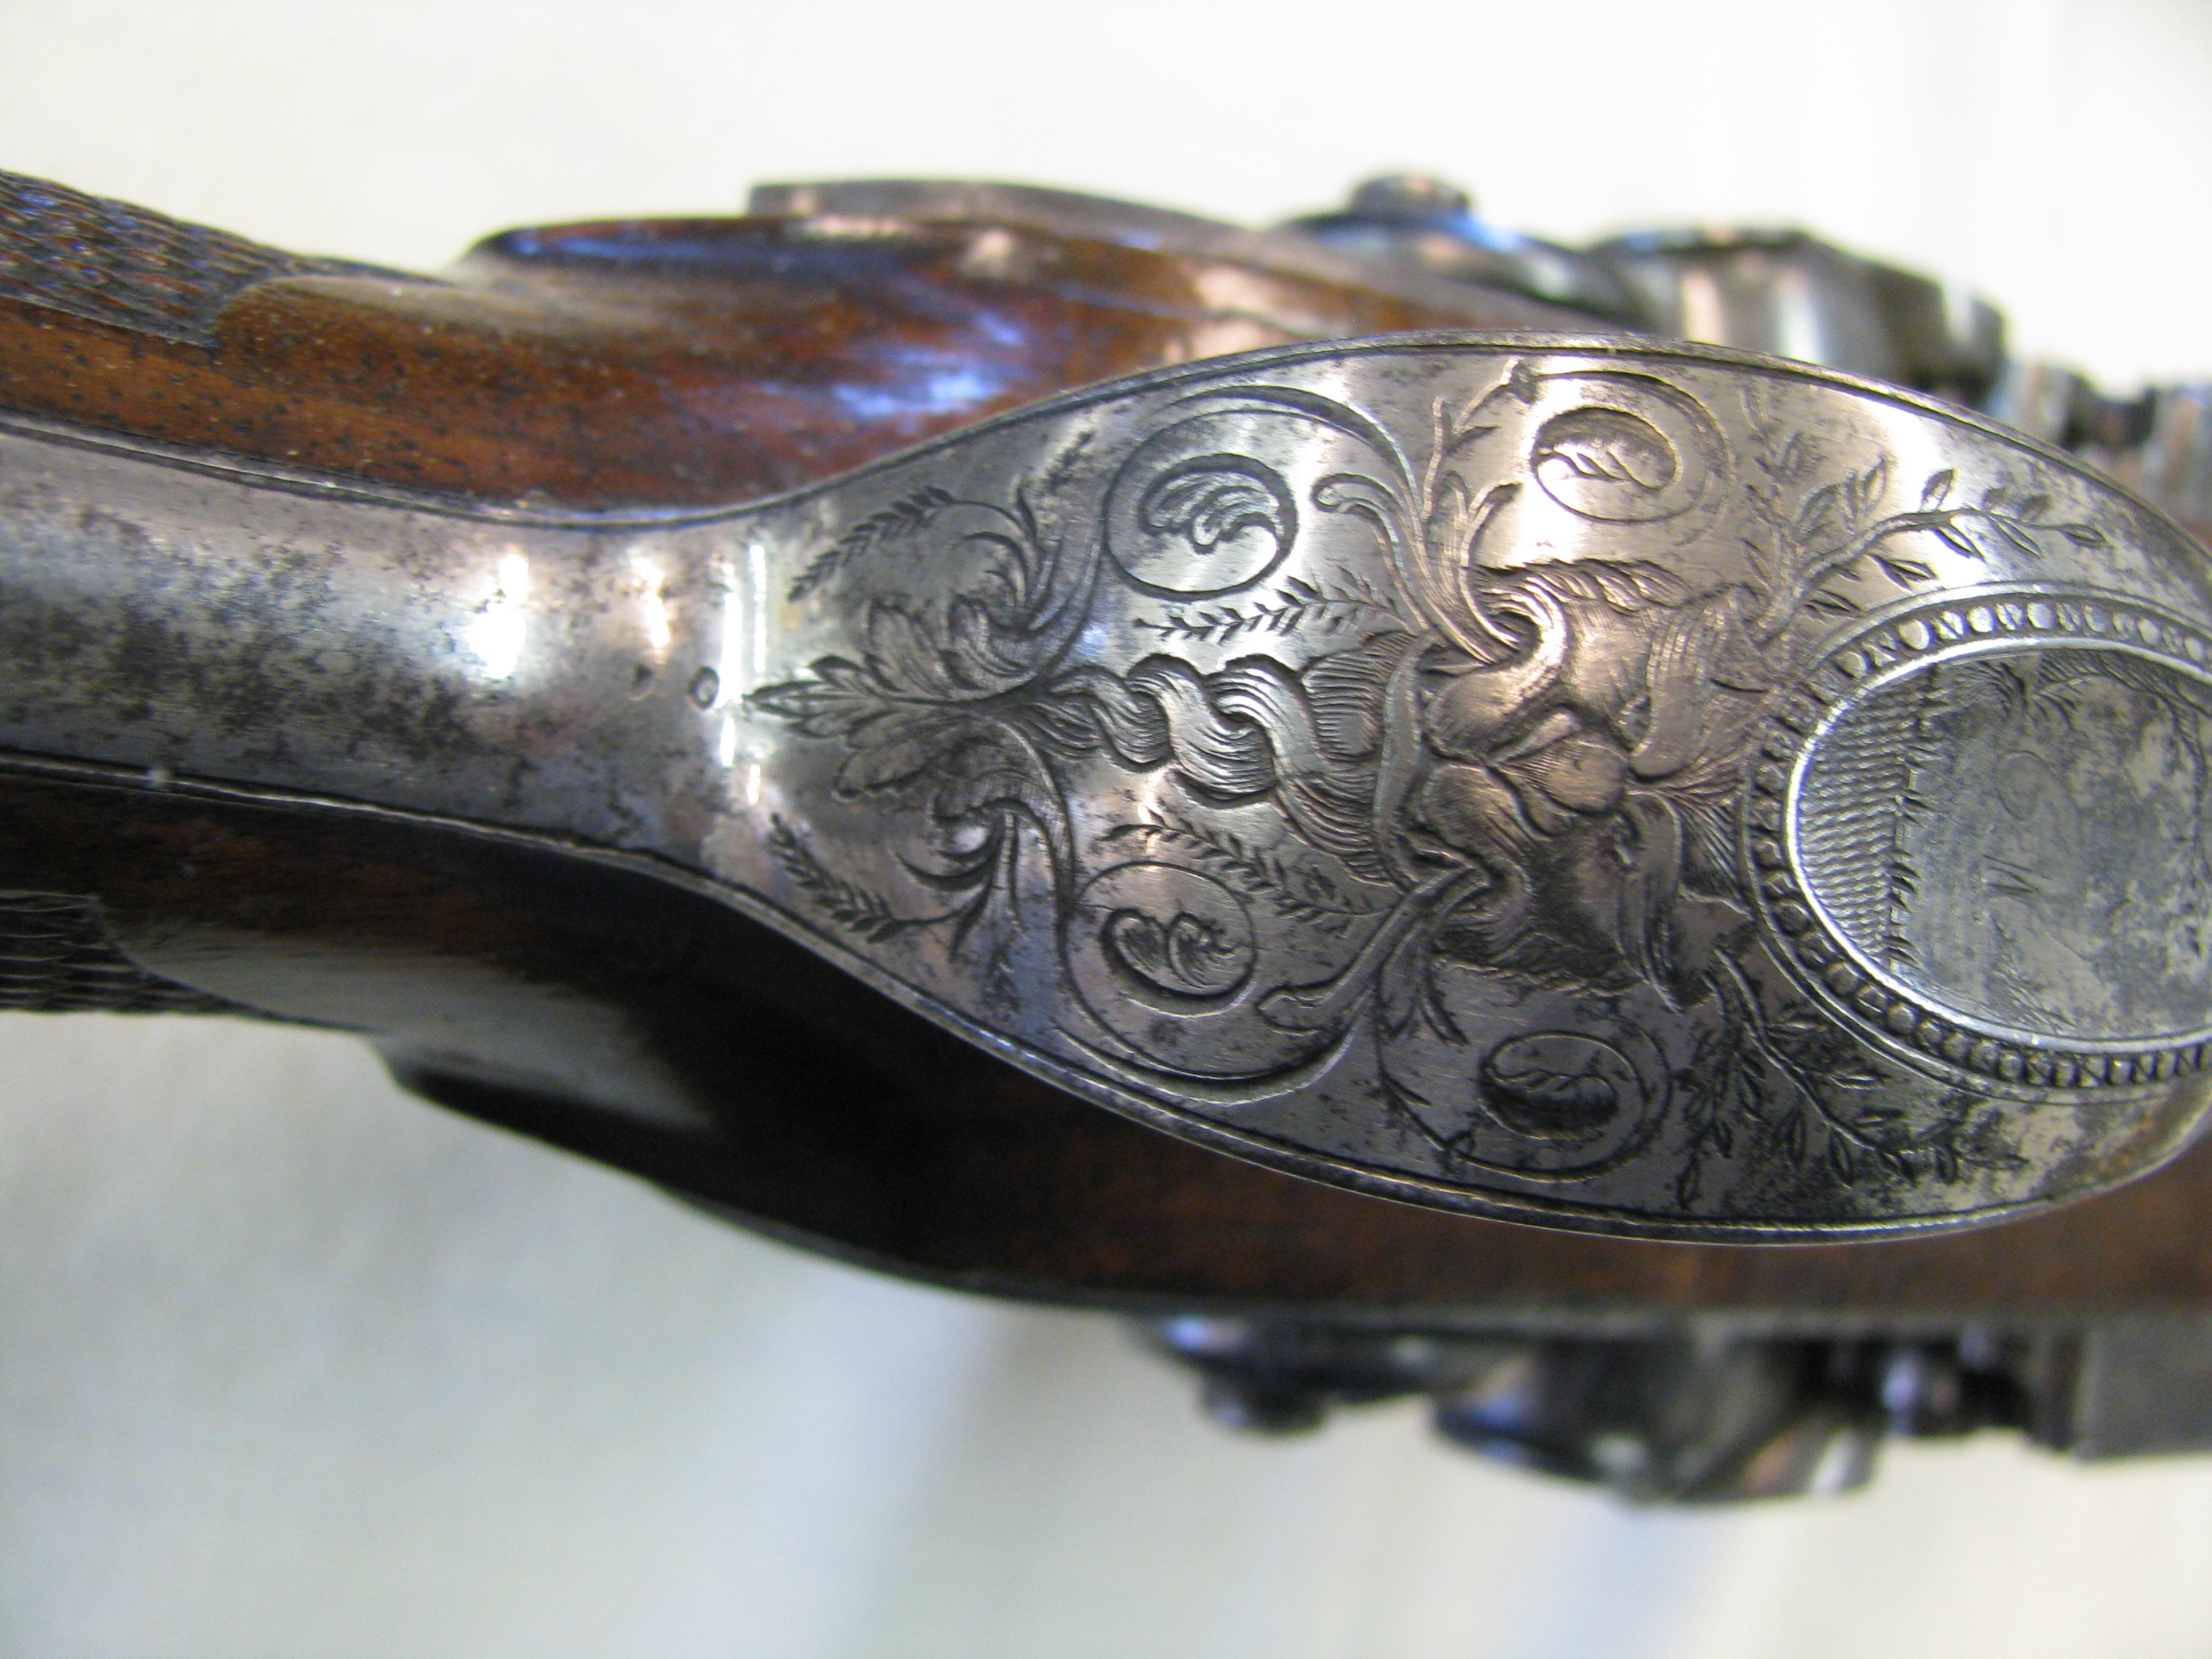
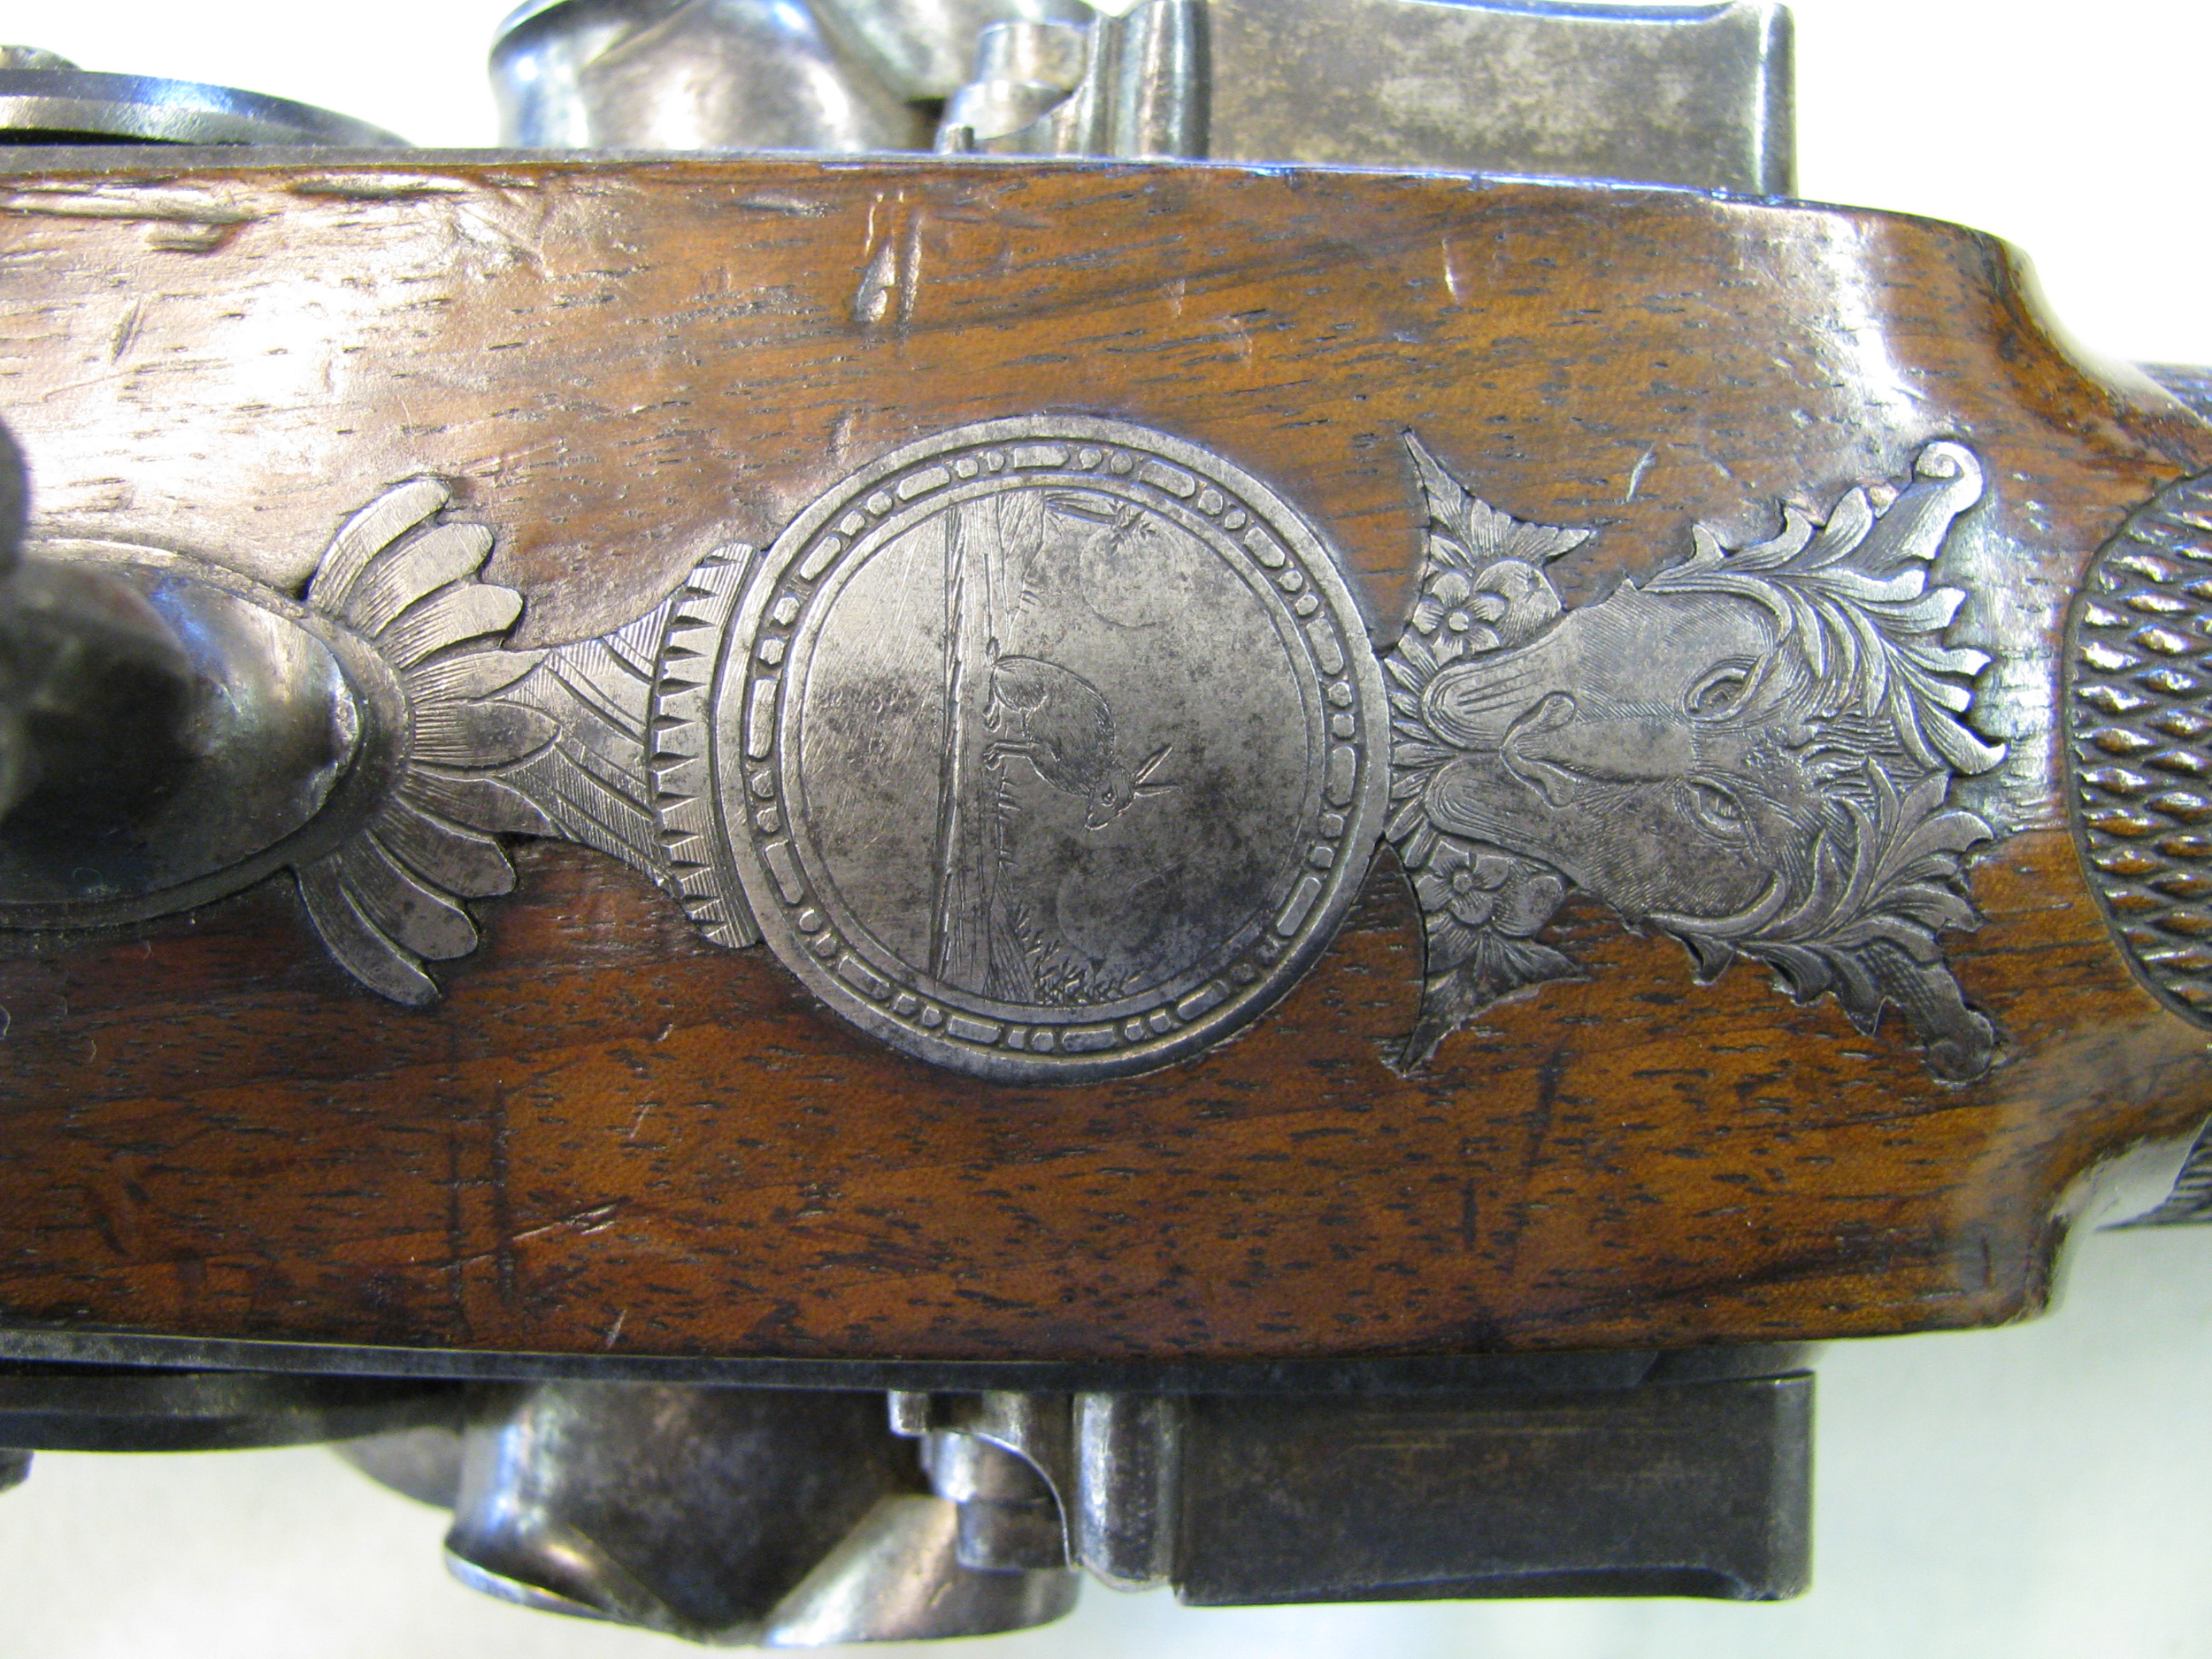
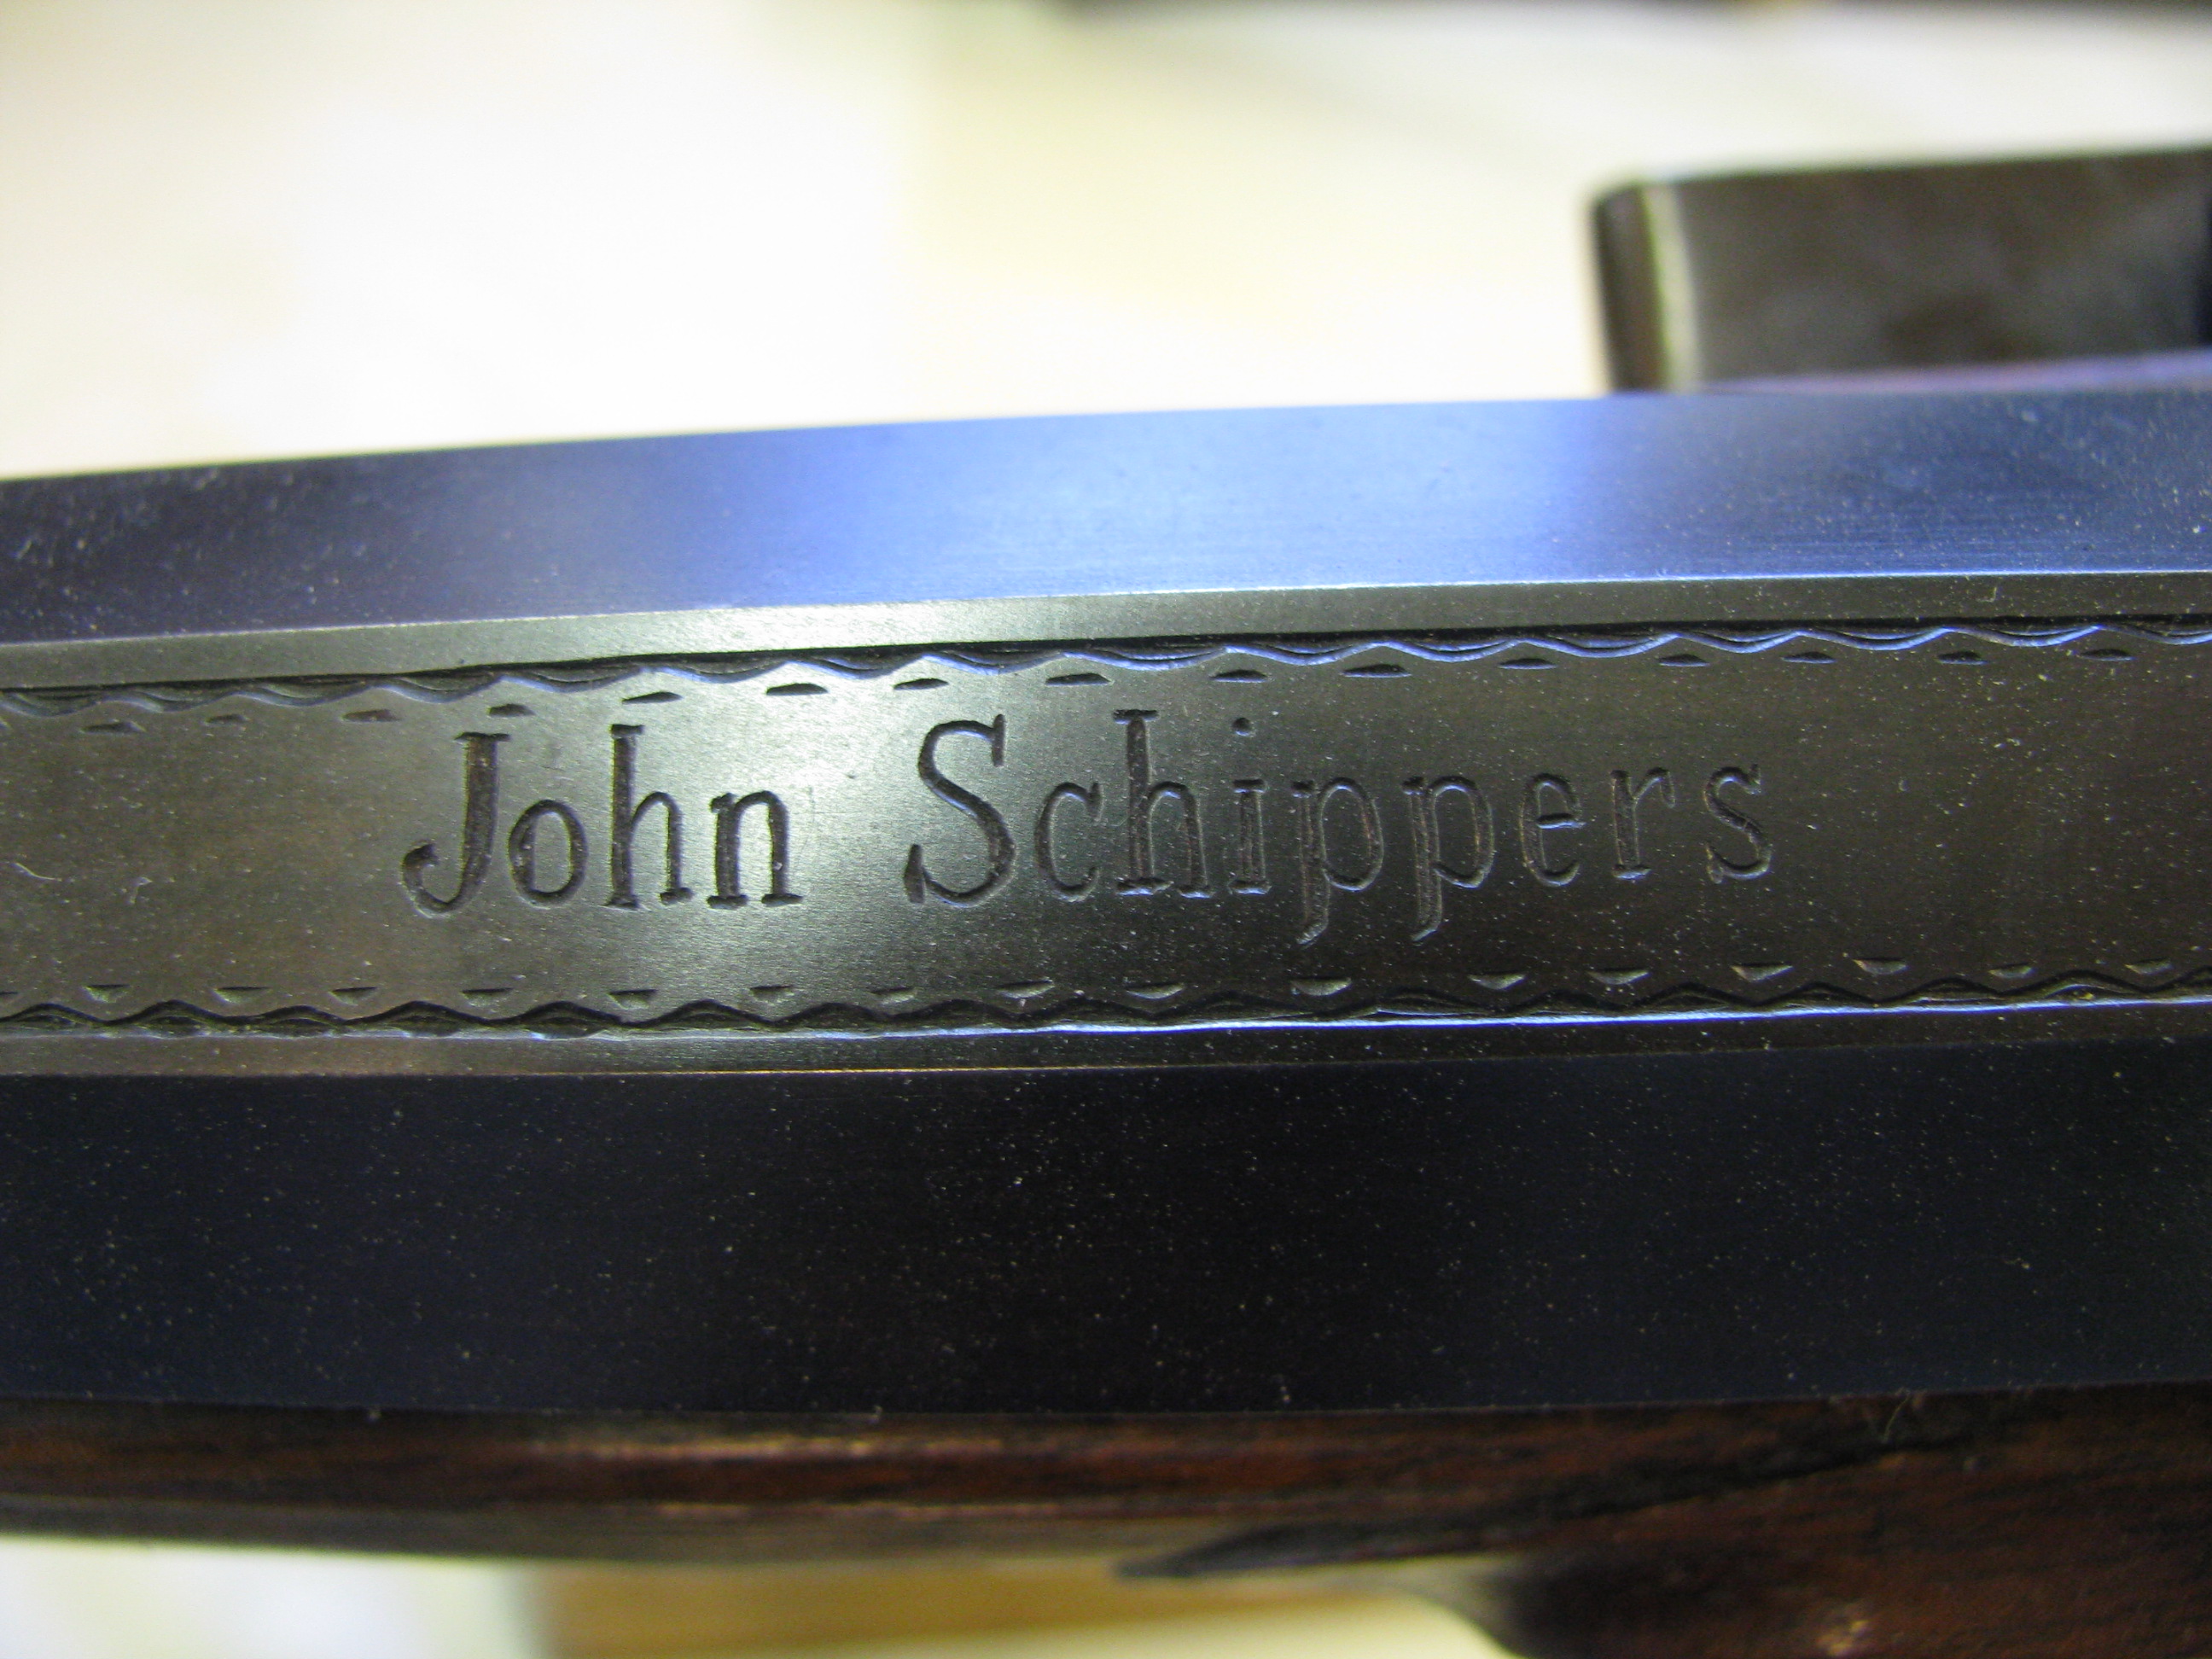
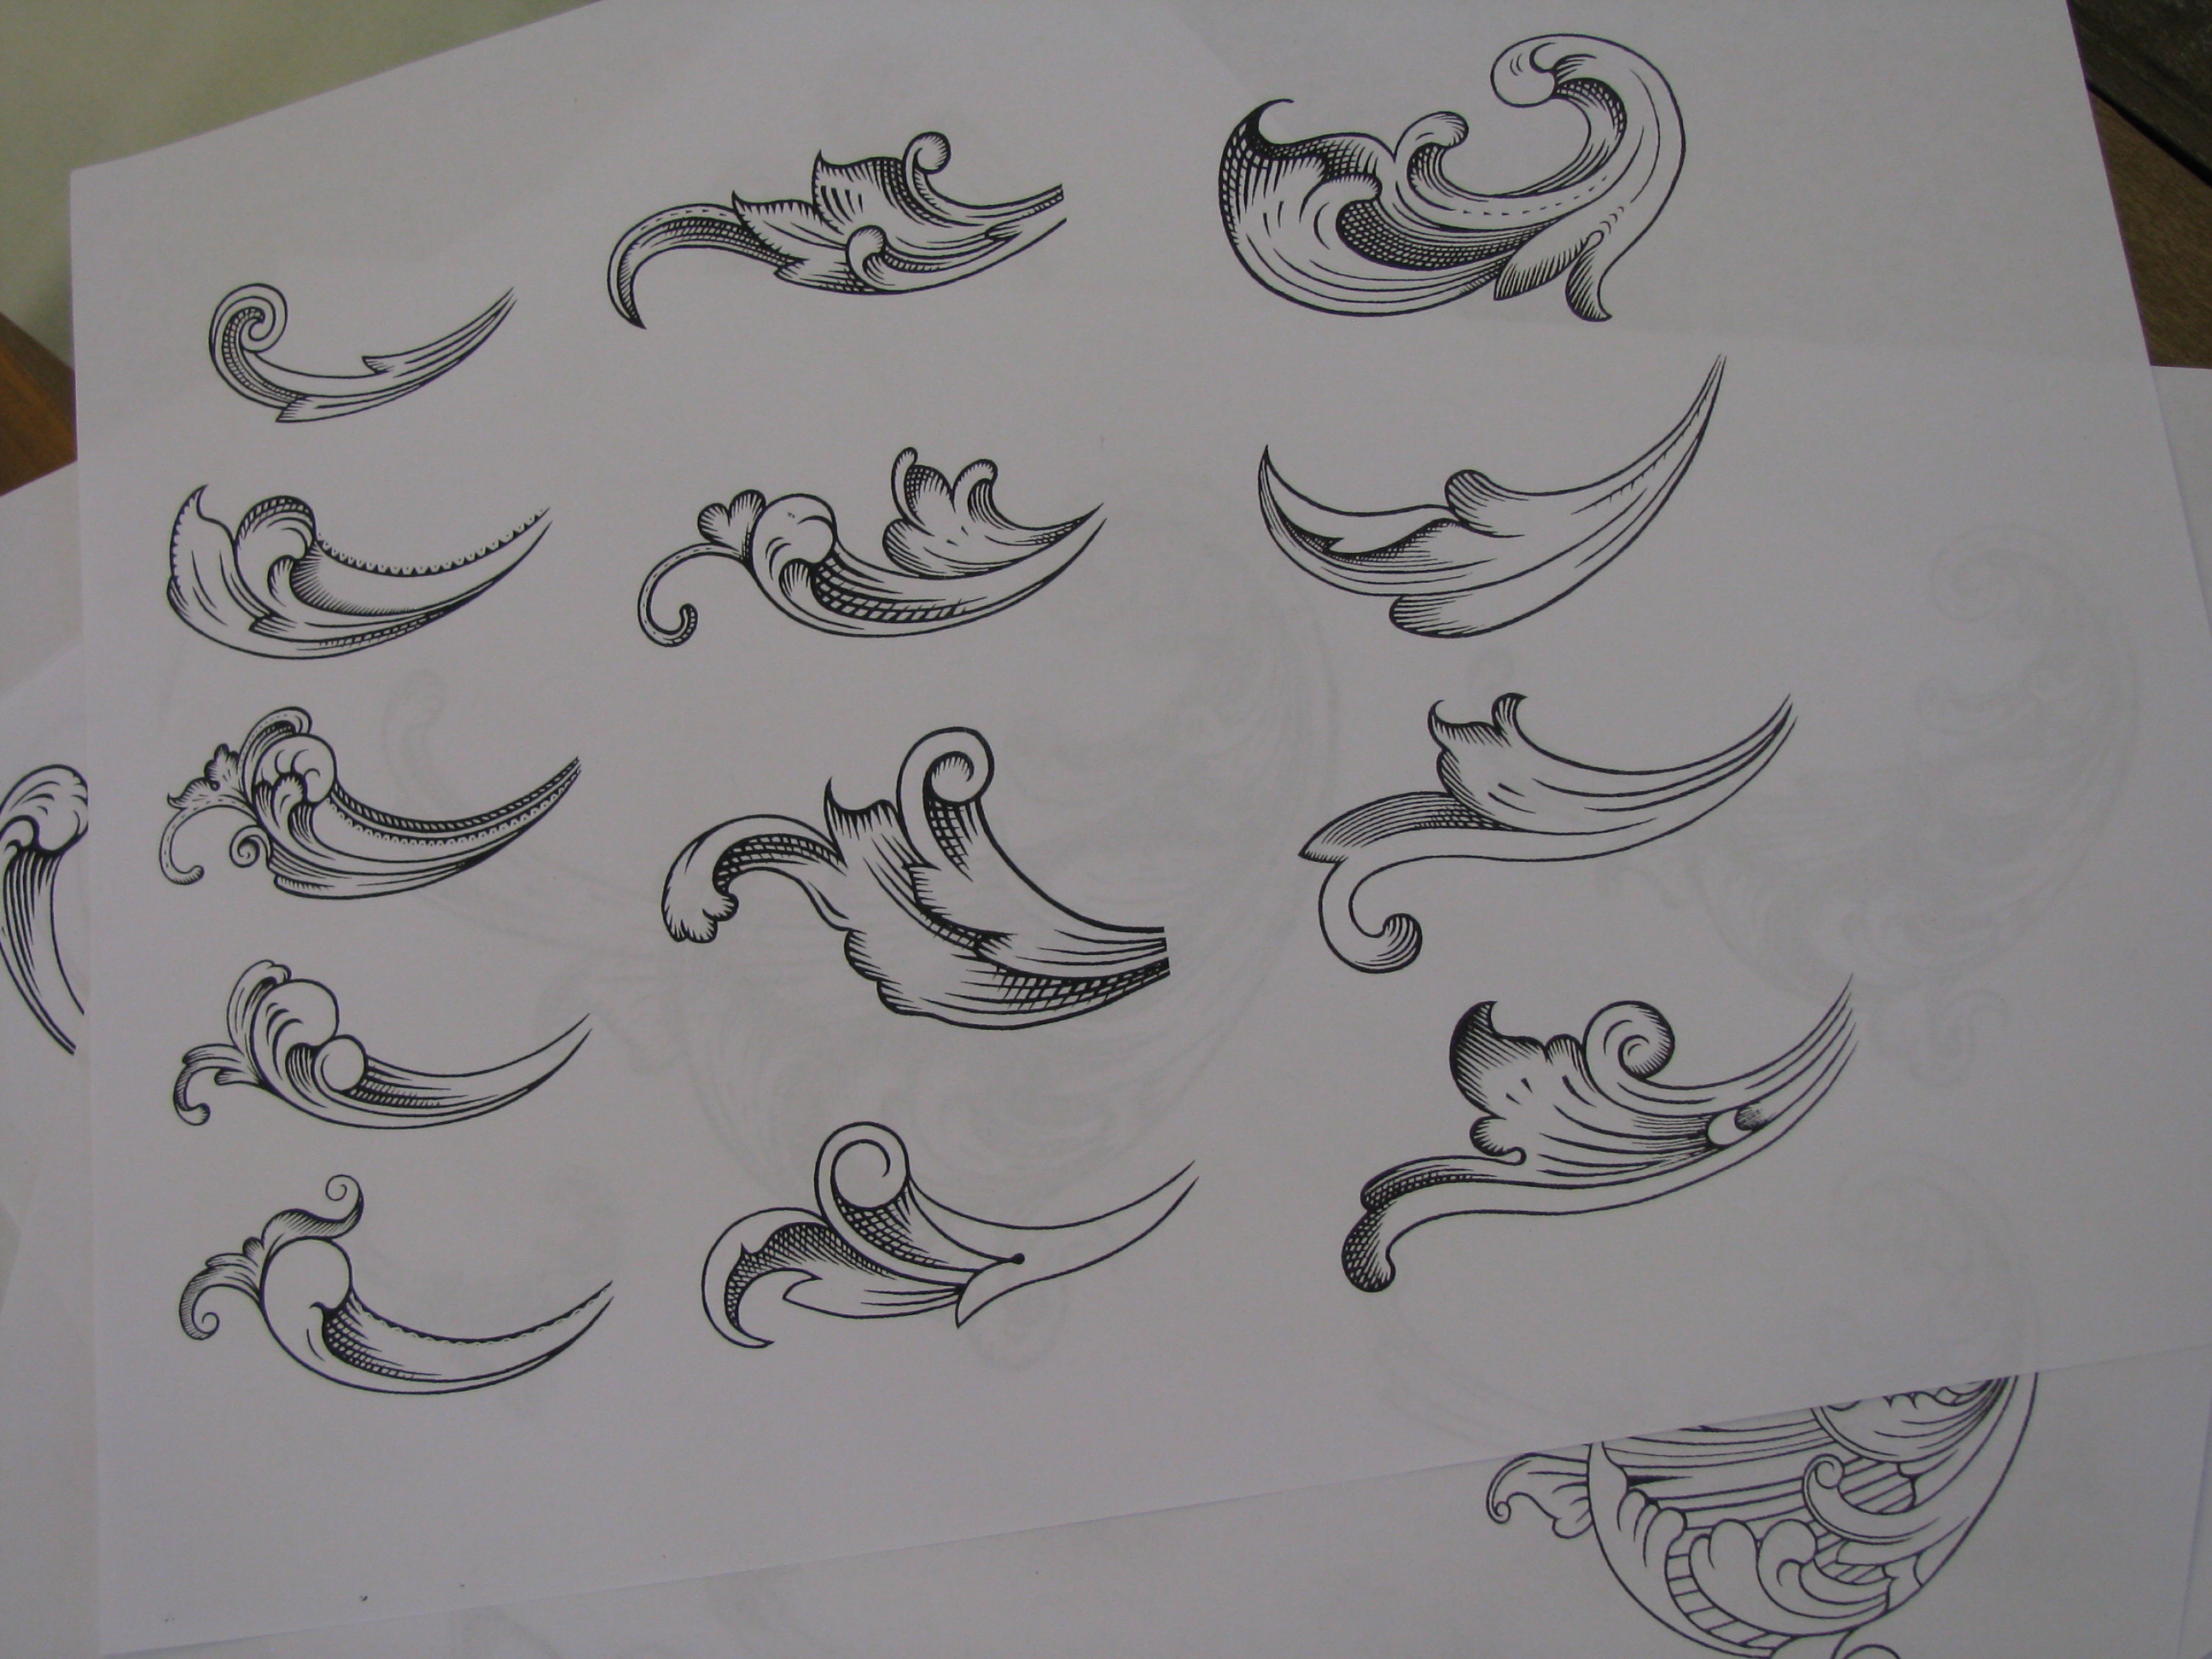
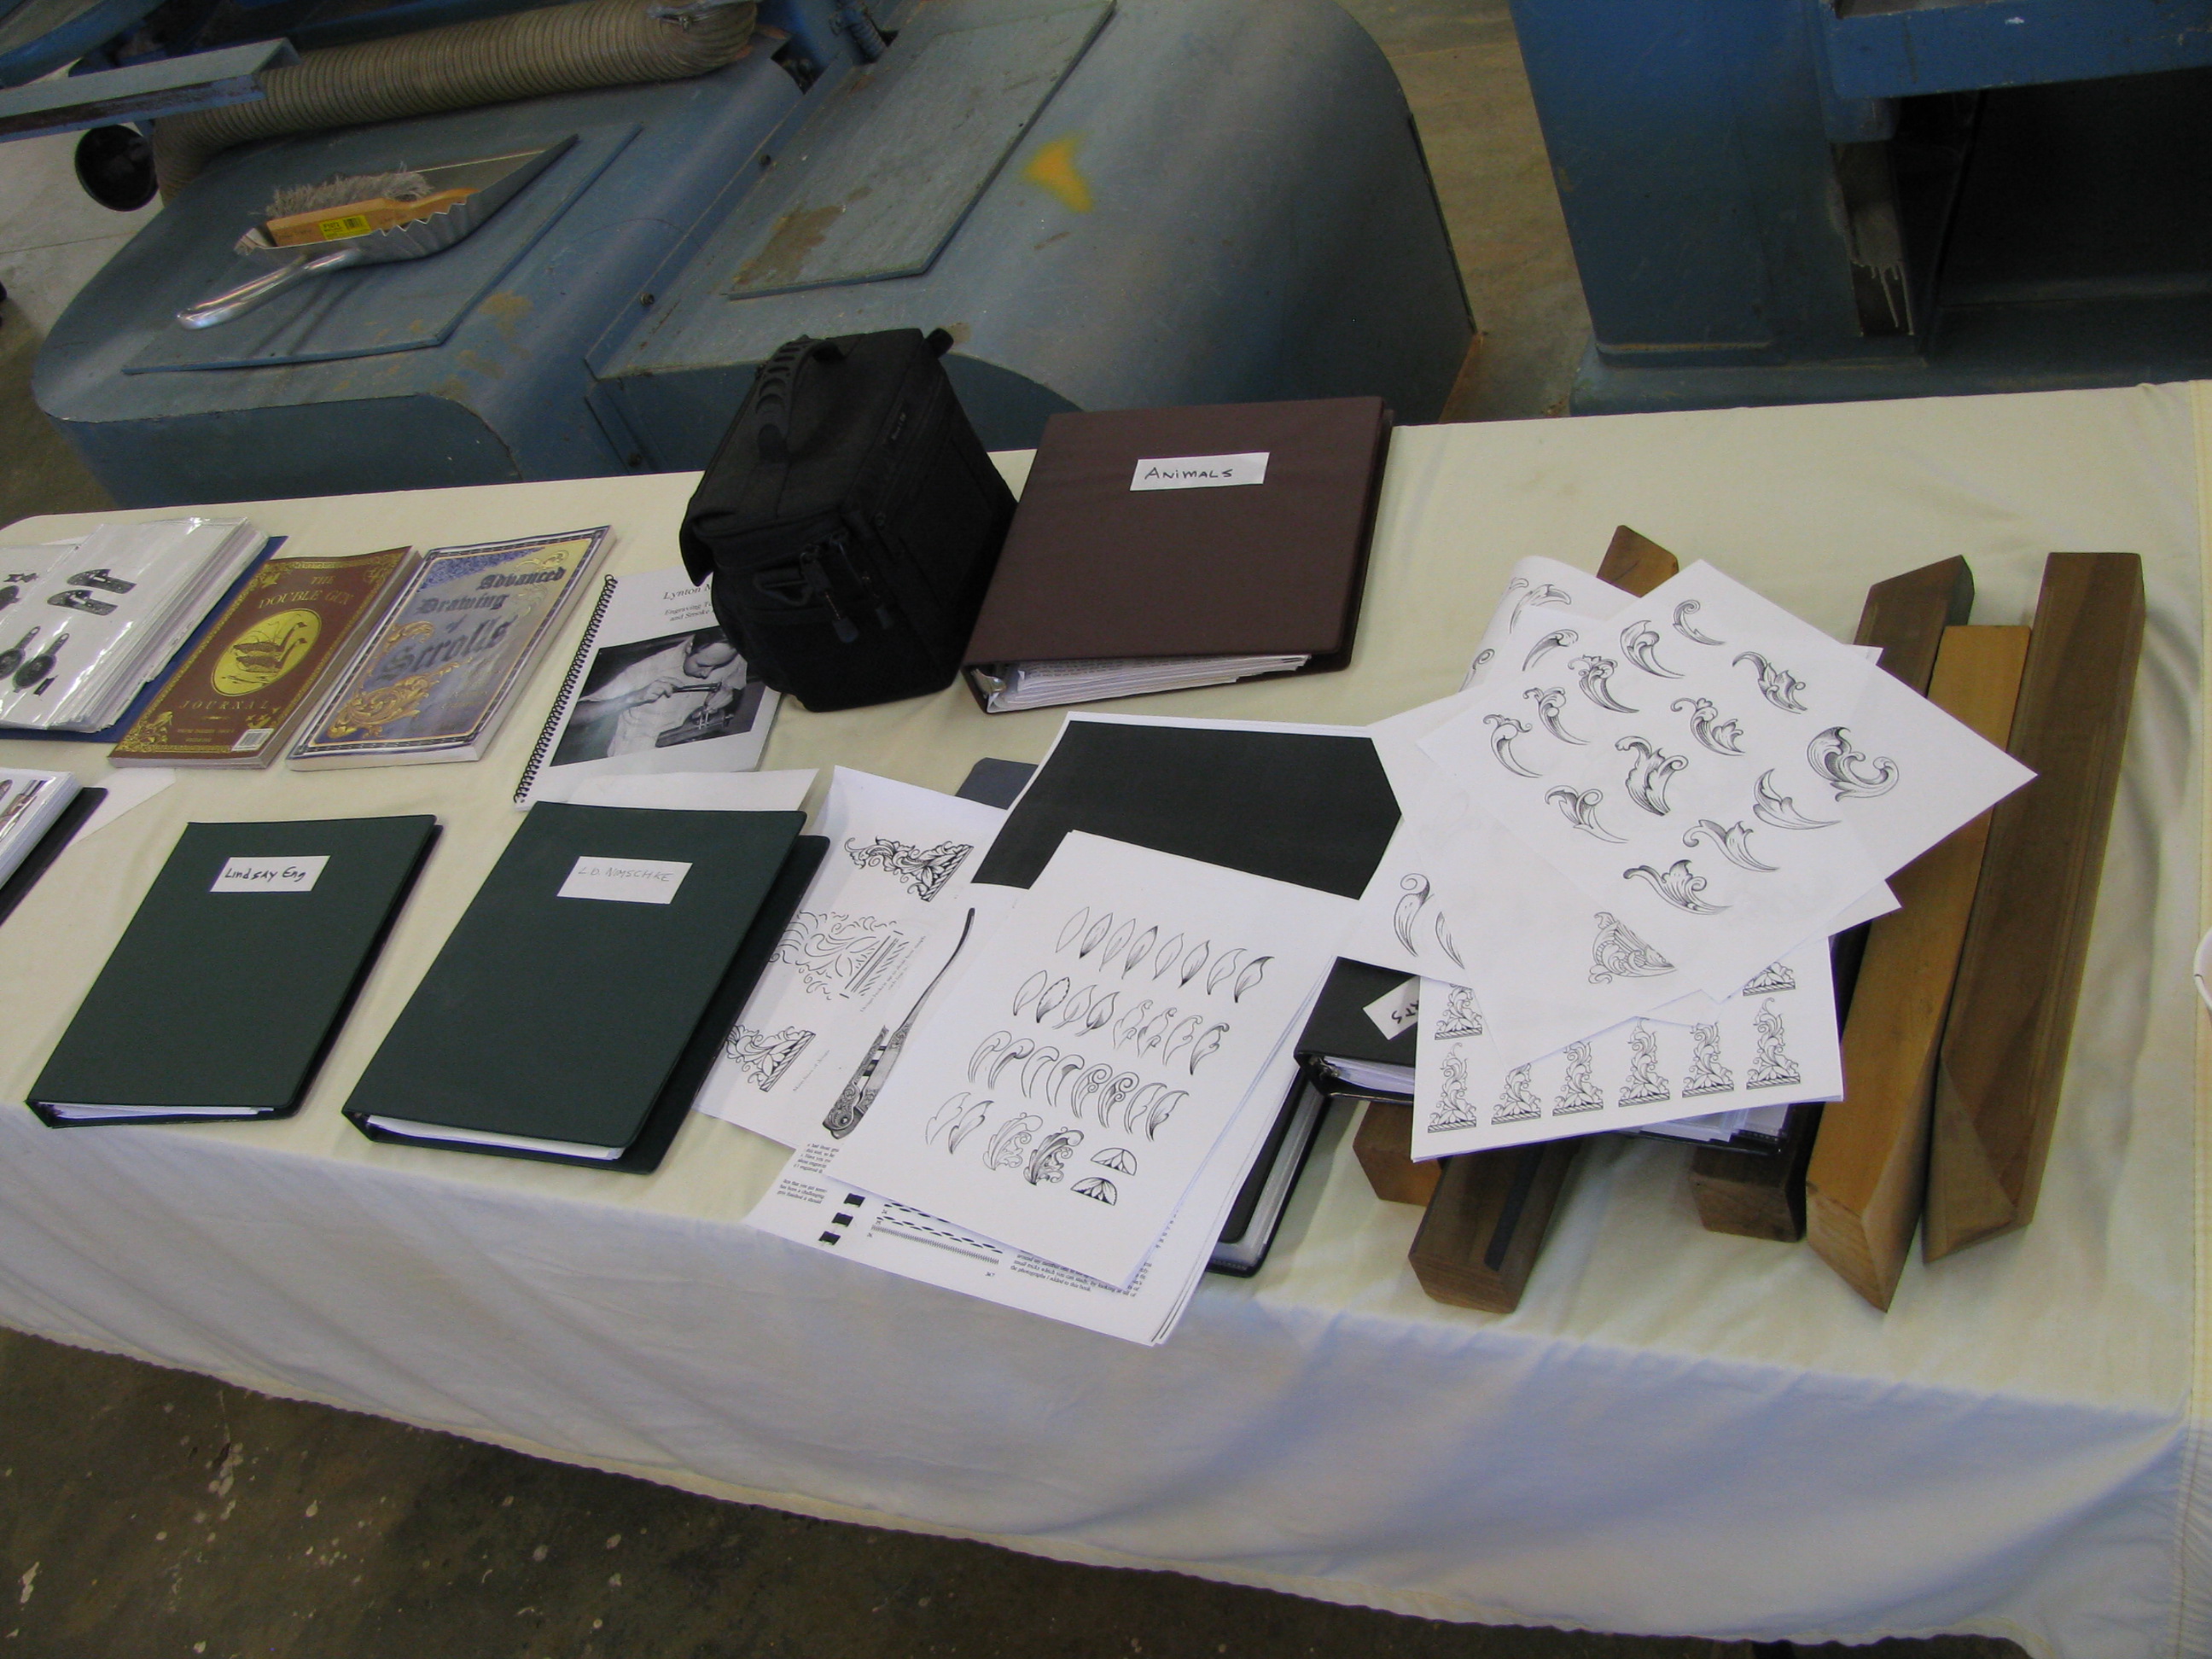
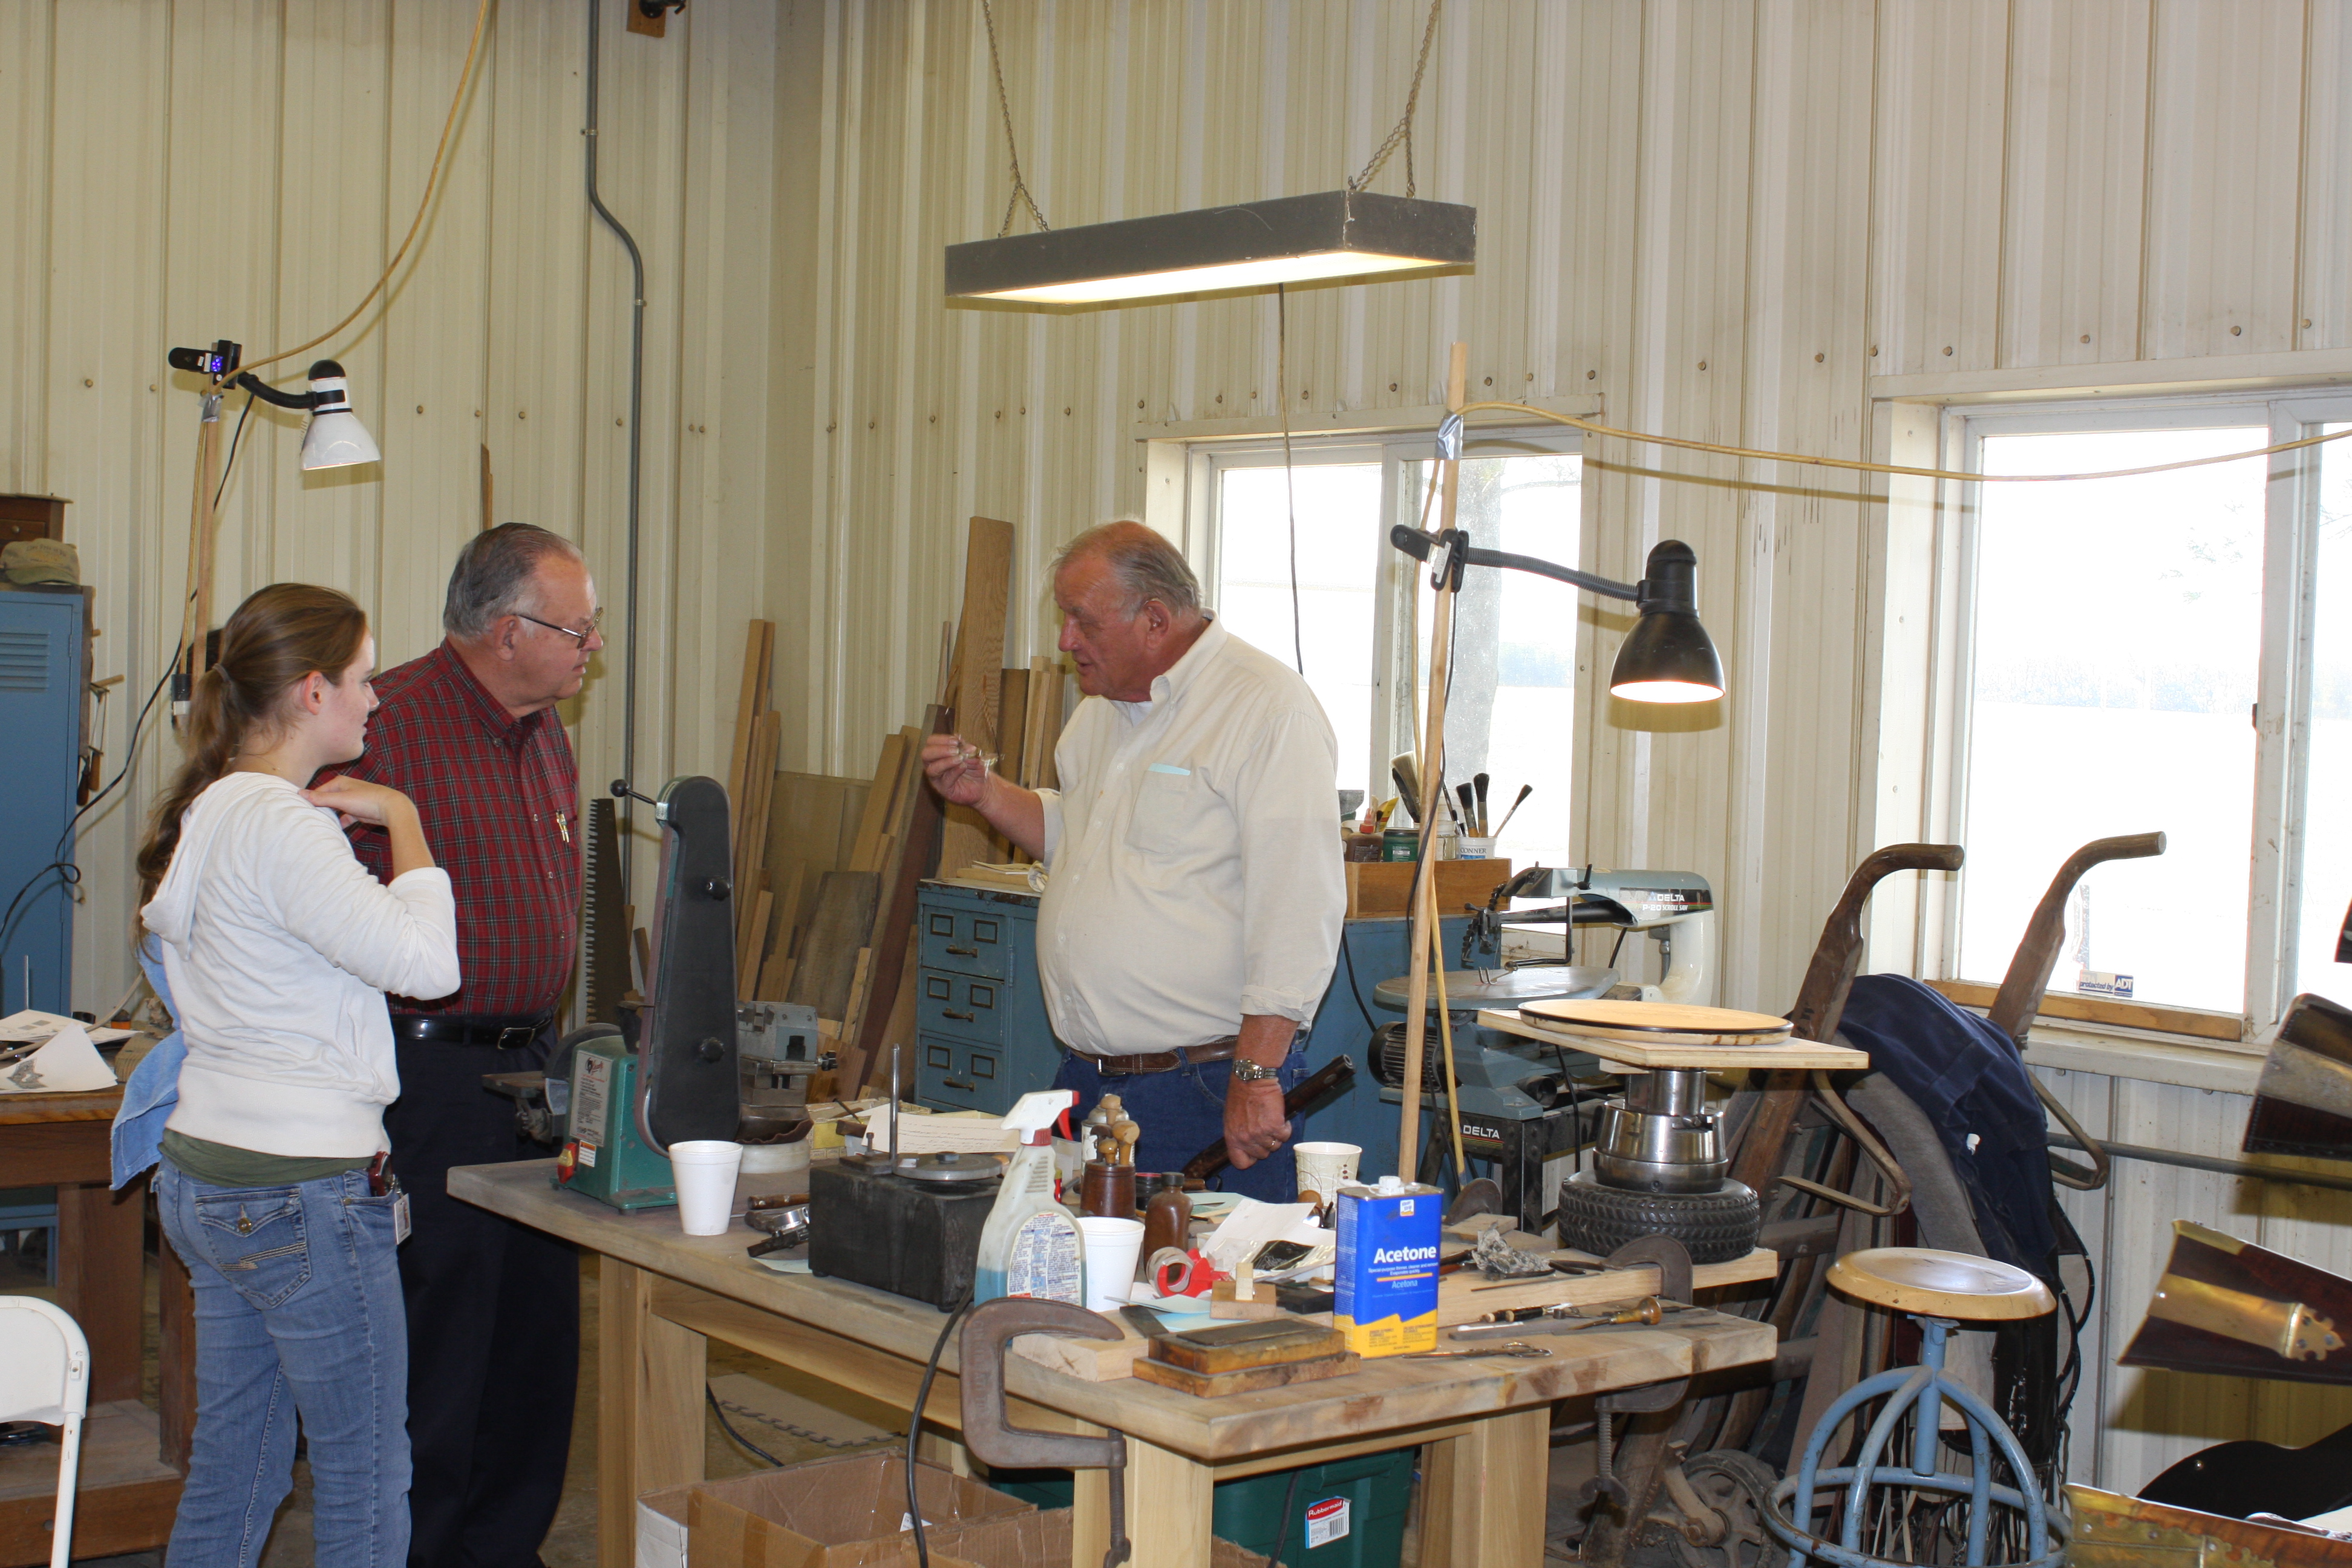
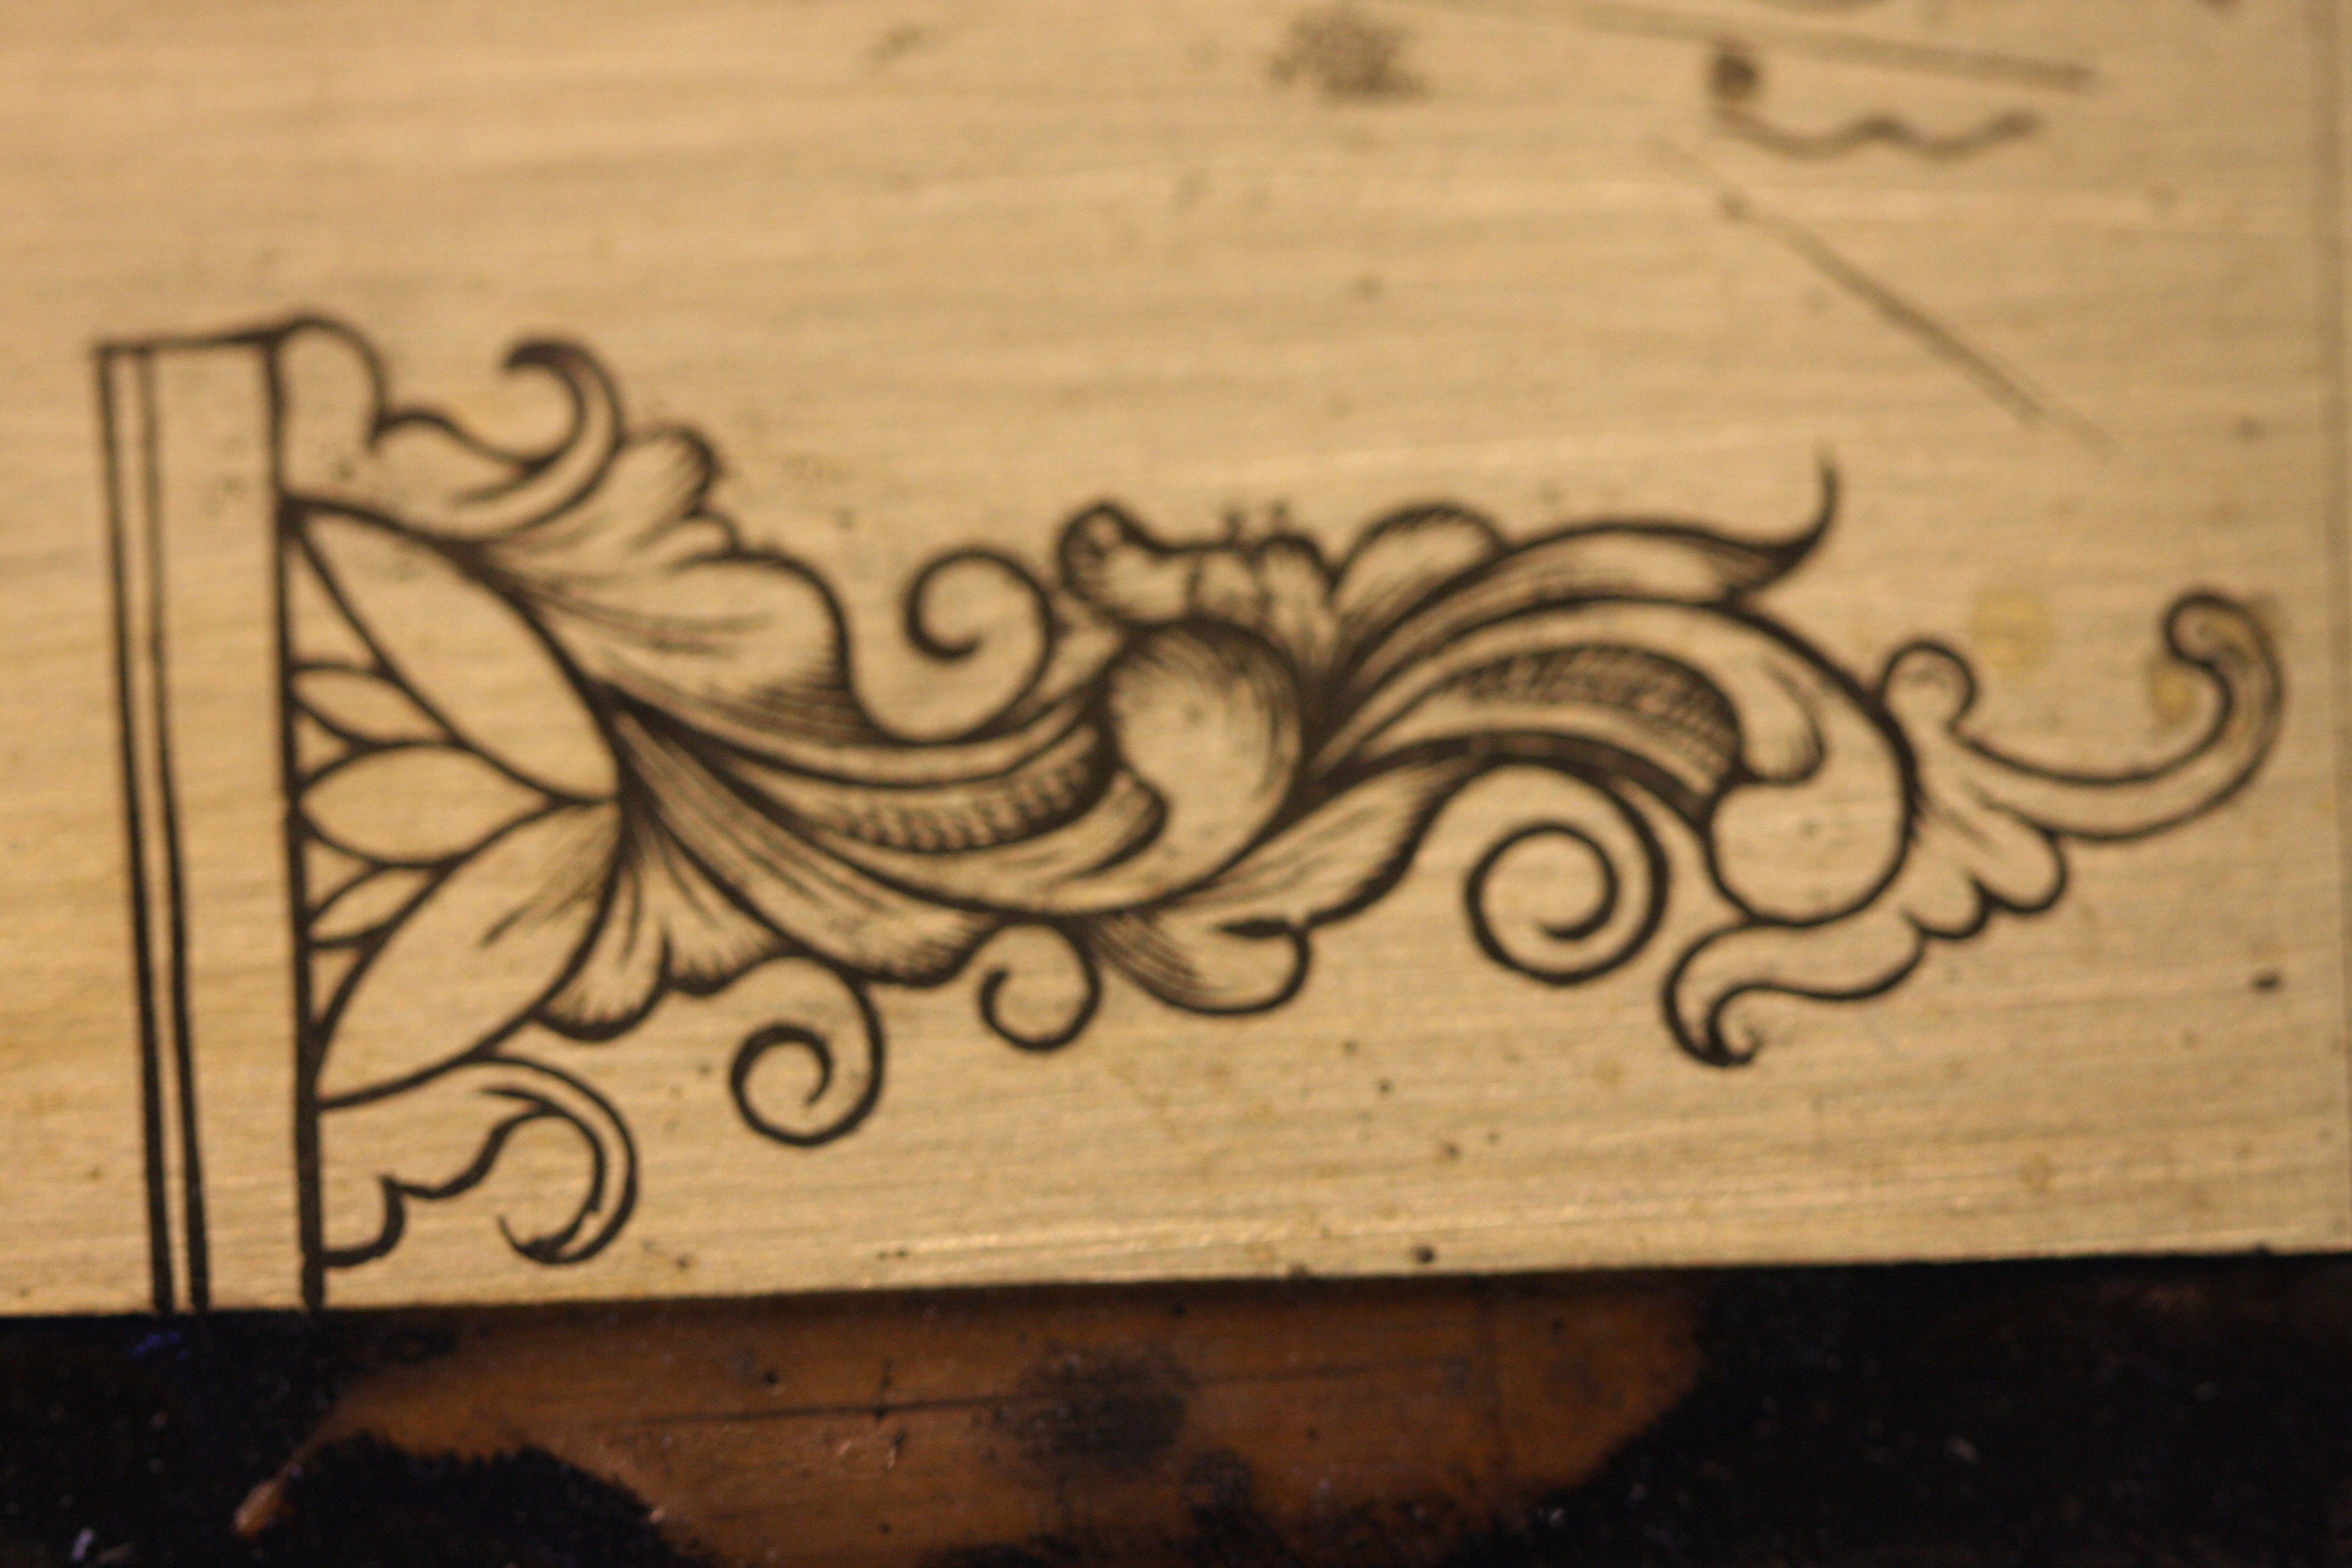
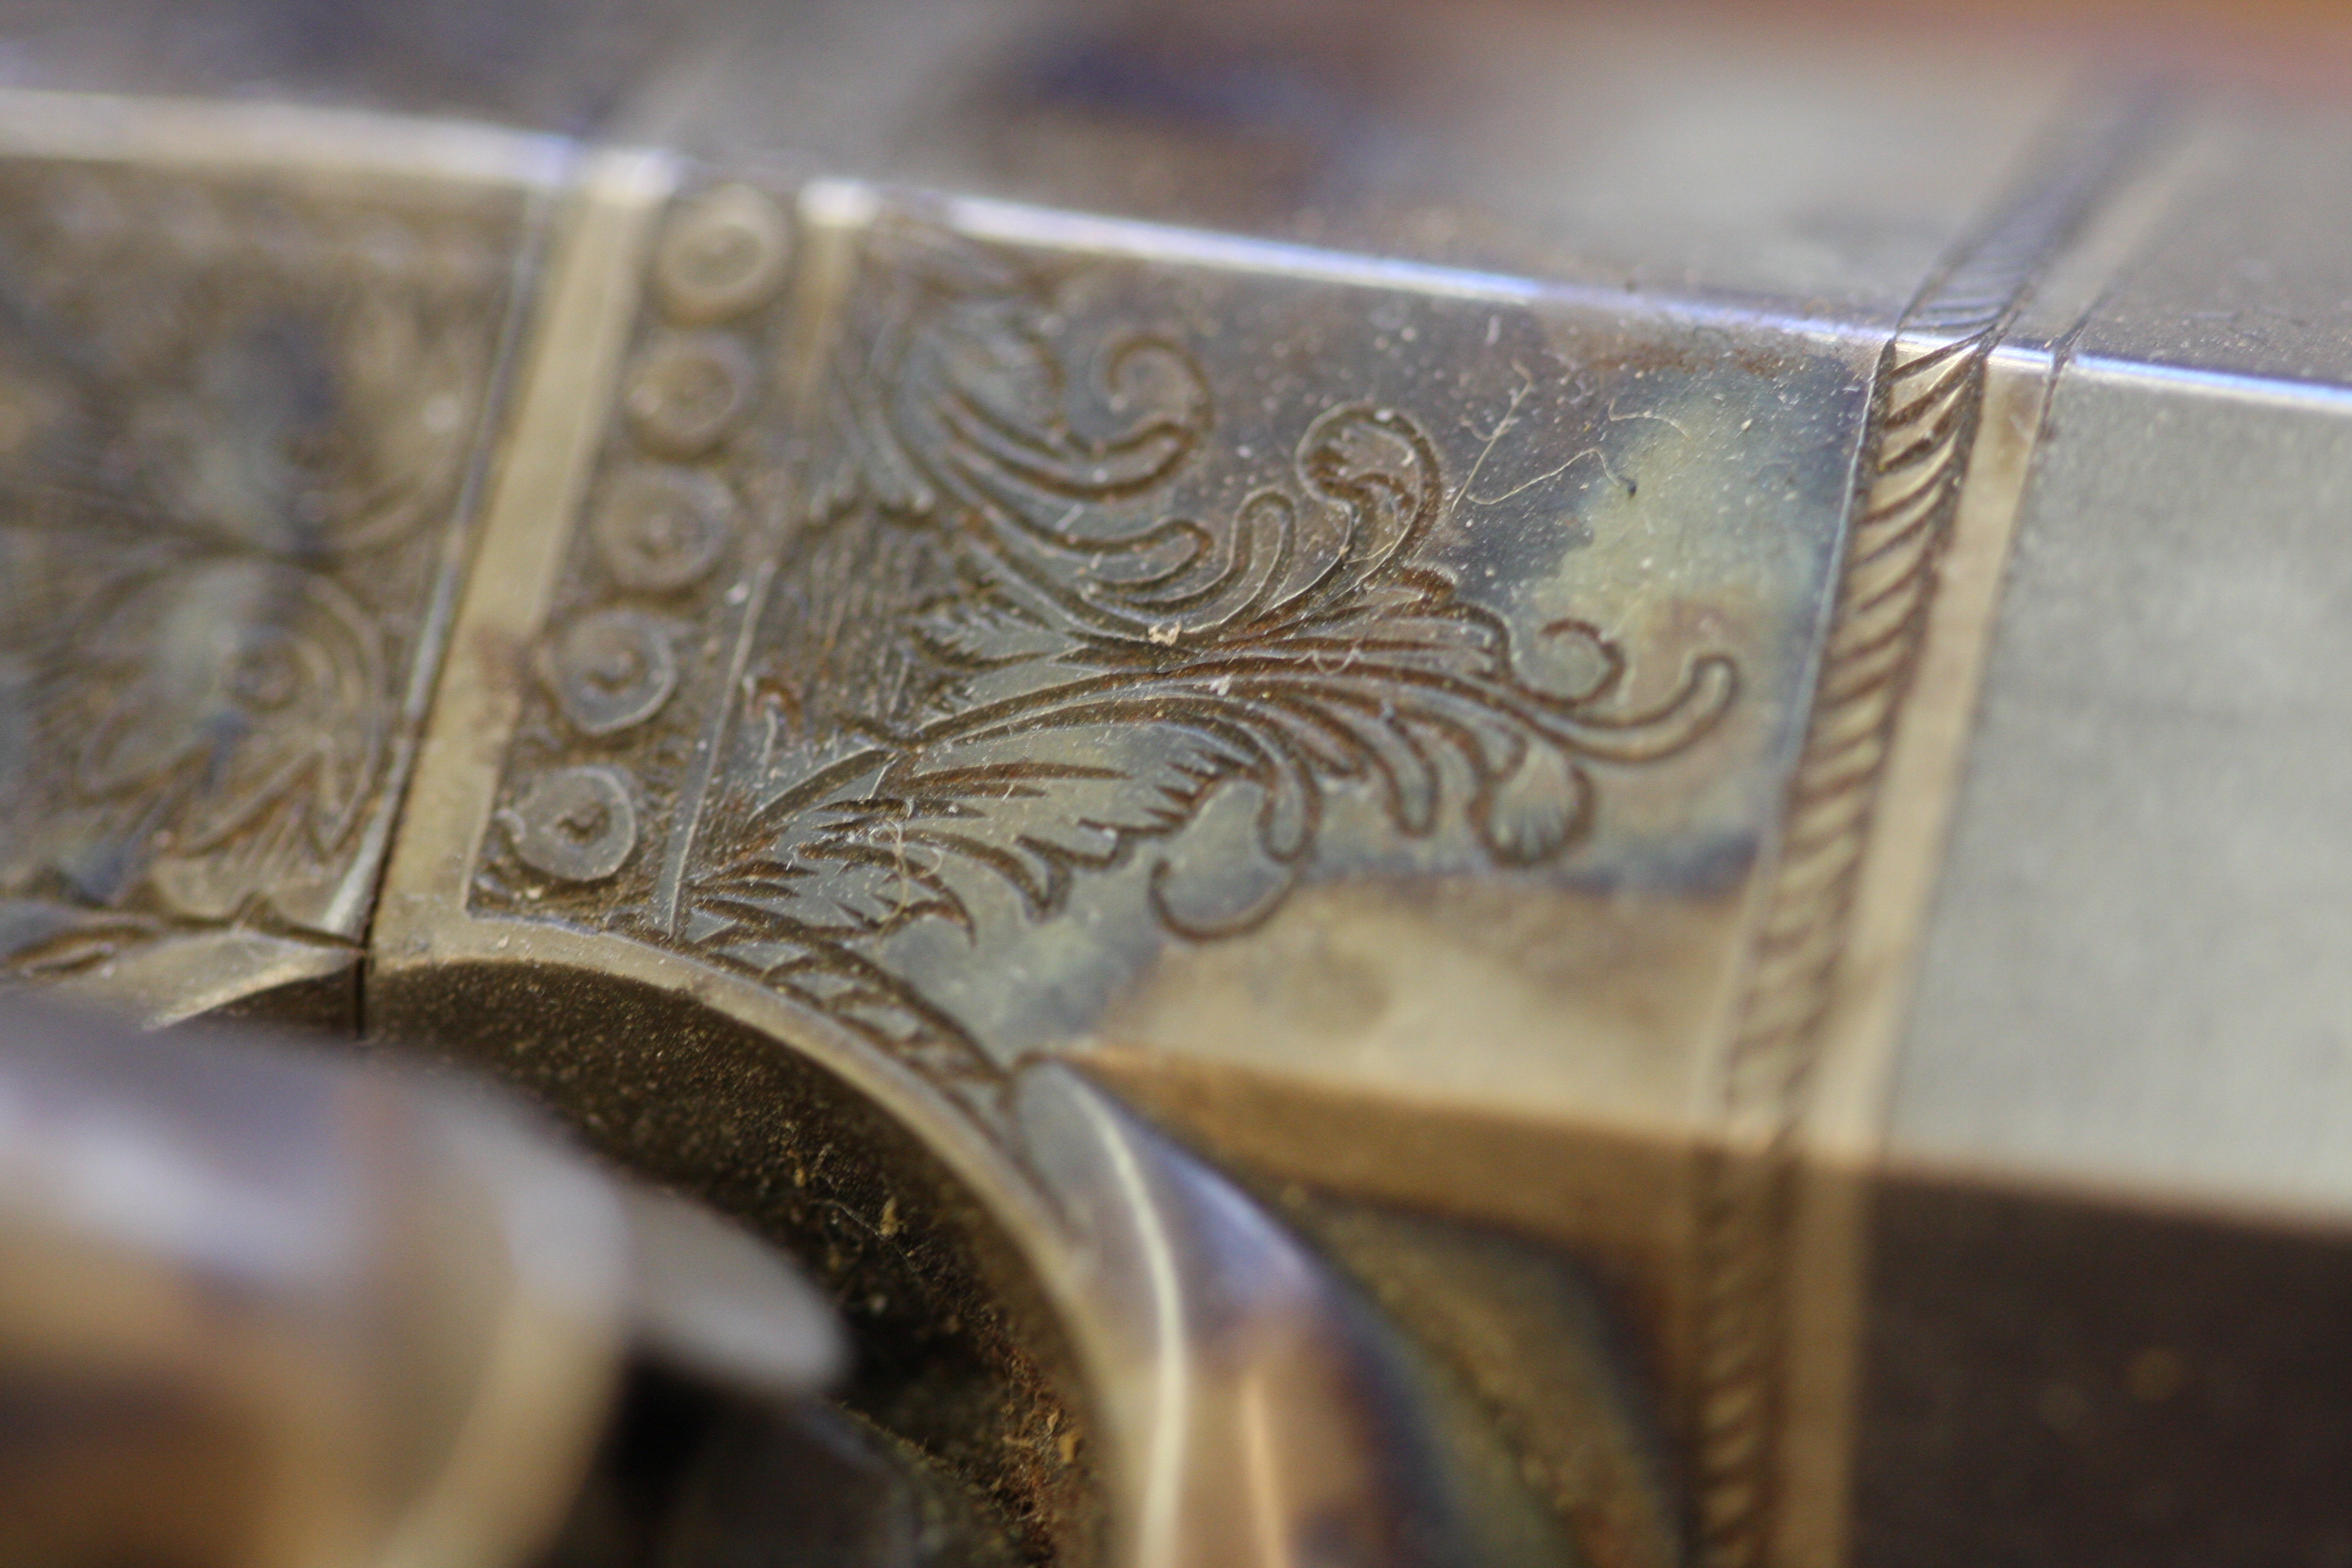
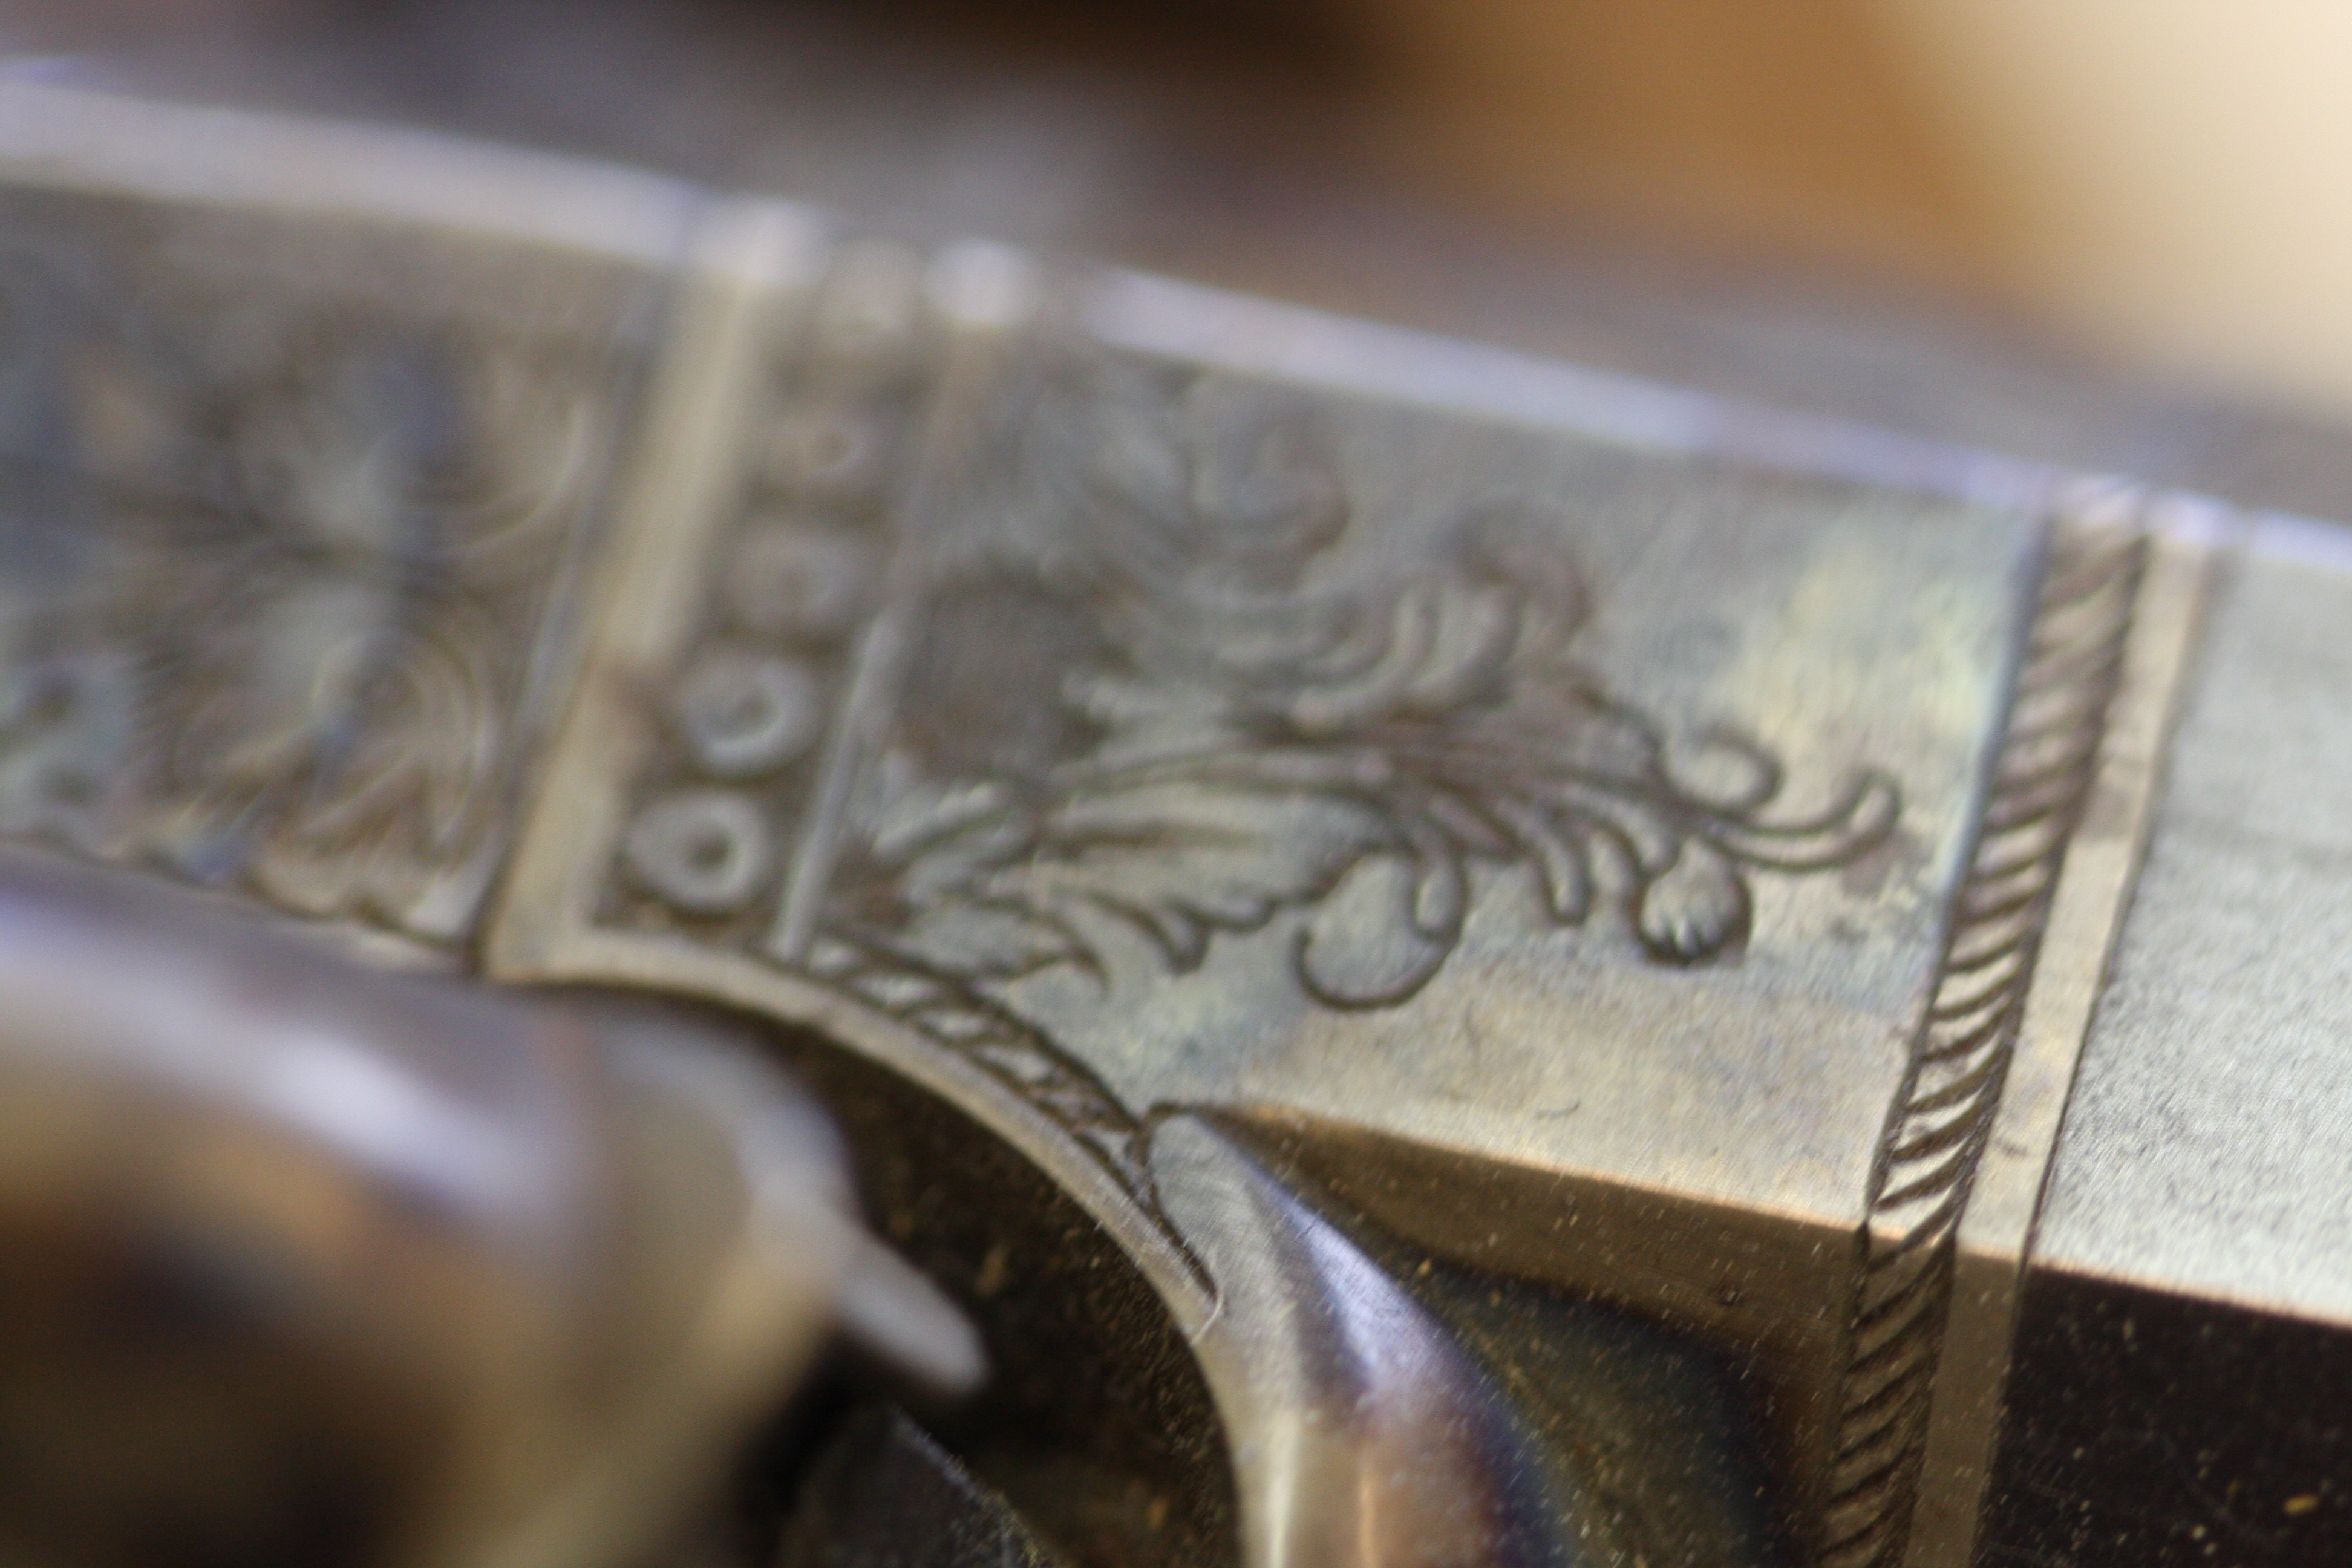
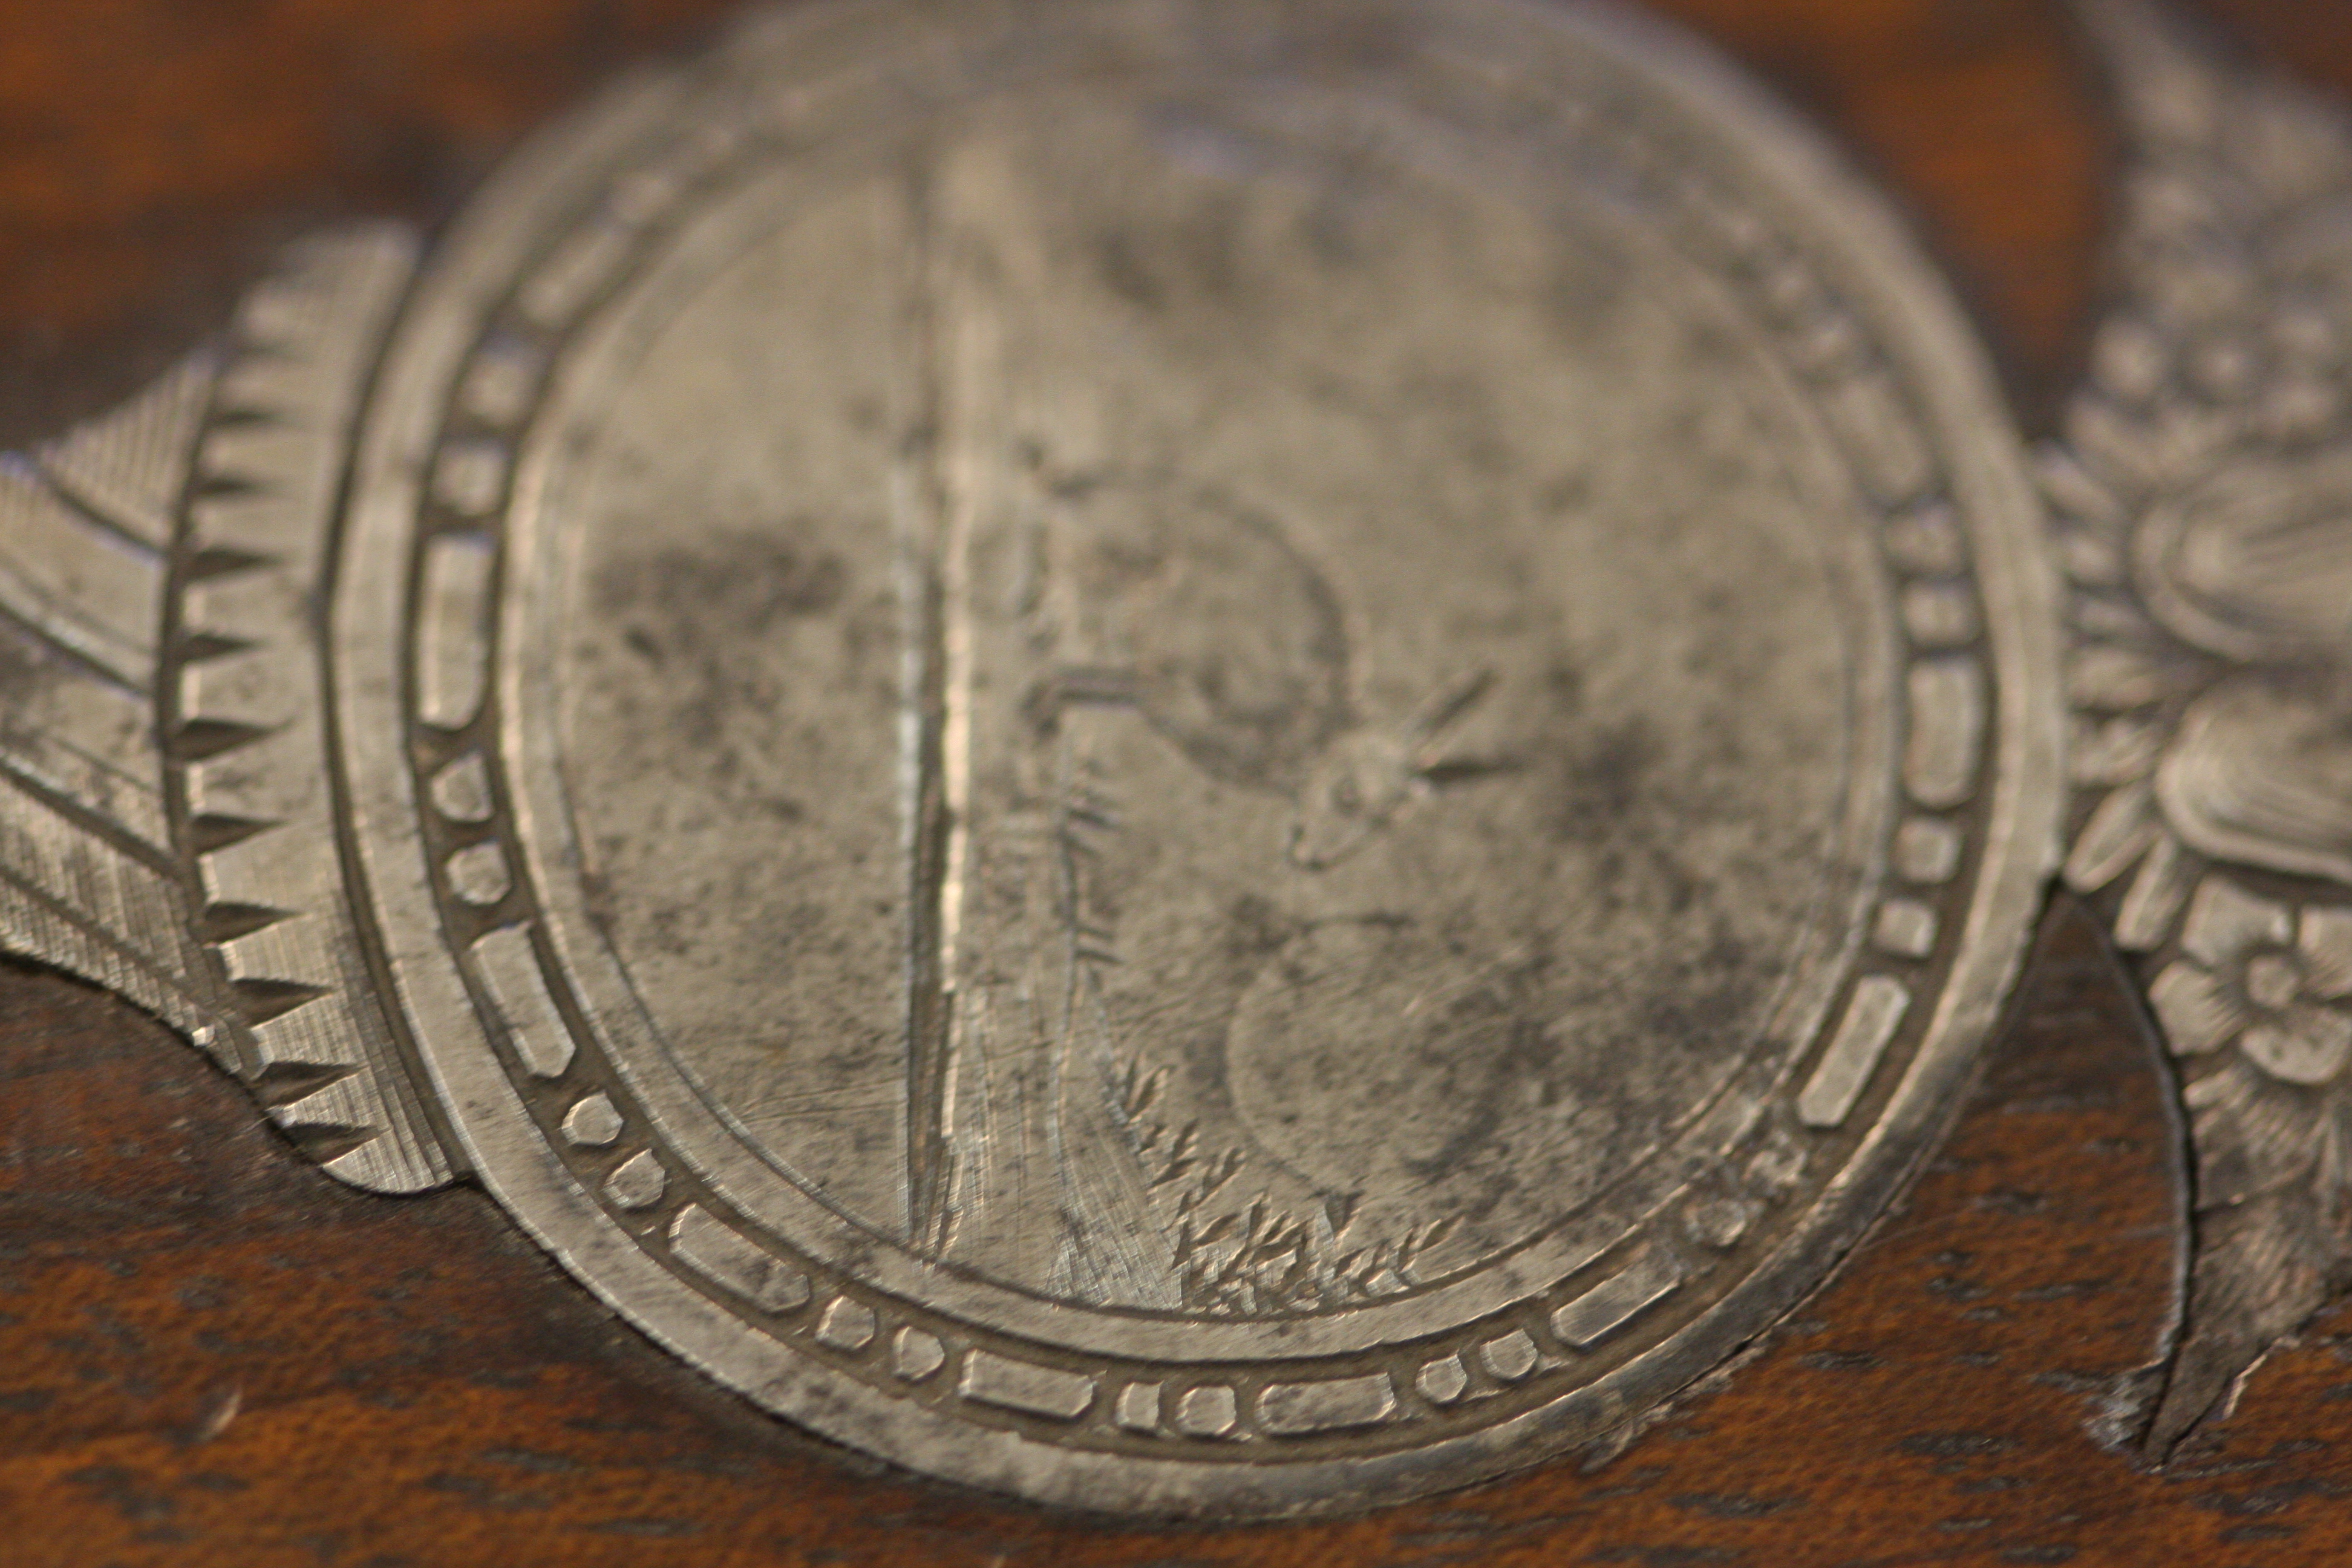
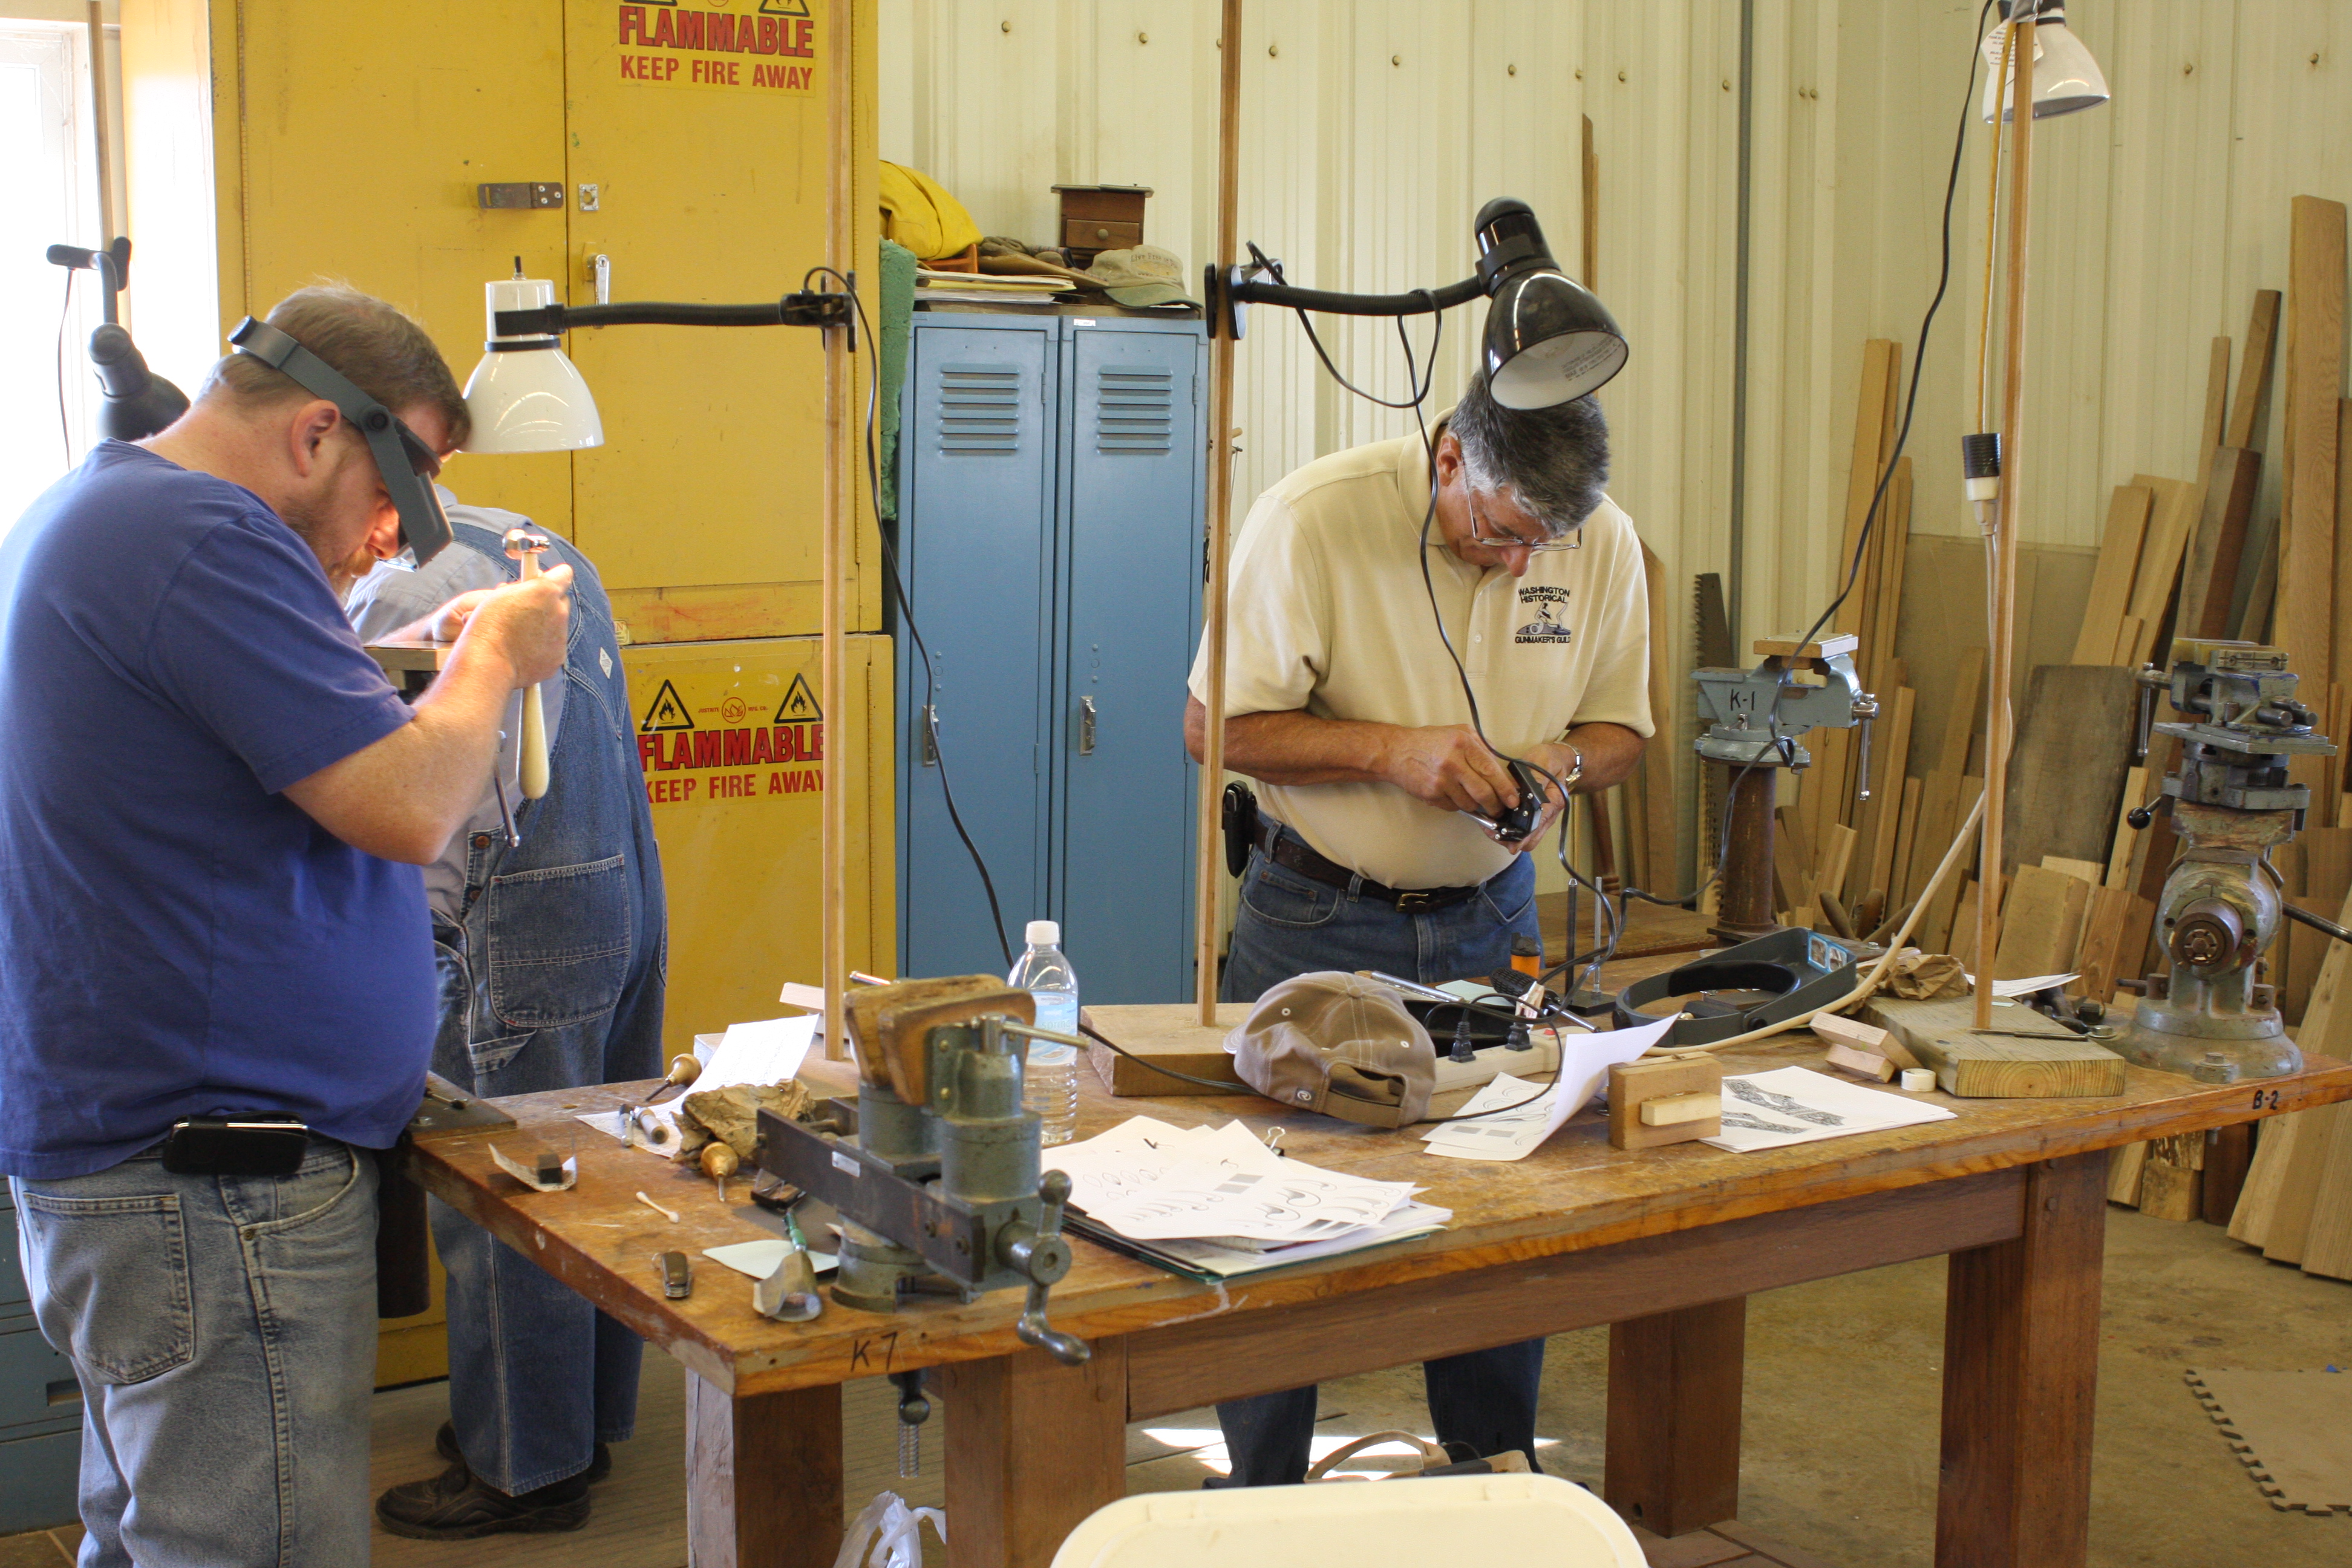
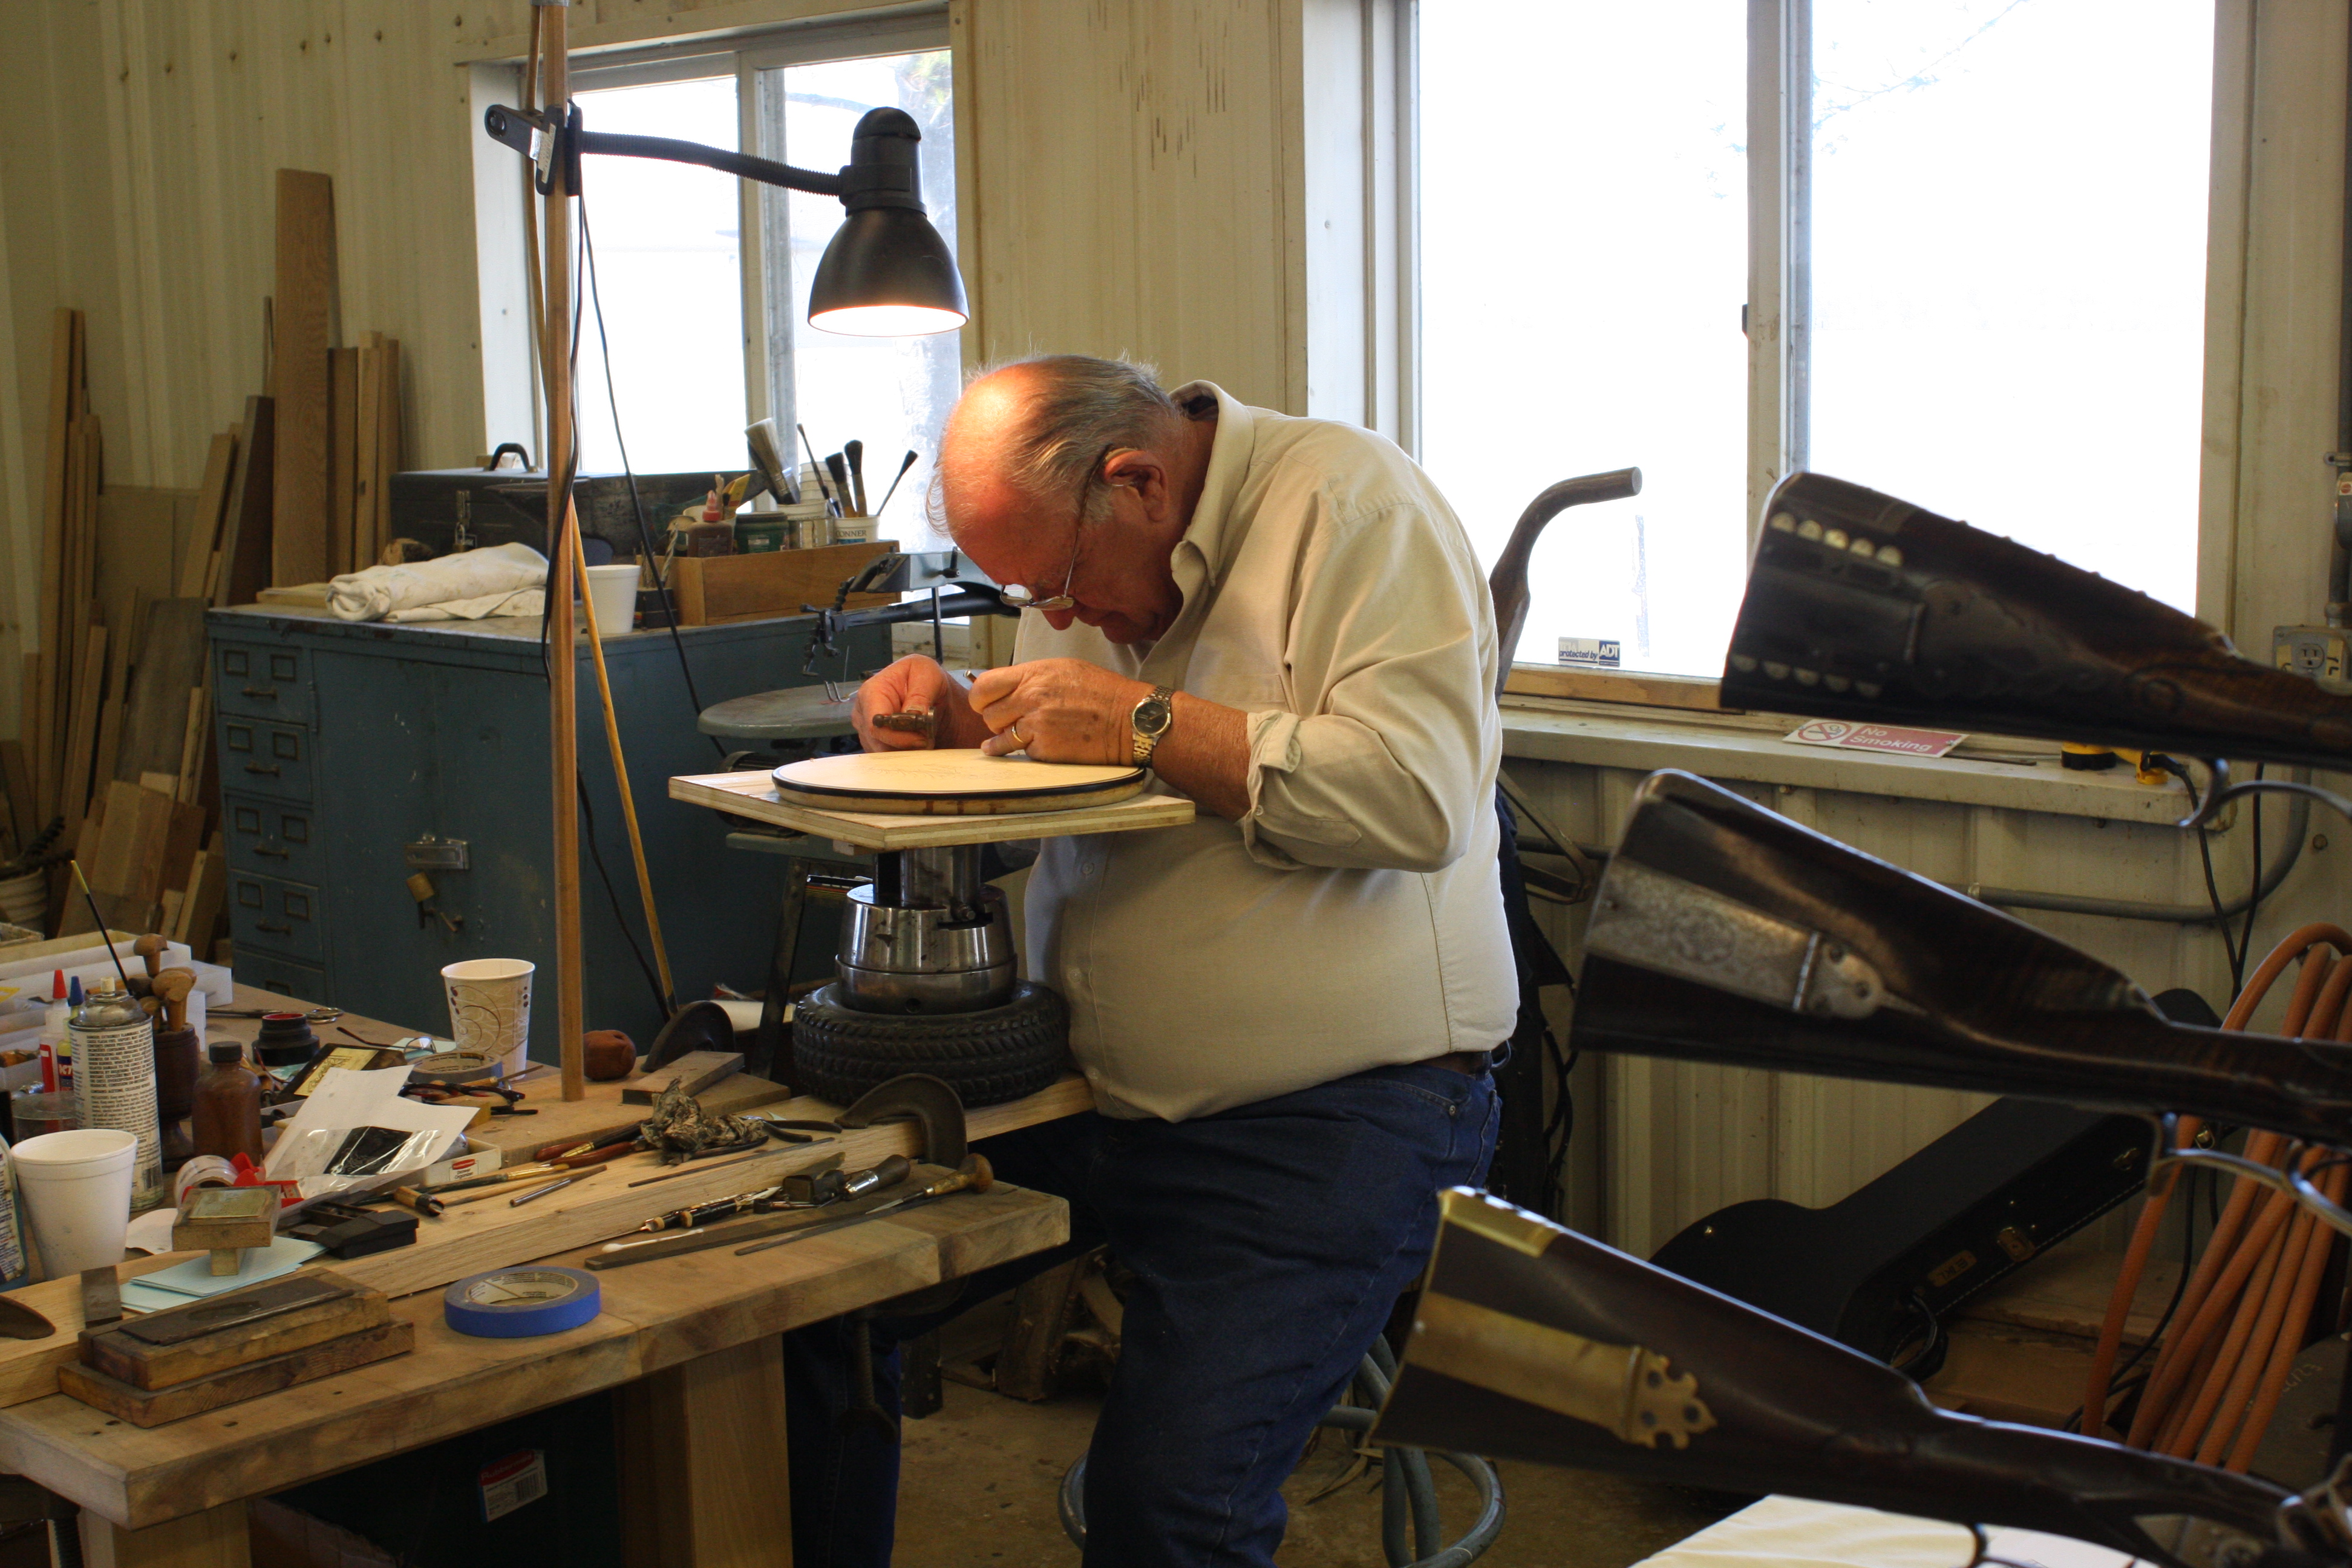
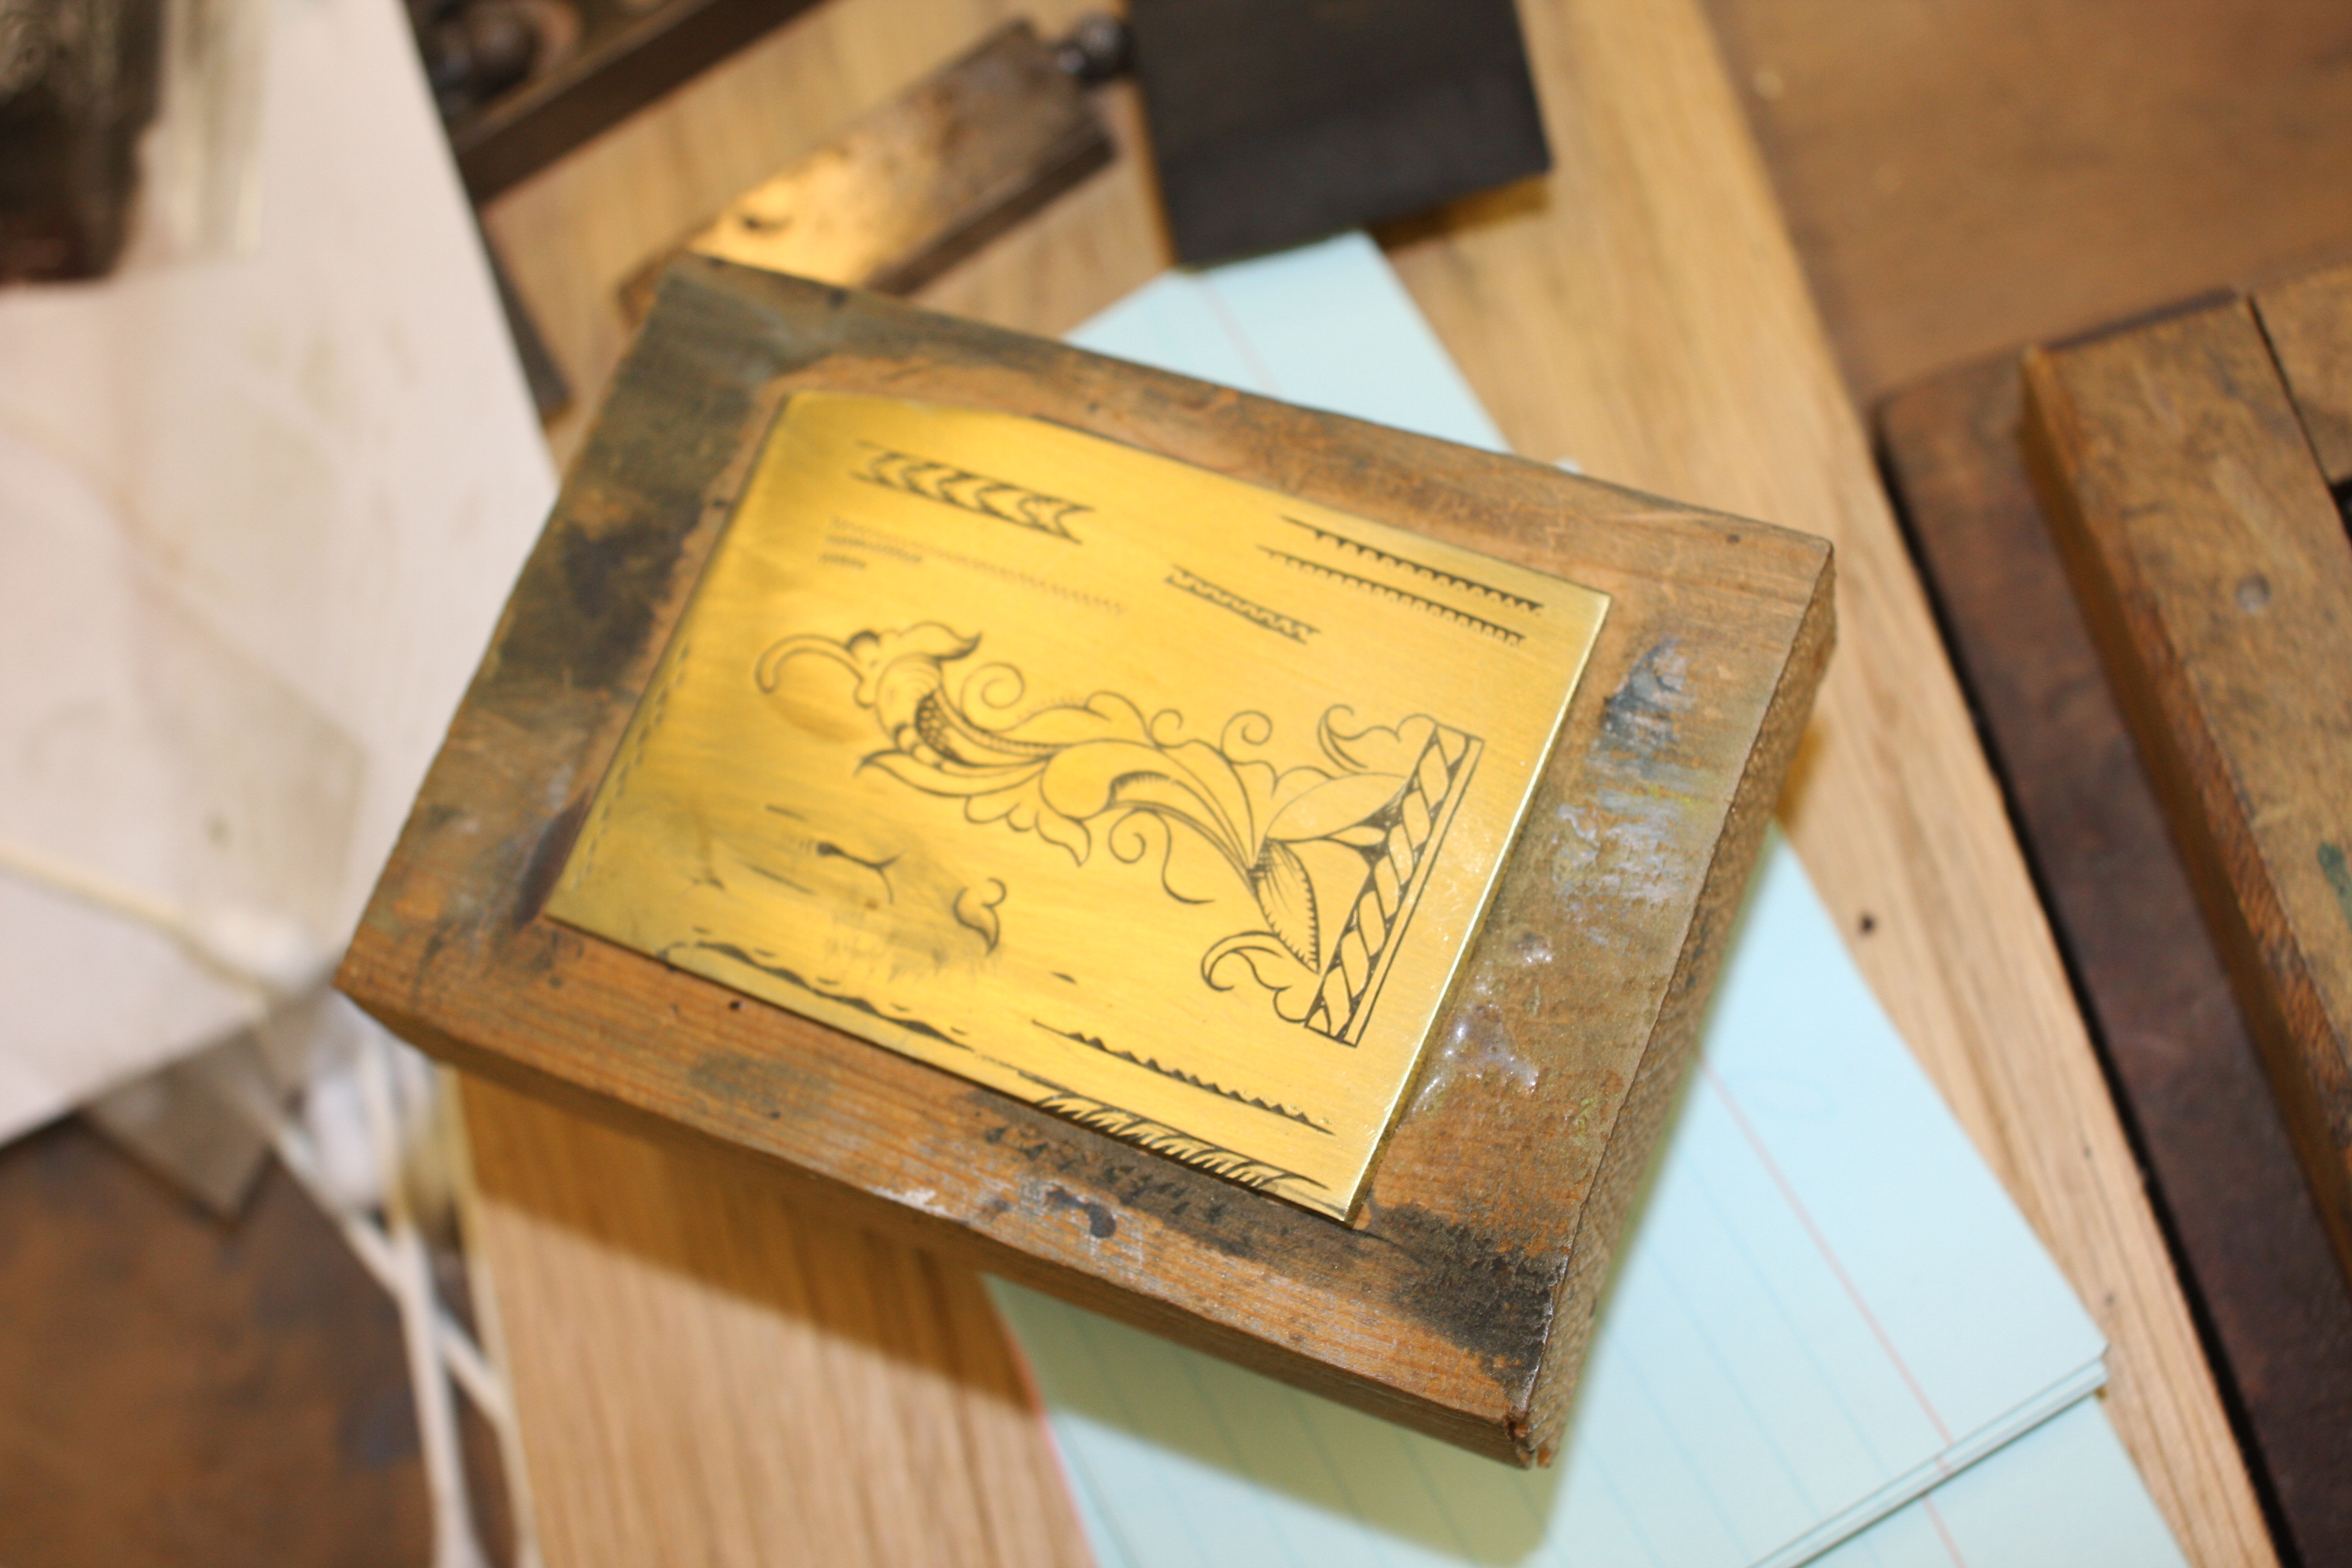
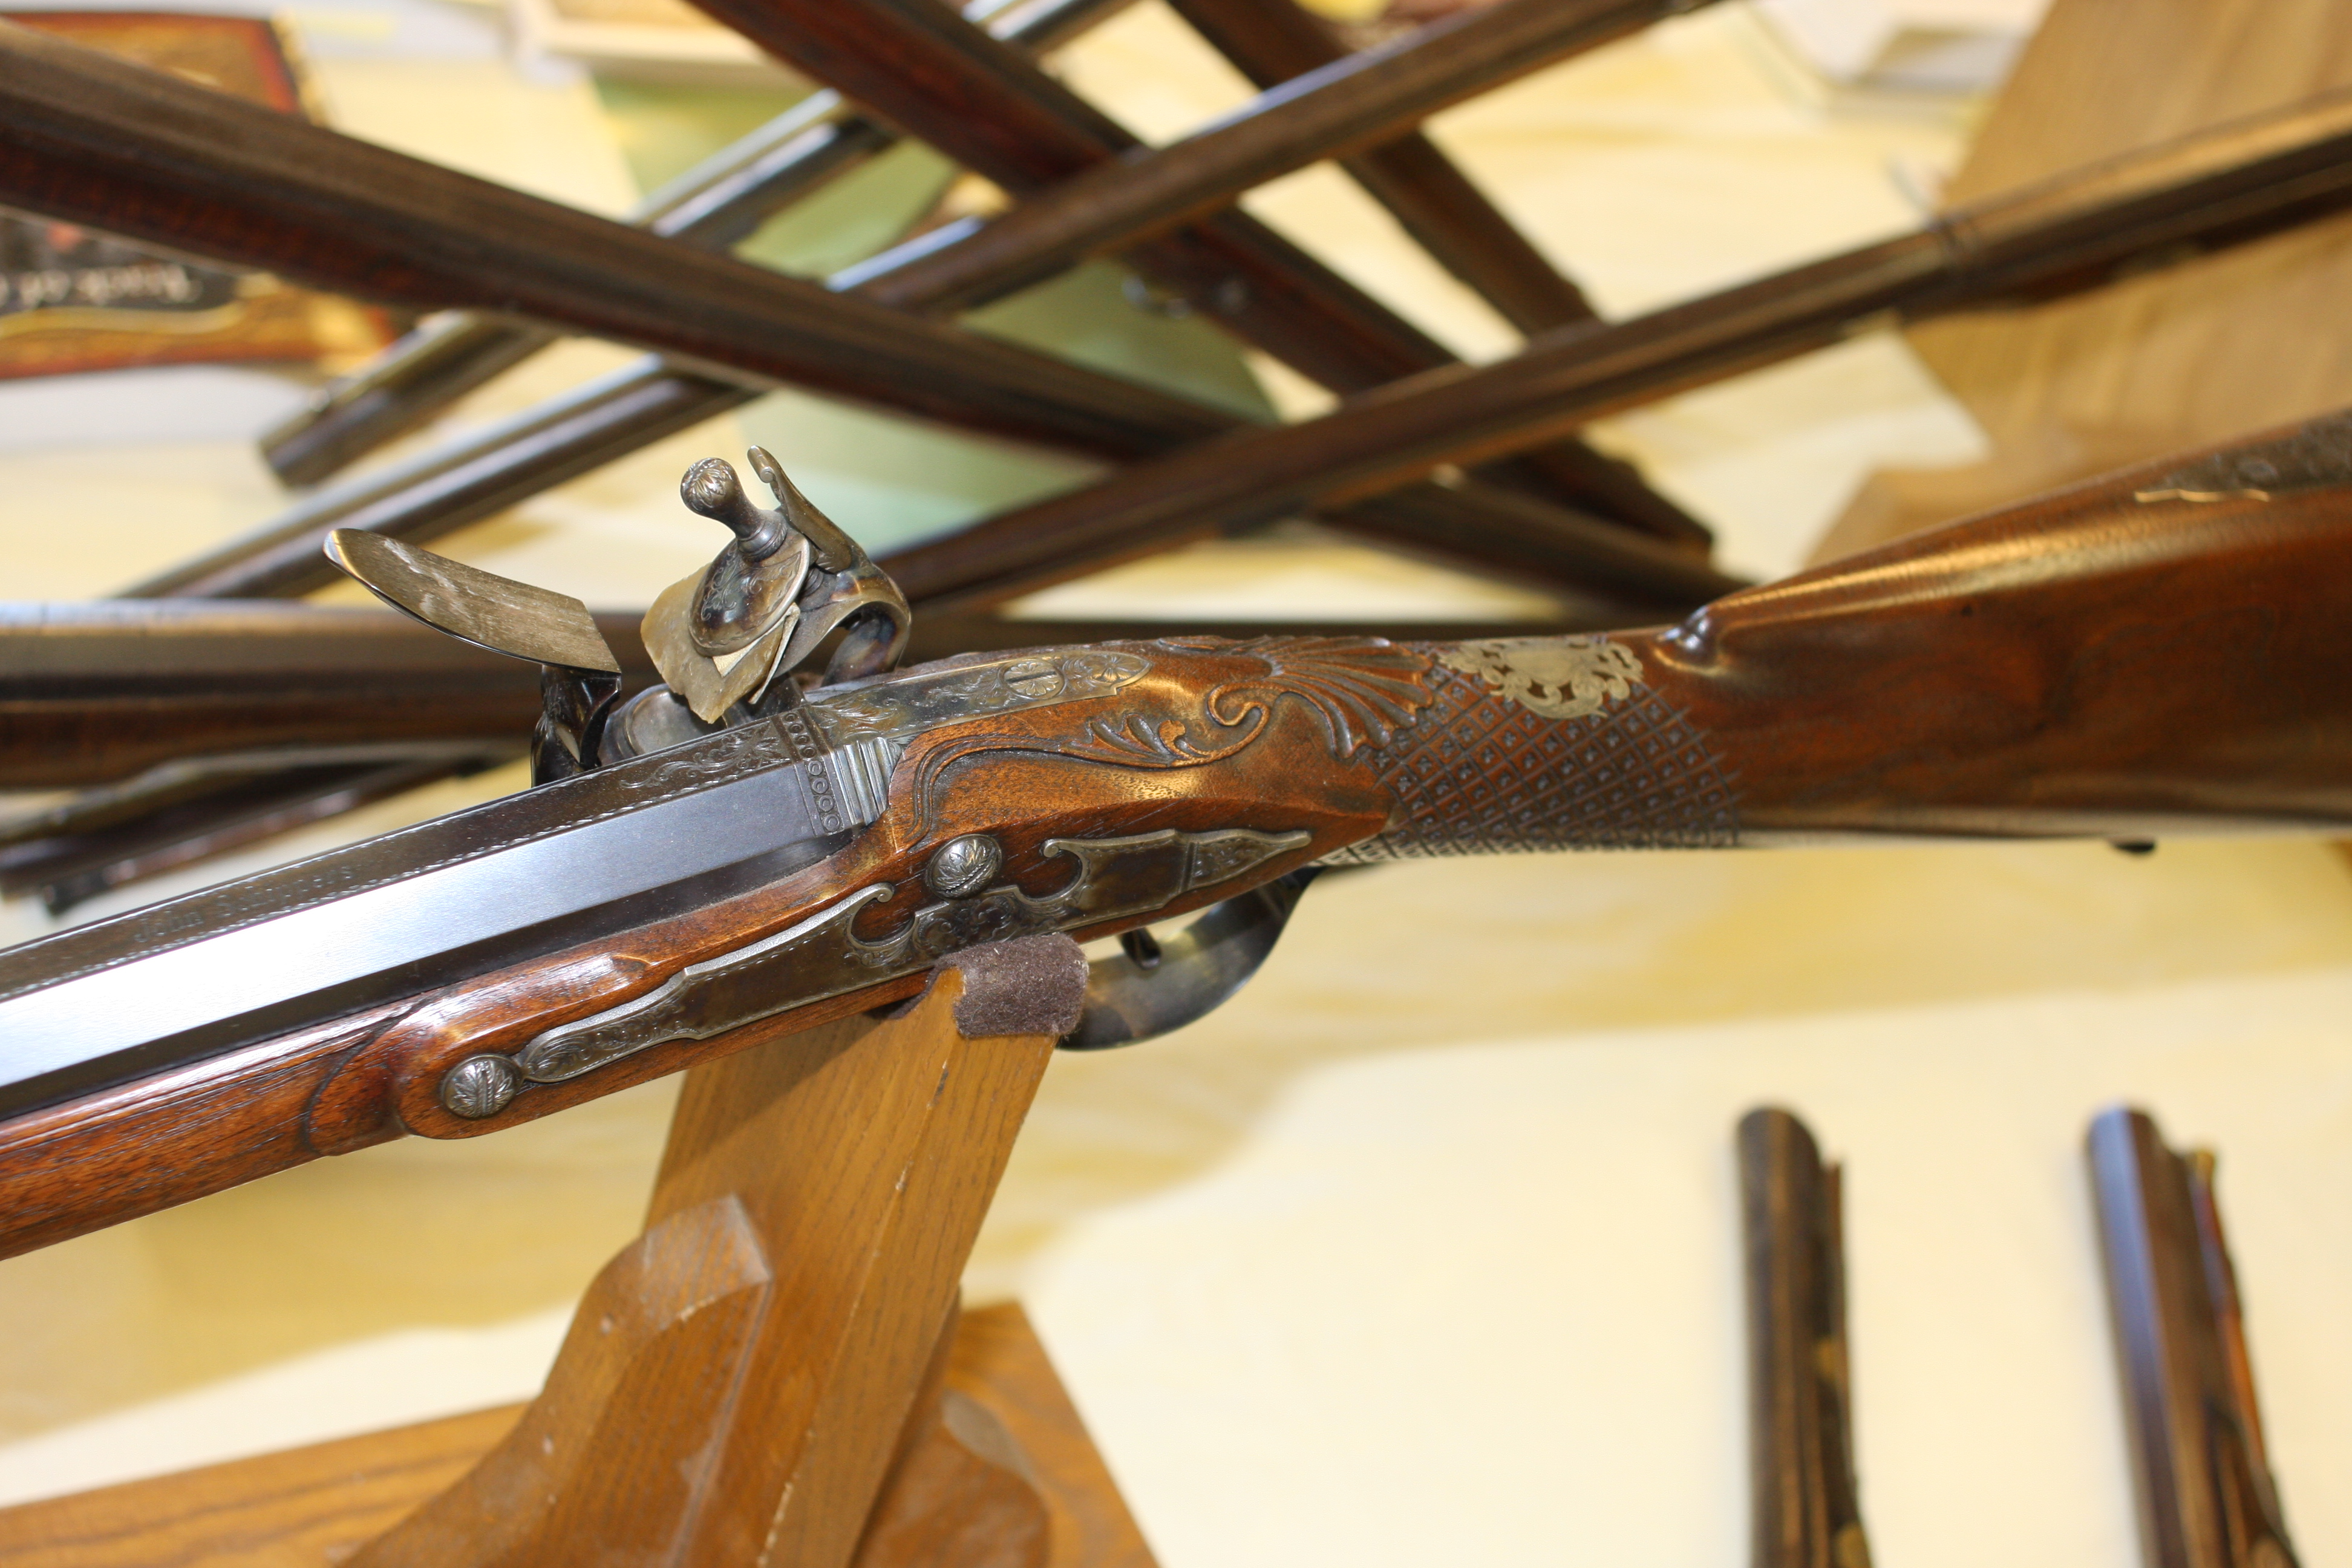
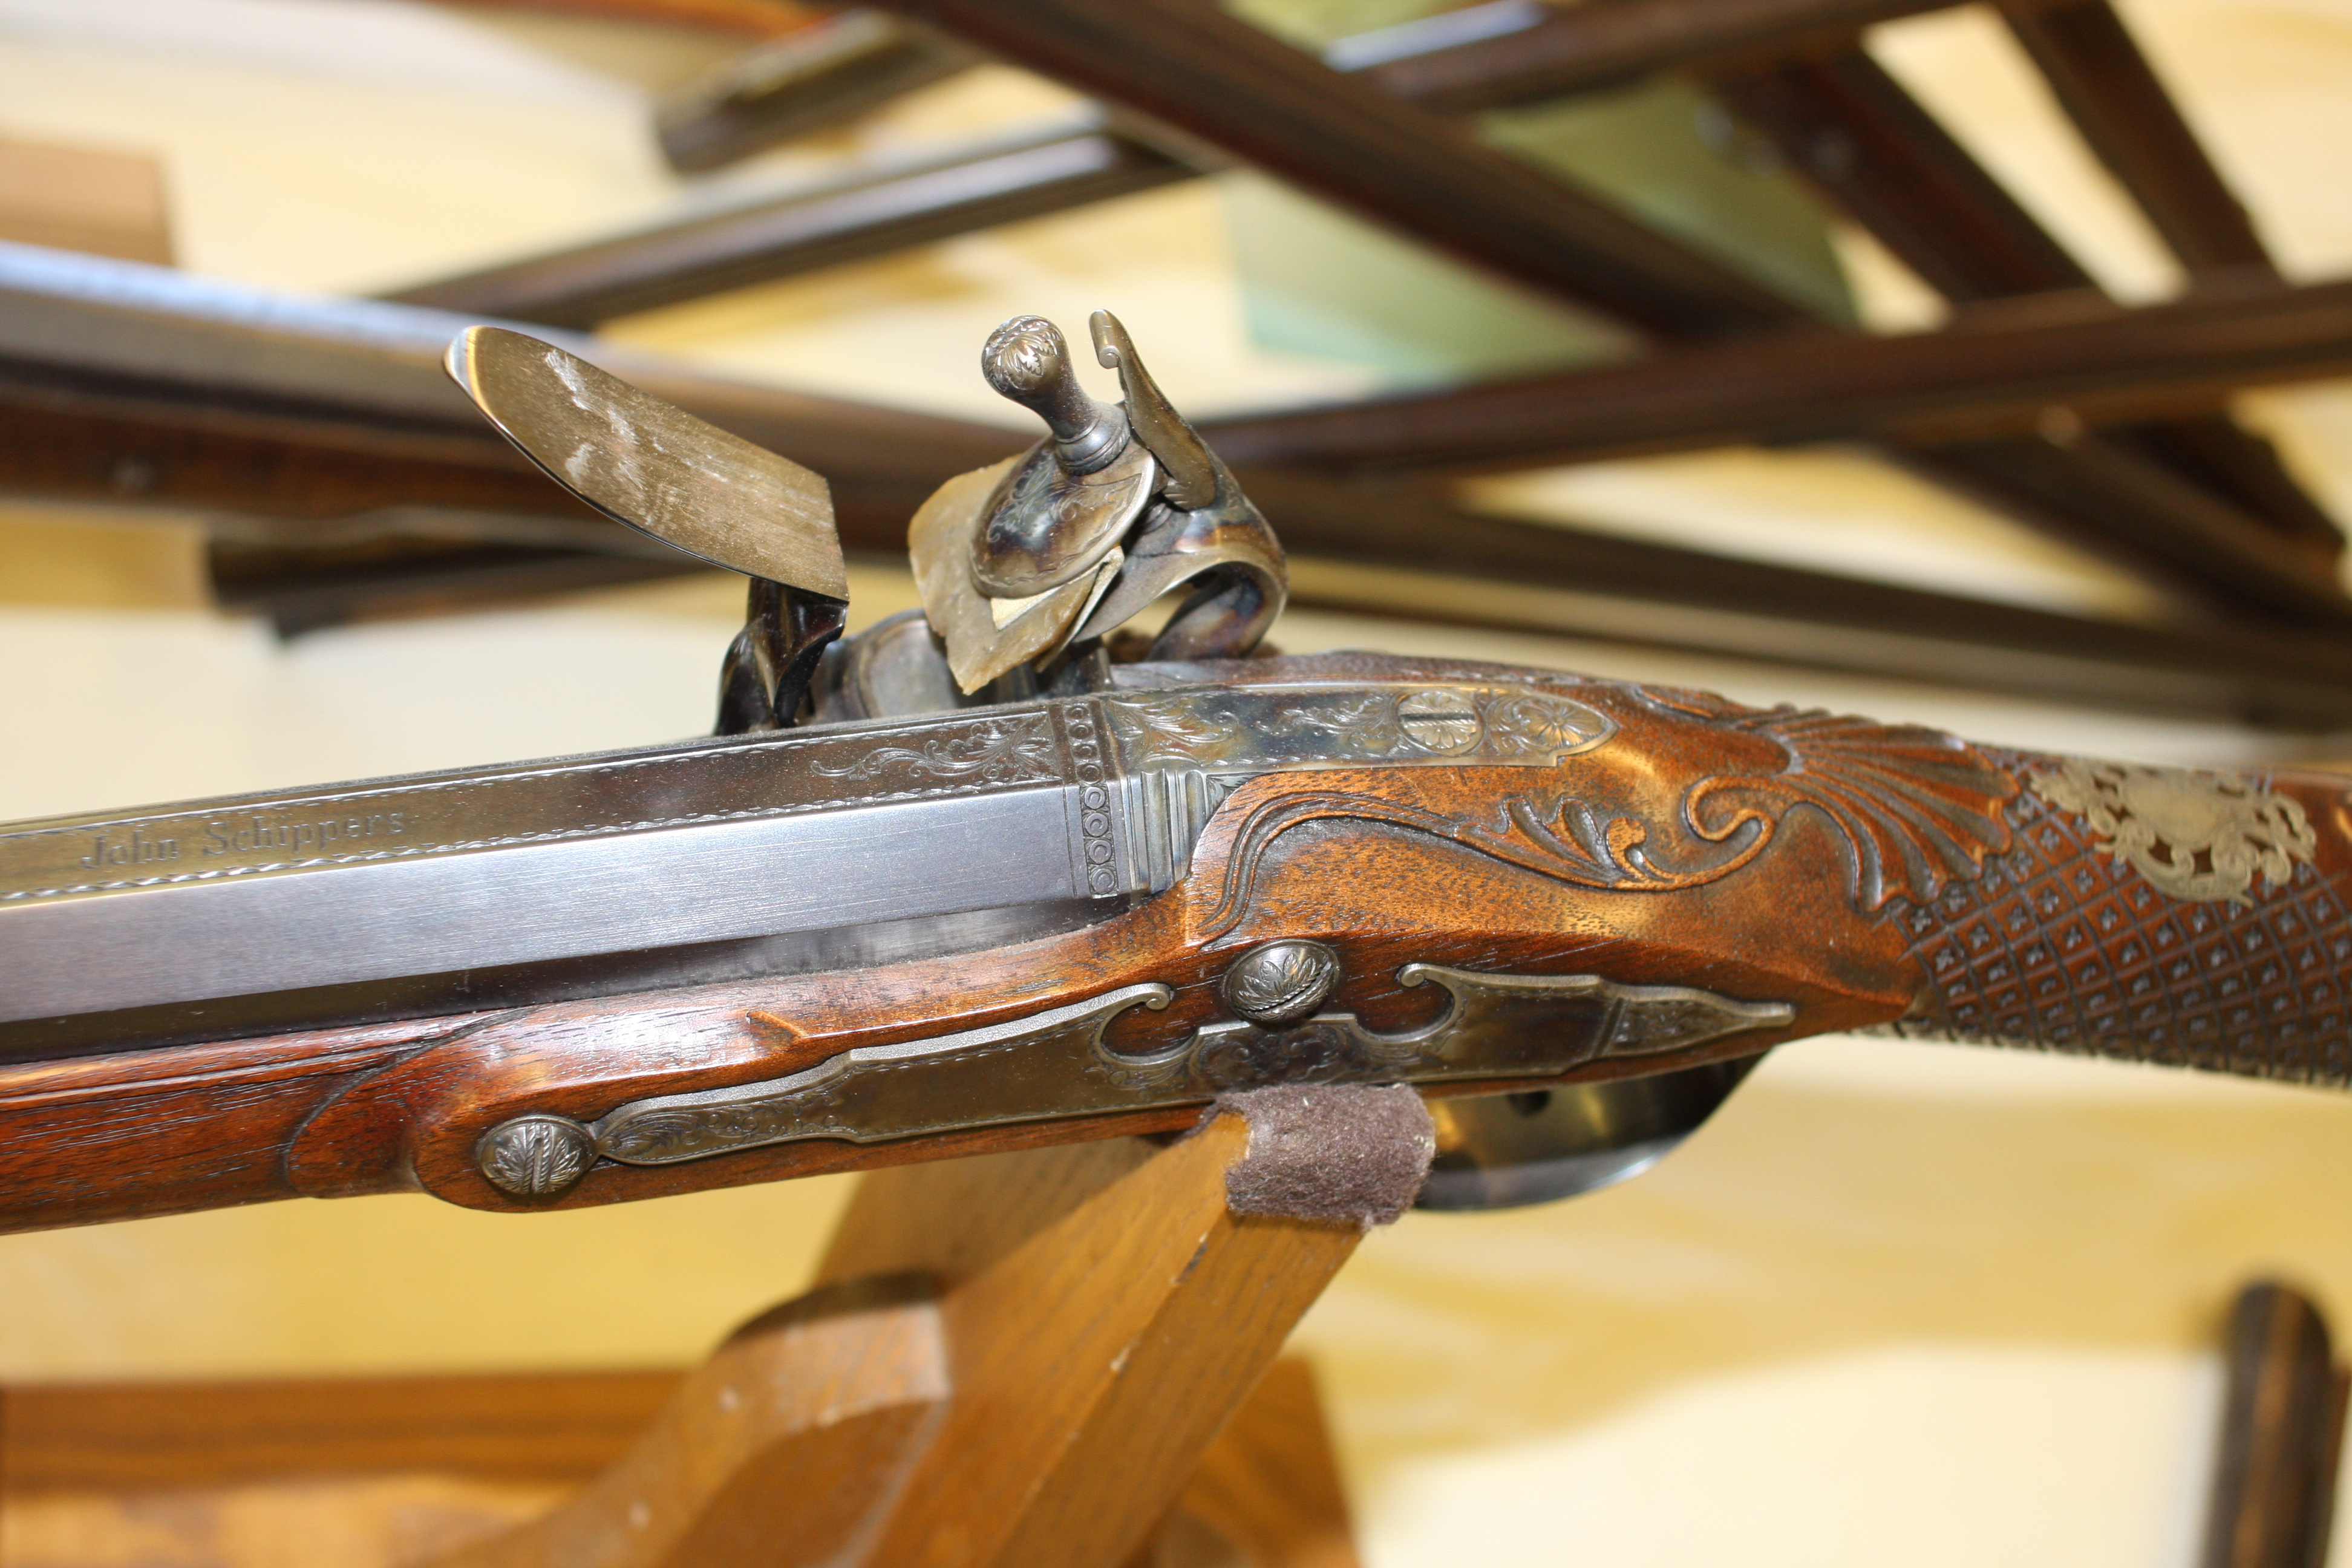
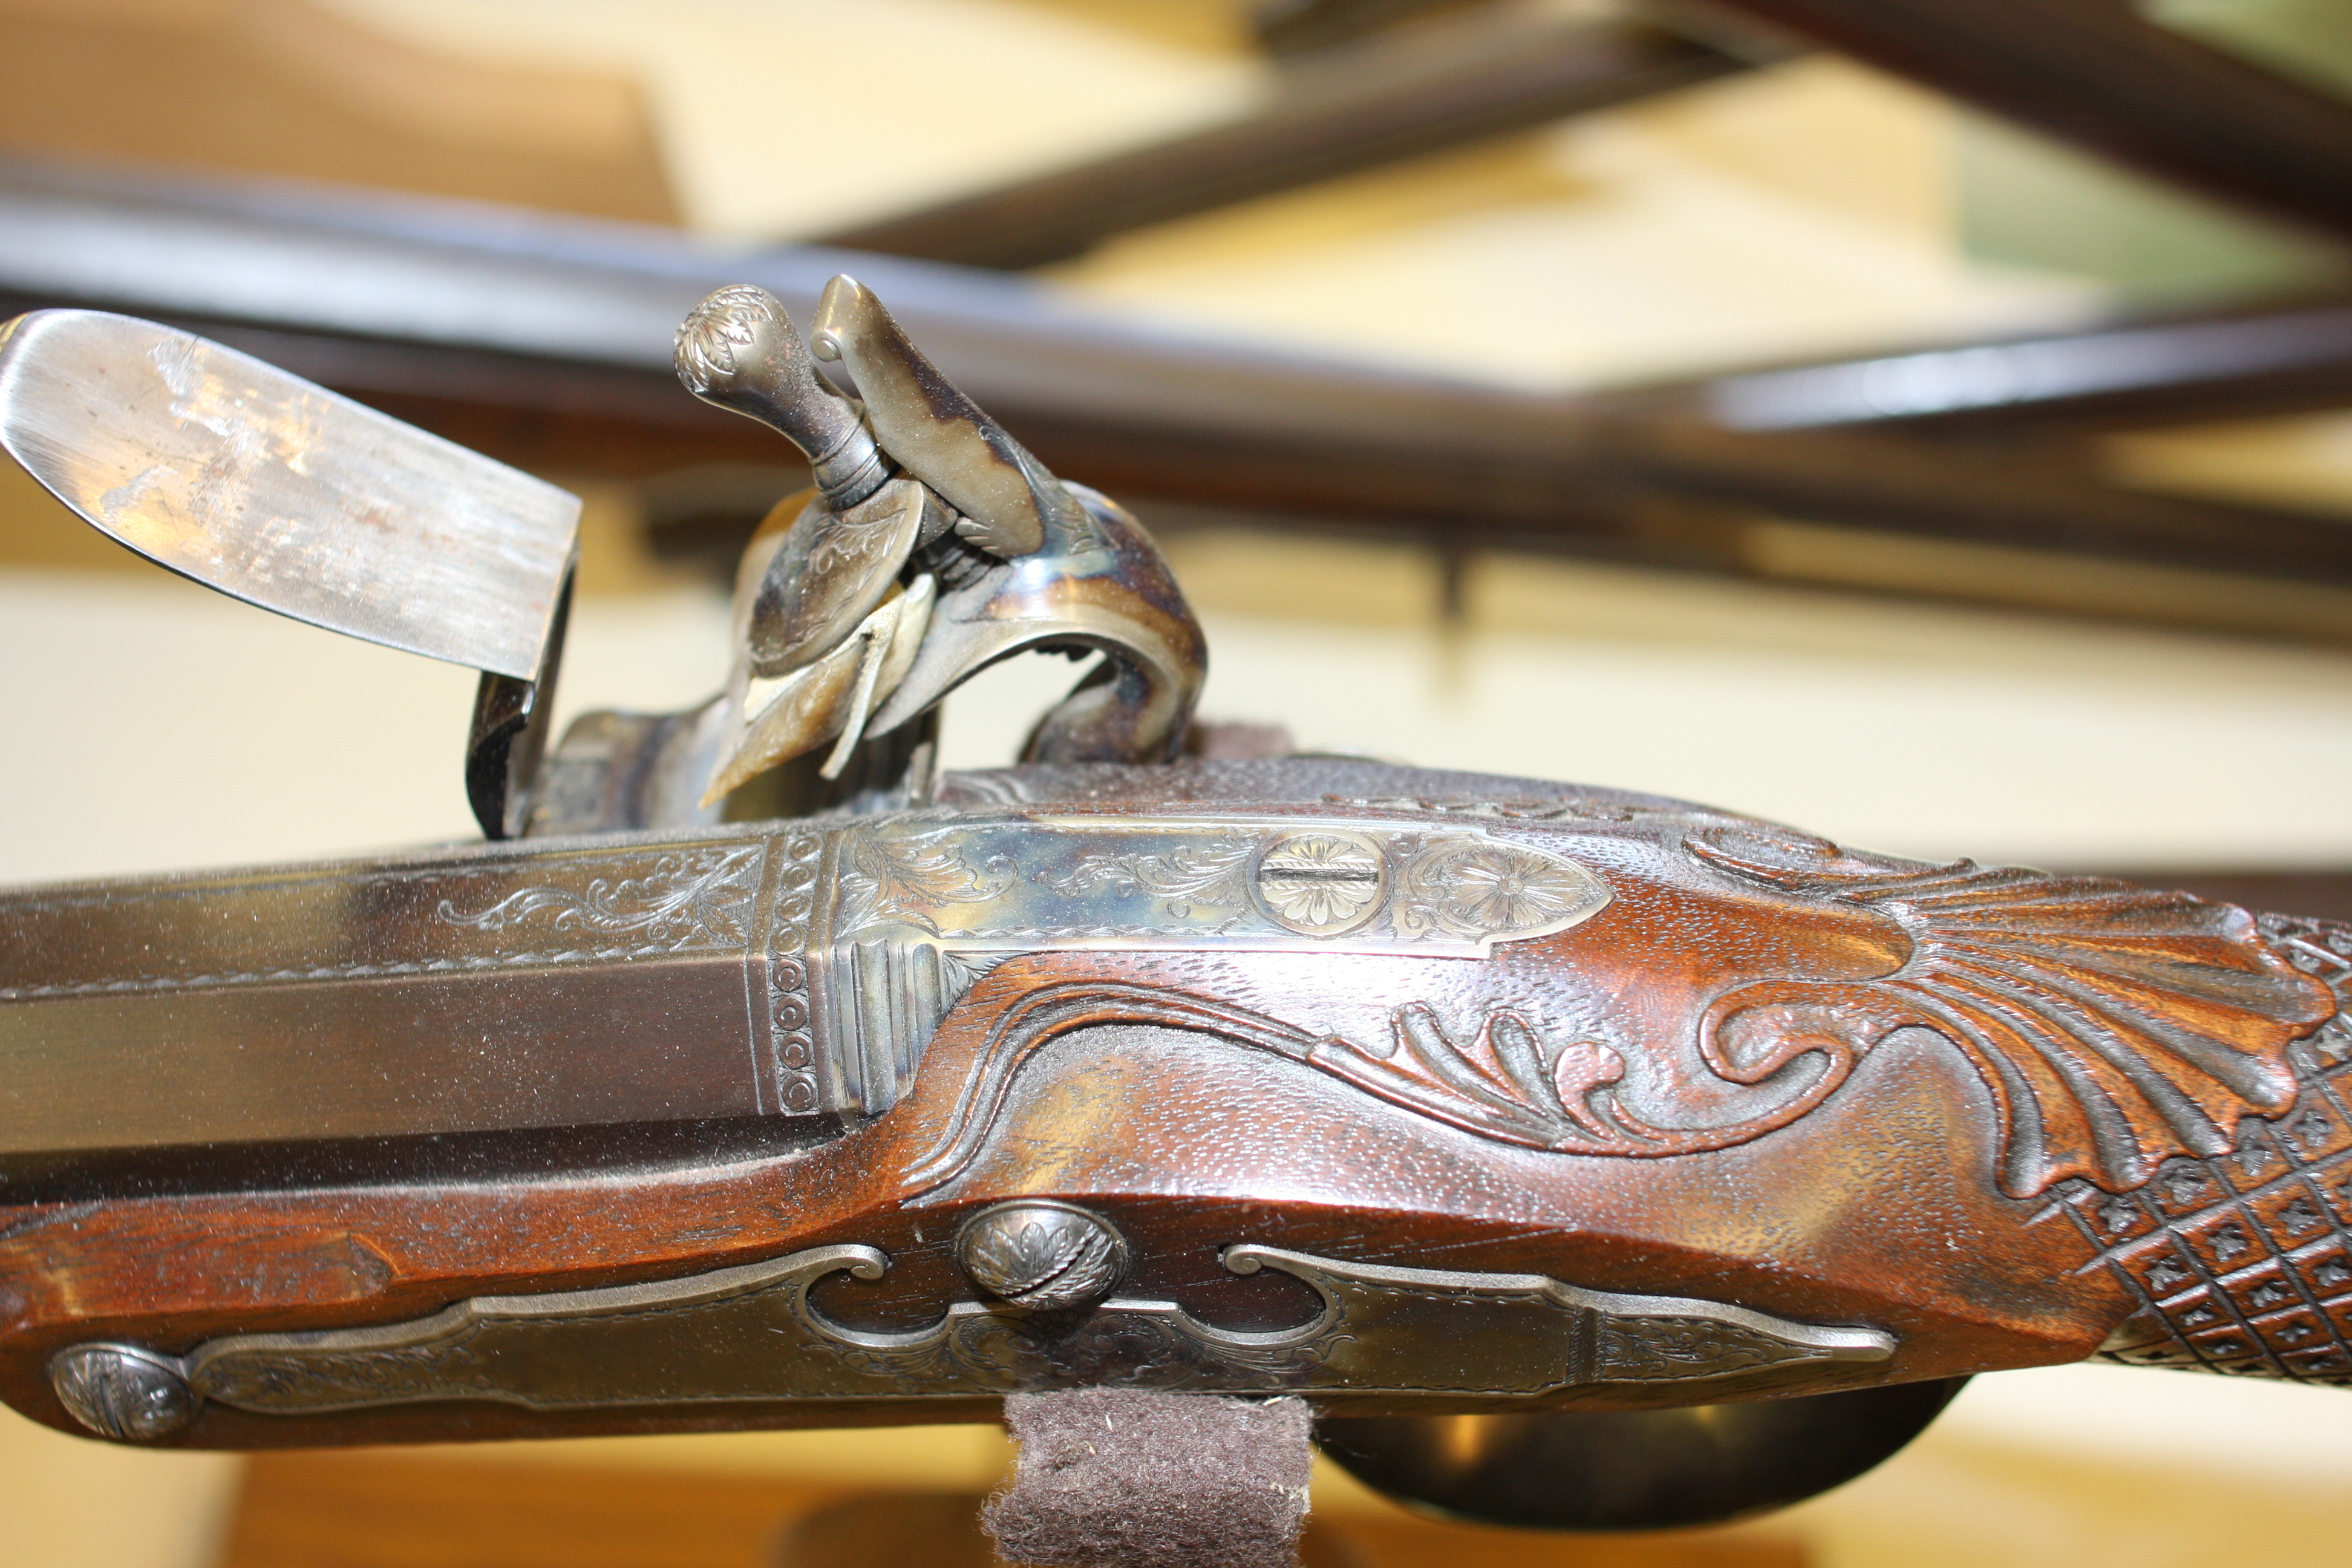
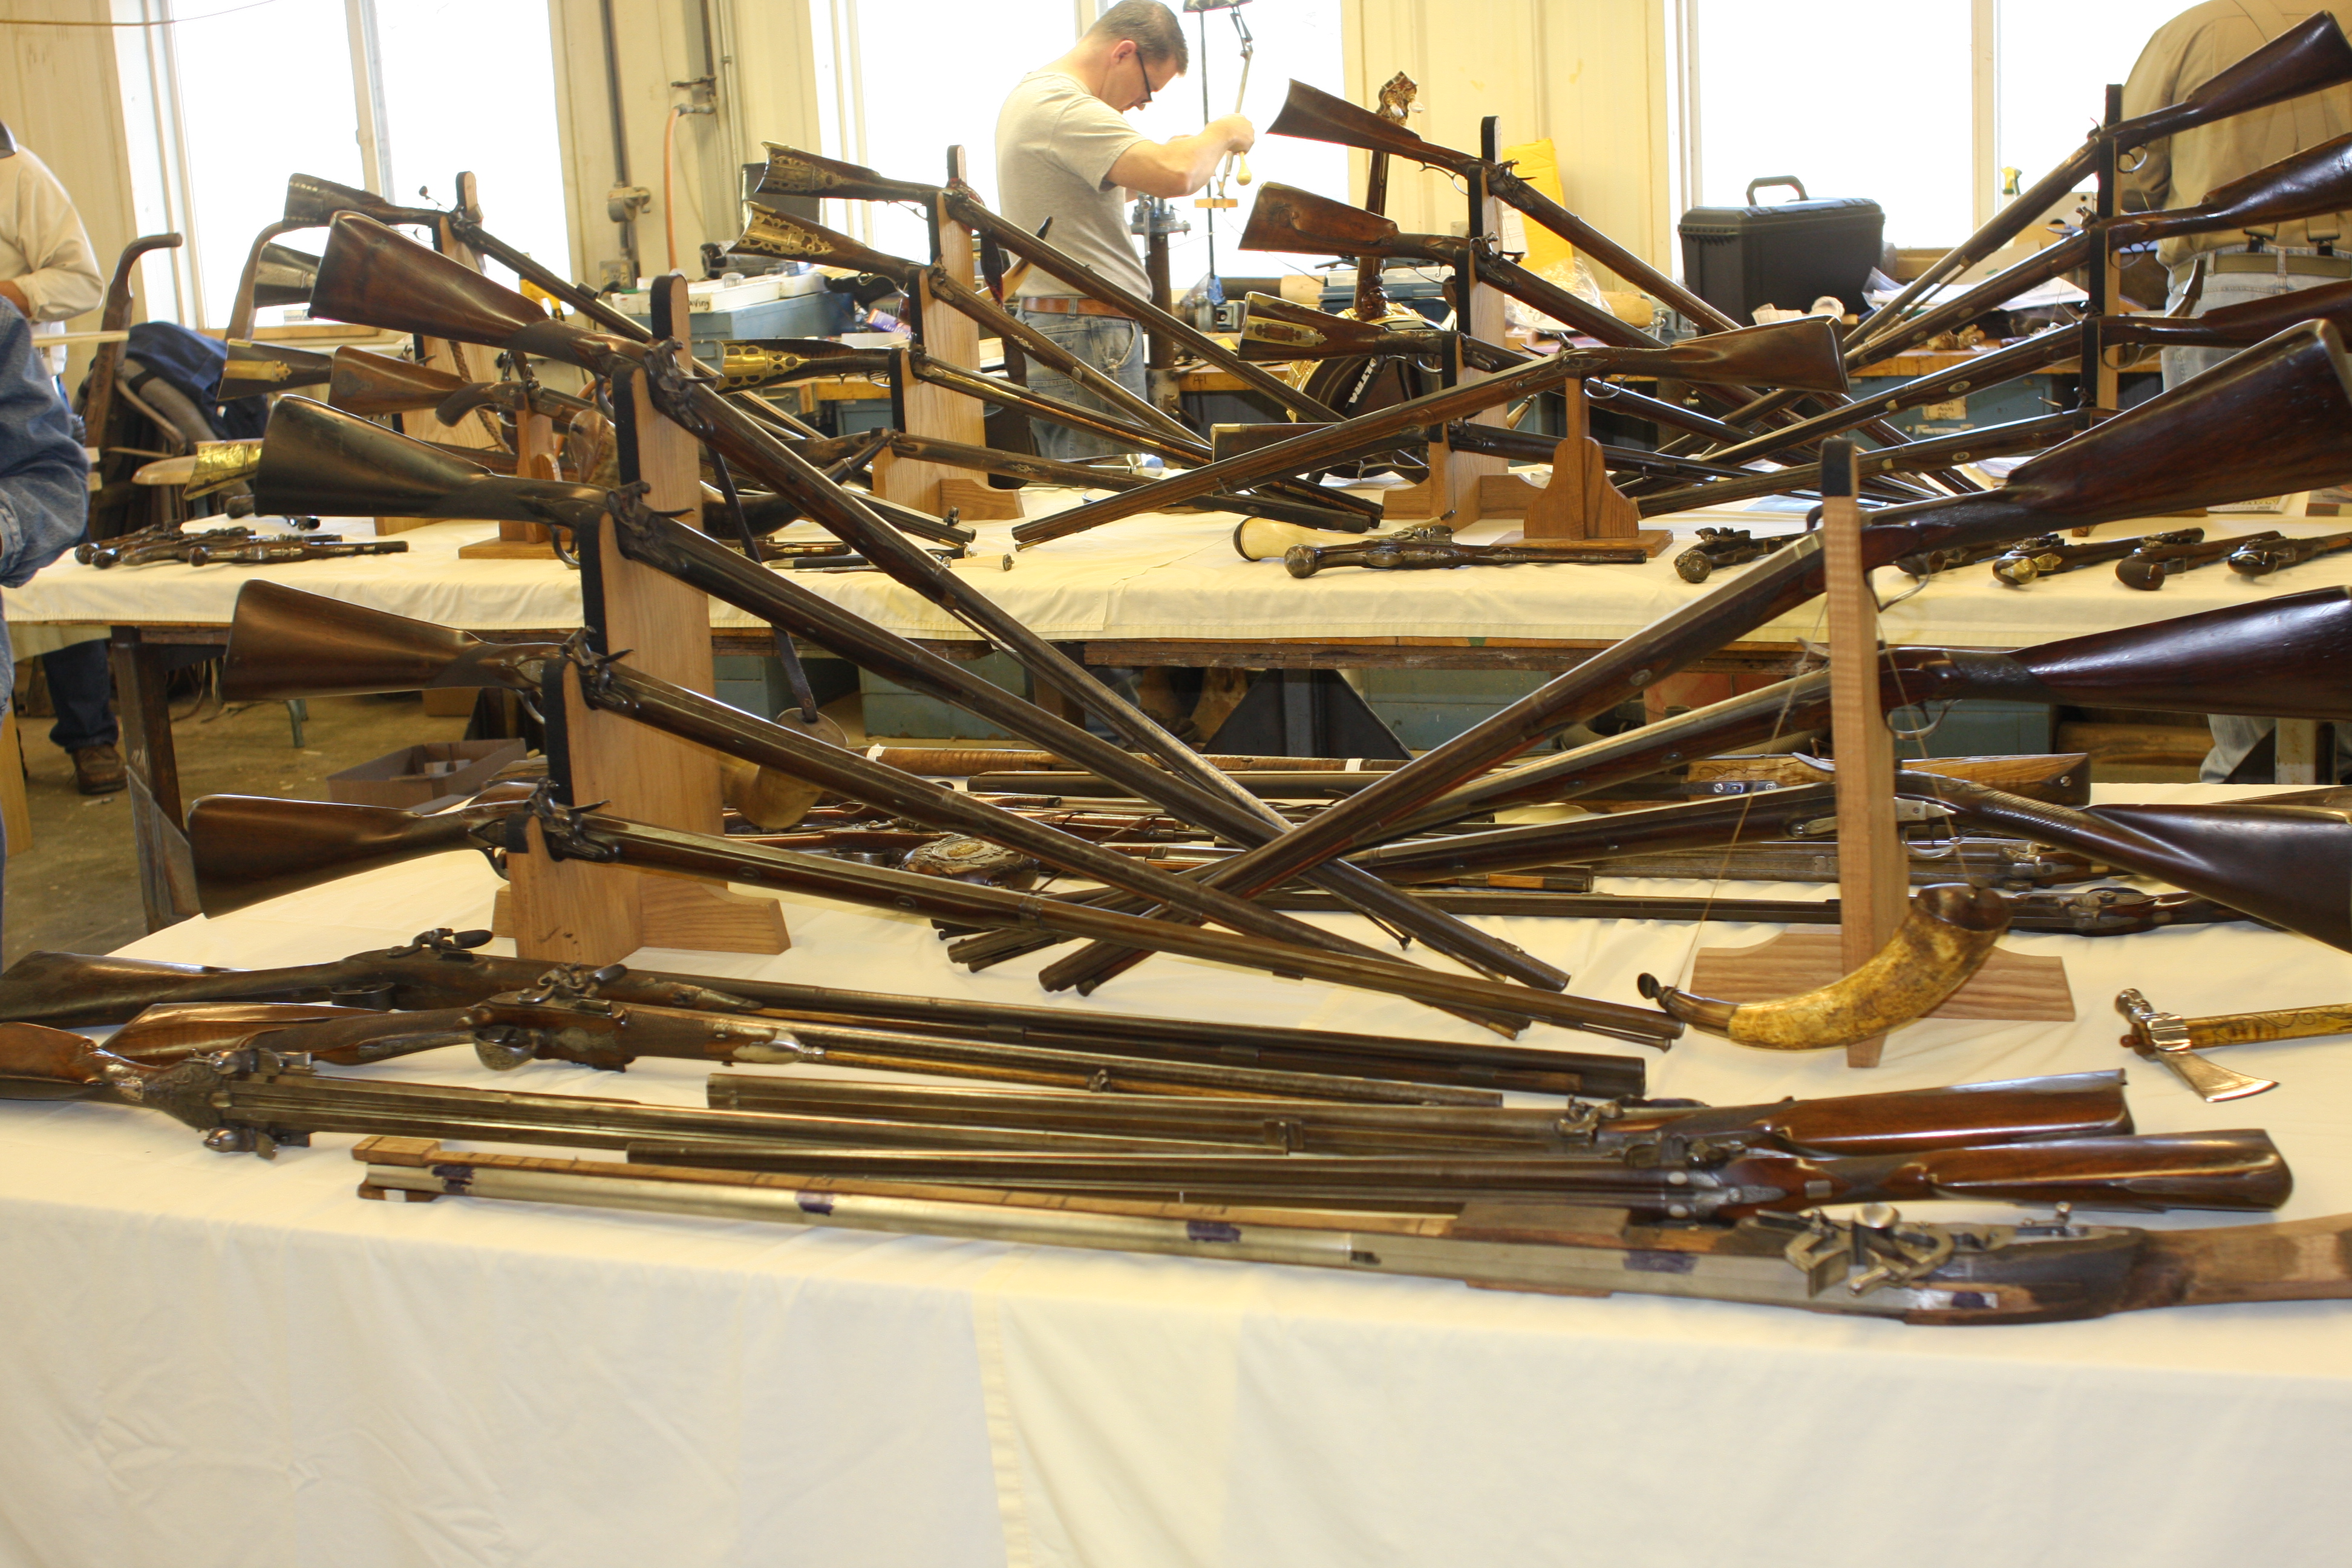
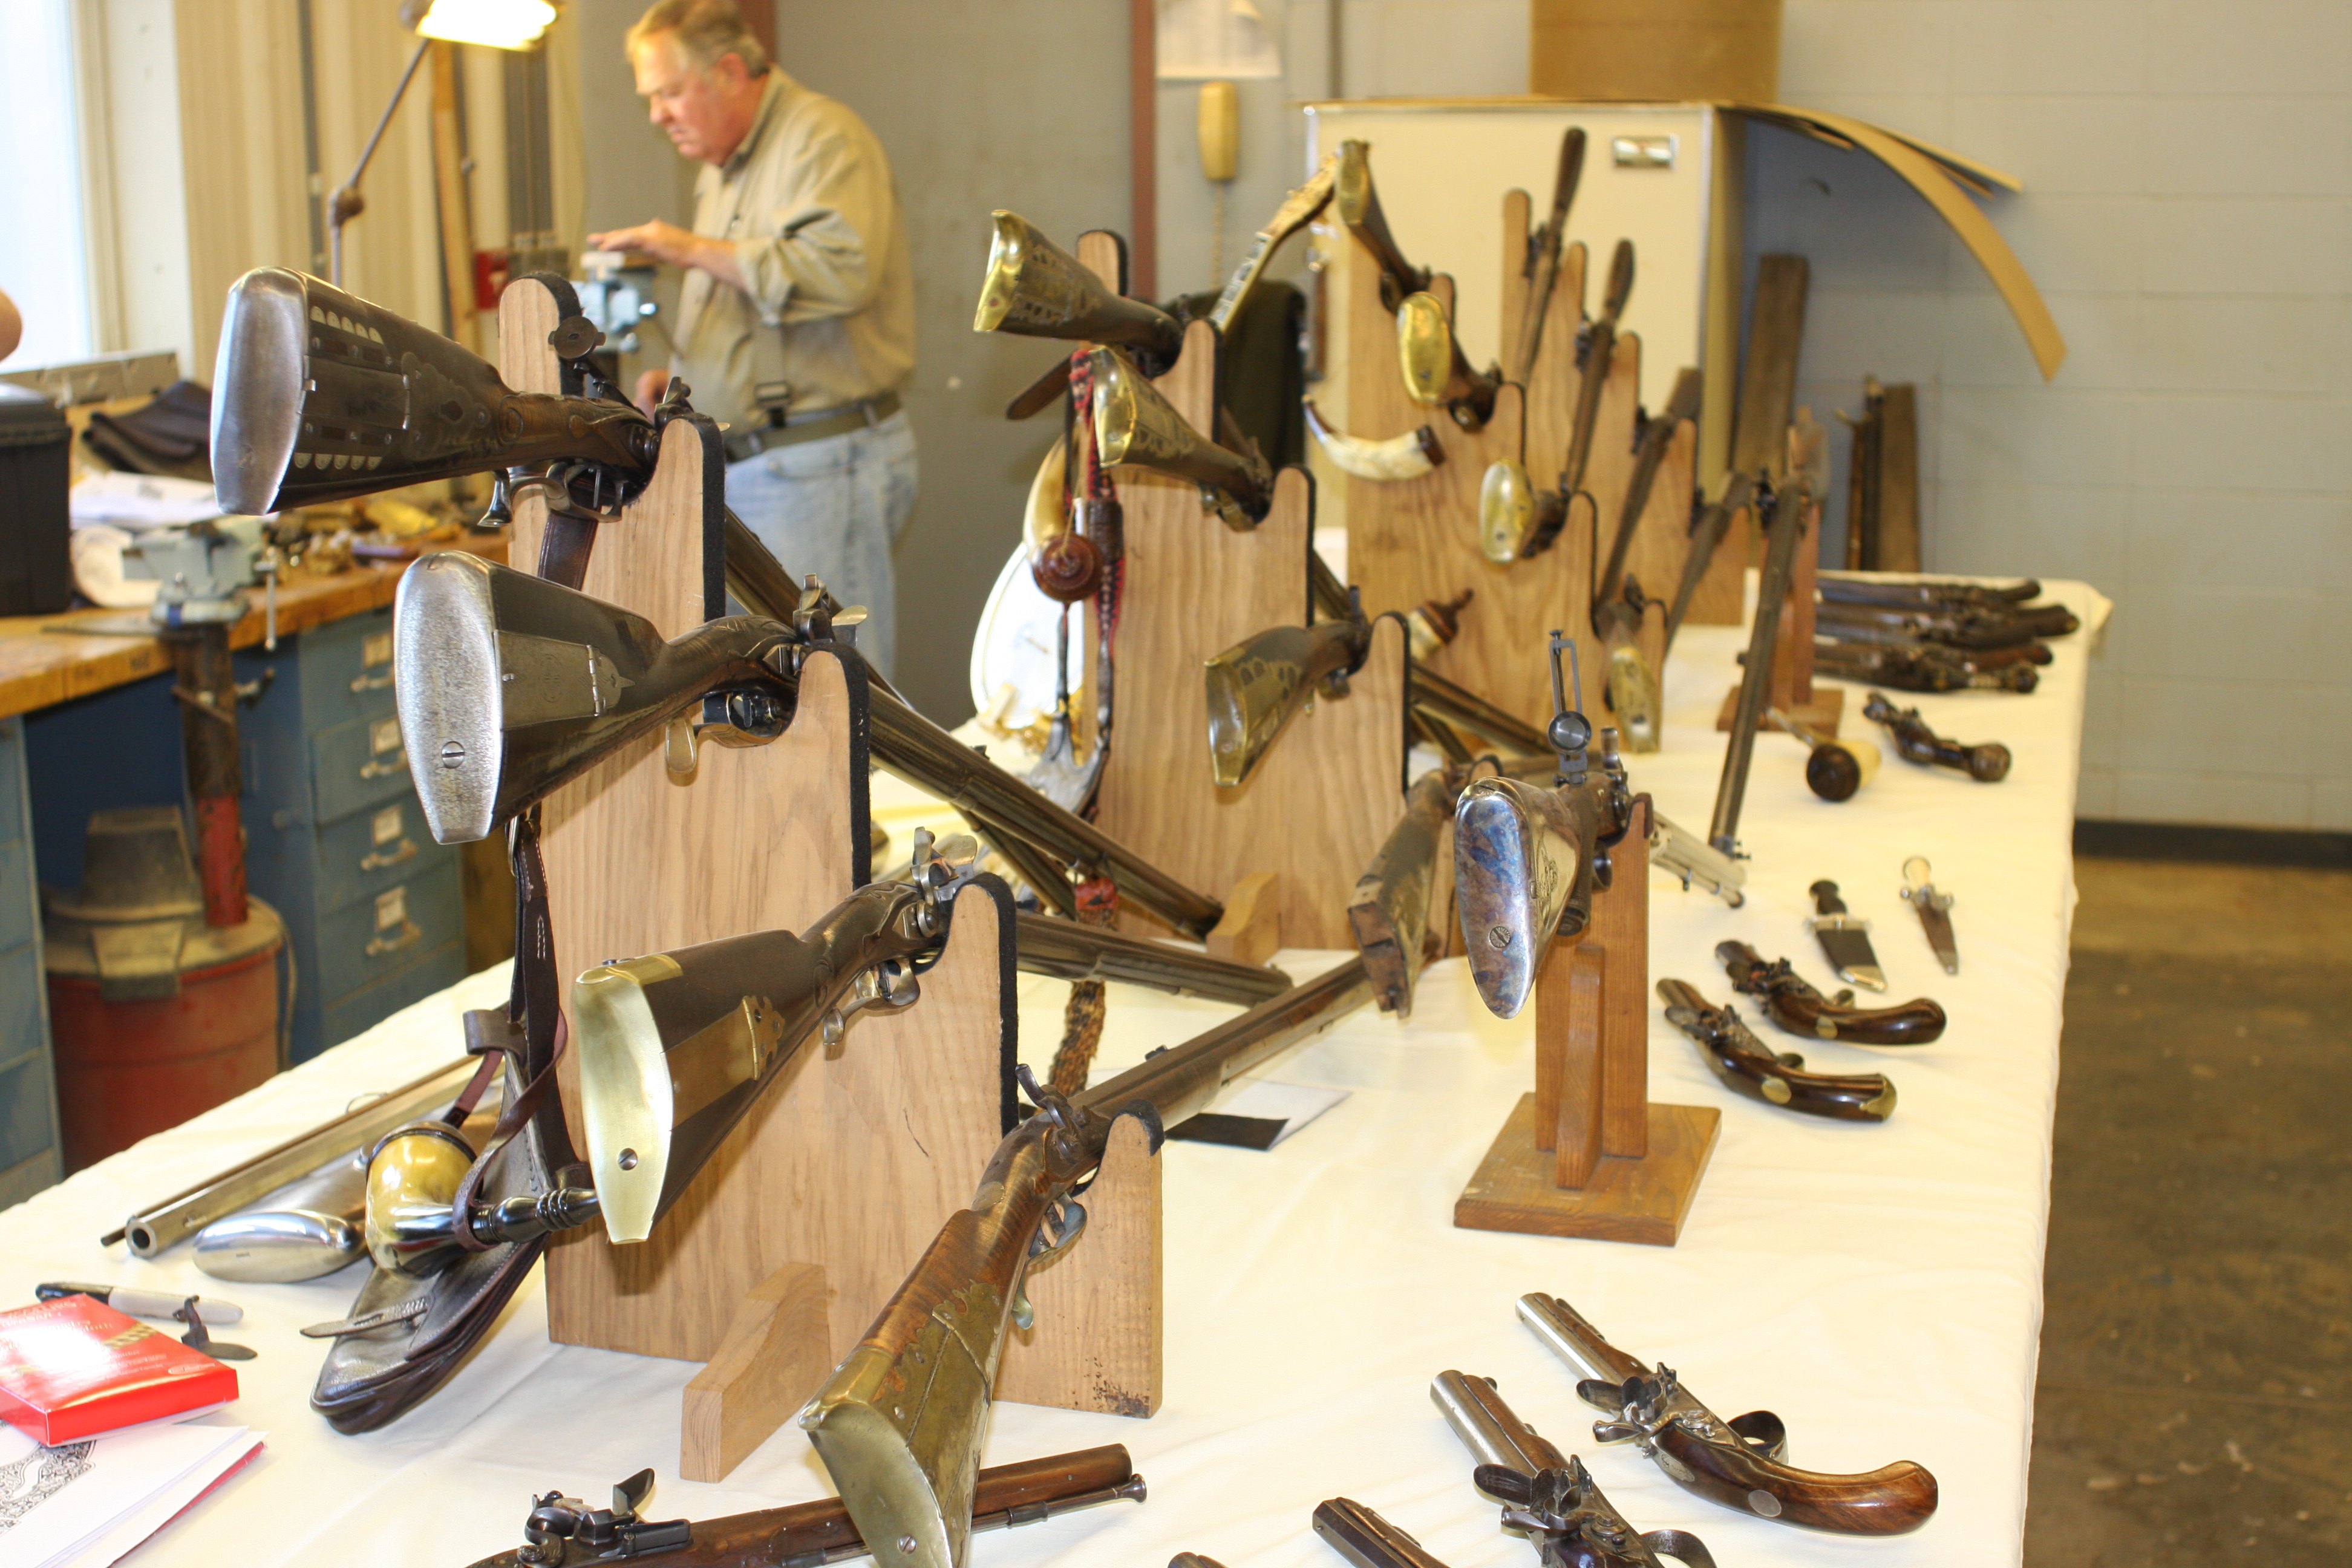
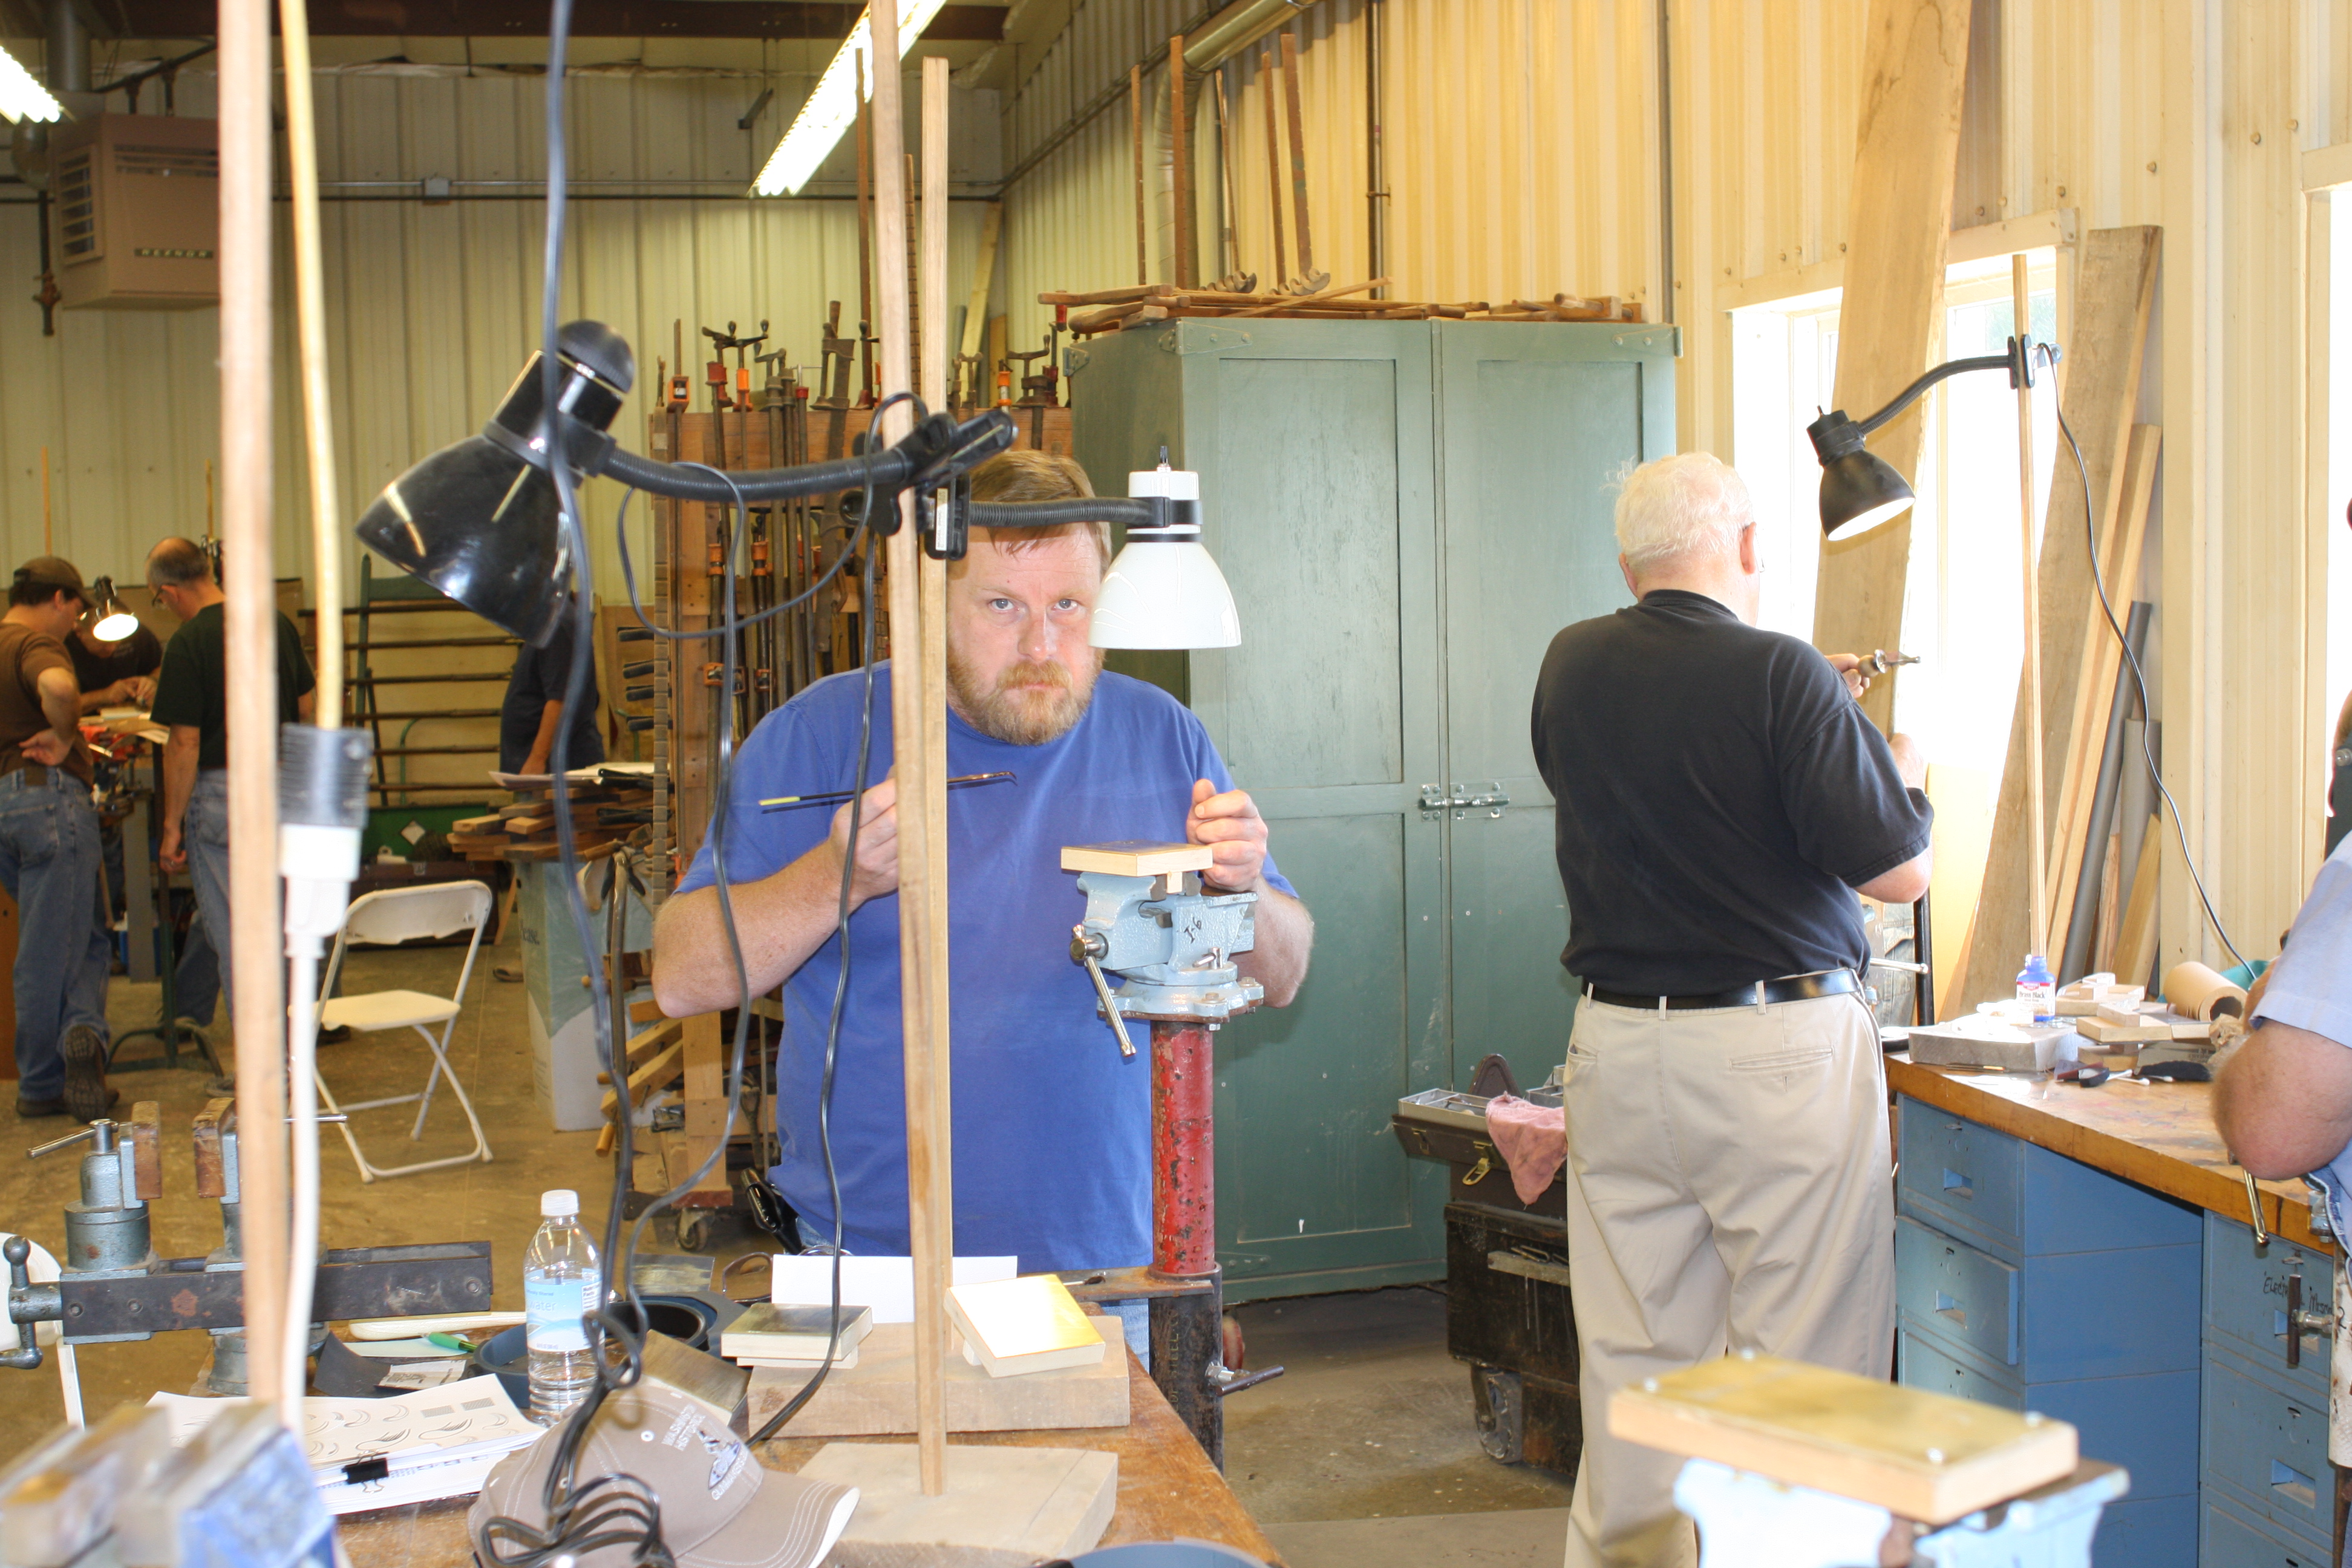
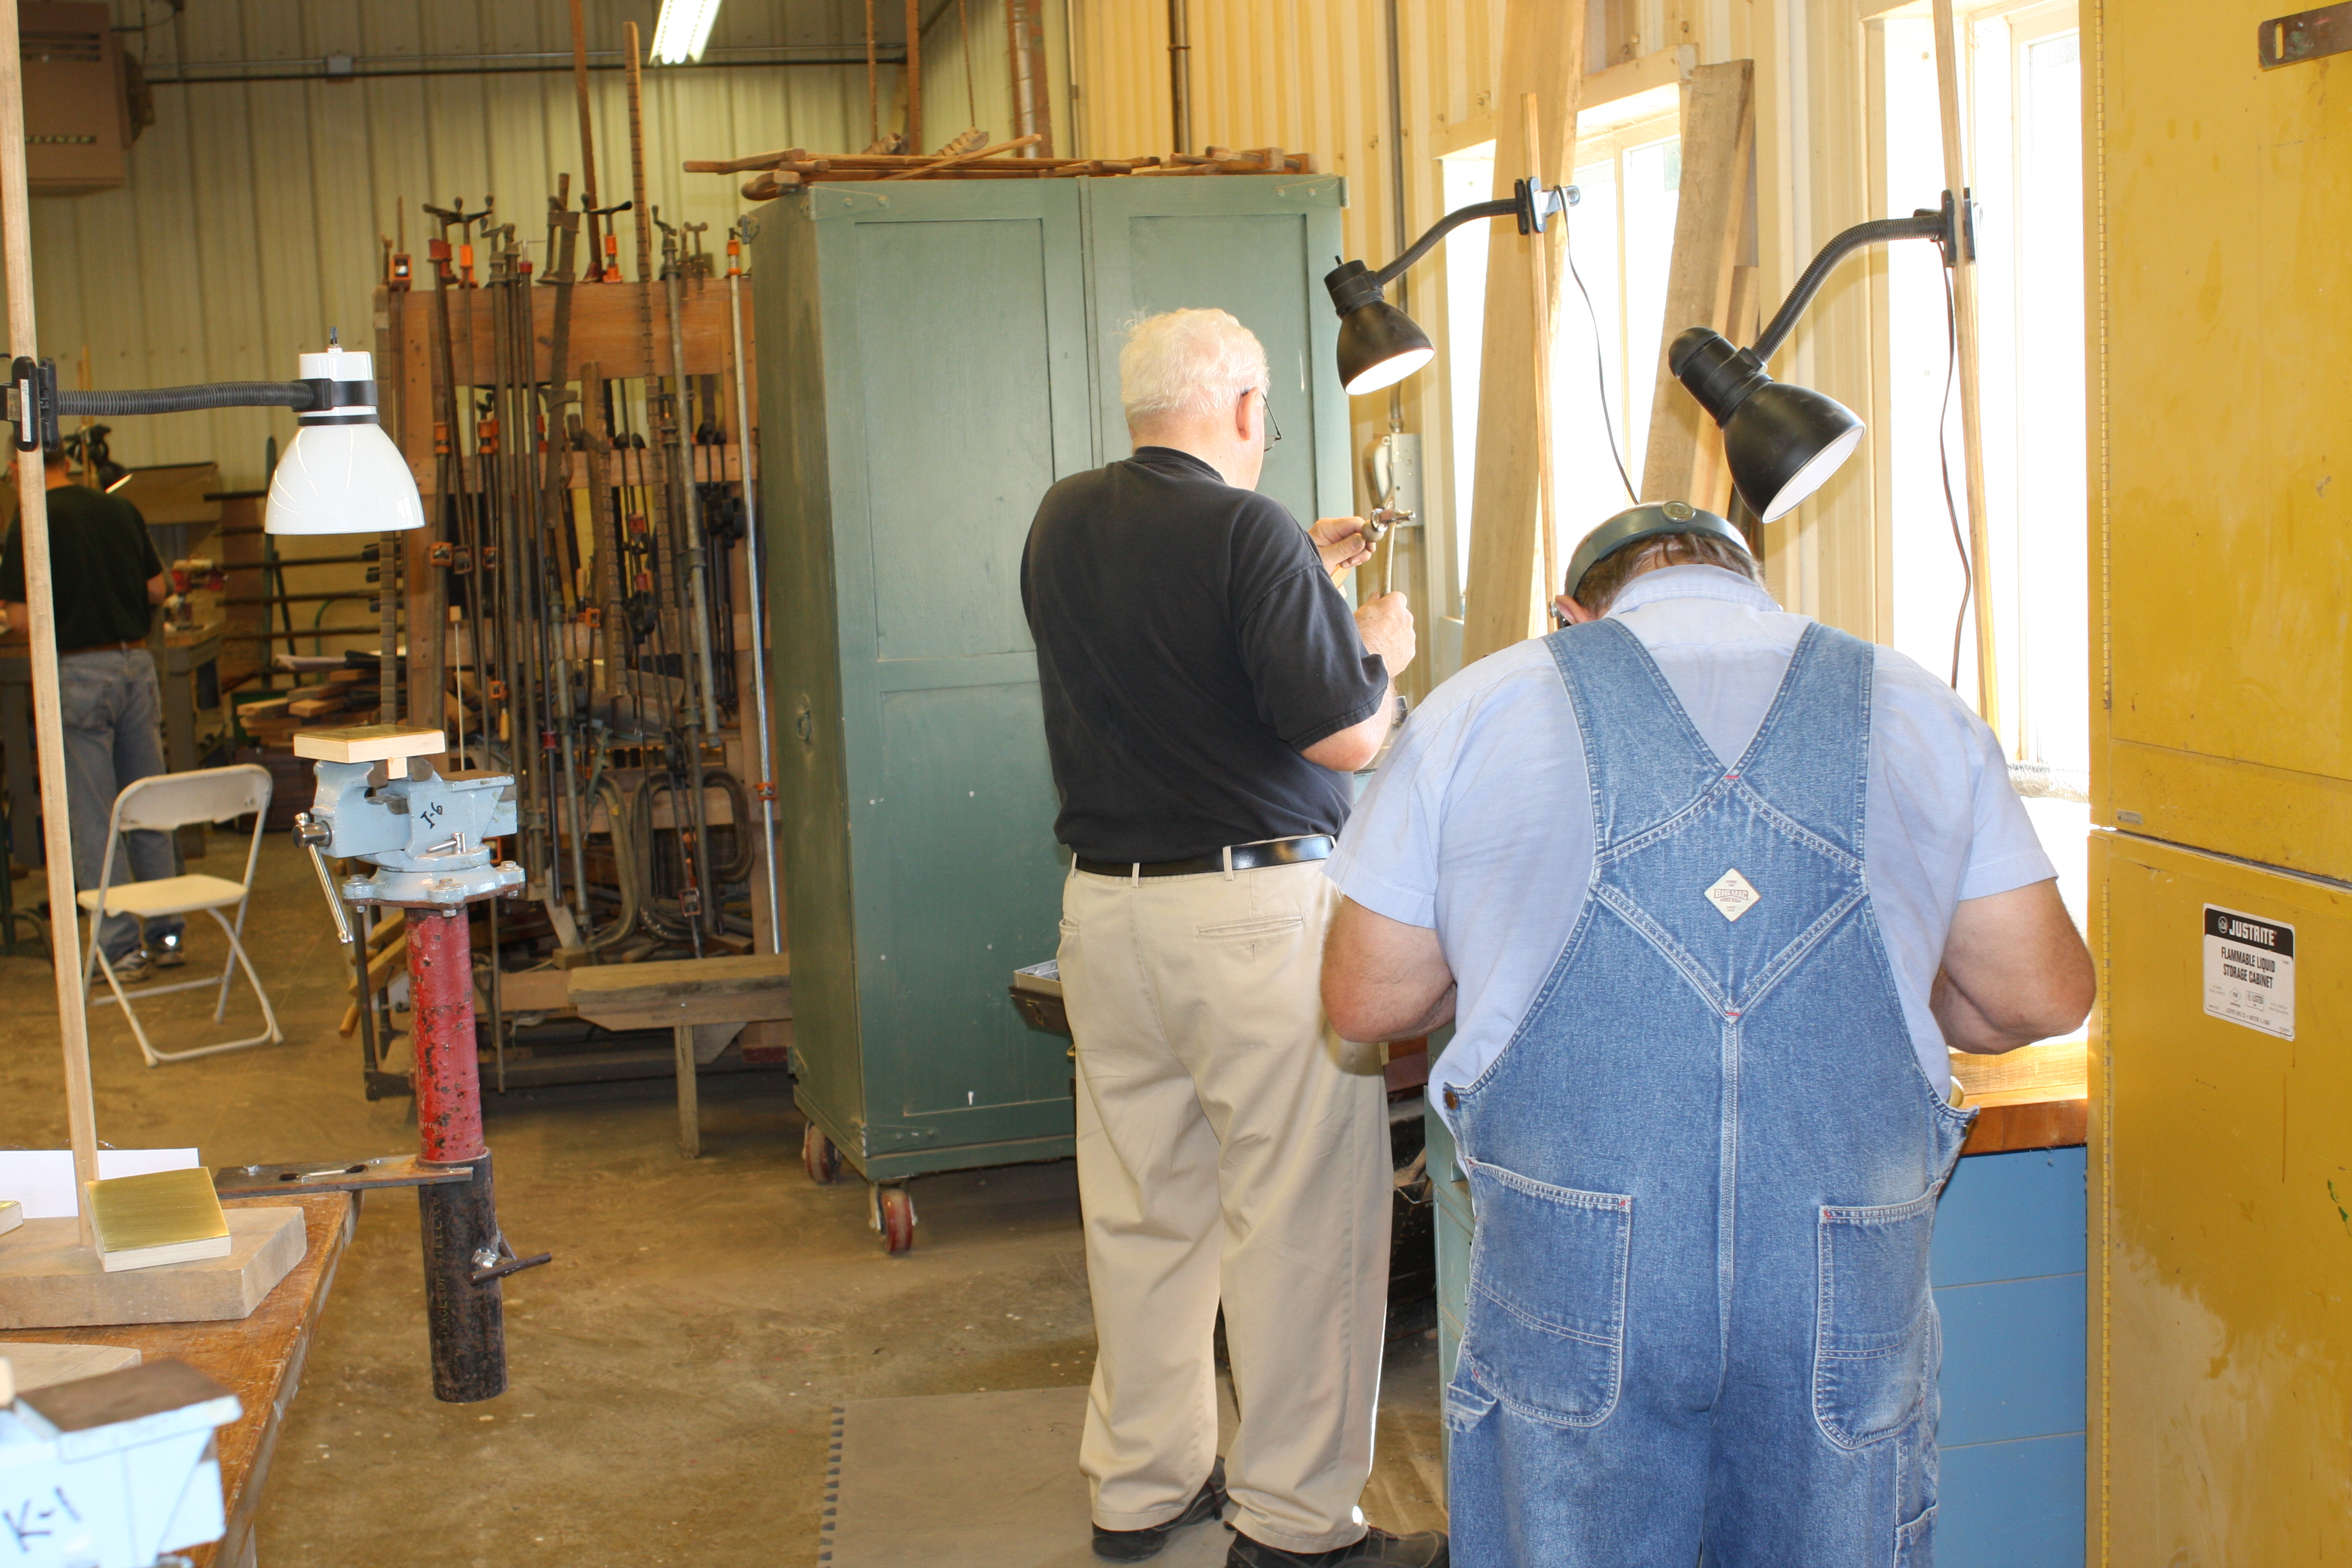
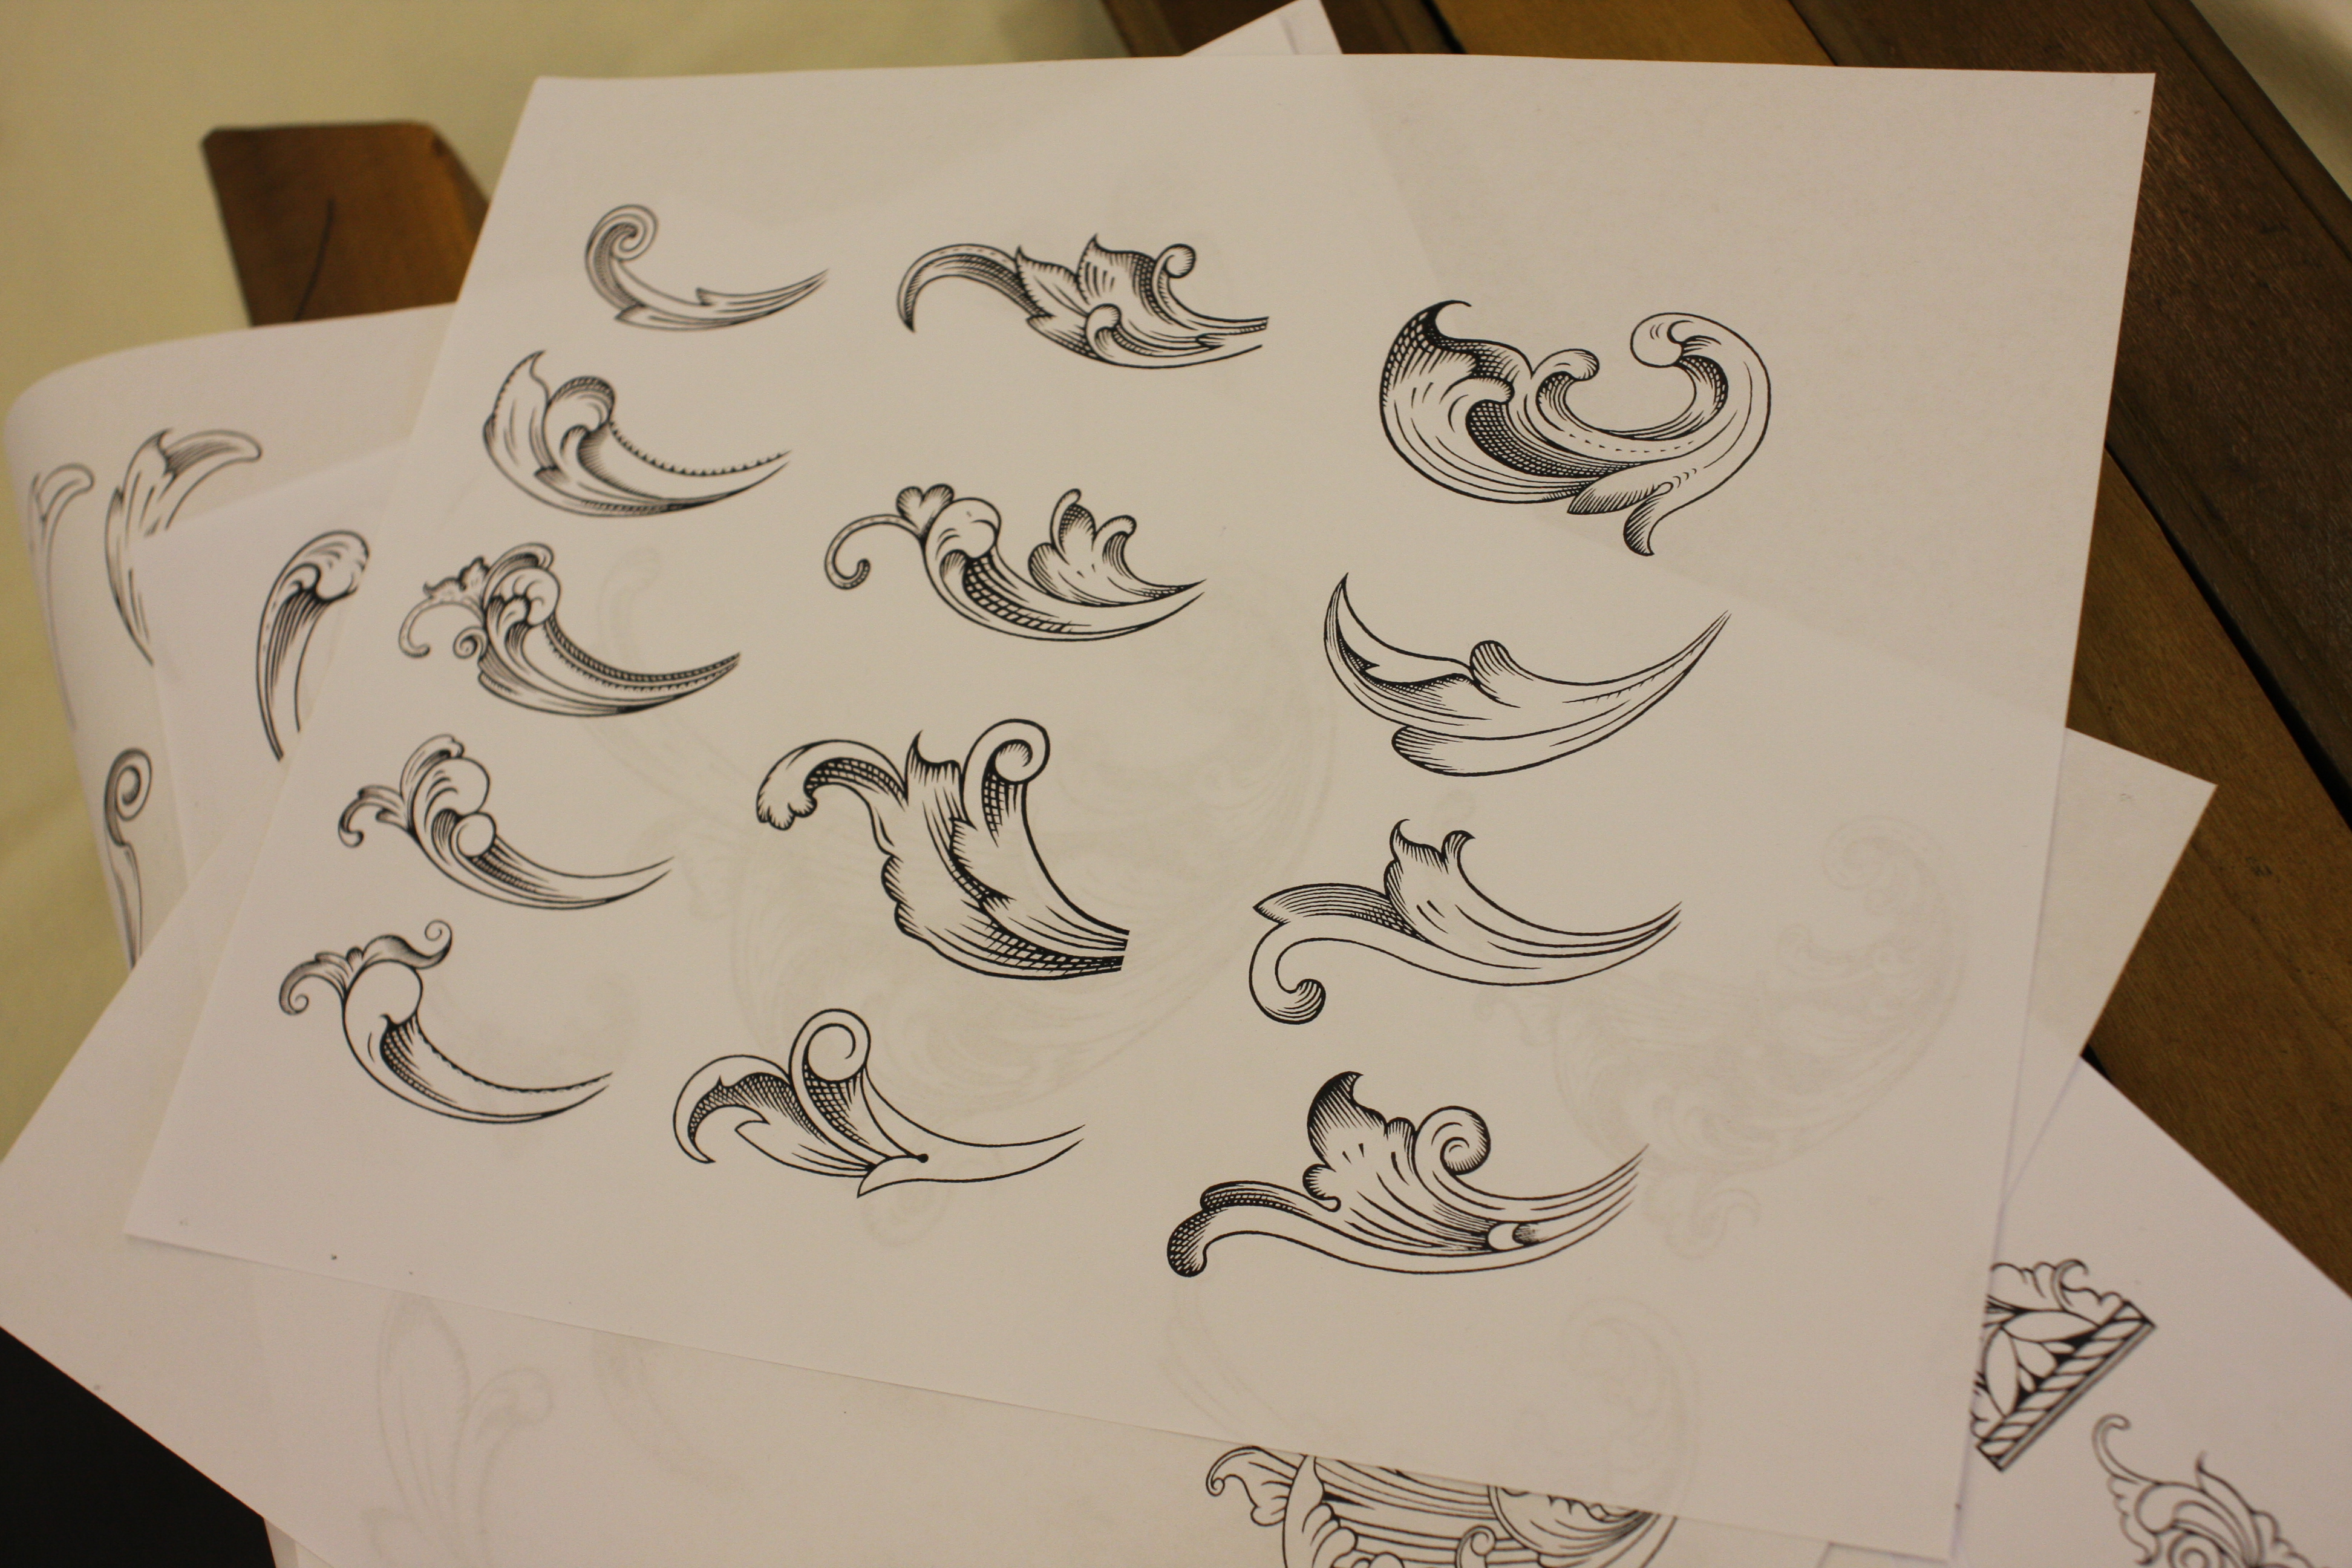
John Schipper has taught the engraving class at Conner Prairie for many years. I first met John and saw his work at the Conner Prairie Gun Show also many years ago. His considable skills are evidenced in the many examples of his work. The tables are full of guns that John has engraved and originals John brought to show engraving styles. His engraving book is finished and ready to be published.
Since I have no talent nor instruction in engraving, I can only marvel at the work done by John and his students. This would be an excellent class for a rifle maker wanting to shorten the learning curve with his engraving. Click on Engraving Class #1 or Engraving Class #2 for more photos. (Use your “back” button to return to the article.)
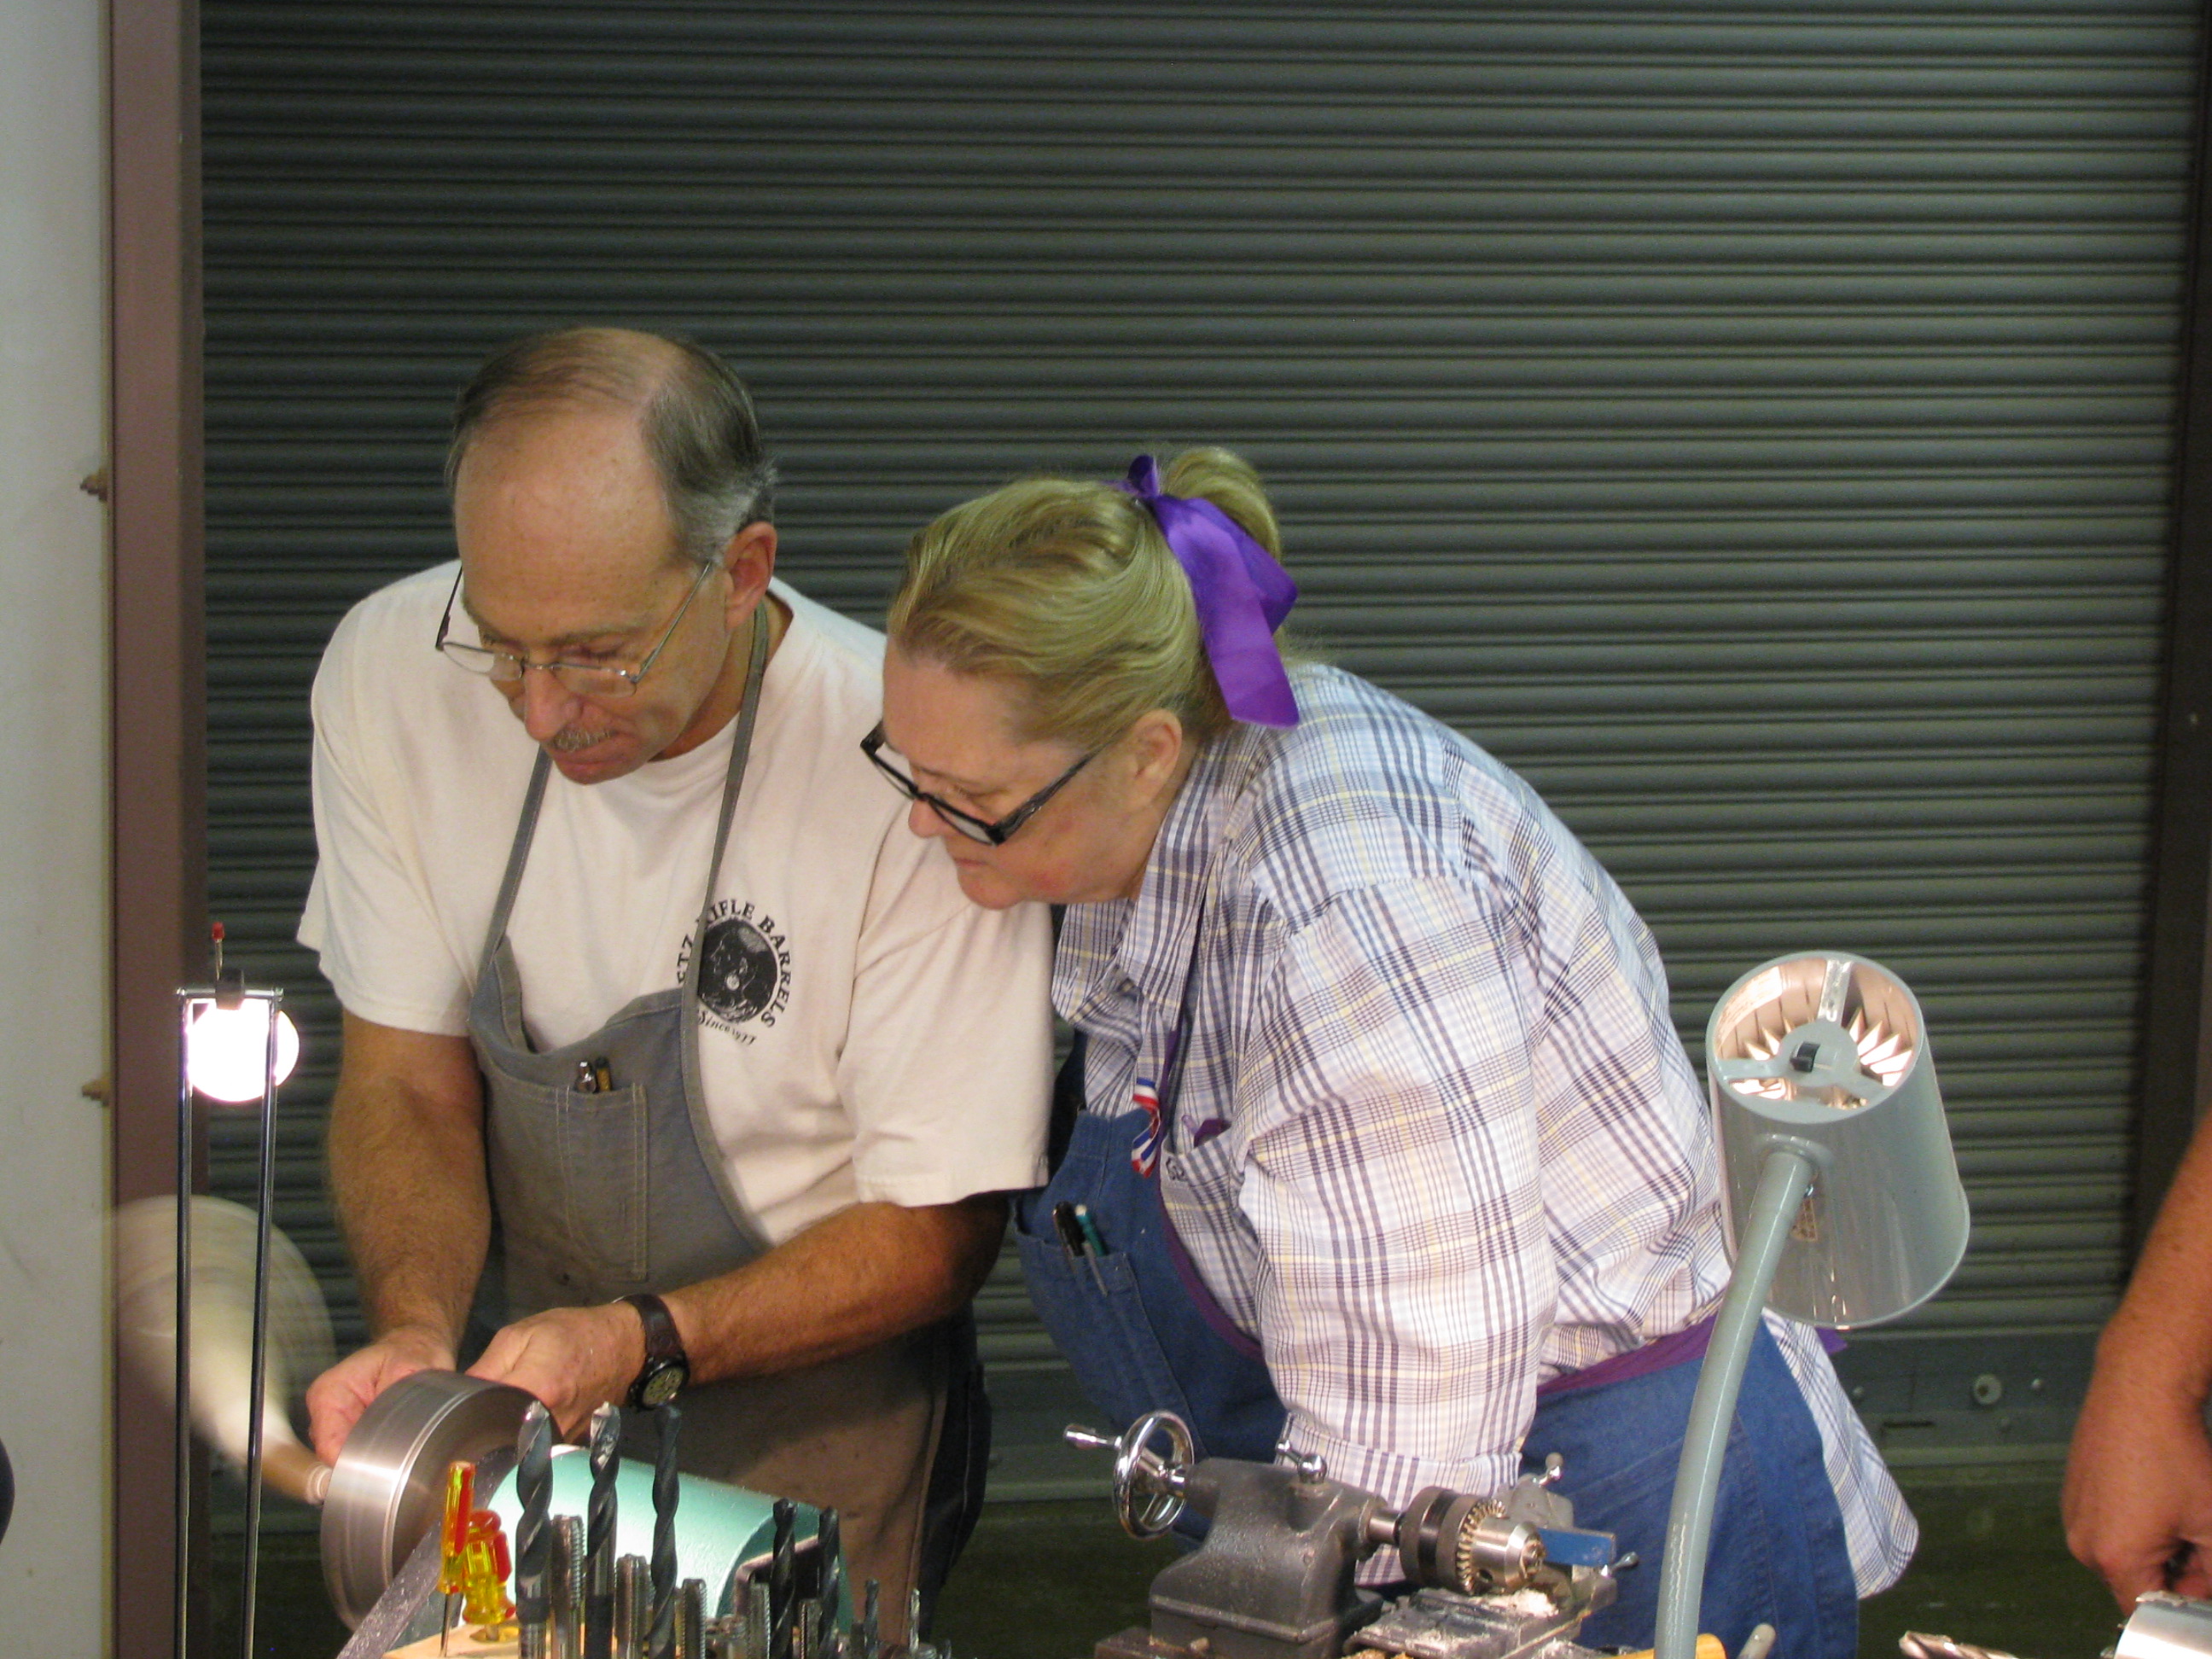
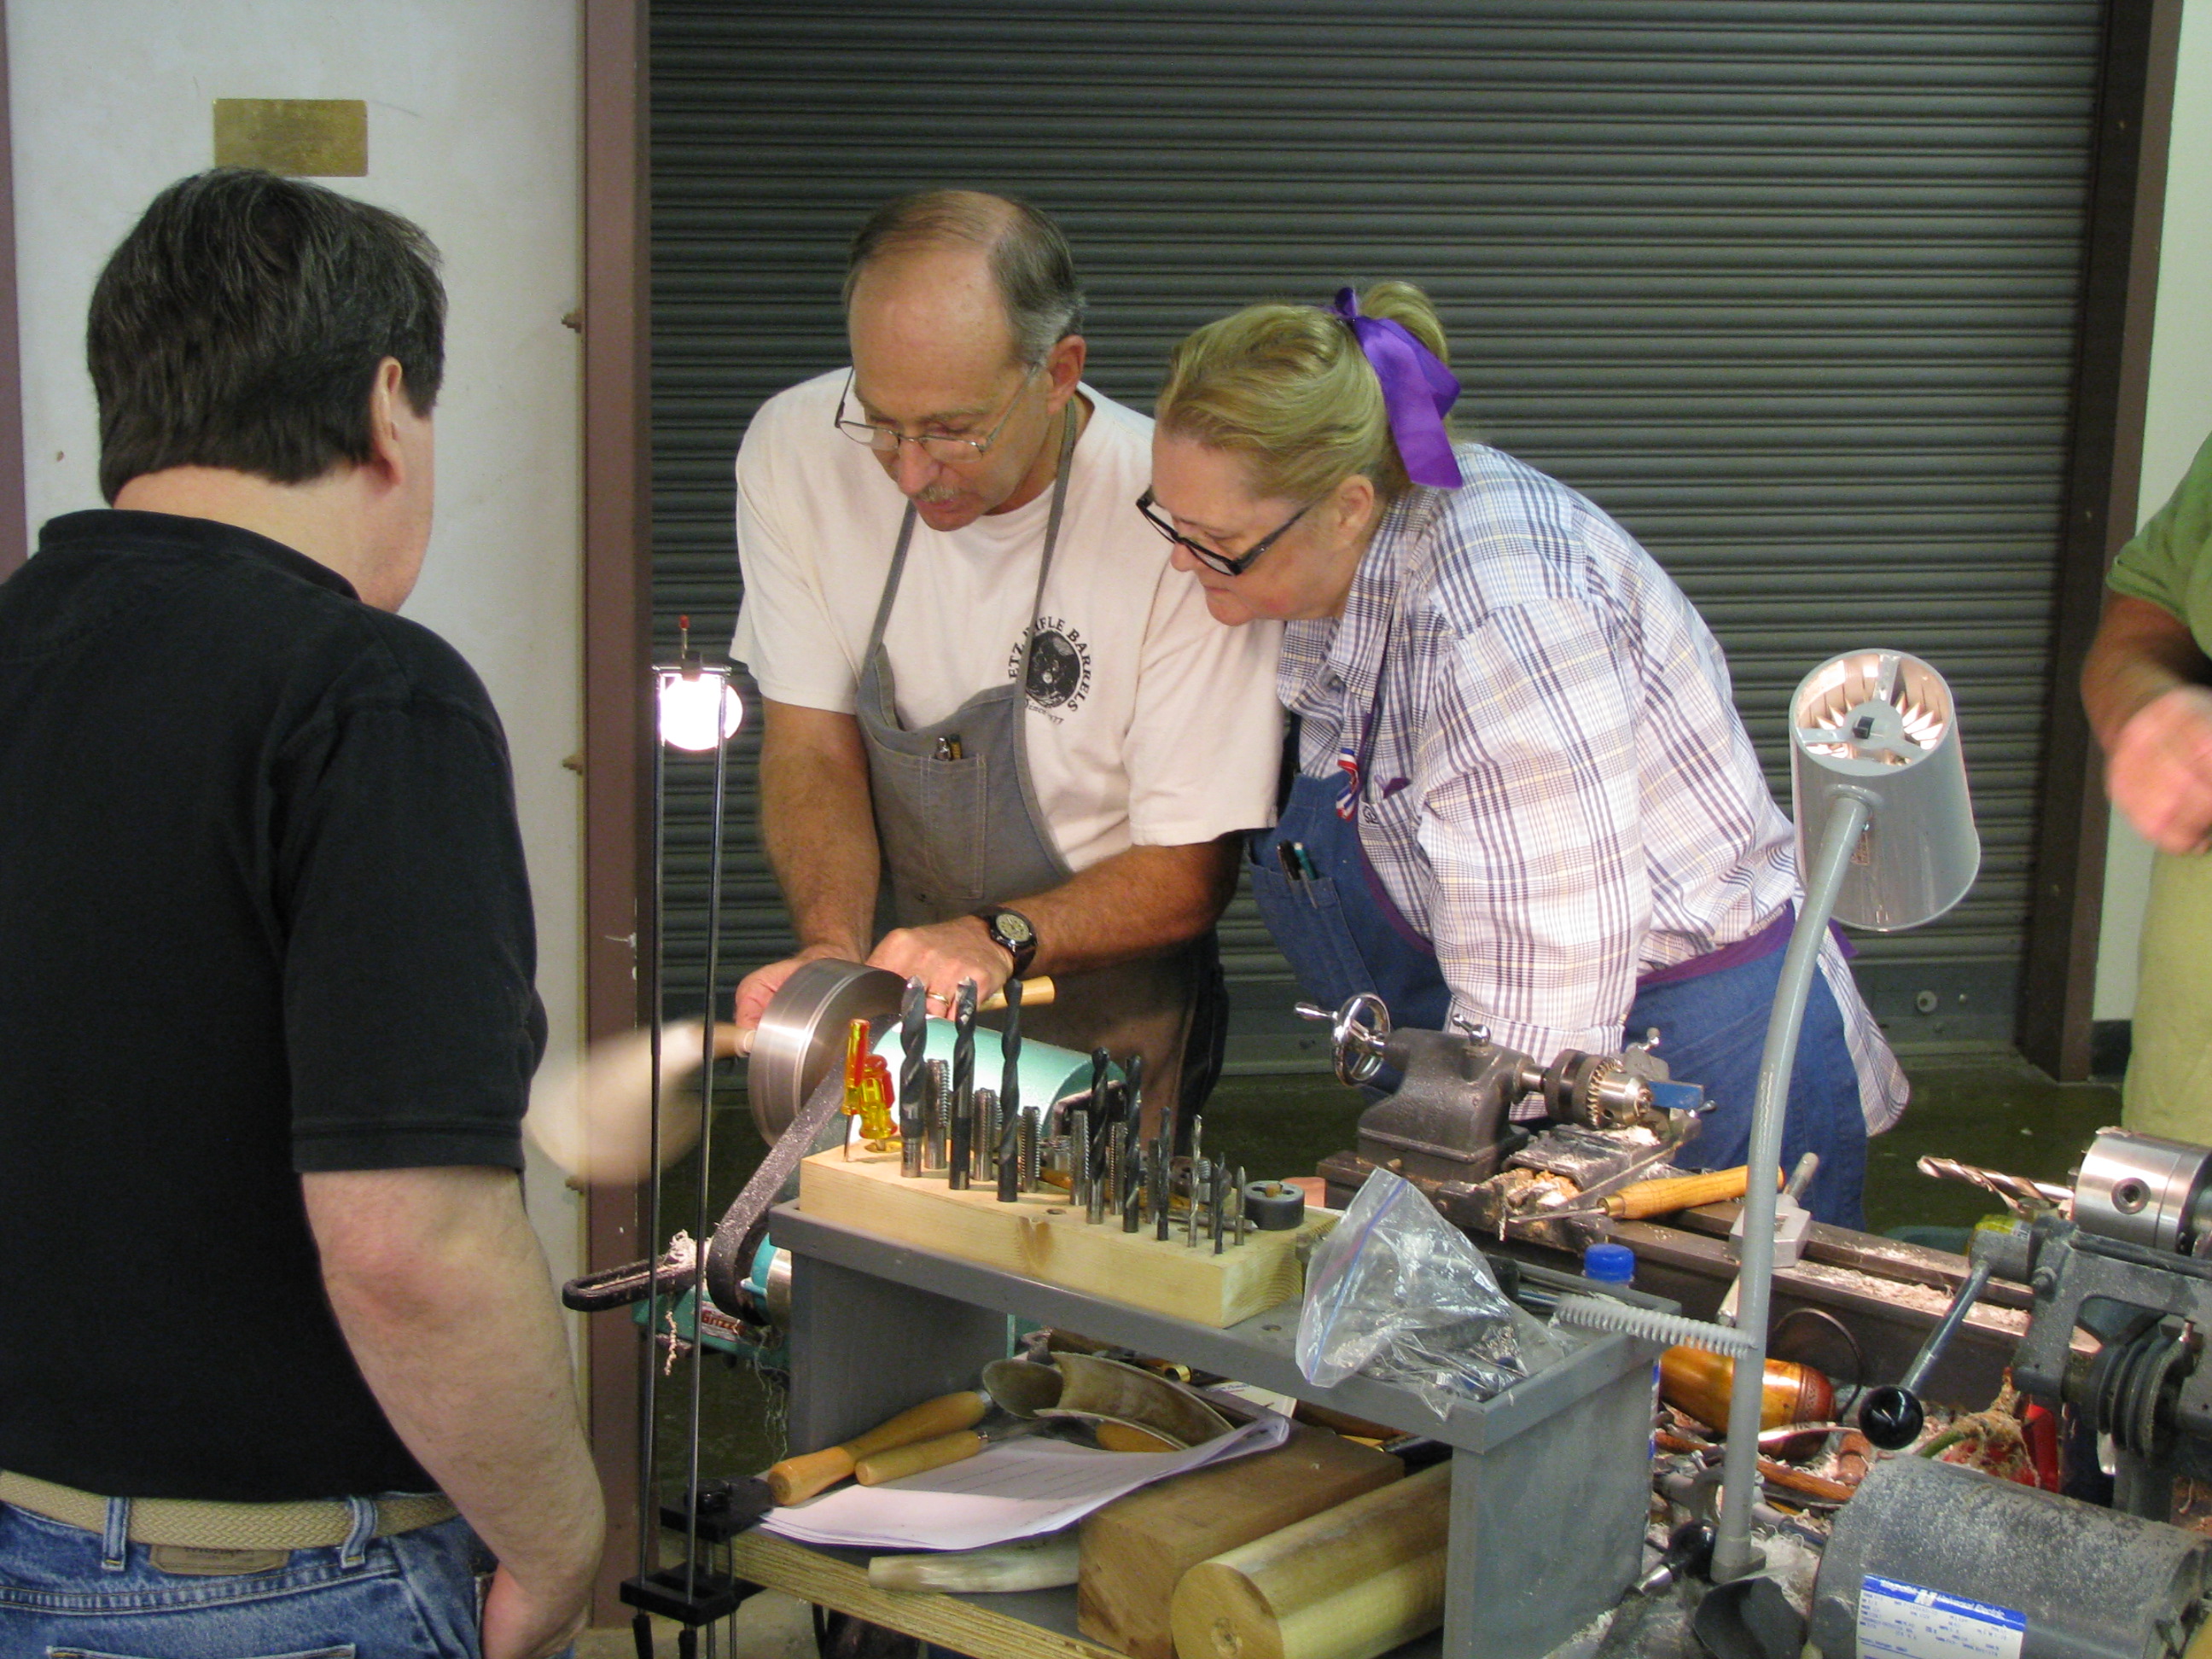
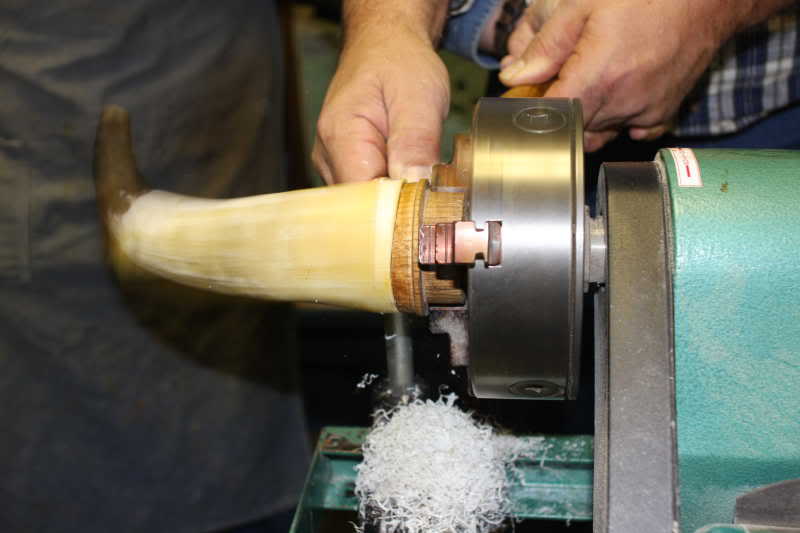
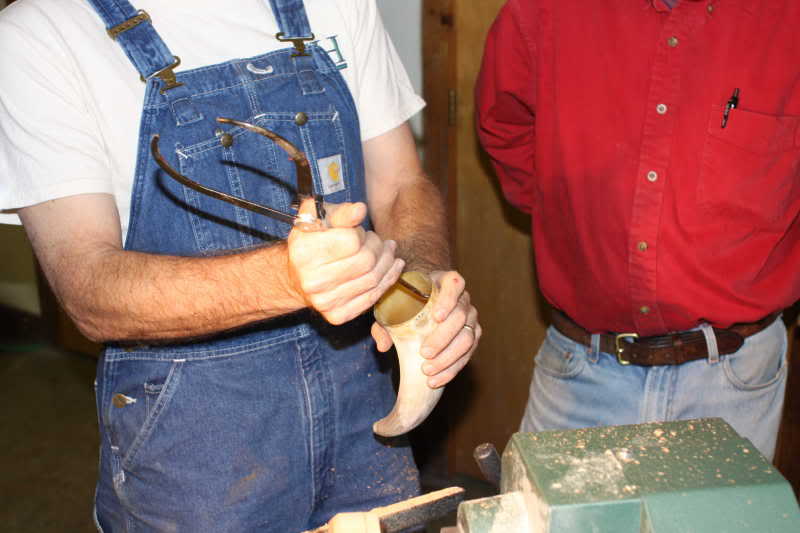
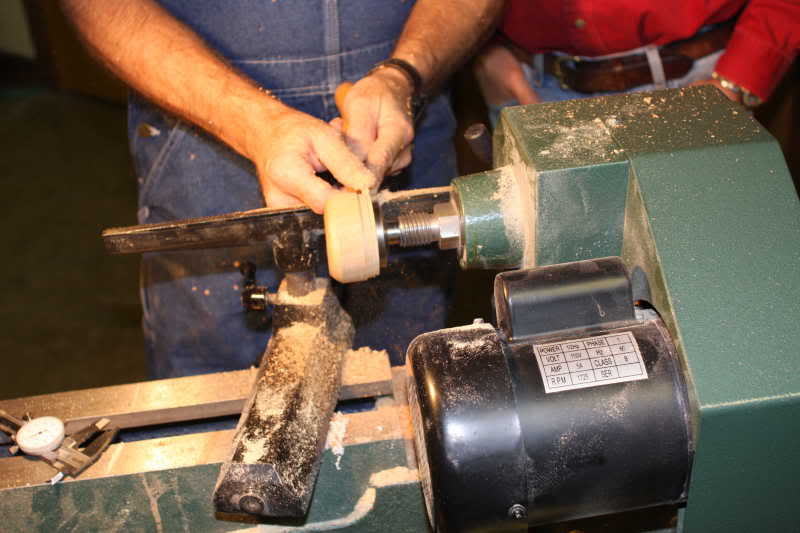
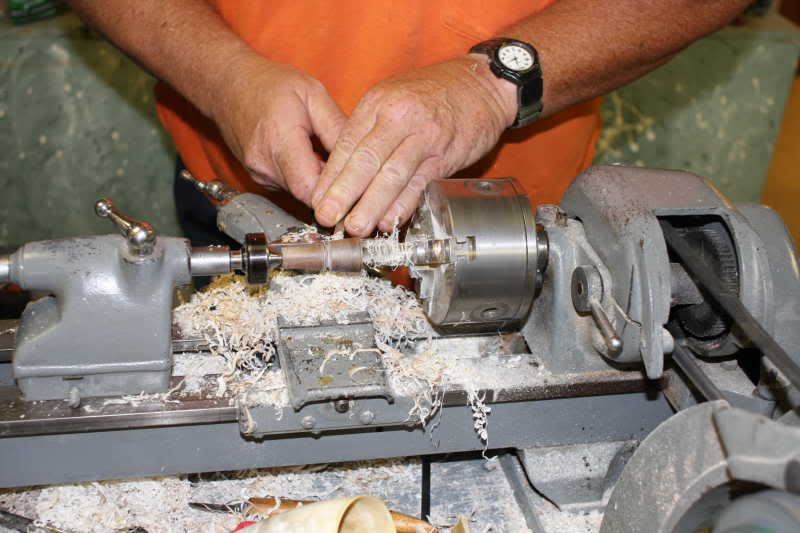
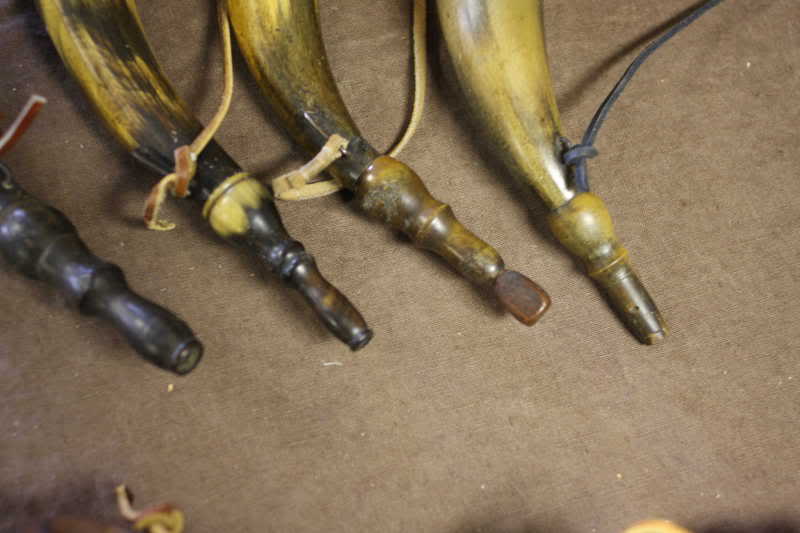
Art DeCamp taught the horn classes for a number of years. From the Tansel horn class in 2008, screw tips in 2009, and basic and screw tips in 2010, Art is the consummate teacher. This year the first half of the week was a basic horn class. The last half of the week was devoted to screw tips.
the class was working on screw tips while we were there. Some turned base plugs; others worked on the horn-turning and threading. If we were there another day, we would have seen the final shaping and dying of the horns and attachment of the base plugs. In this phase Art explains his secret ingredient and the extreme care he uses to measure it into the dye.

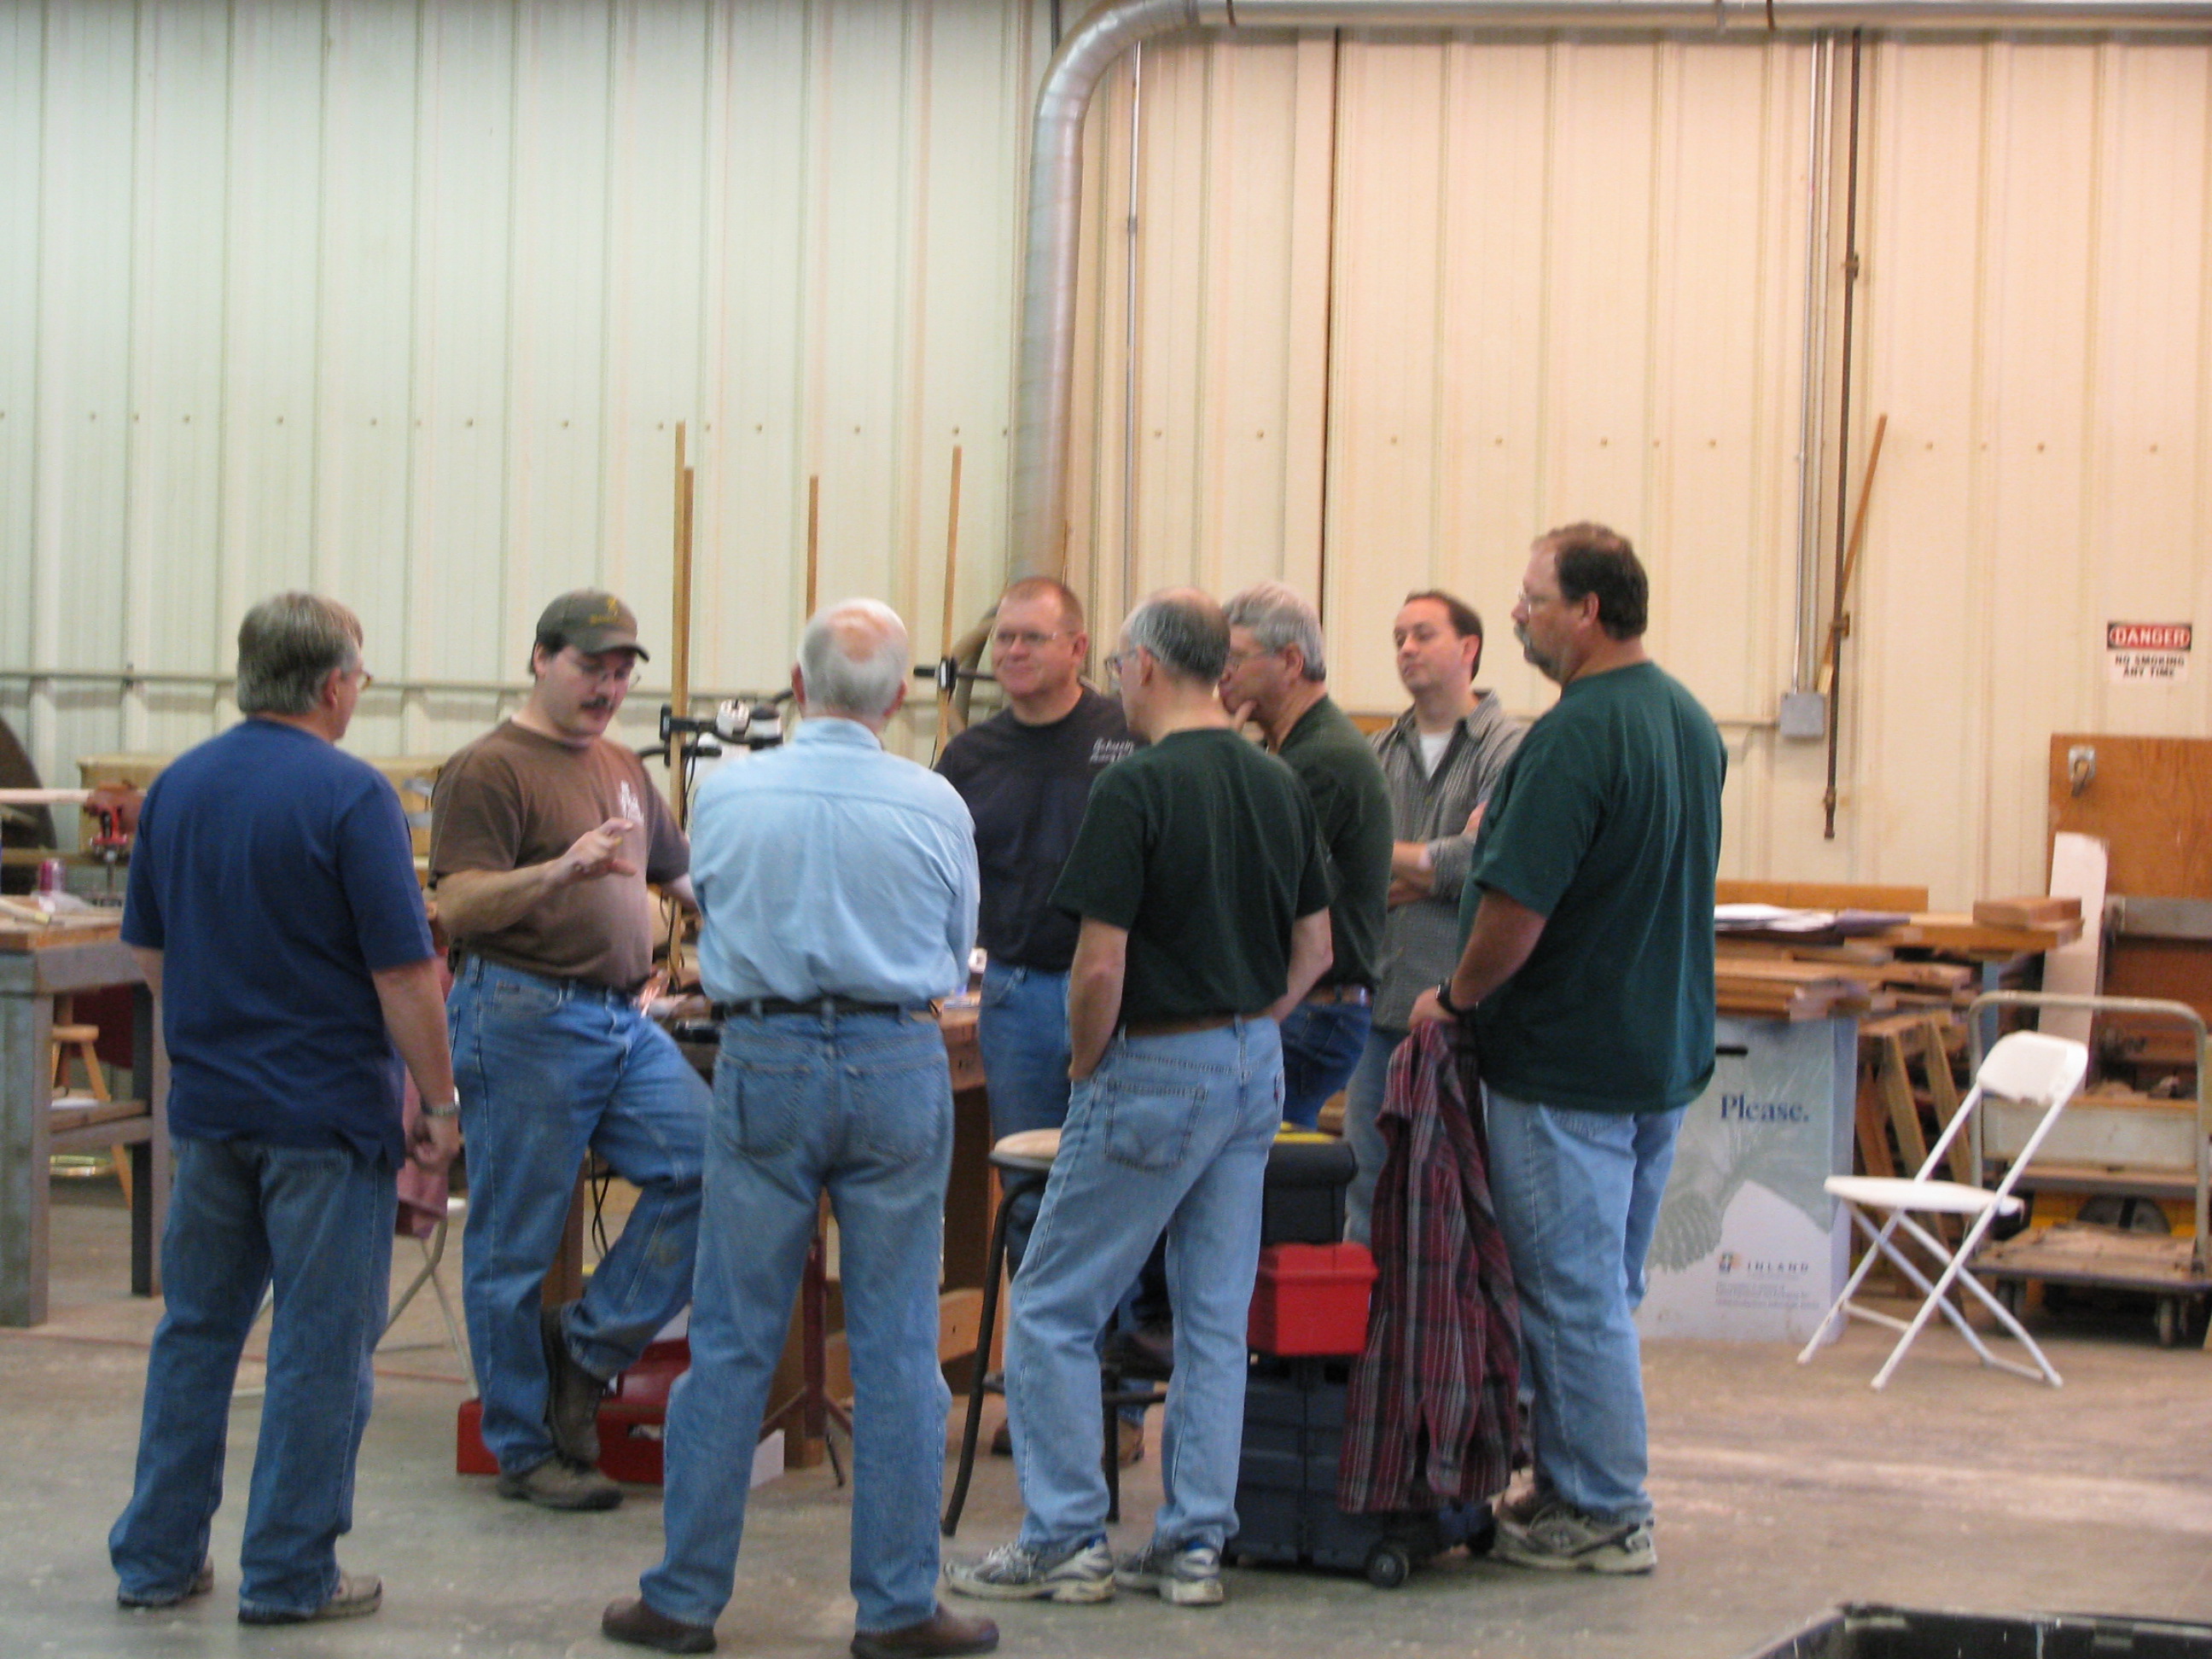
This was an impressive week of classes. The instructors were superb and must have had fun working with such motivated students. The equipment and environment provided by Conner Prairie was second to none. As I moved from class to class, I often felt that I need to come next year and take classes. Many of the students voiced this opinion. A high percentage of the students are returning former students. If there could be a better endorsement I don’t know what it would be. For more photos click on Screw Tip Horn Class #1 or Screw Tip Horn Class #2. (Use your “back” button to return to the article.)
(Selected photos appear here with the article. The 2010 Conner Prairie Photo Gallery contains links to many more. The class photos are divided into 2 parts to make loading faster. There are no captions for these photos; I realized I knew almost none of the students’ names. If students wish to leave a comment or email me I will be glad to add their name to the photos.)
October 2010 – vol.3, Larry Pletcher, editor
Charles Wallingford is an old-school knife maker from Union Kentucky. His blades are hand forged with traditional handle materials. Most I have handles have been antler. He also makes a fine long rifle, but I suspect his passion is his blades.
A man can’t have too many knives; I have a fair number. My favorite knife was made by Charlie.
You can see Charlie and his knives at numerous shows, Friendship, and CLA. Below is his web address with contact information:
September 2010 – vol.2, Larry Pletcher, editor
One cannot think of flint rifle makers without including Homer Dangler. A maker of muzzleloaders for decades, Homer is widely respected for his work. Home Dangler has been a part of Friendship for many years. Although Homer is in his 80’s, he is still active whether it’s making fine guns, building airplanes, or flying them.
Homer has a new web site located at the link below. I hope you enjoy the outstanding samples of Homer’s workmanship you will find there.
September 2010 – vol.1, Larry Pletcher, editor
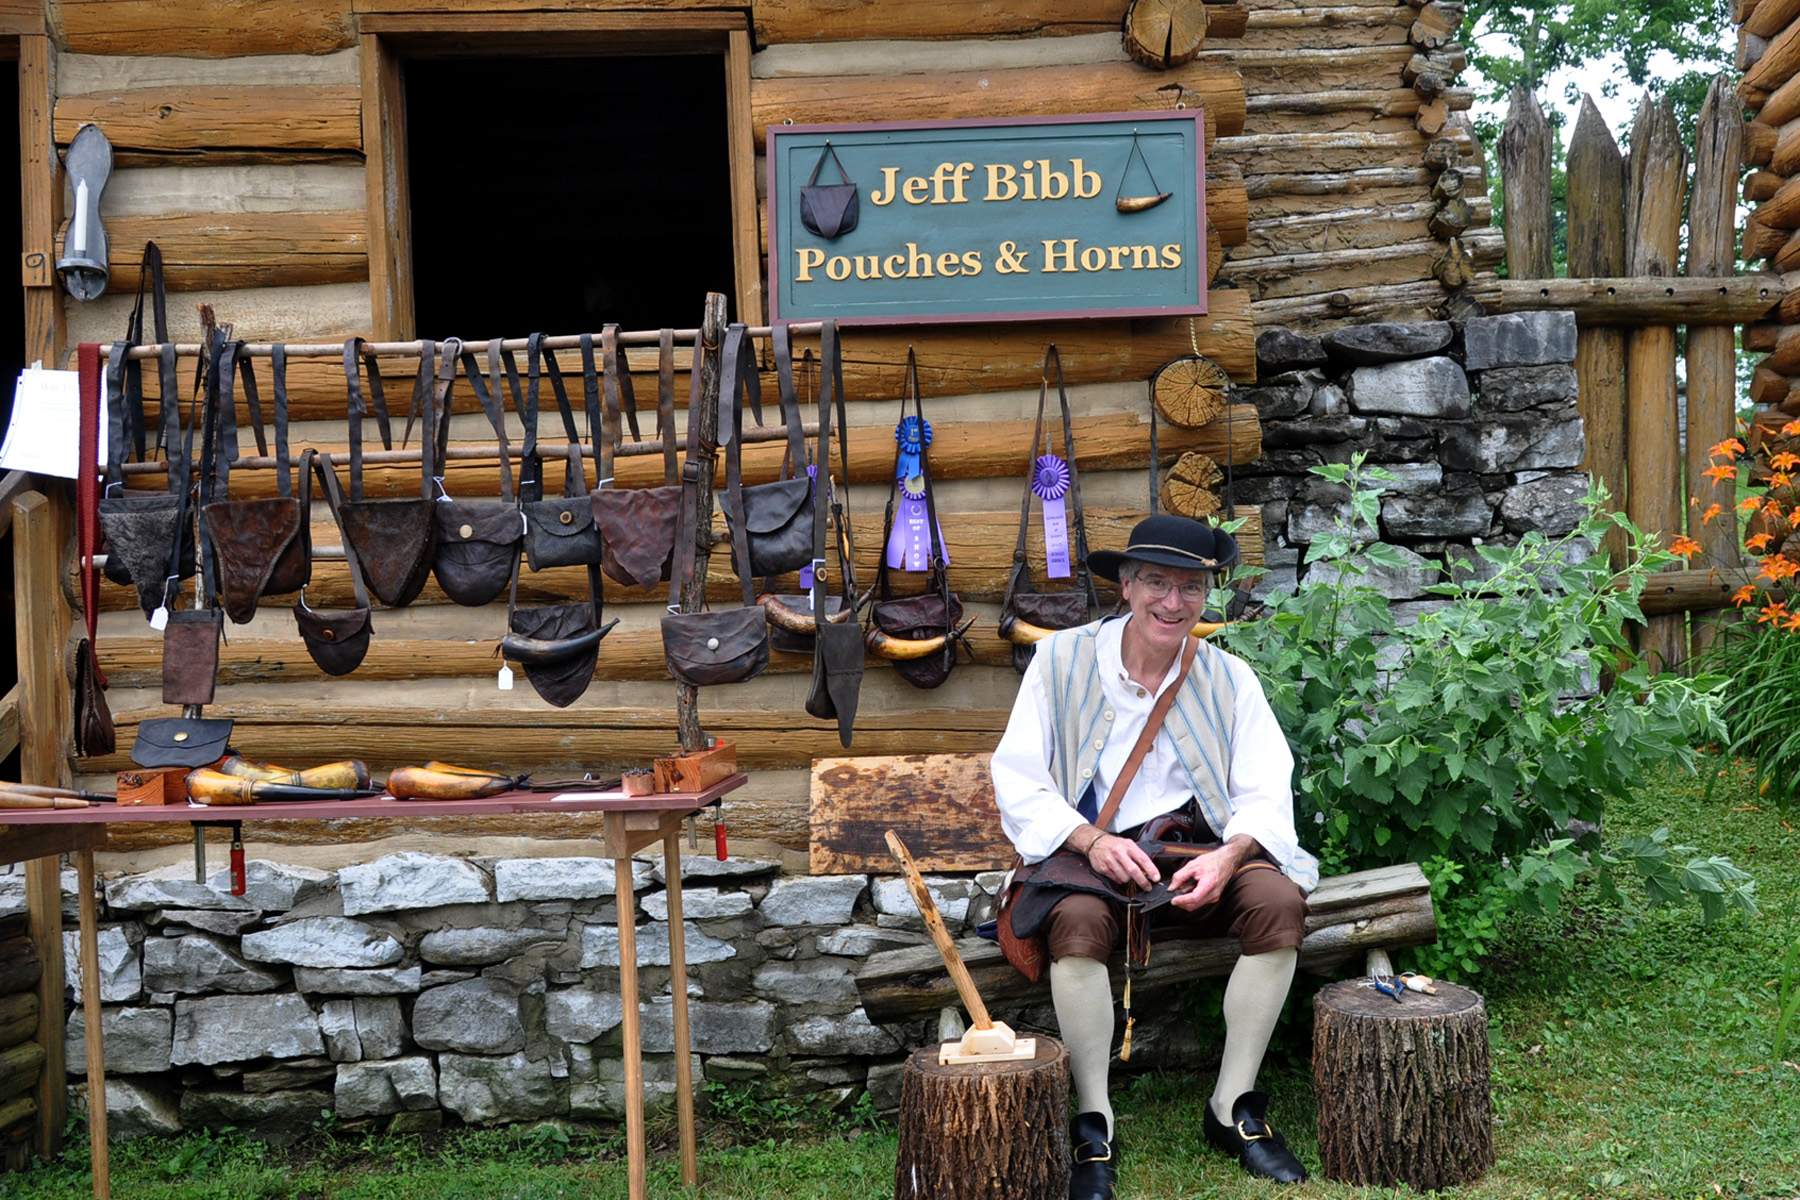
Jeff Bibb is a maker of fine powder horns and shooting bags. He specializes in southern muzzleloading accessories. His banded horns and screw tips are my favorites. I enjoyed working beside Jeff at Conner Prairie.
Jeff attends a number of Blackpowder events, among them are: Dixon’s Gunmakers Fair, CLA (Contemporary Longrifle Association, Lexington), Southern Long Rifle Show, Williamsburg, VA., 18th. Century Artisan’s Show, Lewisburg, PA, and others.
Additional photos of Jeff’s prize-winner can be seen at:http://contemporarymakers.blogspot.com/2010/07/jeff-bibb-bag-and-horn.html
Jeff’s web site is at:http://www.jeffbibbpouchesandhorns.com/
Do you live in a lead-free hunting zone? Are there alternatives for the traditional muzzleloading hunter? BlackPowderMag examines one possibility.
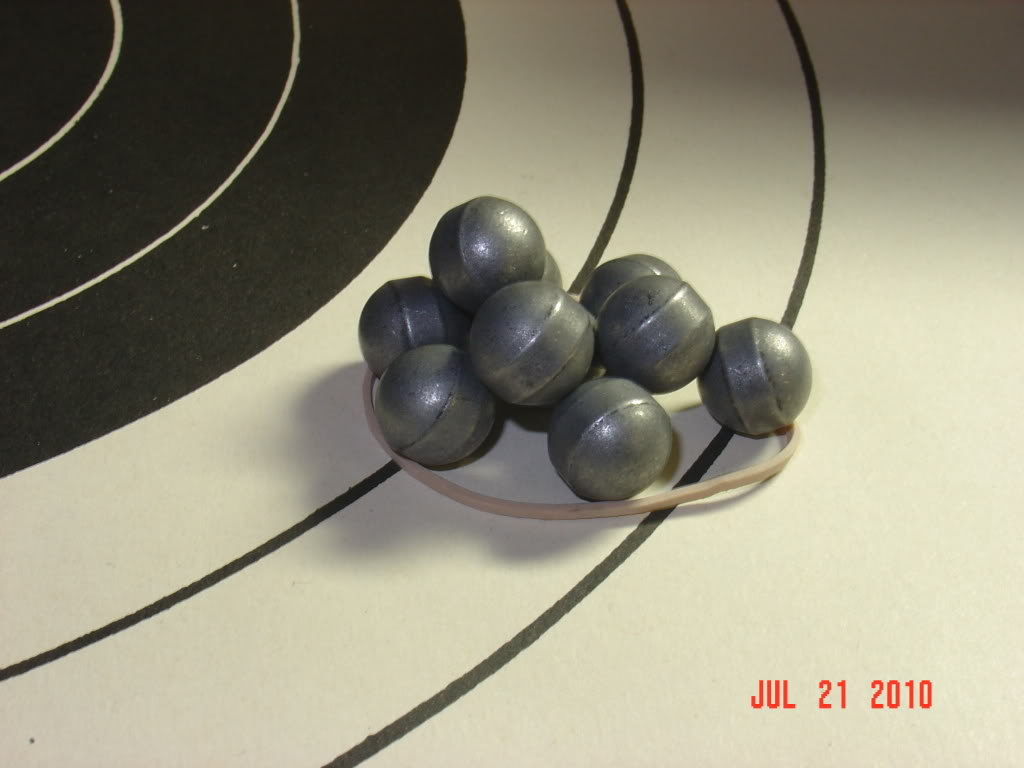
Recently I received a quantity of ITX non-lead balls made to be fired in a muzzleloading rifle. The maker is Continuous Metal Technologies Inc located in Ridgeway PA. Brad Clinton is the contact person. The company produces non-lead projectiles for hunting applications. If, for a variety of reasons, hunting with lead becomes unlawful, these products may prove to be a viable alternative.
You can see a belt running around the ball. This ball measured .487 when not measuring the belt. Around the belt it measured .002″ larger. We seated the ball with the belt level – (with the belt thought of as the equator, the North pole was up). We speculate that if the belt went in slanted, it might be possible to damage a land.
This week Steve Chapman and I worked on testing the non-lead ball in a .50 caliber muzzleloader. Two samples were available: .487 and .490. We planned to test both. The goal was to determine the potential for accuracy with a non-lead patched ball.
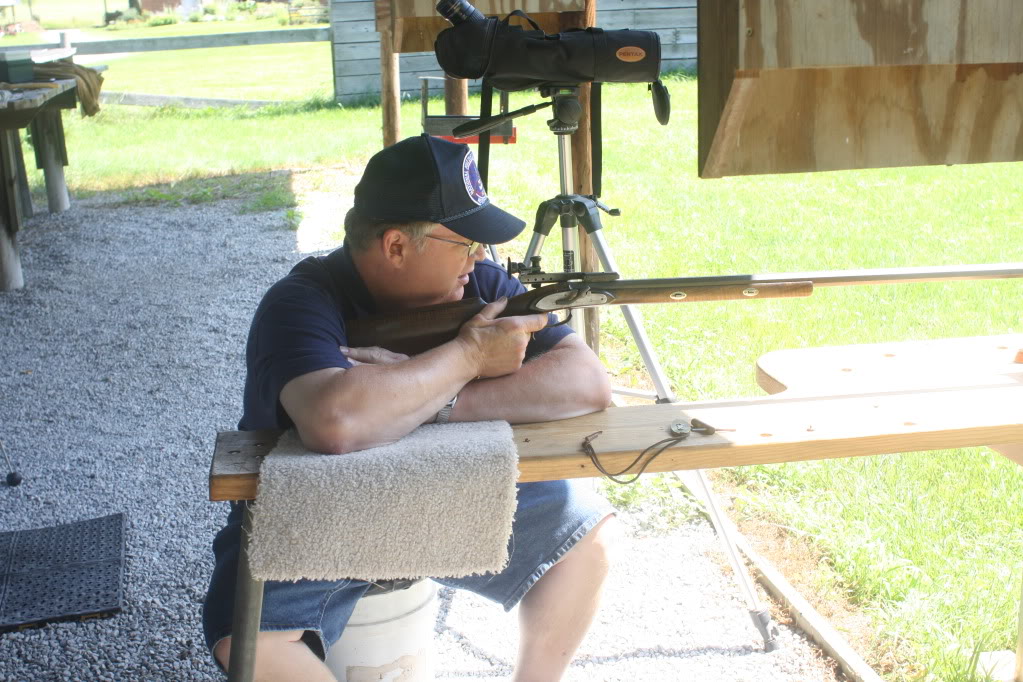
The rifle used was a light bench/x-sticks gun, which Steve used to set a National muzzleloading record. The barrel is made by Green Mountain (1 in 70” twist) and is equipped with target apature sights. When firing the record target Steve used .495 lead balls patched with Teflon. The barrel was wiped between shots.
Before heading to the range I weighed out the balls. The .487 balls ranged from 156-159 grains. I sorted them into groups to minimize the weight differences. The same was done to the .490s. They weighed 152-155 grains – less than the .487s. I don’t understand this. The weighing was done in the same session on the same surface with the same scales.
At the range while Steve was sighting in with lead balls, I pushed a .487 patched ball through a barrel stub. We wanted to check on patch cutting with the harder ball. With this barrel stub the ball cut patches with every patch material we tried. We determined the cause to be the crown on the barrel stub. My reason for reporting this is that if your barrel has any tendency to cut patches, this very hard ball will increase this tendency. We saw NO deformation in the ball, no matter how tight a patch we tried.
We then tried to seat a patched ball into Steve’s target barrel, pull it out by the patch material, and look at the ball and patch. Instead the patch material tore off, leaving the patched ball in the barrel. We removed the nipple, added a squib powder charge, seated the ball, and fired it out. We concluded that if one dry-balls with one of these, pulling the ball will not be an option. You will have to be able to get powder behind the ball to remove it. It’s possible that if a ball was seated against the breech plug, one might need to unbreech the rifle to remove it. (We did not try using a CO2 discharger; that may or may not have worked.)
Not wanting to risk Steve’s barrel with a cut patch, we started with a 20 gr load and worked our way up 20 grains at a time, looking at patches for cutting. We determined that with the excellent crown on Steve’s barrel we could use pocket drill with Murphy’s oil soap at normal velocities with no patch damage. (Later we used Teflon moistened with spit with equal success.)
At 50 yards, Steve used 70 grains of Swiss ffg behind the .487 ball and pocket drill w Murphy’s oil soap full strength. Compared with a normal lead ball, it chronographed faster, but elevation on paper was the same. This group measures 2 inches.
At 100 yards, Steve used 85 grains of Swiss ffg, .487 ball. And pocket drill w Murphy’s oil soap full strength. We also tried Teflon with equal success. This group measured 4 inches.
We feel that the non-lead ball is capable of hunting accuracy and informal off hand target work, but would prefer lead ball for serious offhand or target work that allowed a rest – such as bench or X-sticks. We feel that it will take a serious competition shooter to detect a difference. The added complications with a dry-ball during a competition match may be a factor weighed by some as well.
In order to make a valid comparison, we included a target that Steve shot at Friendship that shows the potential of the patched lead ball with Steve behind this barrel. This target, shot at 100 yards, measures 1.875″ and holds a National record. It was shot with Teflon patching. That is the reason Teflon patches were included in the testing above. Teflon does require wiping between shots, and pocket drill would be the reasonable choice for a hunting load.
Today, wind was our biggest variable, but on two occasions Steve clover-leafed three balls with a lead ball when doing comparisons. He couldn’t do this well with the non-lead ball, but hunting accuracy out to 100 yards is quite acceptable. We expected the non-lead ball to strike lower on the paper at 100 yards, but it did not. I expect that being lighter; its higher muzzle velocity (50-60 fps) may have helped. At distances beyond 100 yards the non-lead ball may drop faster, but we did not shoot beyond 100 yards.
We do feel that shooting this non-lead ball places different responsibilities on the shooter. Dry-balling with a lead ball is a minor inconvience, compared to dry-balling one of these. Good muzzle crowns become much more important. This is not to say that a good crown isn’t important with a normal lead ball, but it is huge with non-lead. Strong, tough patch material is vital with this ball as well. We don’t know what damage might be done if one shoots a ball this hard with a patch that is cut as it enters the barrel. We were prepared to stop the test if that happened rather than risk Steve’s barrel.
We did not test the larger .490 ball for the reason mentioned above. It cut both Teflon and pocket drill when we tried it. The cutting was not the fault of the crown because we worked all day with the smaller ball and with the lead ball with no cutting. Obviously special care is required in choosing the patch material for the non-lead ball.
In our testing we were concerned with accuracy and made no attempt to evaluate the effectiveness of the ball on a game animal. However, based on our accuracy testing, we conclude that the non-lead ball is a viable alternative for hunting use within the range we tested. We speculate that the harder ball will deform less and penetrate deeper than a lead ball. Accuracy is quite acceptable within the ranges that a traditional rifle would be used. As mentioned above, loading and patching techniques are different from handling a lead ball. The shooter will need to adapt to handle the harder ball in order to protect his barrel.
For further testing, we suggest that a ball that measures .015 – .020″ less than the bore (on the belt) may help to make the ball more forgiving to shoot. For .50 caliber, a belt measurement of .482-.485″ might be worth considering. Obviously this will mean a very thick patch, but may help to protect the rifling.
The following is contact information:
Continuous Metal Technologies Inc. 439 W Main Street Ridgeway, PA 15853 814-772-9274
Brad Clinton email: bclinton@powdered-metal.com
Mel Hankla, Editor P.O. Box 156 Jamestown, KY 42629 270-566-3370 melhankla@amhiss.com
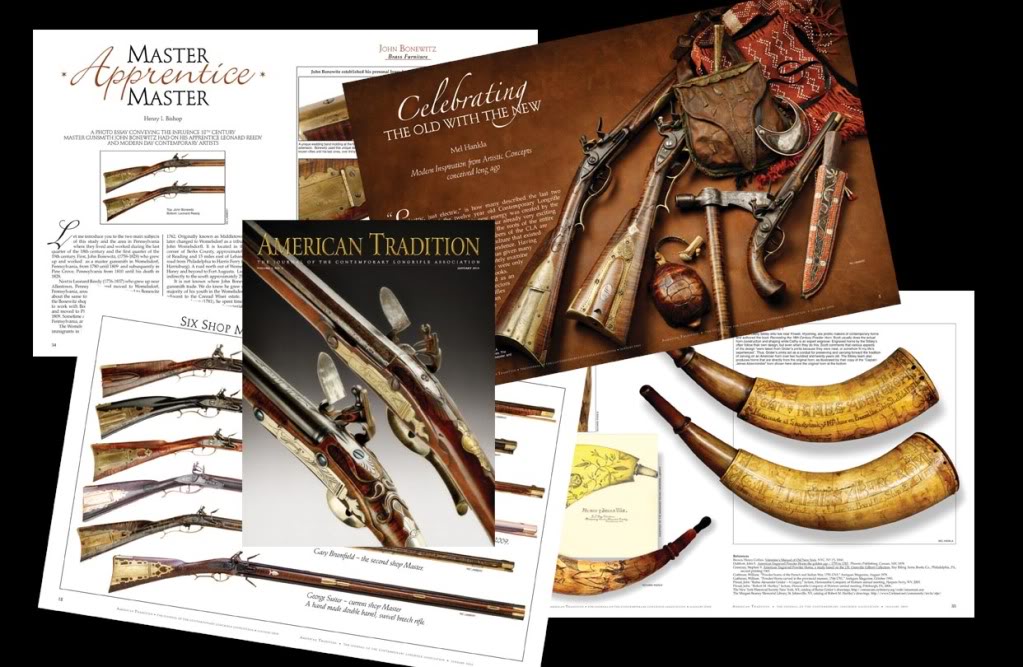
The Contemporary Longrifle Association is pleased to announce the publication of the inaugural issue of its bi-annual journal, American Tradition. This journal is devoted to the tradition of early American craftsmanship in the firearms and related accoutrements trade, as practiced by the artisan-members of the CLA. Established in 1997, the not-for-profit CLA is dedicated to the art of contemporary longrifles and related accoutrements made after the mid-twentieth century. American Tradition is profusely illustrated with color photographs showing the work of CLA artisans, along with examples of original works that have inspired today’s craftsmen.

Articles in the first issue, all richly illustrated with the stunning photography of Ric Lambert and others, include “Celebrating the Old with the New,” in which CLA, Kentucky Rifle Association and Honourable Company of Horners member, Mel Hankla, discusses the connection between the original artifacts and modern-day re-creations, as well as the evolution of what has become known as “the longrifle culture.” James Wright, current president of the CLA and producer of high quality how-to videos, authors an article entitled “Williamsburg – Gateway to the Past,” which tells the story of the gun shop at Colonial Williamsburg, the people who have worked there and the impact they have had on contemporary work. In “Examining Traditional American Engraved Powder Horns” Art DeCamp, charter member of both the CLA and the HCH, as well as being a master horner, shows the influence of the Grider, Grancsay and Hartley horn drawings on contemporary artisans. In “Master – Apprentice – Master,” Henry Bishop, long-time member of the CLA and the KRA, presents a photo essay conveying the influence 18th century master gunsmith John Bonewitz had on his apprentice Leonard Reedy and modern-day contemporary artists. Also included are a book review by Lee Larkin, Russ Young’s column “Sources & Resources,” Joseph McClure’s thoughts on William Whitley, and several shorter pieces on contemporary movement visionaries Robert Weil and Gordon Barlow.
American Tradition is edited by Mel Hankla, noted historian, collector, writer and artisan. Associate editors are Frank House, Art DeCamp and Russ Young. Also on the staff are Art Director H. David Wright, Production Manager Bill Scurlock, Copy Editor Sharon Cunningham, Photographer Ric Lambert, and Administrative Manager Rachel Nolen.
American Tradition is published twice a year (January and July). This inaugural issue includes 48 full color pages plus the covers. American Tradition is distributed exclusively to members of the CLA and will soon be offered to the membership on the internet via a password-protected site. In addition to the journal, CLA members receive the organization’s newsletters and bulletins, free admittance to the annual show in Lexington, Kentucky, and free listings of items for sale on the CLA website. A one-year membership to the CLA is available for $50.00.
To join the CLA and receive the journal American Tradition or for more information about the CLA, call 540-886-6189, email <cla@longrifle.ws>or visit . Checks or money orders may be mailed to the Contemporary Longrifle Association, PO Box 2247, Staunton, VA 24402.
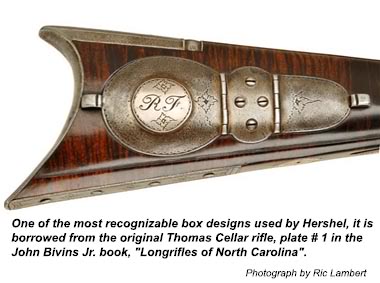
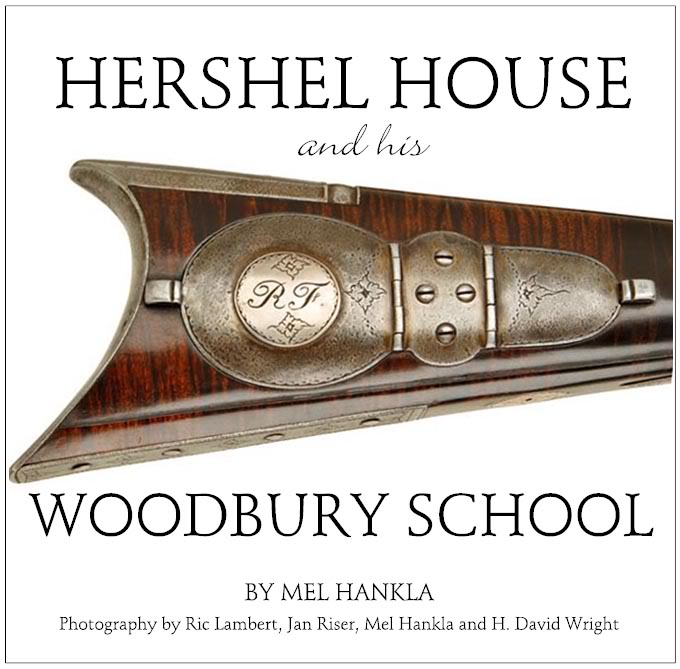
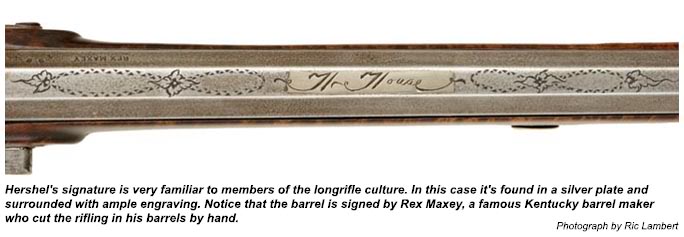
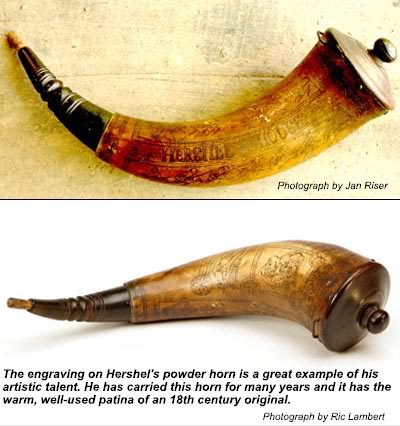
Hershel House and his Woodbury School By Mel Hankla Photography by Ric Lambert, Jan Riser, Mel Hankla and H. David Wright
Reprinted with permission from Muzzleloader magazine, July/August 2009. For more information on this and other black powder topics visit the web site atwww.muzzleloadermag.com
Hershel Carmen House was born July 4, 1941 and needs no introduction to these pages. His work has been nationally known for the better part of four decades. Hershel and his younger brothers, Frank and John, are the progenitors of what is known as the “Woodbury School” in today’s contemporary longrifle society, named for the small Kentucky town on the banks of the Green river in which they grew up. Products made by this family ingenuously express their personalities, exhibit varied artistic talents, and reveal a genuine way of life that has significantly influenced many aspects and countless members of today’s contemporary longrifle culture.
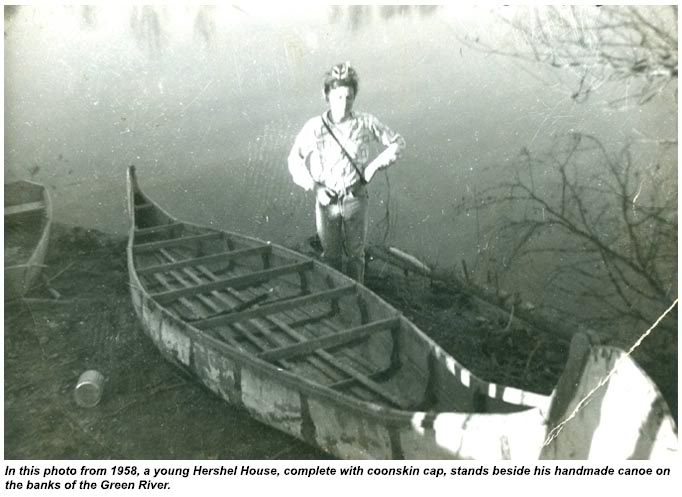
 The first longrifles that Hershel remembers seeing were in an old store in Jamestown, Kentucky. He says it would have been about 1950. His family had temporarily moved and was living there while his father worked on Wolf Creek Dam that now holds back the Cumberland River and forms Lake Cumberland. After moving back to Butler County in 1956, Hershel found an ancient half-stocked percussion squirrel rifle in his neighbor, Mrs. Gibbs’s, old barn. A long time family friend, he asked her if he could have it. It had belonged to her father, but she let Hershel have it anyway. He promptly fixed it, got it firing, and received a tremendous amount of pleasure hunting squirrels while exploring the woods and paddling the Green river in a homemade canoe.
 In 1967, Hershel started building very intriguing mostly iron mounted rifles and through the years has truly become a living legend. In 1979 he was featured in Foxfire V, one of the ongoing series of books recording the customs and lifestyles of people from Southern Appalachia. In 1984 and again in 1985, Hershel was awarded a National Endowments of the Arts ~ Folk Arts Apprenticeship Grant. These grants provide funds for traditional craftsmen to take on worthy apprentices, thus passing on their unique trade. In Hershel’s words: “I am usually pushed for time and deadlines which I almost never make. So without this financial assistance I would probably never have been able to share my experience. The grant gave me 300 hours for the project, which allowed time to explain what I was doing and to go into the smallest of details. A lot of these specifics I had never taken time to explain even to myself…”
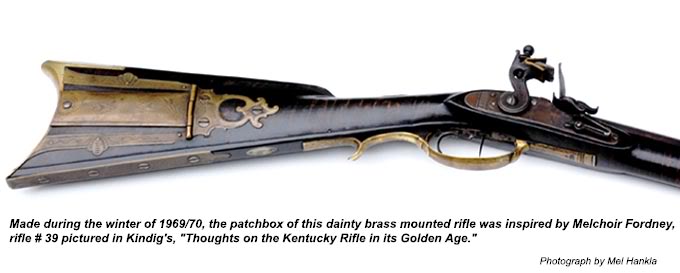
Through his years as a gunbuilder he continues to go through recognizable phases or periods of specific stylistic trends. In the early years his greatest influence was from the pages of Joe Kindig’s book, Thoughts on the Kentucky Rifle in its Golden Age. Thus, his first guns followed Golden Age styling of Pennsylvania’s gunbuilding schools. Most of these early guns were brass mounted, a feature rarely found on his rifles today.
 By 1975 his work had already evolved through a phase of building rather plain iron mounted Appalachian mountain rifles. He leaned more toward elaborate late flintlock period arms, specifically the type found in Southwestern Virginia or East Tennessee. By this time in his career it became obvious that his personal creative signature would be hand forged iron mounts for most every firearm he made.
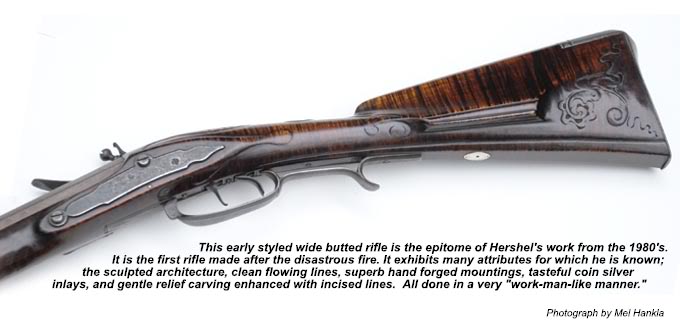
By 1980, his guns started becoming considerably wider at the butt and took on the style of earlier, pre-revolutionary war period firearms. These are the guns he has probably become most noted for and are highly sought by collectors, hunters, and shooters. About this time, antique Kentucky Rifle collectors discovered his talents and started having him apply his knowledge and skill in the restoration of some of the finest antique Kentucky’s that are in existence today. Hershel says, that being able to handle and become intimate with these grand old originals helped his career more than anything else.
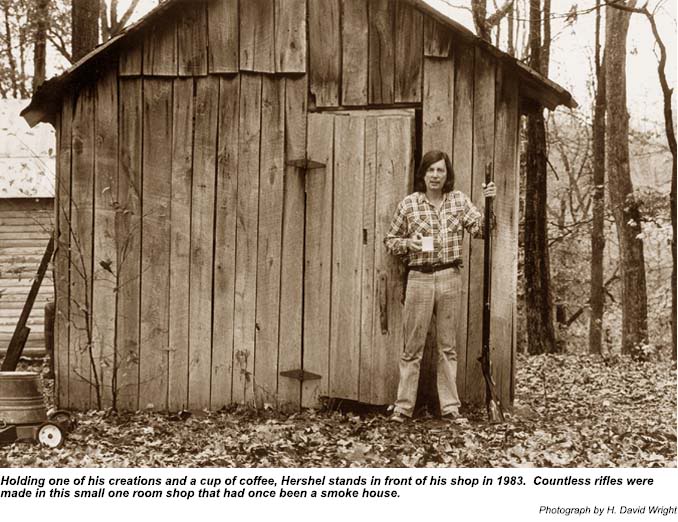 On April 1st. 1987, Hershel fell victim to a disastrous fire. He had worked for many years and produced countless rifles in a small one room shop that had once been a smoke house. In the spring of 1984, Hershel and friends built a larger two room structure that would provide space for the soon to come N.E.A. funded apprentice. Much like Hershel’s rifles it just never seemed new. His tools was an array of patinaed antiques, but obviously used often and included the complete set of his Grandfather’s (and namesake, Hershel Finney) cabinetmakers planes. There were volumes of well-worn books in an ancient glass fronted cupboard; Hershel’s shop was literally filled with treasures from another day.
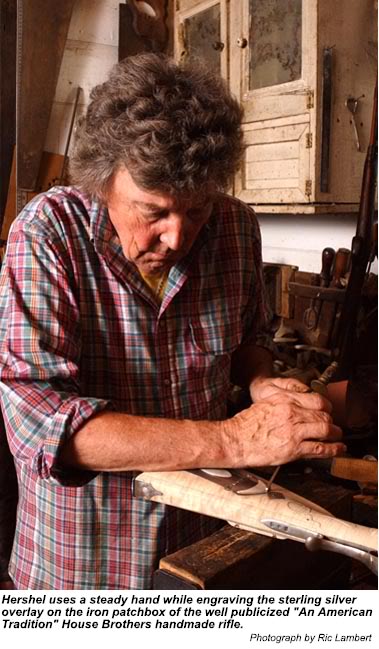
 Basically a hand worker, Hershel tends to avoid most power tools, not from some romantic notion of using old-fashioned tools, but from personal preference. He generally uses manufactured barrels and “brought-on” lock and trigger components, although his ability at the forge, without a doubt, could be commonly applied to the making of barrels and locks from scratch if his customers were willing to pay for the extra time and effort needed for such work. This is quite evident from his recent involvement in the House Brothers, “An American Tradition” longrifle project. His stockwork has always been from the stick and his stylish iron mounts exhibit perfected skill of both black and whitesmithing.
 “… In his work, Hershel’s attitude clearly follows that of the early gunmaker. Whether at the forge, filing vise or stocking bench he is fast, sure and efficient; he wastes no time fussing about. That is a blend of skill and experience that was very well defined by the adjective “workmanlike” which eighteenth-century patrons used to describe sound products of an artisan’s hands.” He continues by saying, “Original pieces have made a strong impact on Hershel’s personal style, but not to the point of duplication. In fact, Hershel’s translations more often than not seem more successful than the originals.”Even when Hershel borrows elements of design from originals, his rifles are not copies; they are Hershel’s own statement of the many styles which he has encountered and absorbed from living his everyday life, precisely in the fashion that an early gunmaker developed his own identifiable style.
Hershel is well known for his ability in shooting competition and therefore understands what is necessary for a rifle to become an extension of the rifleman and for its components to function efficiently. First and foremost, his main concern with a gun is for it to be a shooter, always considering function before form.
 This practical philosophy reflects the essence of utility, a traditional concept and an integral component of the gunsmith trade. However, the most significant signature of his work is the feeling of mellow age and long, but careful use. Even when the piece is brand new, Hershel’s rifles have the look and feel of having traveled a lifetime in the hands of a southern longhunter. Handling one of his rifles spurs the imagination toward visions from an earlier day. The rifles of Hershel House have a special feel about them. This quality of “feel” is hard to describe, but is well known to those who use their rifles for more than mantle decoration.
 In the last several years, Hershel has been featured in “Field and Stream” magazine and on Sports Afield T.V. show. He has also become a much sought after presenter appearing at a multitude of workshops and conferences nationwide. He continues to produce several unique long rifles and pistols each year, along with a multitude of one of a kind knives. This past June, Hershel and his brothers hosted the first Woodbury Gunmaking Seminar; it was a great success, and they are now accepting applications for students next year.
Those in attendance at the 2008 Contemporary Longrifle Association Show in Lexington, Kentucky had the opportunity to see the unveiling of a one-of-a-kind completely handmade Kentucky Longrifle by Hershel, Frank, and John House. The building of this exceptional work of art was donated by the brothers for a fund raising raffle for the Contemporary Longrifle Foundation and will be given away at the CLA show this August.
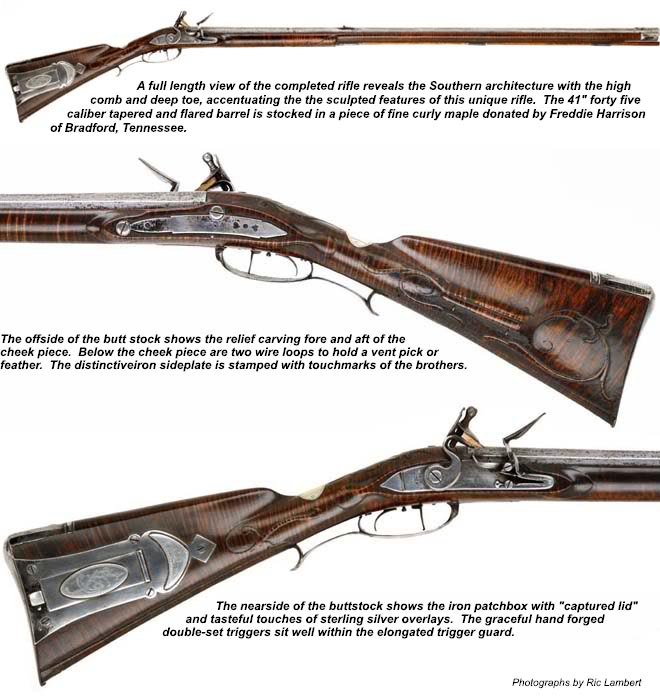
The rifle is a beauty; the wrought iron barrel, the lock, double set triggers, iron mounted hardware, and even the screws are made by hand in the same tradition as those firearms produced by American gunmakers in the 18th century. The rifle is built in their nationally recognized Woodbury School style, and includes many personal and unique attributes for which each are well known. It is relief carved, with engraved iron mounts. The patchbox is tastefully engraved with touches of sterling silver overlays, and a sterling silver escutcheon (for a future owner’s initials) accents the top of the graceful wrist area. The 41″ tapered and flared barrel is rifled in .45 caliber. The only thing not handmade by Hershel, Frank, or John is the fine piece of curly maple wood in which the rifle is stocked. This piece of hand selected wood was donated by Freddie Harrison of Bradford, Tennessee, a supplier of stock blanks to muzzle loading gun makers for more than 30 years.
You are invited to join the Contemporary Longrifle Association and be present at the 2009 annual meeting, August 14th & 15th, at Heritage Hall in Lexington, Kentucky. Come meet Hershel, shake his hand, be part of this exciting project, and the continuing history of the Kentucky Rifle. DON’T MISS YOUR CHANCE to win this entirely hand-made House Brothers , “An American Tradition” longrifle. Chances are available, 5 dollars each or better yet, 5 tickets for $20.00. Everyone interested in being a member of the CLA and supporting our endeavors by buying or helping sell tickets can visit our websites;www.housebrothersproject.com andwww.longrifle.wsfor detailed information about the CLA, photos of the rifle, the House brothers, and the building process. Or call 1-540-886-6189 for more information. See you in August!
About the author
Mel Hankla is a charter member of the Contemporary Longrifle Association and a noted collector of House brothers rifles, tomahawks and knives. Hankla has worked with the Kentucky Humanities Council as a Chautauqua-Living History Character portraying Simon Kenton and George Rogers Clark since 1995. He also portrays Kentucky’s first governor, Isaac Shelby and Benjamin Franklin in other venues. A noted writer, he has contributed articles to many publications. Visit his websitewww.americanhistoricservices.comto learn more.
Larry Pletcher, editor
A NEW KID ON THE BLOCK By Paul R. Jones
Reprinted by permission of the National Muzzle Loading Rifle Association/ Muzzle Blasts magazine, November 2008. For information on the NMLRA and other black powder topics please visit the website at www.nmlra.org
I like tomahawks! I always have, even when I was collecting Colts or Scottish swords, but I just never could afford them. Then, when I discovered that contemporary craftsmen were making them I got excited. Eventually I met the incomparable Richard Guthrie, of Virginia, dean of colonial blacksmiths. Richard is not only unsurpassed at the anvil, but he has a true love and understanding of pipe tomahawks. Owning a Guthrie is the next best thing to owning an original.
I also met Glenn McClain, whose technique, although different from Richard Guthrie’s, produced tomahawks that were spot-on to the originals. (See article in July/August 1999 Muzzleloader magazine)
And as you might expect, there is always “a new kid on the block.” If you watch the wonderful DVD The History of Tomahawks produced by Alan Gutchess, you will spot a young man working at the forge in one scene. That is Brian Barker from Belleville, Michigan. I first met Brian at the Sauder Village gun show some years ago. He had just finished a copy of Jim Dresslar’s Squire Boone tomahawk, not a tremendously fancy axe, but I was greatly impressed with the accuracy of his copy. I didn’t see Brian again until the Eastern Woodland Indian Conference almost a year later. There he had a fine inlaid copy of the tomahawk, on pages 101 and 102 in Jim Johnston’s Accoutrements I. Since then, Brian has produced a number of highly accurate copies of some of the most exciting originals around.
I think it is best to let Brian explain his love of tomahawks in his own words: “My real passion is pipe axes, and I wanted one like Squire Boone had made. I met Jim Dresslar through Don Rettig and Alan Gutchess. He very kindly let me go through and handle his collection so I could see things close up and on every side.
This is something books and videos cannot do – nothing beats looking at the real thing. I found a wrought iron gun barrel in an antique shop and used it for my first attempt. To my surprise it went together right the first time. Since then I have always used wrought iron for my pipe and poll axes.
It welds great, looks right, and is what they used in the 18th century. I have some old springs that I use for the bits. Welding in the bit and not burning it is always the tricky part of making an axe.” Brian signs his fancy tomahawks “B Barker” and everything else with a “B” in an oval.
Brian is a self-taught blacksmith. An early attempt at making a knife from a saw blade without drawing out the hardness got him interested in blacksmithing. A worn-out riveter’s forge given to him by a great uncle got things started. All that was salvageable of that riveter’s forge was the blower. He made the rest from wood, clay, and pipe from a muffler shop. For pipe axe making he has had to make many of his tools and modify others for specific jobs. An article on blacksmithing by Joe DeLaRonde got him started, but Brian says the Hershel House tape on blacksmithing was the most helpful of all. “It seems like I learn better and quicker when I can see things done.”
I don’t want this to sound like all Brian does is make pipe axes; he certainly does much more. Brian makes belt knives and fabulous 18th-century folding knives. He makes his knives from 1080 or 1084 plain steel, and the handles out of bone, horn, or wood. He chooses the harder varieties of wood, since so many people like to use the butt of their knives to start the ball when loading.
Brian also does powder horns. Scott Sibley, probably the best known and most prolific producer of powder horns around, has been a teacher and inspiration in this area of his endeavors. Scott started giving him advice long before his book came out, but Brian says he has still learned a lot from the book.
He likes to find horns sixteen or eighteen inches long with about a three-inch base, which he plugs with either pine or poplar. He tapers the holes in the mouth so they will let go of the stopper easier in wet weather. Brian engraves the horns with a knife he adapted by giving it a short blade for control and a steep bevel for a wider cut.
Tomahawks, knives, and horns are not all you will see if you run into Brian at a show. He also makes carved antler powder measurers, pick and brush sets, turn screws, tow worms, and ball pullers.
Brian has been married to Susan for twenty years and has a fifteen-year-old daughter, Chelsea, who loves to hunt with him on their sixty-acre farm in Kentucky using muzzleloaders. He has worked over twenty-two years for the University of Michigan. In eight years he plans to retire and devote full time to blacksmithing.
Brian is a member of the NRA, NMLRA, and the CLA. If you would like to contact him about any of his work you can do so at squirehawk1774@yahoo.com or give him a call at 734-697-4274.
About the author:
Paul Jones began his interest in living history in 1960 with Ralph Marcum and Randy Cochran, he was a charter member of the Kentucky Corps of Longrifles and began attending Friendship in 1959. His interest in contemporary makers started in the 1970’s when Dr. Glen Marsh introduced him to the work of Gary Birch and Jud Brennan. In conjunction with David Wright he wrote the “From the Hands of Master Craftsman” articles for Muzzleloader magazine and has been writing for Muzzle Blasts.
Art DeCamp’s instruction and horn-making techniques were invaluable to me in making screw-tip horns. Thank you, Art, for the class and the extra help you provided. Art has a new web site at:www.artspowderhorns.com
Samuel Pletcher grew up in southern Lancaster County in the 1750s. He apprenticed to a weaver, and by the time of the Revolution he was married with a family. One family source says he fought in the war, but this is uncertain. He may have participated in the Lancaster militia along with his brother Henry, but this has not been verified. After the war he remained in Lancaster County until 1790 when he and his brother took their families to Howard PA. From here the Pletcher family spread out, with Samuel spending his later days in central Ohio before passing away in 1830.

Samuel was my great, great, great, great grandfather, and it is because of him that I developed an interest in screw tip horns. He would have been working as a weaver in Lancaster at the same time the horn shops would have been operating, as well as Jacob Dickert and other Lancaster gunmakers. It would be quite reasonable to assume that he owned a horn from one of these shops and perhaps a gun from a maker like Dickert.
My interest in screw tip horns continued to increase when I met Art DeCamp. I took horn making classes from Art in 2008 and 2009. It was between these two classes that I realized that there were characteristics that distinguished Lancaster horns from other screw tips. I had to know what those characteristics were, and I couldn’t wait until the class in the fall. I went to Art’s table at CLA and said, “Art, I know you will tell us about the differences between Lancaster screw tips and other horns, but I can’t wait until the class. Will you explain that now?”
Art patiently began filling me in, and I impatiently waited for the horn class in the fall. I was going to make a horn like my ancestor Samuel probably carried when he left Lancaster.
The class is now over, and it was all I expected. Art covered screw tip horns in general and Lancaster horns specifically. He brought many original examples, numerous screw tip horns he made, and of course the raw materials for us to take home a reproduction of our own making.
We began with a discussion of the history of screw tip horns and differences in regional styles. Here we were, a bunch of old codgers, writing and sketching like mad, afraid we’d miss something. (I probably shouldn’t say codgers because Jeff is too young to be a codger.) Art admitted that we spent much more time on this than he planned, but the questions kept coming. I think he was pleased that the research he did on regional styles was appreciated. Art’s work on this isn’t over; he is close to publishing a book on screw tip horns and their history.
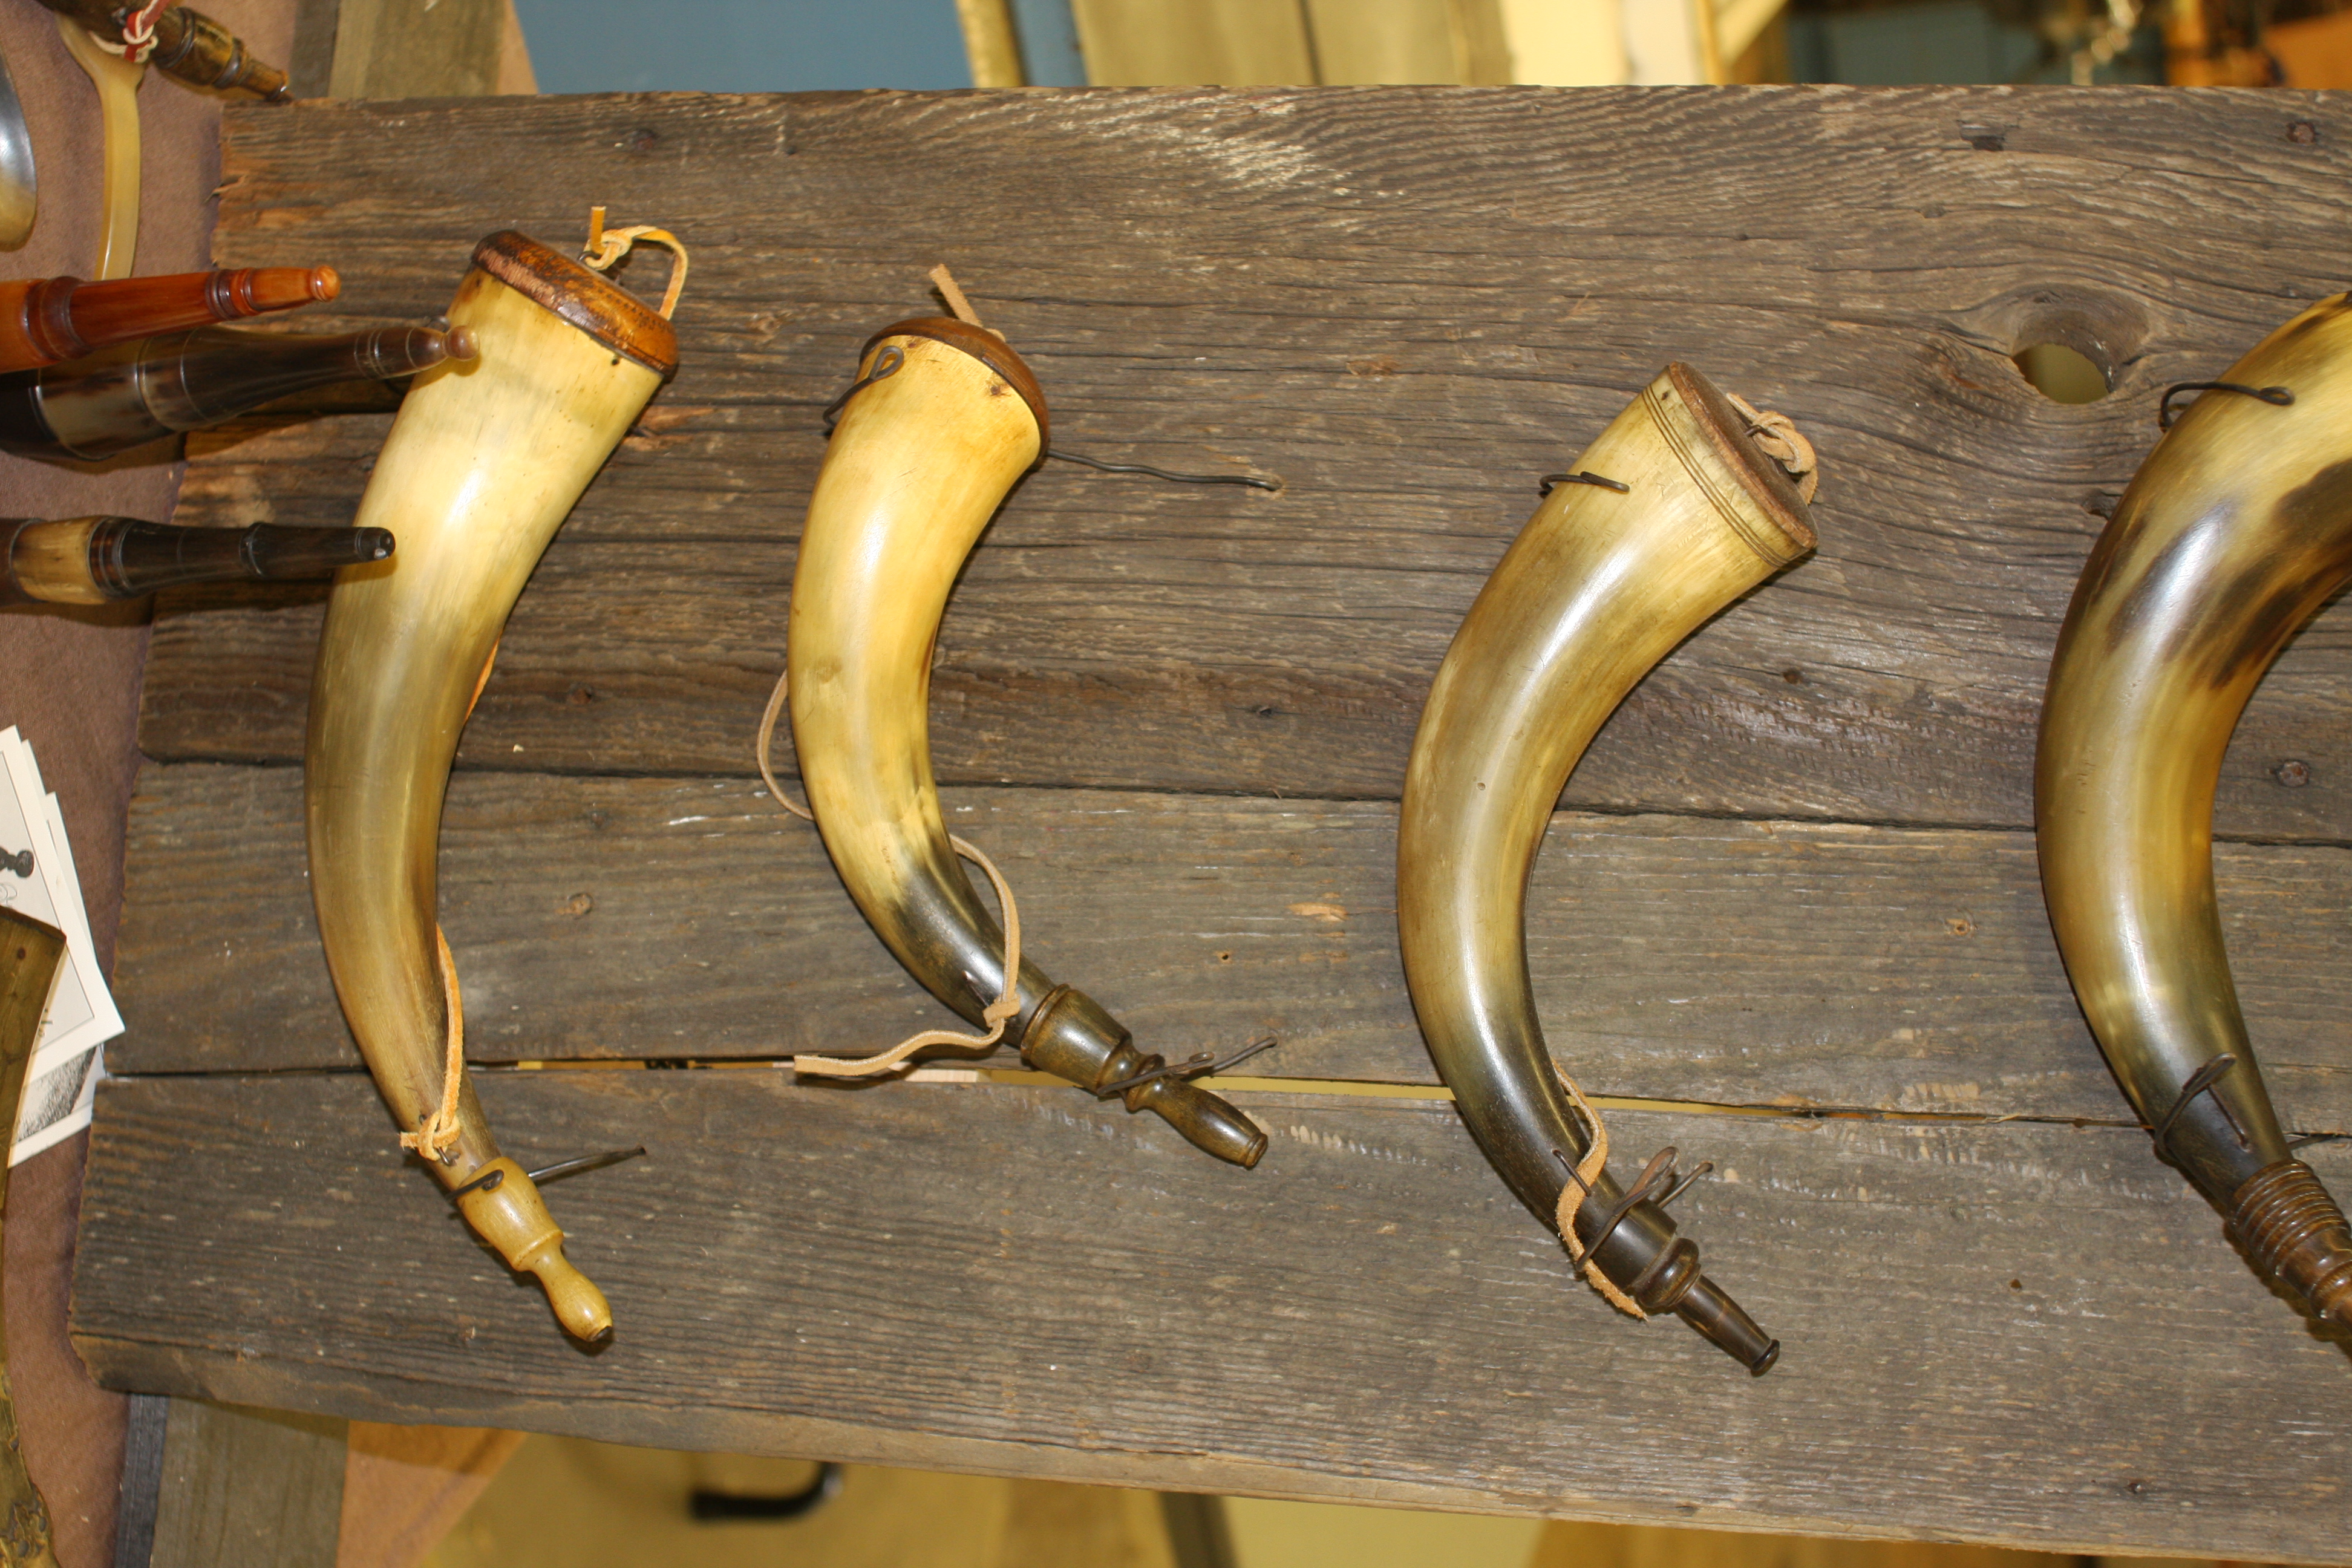
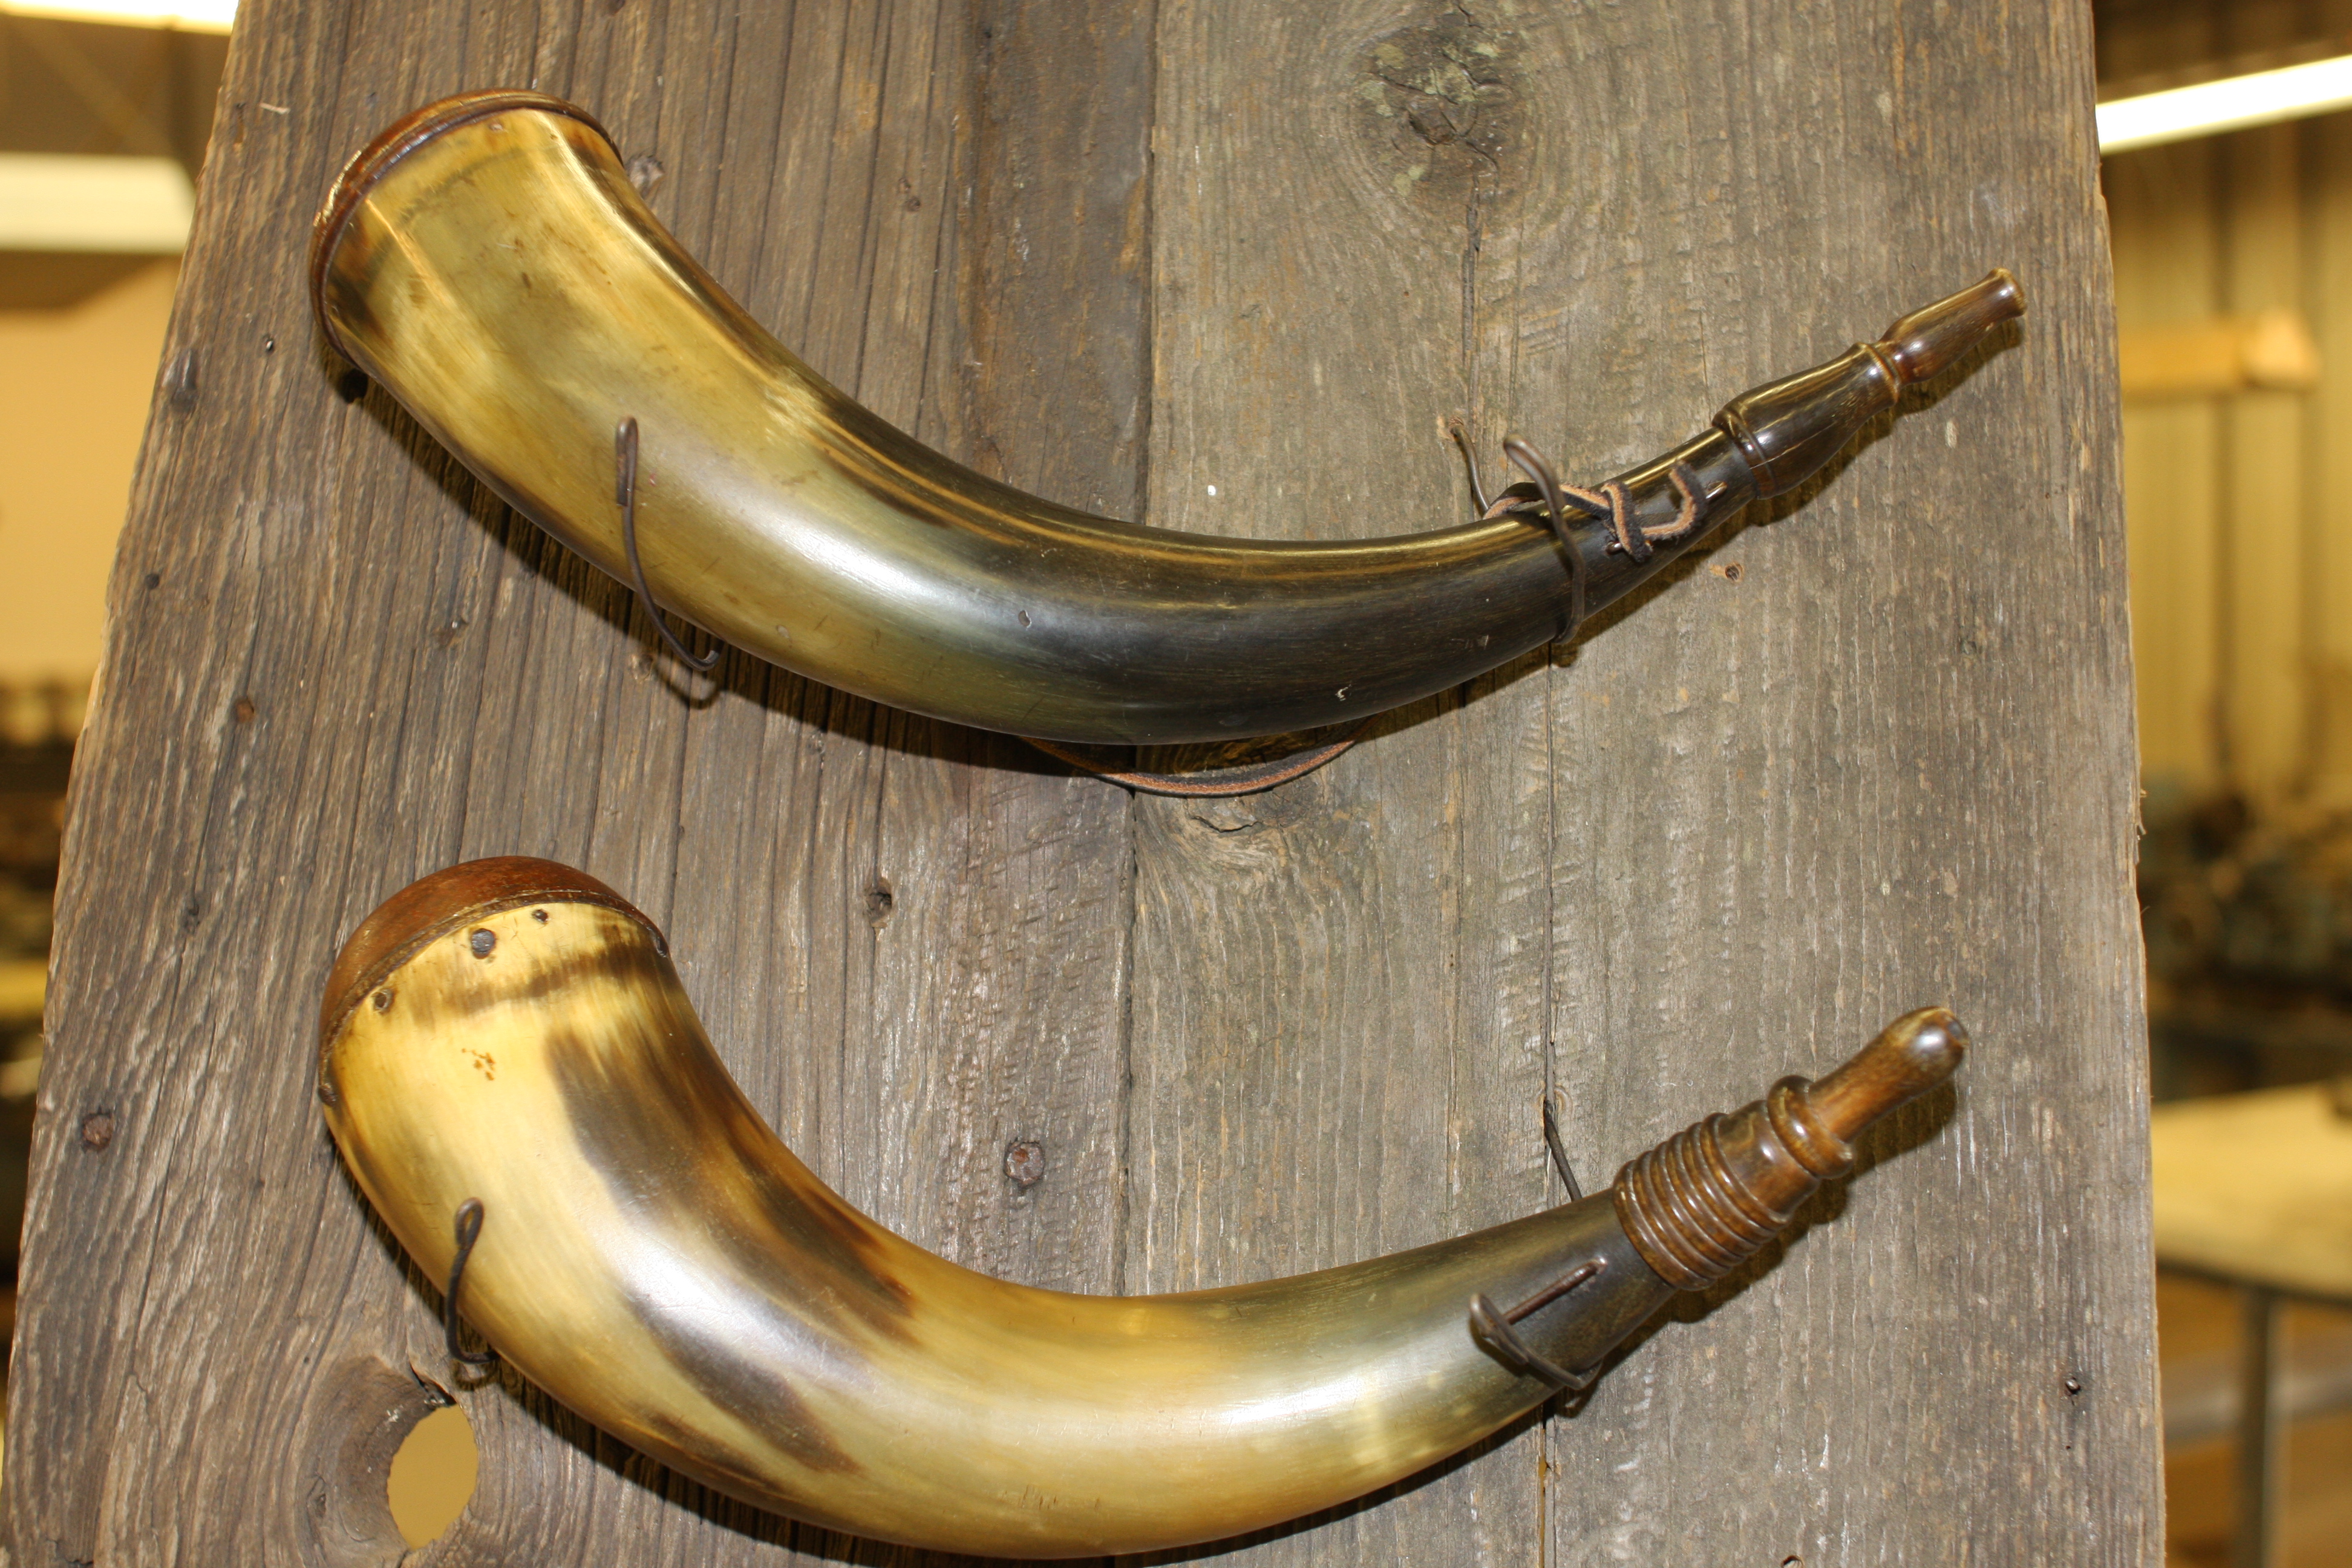
Below – Several original Lancaster tips
Below – Two of Art’s Lancaster tips
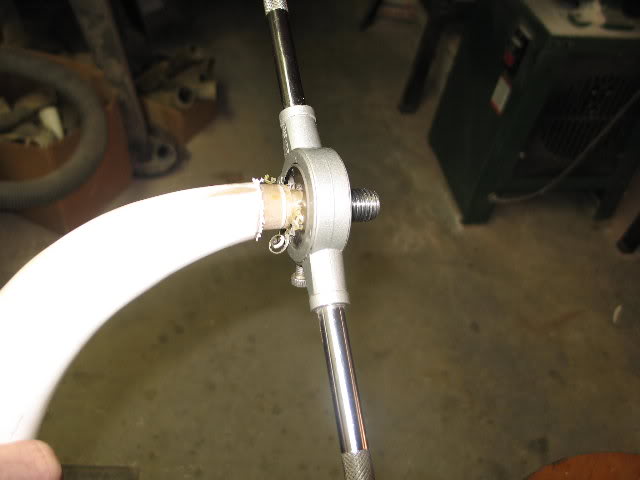
After picking out our horns and tips, Art started us preparing the spout end of the horn. We cut off the end and drilled the spout hole. Art cautioned us that the angle of the hole was vital because all the lathe operations done on the spout and the screw tip used this as the center. A poor drilling angle would result in a poorly angled screw tip. Art encouraged us to have another person watch the drilling from another angle to help us get the hole straight.
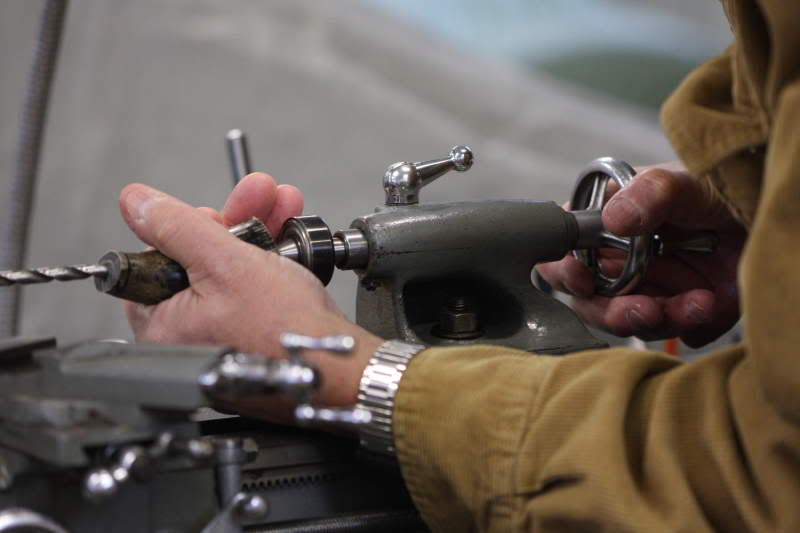
Below – (DeCamp photo) The tap is chucked in the lathe.
Turning the spout for threading, cutting the shoulder, and threading the spout came next. Art brought a variable speed lathe and had very useful tips for producing really good threads. This was tricky on the lathe even with the turning speed quite slow. Using a tap to chuck the spout end of the horn was a method that worked well with the slow lathe speed we used. Art’s threading guide made threading the spout work well.
Below – Jeff Bibb is preparing to turn the spout for the 5/8×11 die.
Below– (DeCamp photo) The threading guide is installed. We will add lube and cut the exterior threads.
We worked on the plug end of the horn next. After cutting off the horn, we formed it round by heating the horn in hot lard and inserting a tapered plug. This plug was also the mandrel we used to chuck the horn in the lathe for cutting the horn wall to uniform thickness. These operations left us with a round end with both inside and outside concentric.
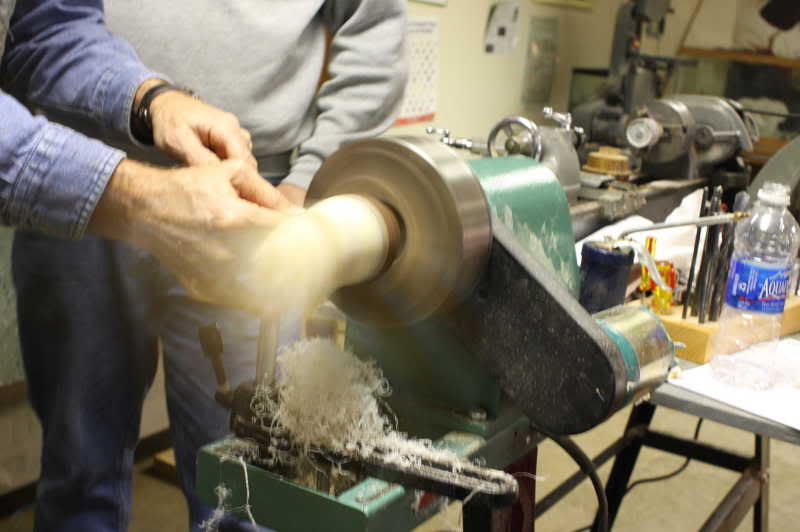
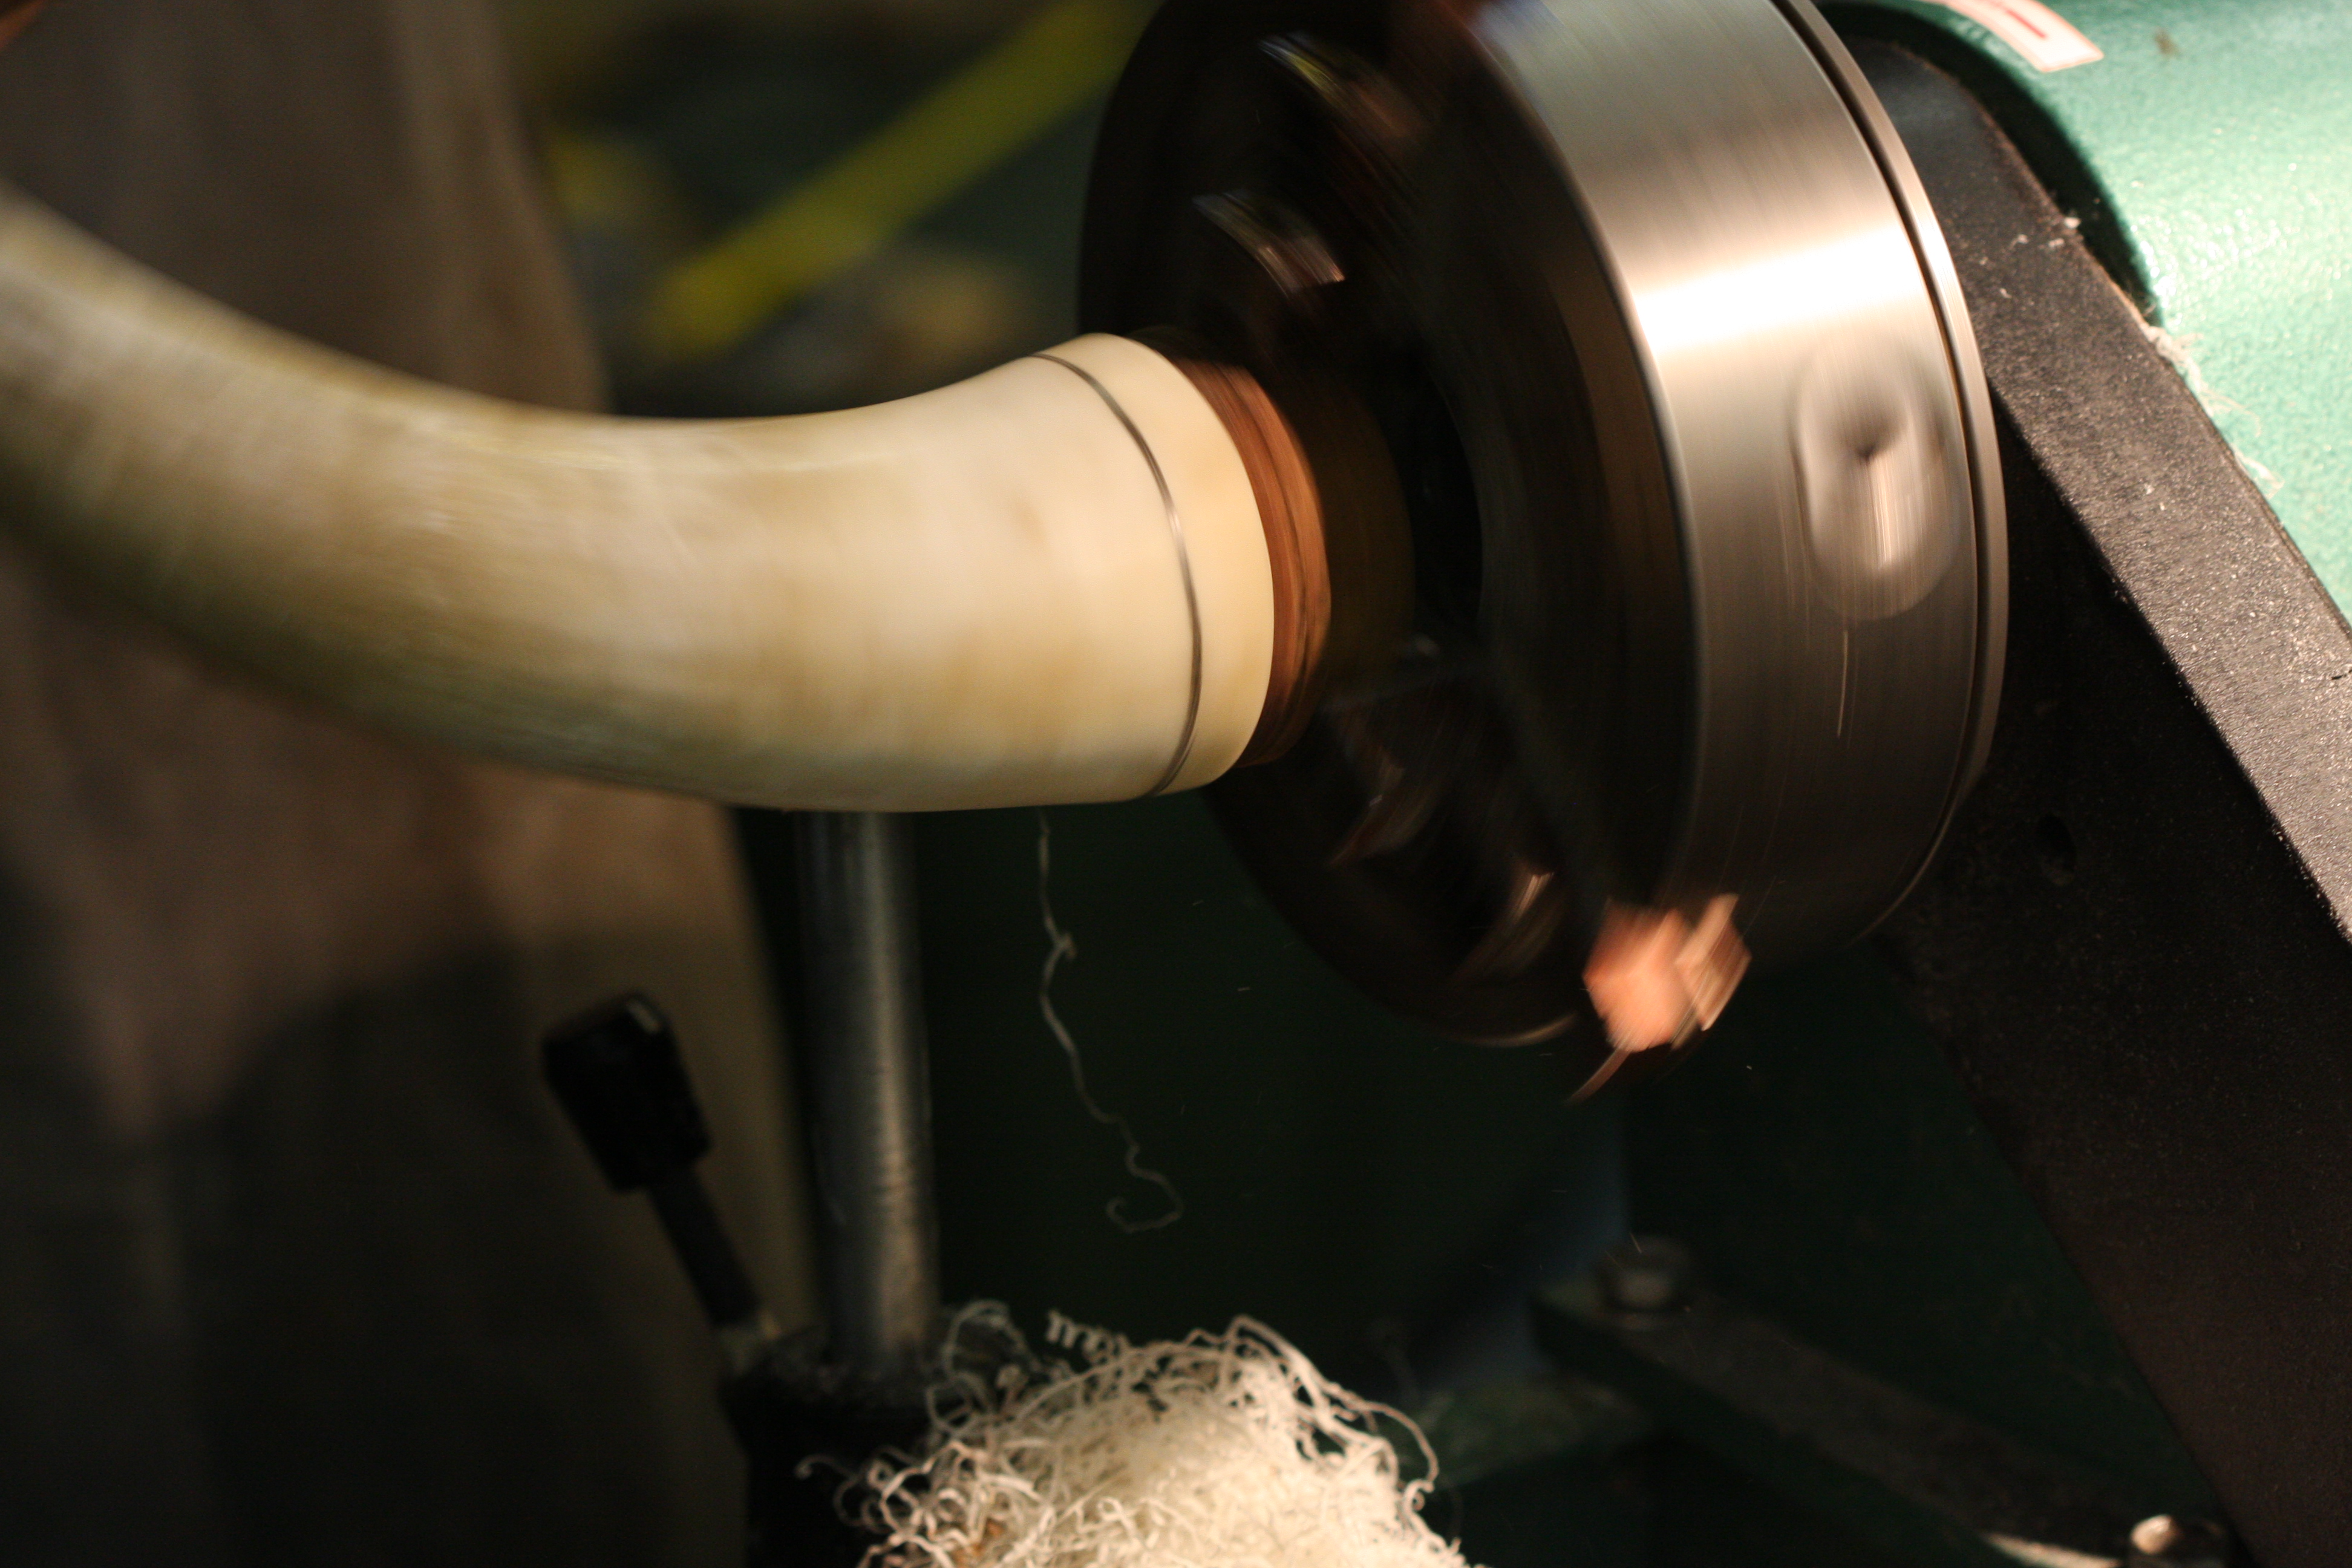
Turning the large end of the horn on the mandrel brought a bit of excitement to the class. Even when turning slowly, sometimes the horn would fly off the mandrel. The trick here was to adjust the speed fast enough to cut well, but not so fast that the horn would fly off. At times this was a delicate compromise. The better the match between the taper of horn and mandrel, the easier this operation was.
Below – Jeff Bibb is turning the the wall thickness and then parting off, providing a clean edge for fitting the plug.
Turning the plug was more or less a basic wood lathe operation. The lathe could be used at normal speeds. A inside/outside caliper as a very useful tool for measuring the horn, especially considering the taper inside the horn. We discussed the type of wood used and the variations in plug styles. The method of fastening the plug also varied with location.
Below – Art uses an inside/outside caliper and does a trial fit of the cherry plug.
Below – Art uses a parting tool to cut the inside diameter of the plug.
Below – A student cuts the final shape of the plugs exterior.

Making a good screw tip begins by making a good choice of blank material. Art cautioned us to keep the proportions of the horn in mind. We want the diameter and the length to look pleasing when attached to the horn. Color is also a consideration. In choosing the material, I looked for material that matched the horn reasonably well – at least I did the second time.
Art looked at my first choice and said, “Are you sure you want to use that piece?” I try to learn from mistakes and ended up with a piece that fit far better regarding color. I might add that sometimes as you turn, you uncover some very nice color variations. Other tip possibilities might include horn, antler, and wood.
Tip preparation involves drilling and tapping the large end, drilling the through-hole, and turning the profile to match the style we have choosen. We did this on Art’s 6″ Atlas metal lathe, although it was set up to use as a wood lathe. When the drilling was done we tapped the large end. We left the tap in place and used it to turn the plug’s outside profile of the tip.
Below – When tapping the tip, we chucked the tap and locked the chuck, turning the tip by hand. Pressure was added to the tail stock when starting the tap.

Below – Art assists a student with lathe technique.

Below – A student begins cutting the tip’s profile.
Higher turning speed, sand paper, and steel wool were used to produce the final finish. Art reminded us, “Be careful that your steel wool doesn’t get caught on the tap.” I’d swear there was a carefully covered grin as he said that. I think almost all of us did it. You’re watching the buttery smooth surface you’re getting on the tip, and suddenly there is a puff of dust that explodes from the steel wool as it wraps around the tap.
Final shaping of the horn was done with few surprises. We did learn that a draw knife works well when used away from the tip. Since the horn layers run out as you get away from the tip, you can peel layers. Going ther opposite direction won’t work.
Below – Art discusses the dying techniques he uses. Here he adds his secret ingredient – a “carelessly” measured amount of white vinegar.

Below – A student’s horn comes out of the yellow dye.

Below – Another student is using the brown dye to darken the spout end.
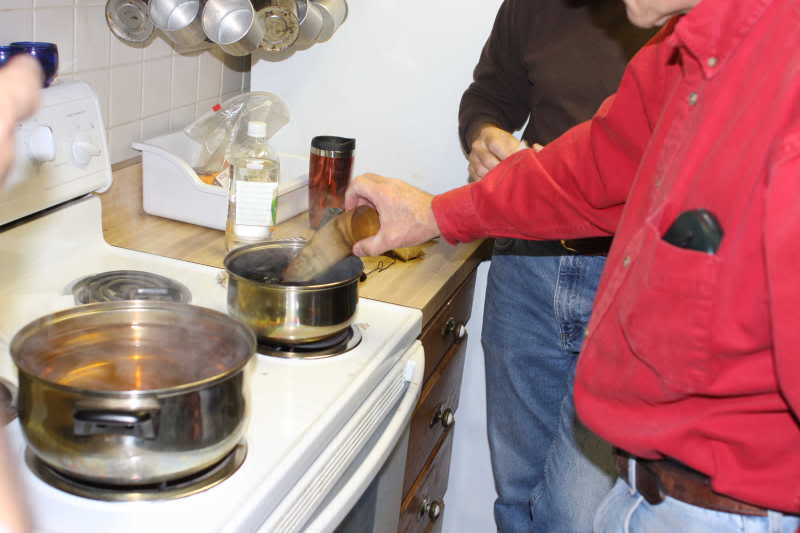
We had a chance to dye our horns with Art looking on. Art’s secret ingredient is vinegar. He has a “unique” method of measuring the amount of vinegar he adds.
Our final step was to fasten the plugs the horn. We used iron nails, but different regions used wood pegs of even thorns.
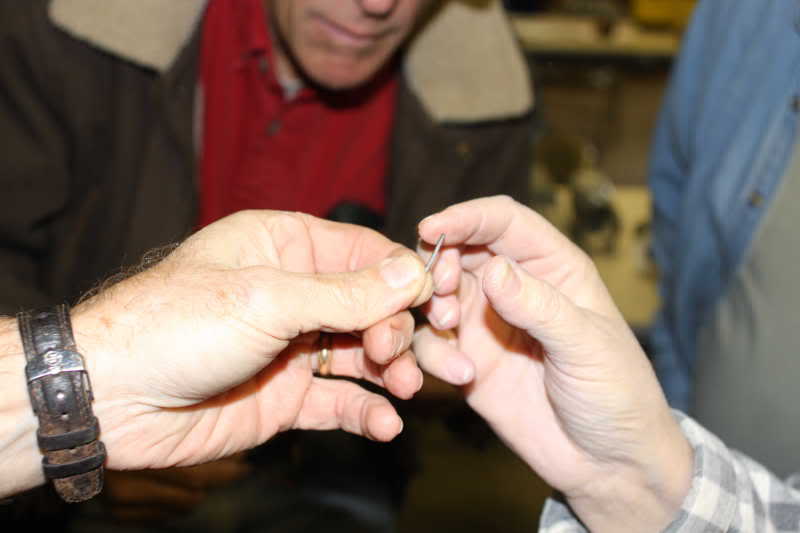
Above – Art prepares cold forged nails for attaching the plug. Here he uses 1/16″ wire and Belowshapes the head with a ball peen hammer.
My goal at the beginning of the class was to make a screw tip horn that would be proper for my ancestor Samuel to have carried. I am pleased also that I could make a second tip at home with what I learned from Art.
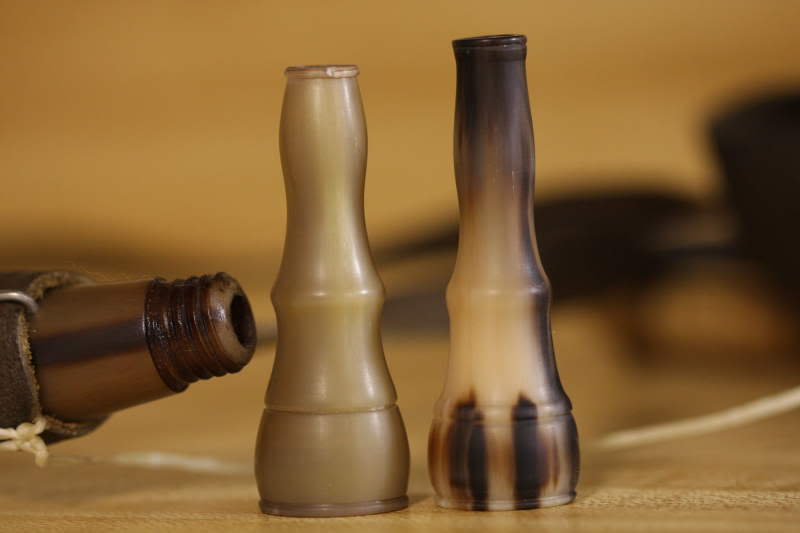
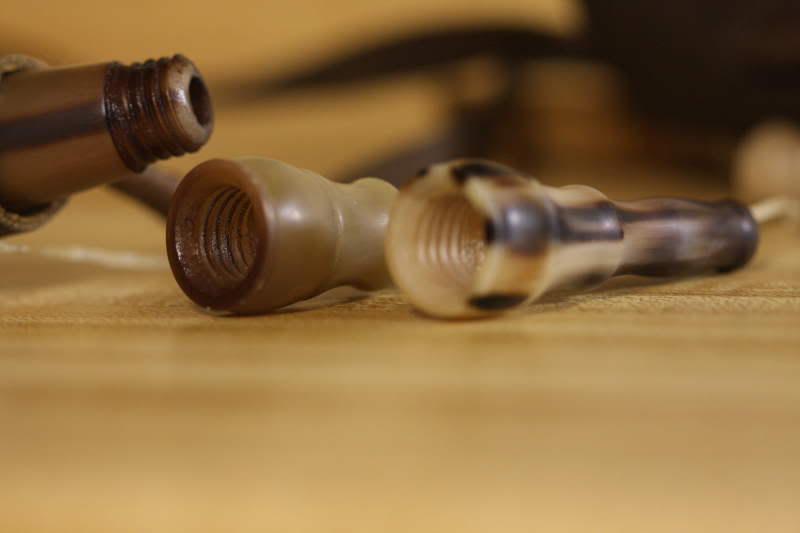
Below – The solid color tip on the left in the next two photos was done in Art’s class. The marbled one was from a horn chunk I found at home. Both fit on my Lancaster horn.
In my opinion, the class was a great success. It was a shame that only 11 students had a chance to learn from Art. That problem has been solved with the announcement that the screw tip class will be offered again in October of 2010. The fall program in on Conner Prairie’s web site, and the brochure with the fall schedule is in the mail. I hope this report on the completed class, and unashamed plug for next fall, has convinced you to sign up. I’m sure the fellows pictured below would agree.

Above – This is the class photo from the 2009 Conner Prairie Class. Front row from left: ——-, Glenn Sutt, Jeff Bibb Middle: Ginny VanMeter Back row: —–, Dave Gundrum, Joe Rushton, Alan Hoeweler, Larry Pletcher, Art DeCamp Missing: Chuck Brownewell (I would like to add the names of the unnamed students if anyone can provide them.)
Larry Pletcher, editor
Art DeCamp’s instruction and horn-making techniques were invaluable to me in making screw-tip horns. Thank you, Art, for the class and the extra help you provided. Art has a new web site at:
Samuel Pletcher grew up in southern Lancaster County in the 1750s. He apprenticed to a shoe cobbler, and by the time of the Revolution he was married with a family. One family source says he fought in the war, but this is uncertain. He may have participated in the Lancaster militia, but may have been more valuable making shoes instead. He remained in Lancaster County until 1790 when he and his brother took their families to Howard PA. From here the Pletcher family spread out, with Samuel spending his later days in central Ohio before passing away in 1830.
Samuel was my great, great, great, great grandfather, and it is because of him that I developed an interest in screw tip horns. He would have been making shoes in Lancaster at the same time the horn shops would have been operating, as well as Jacob Dickert and other Lancaster gunmakers. It would be quite reasonable to assume that he owned a horn from one of these shops and perhaps a gun from a maker like Dickert.
My interest in screw tip horns continued to increase when I met Art DeCamp. I took horn making classes from Art in 2008 and 2009. It was between these two classes that I realized that there were characteristics that distinguished Lancaster horns from other screw tips. I had to know what those characteristics were, and I couldn’t wait until the class in the fall. I went to Art’s table at CLA and said, “Art, I know you will tell us about the differences between Lancaster screw tips and other horns, but I can’t wait until the class. Will you explain that now?”
Art patiently began filling me in, and I impatiently waited for the horn class in the fall. I was going to make a horn like my ancestor Samuel probably carried.
Now you see my interest in screw tips, especially those from Lancaster. This topic will be covered in parts with sections devoted to the preparation of the horn spout, turning the base and butt plug, as well as preparing the threaded tip. Again, I wish to thank Art for his help in this project. His information and encouragement have been invaluable.
Links to Parts 1-3
Part 1 of the tutorial deals with making the spout end of the horn. We discuss bits and taps necessary and show the lathe proceedures used.
Making Lancaster Screw Tip Horns Part 1
In Part 2, we prepare the large end of the horn. This includes forming, and lathe turning the horn, as well as shaping and fitting the plug.
Making Lancaster Screw Tip Horns Part 2
In Part 3 we discuss the making of the screw tip. We limit our examples to Lancaster style and also to using horn rather than other materials such as wood or antler.
Making Lancaster Screw Tip Horns Part 3
Author/Editor’s Notes
Photo credits: The photos used here with a few noted exceptions were taken by me. Most were taken at the horn class at Conner Prairie. I supplemented these with photos from Art. These are identified in the captions. A few more were taken at my home to fill gaps in the photo record.
First a disclaimer:
I do not consider myself a horner. I enjoy teaching and learning, especially learning from knowledgable folks in the area of black powder. Please take this tutorial as a learner who is using this as a chance to organize horn-making information, or take this as a teacher with new information he can’t keep from sharing. However, I’m no horn expert. Art is the expert, and the chance to learn about screw tip horns from him has been a treat.
Lathe considerations:
This project presents unique demands on the lathe. Spinning an object out of round must be done slowly. An electronic speed control is invaluable. Most pulley-driven lathes can be slowed down to 800-900 rpm. Spinning a horn as Art does requires under 300 rpm, and that would be considered too fast. Art estimated his lathe speed at 80 rpm. My seat-of-the-pants calculation was 240 rpm. Having no electronic speed control, I worked out a geared-down belt system that produced a calculated speed is 130 rpm. A little faster would be preferable. Be aware of these speed problems when spinning a horn. Another issue is that the horn will require a larger swing. You will probably need to attach the chuck to the left end of the headstock to have enough swing.
Wood lathe chucks:
The use of the modern chucks simplifies a couple of the operations discussed here. Art uses a face plate with a screw center for the tutorial. This is used when turning the plug in Part 2. With this method, Art must remove the plug to test fit it into the horn. Art is so good at this that he only had to pull the plug twice to get the fit he wanted. I’m not nearly as capable at this. To make up for my lack of experience, I use a chuck that lets me grab the plug from either end. When I turn the taper that fits into the horn, I chuck the large end of the plug, leaving the taper open. I can fit the plug without removing it each time. When I’m ready to finish the exterior of the plug, I reverse the plug. The type of chuck you use will determine the methods you use.
(Larry Pletcher, editor)
Art DeCamp’s instruction and horn-making techniques were invaluable to me in making screw-tip horns. Thank you, Art, for the class and the extra help you provided. Art has a new web site at:
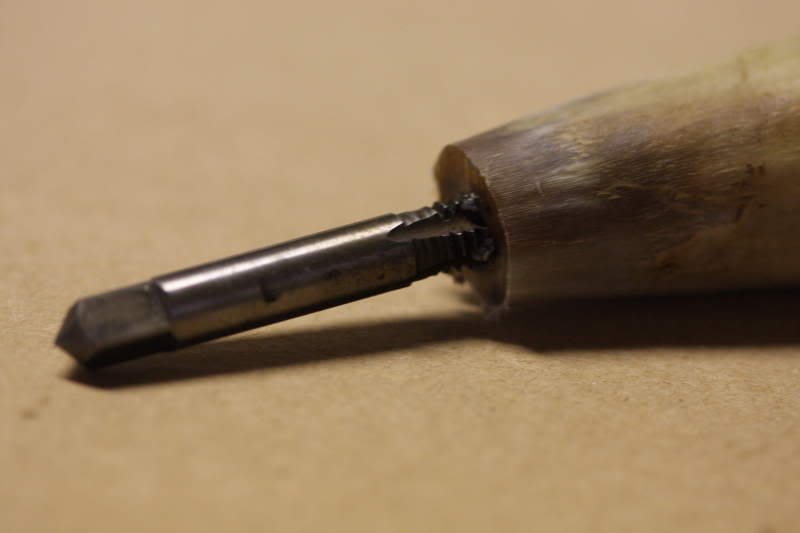
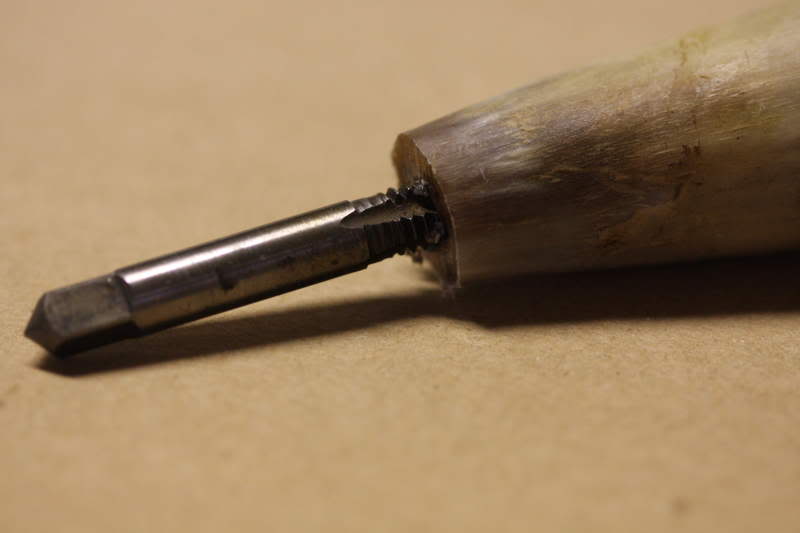
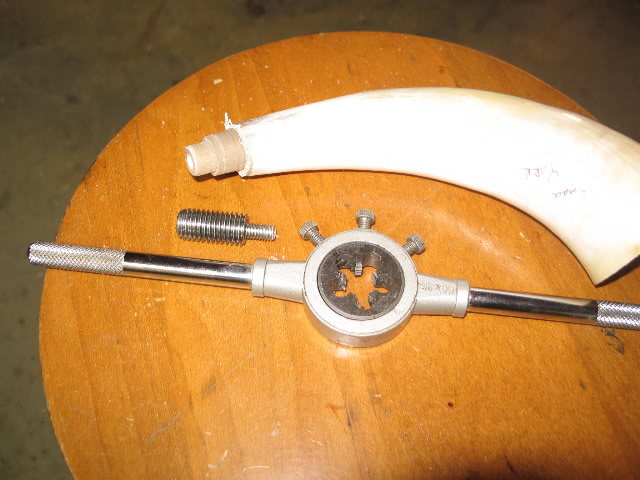
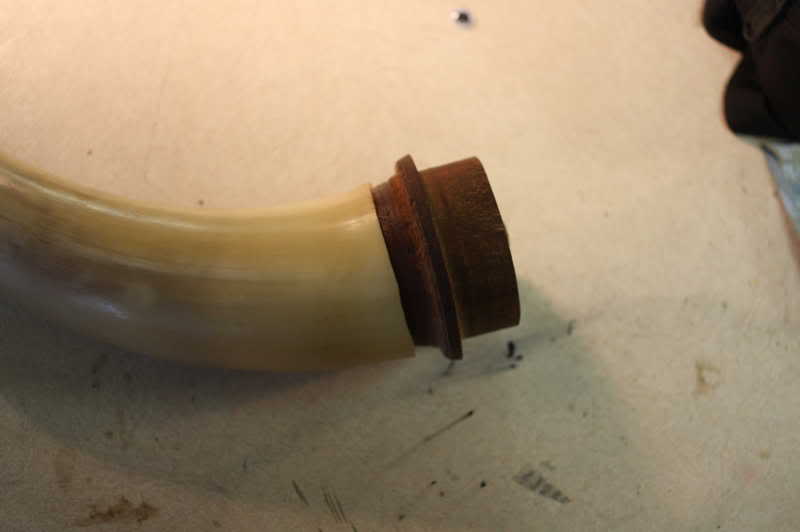
When you select a horn, there are some dimensions that should be considered. For Part 1 we will deal with preparing the tip end of the horn. For the horn used in this Tutorial a 5/8″x11 thread will be used for the screw tip. We will be drilling a 5/16″ spout hole. To turn the exterior threads we will need to turn the spout end to .600”. These facts should be considered as you select your horn. We need a tip that has enough solid material to do these operations. There is nothing magic about the tap and die sizes mentioned above. You might decide to use ½” for the exterior and ¼” for the spout, based on the size of the horn.
First let’s begin by cutting off the end. I determine where to cut by going away from the tip until the horn is at least .600” thick. The cut can be made with a hacksaw. Envision the hole you will drill and cut as square to that as you can. However we will face off the end later on the lathe.
Before you drill the horn it will be helpful to know how long the solid part is. Take a wire and push it into the open end. By holding the wire outside the horn you can tell how deep the hollow part is. This can be marked on the side of the horn.
Now drill the tip. I filed the end smooth so the bit wouldn’t slip. In fact it would be a good idea to center drill to insure that your starting point is in the center. Art suggested that we drill the hole with the finished bit size. He said that often “chasing” a smaller bit with a larger one may cause the larger bit to catch.
It helps to watch the drilling process from two planes. In Art’s class we chucked the 5/16” bit in the lathe and drilled horizontally. I looked straight down while Art looked horizontally. He would help to adjust me if I wasn’t straight from his perspective. Two sets of eyes are better than one, especially with this being my first screw tip. It is important to note that the angle of the screw tip is determined by this hole. All spout work will be determined by the drilling angle of this first hole.
Below – Back home from class, I’m drilling the spout without the second pair of eyes.
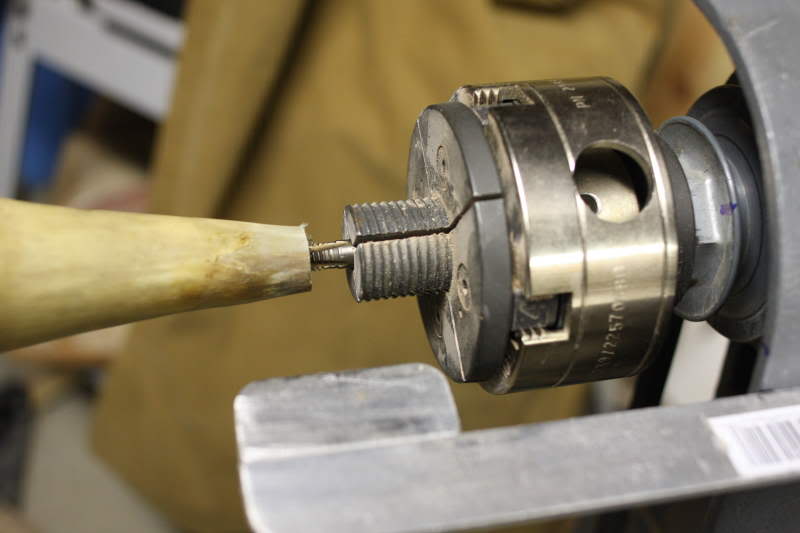
Our next step is to turn the tip to .600” in the lathe. To hold the tip in the lathe, we thread the hole we drilled. By threading the hole and leaving the tap screwed in place, we can chuck the end of the tap in the lathe. (Some makers remove the tap and screw in a 5/16” bolt with the bolt head cut off.) We tapped the hole by hand using oil for a lube. At home I have tried things like Crisco or Lanolin (Bag Balm).
Below – The spout is tapped. We’ll leave the tap in place to use it to chuck in the lathe.
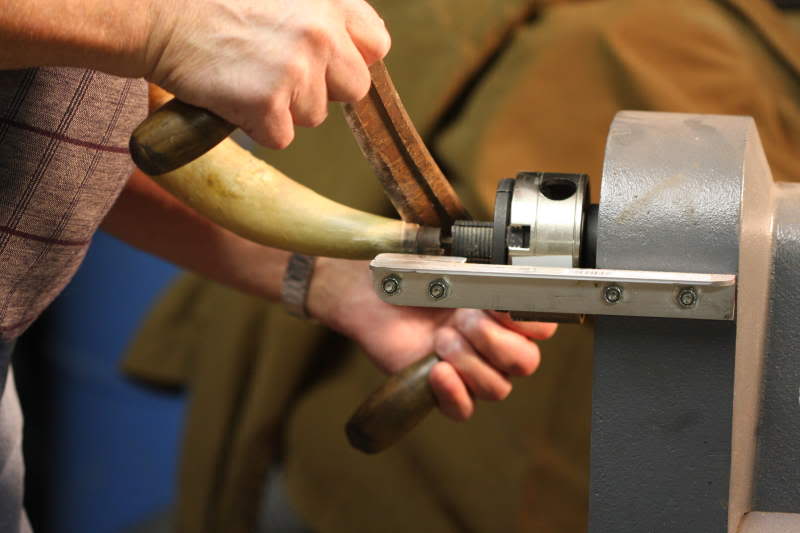
The use of a lathe to turn the end for exterior threads needs some explanation. Because the horn is curved, it can’t be concentric with the lathe center. At normal lathe speeds it would flop terribly. Art’s lathe has an electronic speed control. We estimate that we ran at 80 -130 rpm. (The slow speed on my wood lathe is around 900 rpm – too fast for this operation.)
When turning the tip, we need at least ½” of threads to screw the tip to. So we will turn at least ½” of the horn to .600” inch. I think I turned mine back at least 9/16”. When turning this section I used a scraper and a skew to finish. I took the horn to “round” and then used a caliper and a parting tool to get down to .600”. Once you have gotten to .600”, the diameter of the horn spout should be considered. Turn the spout “round” behind the threaded portion to the diameter you want the screw tip to tighten up against. This horn will be thinned to the shoulder diameter with a rasp or draw knife. (Note this shoulder in the photo just below. The use of a rasp to shape the spout will be covered in part 2.)
Below – (DeCamp photo) The tap is chucked in the lathe.
Below – Jeff Bibb is preparing to turn the spout for the 5/8×13 die.
Before removing the horn from the lathe, face off the turned end. You will lose a small bit of length doing this; that is why you turned the round part a little long. When facing off, take care keep the parting tool from touching the tap. You can always file any small amount away after the tap is removed.
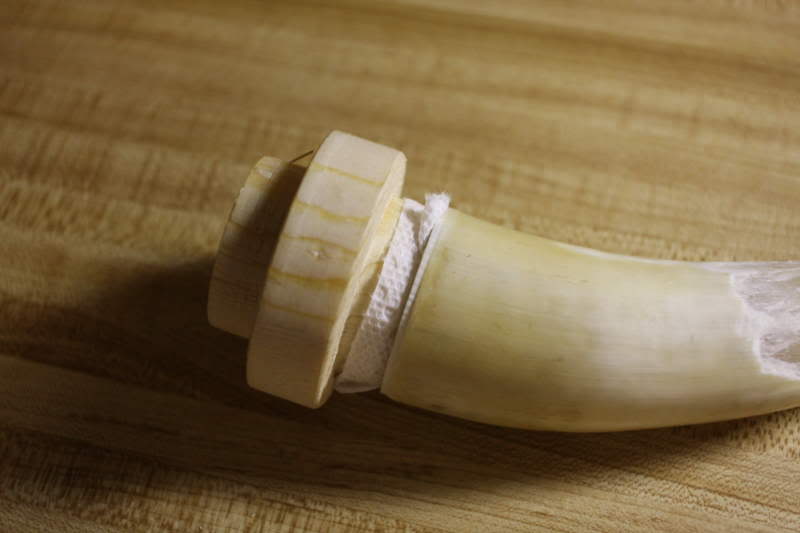
Now we’re ready to thread the turned exterior. Art showed us a threading guide to use when starting the die. See the photo. These can be made on a metal lathe. (I used a piece of threaded rod and drilled a hole centered in one end. This hole is tapped for the size used to tap the interior of the spout hole.)
Below – (DeCamp photo) The horn is shown with the die and the threading guide.
Below– (DeCamp photo) The threading guide is installed. We will add lube and cut the exterior threads.
Thread on the guide and lube the horn. Spin the die unto the guide then begin threading. With lube, the horn should thread easily. I spin off the die and reverse it, and spin it back on backwards. This will cut the threads closer to the shoulder. Remove the die and the threading guide. You should have perfectly formed exterior threads, all ready for the screw on tip. In the next part we will prepare the butt of the horn and turn the plug.
Go to Part 2: Making Lancaster Screw Tip Horns Part 2
Go to Part 3: Making Lancaster Screw Tip Horns Part 3
Go back to the Intro: Making Lancaster Screw Tip Horns Intro
Art DeCamp’s instruction and horn-making techniques were invaluable to me in making screw-tip horns. Thank you, Art, for the class and the extra help you provided. Art has a new web site at: www.artspowderhorns.com
In this part we will discuss the preparation of the butt of the horn. This will involve trimming, shaping, and turning. We will also turn and fit the plug.
Let’s first look at the horn. There is probably material at the end that needs to be trimmed. Decide where to trim to get rid of any damaged or unflattering parts. Cut this part away as square as possible and use a disk or belt sander to make it as true as possible. When turning we will face off the end, and final edges will be cared for there.
Below – Notice the rough end of the horn before cutting off.
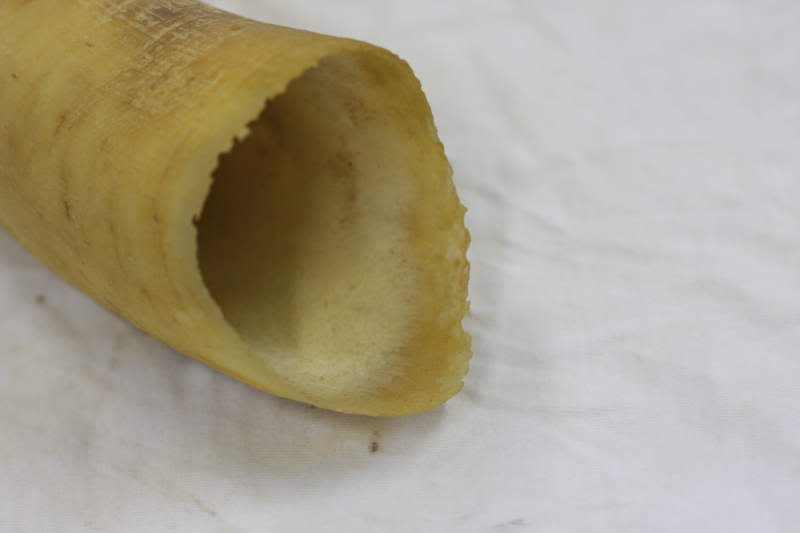
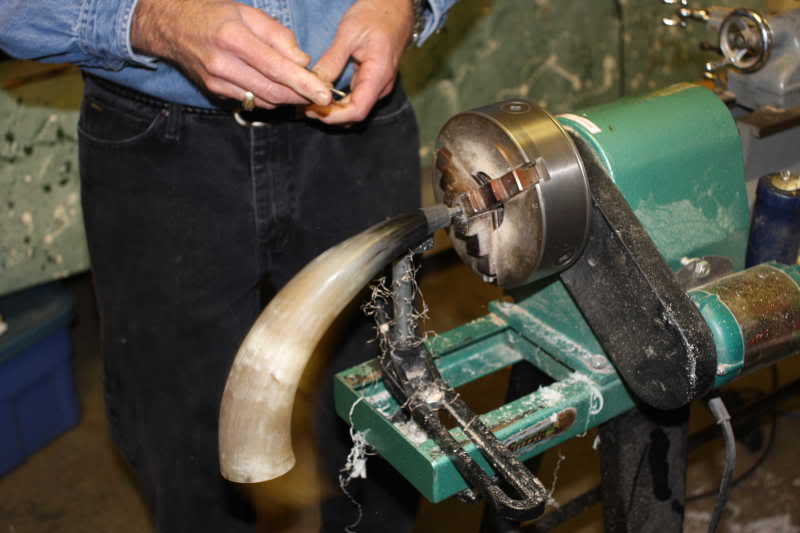
The horn will now be heated and made round. Art had a number of tapered forms which the class used. These can be made on the lathe. I have made a couple with mild tapers and will make additional ones as different size horns are made. With a suitable tapered form ready, the horn can be heated.
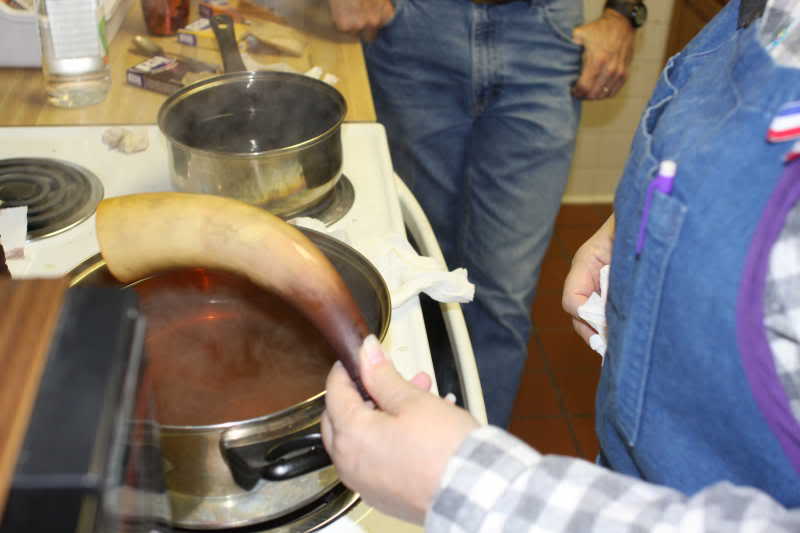
In Art’s class we used his small deep fryer filled with lard. We used a thermometer to keep the temperature no higher than 350 degrees. The horn is placed in the grease deep enough to heat it thoroughly. Be aware that since you have the spout end open, grease can run out if the horn is tipped up to look at the plug end. Watch how you hold the horn, being mindful of the open end.
Below – The horn is heated in hot oil.
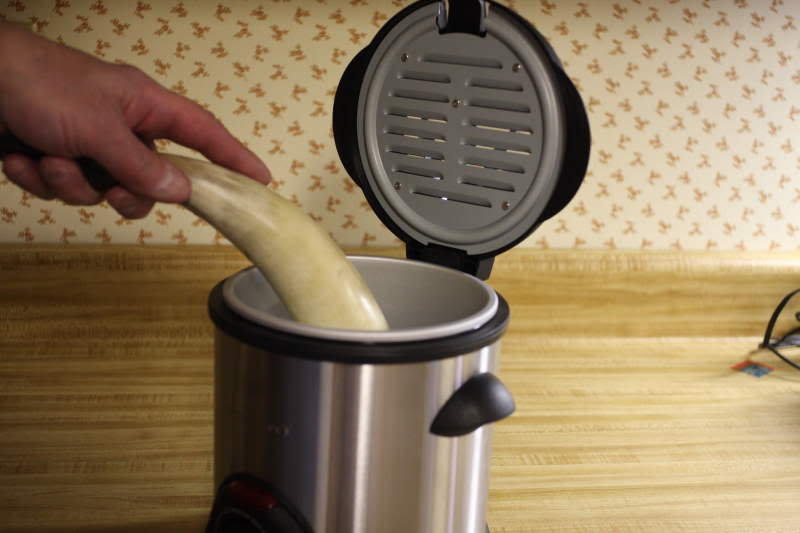
A useful tip was given to us as we wondered how long to heat the horn. Before heating the horn, tap it on the side of the fryer and listen to the hard clicking sound. When the horn is heated enough, a tap on the side of the fryer will give a dull thunk – very different from the sound you heard before heating. This was very useful to me. I dunked the horn for a few seconds, tapped it on the side, dunked again, repeating until I got that dull thunk. Shake off the oil and push the form inside the end. Push the form into the horn until the horn completely conforms to the round form. If it doesn’t, another heating is necessary.
Below – The plug is installed in the horn and is ready for turning.
Below – Jeff Bibb is turning the the wall thickness and then parting off, providing a clean edge for fitting the plug.


With the forming step complete, we know that the horn is round on the inside. If the wall thickness was the same, the outside would be concentric with the inside. Obviously this will not be the case, and we must turn the exterior so that it is uniform in thickness. With the form still in the horn, the form now becomes the mandrel that is chucked in the lathe. Here again the lathe speed must be quite slow. If my lathe was a variable speed, I would start slowly and gradually increase the speed until the tools cut well – probably under 200 rpm. A scraper is a good tool to use. We want to cut the thick parts down to the same thickness as the thinnest part. Another way to put this is that we want to stop when we are cutting all the way around the horn. As you get close you may want to change tools to a skew. Your lathe experience will come into play here. Stop though, just as soon as you are cutting all the way around. Now would be the time to part off the horn to give a perfect fit to the plug.
A couple of unexpected things may happen as you begin turning the butt. If any oil remained in the horn, it will be flung from the end of the horn as you turn on the lathe. Count on that happening, even it you tried to wipe out the horn. I’d stand to one side as you start the lathe the first time. Once the lathe has run briefly, the oil will be gone.
Another possibility is that the horn may come flying off the mandrel. If the taper of the mandrel matches the taper of the horn fairly well, this is less likely to happen. If the horn needs to be reattached, try a piece of damp paper towel over the mandrel, and then push the horn firmly on. In class we had some horns fly off more that once, but we still managed to get them turned concentric.
Below – The wet paper towel trick is being used to reattach the horn to the plug/mandrel.
Below – I use a draw knife to peel back material from the shoulder behind the threads.
The horn body can be worked down any time. Whatever tools you are comfortable using can now be used to work from tip to butt. Art’s use of the drawknife saved us much rasping. Art does this while the tap is in the spout and the horn is still in the lathe. He simply pries up on the material on the shoulder and peels it back. When using this method, always work from the tip to butt because of the way the horn fibers run out as you go toward the butt.
My experience with finishing a horn is that I always find scratches that I thought were gone. In class I thought I had the horn done quite well until it came out of the dye. When dyed, all kinds of marks suddenly appeared. The dye made the flaws much easier to see. After hearing other horn makers mention this, I may do a quick dye job just to make the flaws show up – planning the real dye work later.
With the horn largely done, we need to turn a plug. If you are making a screw tip styled after a particular location, some research will help. In our class we used cherry, as it was commonly used and turns well. Other fruit woods were mentioned also. (I had a chance to get some apple wood and will try it on my next horn.)
Below – Art uses an inside/outside caliper and does a trial fit of the cherry plug.

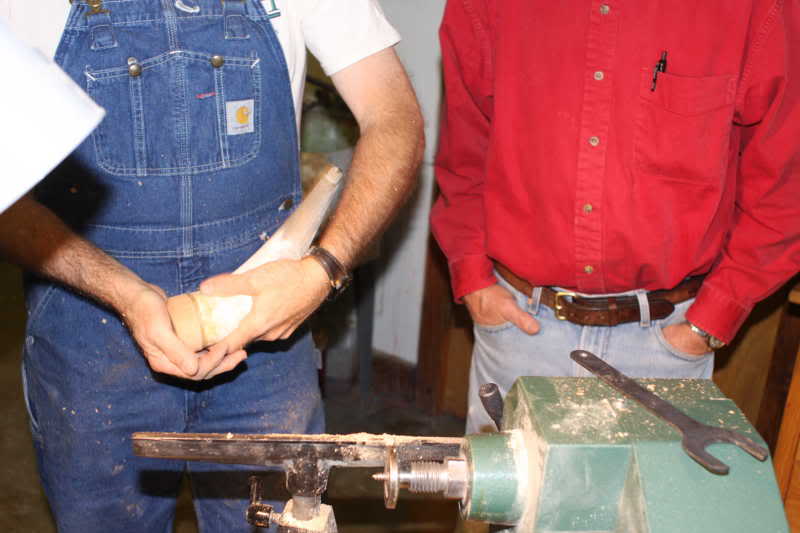
Inside and outside calipers will be useful tools in turning the plug. From a square piece of cherry, I located the center and drew a circle to the exterior dimension of the plug. For depth, I left enough for the taper inside the horn as well as enough to chuck in the lathe. I cut the corners off the piece to save extra lathe work. In Art’s class we used a face plate with a center screw.
Measure the exterior of the horn and turn the plug down close to the final dimension. Determine where the shoulder will be and measure the inside diameter of the horn with an inside caliper. With a parting tool, carefully cut down to the inside diameter. Keep the shoulder of the cut straight, as this is where the horn will fit. Now work the taper to match the taper of the horn. An inside-outside caliper is a great tool for this. You can find the diameter of the horn at the depth of the taper and work toward the shoulder you have already determined. At this point you will need to remove the plug from the face plate and see how it fits the horn. You will probably need to do this a couple of times. With each try, mark the tight places with a pencil, reattach to the face plate, and remove wood carefully from the tight places. (I use a slightly different method of fitting the plug because of a different type of lathe chuck. See the editor’s note in the Intro.)
Below – Art uses a parting tool to cut the inside diameter of the plug.

Below – A student cuts the final shape of the plugs exterior.
When your plug fits well, begin turning the final shape to the exterior. Keep in mind the style of the horn and tip you are making. Your plug style should be in keeping with the rest of the horn. As you work to the final shape, carefully match the diameter of the horn. With some exceptions, you will want to match the horn’s diameter.
Sand and finish the plug. I like to do as much of this on the lathe as possible. Extra time spent here will be worthwhile. Various finishes work well. I used lanolin (Bag Balm) on my last horn and plug. I will probably use it again.
You may wish to dye the horn or add some protective finish. Because I had so many marks show up after dying the horn in class, I refinished my horn at home. I tried to use the same techniques as we used in class. My horn was dyed with a yellow and brown dye in two separate pots. I started with yellow and then a little brown on the tip end. One of the last trips into the yellow, I added a small amount of orange. The screw tip didn’t go into the dye because I liked the buttery caramel color without. The horn, plug, and tip were rubbed with lanolin as the final step. I think lanolin is good for both horn and wood plug.
Below – Art discusses the dying techniques he uses. Here he adds his secret ingredient – a “carelessly” measured amount of white vinegar.
Below – A student’s horn comes out of the yellow dye.
Below – Another student is using the brown dye to darken the spout end.

At this point your horn should be done except for the screw tip – the part that gives this style of horn its name. This will be the subject of Part 3.
Return to Part 1: Making Lancaster Screw Tip Horns Part 1
Go to Part 3: Making Lancaster Screw Tip Horns Part 3
Go back to the Intro: Making Lancaster Screw Tip Horns Intro
Art DeCamp’s instruction and horn-making techniques were invaluable to me in making screw-tip horns. Thank you, Art, for the class and the extra help you provided. Art has a new web site at:
Part 3 will deal with the turning of the threaded tip. First let’s choose the tip. Keep in mind the proportions of the horn. We want the diameter and the length to look pleasing when attached to the horn. As long the blank is large enough for the length and diameter of the tip we want, we’re OK. In choosing the material, I looked for material that matched the horn reasonably well – at least I did the second time.
Art looked at my first choice and said, “Are you sure you want to use that piece?” I try to learn from mistakes and ended up with a piece that fit far better regarding color. I might add that sometimes as you turn, you uncover some very nice color variations. Other tip possibilities might include horn, antler, and wood.
Once a choice was made, we began by drilling the tip for the threaded end and for the through hole. We found the center of each end and center drilled them. We chucked the bit for the threaded end in the lathe. We placed the tailstock against the other end to keep the blank centered. We held the blank in one hand and advanced the tailstock with the other. We used the graduations on the tailstock to drill the hole 9/16”deep.
Below – The end that eventually will be threaded is being drilled here. The bit size matches the the tap we plan to use.
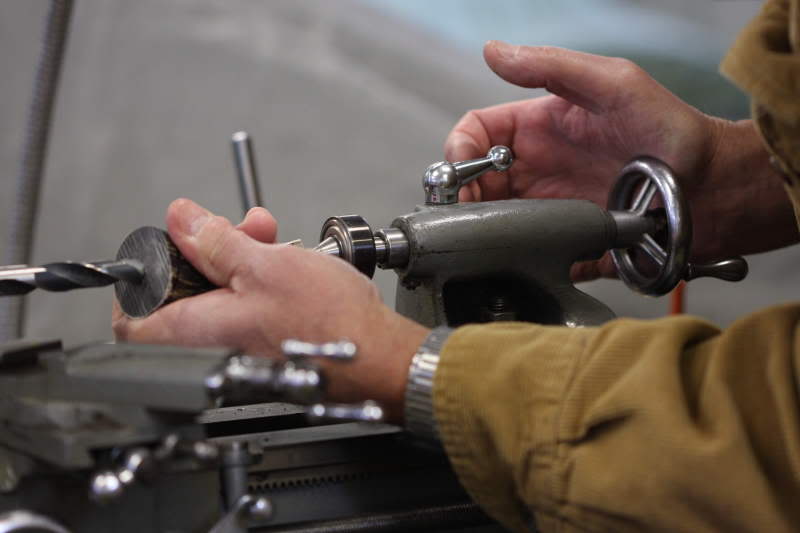
Next we drilled the through hole. Here we used ¼” bit, drilling from both ends of the blank. The tailstock was always used to maintain the center.
Threading the large end comes next. We chucked the tap in the head stock and locked it. We used a ball-bearing center in tailstock and pushed against the small end of the tip to keep everything centered. We turned the blank by hand, keeping lube on the tap and reversing often to clean it.
Below – When tapping the tip, we chucked the tap and locked the chuck, turning the tip by hand. Pressure was added to the tail stock when starting the tap.
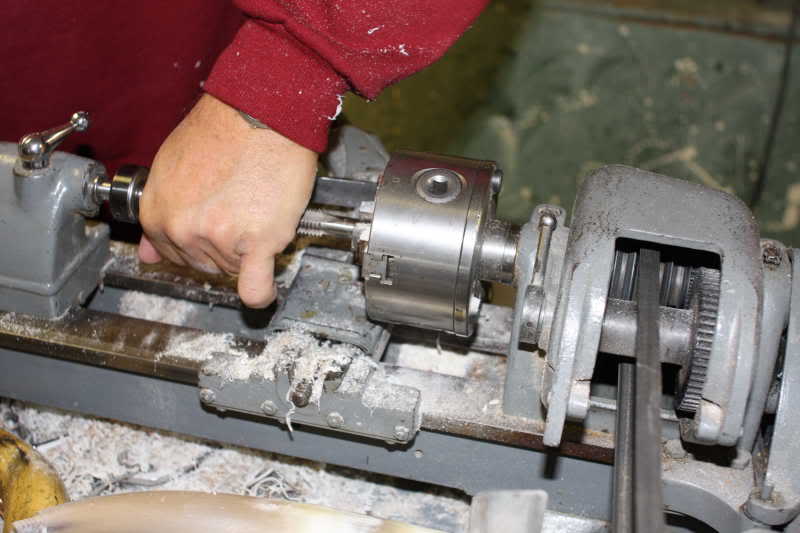
Below – Here I used a channel lock to turn the tip.
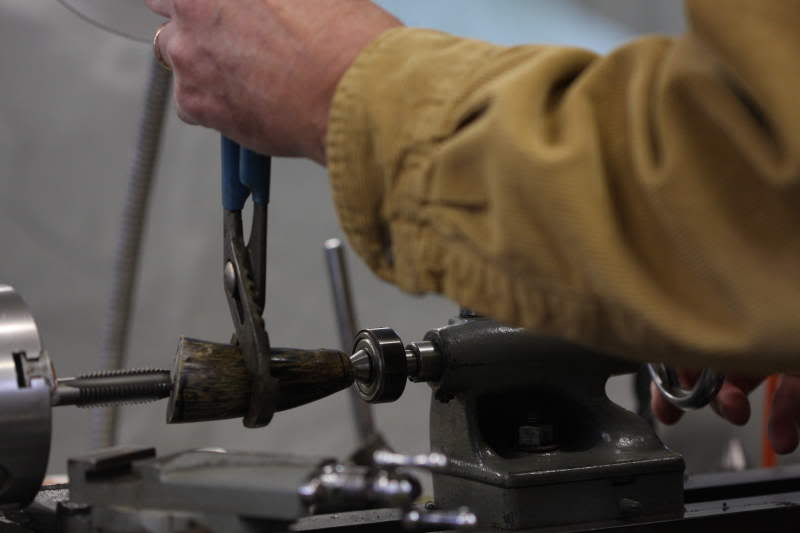
By going slowly you should have very nice threads. I had trouble with this step as I have damaged nerves in my hands and have no grip. Since the surface of the blank had not been finished, I used a channel lock to turn it. That has worked well for me here at home as well. This by itself is a good reason for turning the exterior last. When finishing up, you may want to use a bottoming tap to thread closer to the inside shoulder.
When turning the exterior, we left the tip threaded on the tap. We unlocked the chuck and used it to turn the tip. The ball-bearing center is used in the tail stock to support the small end of the tip. Again I liked using a scraper for this operation. I worked until the scraper was cutting all the way around and from end to end. This would be a good time to face off both ends of the tip.
Below – Art assists a student with lathe technique.
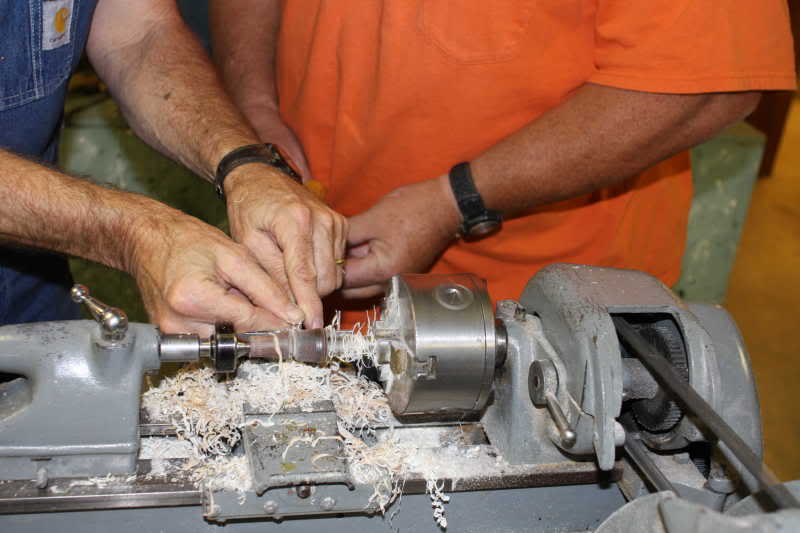
Below – A student begins cutting the tip’s profile.

For the profile of the tip, again consider the type of horn. The profile of the tip used for this tutorial is in the style of the Lancaster shops. The diameter of the threaded end needs to be proportionate to the neck of the horn. The length, as well, should be in the style of the area. Pictured here are the tips of a number of original Lancaster horns that Art brought. Studying originals pays off here as well as in the study of the long rifle.
Below – Several original Lancaster tips

Below – Two of Art’s Lancaster tips
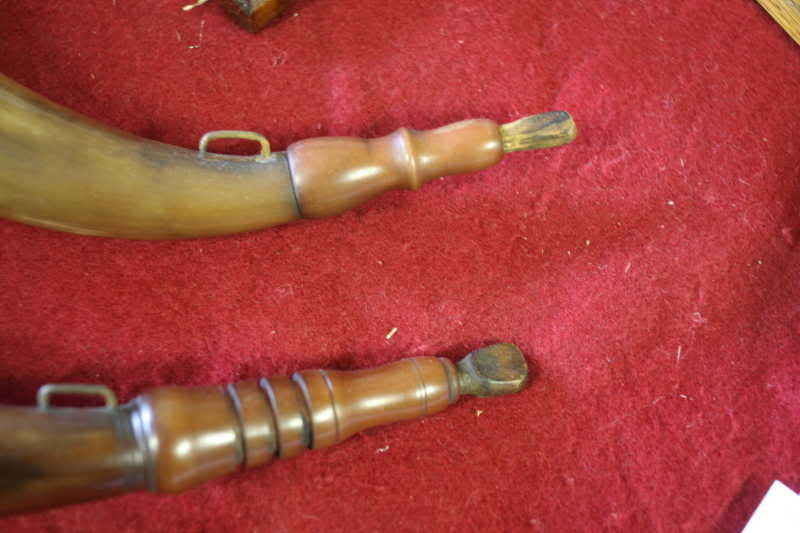
When I returned from the class I hunted through my scraps of horns for a piece to make another tip. I found a chunk of horn that had a nicely marbled tip inside. That tip is the one pictured in a number of the photos. The one turned at Conner Prairie is there, as well.
Below – The solid color tip on the left in the next two photos was done in Art’s class. The marbled one was from a horn chunk I found at home. Both fit on my Lancaster horn.


When finishing the tip, I like a faster lathe speed and do as much sanding on the lathe as possible. Stay with a grade of paper until all marks larger than the paper makes are gone. Each grit size after that should only have to remove the marks from the previous paper.
The class finished with 0000 steel wool. Be careful as the steel wool readily catches on the tap. Inevitably I do this no matter how much I try to prevent it. By this time, you should see no marks, and the sheen should have a buttery look.
You are ready to fit the tip to the horn. It should turn on well, but I like a bit of lanolin here. As you turn it completely, you will notice that the tip won’t thread up to the shoulder of the horn. The incomplete threads are the likely culprit. A little carving with a knife on the threads of the tip will gradually bring the tip up to the shoulder. A little scraping on the first thread on the horn may help too. With a careful fit up against the horn shoulder, you are pretty much finished with the mechanics of building a screw tip horn.
Below – I’m paring away part of the outside thread to seat the tip.
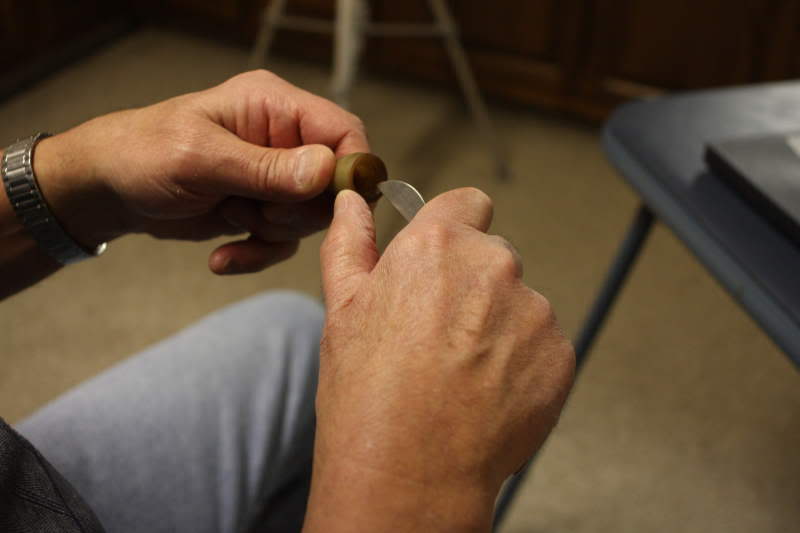
The hole in the tip should now be tapered. A tapered reamer is a excellent for this. Another method that works well is to twist the handle of a file in the hole. I have used both. The amount of taper should be worked with the type of plug you intend to use.
Attaching the plug can be done in a number of ways. If your plug-fitting job was a good one, you can blow through the spout and not hear air escape. A fit like this could be attached without bees wax, glue, etc. In class we made nails out of wire or brads, cold forging a head. The number of fasteners used will vary with regional styles. Art mentioned that he has seen as few as 4 and as many as a dozen plus. I used 5 on my horn. I drilled one size through the horn and into the plug, and then opened the horn very slightly to sink the nail head a bit. Based on regional styles, other materials may be used, such as wood pegs and locust thorns. If desired, you could use glue or wax on the taper. I have done that, but it was probably unnecessary.
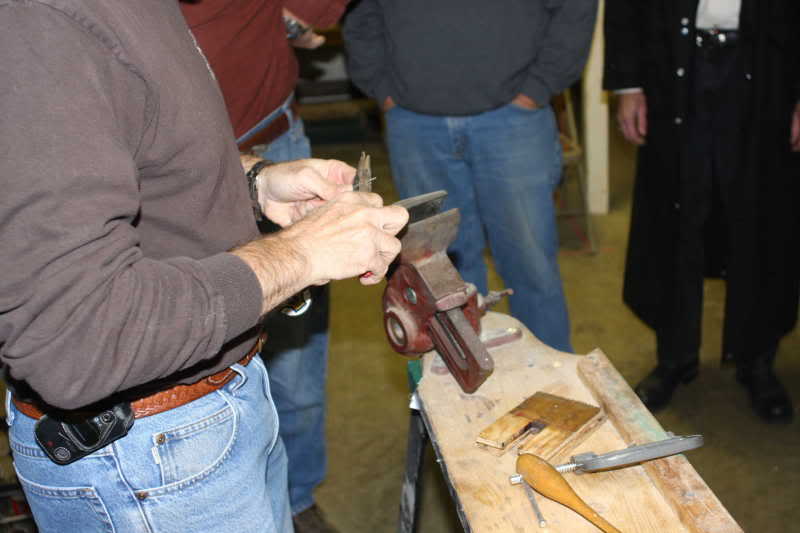
Above – Art prepares cold forged nails for attaching the plug. Here he uses 1/16″ wire and Below shapes the head with a ball peen hammer.
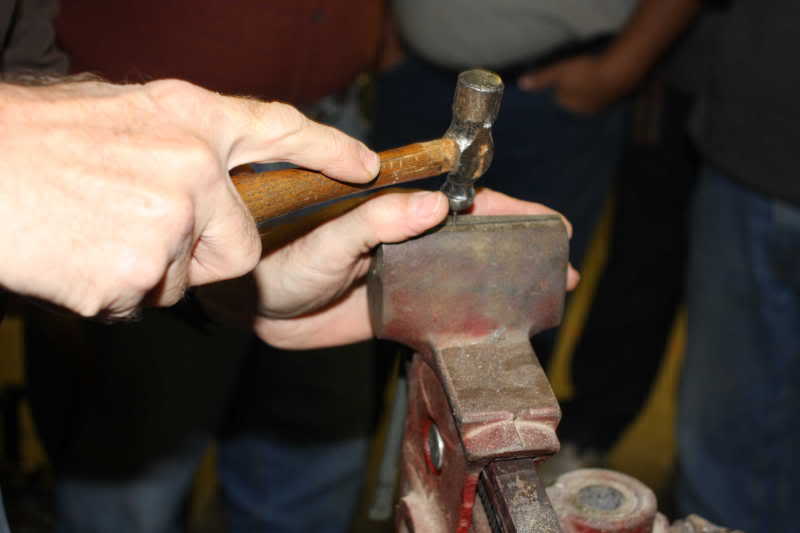
Now that you’re done with the horn, look it over. This is the time to evaluate your project, looking for strengths and weaknesses. Think about how changing a proceedure might improve the quality of the horn. If you should choose to follow a style different than a Lancaster, note where changes should be made. I hope that completing a horn using this tutorial resulted in a horn you can be proud to carry.
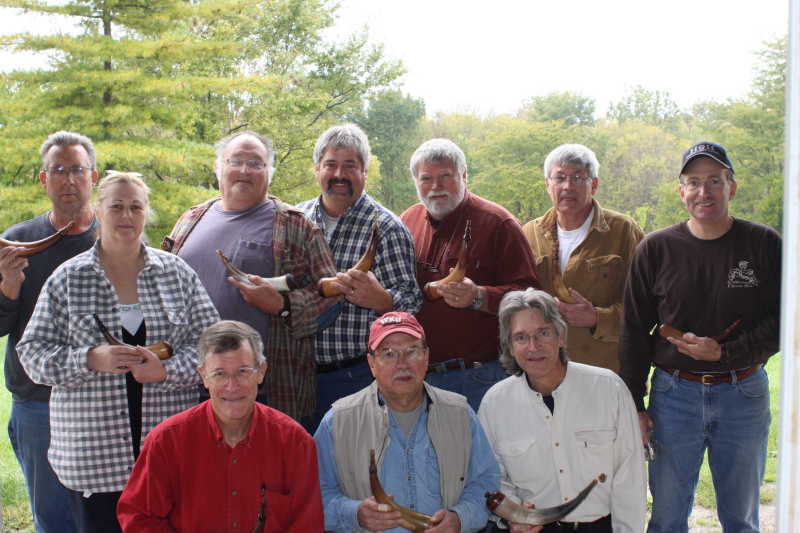
Above – This is the class photo from the 2009 Conner Prairie Class. Front row from left: ——-, Glenn Sutt, Jeff Bibb Middle: Ginny VanMeter Back row: —–, Dave Gundrum, Joe Rushton, Alan Hoeweler, Larry Pletcher, Art DeCamp Missing: Chuck Brownewell (I would like to add the names of the unnamed students if anyone can provide them.)
Return to Part 1: Making Lancaster Screw Tip Horns Part 1
Return to Part 2: Making Lancaster Screw Tip Horns Part 2
Go back to the Intro: Making Lancaster Screw Tip Horns Intro
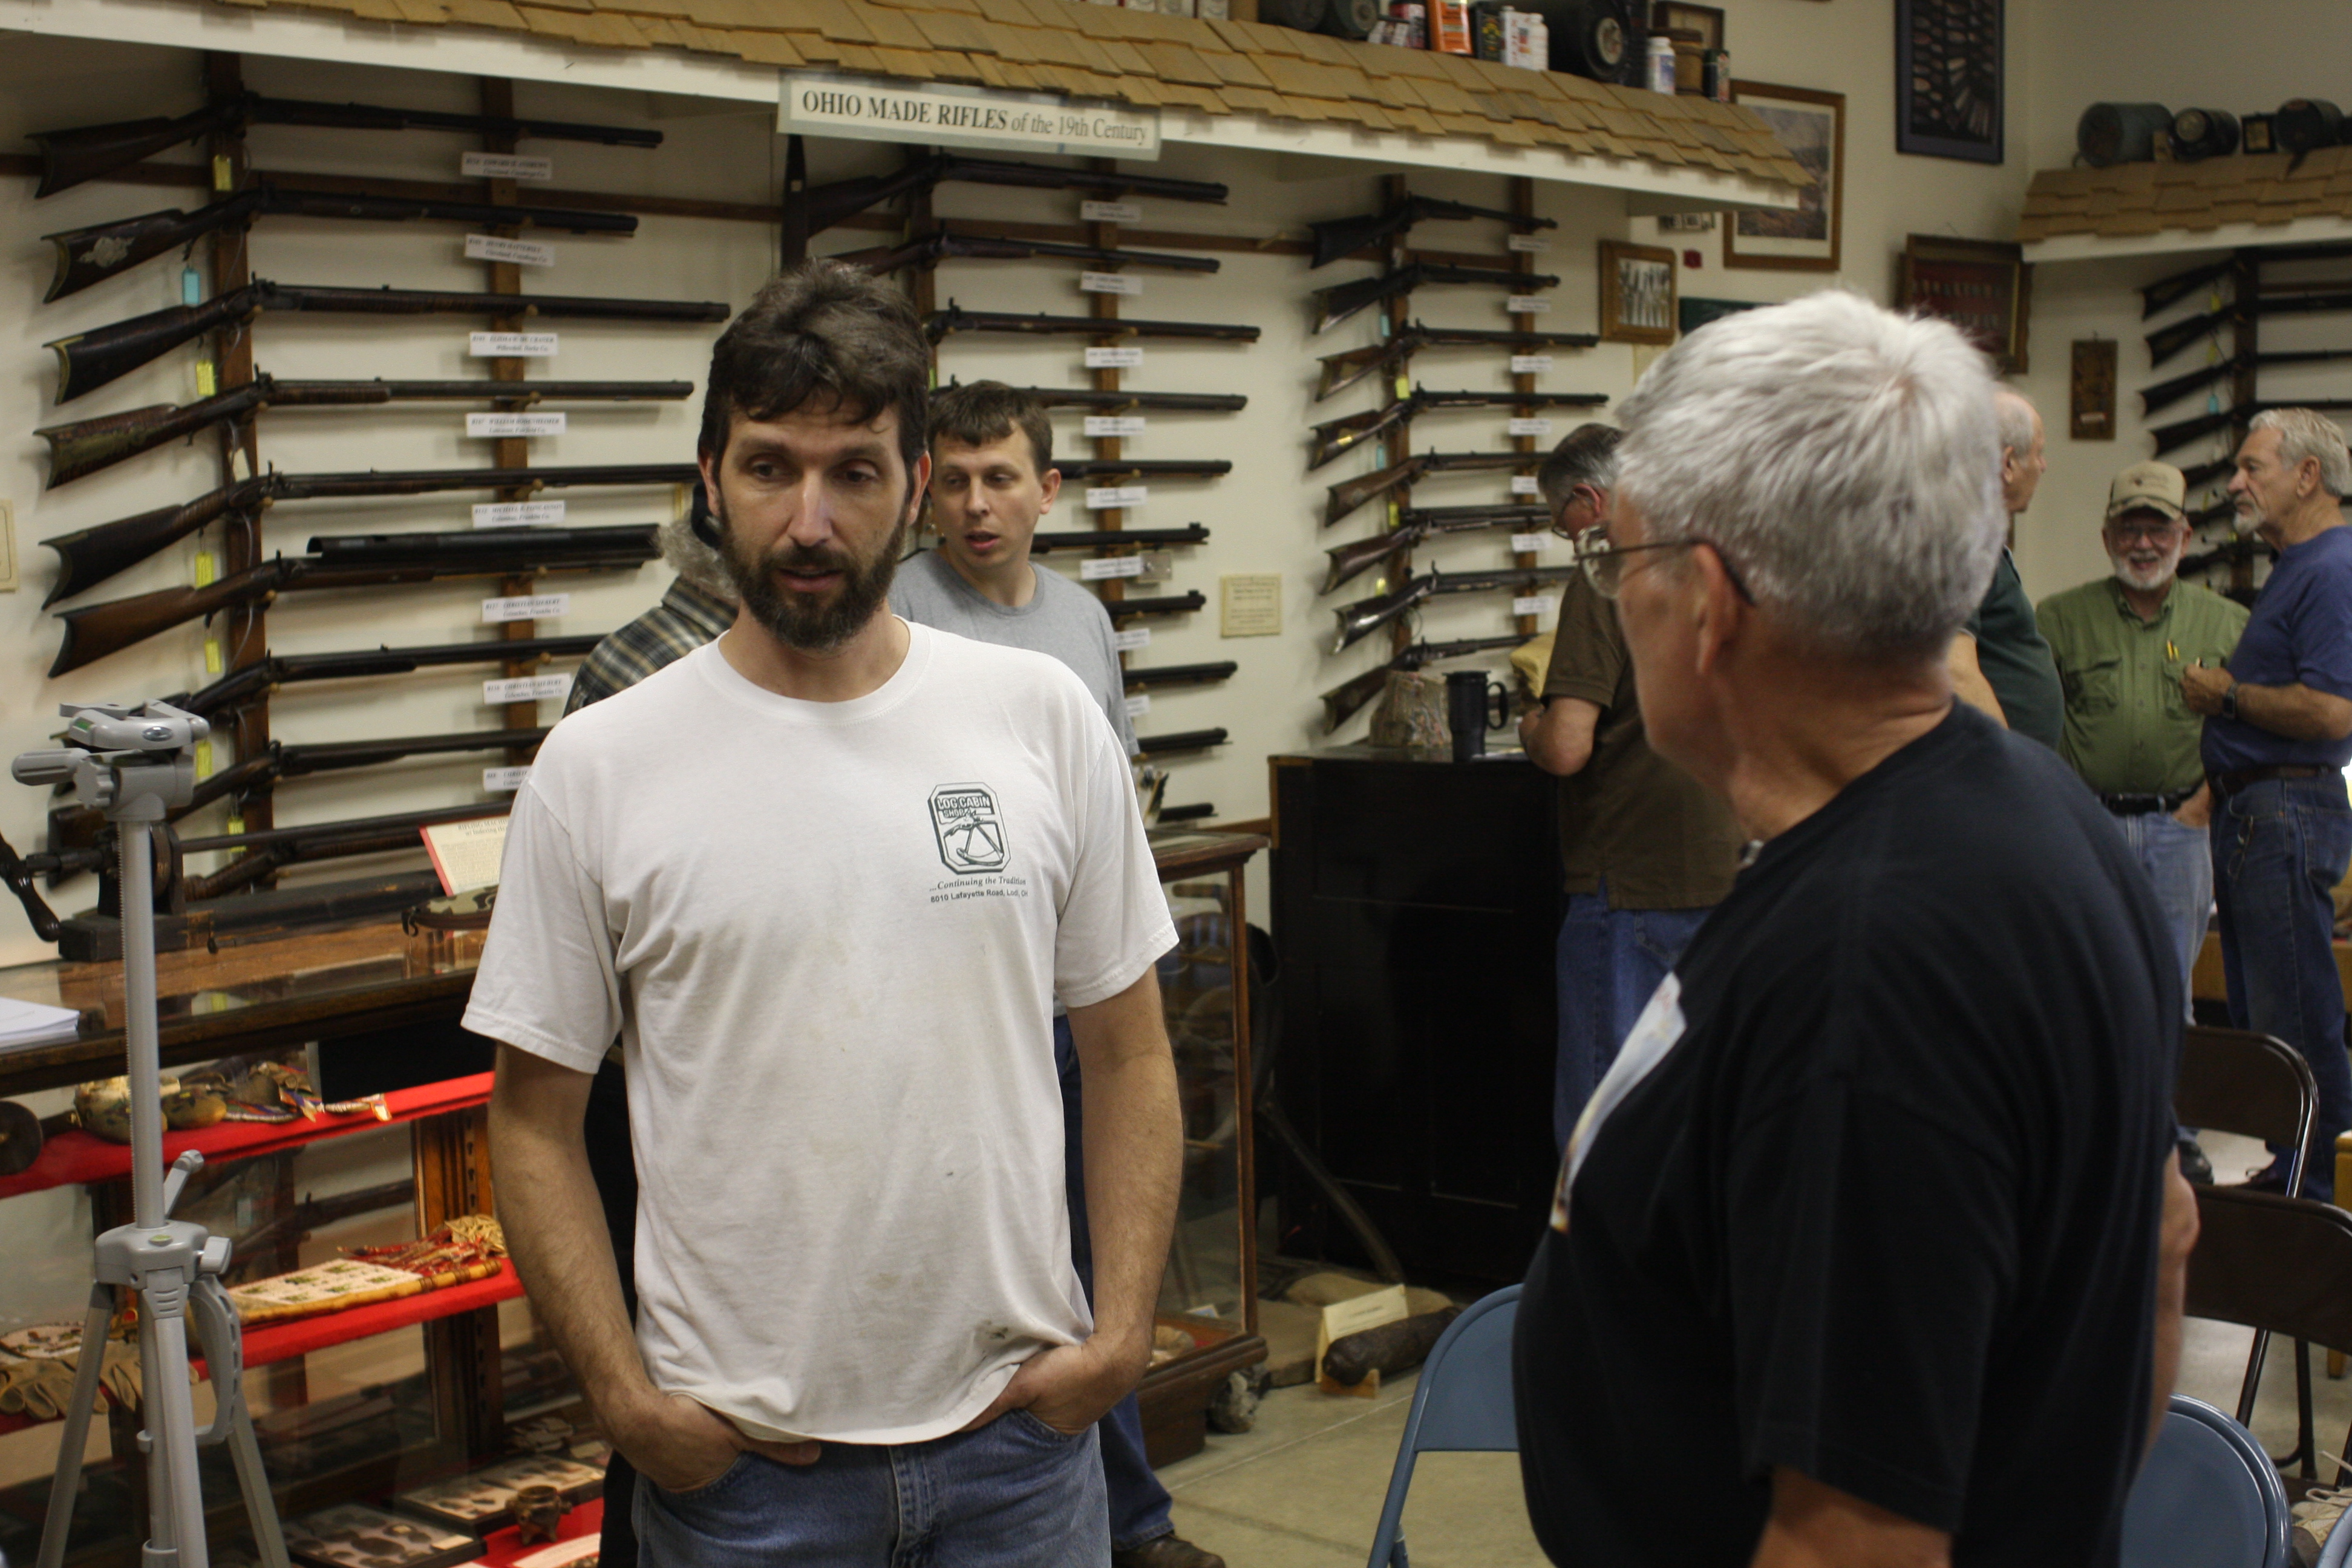
IAN PRATT’S IRON-MOUNTED MAIDENS By Sharon Cunningham Photographs by John Pratt and H. David Wright
Reprinted with permission from Muzzleloader magazine, May/June 2008. For more information on this and other black powder topics visit the web site at www.muzzleloadermag.com
To give the reader the added advantage of color and extra space on the website, we are adding photographs to the story. We realize you would like to see more of the artist’s work and therefore are including new photos. The original story as written by the author remains the same.
From being an excavation laborer/pipe layer, Ohioan Ian Pratt has become a premier custom longrifle maker. In a little over ten years, his iron-mounted flintlock rifles have become “most wanted” by shooters and collectors from all over the country.
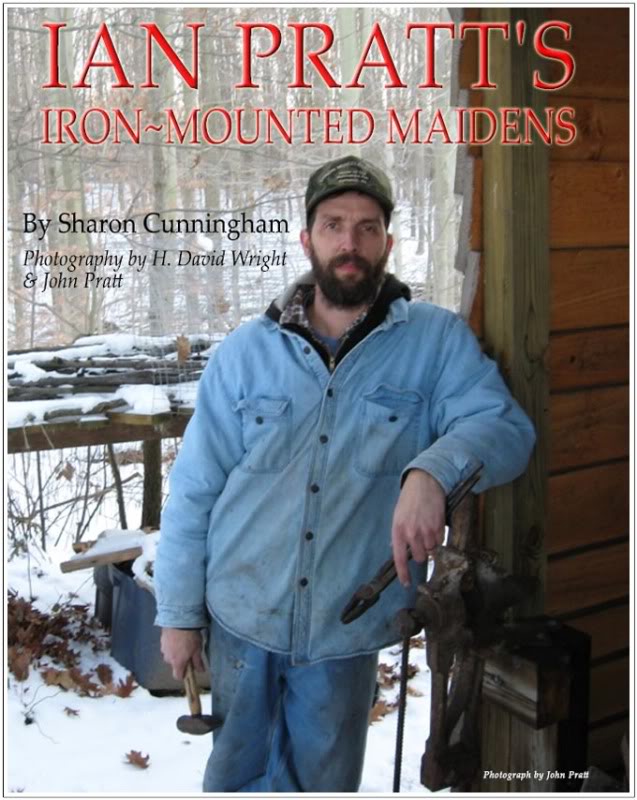
“(In 1996) I made the first left-handed rifle for myself, and pretty much from the start, I hoped to do this for a living some day. For a few years I built guns and sold them locally (northeastern Ohio, south of Akron) and out at Friendship (the National Muzzle Loading Rifle Association’s semi-annual shooting matches at Friendship, Indiana)…In 2006, however, I had so many orders for guns I quit my job and started doing this full time,” explains Pratt.
After a few years of experimenting and teaching himself the craft of longrifle making, in 2005 Ian took Jim Chambers’ lock-building class and Mark Silver’s stock-finishing techniques at the NMLRA’s gunsmithing school, which is held each June at Western Kentucky University in Bowling Green, Kentucky. Later, Pratt attended John Schipper’s metal-engraving class, held at the annual October Arts & Arms Making Workshop sponsored by Historic Connor Prairie in Fishers, Indiana. During the winter of 2006, he found his muse when he attended Hershel and John House’s gun-stocking class at Canter’s Cave, Ohio.
Ian states, “…it was a major change in how I did things afterward.” When asked during a written interview about having a mentor, Pratt stated, “I definitely think of Hershel as a mentor. Everything he does and the whole Woodbury School of rifle making has had a strong effect on my work.”
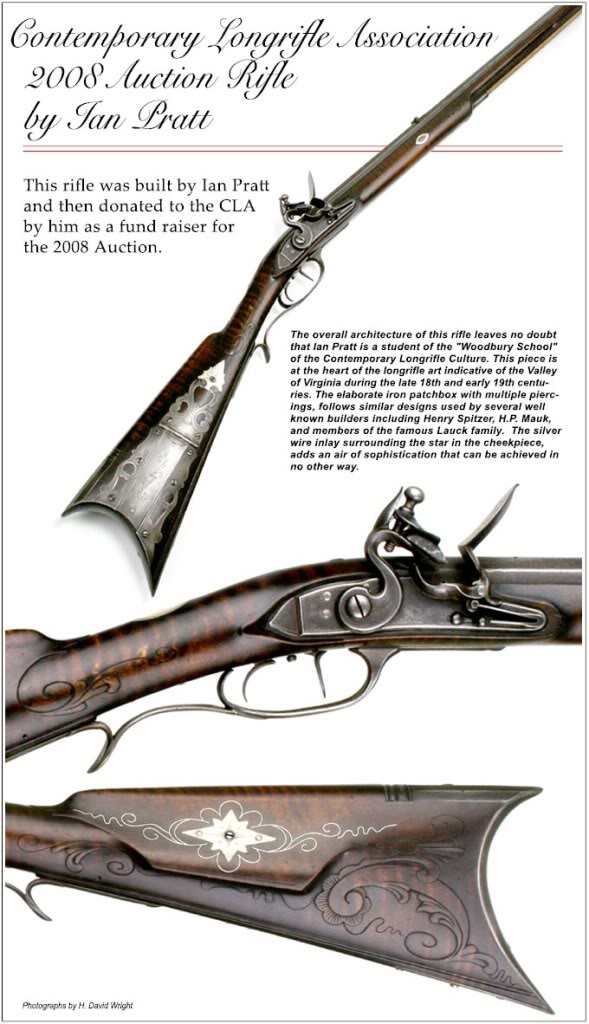
Pratt now specializes in iron-mounted flintlocks with a Southern influence, from the mid-1700s through the early 1800s. He likes brass-mounted rifles, has owned a couple, but he does not enjoy building them as much as iron-mounted longrifles.
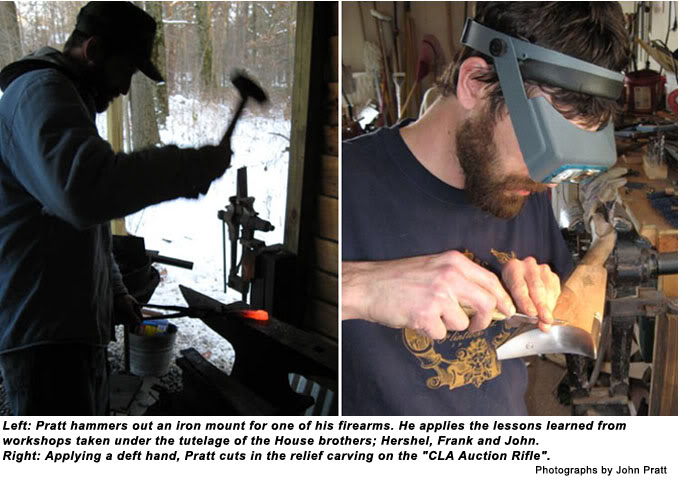
Ian states, “If a brass mounted rifle is a pretty girl, the iron-mounted gun is her sister, just as pretty, but there’s something in her eyes that lets you know if you ever crossed her, you might not live to tell about it…”
I’d say that Ian Pratt is more than smitten with iron-mounted muzzleloading longrifles, which is the reason his rifles are classically beautiful and are so collectible.
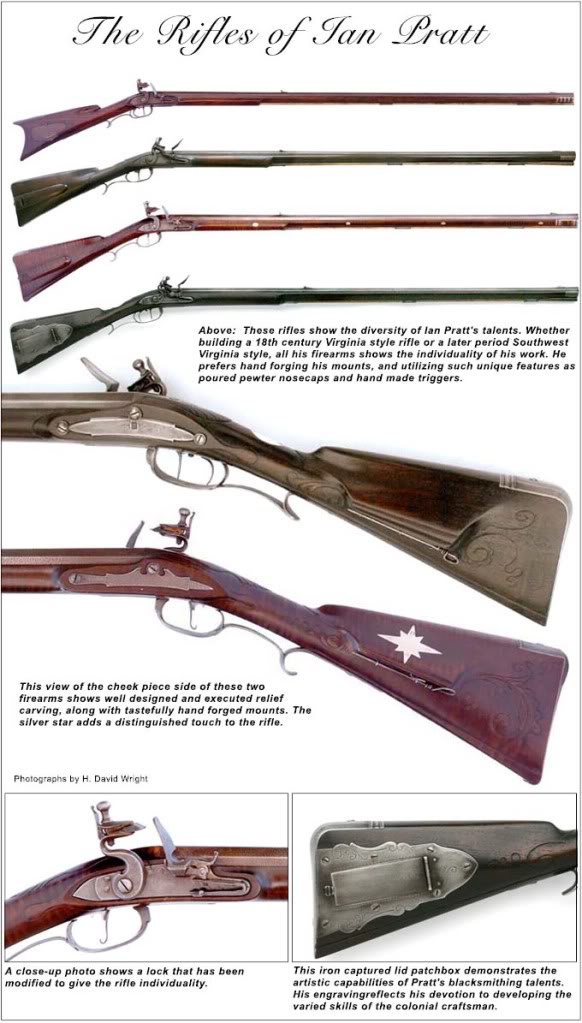
Ian believes that the riflemaker’s self sufficiency and his ability to make “something wonderful” with limited materials is more apparent in the iron-mounted rifles.
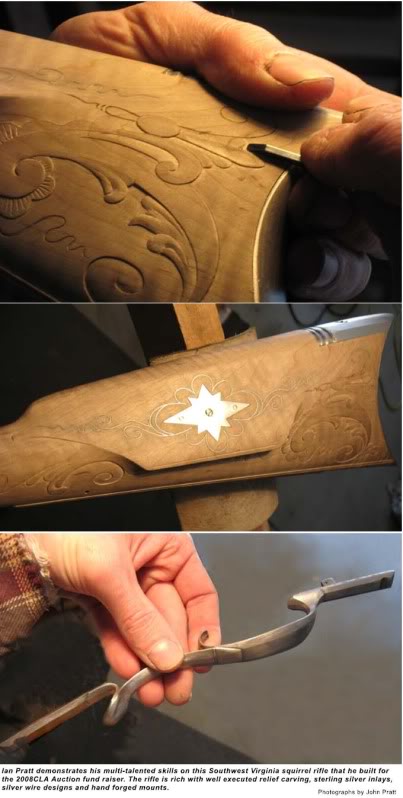
“A lot of them show work that is little more than functional, but others are real works of art.” And so it is with Ian Pratt’s artfully carved and embellished “Iron-Mounted Maidens.” Pratt was born in Ohio in 1965 and is married to Maryellen. The couple has one son, John. During his rifle-building career, he has made between 40 and 50 guns, and except for the very first one, all have been for sale. He is a member of the Contemporary Longrifle Association, at whose annual meeting, August 14–16, 2008, one of his famous Iron-Mounted Maidens was auctioned.
Ian Pratt can be reached at 330-658-4049.
Sharon Cunningham worked for Dixie Gun Works for many years and was editor of Dixie Gun Works’ Black Powder Annual for several years. Now retired from Dixie, she still retains a lively interest in black powder sports.
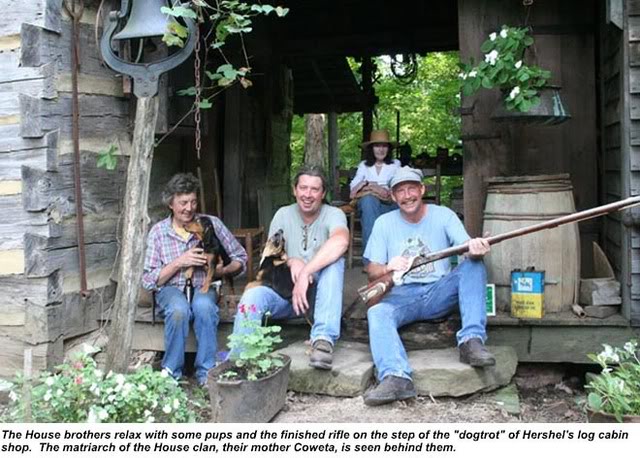
PRESERVING AMERICAN TRADITION: Hershel, Frank and John House carry on the magic passed down by the old masters. . . By Mel Hankla
Photography by Ric Lambert, Steve Auvenshine, and H. David Wright
Reprinted with permission from Muzzleloader magazine, January/February 2009. For more information on this and other black powder topics visit the web site atwww.muzzleloadermag.com
There has never been a time since its invention that the American muzzleloading rifle has not been produced; yet when regarded simply as a shooting apparatus, it fell out of favor soon after the close of the Civil War with the development of the metallic cartridge. However, during the last 50 or so years, thousands of individuals have again become very interested in them. They study them, read about them, collect them, shoot them, and… they build them.
 Uniquely, American in its design, and impressively accurate in its day, this truly American firearm has long been dubbed the “Kentucky Rifle”. After the tremendous American victory at the Battle of New Orleans, January 8, 1815, (the last battle of the War of 1812), a popular song was written by Samuel Woodworth to celebrate the feats of the men of Kentucky who had taken part under the command of Andrew “Old Hickory” Jackson.
                    YE gentlemen and ladies fair who grace this famous city,
                    Just listen, if you've time to spare, while I rehearse a ditty;
                    And for the opportunity, conceive yourselves quite lucky,
                    For ‘tis not often here you see a hunter from Kentucky.

                                 Oh, Kentucky, The Hunters of Kentucky,

                    We are a hardy, free-born race, each man to fear a stranger,
                    Whate'er the game we join in chase, despising toil and danger.
                    And if a daring foe annoys, whate'er his strength or forces,
                    We'll show them that Kentucky boys are alligators-horses.

                                Oh, Kentucky, The Hunters of Kentucky,

                     I 'spose you've read it in the prints, how Packenham attempted
                     To make Old Hickory JACKSON wince, but soon his scheme repented;
                     For we with rifles ready cock'd, thought such occasion lucky,
                     And soon around the general flock'd the Hunters of Kentucky.

                                 Oh, Kentucky, The Hunters of Kentucky,

                     But Jackson, he was wide awake, and was not scared of trifles;
                     For well he knew what aim we’d take with our “Kentucky Rifles”!

It is generally agreed that this song is the basis for the name applied to the American Longrifle, still used today. It was named the Kentucky Rifle, because it was used by Kentuckians, not that it was made or developed in Kentucky. This American icon enjoys a prominent place in our nation’s early history. With its long rifled barrel that fired patched round balls, it won laurels on several fields of battle: King’s Mountain during the Revolutionary War, the War of 1812 at The Battle of New Orleans, and in 1836 when patriots with Kentucky rifles held out heroically for 13 days at the Alamo. It was far more than a tool of battle, as it helped to bring food to the tables and enabled frontiersmen to defend their homesteads. The revered Kentucky Longrifle – the defining symbol of self-reliance.
During the 1960’s there was a mounting interest in making the so-called “Kentucky Longrifle”. This passion developed alongside an increasing interest in collecting and studying antique rifles and was fueled by the popular shooting matches of the National Muzzle Loading Rifle Association held spring and fall at their headquarters at Friendship, Indiana. The longrifle is one of the most important and finest art forms of early America. Thus, the longrifle is not just a weapon, a sporting arm, nor merely an important tool from America’s frontier era, but also a representation of artists applying their expertise in design and execution.
In 1980, Robert Weil wrote the first comprehensive and authoritative work on the new makers of the old traditional American arms. His book, “Contemporary Makers of Muzzle Loading Firearms”, sparked the interest in many of today’s builders and collectors and expanded the level of appreciation for this important and comprehensive form of art. As a contemporary art form, when designed with taste and executed with skill, it can exist solely as an object of beauty. If well done, it is indeed a complex sculpture of three-dimensional art with two-dimensional art superimposed.
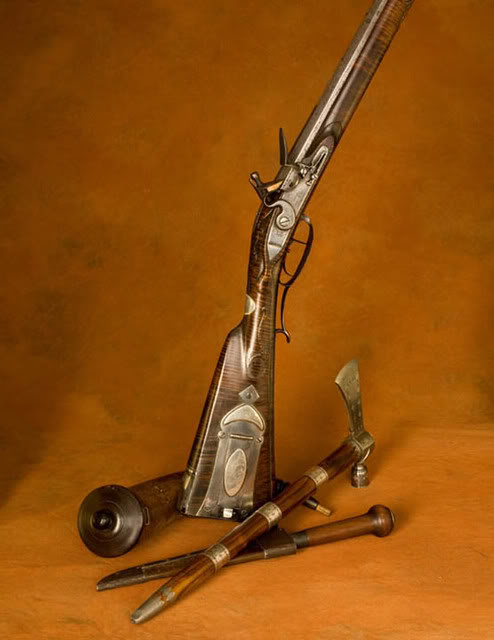
Its general structure is commonly made from beautiful wood, most often figured maple or walnut, and decorated or mounted in different combinations of forged iron, cast brass, and coin or sterling silver. No doubt, some of the finer longrifles being made today will be collected and preserved for their aesthetic aspects alone and never put to use for shooting .Yet I contend, that the flintlock rifle is full of life and to be fully appreciated needs to be handled, loaded, shot and cleaned, as well as being looked at, caressed, cherished, and studied. The thought and research required to build a “correct” early American rifle adds unique insight into the spirit of this tool, enhances the mindset of the maker, and bestows a deep appreciation of our glorious past that can be achieved in no other way.
The Contemporary Longrifle Association is a non-profit organization of collaborative members, who are collectors, makers, and students dedicated to the art of contemporary longrifles, accoutrements and related items made after the mid-twentieth century. The Contemporary Longrifle Foundation (CLF) is the educational and fund-raising arm of the Association. Through the collective efforts of three renowned Kentucky gunmaking brothers, Hershel, Frank, and John House, a special handmade longrifle has been created for the CLF as a fundraiser. The proceeds from the “An American Tradition” House Brothers Handmade Flintlock Longrifle Project will enable the Foundation to continue its mission to promote the art of the Kentucky Longrifle and related arts through publications, museum exhibits, grants, and promotion of contemporary artists.
The first long rifles that Hershel remembers seeing were in an old store in Jamestown, Kentucky. He says it would have been about 1950. His family had temporarily moved and was living there while his father worked on Wolf Creek Dam that now holds back the Cumberland River and forms Lake Cumberland. After moving back to Butler County in 1956, Hershel found an ancient half-stocked percussion squirrel rifle in his neighbor, Mrs. Gibbs’s old barn. A long time family friend, he asked her if he could have it. It had belonged to her father, but she let Hershel have it anyway. He promptly fixed it, got it firing, and received a tremendous amount of pleasure hunting squirrels with it while exploring the woods and paddling the Green river in a homemade canoe.
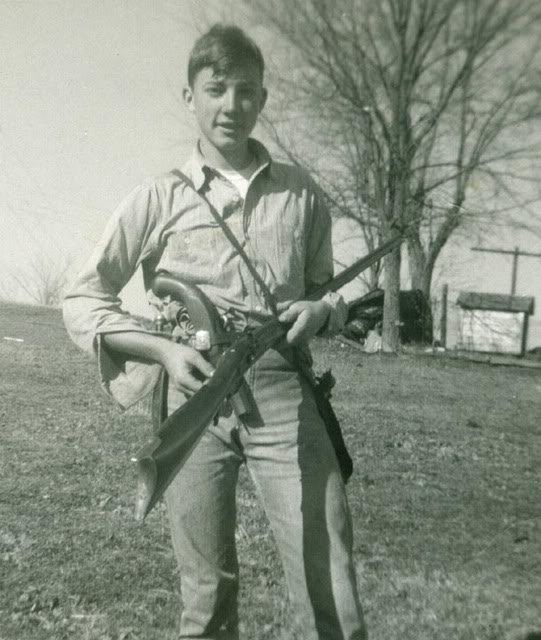
In 1967, Hershel started building very intriguing, mostly iron mounted longrifles and has truly become a “living legend”. In 1979 he was featured in Foxfire V, one of the ongoing series of books recording the customs and lifestyles of people from Southern Appalachia. In 1984 and again in 1985, Hershel was awarded a National Endowments of the Arts ~ Folk Arts Apprenticeship Grant.
These grants provide funds for traditional craftsmen to pass on their unique trade through an apprenticeship program. He has been featured inField and Stream magazine, on Sports Afield TV, and is a much sought after instructor at gunmaking and blacksmithing workshops.
Frank House, 18 years younger, grew up strongly influenced by his brother, yet his firearms soon took on a different appearance. He prefers entirely handmade locks, often casts his own brass mounts, and is respected for his fine engraving and intricate detail. Frank started working with Hershel part-time in 1979; building his own shop and becoming a full time gunsmith in 1988. He is well-known for his work in the movie industry by making a rifle for Mel Gibson in The Patriot and teaching him to shoot it. He also worked as head armorer inMaster and Commander and was hired to make available his expertise on Pirates of the Caribbean – 2, 3, and 4. In 2001 he and his wife Lally moved from Woodbury to Paris, Kentucky and are restoring a historically significant 1790’s Bourbon County log home.
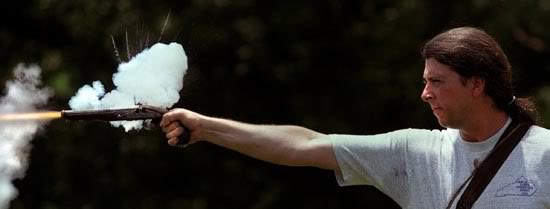
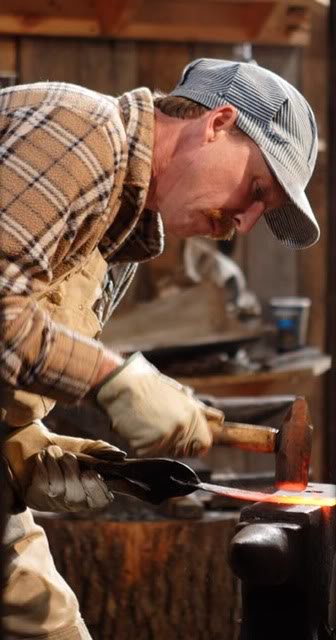
Brother John, the youngest of the trio, has made several rifles, but is best known for his expert blacksmith skills, his diverse knives, and discriminating iron trimmed sheath designs. He also has made items for the movie industry and is locally renowned for his jewelry, using indigenous semi-precious stones, and for his graceful, willow “rustic twig” style furniture.
The artistry, personality, and genuine way-of-life of these three very individualistic family members has significantly influenced many aspects and countless members of today’s contemporary longrifle culture; which brings up the concept of this term.
Only recently has the term “Longrifle Culture” been properly addressed and was discussed at length by Richard Nicholas in his November 2008 article in “The Broadside”, the quarterly newsletter of the CLA. He writes, “ The term ‘Long Rifle Culture’ is a means to easily describe the underlying behavior and interaction between, collectors, shooters, builders, students, organizations; in short, any entity whose actions, interest, or way of life, is influenced by some aspect of the American Long Rifle.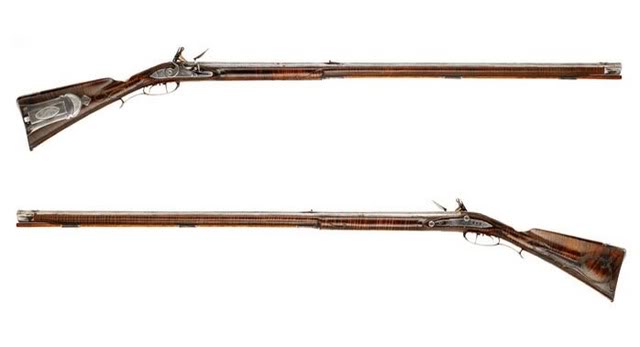
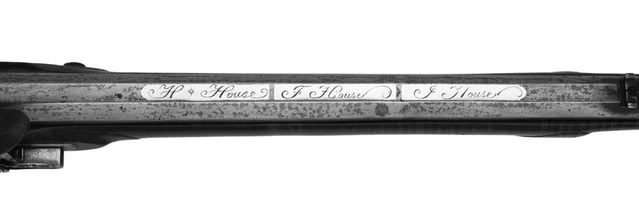
He goes on to say, “Our Long Rifle Culture is a dynamic population that often lacks constant boundaries, is constantly in flux, and is identified by entities that interact and more often than not, in some method compete with one another.
Culture has been called “the way of life for an entire society”, thus our Long Rifle Culture is actually a subculture within a larger society, perhaps most often observed as an interaction between the members of organizations that primarily collect antique long rifles and/or along with those interested in all facets of associated contemporary work.
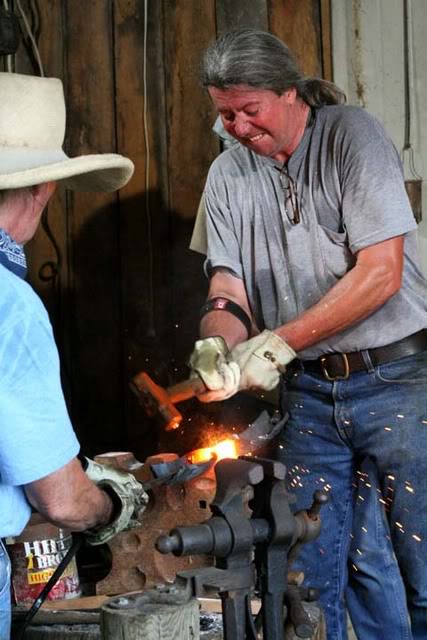
This is apparent in the many recent educational exhibits of firearms and supporting accoutrements – both new and old – presented by the populace of the CLA, KRA, the Horner’s Guild, the N.M.L.R.A. and other collecting or shooting communities. In essence, this study, art, collecting and modern use, encompasses elements and behavior resulting in a complex society that can be defined as the ‘Long Rifle Culture”.
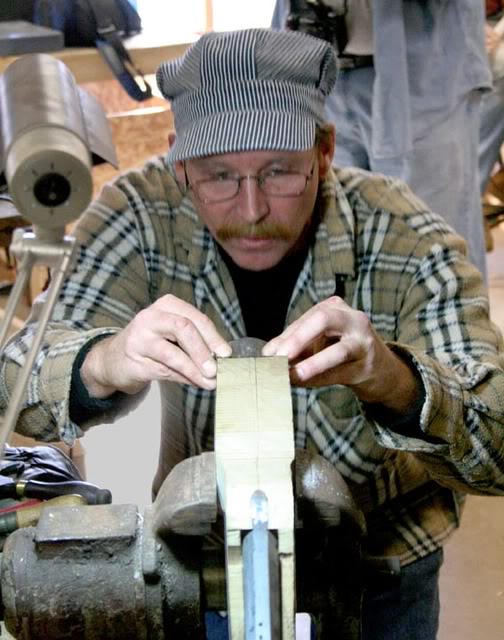
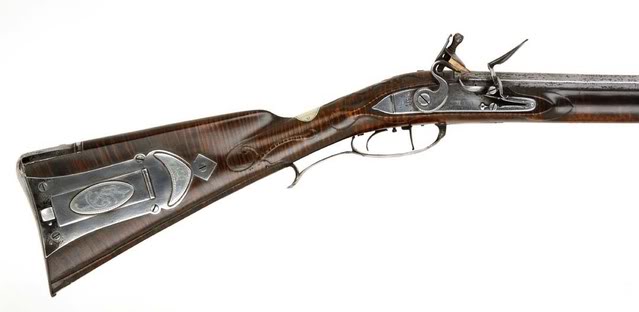
The Contemporary Longrifle Foundation is offering a once-in-a-lifetime opportunity to own a one-of-a-kind completely handmade Kentucky Longrifle by Hershel, Frank, and John House. Those in attendance at the 2008 Annual Show in Lexington, Kentucky had the first chance to see the unveiling of this exceptional work of art donated as a fund raiser for the Contemporary Longrifle Foundation. This kicked off a year long raffle program which will culminate at our 2009 Annual Show with the drawing of the lucky ticket. Response was tremendous.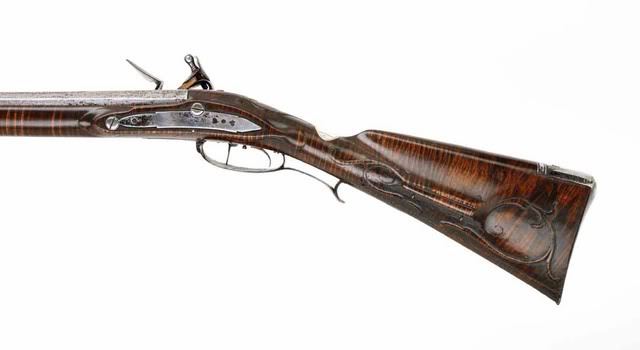 David Wright, Chairman of the Foundation and the House Brothers An American Tradition Project says of the project, the rifle and the brothers, “Masterpieces in art attain reverence when properly presented to the public. And, such is the case with the handmade longrifle created by Hershel, Frank and John House. This masterful work epitomizes the gun makers’ art in its display of craftsmanship and artistry. One of our important missions in the Contemporary Longrifle Association is to promote the art of the contemporary Kentucky Longrifle, its related arts and its artists. We speak of ‘Following the Tradition’ thematically and earnestly. The House Brothers are artists and friends, contributing in the finest tradition of the CLA.”

The flintlock longrifle is a beauty – the wrought iron barrel, the lock, double set triggers, iron mounted hardware, and even the screws are made by hand in the same tradition as those firearms produced by American gunmakers in the 18th century. The rifle is built in their nationally recognized style, known as the “Woodbury School”, and named for the small Kentucky town in which the brothers grew up. The House Brothers have included many of their personal and unique attributes for which they are so well known. The rifle is relief carved and is mounted with engraved iron mounts.
The patchbox is tastefully engraved with touches of sterling silver overlays and a sterling silver escutcheon (for a future owner’s initials) accents the top of the graceful wrist area. The 41″ tapered and flared barrel is rifled in .45 caliber. The only thing not made by Hershel, Frank, and John is the fine piece of curly maple wood in which the rifle is stocked. This piece of hand selected wood was donated by Freddie Harrison of Bradford, Tennessee. A supplier of stock blanks to muzzle loading gun makers for more than 30 years, Freddie volunteered one of his very best “pet” pieces of wood for this unique and important project.
Frank says, “It’s magic from the hammer!” that allows these intriguing icons from our nation’s past to still be produced today. It’s as if someone else is guiding his hand as he lays out the carving or forges the barrel and fashions the other integral parts for a magnificent flintlock or detailed set of triggers. He says that late 18th century gunmaker Thomas Simpson, said it all in his challenging advertisement in the July 26th, 1790 issue of the “Lexington [Ky.] Gazette” when he boasts, “From the wood of a tree and a bar of iron I can build a rifle with any man.” This statement provides us with insight into the competitive nature of the gunmaking business in the late 18th century. There were many gunsmiths that had depended heavily on the military contracts of the Revolutionary war for their earnings and now found themselves on their own. In the years following the war, the commercial competition between the many craftsmen, created what is known as the “Golden Age” of the Kentucky rifle with each smith doing his best to out-do; to out-sell – the other with perfected art and style. This has left us with numerous outstanding examples of exciting artistic statements by these early American artists, inspiring contemporary artisans today.
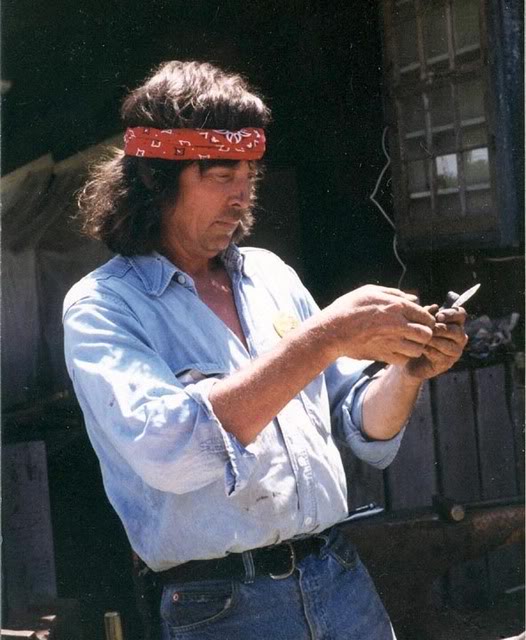
The year long building project has been documented through a grant from Hammond Communications Group, Lexington, Kentucky. DVDs of this video will be for sale in the future with the proceeds of sales going to the CLA. Photographers Ric Lambert, H. David Wright, and Steve Auvenshine have documented the building process through digital photography as well.
Besides offering the completed rifle through a raffle in 2009, the Foundation desires to promote this art which represents the ultimate “Following the Tradition” of our forefathers – in view of the fact the Kentucky Rifle was one of the decisive factors in the freedoms gained by our American Revolution and the subsequent settling of our country. Given that the Foundation (the fund raising arm of the Association) is a tax free non-profit entity, our mission is to promote education, fund grants, publish publications, mount museum exhibits, promote our artists, and other special projects such as this one. The funds raised from this endeavor will go to carry out that mission.
An extensive PR campaign is planned throughout the year to encourage membership in the CLA, promote the House Brothers project, and to publicly feature numerous CLA artists. During the twelve year development of the organization, many artists have very unselfishly donated tens of thousands of dollars worth of their work that has been auctioned at our annual show each August; raising funds to further the endeavors of the organization, fueling the on-going movement, and promoting rapid quality improvement of these Contemporary art forms. The publications of the Longrifle Cultural Movement;Muzzleloader, Muzzle Blasts, On The Trail, and Smoke & Fire News, support our efforts and you will be seeing stories about the “An American Tradition” project and about many other CLA artists in these publications in the up-coming year.

Additionally, a feature story about the project and the CLA is scheduled for release in 2009 in National Rifle Association American Rifleman magazine. Chad Adams, field editor for American Rifleman Television is currently filming an episode featuring the House Brothers, the longrifle project, and the CLA. It will be aired this year.
We would like to personally invite you to come on board! Please come join the Contemporary Longrifle Association and start making plans now to be present at the 2009 annual meeting, August 14 & 15, in Lexington, Kentucky. Come and be part of this exciting project and the continuing history of the Kentucky Rifle. You may have already heard that the 2008 meeting and show of the CLA was truly electric. It was the first year of the addition of an “antique” exhibition and I have only heard great comments and can only say great things. Perhaps Don Getz said it best: “It was such a joy to see the great variety of items displayed there. It is hard to put into words the effect [the addition of antiques]this has on the show. While the CLA portion itself is great, and seems to be getting better, the addition of this old stuff really adds to the overall greatness of this show. From my point of view, I think this was the greatest collection of items ever put under one roof at one time.”
I could not agree more! The CLA has truly evolved into an eclectic art show of many associated items and ideas and this has opened the door for the full spectrum of antique arms, accoutrements, armament, and art as well. And we have just begun!
In closing, raffle tickets for the fundraising “House Brothers – American Tradition” rifle are now on sale for $5.00 each or 5 tickets for $20.00. Anyone interested in becoming a member of the CLA and /or supporting this project by buying or helping sell tickets can visit our websites;www.housebrothersproject.com and www.longrifle.ws. Here you will find detailed information about the CLA and numerous photos regarding this phenomenal project, the brothers, and the effort in capturing the process. Hope to see you next August!
Mel Hankla – Kentucky . . . . Mel Hankla supports all facets of our Longrifle Culture. He is a chartermember of the Contemporary Longrifle Association, and an active member of the Kentucky Rifle Association, the National Muzzleloading Rifle Association and the National Rifle Association. An avid collector of antique and contemporary firearms, powder horns, tomahawks and knives, he is Show-Chairman of the Antique arena at the CLA and serves on the Museum Board for the National Society of the Sons of the American Revolution. Hankla has worked with the Kentucky Humanities Council since 1995 as a Chautauqua-Living History Character portraying Simon Kenton and George Rogers Clark. He also portrays Kentucky’s first governor, Isaac Shelby and Benjamin Franklin in other venues. A noted writer, he has contributed articles to numerous publications. Visit his websitewww.americanhistoricservices.com to learn more.
The House brothers can be reached at:
Hershel C. House, 101 Frames Road, Morgantown, KY 42261
Frank House, P.O. Box 257, Paris, KY 40362
John House, General Delivery, Woodbury, KY 42261
Freddie L. Harrison, 81 Trenton Hwy., Bradford, TN 38316
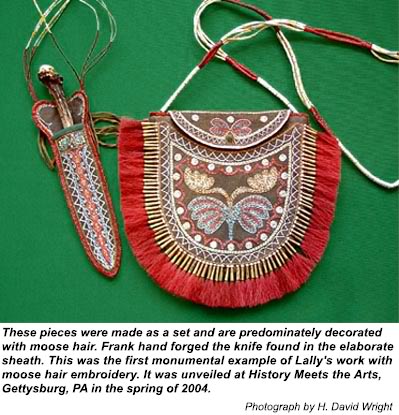
Frank & Lally House Artistry in Unison . . . By Mel Hankla
Photography by Ric Lambert, Gordon Barlow, and H. David Wright
Reprinted by permission of the National Muzzle Loading Rifle Association/ Muzzle Blasts magazine, April, 2009. For information on the NMLRA and other black powder topics please visit the website at www.nmlra.org
Frank and Lally House are well known in today’s contemporary longrifle culture. Each an artisan in their own right, their names are usually spoken together and their unique conceptual art is treasured by collectors internationally. Lally creates embroidered pieces inspired by traditional Native American designs using naturally dyed porcupine quills and moose hair. Frank is a renowned gunmaker, blacksmith, and horn worker who was influenced by his brother Hershel House, the progenitor of the Woodbury school of contemporary longrifles.
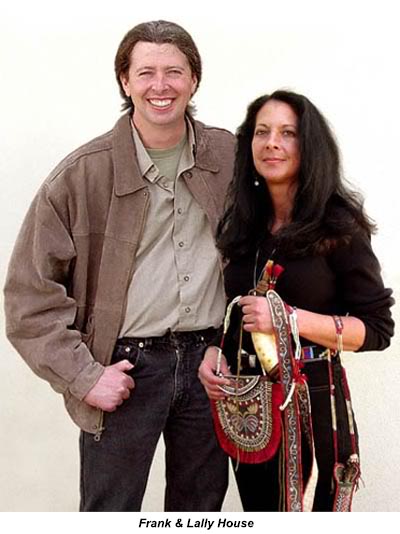
Unity of Expression
Webster’s dictionary defines the phrase “in unison” as: in perfect accord; corresponding exactly. Art is a personal expression coming from the heart, mind and soul. In this rare case of two intimate artists, what emerges from their working together, whether individually rendered or a combination of thought, compliments one another.
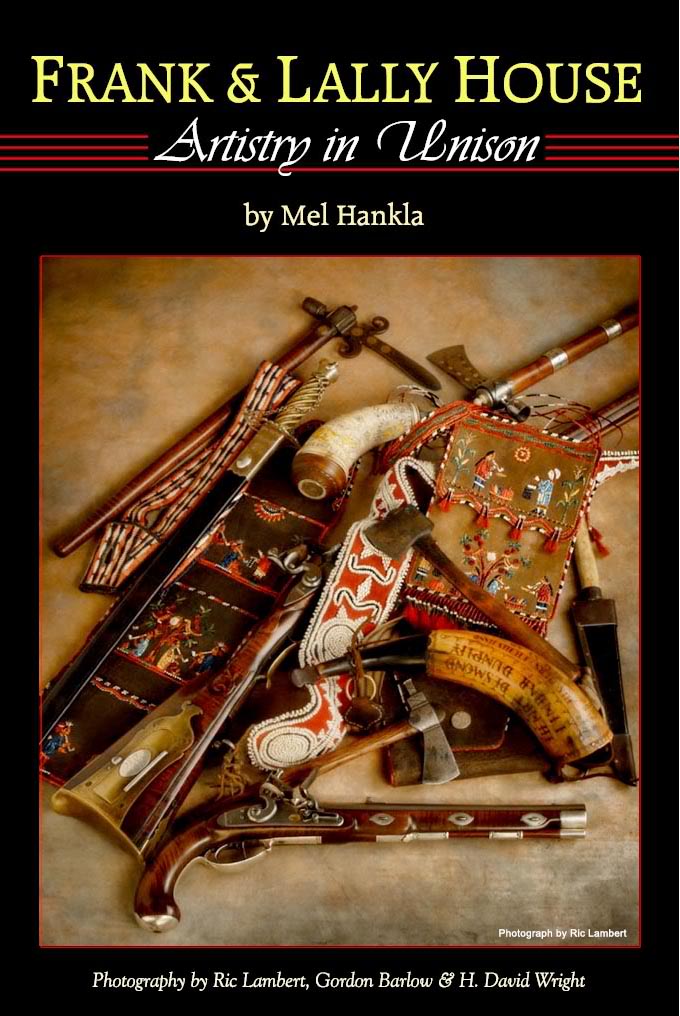
When asked about their work, Lally said, “It’s been a dream for our work to be recognized as “art” instead of “craft”. It [quillwork, and especially gunwork] always seems to be associated with “re-creation or replication” rather than identified as unique and original creations of artwork produced using 18th century methods, materials and design elements. I take great pains to create original designs and generally do not copy or reproduce other existing pieces of quillwork. I always use brain-tan deer hide for my pieces and take great pride in using natural dying methods and colors that were used during the mid-18th century by the Eastern Woodland Indian tribes.” In the last several years, Lally has become known for intricate moose hair embroidery coupled with porcupine quills, enhancing the texture and impression.
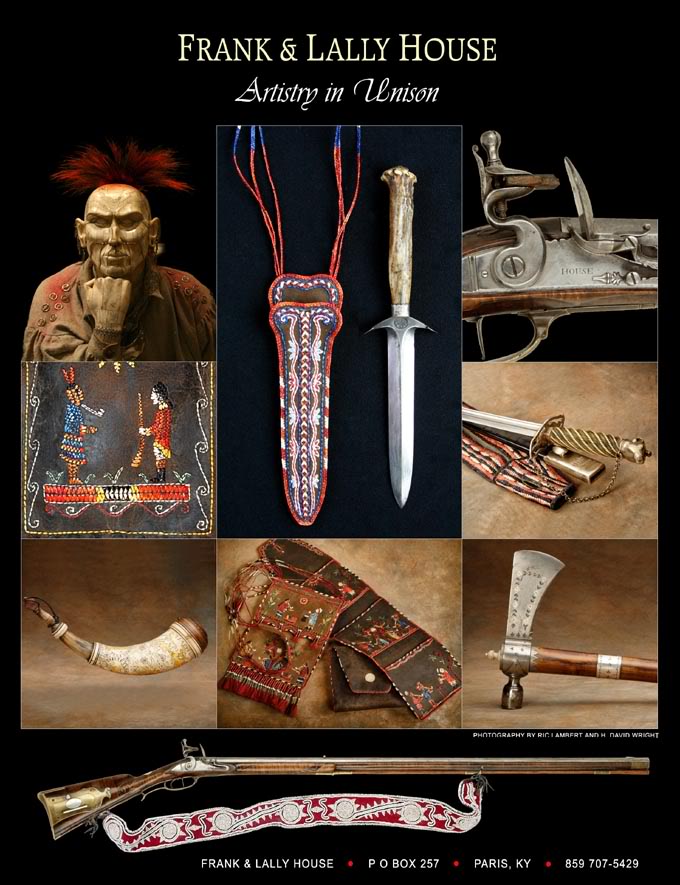
When asked about blending their artistic concepts, Frank commented: “At the 2nd annual meeting of the Contemporary Longrifle Association, Lally and I presented our first monumental duo piece, an American Colonial Style Sword with Porcupine Quillwork Baldric & Frog. This hand forged sword blade is gripped with green-stained sculpted Ivory with spiral gadrooning and capped with a silver repousse pommel in the form of an animal head. The guard with steel chain is pierced silver with punched and engraved decoration. The quillwork decorated Baldric and Frog displays repeating geometric Native American designs created with multicolored natural dyed quills. I must admit it is still some of our best individual work and a milestone in our career working together.”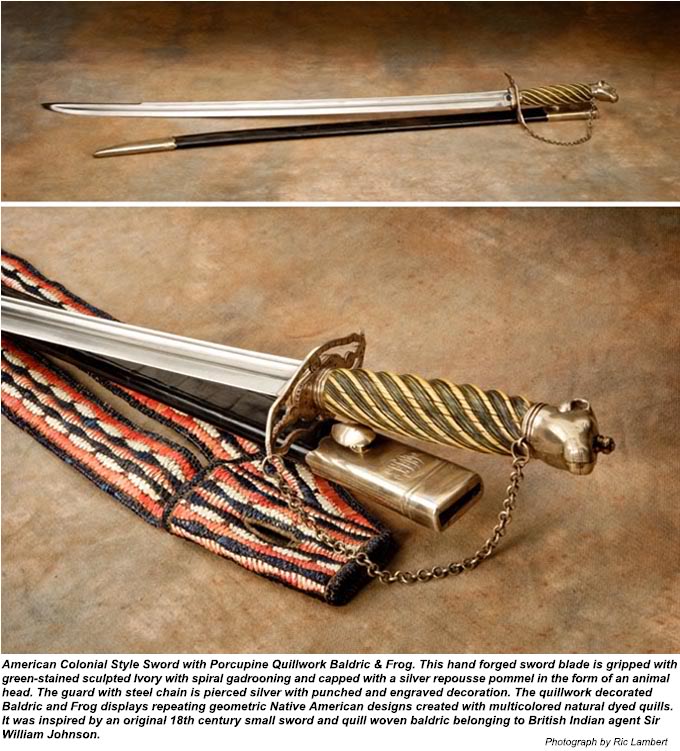 Nechasin
Frank and Lally wanted to create a work of art that would be a composite of their individual mediums. The concept evolved into a unique, powerful sculpture they named Nechasin. Pronounced, nay-Cha-seen, a Lenape ~ Delaware name meaning ‘to be watchful’. This mixed media sculpture is a testament of 18th century culture. Originally Frank imagined a rifleman or other entity that may have carried the sword, but as the idea evolved, Lally’s artwork dictated that the piece should be Native American, specifically Delaware. This tribe was known for fierceness and tenacity as warriors, however, they preferred to choose a path of peace when possible. The sculpture incorporates a number of Frank and Lally’s pieces, including a rifle, tomahawk, powder horn, and quillwork. Its head and hands are a composite of carved wood overlaid with mosaic bone and sculptured ivory. The body is willow-bough framework covered with cotton batting and homespun linen.
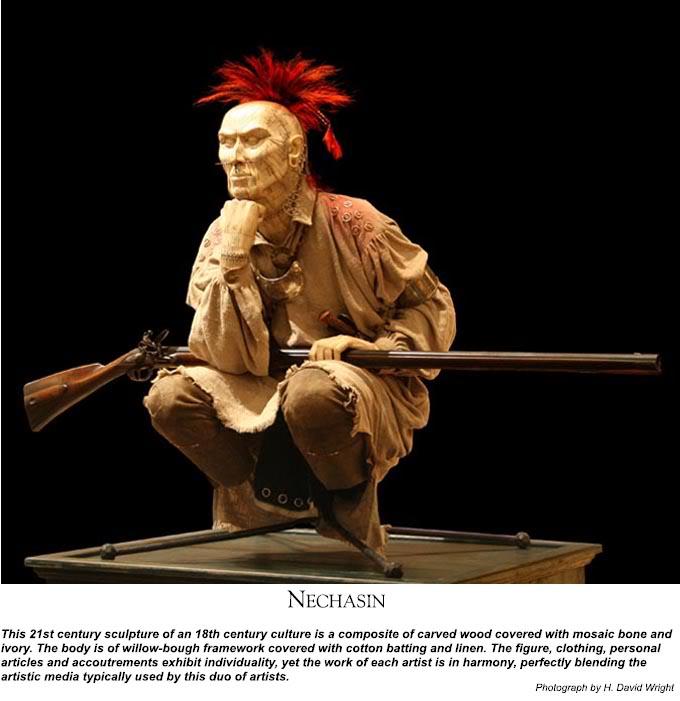
His face shows the effects of stress and a troubled life. He is not old, yet you can clearly see the harsh elements; he is aged beyond his years. His hands are tense, almost cat like, even the hand under his chin is tense, not relaxed at all and ready to act. He is squatting and resting on the balls of his feet. He is not just getting ready, but always ready. His look is one of consternation and determination, with much pride and dignity.
His tattoos are traditional designs. In Native American culture, tattooing was a sign of rank or to commemorate an event. His quilled bag is Delaware, and his knife sheath is Iroquois, showing influence of trade among tribes. His scalp lock is made of hair cut from Frank’s head. The porcupine quill adorned roach is braided into hemp cord, wrapped around two willow sticks, and dyed bright red using Cochineal bugs. The decorative silver cones hold deer hair dyed red and the paint is true vermilion. His breechclout is wool stroud and his leggings are smoked brain tan deerskin, dyed with walnut hulls and sewn with linen thread. His shirt is homespun flax linen and hand stitched. He is armed with an early smooth rifle showing French influence, and his powder horn is styled and decorated with polka dots, common characteristics of horns made for the Indian trade in central Pennsylvania. An original axe signed by Indian trader and gunsmith John Frazier inspired his pipe tomahawk. The haft is wrapped with porcupine quill braid.
In creating Nechasin, Frank and Lally did not make an objective statement, but rather let Nechasin tell a life story, one of a culture now entirely lost. Frank purposely did not finish Nechasin’s ivory eyes in hopes that the observer will derive their own interpretation of this highly creative, one-of-a-kind sculpture.
Conceptual Art
When asked to describe the philosophical approach to their art, Franks says, “In conceptual art, the idea or concept is the most important aspect of the work. The part of this art that is not understood is the painful part – the idea.” Samuel Beckett said, “Suffering is the main condition of the artistic experience.”
And so it is with Frank and Lally’s work. Each piece of their unified work has a vivid story. Painstakingly, thousands of hours of thought-time and conversation are invested. When finishing a creation it’s akin to giving birth, as months of careful planning, attention, and excitement finally becomes a reality. Creating new ideas is the life force of the artist. To be successful, another and better idea must be conceived, created, and presented to a world of clients expecting something more creative than the artist’s previous work.
Nechasin was complex, but Frank and Lally’s next work was simpler. Yet, the concept for the piece was meticulous and dictated the design of an entirely handmade rifle and it’s paring with a sophisticated beaded sling-strap. Lally’s creation follows patterns from a Native American sash belonging to early Kentucky frontiersman Colonel William Whitley. This rare textile is on exhibit at Whitley’s estate named Sportsman’s Hill, the first brick house built in Kentucky and today preserved as the William Whitley House state historic site. Whitley was the veteran of numerous Indian campaigns and this strap, altered to carry his large powder horn, was most likely a war trophy. Frank handmade the lock, stock, and barrel for the rifle designed around Lally’s elaborate strap, which was fashioned using 18th century beads stitched onto hand woven, naturally dyed red wool. The colors of the metal and wood of the rifle were carefully tailored to blend with the bright colors of the beaded strap.
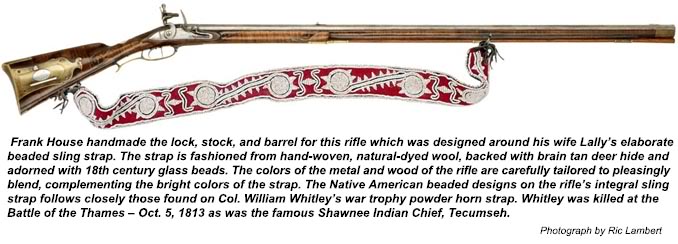 The rifle is based on details and architecture attributed to a school or style of longrifles developed in or around the early Watauga settlement, which was located on Virginia’s southwest frontier. It was here that the first majority-rule system of American democratic government was formed in 1772 and called the Watauga Association. In March 1775, the Transylvania Purchase led by North Carolina Judge Richard Henderson, transferred ownership to the Transylvania Company an estimated one million acres of land, stretching from the Cumberland River watershed to the Kentucky River. For this land, the company paid the Cherokees 10,000 pounds sterling worth of trade goods. Less than one year after the Transylvania deal, Cherokee warrior Dragging Canoe waged war against the pioneers in Powell’s Valley and Watauga in retaliation for the settlers’ squatting on Cherokee lands.
Reaction to the Indian attacks was swift. On July 14th, 1776, Brigadier General Griffith Rutherford wrote the North Carolina Council of Safety saying that nothing less than a scorched earth policy would suffice in eviscerating the Cherokee threat. The Cherokee Expedition of 1776, the largest rifle campaign in American history to that time, placed some 6,000 militiamen from the Carolinas, Georgia, and Virginia in the field and executed a near simultaneous military campaign against the Cherokee. William Whitley was among them. His strap could likely be a trophy from this campaign. Frank’s gun exemplifies arms carried by these riflemen.
This work of art stands as an icon for an important time in America’s history. The rifle, with its sculptured lines and texture of its sling, evokes images of 18th century life that brings to mind visions of a fascinating journey into two worlds fighting for the same principles, but unwilling to share the same land.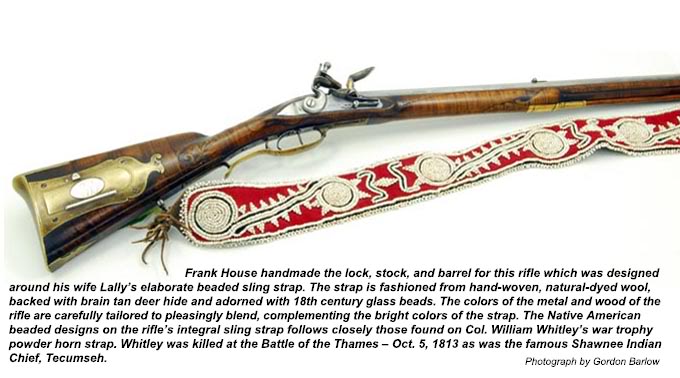 Frank and Lally each produce individual pieces, but their collaborative creations showcase their talents in a powerful way that moves their work beyond traditional boundaries of what was accepted as art. Continuing to develop new concepts, each piece of their work is based on thorough research. Private collectors often allow study of original artifacts and they find this study is necessary to produce art that is as beautiful as historically accurate.
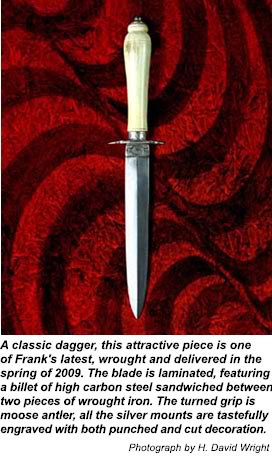
Together Frank and Lally House bring more than 60 years of experience in artistry. Frank reflects, “The longer I do it [art] the longer it takes… because I continually strive to become better and am always learning, attempting something new. We are finally starting to breach the bastion of the mainstream art world.”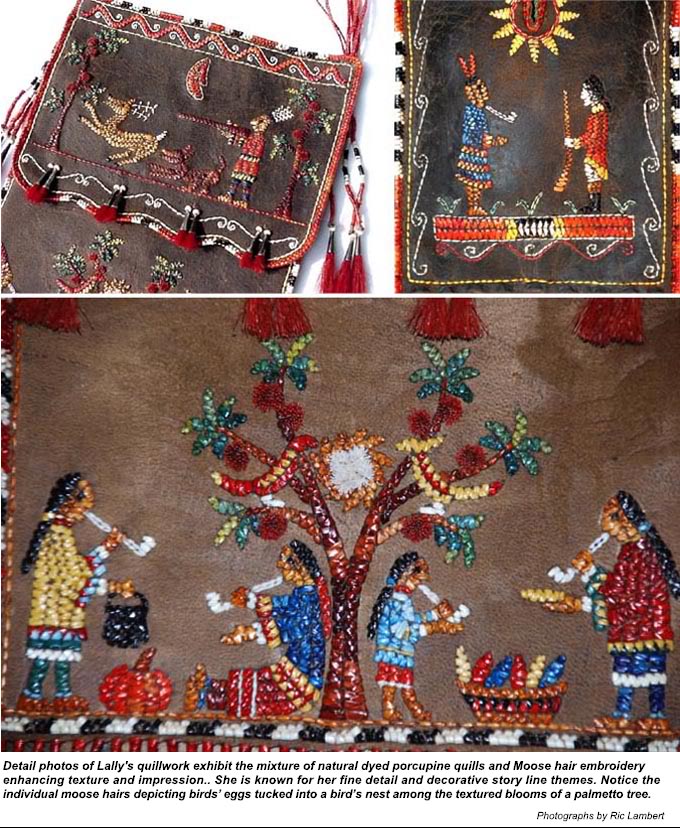
Frank and Lally House are members of the National Muzzle Loading Rifle Association and are familiar faces at Friendship. As charter members of the Contemporary Longrifle Association, they have served diligently since 2001 as co-chairpersons of the annual show each August. Also members of the NRA, they have recently represented the Contemporary Longrifle Foundation at the 138th annual meeting of the National Rifle Association in Phoenix, Arizona.
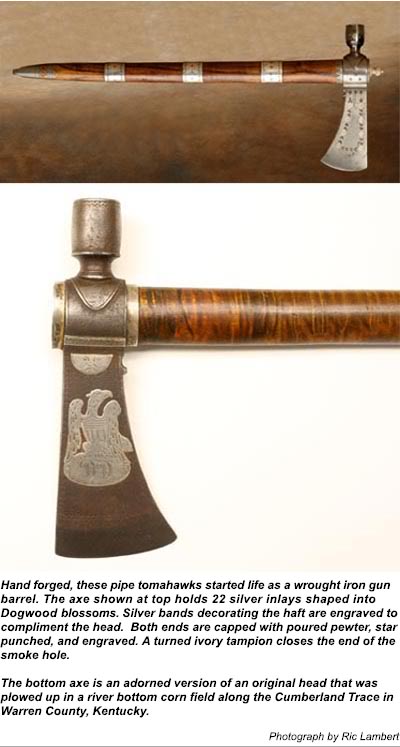
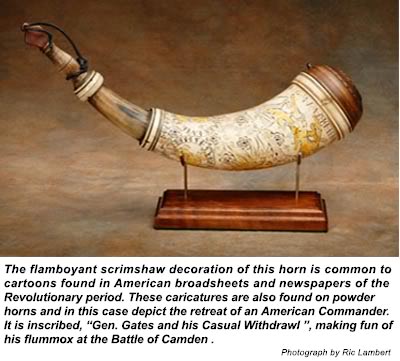
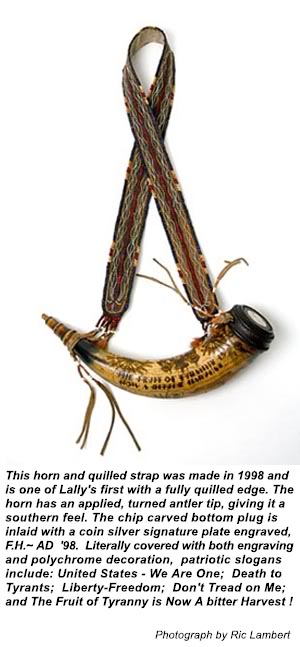
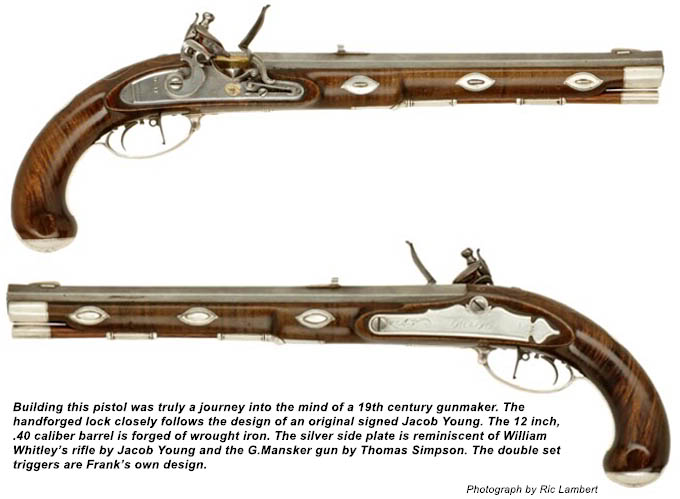
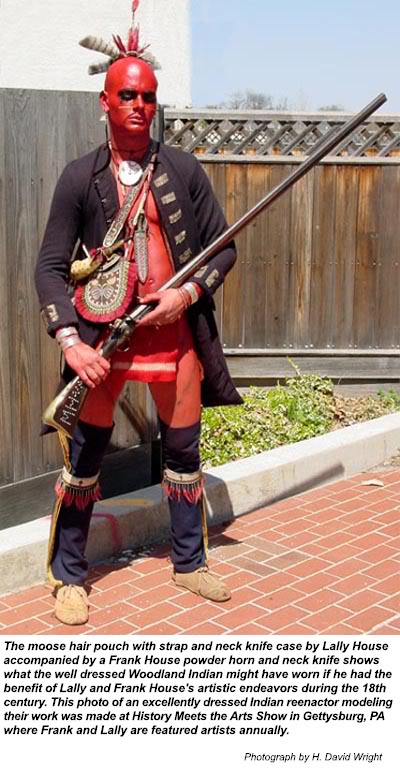
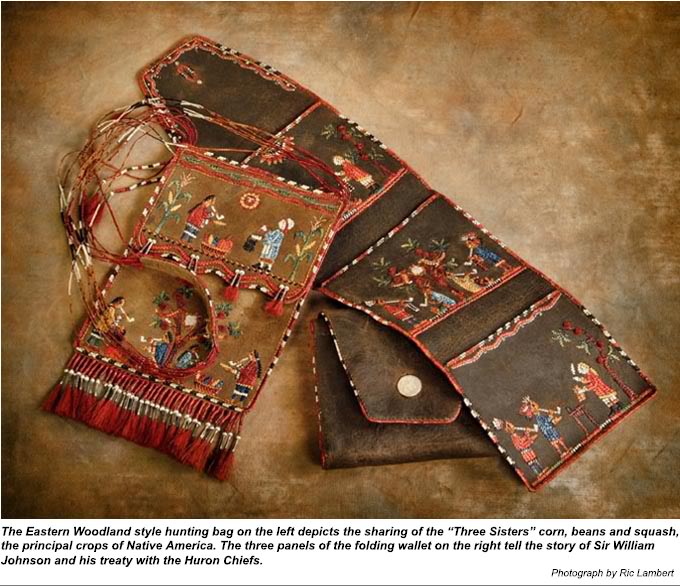
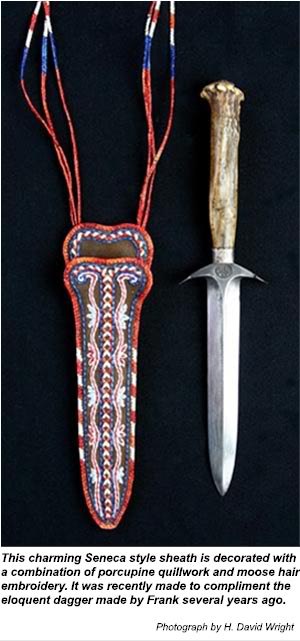
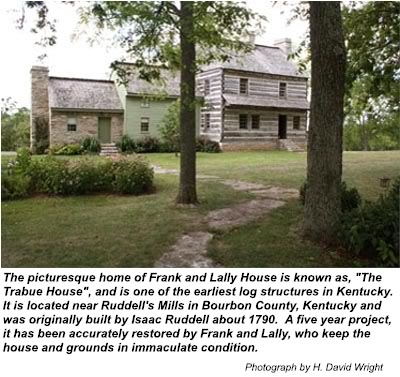
[Editor’s Note – I was graciously provided with many extra photos along with the original article. While they are not referenced in the article itself, it would be a disservice not to include them. I am pleased to add the extra photos you see here.]
ABOUT MEL HANKLA
Mel Hankla is a charter member of the Contemporary Longrifle Association and a noted collector of House brothers rifles, tomahawks and knives. Hankla has worked with the Kentucky Humanities Council as a Chautauqua-Living History Character portraying Simon Kenton and George Rogers Clark since 1995. He also portrays Kentucky’s first governor, Isaac Shelby and Benjamin Franklin in other venues. A noted writer, he has contributed articles to many publications. Visit his website:www.americanhistoricservices.com
Larry Pletcher, editor